


16 December 2023
|
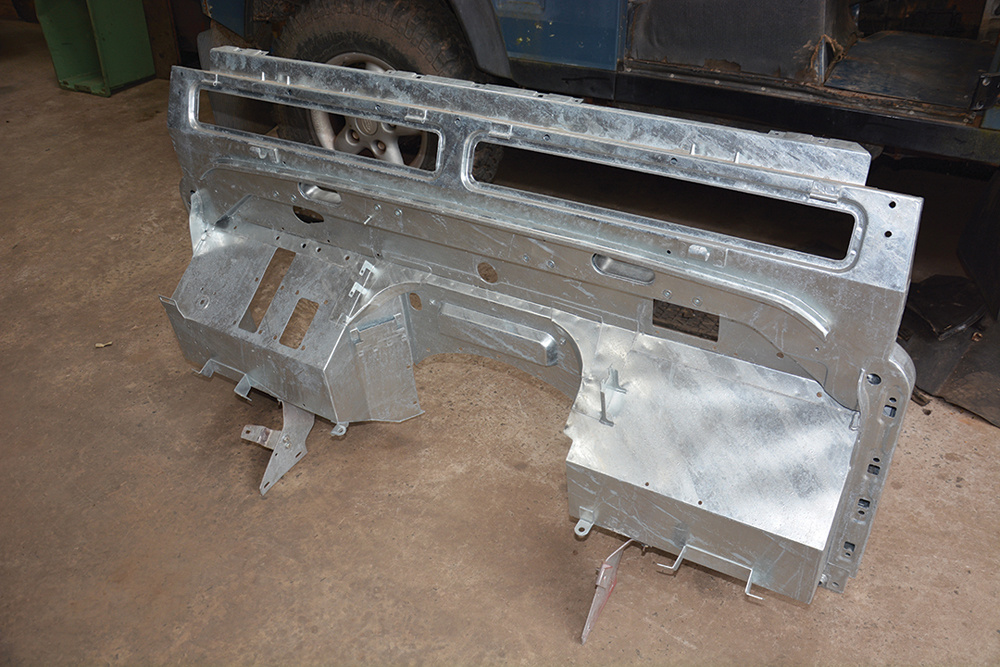
 Shiny new bulkhead ready to go
: credit: © Trevor Cuthbert
Shiny new bulkhead ready to go
: credit: © Trevor Cuthbert
Trevor Cuthbert has a method for removing the old bulkhead and fitting a new one that saves time and effort
Need to know
Cost: £2036
Difficulty: 3 out of 5
Models: Defender 90, 110, 130.
Tools needed: General workshop tools, sealant gun, angle grinder with 1mm cutting disc, nut splitter tool.
Parts and costs: New galvanised bulkhead for 300Tdi Defender, £1920, Richards Chassis Ltd; Pair of galvanised inner sill rails, £98, YRM Metal Solutions Ltd; two tubes of grey Tiger Seal, £18, local hardware store.
Work safely:
• Use axle stands on firm, level ground to support a raised vehicle. Ensure the vehicle is stable.
• Disconnect the battery before working on the vehicle.
• Get assistance for handling heavy components and wear gloves and safety boots.
• Wear strong gloves and face protection when using an angle grinder. Hold it with both hands to resist twisting and kickback. Be mindful of the direction of the sparks and the position of fuel lines and inflammable parts.
Contact: Richards Chassis Ltd, Tel: 01709 577477, richardschassis.co.uk; YRM Metal Solutions Ltd, Tel: 01388 488150, yrmit.co.uk
Also, see part one and part two here.
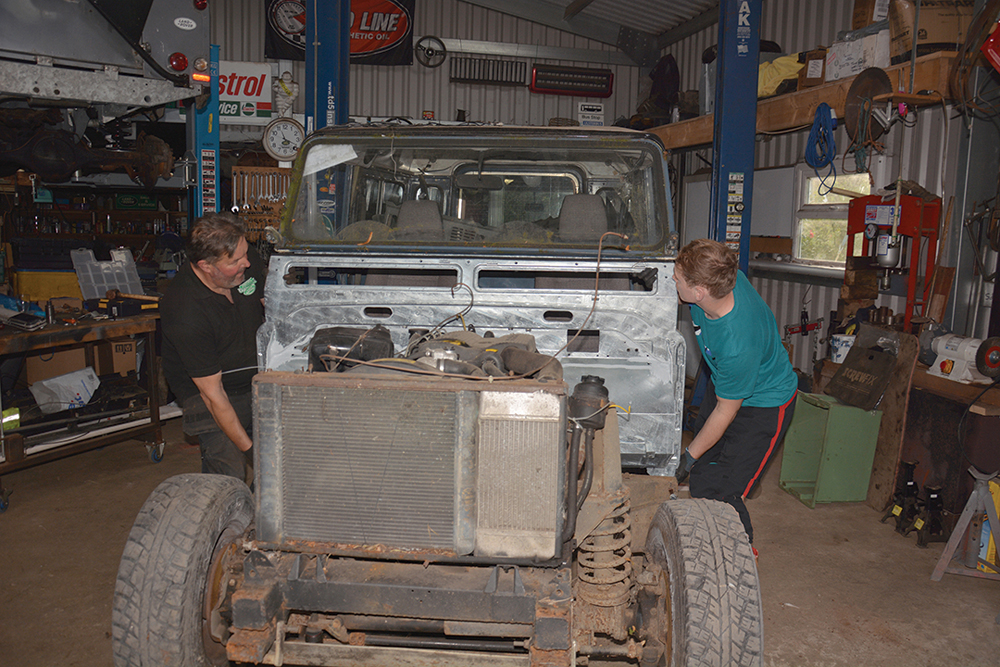
I have often been asked to take on the build of a project Land Rover where the owner has embarked on the rebuild or refurbishment and then run out of steam, time or talent. The mistake often made is to completely dismantle the Land Rover into component parts, causing unnecessary work, complication, confusion and expense.
My method is almost always to remove the body in one piece, and then refit it to the new chassis again, as the same assembly. This is quicker, following a philosophy of not disturbing something if it is not necessary. For example, releasing the roof panel from the windscreen frame and body sides takes time, effort and usually extra expense if, say, the seal between the roof and the side was not previously leaking – once interfered with, a new seal will most likely be required. So in my opinion, it’s a good idea not to take things apart that do not need to come apart, saving yourself time, effort and money.
Over the past two instalments, this bulkhead has been stripped of everything in the engine bay and interior. In this case, the bulkhead’s two forward lower mounting brackets to the chassis have already been removed, so we’re ready to remove it from the vehicle, using the philosophy of: if it doesn’t need to come apart, don’t disturb it.
Removing the old bulkhead
This task often involves detaching the windscreen frame from the roof panel, but I prefer to avoid this where possible because the windscreen is attached to the roof panel with bolts, seals and a polyurethane bond. Unless there is already a leak from this area that needs repair, it is best left intact. An alternative way of getting the old bulkhead out and the new one in, involves moving the inner sills out of the way to allow the bulkhead to drop down from the bottom of the windscreen frame.
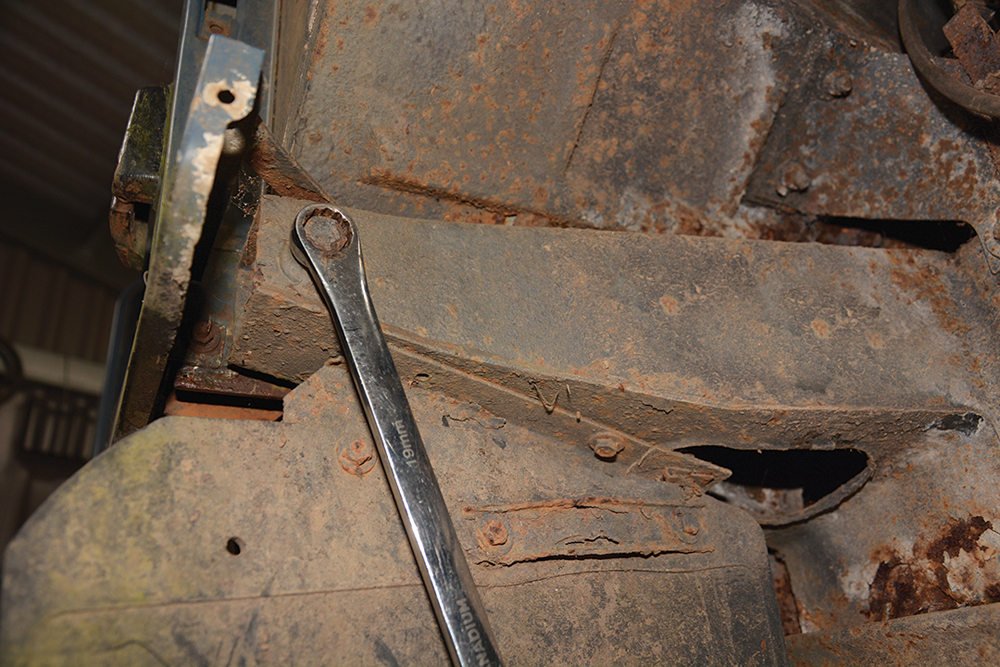
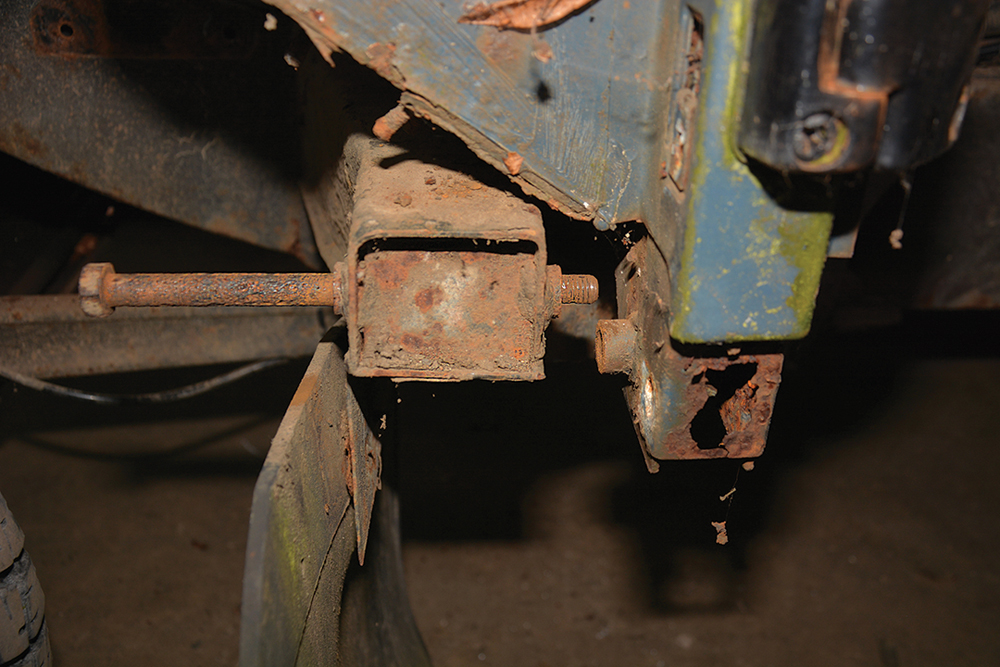
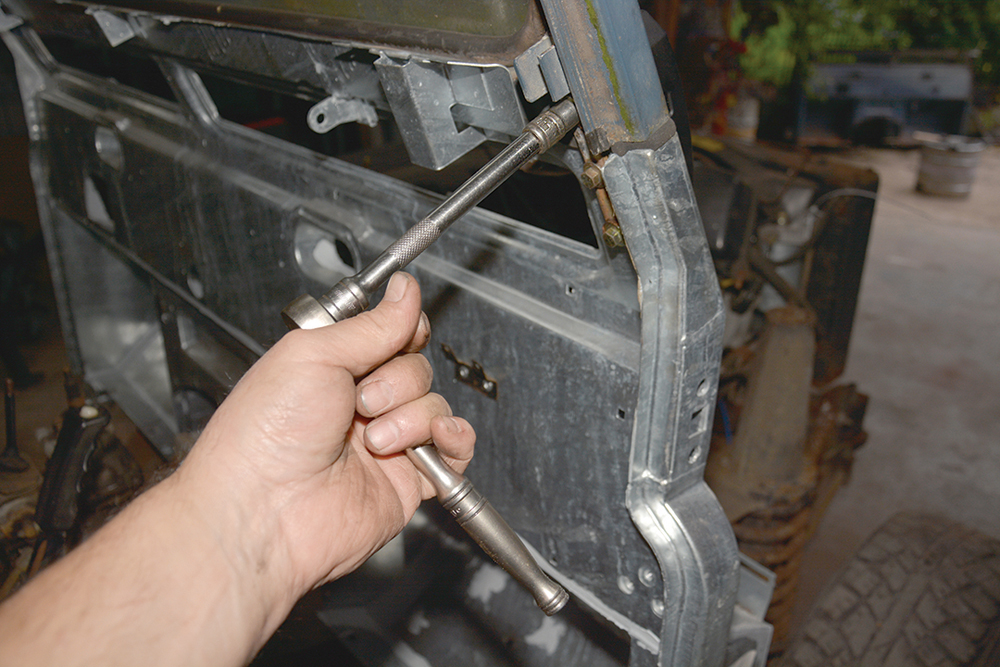
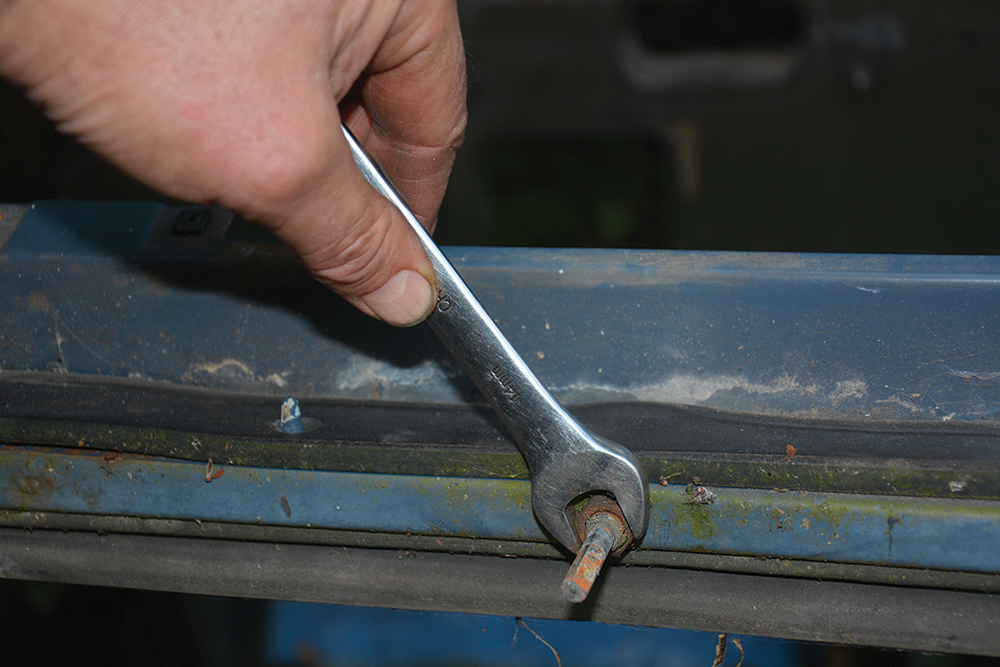
Holding the bolt head: The bulkhead outrigger bolts can be hard to move because of rust, so I use long-handled tools giving plenty of leverage to get things moving.
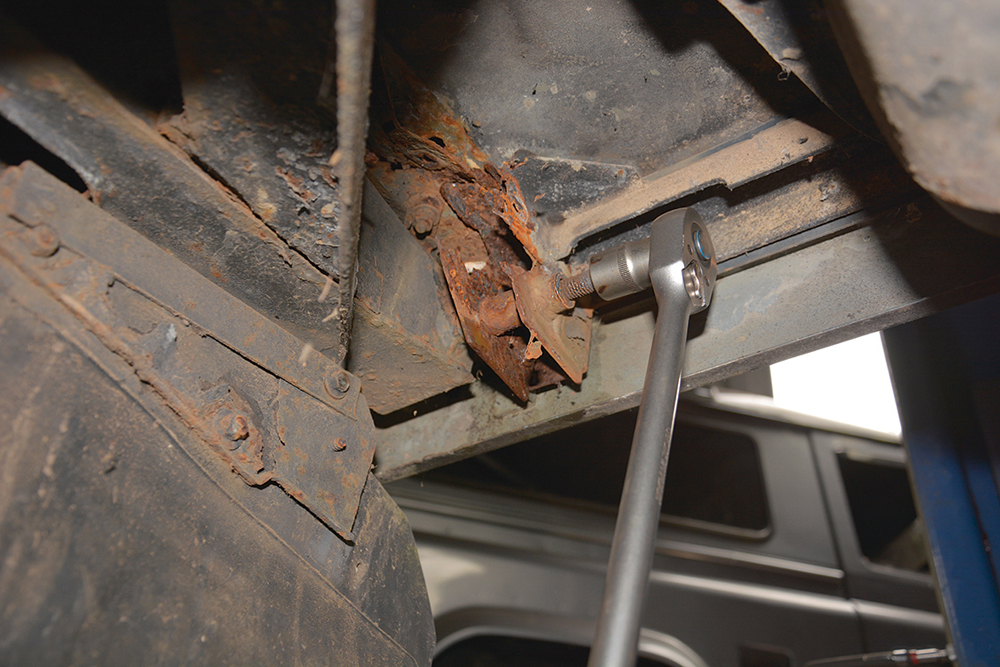
More leverage: This long-handled ratchet spanner soon gets the nut turning without too much strain on the arms; wire brushing the threads and using easing oil helps.
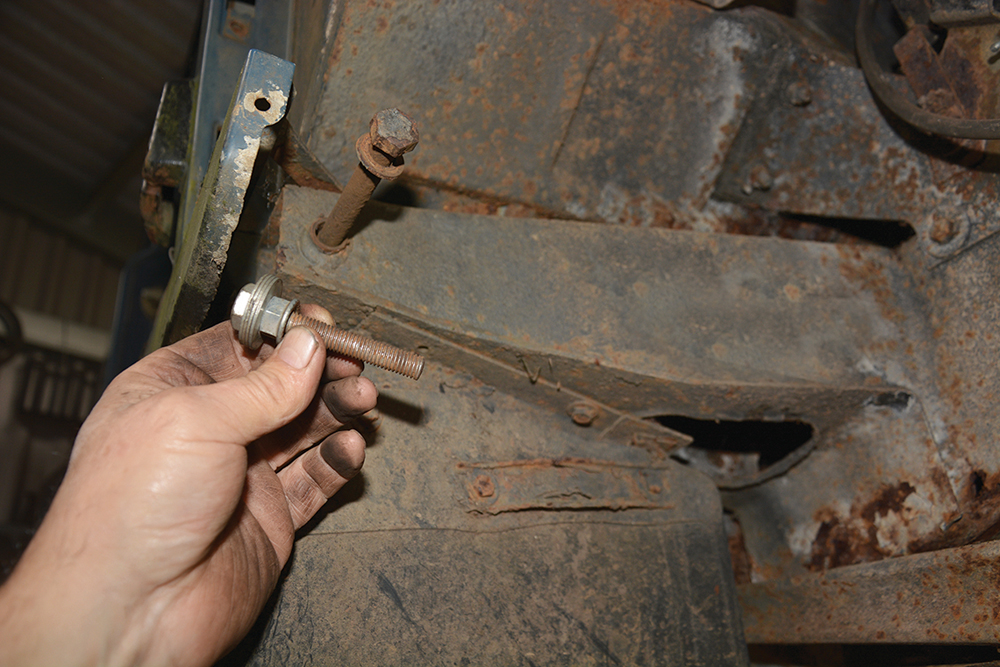
Simple but effective: This bolt-based tool was put together for partially knocking the bulkhead’s foot bolts through from the front side, leaving just enough to prevent the bulkhead dropping.
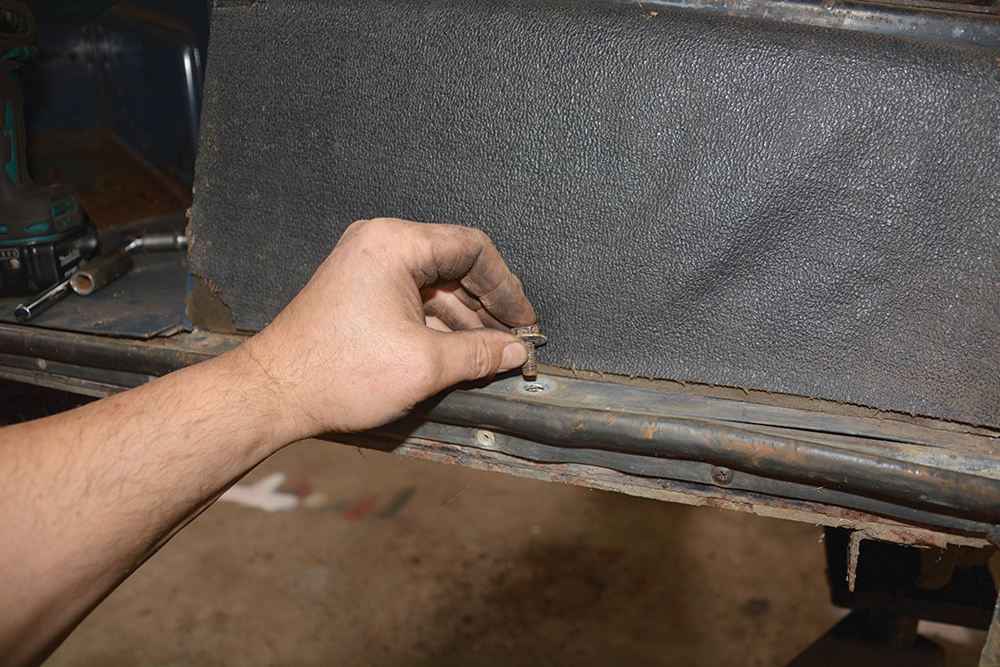
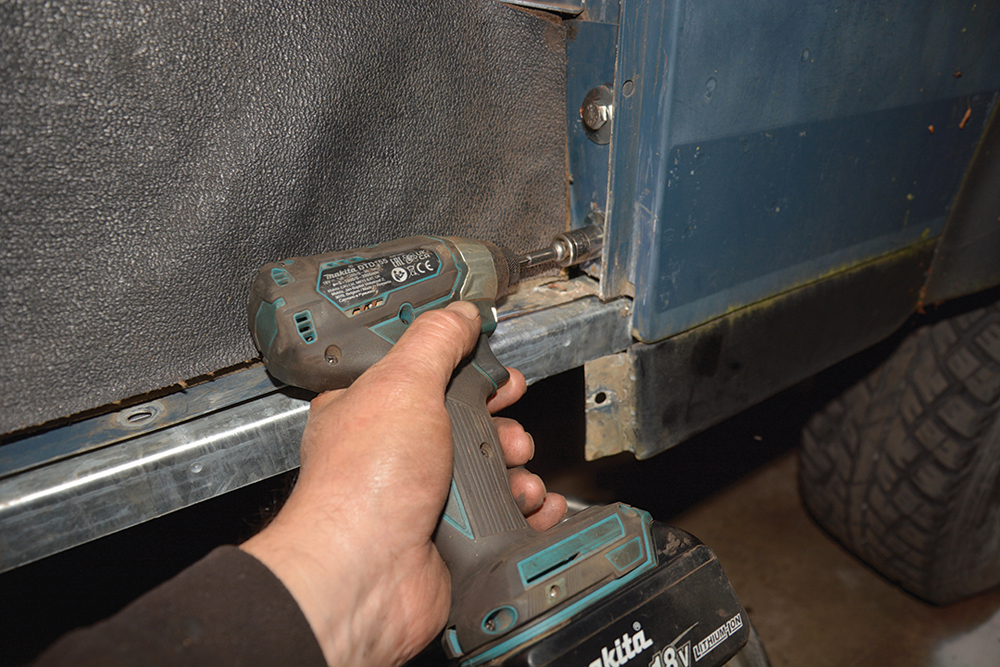
Loosening the sill: The inner sills on both sides have already been unbolted at the floor panels, but now are freed up from the seat box flanges as well.
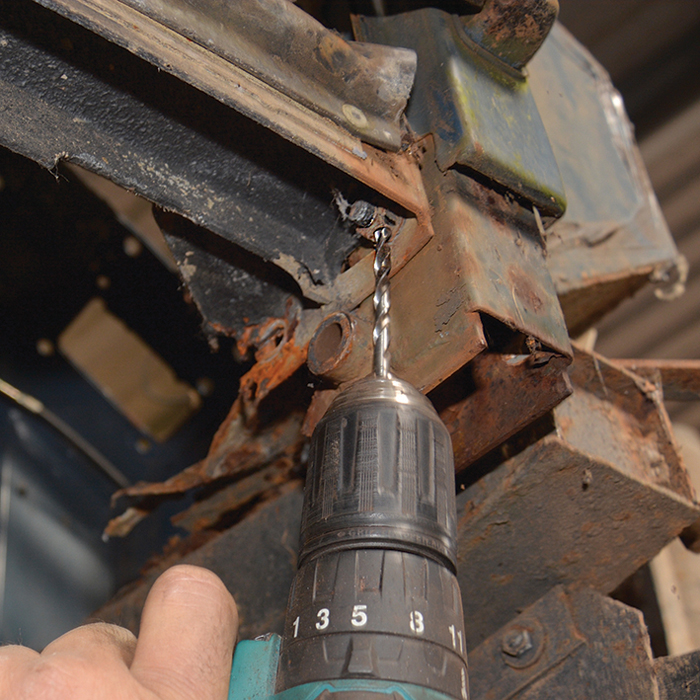
Seized nut: With no access to cut this bolt, I use a stepped series of drills, starting at 5mm, to drill through the side of the nut in order to split it.
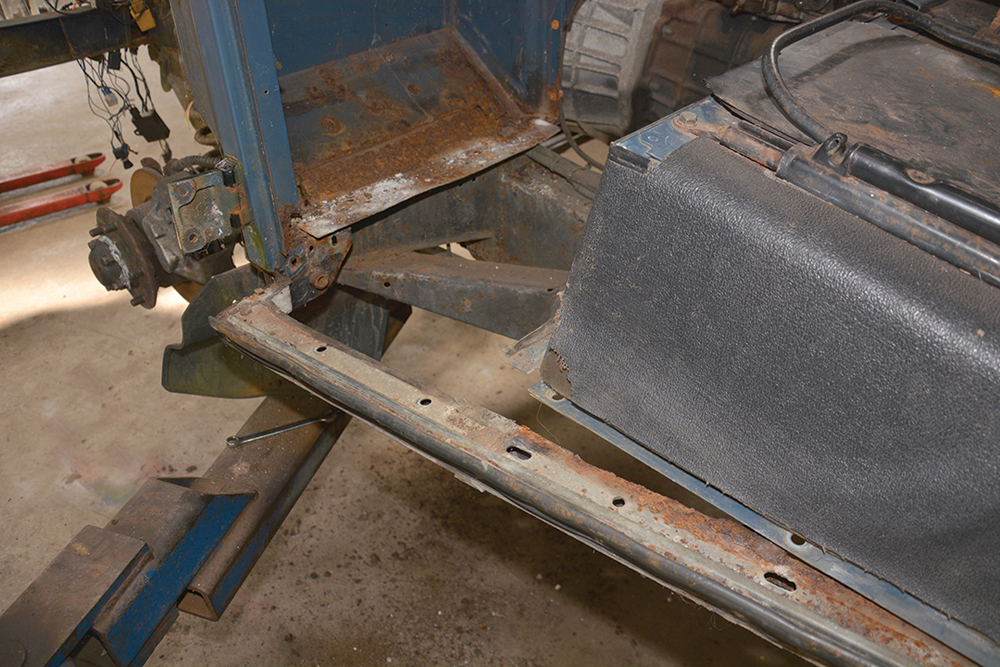
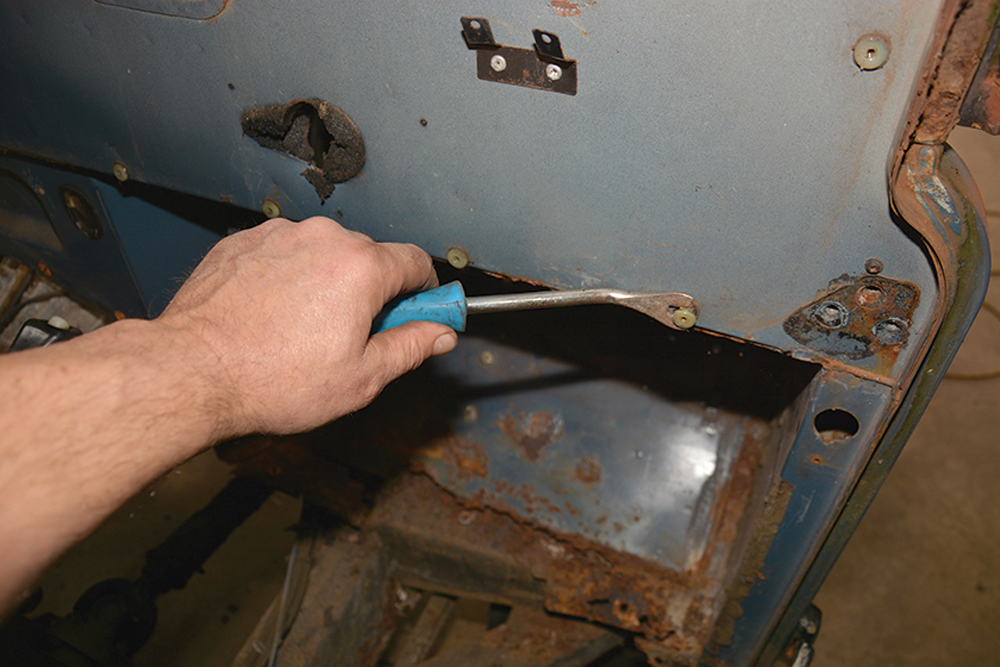
Swing them out a little: The inner sills are still attached at the rear upstand end, but they are now free to pull them clear of the bulkhead feet on both sides.
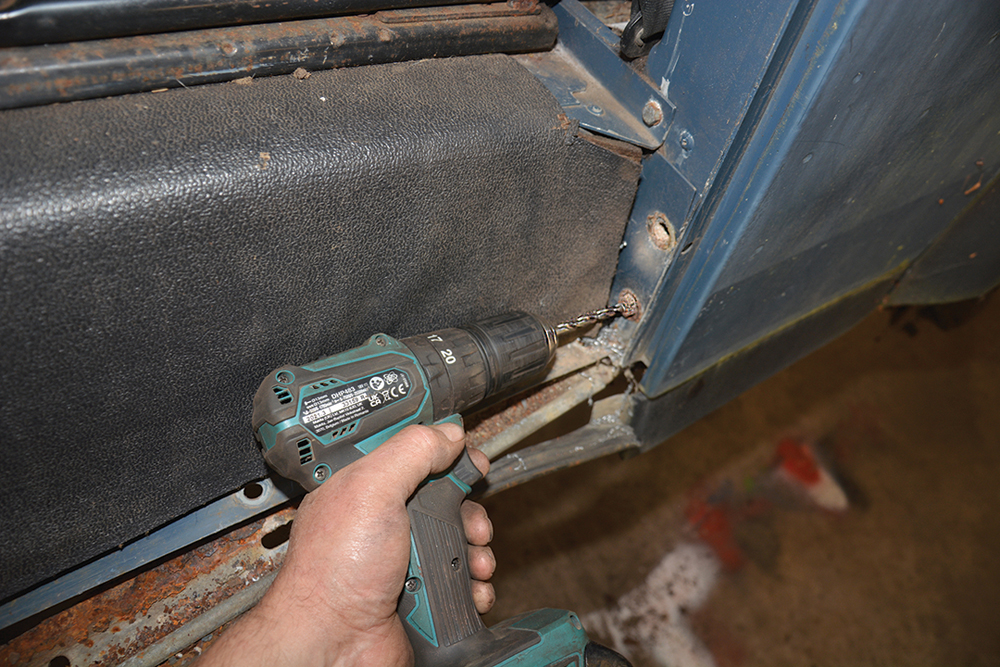
Drill out upstand bolts: I don’t normally need to remove the sill completely, but these are in quite poor condition and will be replaced with new ones, so now is the time.
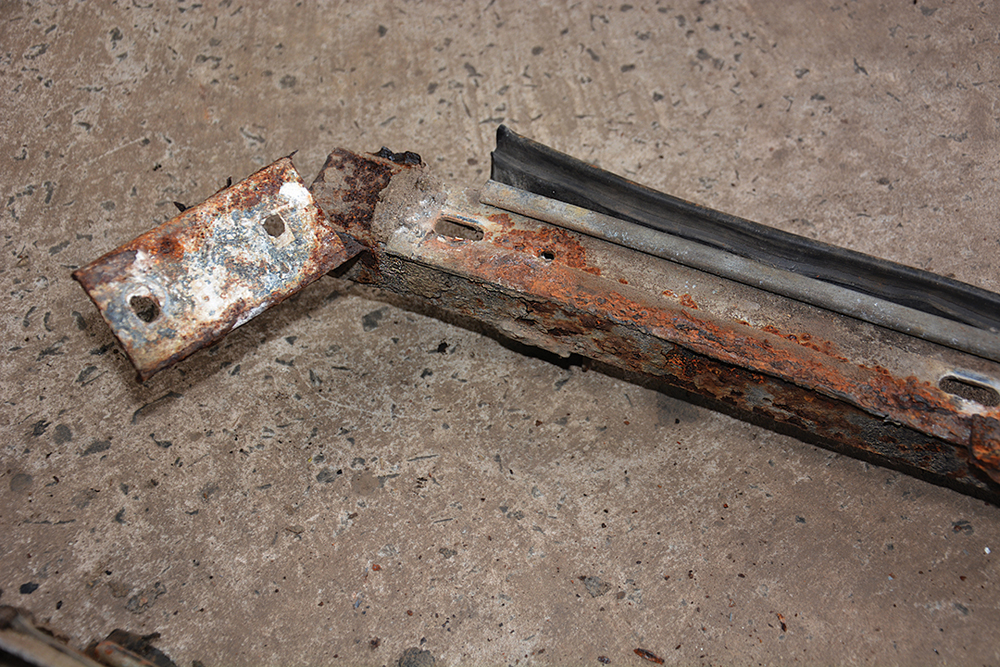
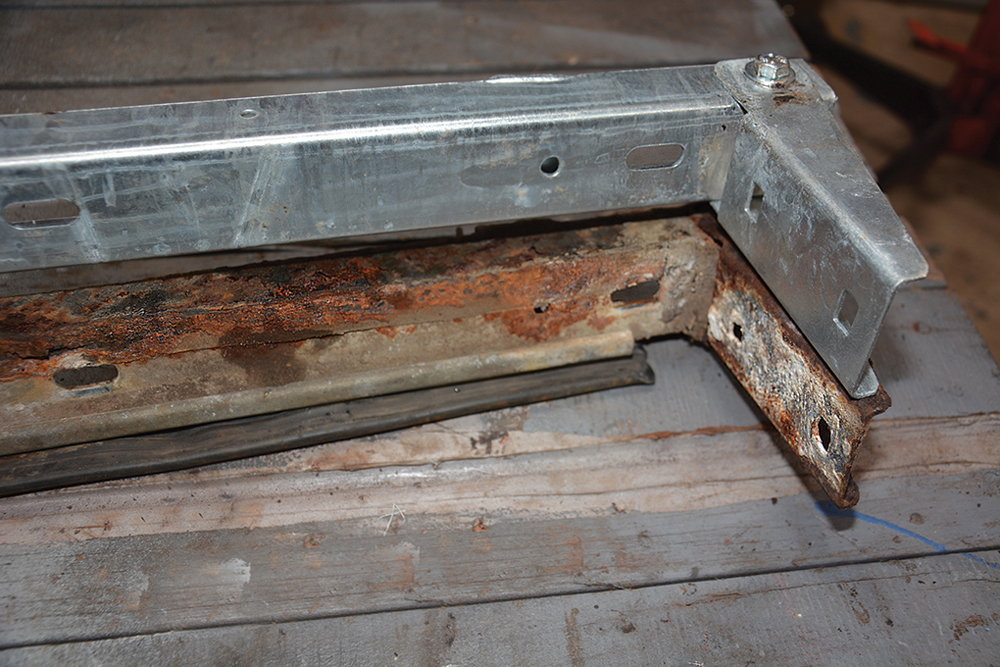
Good decision: The upstand on the left inner sill is actually fractured and both sills are quite rusty, as the galvanisation has broken down over 38 years.
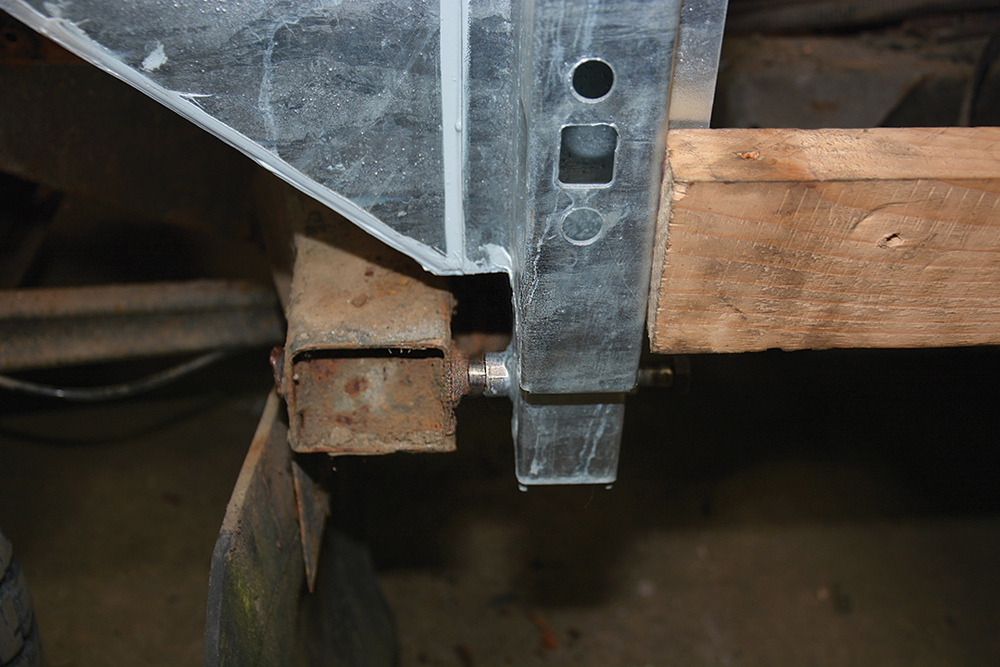
Hold it upright: With the sills either swung out of the way, or removed, the outrigger bolts are fully knocked out and the bulkhead drops down about 50mm (keep fingers clear).
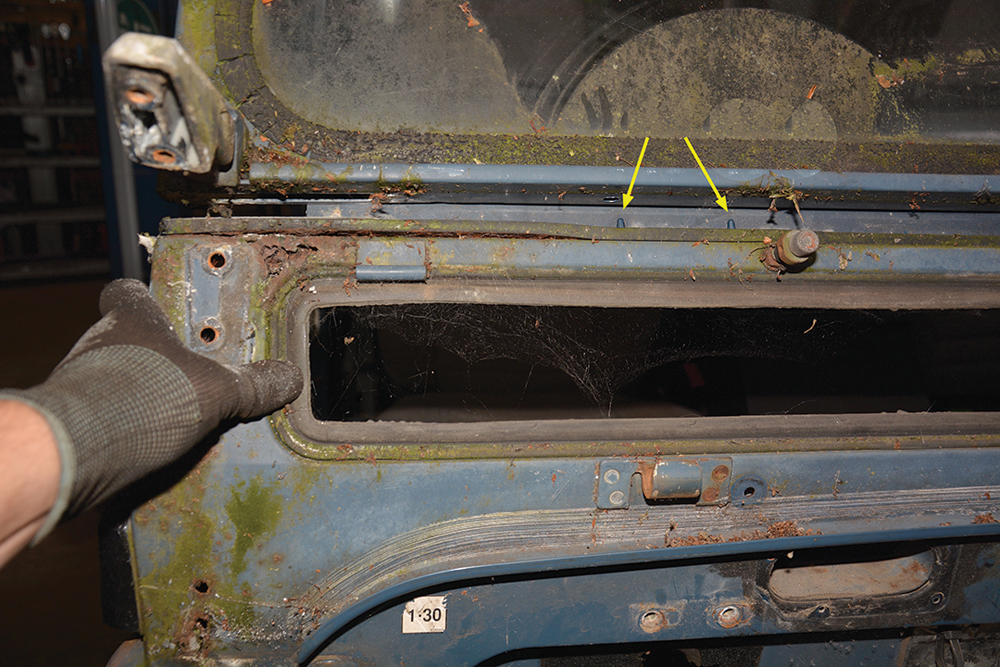
Break the seal: As the bulkhead drops, it separates from the windscreen frame, and the four locating pins (two arrowed) on the top of the bulkhead disengage from the frame.
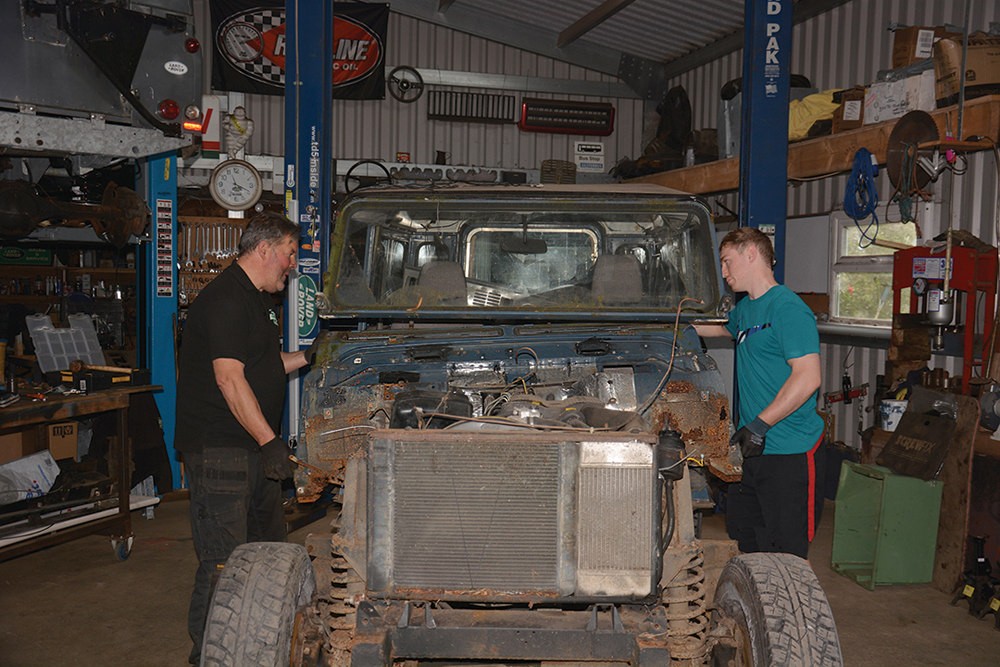
Ideally two pairs of hands: The old bulkhead can now be tilted backwards, clear of the windscreen frame, and then lifted clear of the bulkhead’s chassis outriggers.
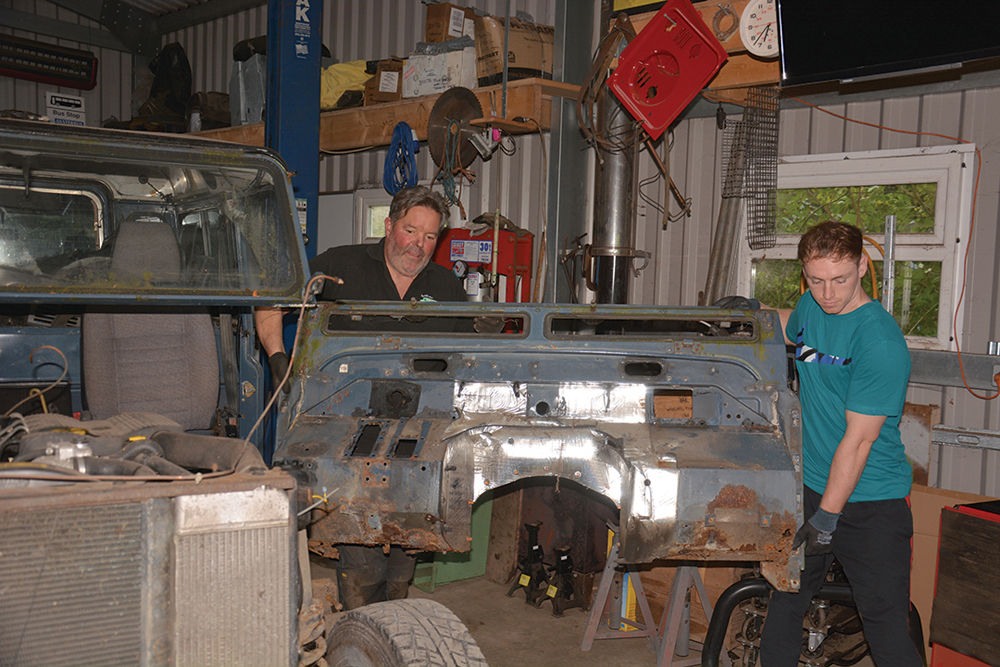
Take care: The bulkhead is first rested on the gearbox then, with two people at the same side, it’s lifted off the gearbox and removed clear of the Land Rover.
Preparing and fitting the new bulkhead
The new bulkhead from Richards Chassis arrives almost ready to fit, with the threaded holes tapped out to remove excess zinc from the galvanisation process. Likewise, round bolt holes have been cleared, while the numerous square holes are perfectly formed ready for plastic Lok Nuts to be inserted.
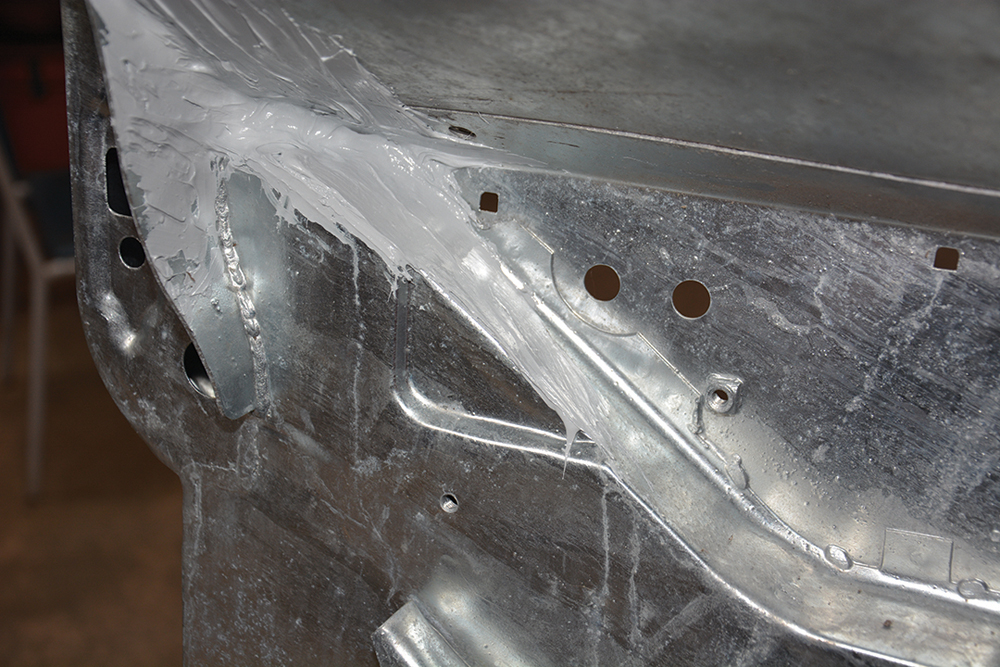
The new bulkhead does, however, need to be seam-sealed, just as the original would have been at the factory. I find that bulkheads from later Defenders had much more sealant applied at the factory than the earlier models. I follow this lead when seam-sealing a new bulkhead, generously applying sealant everywhere that might need it, to get the maximum protection from water ingress. Let’s face it – that extra tube of Tiger Seal is a relatively minor cost within the scale of the overall job.
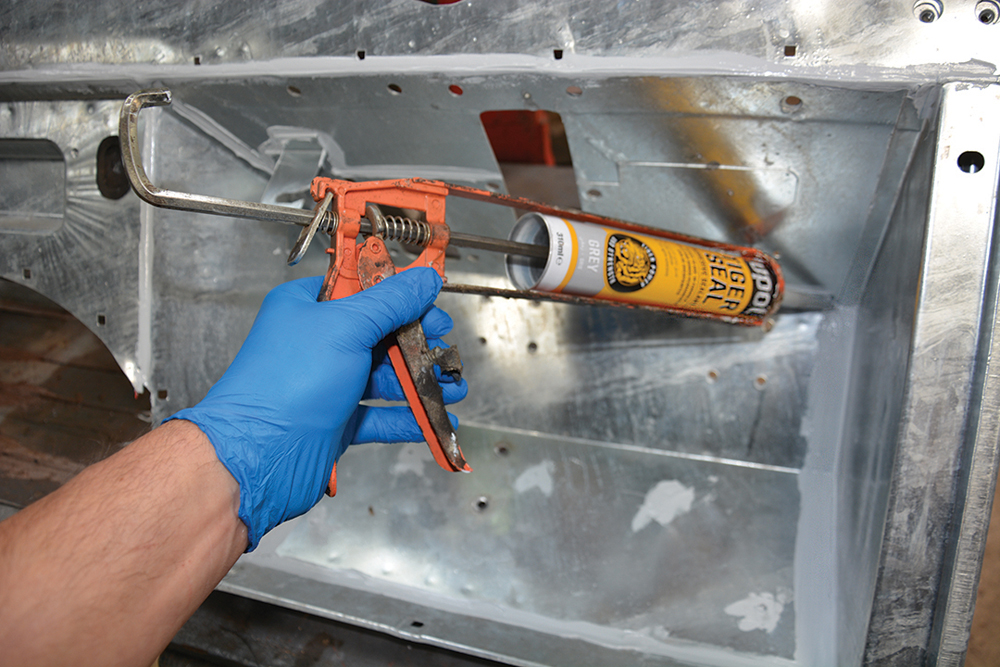
Waterproofing: Just as Land Rover did with the original bulkhead, the new bulkhead needs to be seam-sealed throughout using Tiger Seal quality flexible adhesive sealant.
Upside down: The bulkhead is inverted to apply sealant in recesses either side of the transmission tunnel and on these lower areas wherever panels are joined or lapped.
If in doubt, apply it: With the bulkhead right way up again, every junction of galvanised steel is liberally applied with sealant, whether it appears to be needed or not.
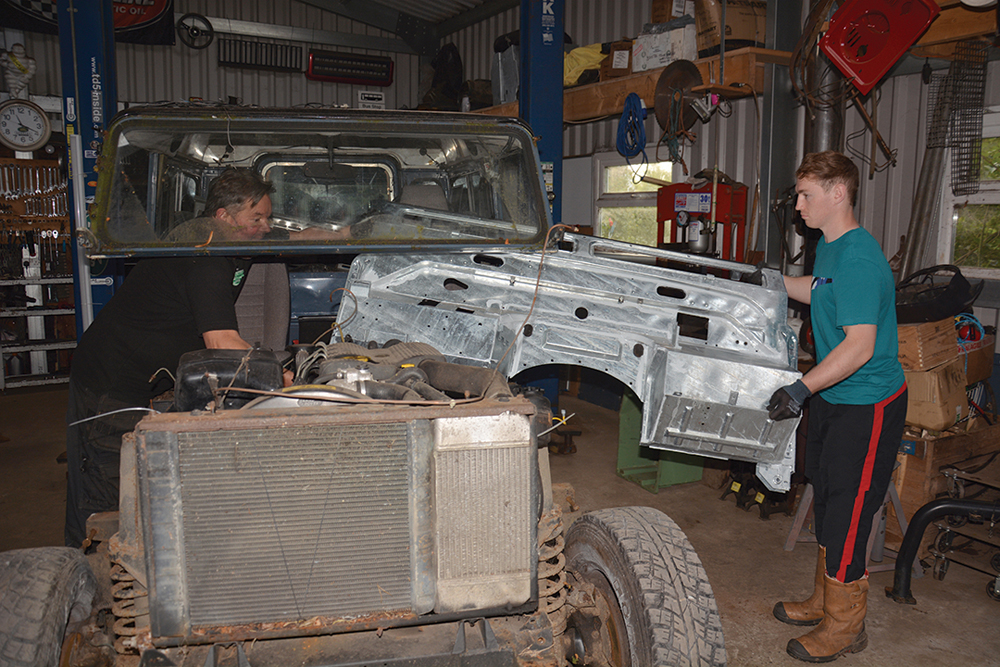
New seal, and install: The sealant is allowed a few hours to cure, before fitting a new rubber seal to the bulkhead top. Then it’s manoeuvred into position (reverse of removal procedure).
Slots in perfectly: Once in position, the bulkhead is engaged using the locating pins into the windscreen frame, and a pair of new outrigger bolts fitted through each foot.
Fine tune later: For now, the number of spacer washers inserted between the bulkhead foot and the outrigger isn’t a priority. Typically, the factory fitted two or three at each side.
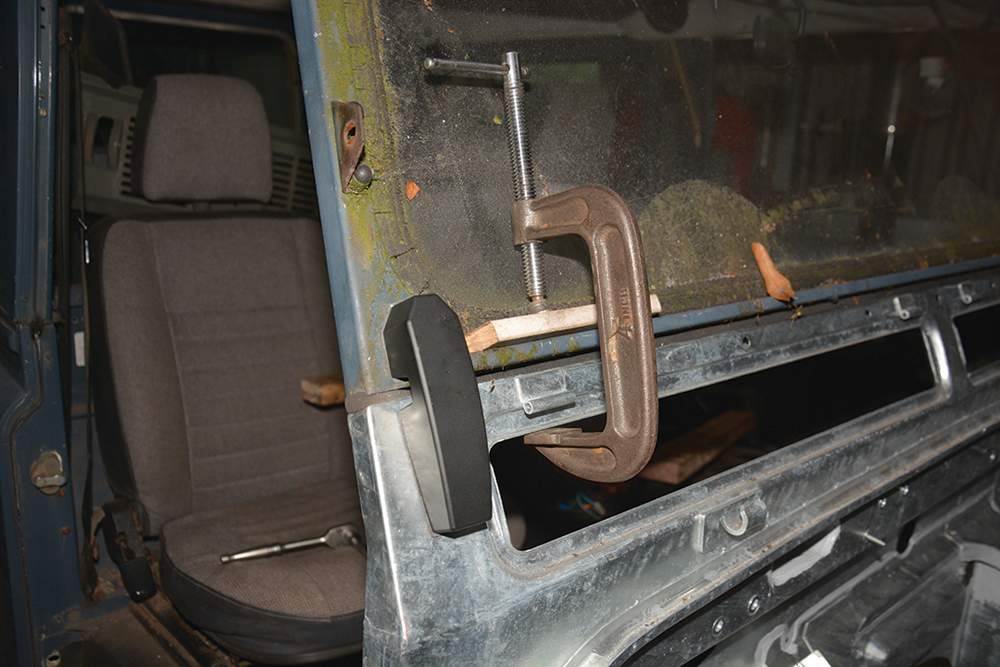
A little help: G-clamp is used to bring the windscreen frame and the bulkhead close enough together to fit each windscreen mount, compressing the new seal sufficiently.
Firmed up: The new seal is compressed enough to get the bolts to line up correctly with the threaded holes, and a 10mm socket wrench tightens them home.
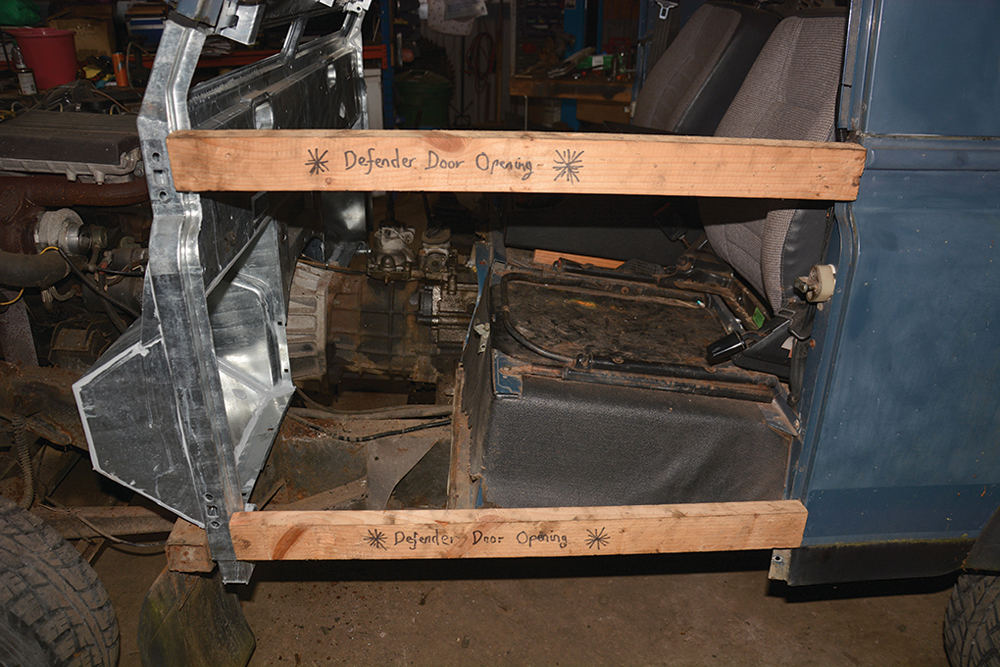
Setting the gap: Timber formers cut to the correct length create an accurate door opening between the rear body and the bulkhead. Measure before dismantling, assuming the original gap was correct.
Replicate length: The upstands on the new inner sills are bolted in place to match the original sill’s length (original door gap was good). They’re not fully tightened yet.
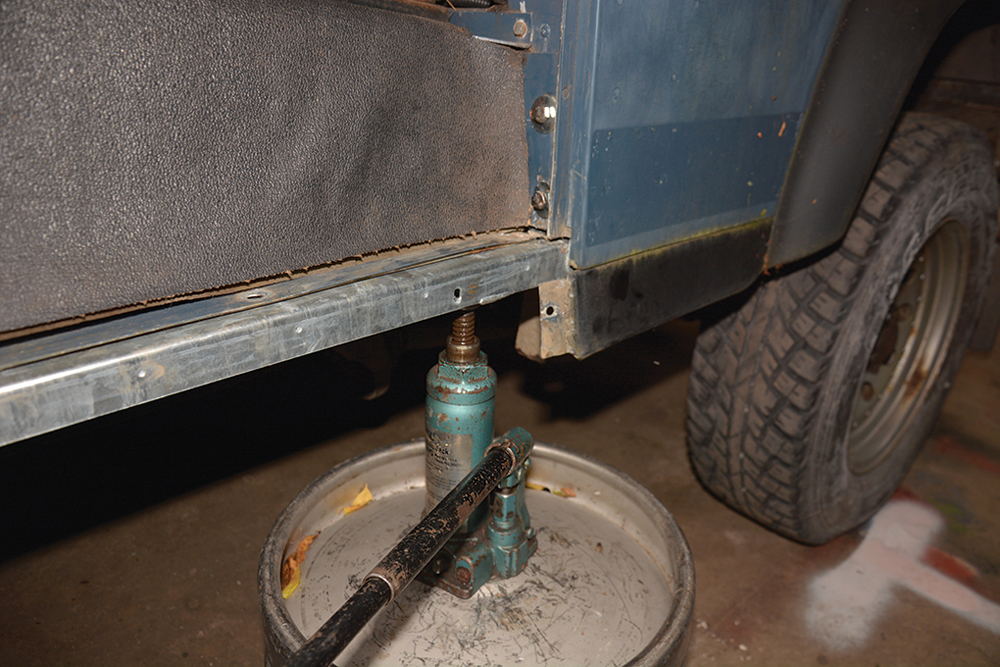
Helping hand: To get the new sills to make contact with the seatbox, they are held up by this bottle jack arrangement, while bolting the front end to the bulkhead.
Aligned and fixed: Now that the new inner sills are nicely aligned, they can be bolted in place permanently, putting strength back into the body structure.
Harvesting a few final parts
Save some money: There are a number of parts remaining on the old bulkhead that will prove useful, like these plastic Lok Nuts which the lower dashboard screws into.
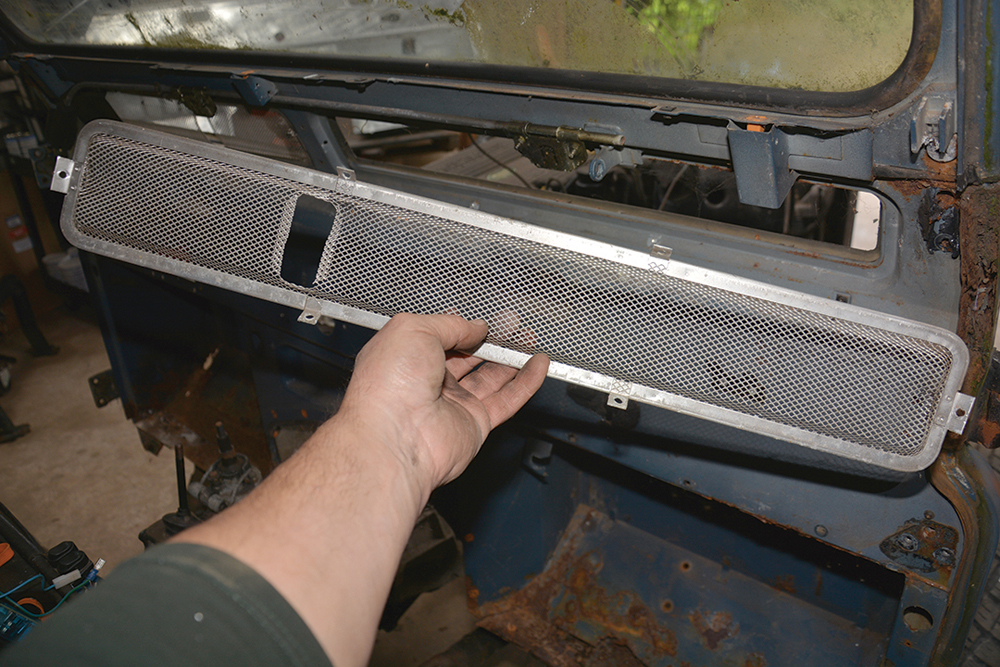
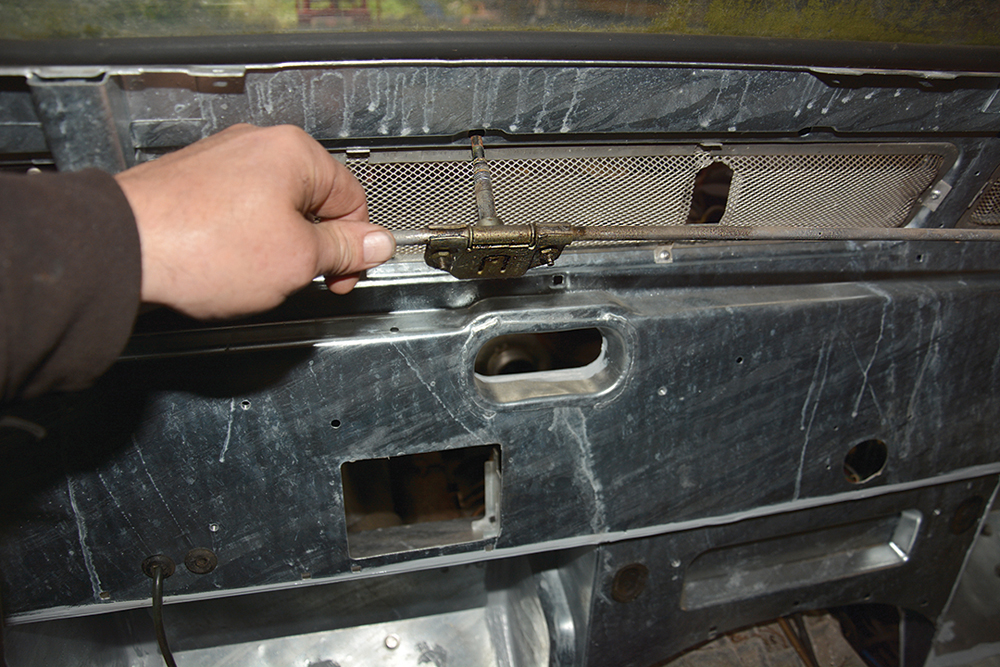
Not available: These aluminium inner vent grilles are difficult to obtain now, so it is vital to drill out the rivets so that they can be employed in the new bulkhead.
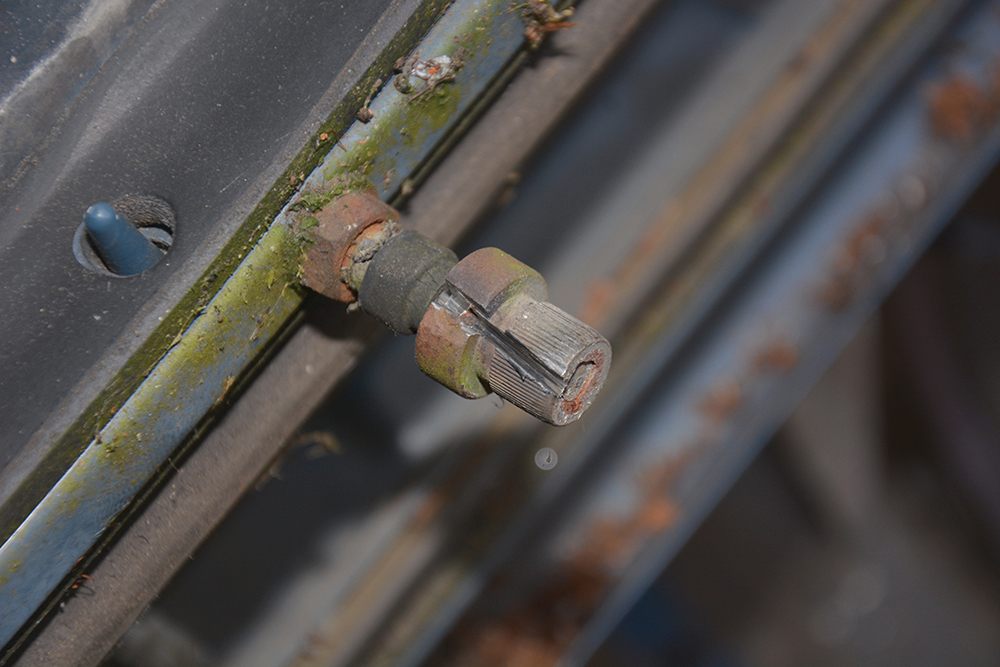
Wiper wheel boxes: The wiper arm bosses are often impossible to remove and reuse. This one has been cut with the angle grinder cutting disc prior to removal.
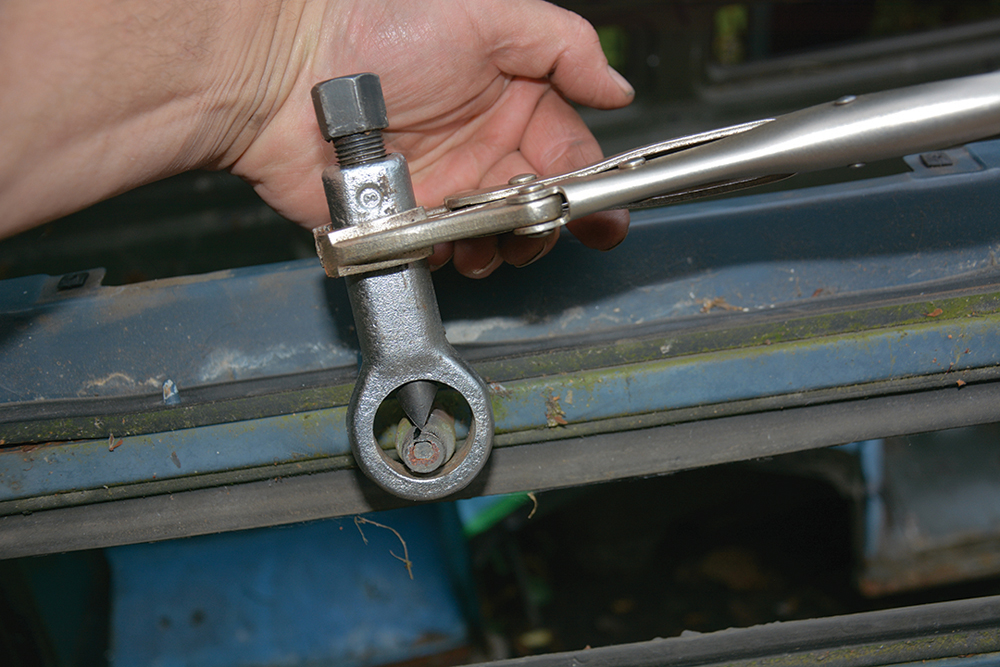
Sacrifice to save: Employing a nut splitter tool in the gouged channel on the boss breaks it off without damage to the spindle, so that the wheel boxes can be re-used.
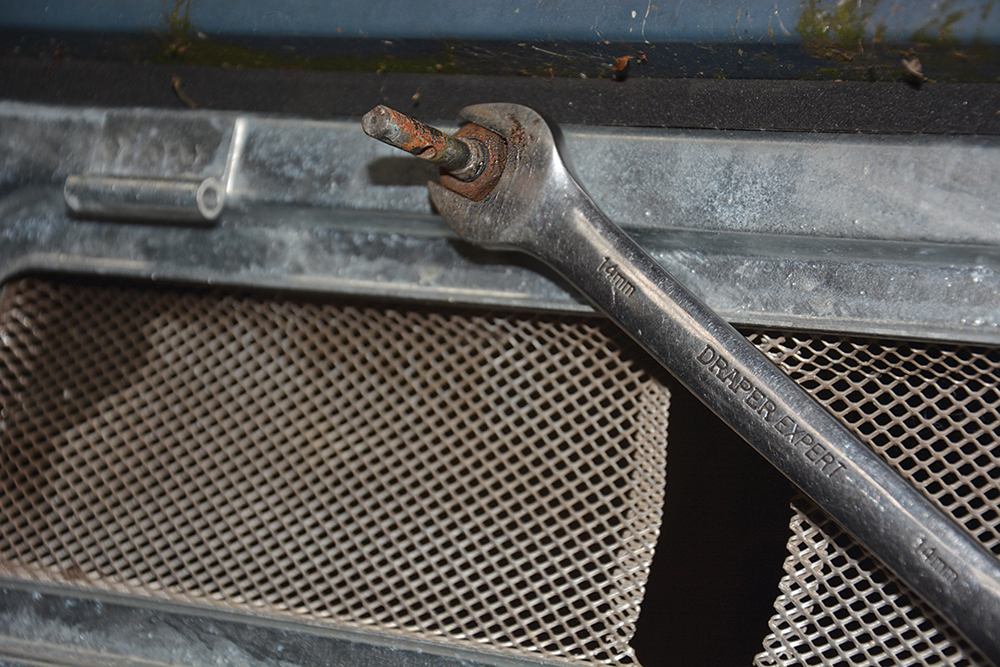
Easy removal now: With the boss successfully removed the retaining nut for the wheel boxes is removed with a 14mm spanner, then the spindles are tapped through.
Precision accuracy: The wiper wheel boxes, still attached to their tubes, slot straight into the holes in the new bulkhead with no adjustment of tube length necessary.
Check movement: As the retaining nut is tightened, the operation of the wheel box is checked to ensure that the spindle continues to rotate freely and is not hindered.
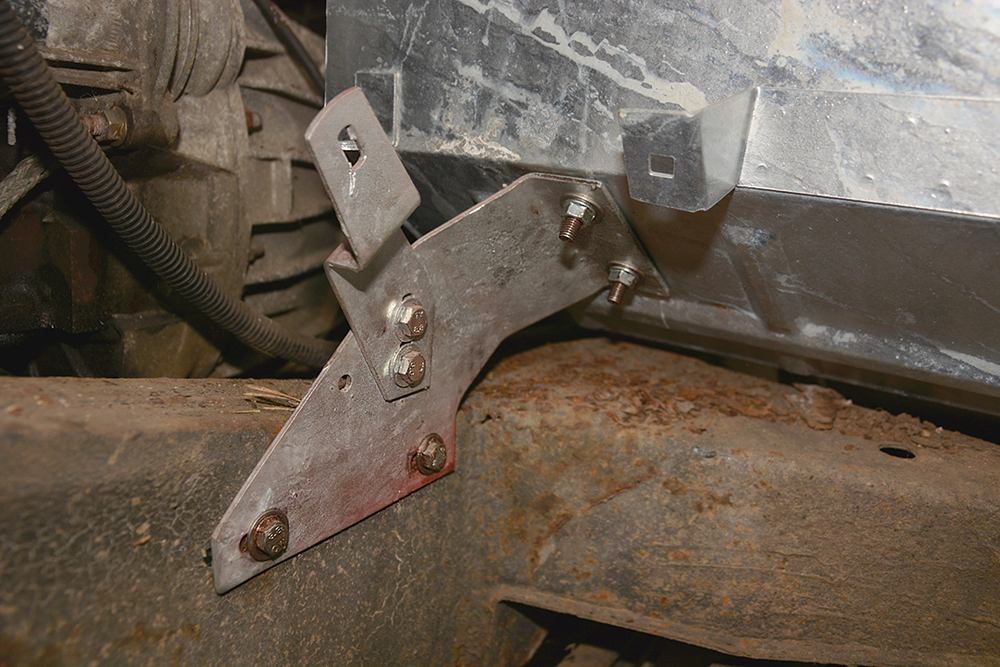
Last of bulkhead fixings: Because the door openings are set correctly, final securing of the bulkhead happens by fitting bulkhead support brackets and tightening bulkhead outrigger bolts.
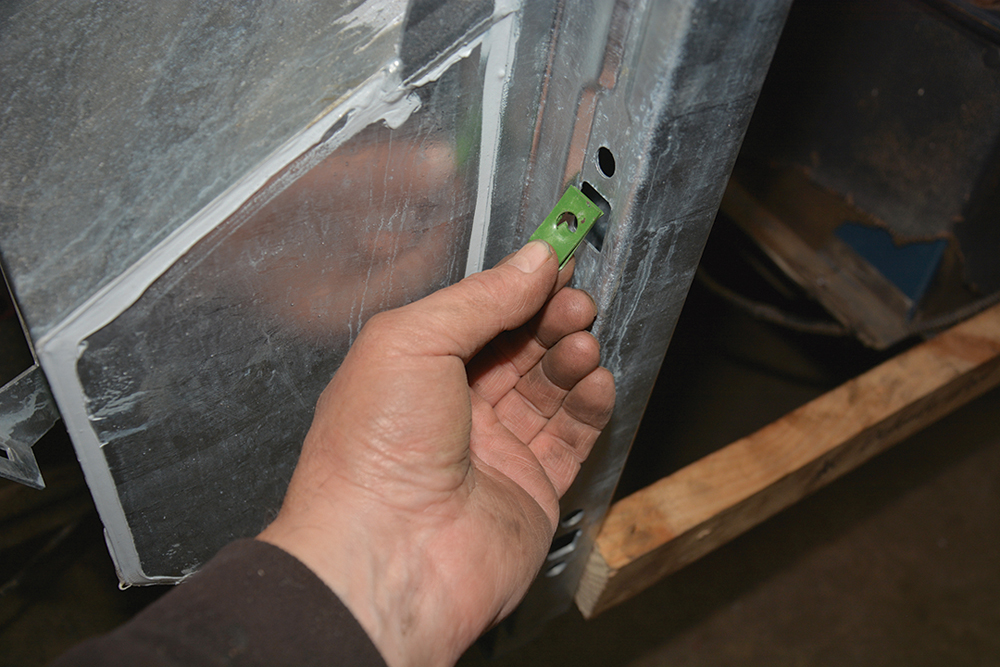
Special fixings: There are four fastening points on each side of the bulkhead for the wings to be secured using these Speed Fastener plates and coarse-threaded screws
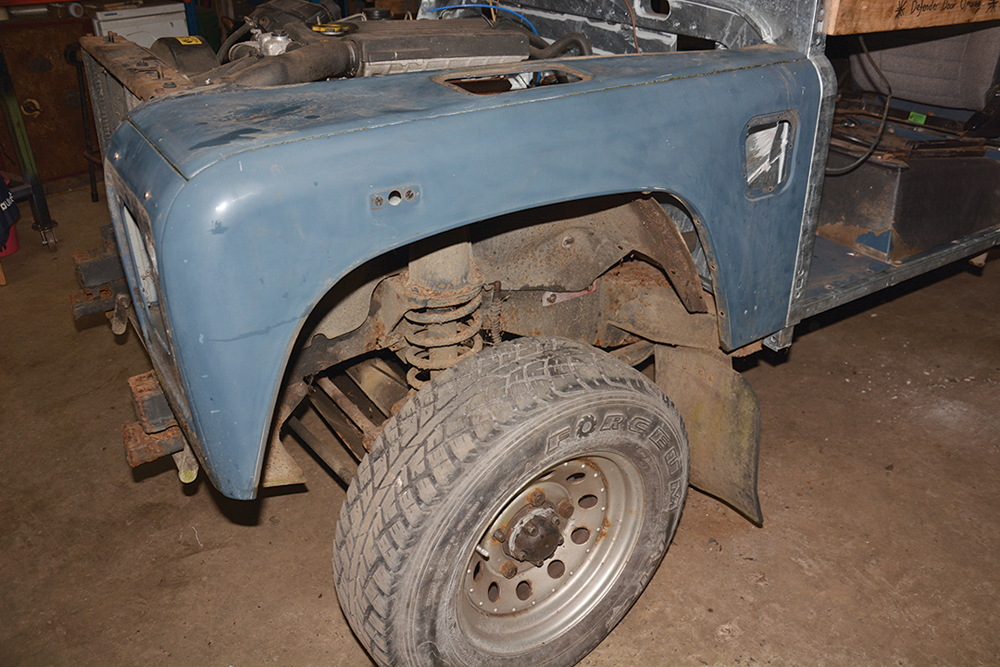
An easy fit: The front wing assemblies are fixed to the bulkhead with the Speed Fasteners and bolted to the chassis at the front, where – in this instance, at least – the bolt holes lined up perfectly.
Coming up, in part 4: In the final instalment of our bulkhead change, the dashboard and all cabin parts, plus the engine bay components including the heater unit, pedal housings and steering, will be checked and refitted. Then the doors and front end will complete the job. With the braking system and the clutch bled, the engine will be fired up so the Land Rover can drive out of the workshop.
Like to have your own Land Rover library?
Try our Budget Digital Subscription. You'll get access to over 7 years of Land Rover Monthly – that’s more than 100 issues plus the latest digital issue. All issues are fully searchable so you can easily find what you are looking for and what’s more it’s less than 10p a day to subscribe. Click here to find out more details and start enjoying all the benefits now.