


27 October 2023
|
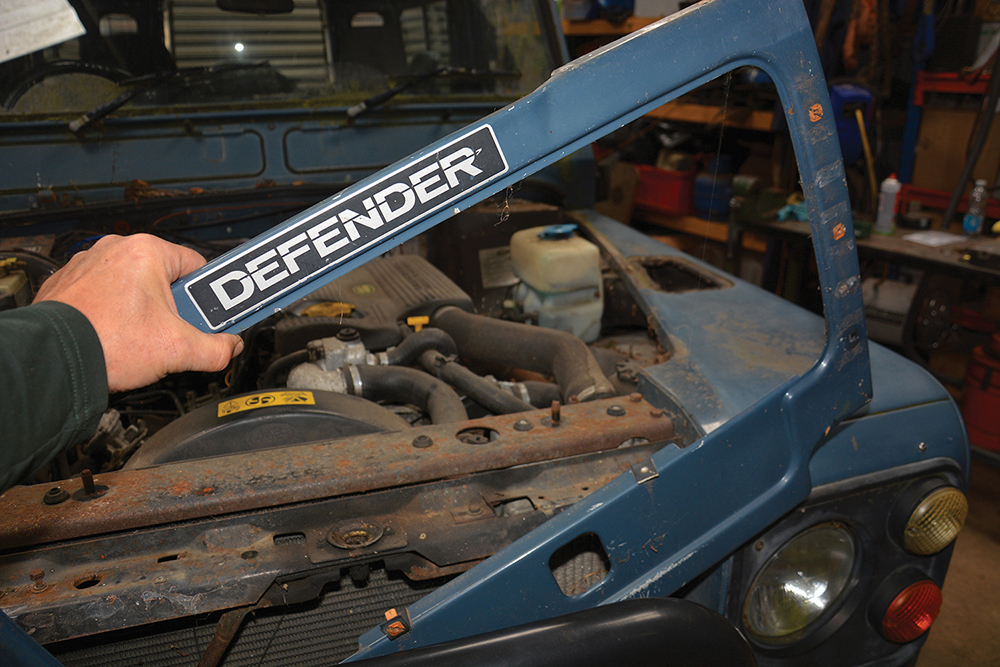
 First job is to remove the Defender's wings
: credit: © Trevor Cuthbert
First job is to remove the Defender's wings
: credit: © Trevor Cuthbert
Removing the front bulkhead for repair or replacement is easier and quicker with the right work plan. In this series of features, Trevor explains the process, starting with removing the front bodywork.
Need to know
Difficulty: 3 out of 5
Models: Defender 90, 110, 130
Tools needed: General workshop tools. Wire cutters. 3/8-inch drive socket set with multiple extensions
Work safely:
• Use axle stands to support a raised vehicle
• Disconnect the battery before major dismantling work
• Safely secure raised bonnet to prevent it falling closed
Utility Land Rover models (Ninety, One Ten and Defender) are unusual vehicles in the modern age because almost everything is bolted together and can therefore be unbolted. This is a boon where a body part needs to be replaced, especially when that part is the main bulkhead.
This early Ninety is 38-years old and suffering major rust issues in the chassis and bulkhead. The bulkhead has serious corrosion in the footwells and the bulkhead feet (where it is bolted to the chassis), rendering the Land Rover structurally unsound. There are also signs of ugly rust damage around the top corners of the bulkhead, below the windscreen where rust is eating its way out from the inside.
Replacement bulkheads are available from Richards Chassis and others, whereas just five years ago it was almost impossible to purchase a good replacement. Nevertheless, it may be possible to repair this bulkhead rather than replacing it but, either way, the front bodywork needs to be removed to investigate fully.
Releasing the inner wings, front panels and ancillaries
Removing the wings from an unmodified Land Rover is a relatively uncomplicated task. The ancillary components that need to be detached, such as the power steering fluid reservoir fixed to the inside of the wing, are pretty obvious. However, when Land Rovers reach the age where they need major repair or replacement of the bulkhead, modifications and additions over the standard factory layout have usually been made.
An example is the vehicle in this feature. Not only has the original 2.5-litre (12J) diesel engine been replaced with a 300Tdi engine, but a winch, A-bar with driving lights and North American Specification (NAS) side lights and indicators have been fitted.
This engine installation is of a high standard and the wiring for the lights and winch is not intrusive. However, aftermarket wiring and accessories can often introduce complications, so if any needs to be cut or removed, I always carefully label and photograph the sections I interfere with.
For example, if I need to cut an unidentified wire, I colour-code each end with a coloured cable tie so the circuit can be reinstated exactly as found. Often it becomes clear later what the wiring is doing, in which case it is easy to reinstate or indeed improve upon.
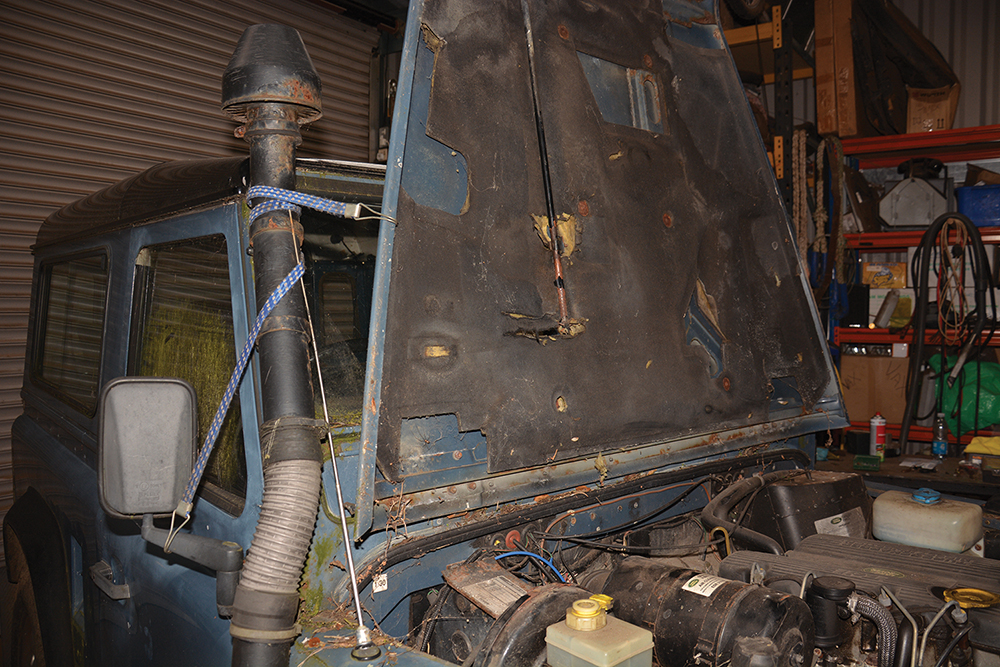
Safety prep: The battery negative cable has been disconnected. The bonnet is the first body section to be removed to prevent the risk of it falling – it’s a two-person lift.
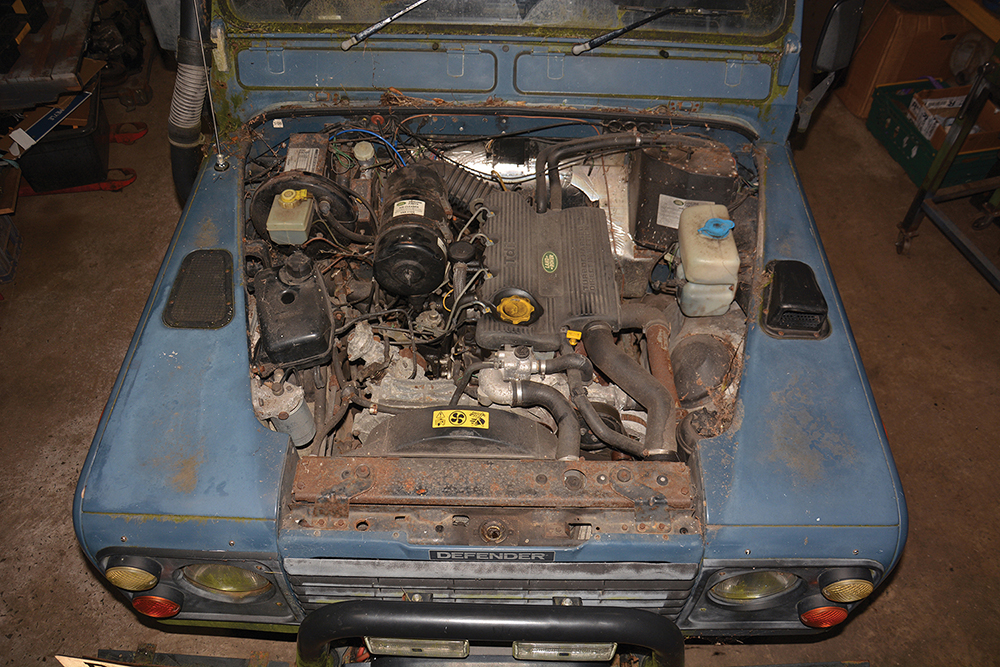
Consider it a 1994-97: This very early Ninety has been retrospectively fitted with a 300Tdi engine. The work has been done to a high standard and to factory configuration.
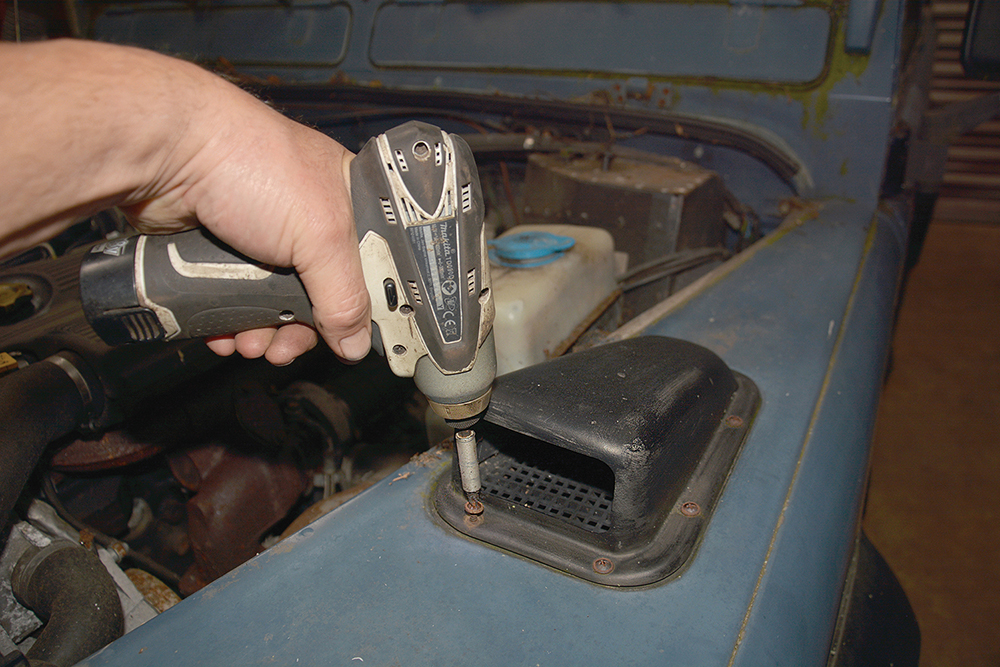
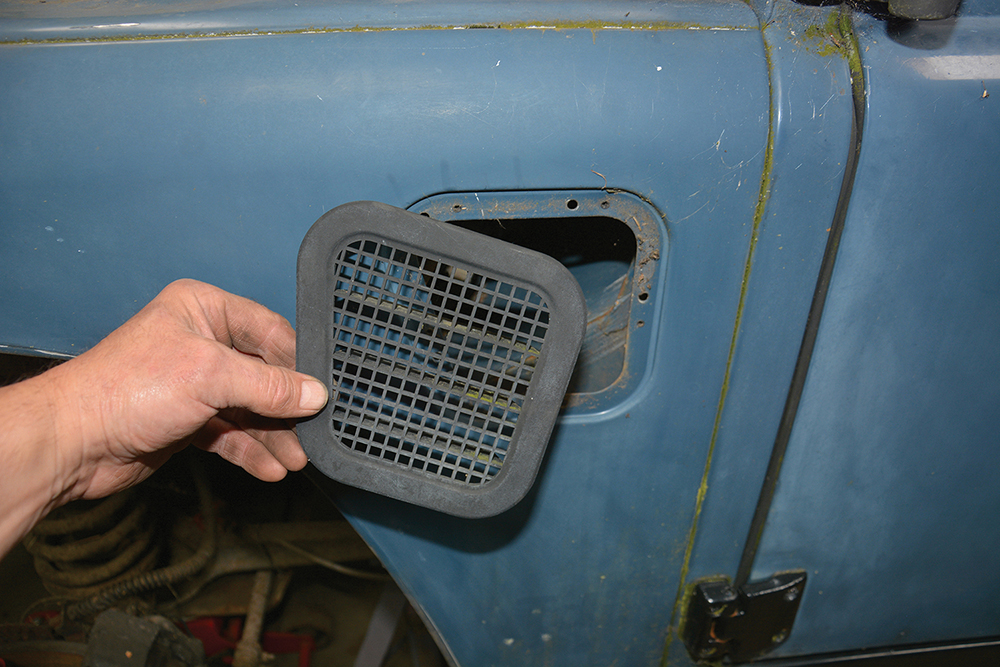
Both sides now: The heater air intake grille on the left-side wing-top and the plastic blanking panel on the right one are both removed to gain access to the inner wings.
Captive nuts: With the plastic radiator grille having been removed earlier, the M8 bolts holding the front surround panel to the wings are loosened and withdrawn.
Ease it upwards: The four self-tapping screws that secure the top of the panel have been removed, allowing it to be lifted from between the front wings.
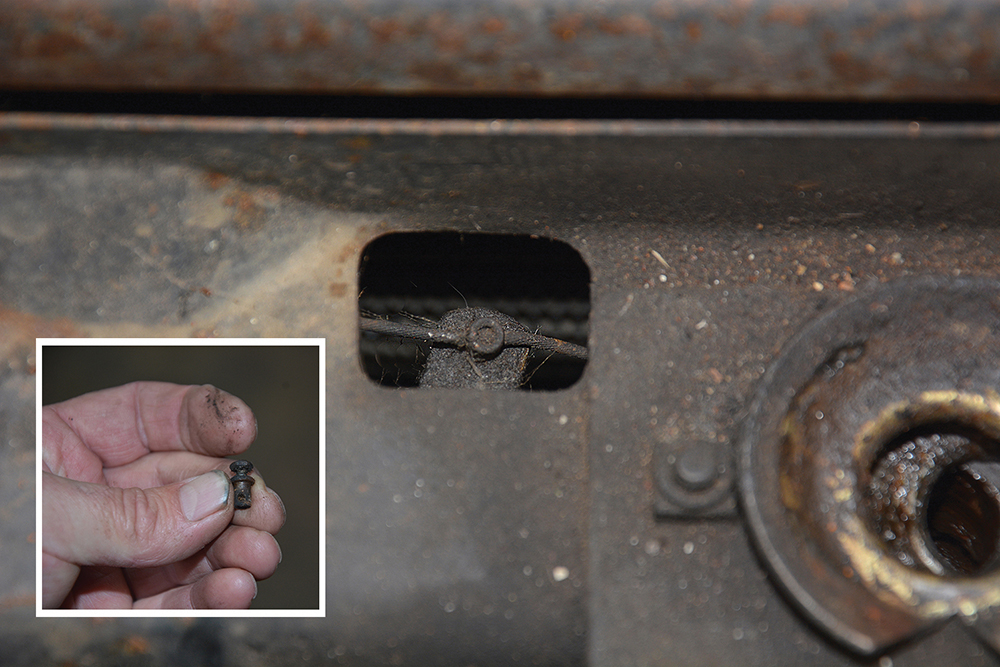
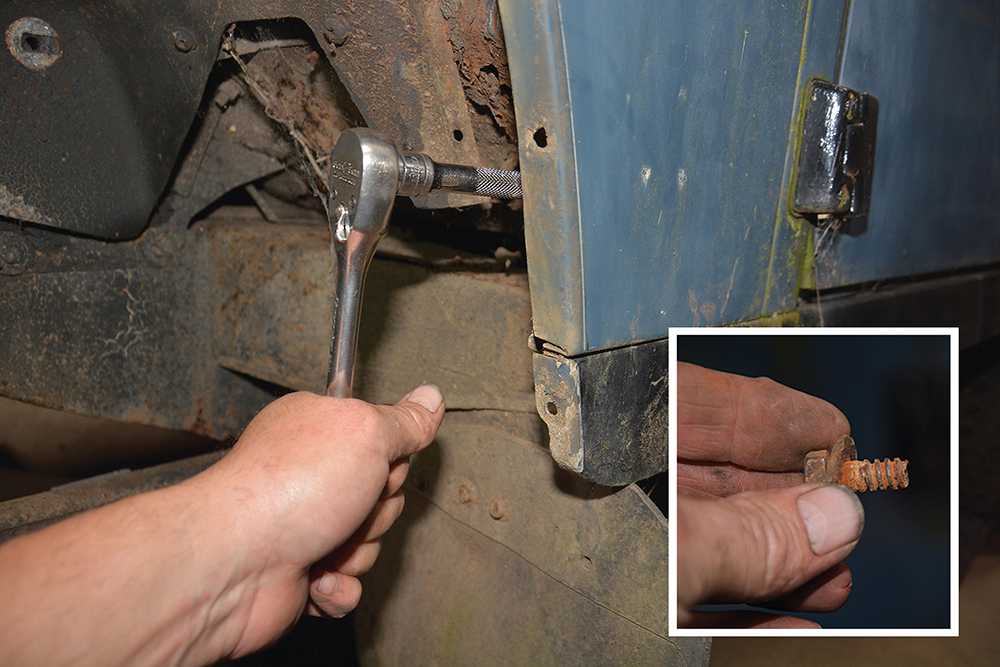
Costly little part: Usually either a 7mm or a ¼-inch socket loosens the pinch bolt holding the bonnet release cable. Store the bolt (or trunnion, as it is known) safely.
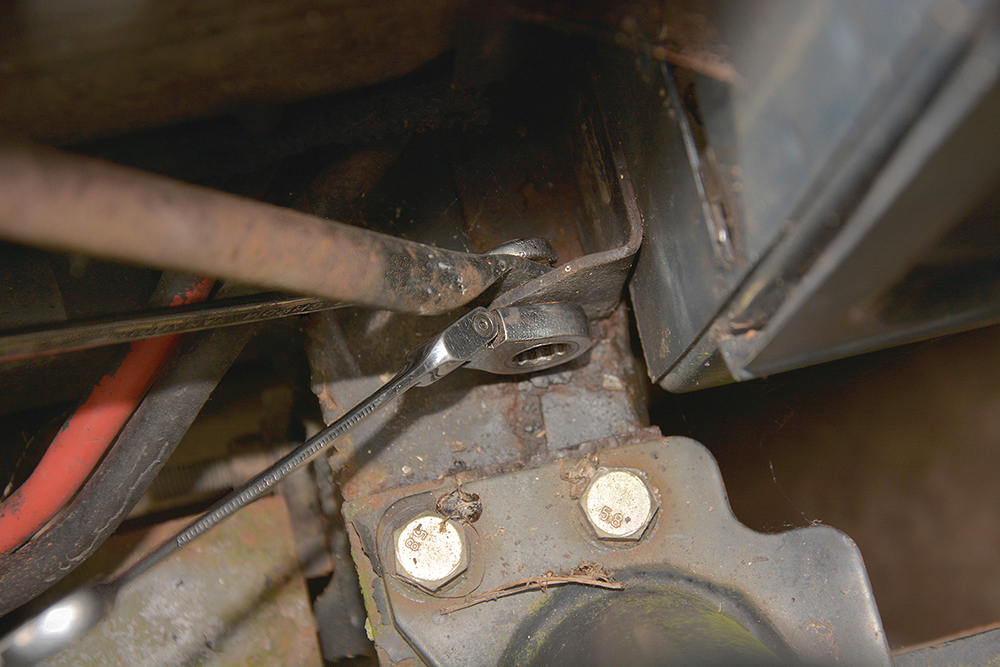
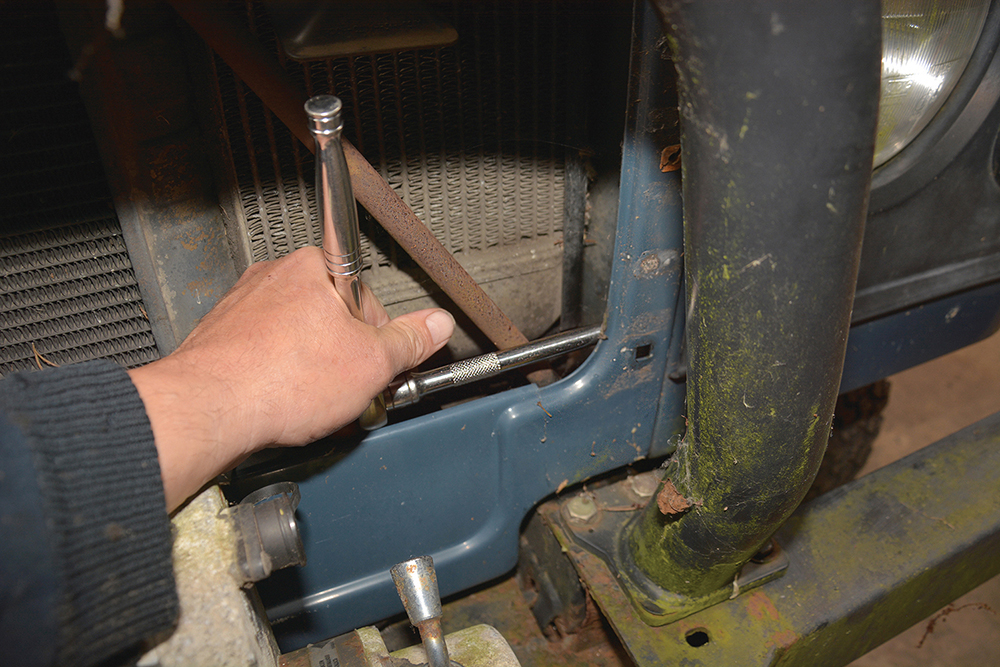
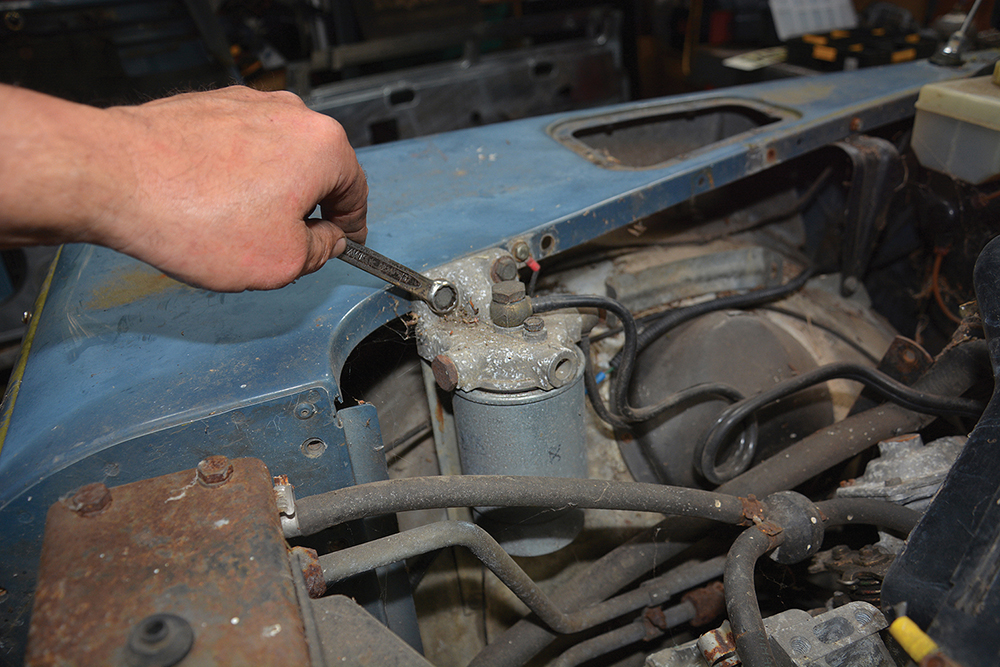
Fixed to the frame: Each slam panel diagonal support rod is attached to a bracket on the chassis by an M8 x 25 bolt – here being removed with 13mm spanners.
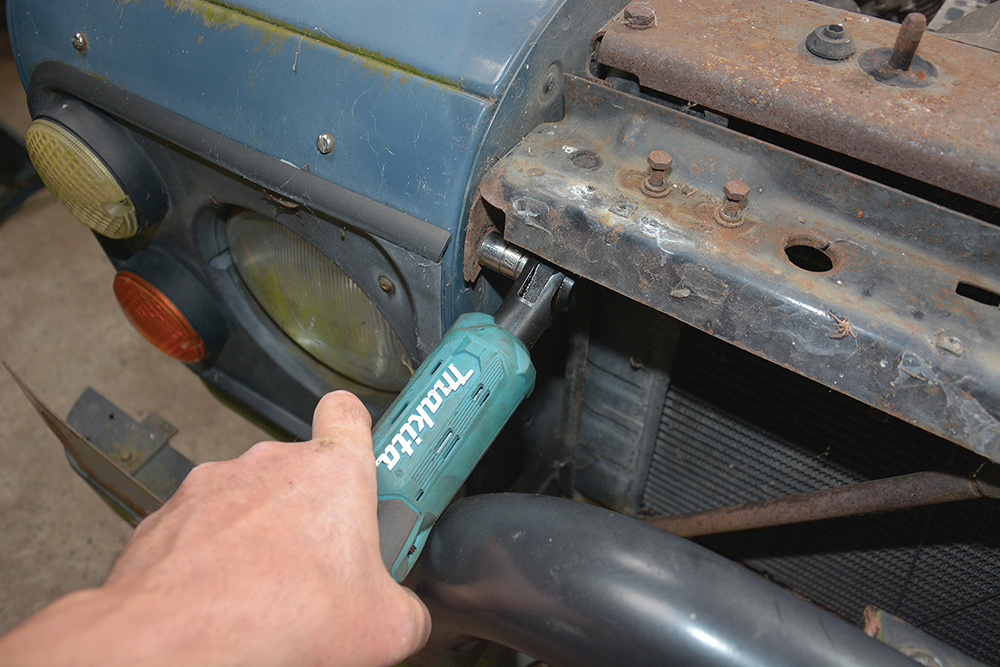
Slam panel: Two M8 bolts each side are removed from the wings to free the slam panel assembly which is lifted off after unbolting the radiator brackets and horn.
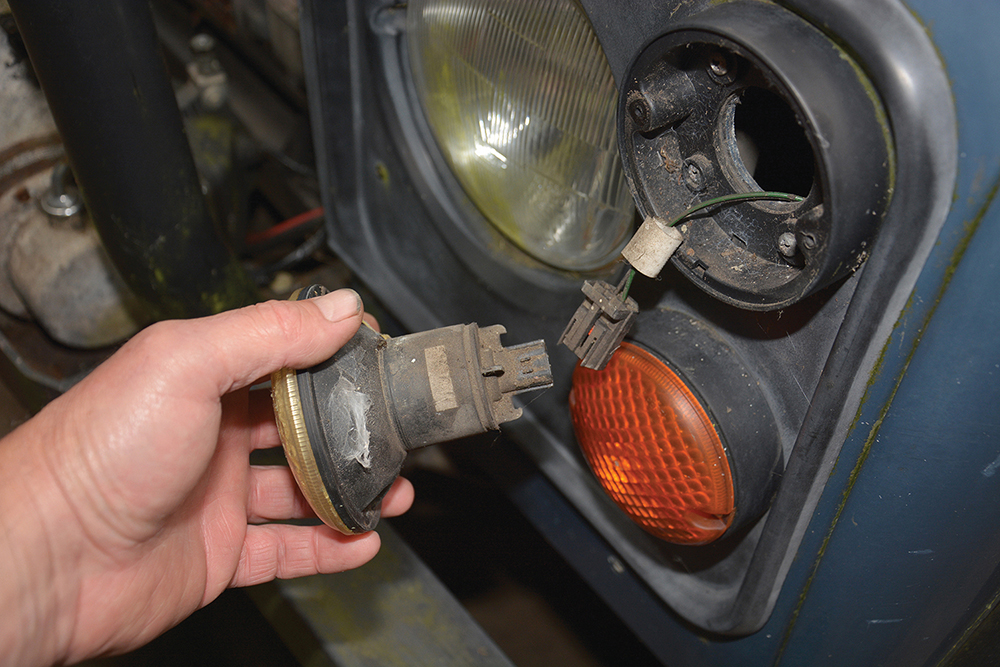
Plug-in wiring: The front indicators and side lights are removed from the front wings, including their plinths, freeing up the wiring and plastic headlight surround trim.
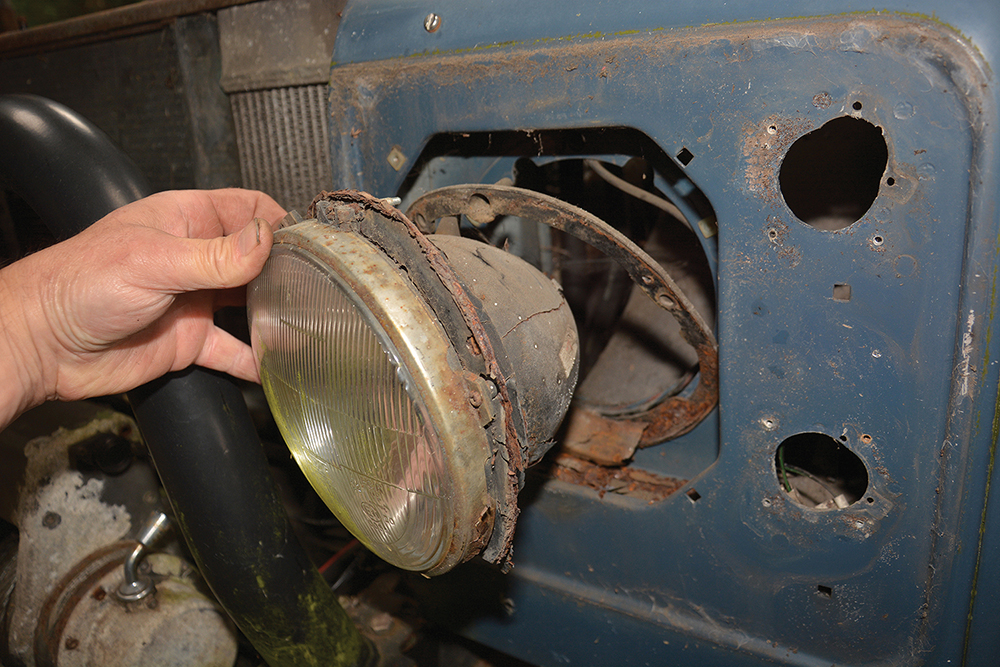
Old and tired: The headlight assemblies are held in the wings by four self-tapping screws. They are eased out and disconnected from the wiring harness for removal.

Minimise risk: The road wheel is removed for access to the wheelarch trim fixings. The vehicle is supported on a robust axle stand, as the jack alone is not sufficient.
Knock them out: A 2.5mm parallel pin punch is ideal to push out the plastic spreader pin from the centre of each of the plastic rivets in order to remove them.
Store it carefully: With all of the plastic rivets removed, the wheelarch trim is taken off to allow access to the wiring harness and the screws holding the wing to the bulkhead.
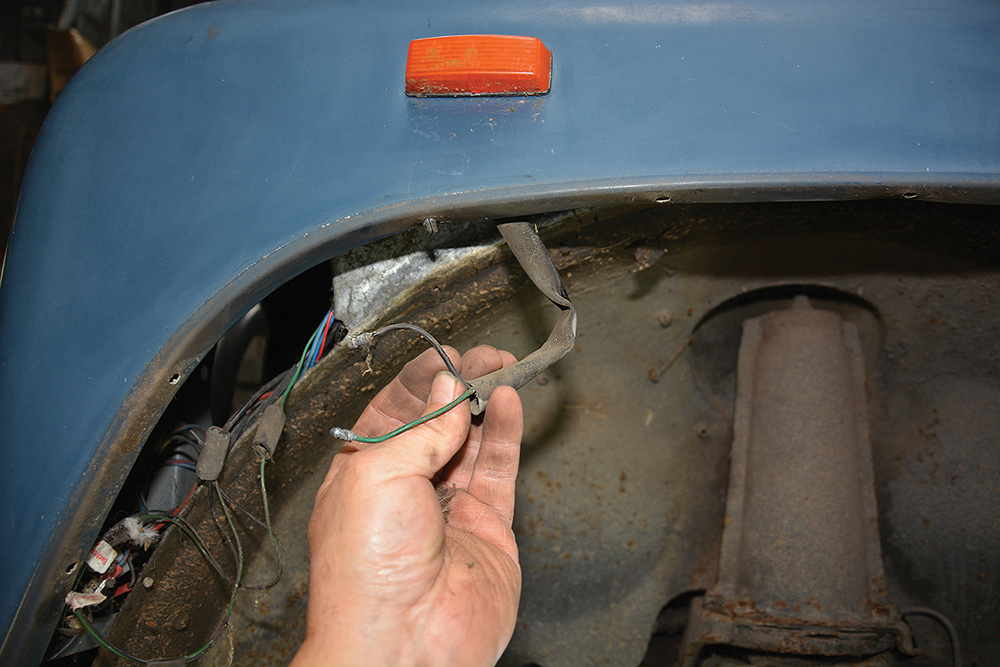
Unearthed: The indicator repeater light is disconnected from the wiring harness and the earth cable is unbolted from the inner wing by removing the M6 bolt.
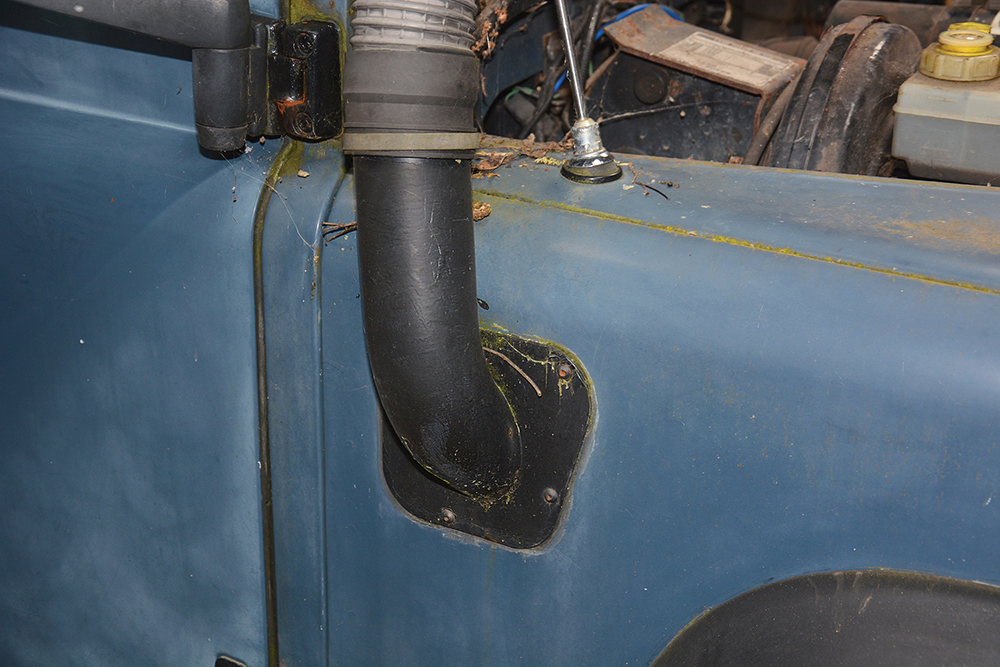
Disused access point: The air intake port from the previous engine installation will help gain access to the bulkhead fixing screws, so the plastic trim grille is eased away and removed.
Look out for leaking fluid: The windscreen washer bottle and its mounting bracket are removed from inside the wing after disconnecting the electrical leads and the fluid hoses.
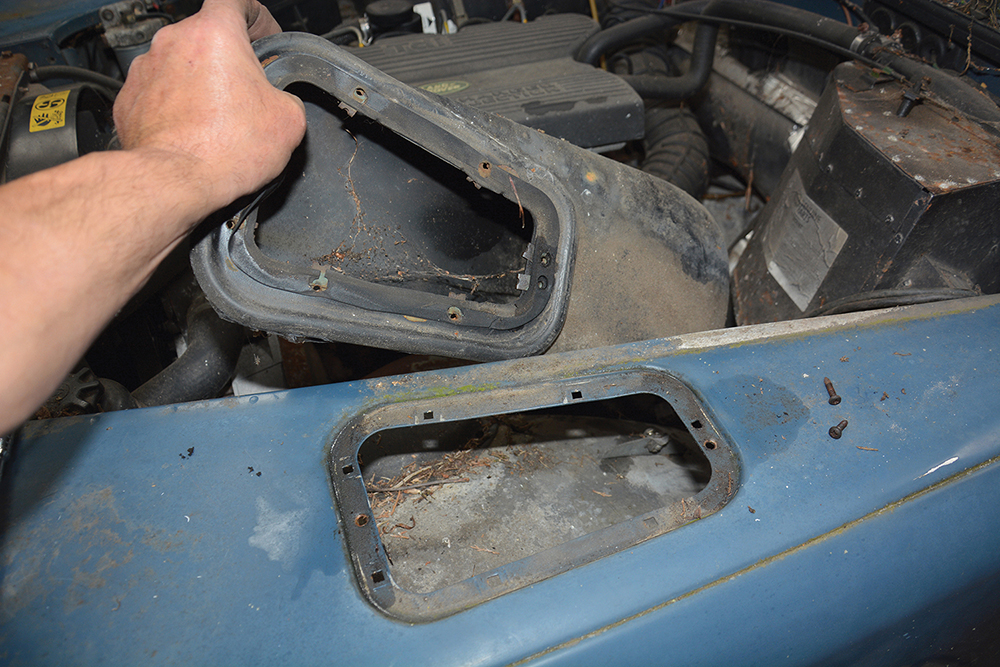
Snug fit: Two screws need to be removed from through the wing-top to allow the air intake box for the heater to be eased out from inside the wing.
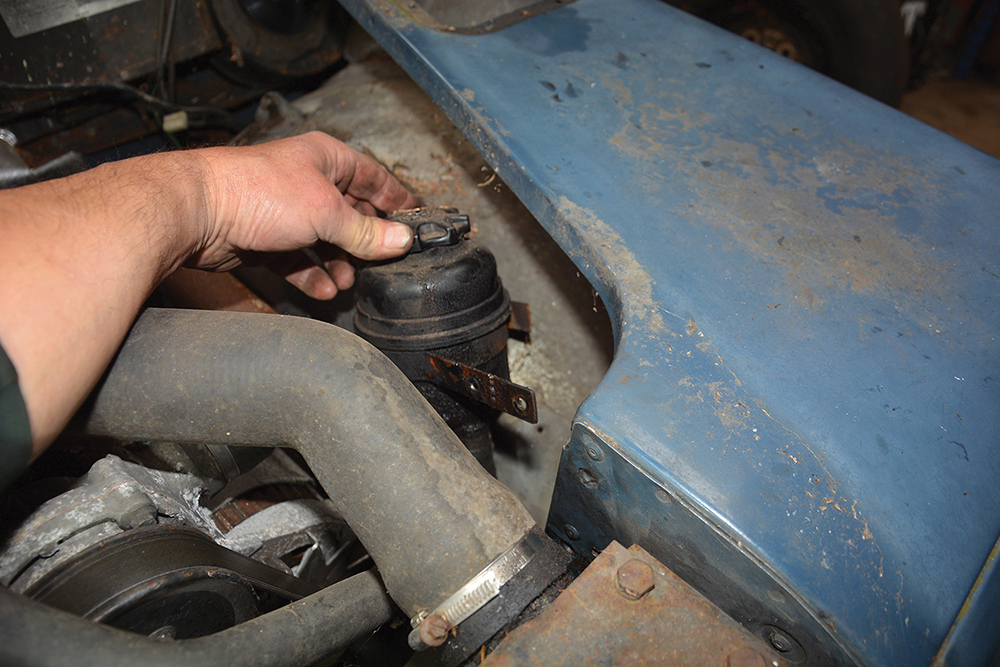
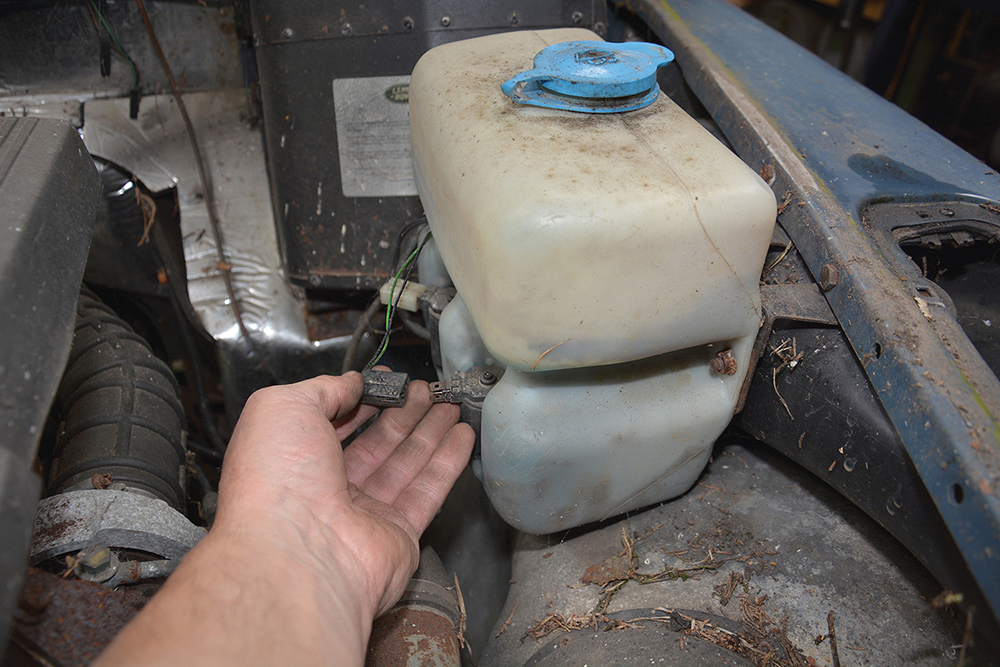
Non-standard: The power steering reservoir is unbolted from inside the wing and eased back out of the way and towards the engine, where it can be left in place.
Large P-clamp: An M6 bolt is removed from the inner wing to free up the wing from the metal intercooler pipe, as per a factory 300Tdi engine installation.

Don’t forget this: Each wing’s rear top edge has an M6 bolt into the bulkhead that supports the wing-top via a bracket. Take care with the bolt head when removing.
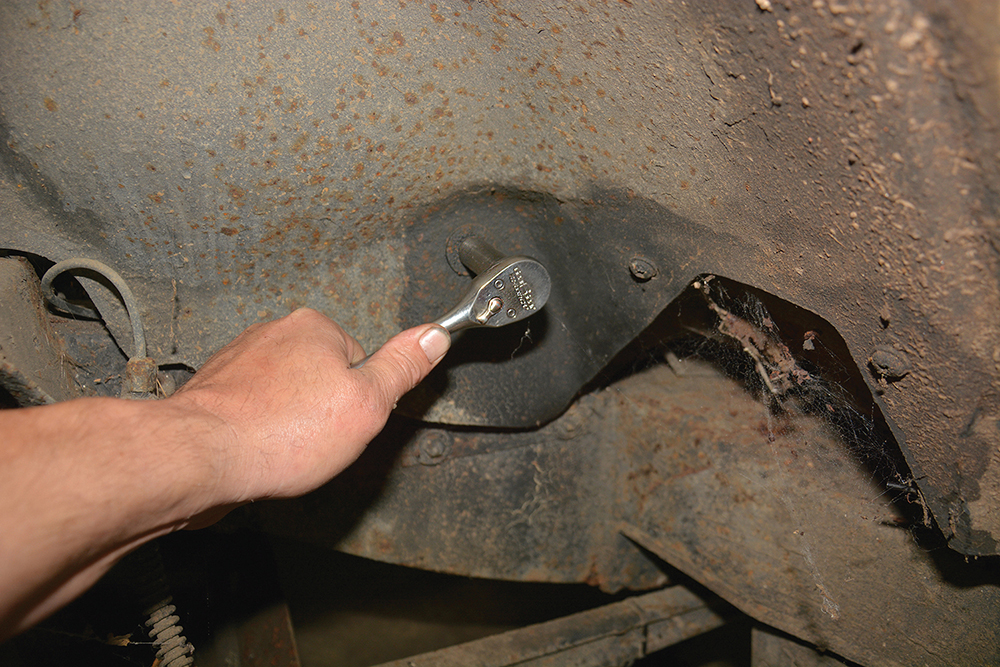
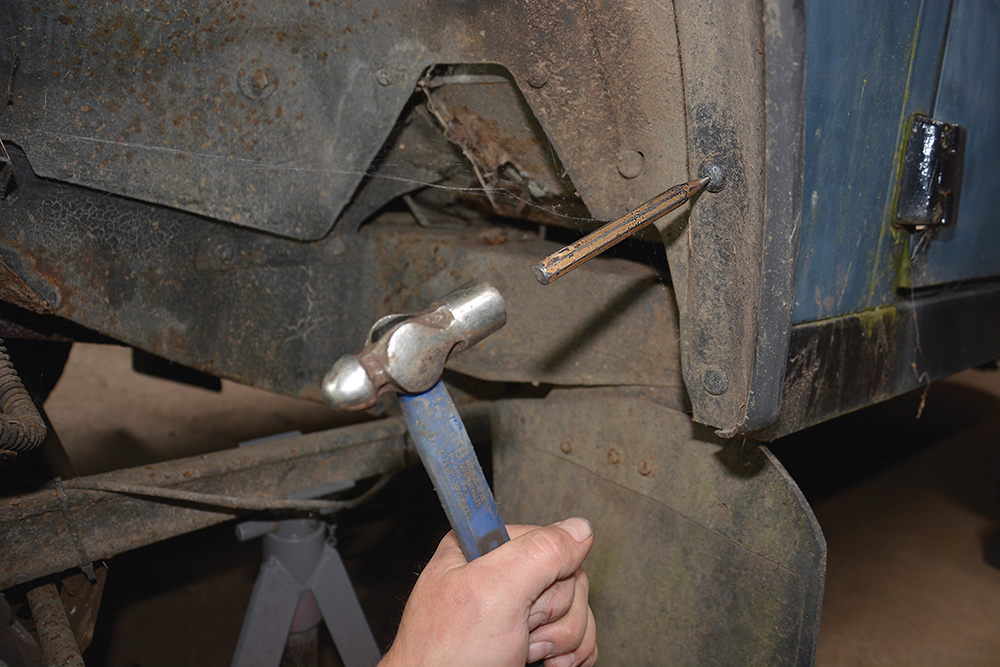
Chassis connections: Under each front wheelarch there are two M8 bolts to remove. One is through a bracket on the chassis up front and one at the bulkhead support bracket.
Final fixings, then wings off
With the ancillary components detached, there remain the fixings between the wings and the bulkhead to deal with. The heater unit hinders the attachment of a socket wrench to the bulkhead screws, and the bottom bolts holding the heater to the bulkhead are themselves restricted by the wing. I have found that with a good selection of extension bars, the screws can be removed with the heater unit in place. Conversely, when refitting the left-hand wing, I do this before the heater unit is fitted, otherwise it is difficult to get some of the screws lined up.
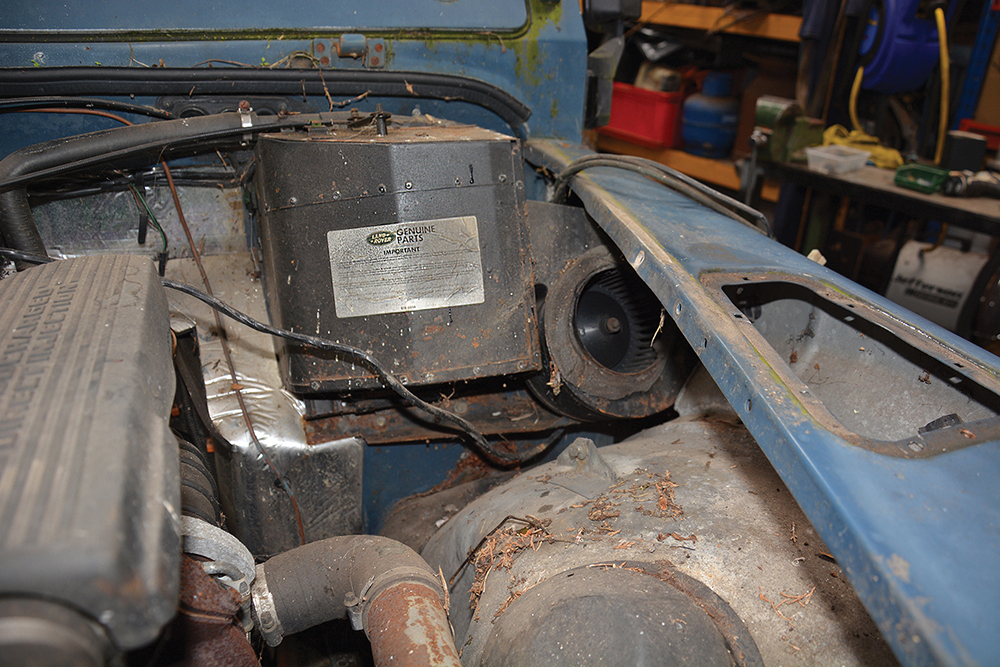
Heater stays in: The heater unit impedes access to the four screws holding the wing to the bulkhead on the left side, but it is possible to work around it.
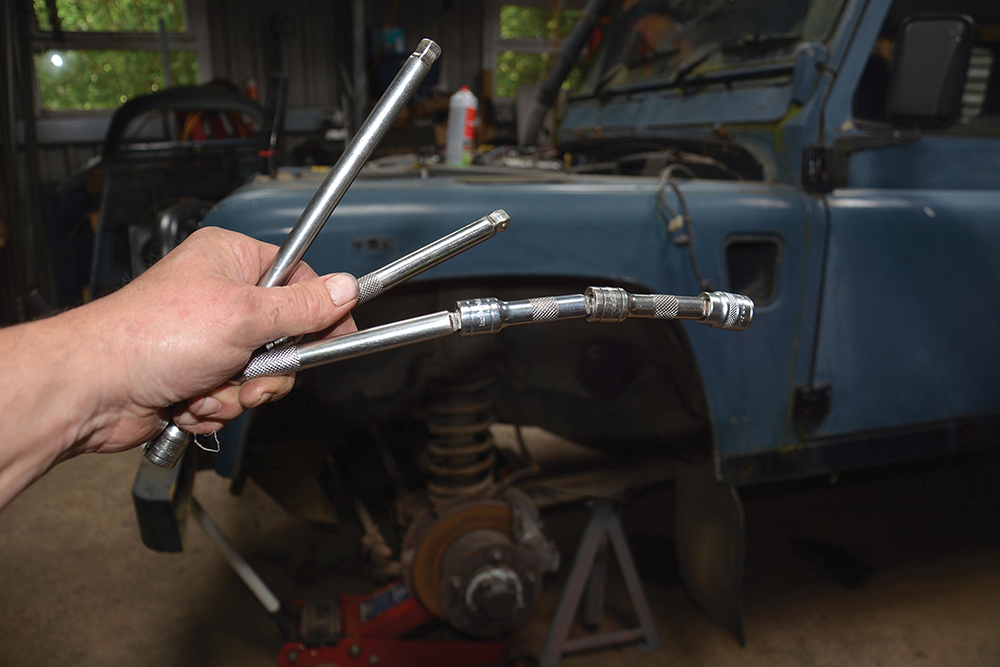
Useful tooling: These ⅜-inch socket drive and extension bars of various lengths have an option for ‘wobble’ connection, which gives a little scope to bend around obstacles.
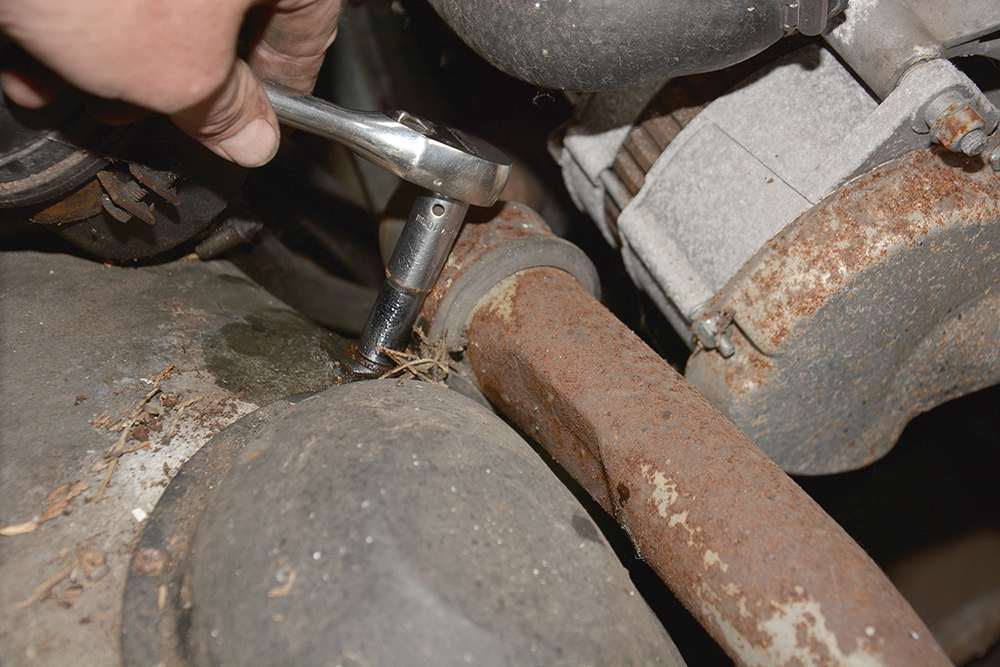
Wing to bulkhead screws: The lower wing-to-bulkhead screws are loosened with an extension bar and 14mm socket. Screw (inset) has a coarse thread which quickly screws out.
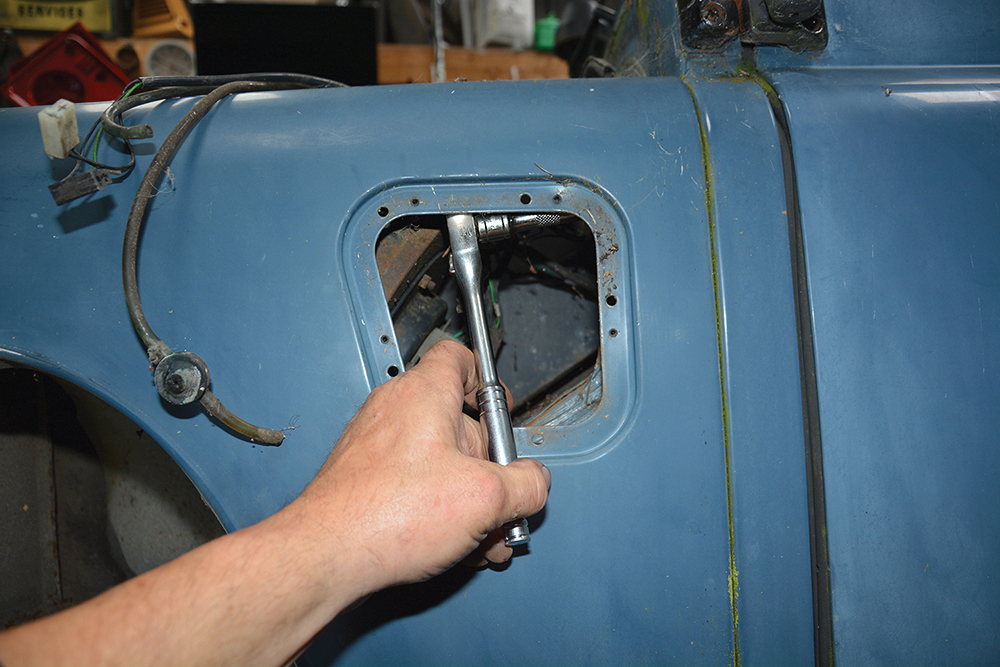
Top screw easy: Access through the air intake aperture only necessitates a slight angle on the extension bar. Otherwise longer and more angled combinations are needed.

Good access: The middle two bulkhead screws are also simple enough, with the correct length combination of extensions for the 14mm socket, reached from the wheelarch.
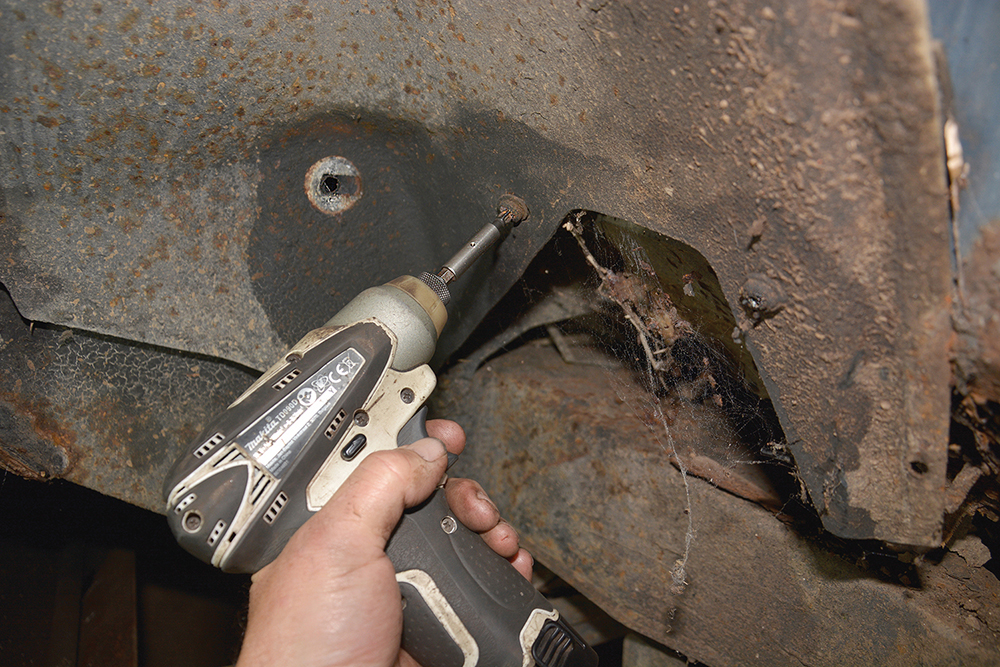
Last two: There are two 6mm self-tapping screws through the inner wheelarch to a bracket on the footwell of the bulkhead, removed with a Pozi-drive #3 screwdriver bit.

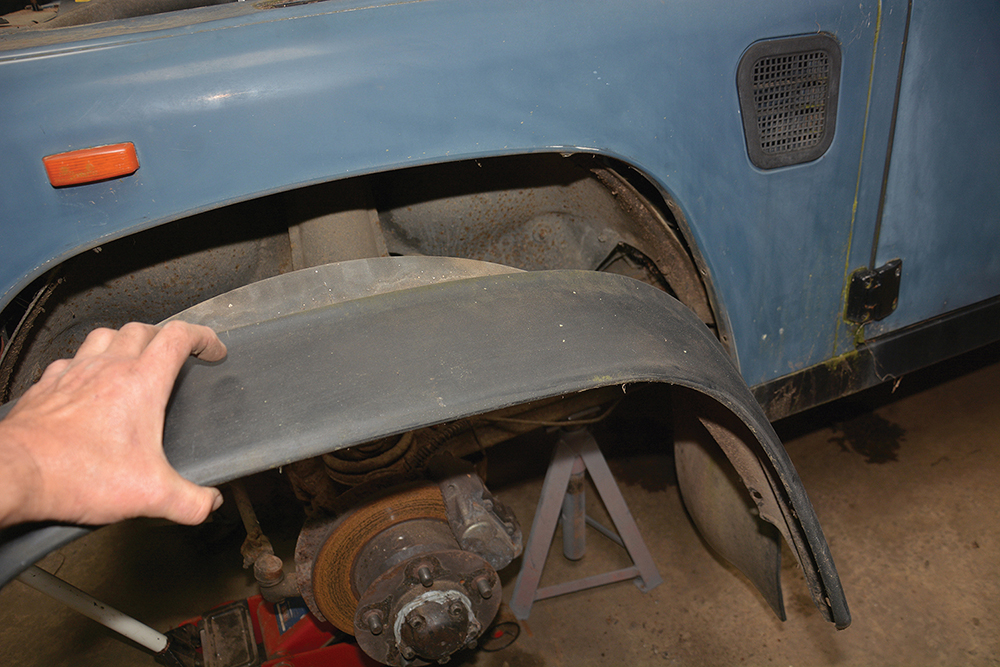
Clean lift: The left-hand wing assembly has now been lifted clear of the vehicle. Look out for the power steering reservoir snagging at the front as it comes away.
Differences with the right side
Removing the right-hand wing is similar and a little easier because there is no heater in the way, although on 300Tdi and Td5 models the engine air intake components can cause some restriction. The plastic air intake parts are detached from the outer wing panel to allow them to move up or down a little to access the screws. However, these can be tricky to fully remove because of restrictions caused by the brake pedal housing, servo, and the steering linkage.
Accessories: This Land Rover was fitted with a raised air intake (or snorkel), and it is best to remove this from the right wing and windscreen frame to begin with.
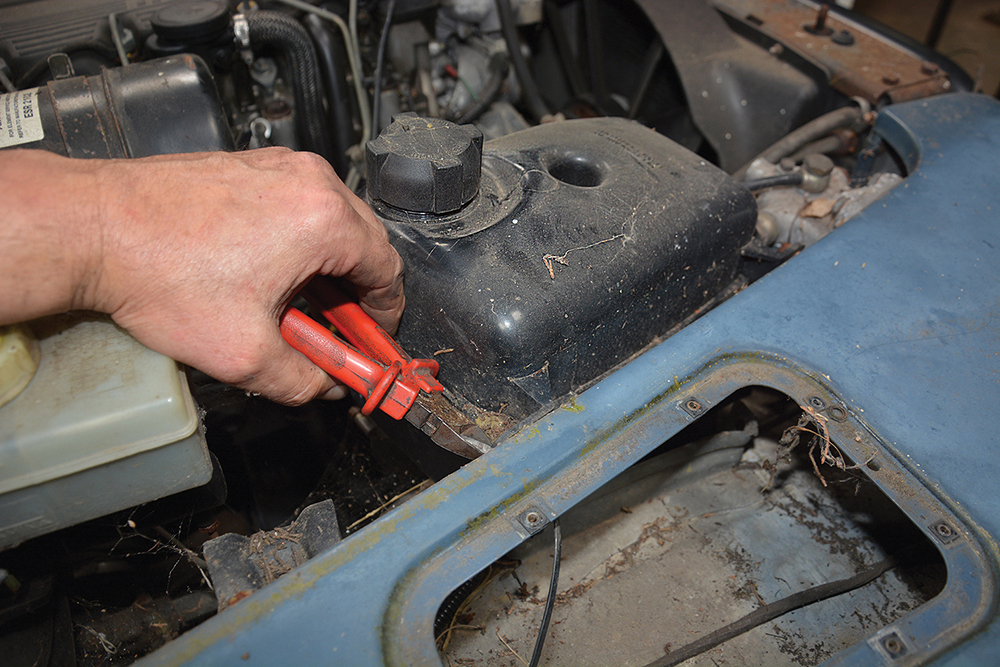
Normally bolted: The coolant expansion tank had been cable-tied to the inside of the wing. These plastic fixings are cut and the tank is then tied out of the way against the engine.
Easy does it: The fuel filter housing also needs to be detached from the inner wing and tied to the engine, taking care not to strain or damage the fuel pipes.
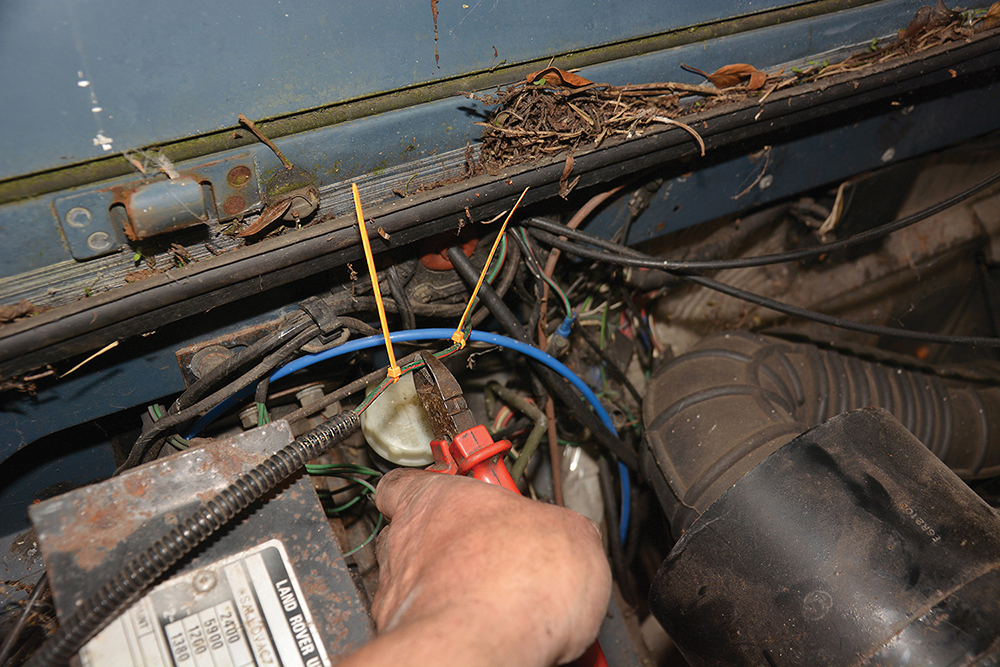
Coloured cable ties or tape: This aftermarket wiring has been added to the vehicle for an unknown purpose. I mark it with coloured cable ties for later reconnection before it’s cut.
In part 2: The engine wiring and other items will be disconnected from the bulkhead. The front doors, sills, floor panels and transmission tunnel will then be removed to free-up the bulkhead, while other components are stripped from it. The bulkhead can then be lifted off and fully stripped down, and we’ll show you the best order in which to carry out this work. All parts will then need to be assessed to determine what components can be renewed and which ought to be replaced, not forgetting the required new gaskets and seals.
Read all of the parts so far in our 'How to' section here.
Like to have your own Land Rover library?
Try our Budget Digital Subscription. You'll get access to over 7 years of Land Rover Monthly – that’s more than 100 issues plus the latest digital issue. All issues are fully searchable so you can easily find what you are looking for and what’s more it’s less than 10p a day to subscribe. Click here to find out more details and start enjoying all the benefits now.