


23 November 2023
|
 Trevor starts on the inside
: credit: © Trevor Cuthbert
Trevor starts on the inside
: credit: © Trevor Cuthbert
Trevor details a methodical system for removing the components and disconnecting systems from the old bulkhead
Need to know
Difficulty: 3 out of 5
Models: Defender 90, 110, 130.
Tools needed: General workshop tools, wire cutters, 3/8in drive socket set including Allen keys, screw extractor tool, steering wheel puller.
Work safely:
• Use axle stands to support a raised vehicle.
• Disconnect the battery before major dismantling work.
• Safely secure raised bonnet to prevent it falling closed.
See part one here.
There are several different approaches to removing a bulkhead from a Land Rover body. I have been to Land Rover shows where fully dressed bulkheads are offered for sale with almost every part still attached to them – complete dash, steering column (and steering wheel), heater, pedals – the lot.
In fully dressed state, a bulkhead is heavy and cumbersome, and it’s certainly not the way to take one out, if working alone. My preferred method shown here allows me to carry out the job completely alone by careful manoeuvring. Another reason for totally stripping the bulkhead before removal is that all serviceable components will be reused on the new bulkhead, so they need to be removed in any case.
I remove the complete dash and other cab-side components from the bulkhead first. However, there is nothing to say the parts on the engine bay side cannot be dealt with first. There are also some parts that require work on both sides of the structure – for example, the steering column and the wiring loom.
The key to any dismantling task, is a methodical and careful approach, so that as many expensive parts as possible can be reused during the rebuild.
Working from inside the cab
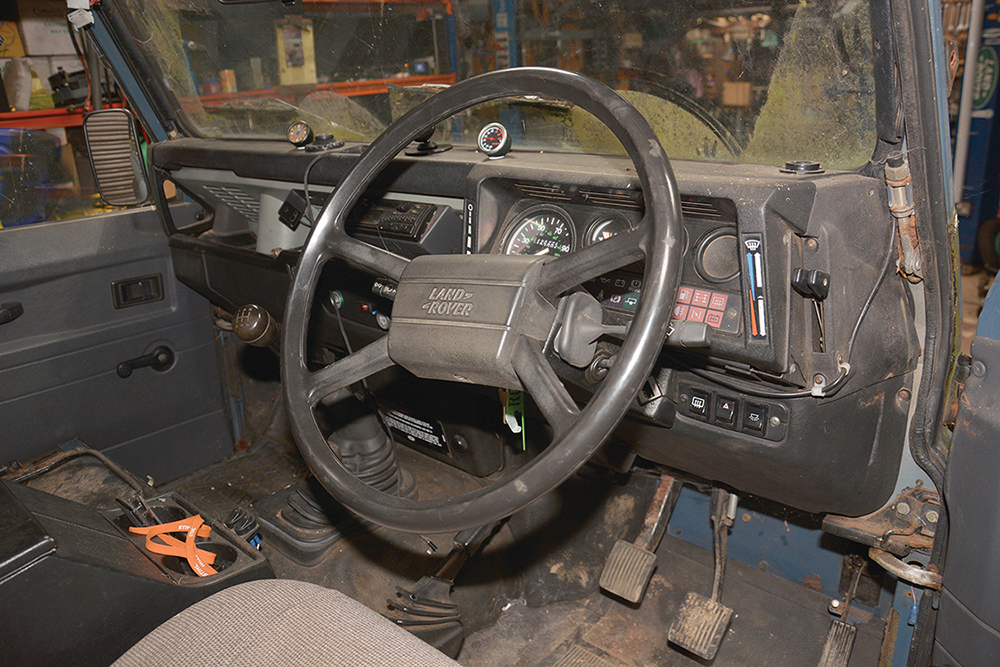
Electrics and switches: Inside the cab, the bulkhead is equally well kitted out, including the dashboard, instruments, controls, cabin heating and ventilation.

Clevis pin out: For proper access to the cab side of the bulkhead, the doors need to be removed first, starting with disconnecting each of the door check-straps.
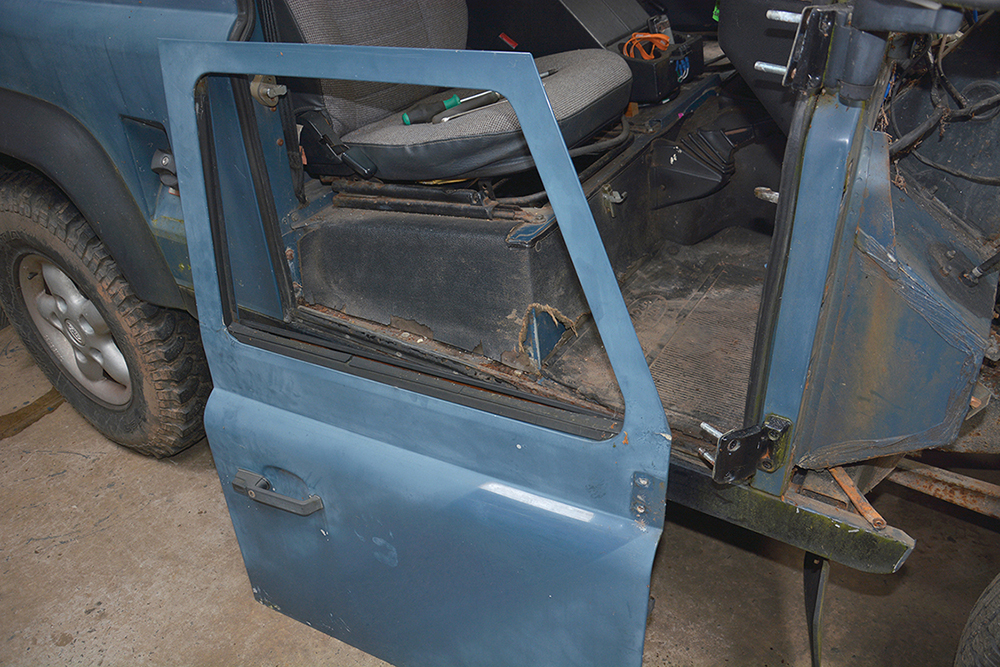
Worn out: The door hinges need to be replaced, so the doors are unbolted from them, leaving the old hinges in place on the bulkhead.

To be re-fitted: The door check-strap slider assembly is in good condition on each side. These often are worn or damaged through constant use.

Ten quid on eBay: The early-type steering wheel will not come off with a tap or wiggle and needs a proper puller to ease it off the steering column.

Exposing the metal: There are seven screws under the steering column shroud that need to be removed in order to separate the two halves and extract them.

Slide it free: The assembly that houses the steering column stalks and switches is removed by loosening the pinch screw and separating the electrical plugs.

Rat’s nest: The instrument binnacle has been unplugged and removed, revealing a bigger mess of cables than expected, due to various added electrical systems.

Concealed: At the left side of the upper dash, the grab handle is removed by loosening this screw (behind the Land Rover badge), and removing the lower securing screw.

Room for a small one: The screws at the top of the dash are difficult because of the restriction of the windscreen, but this ratchet-operated screwdriver bit works well.

Ease it off: With all of the fixing screws removed the dash top will come off with a little gentle manoeuvring to free it from the middle section.

There is a way: The grey plastic section is tricky to remove but, by rolling it back from the top, it will easily pop out of the recess without damage.

From outside: The vent flap is attached to the lever mechanism by two M5 set-screws. An 8mm ratchet spanner is the most efficient way of removing the screws.

Good reach: The middle steel assembly of the dash is held along the bottom by a series of five self-tapper screws. A long-handled pozi-drive #2 screwdriver removes them.

Freeing it up: Before the inner steel section can be removed, the steering column support bracket is unbolted, using a 17mm spanner on the M10 bolts.

Little short ones: The top of the assembly is held to the bulkhead by three small self-tapper screws. Long-handled screwdriver provides good reach for the restricted centre one.

Thread out the cable: The middle assembly can now be withdrawn from the bulkhead, taking with it one of the heater unit control cables that was detached from the heater.
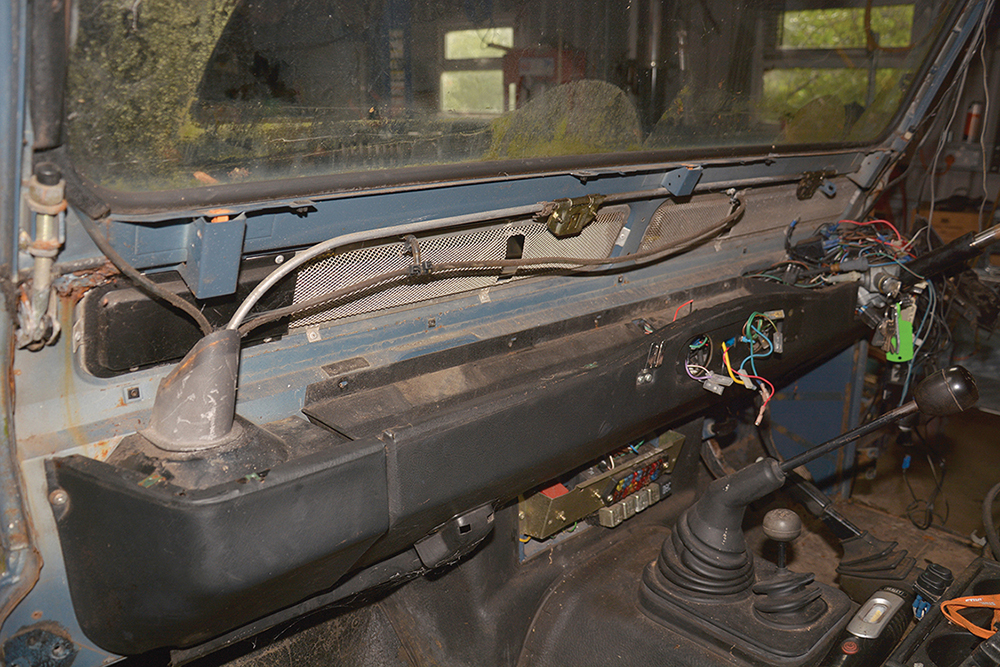
Getting lighter: The inside of the bulkhead is now becoming more exposed and accessible as the dashboard is slowly being dismantled and removed from the cabin.

8mm spanner: The final major assembly to be removed from the inside is the lower dash. Two upper M5 set-screws hold it, along with self-tapper screws along the bottom.

Gently does it: With the screws removed, the lower dash will come away from the bulkhead, with gentle levering to break the seal and adhesive around the heater intake.

Wipers removed: The wiper arms and spindle nuts are removed, then the wiper motor and cable is eased out after removing the securing bracket and loosening the large nut.
GRP structure: The transmission tunnel is held in place by a series of large self-tapper screws which are removed using a pozi-drive #3 screwdriver.
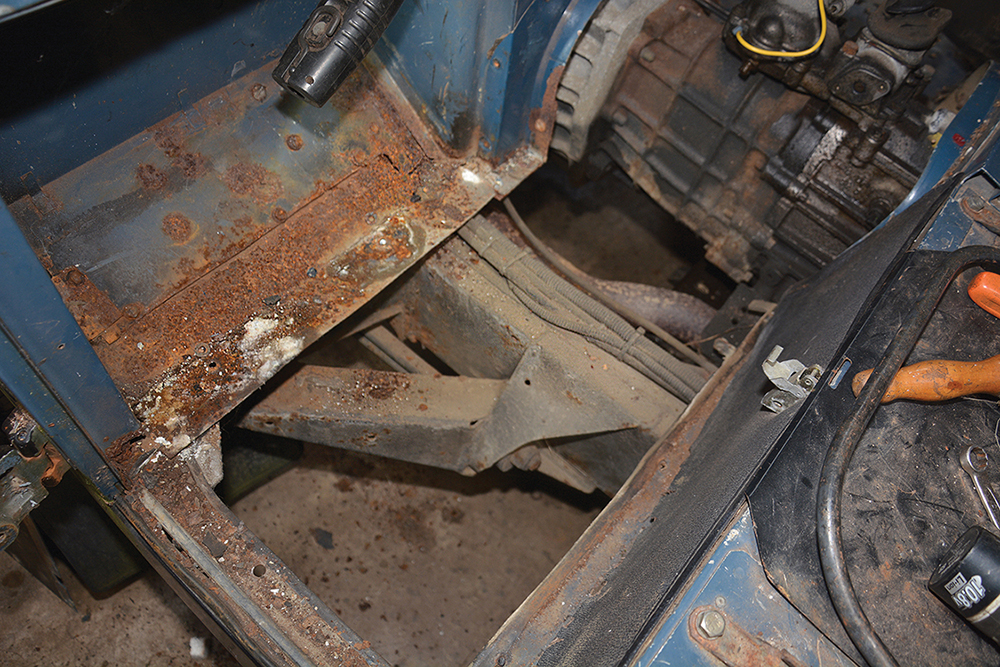
Rusty heads, seized: The floor panels are often held in place by a variety of aftermarket fixings over the years. Most of these were cut with a small angle grinder.
Stripping the engine bay side of the bulkhead

Heater pipes: It is not necessary to drain the coolant from the Land Rover, so after they are detached from the heater, the heater hoses are plugged to prevent leakage.

Tight spot: The top of the heater unit is fixed to the bulkhead with a pair of M8 bolts into threaded holes. These are loosened with a 13mm spanner.

Not shown: The heater has been removed after unbolting a further two M6 fixings, which had been holding the bottom of the unit to the top of the footwell.

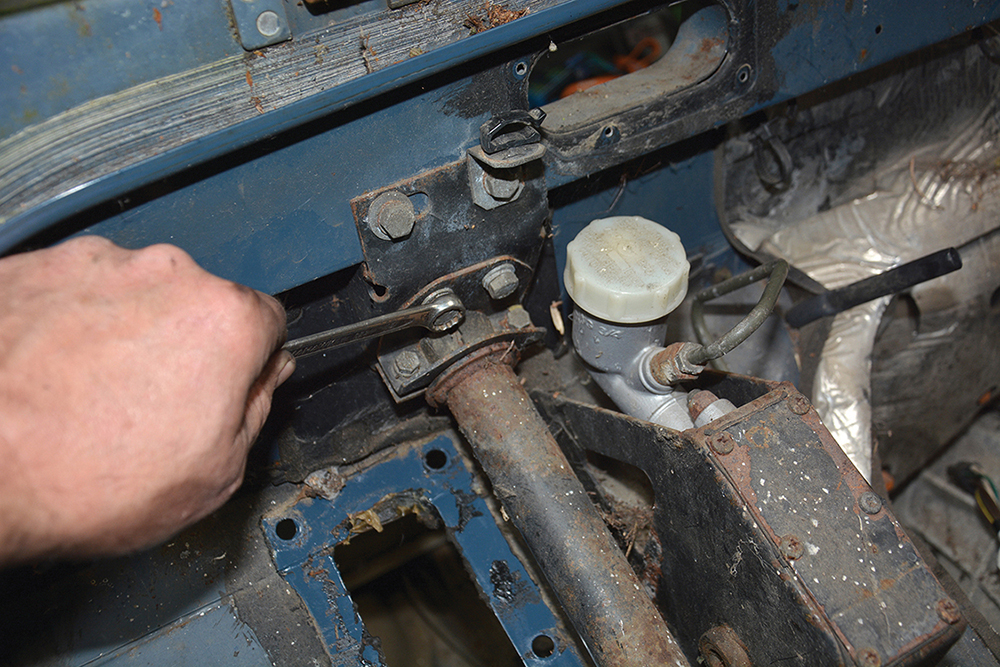
Minimise mess: As much of the brake fluid as possible is sucked out using a syringe so that there is less to drip on the floor when the brake pipes are undone.

Dual-circuit brakes: There are three of these brake pipes to detach from the brake master cylinder – one to the rear and two to the front brakes.

Resting on the tyre: The brake pedal housing assembly has been lifted off the footwell after removing the six M8 bolts from the inside with a 13mm ratchet spanner.

Six more bolts: In a very similar way to the braking assembly, the clutch pedal housing is released from the bulkhead after the clutch pipe is detached.
Clean at the top: To begin removing the steering column, these lower and upper fixing bolts are removed. All are M8 bolts loosened with 13mm spanner and socket.

Rusty at the lower end: With the lower bolts removed, the steering column separates from the fixing bracket and is raised up, to work on the other end inside the cab.
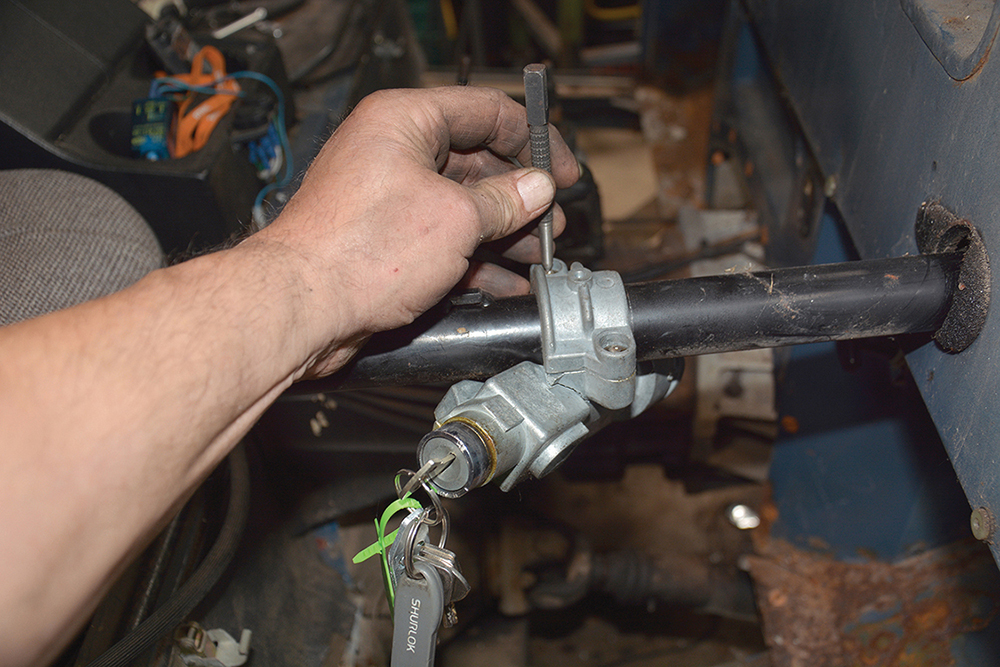
Turn 180 degrees: The security bolts that hold the ignition lock assembly to the steering column are centre-punched at their centre using a hammer and centre punch.

Easily drilled: The centres of the security bolts are now drilled using a 5mm drill bit, to a depth of between 8mm to 10mm for a bolt extractor to work on.

Not so tight: The security bolts do not need a large amount of torque on the bolt extractor tool to get them moving, and are pretty easily removed.

Through the aperture: Now that the ignition lock assembly has been removed, the steering column is withdrawn through the bulkhead and set aside.

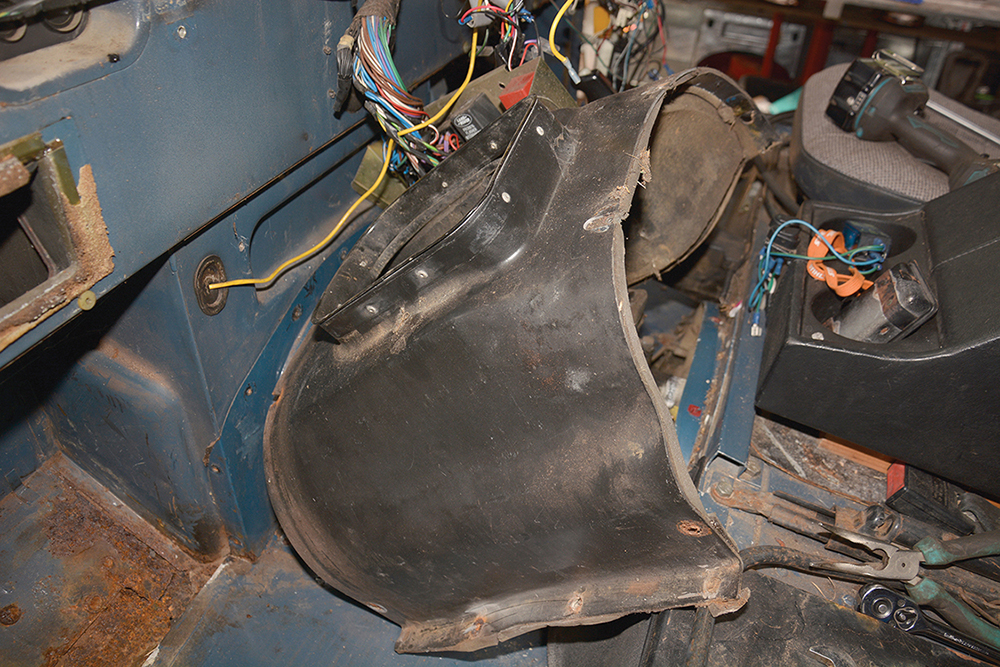
Wiring out: From the engine bay side, the plastic cover is removed to allow the wiring loom to be pushed through to the cabin, easing the grommet with a screwdriver.

Gently does it: Wiring loom progressively pulled through to cab. Before refitting to replacement bulkhead, much of aftermarket wiring may be removed to simplify things.
In part 3: Now that the old bulkhead is considerably lighter, it is time to detach it from the Land Rover’s chassis and body. There are hardware fixings at the windscreen frame, the sills, the bulkhead outriggers and support brackets to the chassis, which all need to be detached. We will also show how the bulkhead can come out without need to remove the windscreen and its frame.
The new bulkhead will be prepared and seam-sealed before it is fitted with new seals and gaskets. Then work can commence to refit the components and systems that have just been removed.
Like to have your own Land Rover library?
Try our Budget Digital Subscription. You'll get access to over 7 years of Land Rover Monthly – that’s more than 100 issues plus the latest digital issue. All issues are fully searchable so you can easily find what you are looking for and what’s more it’s less than 10p a day to subscribe. Click here to find out more details and start enjoying all the benefits now.