


08 December 2022
|
 The coupling distributes torque to improve traction
: credit: © Dave Barker
The coupling distributes torque to improve traction
: credit: © Dave Barker
Dave Barker shows how the hydraulic components at the heart of the Freelander’s four-wheel drive system are serviced
Need to know
Time: 2 hours.
Difficulty:
Models: Freelander 2.
Tools needed: General workshop tools, E11 Torx, 10mm spanners and sockets, torque wrench, syringe for removing oil from the Haldex unit. This job is best done with the Freelander off the ground on a vehicle lift.
Parts & costs: Haldex unit kit of service parts (LR032298), £27 to £56; Borg Warner Haldex Unit (friction modifier) oil 850ml (LR054941 / LR003136), from £40 to £70.
Work safely: When planning to work underneath a vehicle on a vehicle lift, ensure that it is rated to lift the weight of the vehicle and in serviceable condition. Always wear protective gloves and eye protection and an appropriate mask when needed.
Contact: Maddison 4x4, Water House Farm, Station Road, Topcliffe near Thirsk, YO7 3SG.
Tel: 01845 587407, maddison4x4.com.
The Freelander 2 from the 2009 model year is fitted with the Generation 4 active on-demand coupling (otherwise known as the Haldex unit) mounted on the rear differential. This is an improved design over the previous couplings, and its role is to distribute torque to the rear wheels when front wheel traction is lost. This allows normal front-wheel only drive for economy, but switching into four-wheel drive by also driving the rear wheels when needed. This Haldex unit active on-demand coupling provides seamless transition to four-wheel drive and is a self-contained hydraulic and mechanical unit which sits between the rear driveshaft (propshaft) and the rear differential.
The only service requirement for the rear diff (which shares its oil with the Haldex) is to renew the oil every 150,000 miles or 10 years. However, this 2013 Freelander 2 Td4 with 78,000 miles on the clock had a fault message flashed up on the dash message centre stating ‘Gearbox Fault, Traction Reduced’, along with an amber exclamation mark in the warning triangle. The Freelander was plugged into Maddison 4x4’s diagnostic machine which indicated low oil pressure in the active on-demand coupling, the Haldex unit. The most likely cause of this fault, which defaults the Freelander into two-wheel front-wheel drive, is normally either a clogged main oil filter on the Haldex unit or a blocked oil filter on the oil pump pick-up, or possibly both. The main oil filter can be easily removed and changed, and the small filter on the pump is easily cleaned and refitted. There is, however, always the chance of a more serious fault with the Haldex unit, which could mean it will need to be replaced, incurring a lot more expense. In this case, the fault was cleared and the car booked in to have the oil and filter changed and the pump pick-up filter cleaned.
However, while waiting for the car to come in for the repair, the fault had not re-appeared so the owner decided to see what happened in the future. But seven months later the fault re-appeared, so the Freelander was booked in again to have the Haldex oil changed and the main oil filter replaced.
To change the filter, clean the pump’s pick-up filter and replace the oil, the Haldex unit needs to be removed from the vehicle. This is a relatively easy job as it is only secured to the rear differential by four bolts. It’s also necessary to remove the rear propshaft (driveshaft) from the Haldex unit. With the Haldex removed, the filter, oil pump and oil pickup filter are easily accessed. There is no oil drain plug in the Haldex unit so the oil will leak out when you first release it from the rear differential, with the remainder of the oil needing to be drained out with the unit upended on a bench. Before refitting the Haldex it’s advisable to clean the drive coupling casing to remove any build-up of dirt and other contaminants.
Land Rover has a prescribed method to follow when refilling the Haldex unit with special transmission fluid, part number LR003136 or equivalent. After reinstalling the unit, and initially filling with oil, it’s necessary to turn on the ignition for five minutes, then turn off and remove the filler plug. Then fill the Haldex unit again until oil just starts to come out of the filler plug. At that point, a syringe is used to extract exactly 70ml of oil, before refitting and tightening the filler plug. Note: the filler hole is only for filling, and is not an oil level indicator. Once this is all completed the fault message will need to be cleared using a diagnostic tool.

Fault warning: The fault message ‘Gearbox Fault, Traction Reduced’ and the amber exclamation mark in the warning triangle, flashed up on the dash’s message centre.
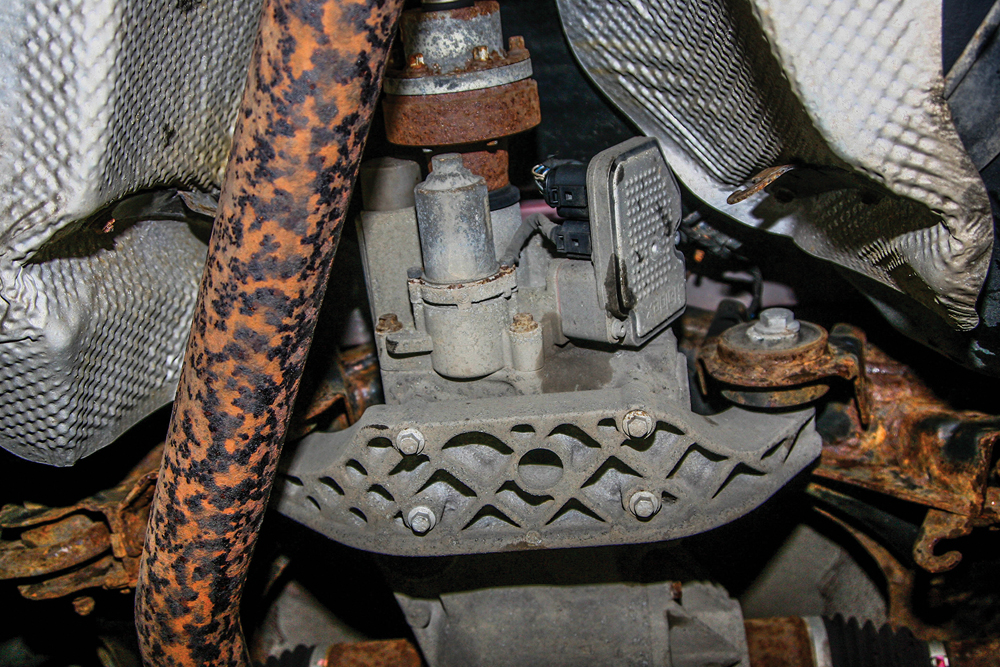
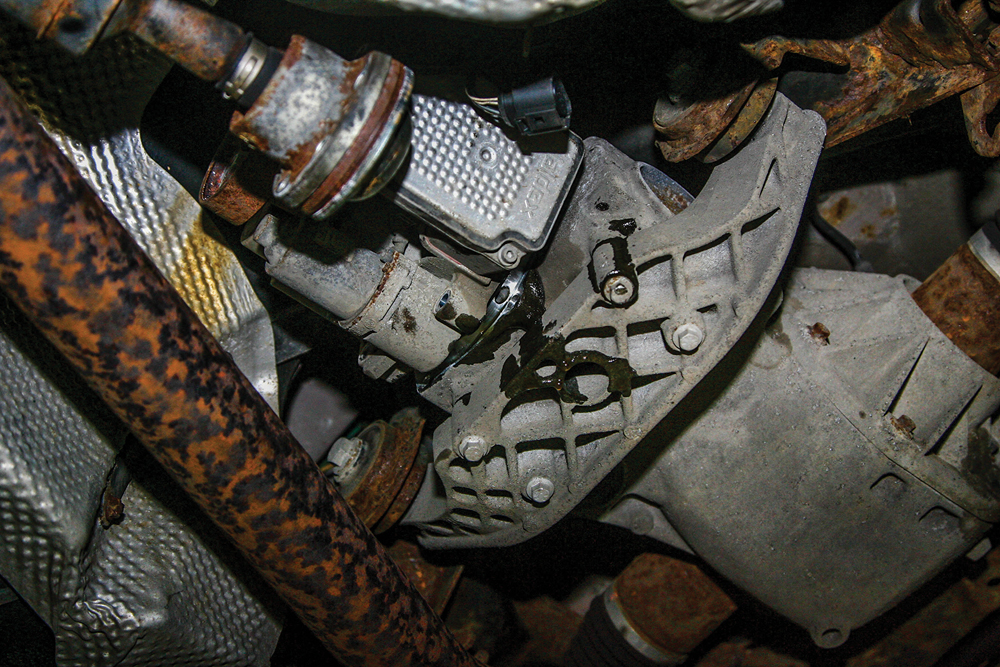
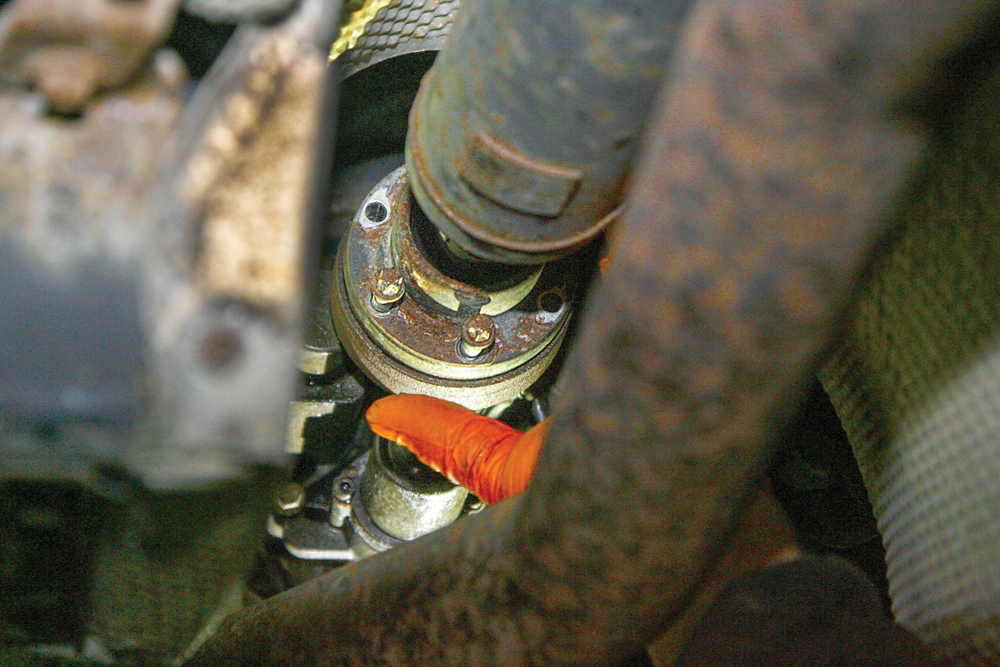
The location: The Haldex active on-demand coupling unit (centre) is located between the rear propshaft (top of picture) and the rear differential (bottom of picture).
Removing the Haldex unit
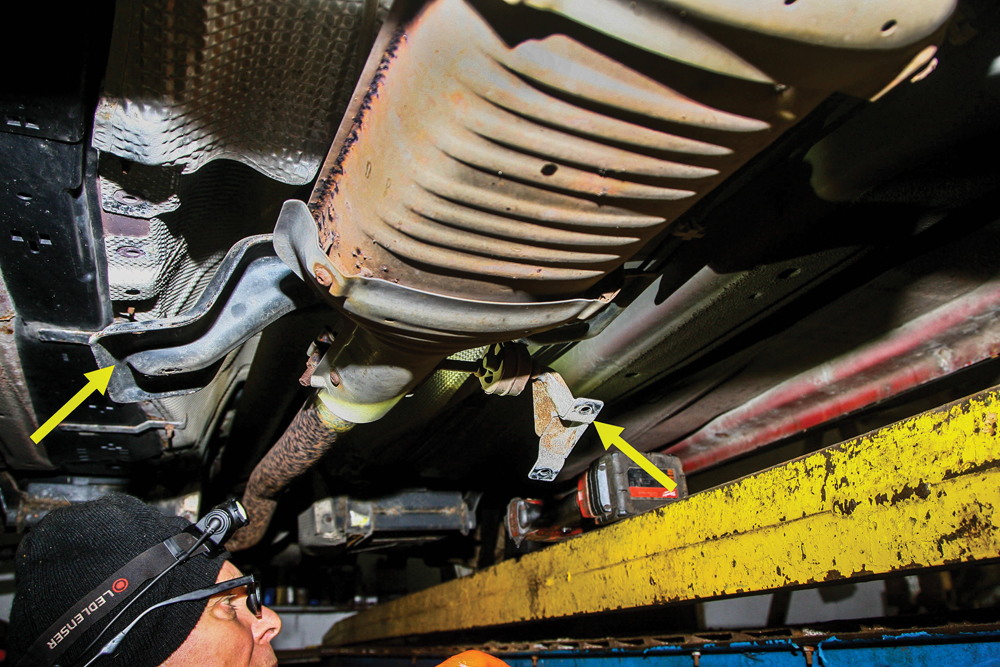
Prop support: The securing bolts holding both sides of the rear propshaft support bracket to the Freelander’s body are released. This will allow the propshaft to be moved sideways.
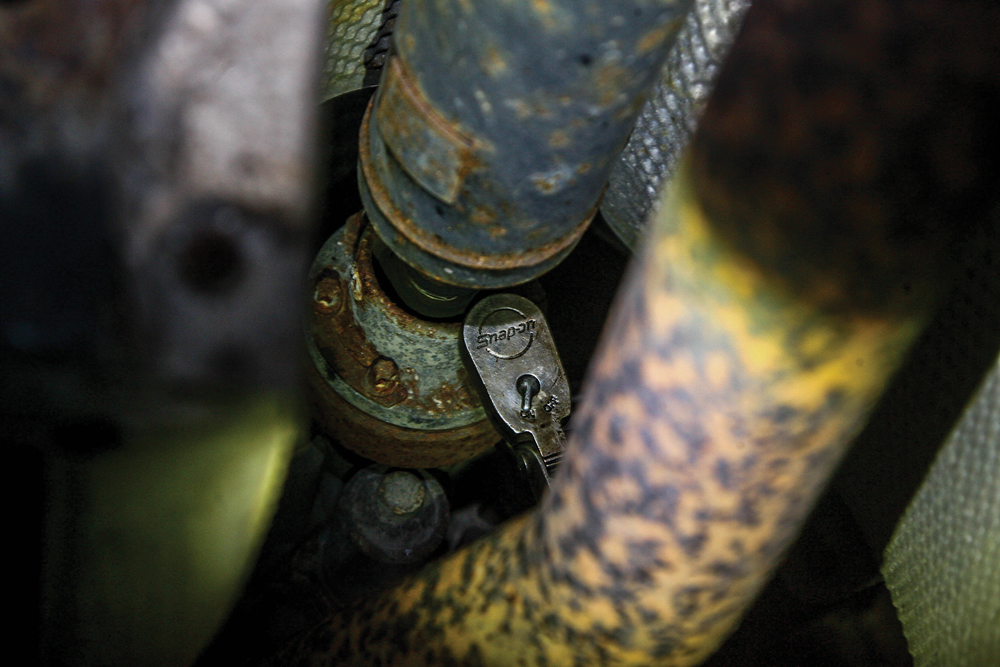
Mark up: After marking the aligned positions of both flanges, the six bolts securing the propshaft to the Haldex flange are removed, and the three plate washers put aside.

Separating the flanges: An M8 bolt is inserted through the plain hole in the Haldex flange, against the propshaft flange. The bolt head is gently tapped to split the flanges apart.
Moved aside: The prop is moved aside to allow the Haldex to be removed, but its free end is kept supported with wire to avoid deformation of the front joint.
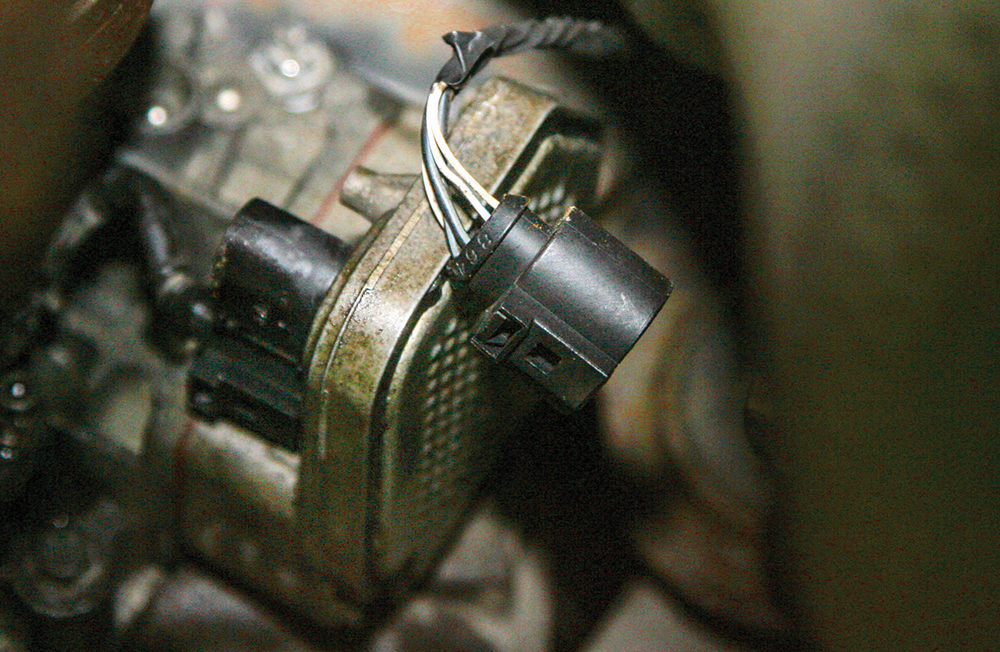
Unplugged: Located on the side of the Haldex unit is the on-demand coupling module where the electrical multi-plug to the unit from the vehicle is disconnected.

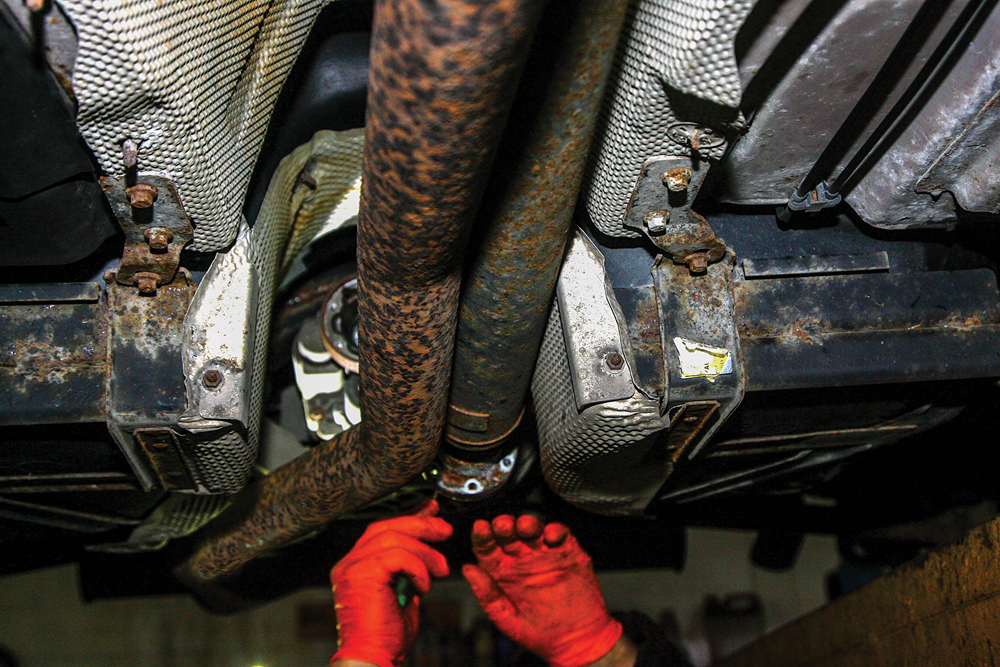
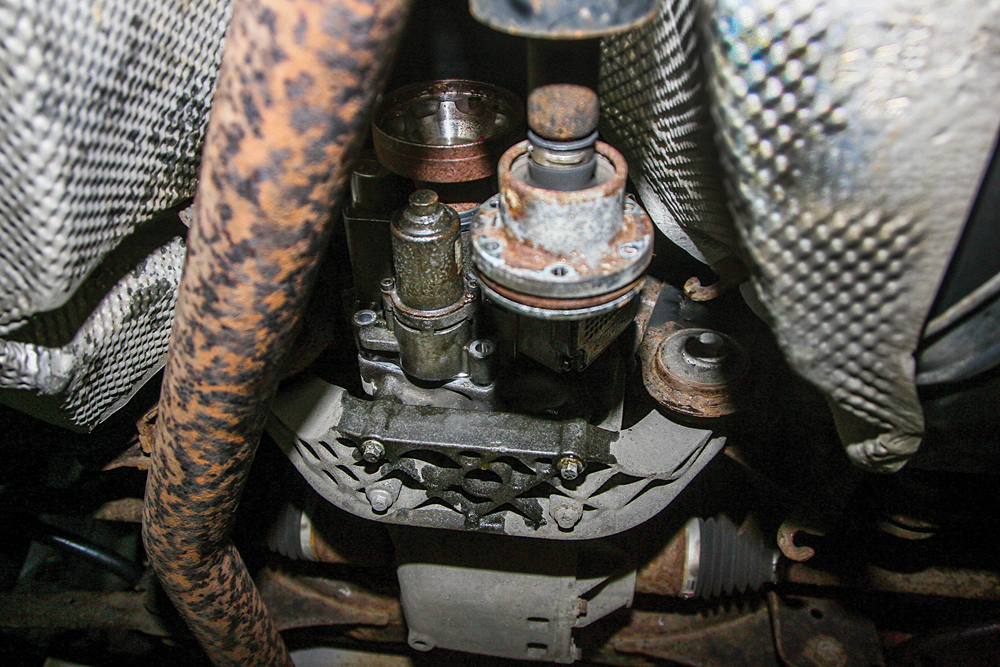
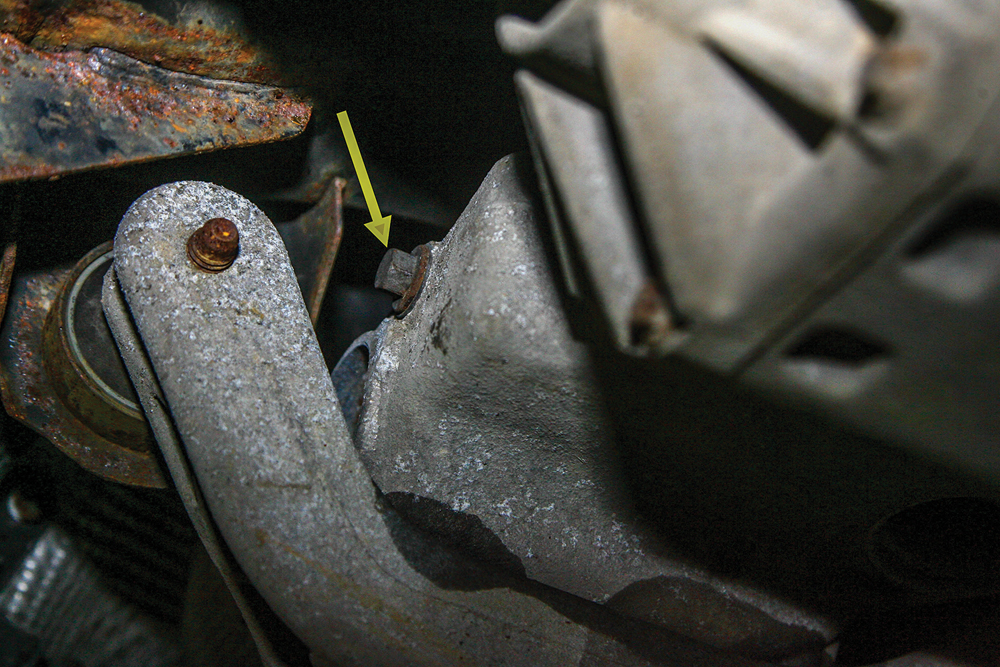
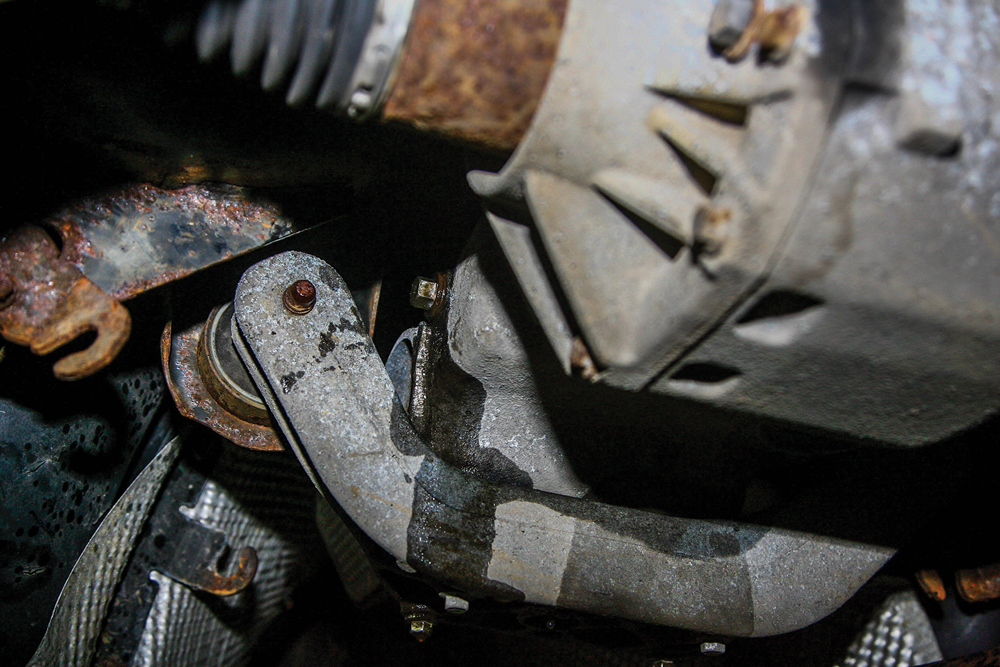
Haldex bolts: The Haldex is released from the rear diff by removing four bolts: two at the top (a long extension helps) and two seen here at the bottom.

Oil leaks out: The Haldex unit has no drain plug, so oil leaks out as it is separated from the diff and needs to be caught in a suitable container.
Ready to remove: The Haldex unit can now be easily pulled and worked free from the differential, then manoeuvred out and lowered to the oil collection tray to completely drain it.
Servicing the unit

New parts: It’s important to use the correct specified oil. Parts kit includes new filter and top cover with new securing screws and fitted O-seal.

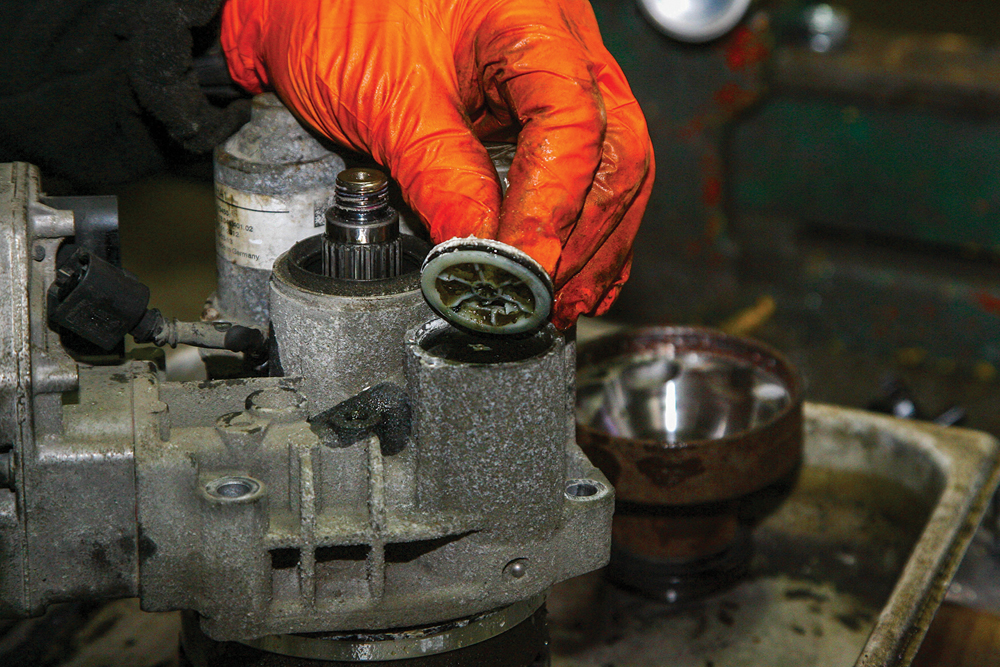
Keep it clean: The drained Haldex unit is transported to the bench and placed upright in a clean tray ready to have the filters changed and cleaned. Cleanliness is paramount.

Remove the flange: Before removing the filter and pump casings, the input shaft flange needs to be removed. It’s secured by a single nut on the end of the input shaft.

Disconnect: The second multi-plug connection on the on-demand coupling module to the electrical hydraulic pump is disconnected to allow the pump to be removed for cleaning.

Remove the bolts: The oil filter is located inside this housing on the front of the Haldex unit. The filter housing top is released after removing these two screws.
Remove the top: The top cover should lift away cleanly from the housing. No need to clean it because a replacement top is supplied as part of the new filter kit.

Remove filter: The old filter was carefully removed from its housing, initially by pulling with a small pick. The filter looked very clogged with old oil.

Unbolt the pump:The electrical hydraulic pump is also located in a housing on the front of the Haldex unit – again, secured by just two screws.

Pump and filter: The pump then simply lifts out. Here it is inverted showing the small gauze filter on the pump’s pickup clogged with oil and debris.

Cleaning up: Before the new oil filter is fitted, the Haldex unit is also given a thorough clean to remove any build-up of congealed oil and dirt.

Fit new filter: The new oil filter is pushed down fully into the housing. A new top cover, complete with seal and two new screws (all supplied in the kit) are installed.

Pump cleaned: The hydraulic pump is thoroughly cleaned to remove the build-up of old congealed oil and dirt from around the filter and the base of the pump.

Filter and pickup: The gauze filter over the pump’s pickup was removed to clean both it, and the pump’s base. Here, the filter is being refitted to the pump.

Refit the pump: The hydraulic pump is now fitted back into position, the securing screws tightened and the multi-plug to the coupling module reconnected.

Refit the drive flange: Before fitting the input shaft drive flange (which will connect to the propshaft) locking fluid is applied to the threads of the shaft and the nut tightened.
Haldex back on: The Haldex is aligned and refitted to the diff after thoroughly cleaning both the Haldex and diff mating faces. The four securing bolts are tightened to 24Nm.
Finishing off: The propshaft is aligned with the diff flange marks and bolted to 40Nm. The multi-plug is reconnected to the Haldex module and propshaft bracket refitted.
Recommissioning the Haldex
Filler plug: The oil filler plug feeding both the Haldex and the diff is on the side of the casing. Note that it’s a filler only, not intended as a level plug.
Fill procedure: Oil is added until a trickle overflows from the hole. With the plug refitted, the ignition is turned on for five minutes, then turned off and the plug removed.

Adjust quantity: The oil is now topped up until a small amount trickles out again. Then using a syringe, 70ml of oil is removed, before refitting the plug to 35Nm.
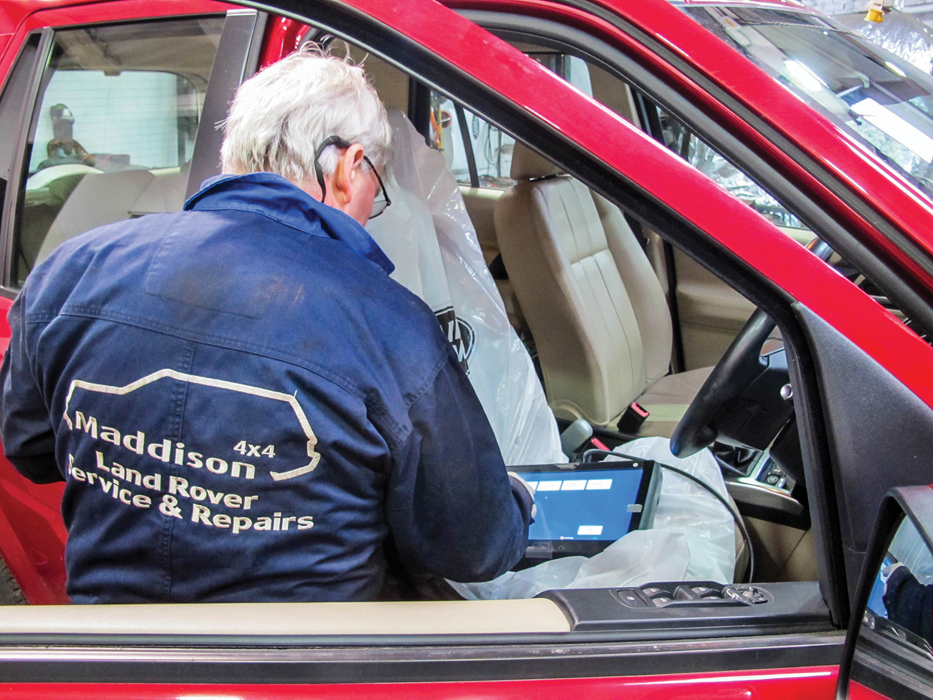
Reset the fault warning: With the Haldex filled with the correct quantity of oil, we just need to clear the ‘Gearbox Fault, Traction Reduced’ code from the ECU using the diagnostic tool.
LIKE TO READ MORE? Try our Budget Digital Subscription. You'll get access to over 7 years of Land Rover Monthly – that’s more than 100 issues plus the latest digital issue. The issues are fully searchable so you can easily find what you are looking for and what’s more it’s less than 10p a day to subscribe. Click here to find out more details and start enjoying all the benefits now.