


18 July 2023
|
 Get your new Defender ready to haul itself out of trouble
: credit: © Tom Critchell
Get your new Defender ready to haul itself out of trouble
: credit: © Tom Critchell
Give your new Defender extra off-road pulling power by fitting a 12-volt winch
Need to know
Time: One day
Cost: See below
Difficulty: 4 out of 5
Models: 2020-on Defender L663.
Tools: Socket/spanner sets, drill and bits, hole cutter, screwdrivers, trim tool.
Parts and costs: A12000 12v winch kit, TF3301, £507.60; L663 discreet winch mount, TF8030, £TBA.
Work safely:
• Raise and support the vehicle securely on rated equipment.
• Wear the correct PPE at all times.
Contact: Terrafirma4x4.com
An electric winch is a great way of giving yourself – and the others around you – some extra peace of mind when out on adventures. Having the means to self-recover your Land Rover and give assistance is a huge advantage when the going gets tough, and not having to rely on a third party to come to your rescue should you become stuck can save serious time, depending on where you are.
The 2020-on Defender is the latest model to get the aftermarket treatment from Terrafirma, and in the first of a series of tech features on the L663, we’ll be equipping one with the company’s brand-new discreet winch mount and a 12,000lb 12v electric winch.
Fitment of the tray itself isn’t particularly difficult, but it is time-consuming because there are so many parts to remove from the front of the Defender to get it to the point that the new mount can be fitted. We’ve mentioned the main points for the stripdown in this guide, but a short-term subscription to Topix, Land Rover’s online workshop manual, is well worth the money for the intricate details if you’re tackling this job at home.
Other than the fiddly design of the L663’s plastic front bumper and some careful marking, drilling and cutting, the winch mount and winch installation is easily achievable by a competent DIY-er with good tools and some patience. Let’s
get started.

Make it safe: Retrieve the locking wheel nut key, then disconnect the battery. Access it by moving the driver’s seat forward and lifting the hatch below, then loosen and remove the earth cable. Land Rover may call and confirm your vehicle isn’t being stolen.
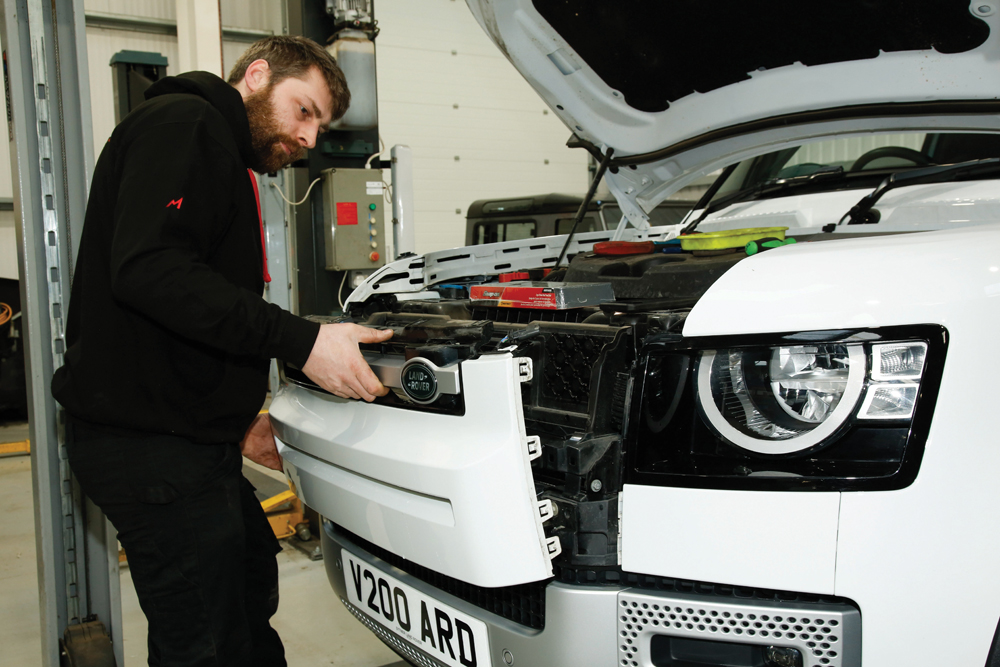
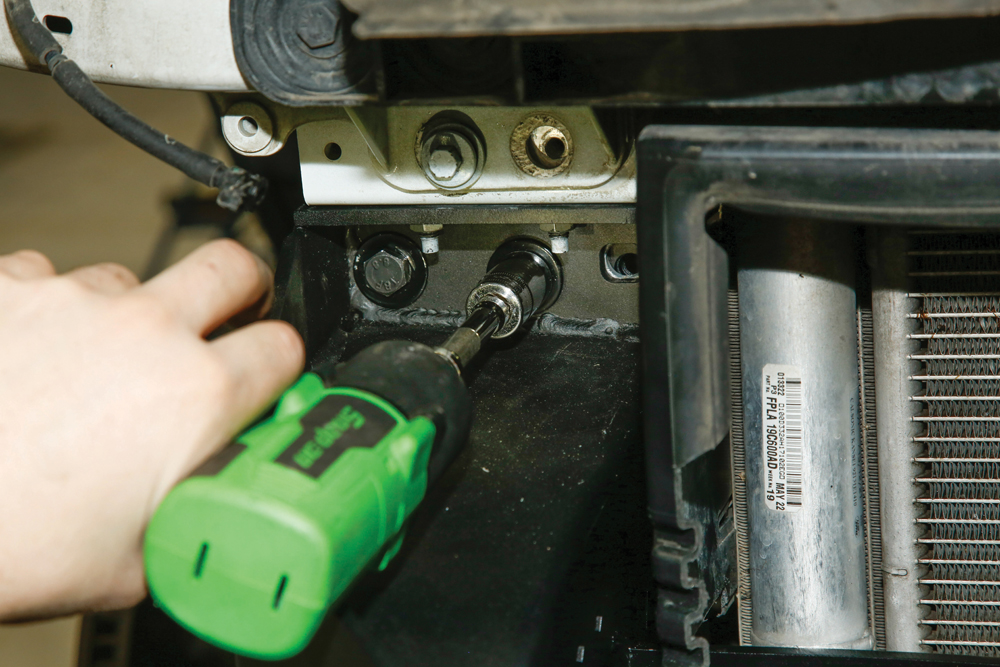
Start the stripdown: Release the four plastic pins along the top of the slam panel, undo the four T27 screws and remove the plastic cowl. Use a trim tool and long screwdriver to release the four clips down the side of each headlamp to free each side of the grille, then lift the grille away.
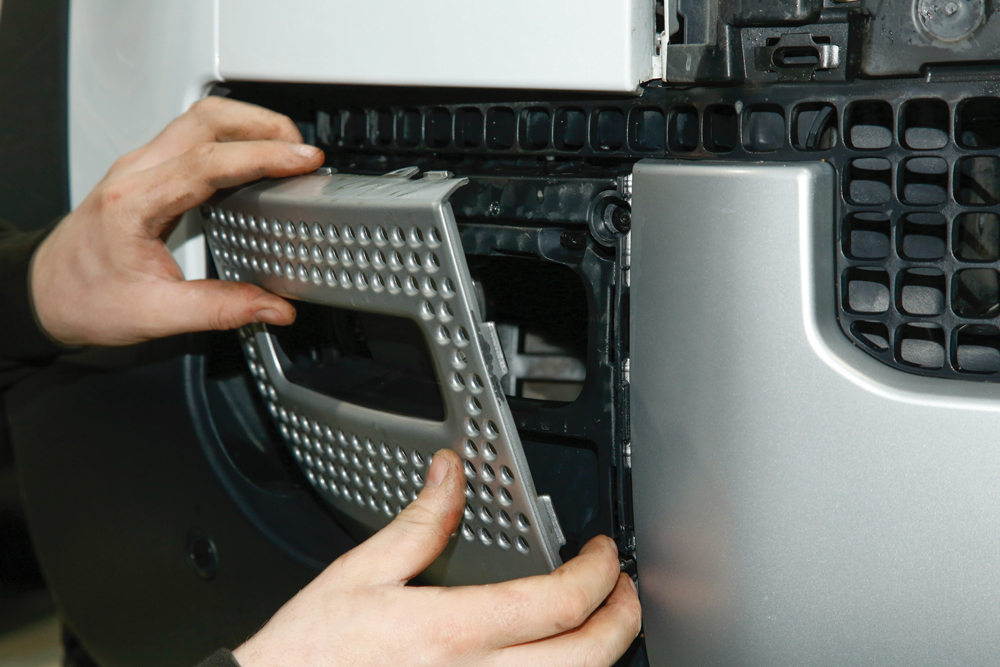
Unclip the trims: Use the trim tool again to access and press down the clips around the outside of each foglamp surround and lift them away. Now’s the time to jack up the front of the Defender, secure it on stands and remove the front wheels to gain access to the back of the bumper.
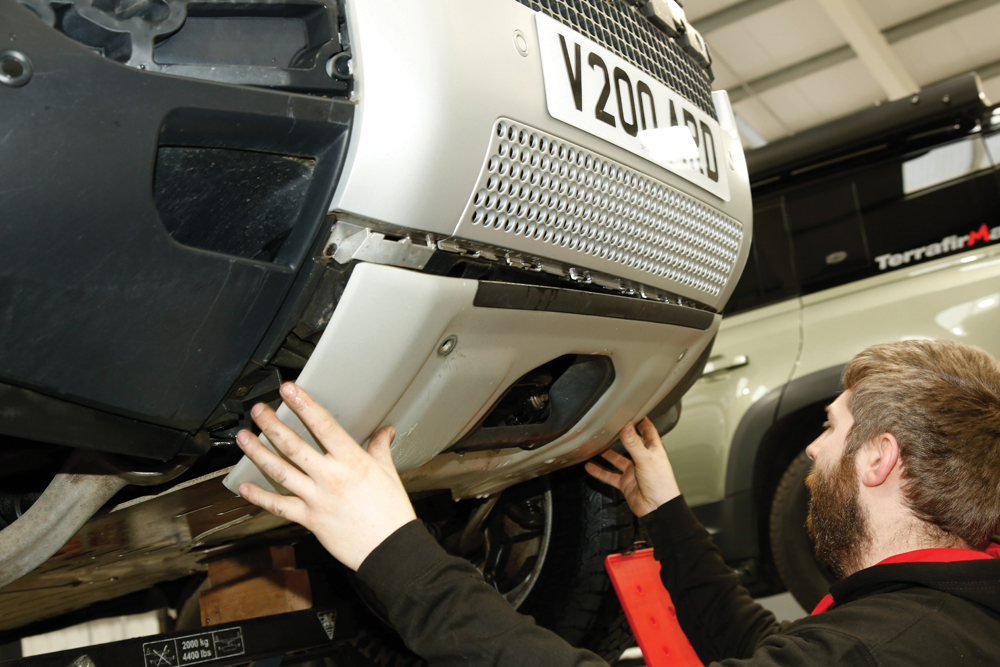
Unbolt bash plate: Undo the six bolts that hold the aluminium bash plate from the underside of the front bumper, if fitted. Once off, the T20 screws that hold the silver section of the front bumper in place will be exposed; undo them, but leave the bumper intact for now.

Wheelarch liners out: With the front wheels off, release the four plastic pin clips and four screws that secure each inner arch liner, then remove them. Release the tabs and remove the plastic brake ducts – once out of the way, undo the 10mm wing bolts and unclip the ends of the bumper.

Take it easy: Unplug the two electrical connectors from the nearside of the bumper. Undo the 10mm screw each side, then carefully unclip the headlamp surrounds. Release the plastic headlamp washer tube connectors, then place the surrounds somewhere safe.

Lift bumper away: Undo the 10mm screws along the top and T30 screws along the base, then lift the bumper off. Let it rest on its back, or sit it forward on a soft towel or sheet to prevent scratches. We’ll turn our attention to the silver bumper piece later on.

Unscrew air dams: Undo the 10mm screws and release the washer pipe and wiring harness, then remove the grille support. Undo the T30 Torx fixings, then pull the plastic air ducting away from the front of the crash bar. We will modify this to clear the new winch and tray later.

Remove lower bar: Loosen and remove the four 15mm bolts that hold the tubular lower crash bar in place, and remove it. This will be refitted once the Terrafirma tray is in place, and will be held to the bottom of the winch mount with dedicated brackets.

Unbolt the crash bar: Undo the eight 13mm bolts that hold the main crash bar to the chassis legs, and undo the four 10mm bolts that secure the separate box section pieces to the radiator support. Lift the crash bar away, then prise the captive nuts off; these will be replaced with nut plates.

The first cuts: The plastic guard that runs behind where the crash bar was needs to be trimmed away. Carefully slice down the sides of the radiator duct, then remove the centre. Mask off the edges of the duct, mark out the measurements in the kit instructions and trim away.

Box sections off: Unbolt the box section pieces from the top of the old crash bar with a 10mm socket and extension. These will be refitted to the new winch tray and secured to the front of the Defender’s bodywork the same way they were when fitted originally.
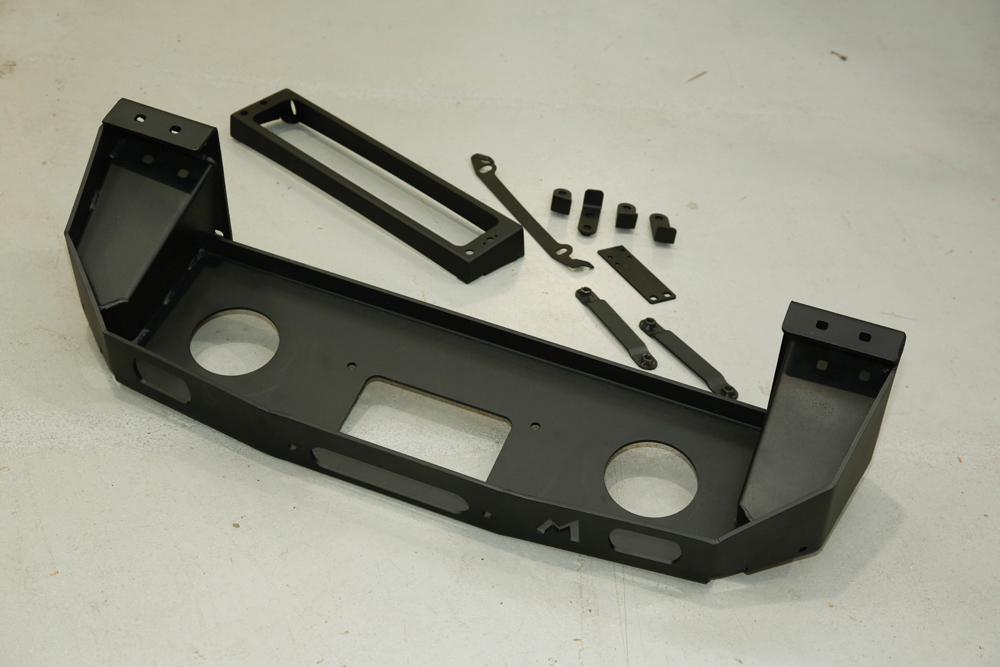
The new kit: Here’s the Terrafirma winch tray in all its glory, along with the nut plates that brace it to the chassis rails, front number plate mount, winch solenoid relocation plate and crash bar bracket. Fit the crash bar box sections to the top, but leave the bolts loose.

Offer tray up:With assistance, lift the winch tray up and into place and push the top bolts through, allowing the tray to hang. Position the nut plates behind and start the new bolts by hand; nip them up just enough to hold the tray flush to the chassis, but still allow movement.
Keep it central: Move the winch tray so that it sits centrally on the chassis, then fully tighten all the new 17mm bolts into the nut plates. Slide the box section pieces so that the witness marks in the paint line up with the heads of the original 10mm bolts, then tighten the bolts up.

Align and tighten: With the main winch tray and original box section pieces tight on the chassis rails, use a spanner to reach down the box sections and fully tighten them down onto the tray, holding the new 13mm nuts on the inside of the winch tray aperture.

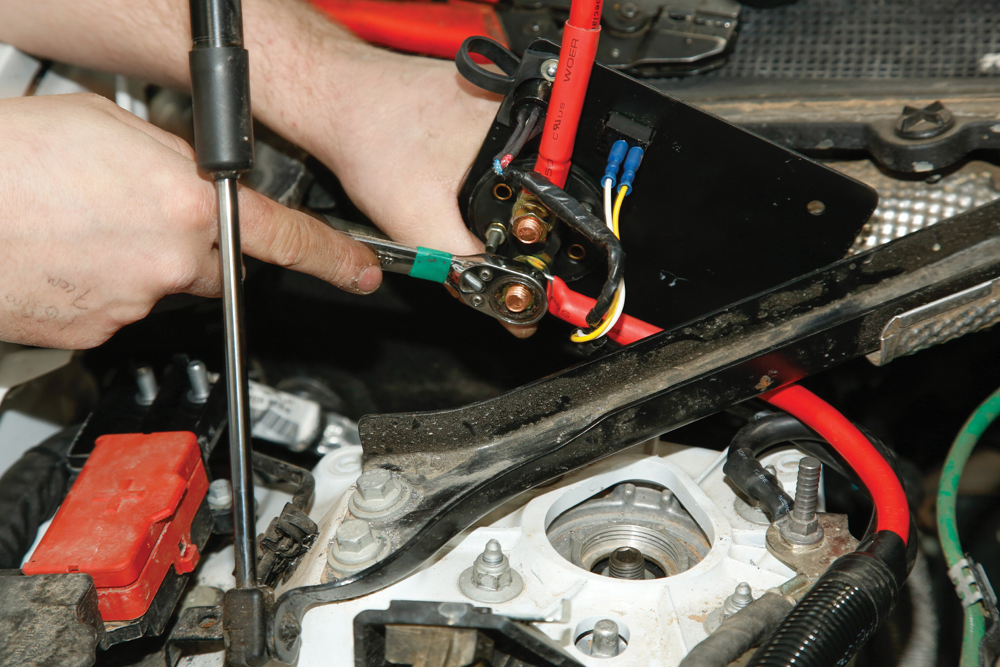
Solenoid bracket: The winch we’re fitting is a Terrafirma A12000, and the tray comes with a dedicated relocation bracket for the solenoid pack. Unscrew the pack from the winch, then remove the metal backplate and swap the original mounting bracket for the one in the kit.

Wiring extension: The connector for the winch remote and the power switch will be relocated from the solenoid pack to a switch panel under the bonnet, for easy access. Unscrew the plug and pop out the switch, then extend the wires with the connectors in the kit.

Wire the motor: Take the extended power and earth cables from the solenoid pack and attach them to the winch motor. The cable insulation is colour-coded to the posts on the motor body, so be sure to connect them the correct way, and run them away from the winch body.
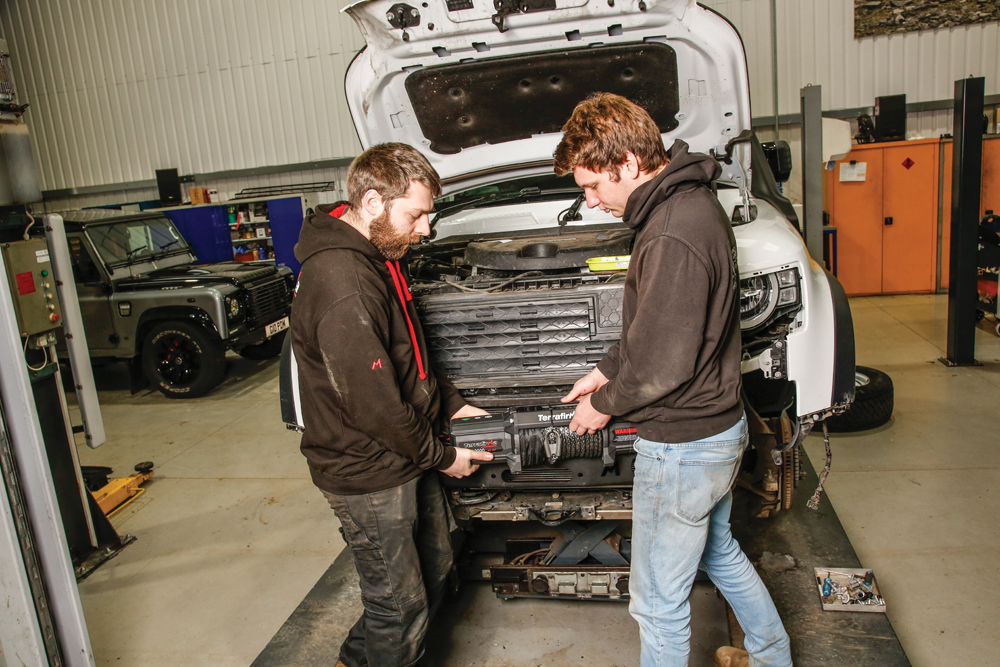
Lower winch in: Fit the four square nuts to the feet of the winch then, with the rope protruding out of the front, carefully lower it into the new tray. Look underneath and line up the mounting holes with the holes in the tray, and start the two rearmost bolts by hand.

Protect the cables: Nestle the solenoid pack in the tray beside the winch, then take the length of conduit from the kit and run the red power and black earth cables through it. Feed the power and earth cables up past the side of the radiator and into the engine bay.

Secure solenoid: Position the solenoid in the side of the winch tray, making sure the wiring is sitting neatly, then fit and tighten the supplied M8 bracket bolts. Secure the wiring with cable ties, then remove the paint and attach the solenoid earth to the stud on the back of the square section.

Earth it well: Route the black earth and red power cables around the inside of the offside wing and up to the rear left corner of the engine bay. Undo the nut on the earth jumper post, fit the earth cable beneath it, then spin the nut back on and nip it up.
Switch panel: Attach the winch isolator, power switch and controller plug to the switch panel, then connect and insulate the wiring, paying special attention to the posts on the isolator. Drill the steel strut brace using the template supplied, then bolt the switch panel on.
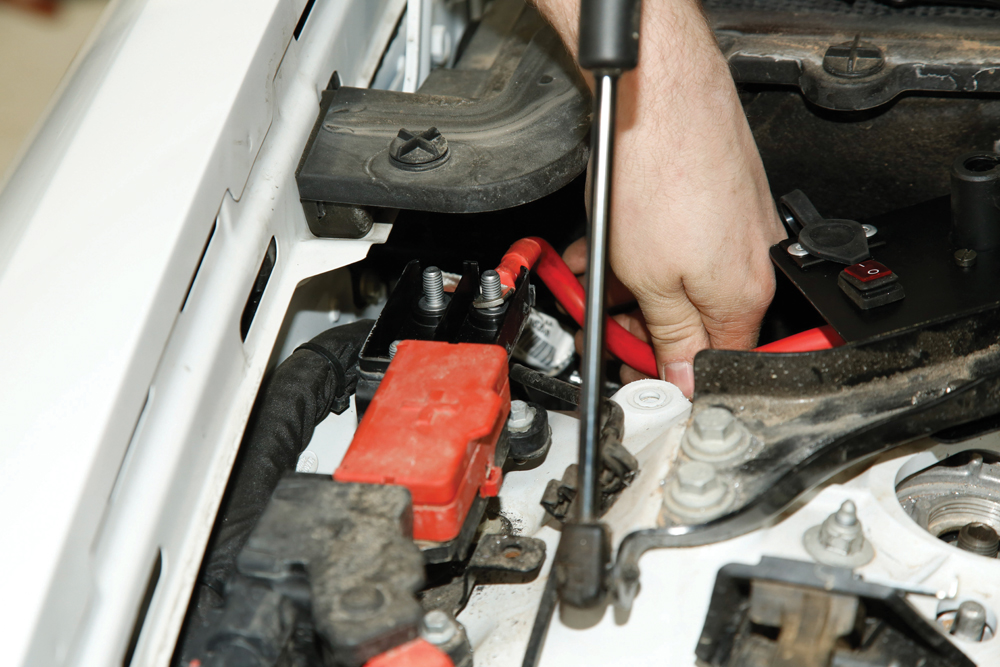
Power up: The Defender L663 has convenient pre-wired power posts in the engine bay. Unclip the cover and fit the winch power cable that runs to the isolator switch to one of the posts, along with a 500A mega fuse, and secure both with M8 nuts. Refit the cover.

Centre piece out: Next, the silver bumper insert can be unclipped and removed, ready to have the hole cut for the winch fairlead to poke through. Remove the front number plate and cut away the single strip of plastic from the main bumper, which the silver panel sits in front of.
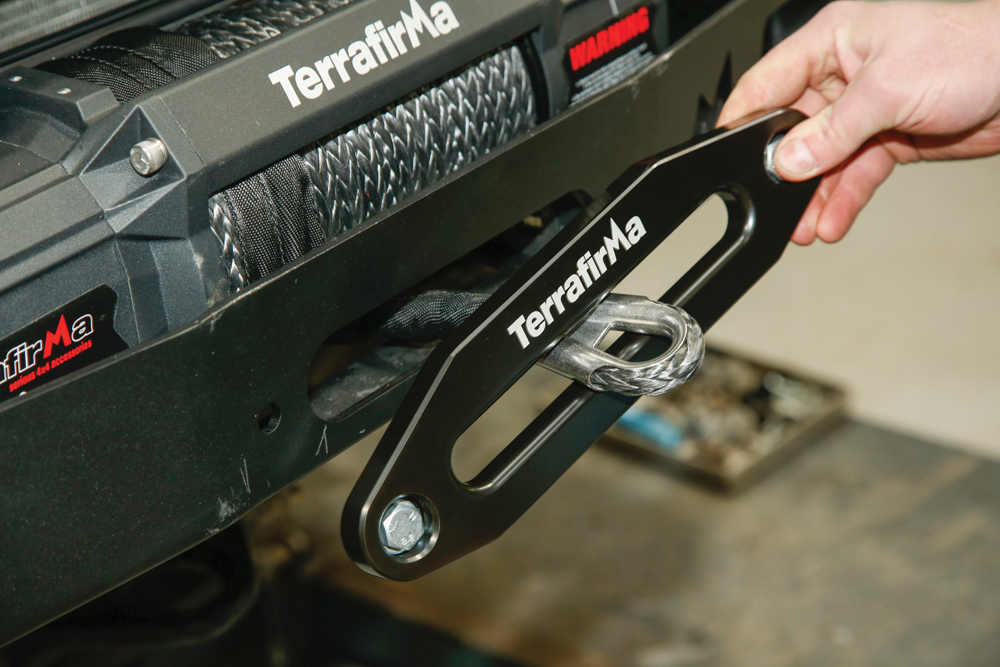
Fit the fairlead: Take your fairlead and feed the winch rope through the slot; you may need to free-spool some rope off the winch drum first. Push the two bolts through, then fit the fairlead to the front of the winch mount and secure it with washers and nuts.

Refit lower bar: The lower crash bar can be bolted back onto the Defender. Offer it up and start the original lower fixings by hand, then attach it to the underside of the Terrafirma winch tray with the new nuts, bolts and washers from the kit. Once central, tighten them all up.

Top templates: Use a sharp knife or saw to cut the two half-moon pieces off the main bumper plastic, then turn your attention to the air ducting. Cut out the paper template and tape it to the duct, making sure it’s central. The duct will be cut into two pieces to clear the tray.

Drill and cut: Carefully cut the duct with a hacksaw blade or grinder and slitting disc, following the edge of the template. Drill pilot holes where marked and enlarge them to 10mm, then use a file to make the two half-moon shapes. Remove the template.

Bolt bracket on: Take the new bracket from the winch tray kit and bolt it up to the underside of the mount into the square nuts in the base of the winch. This will support the lower piece of air duct, which helps direct cool air through the radiator, keeping the cooling system efficient.

Fit lower duct: Hold the lower duct piece up and use the two M6 screws to attach it to the bracket you just fitted to the tray. Here, you can see the need for those half-moon shapes cut into the duct – they’re required to clear the winch securing bolt heads.

Upper cut: Use a saw to cut through the upper piece of ducting, removing the supports and lower horizontal piece. Cut up to the edge of the lower corners, as shown, so that the duct corners sit neatly on the winch tray when in place. Test fit and trim as needed.

Fit and secure: Once trimmed, fit the upper duct piece to the front of the Defender and secure with the OE Torx screws you removed earlier. Line up the witness marks on the duct with the screw heads, and tighten them up. You can now see the need for cutting it in half…

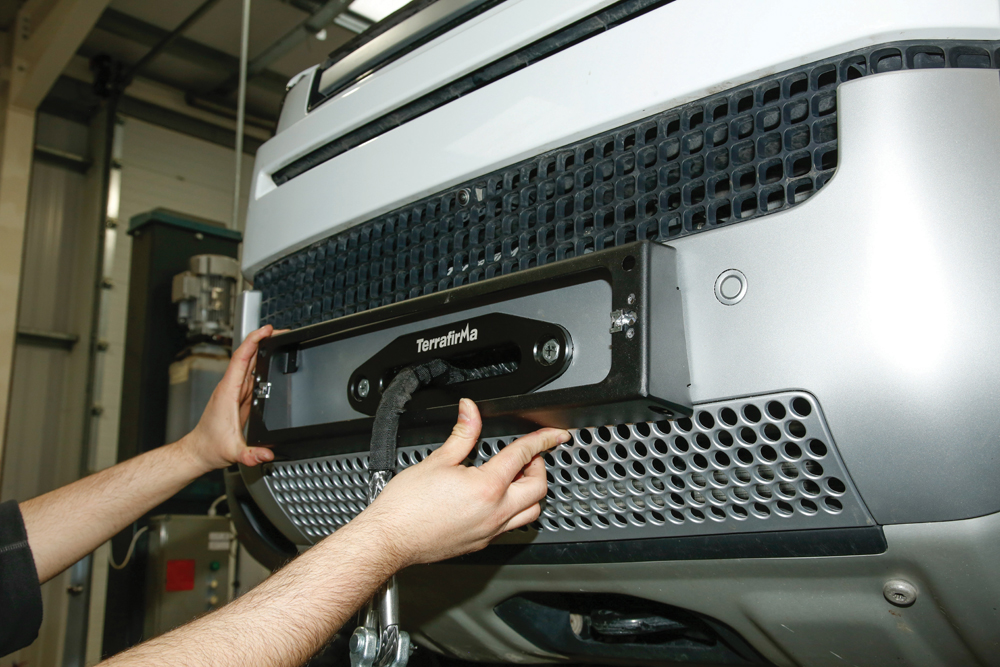
Route PDC wires: The front of the winch tray has two holes, which the centre parking distance control (PDC) sensors recess into. Route the wiring harness and position the two plugs so they poke through the holes in the tray – this will make refitting the bumper easier.

Refit lower bumper: Fit the grille support followed by the main bumper, remembering to plug in the PDC sensors and route the washer tubing back. Clip the sides of the bumper back on and secure, then refit the brake ducts and inner wing panels. Secure with the correct screws and pins.
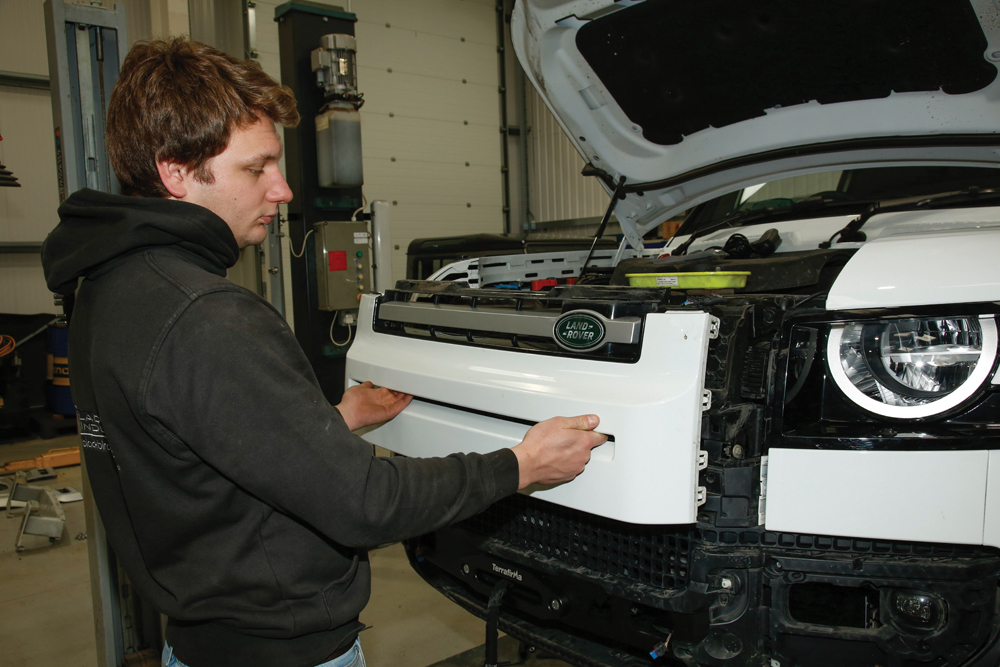
Plastics back on: Refit the headlamp surrounds and plumb the washer nozzles, then clip the fog lamp surrounds back in. Fit the upper grille, then finally the slam panel cover, being sure to use the correct fixings in the right places. Leave the metal bash plate off for now.

Measure, mark, drill: Lay the silver bumper centre section on a soft surface, then cut out and stick on the final template from the kit. Drill the two small holes marked on the fairlead, but don’t cut or drill anything else just yet. This is a time when ‘measure twice, cut once’ is relevant!
X marks the spot: Make a cross or dot in the middle of each of the fairlead bolt heads with a marker pen or blob of paint. This will help assure that the fairlead cut-out template is perfectly positioned before you commit to making the full cut on the silver bumper finisher.

Check fitment: Offer the silver piece up to the bumper but don’t clip it into place. Look through the holes you drilled, and make sure they line up with the marks in the centres of the fairlead bolt heads. The trim should be a snug fit around the fairlead, so it’s important to get this right.

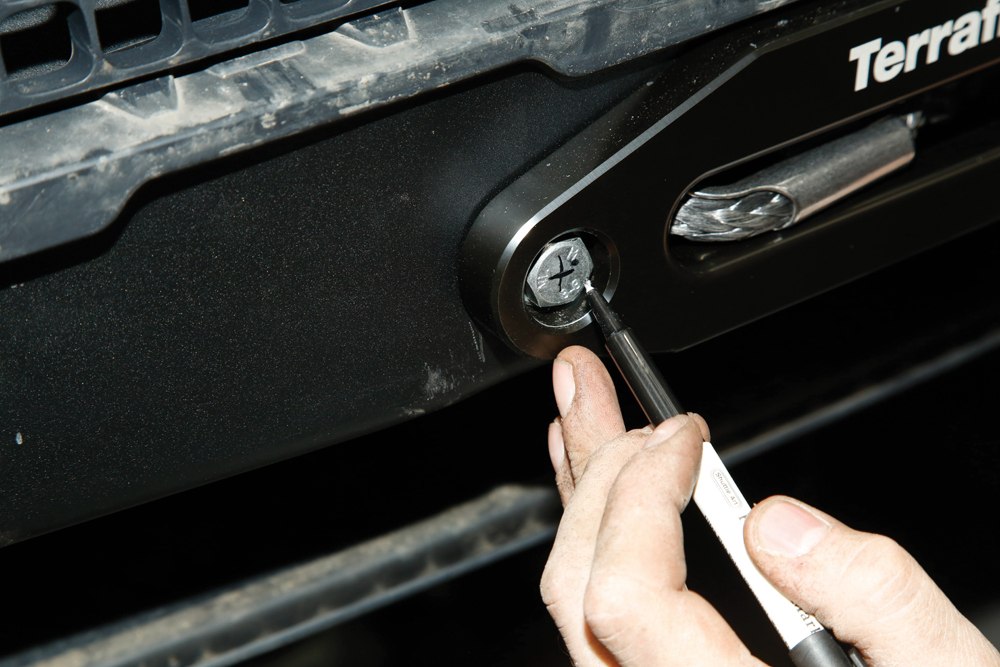
Cut and fit: Use hole saws to cut the corners of the fairlead aperture, then carefully join the holes together with a sharp knife. File the edges smooth and check the fit of the panel, adjusting if needed. When happy, clip the panel on and secure, then refit the bash plate.

You’ll be hooked: We’re getting there now. Take the hook from the winch kit and attach it to the rope’s eyelet with the supplied retaining pin and split pin. The battery can now be reconnected, and the winch spooled in just enough to pull the hook flat against the fairlead. Wear gloves.
On a plate: The number plate plinth simply screws to the bumper, then the number plate itself is stuck or screwed to a removable fascia that’s secured with two Dzus fasteners. When the winch is needed, simply unclip the fascia to access the hook and fairlead.
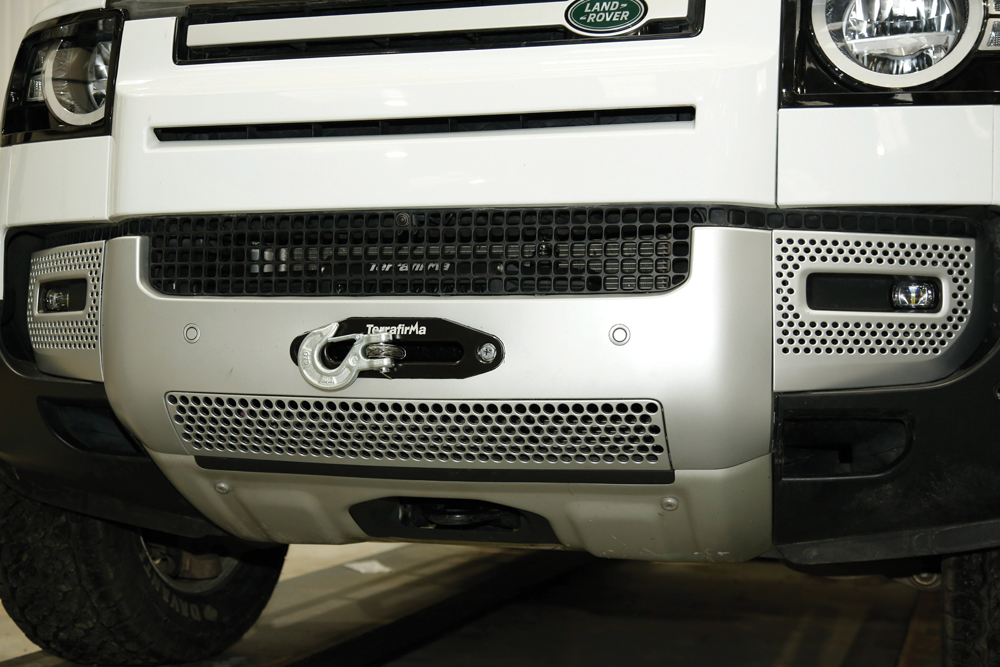
Ready for action: With the Defender fully reassembled and the cables secured neatly, the fitting of the Terrafirma winch mount and A12000 winch is complete. Always remember to switch the isolator off when the winch isn’t being used, and inspect the rope and hook regularly. It’s well worth getting some training on how to use the winch safely and to get the most out of your new purchase – they are held at various Land Rover Experience centres.
Like to have your own Land Rover library?
Try our Budget Digital Subscription. You'll get access to over 7 years of Land Rover Monthly – that’s more than 100 issues plus the latest digital issue. All issues are fully searchable so you can easily find what you are looking for and what’s more it’s less than 10p a day to subscribe. Click here to find out more details and start enjoying all the benefits now.