


09 September 2023
|
 Fitting rock sliders can be a benefit in a number of ways
: credit: © Tom Critchell
Fitting rock sliders can be a benefit in a number of ways
: credit: © Tom Critchell
Protect your L663 Defender’s flanks
Need to know
Time: 3 hours Cost: TBA
Difficulty: 2 out of 5
Models: 2020-on Defender L663.
Tools: Socket and spanner sets, screwdrivers, trim tool, file, saw, drill and bits, tape measure, knife.
Parts: Terrafirma rock sliders for L663 90, TF8020; Terrafirma rock sliders for L663 110 TF8021.
Work safely: Wear safety glasses or a face shield when cutting plastic and sound deadening. Raise and support the vehicle safely on rated equipment.
Contact: Terrafirma4x4.com
There are relatively few upgrades you can do to a Land Rover that benefit its use overall. Most are focused on improving capability in one area, but then others suffer slightly as a result. Mud-terrain tyres, for example, look great and will boost off-road prowess, but they can sap fuel economy and handling on the road can suffer.
Happily, modifications do exist that offer benefits in more areas than one, and rock sliders are a great example. By fitting tough steel rails outboard and underneath the sills of a Land Rover, they offer excellent protection to the softer metal behind when navigating tough terrain, warding off rocks and stumps. Sliders with protruding ‘tree bars’, such as these new ones from Terrafirma, can also prevent car park biffs from shopping trolleys and car doors. The tree bars can also be used as a side step for jumping in and out and aiding access to the roof rack, if fitted.
The bonuses don’t end there, either. Because most sliders butt up against the factory jacking points in the body or bolt sturdily to the chassis, they can safely support the Land Rover’s weight on a suitable jack.
We’re fitting Terrafirma rock sliders to this new Defender 90 – a straightforward DIY job. The process is very similar on 110s, with a couple of small differences that we’ll explain along the way.

What’s in the box? The Terrafirma rock slider kit comes with everything you need – the sliders themselves, brackets to attach them to the body, a fixing kit, templates to help trim the sound deadening and plastic sill covers and comprehensive instructions.

Head underneath: Raise and support the Defender safely on level ground to give yourself more room to work. Start by using a trim tool to release the series of plastic push-pins from the lower edge of the plastic sill cover – there are six to remove each side on the 90.
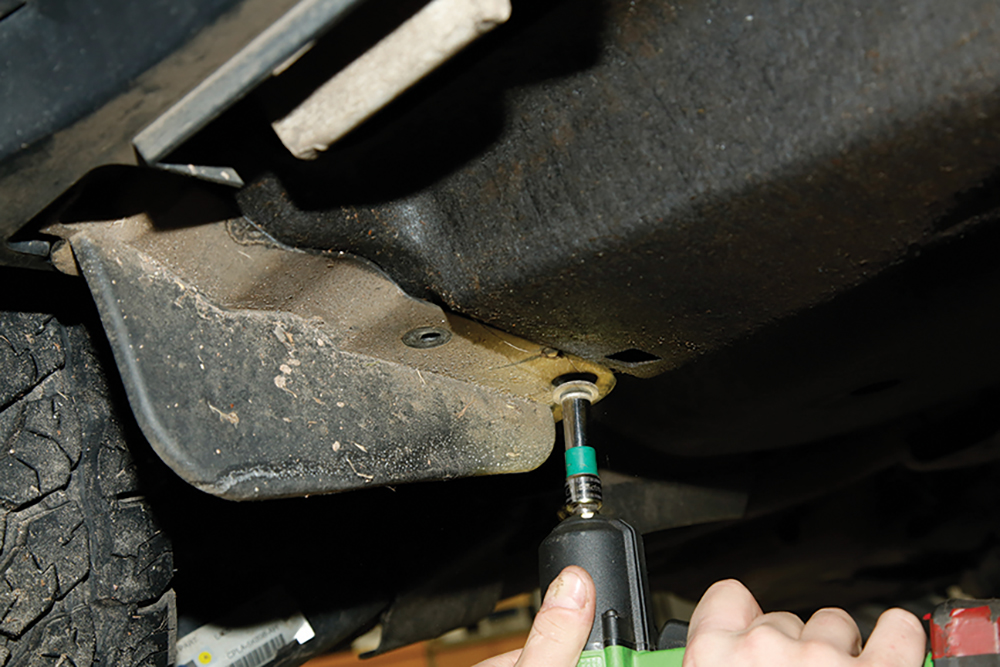
Remove the mudflap: There’s a small plastic mudguard just ahead of the rear wheel which needs to come off next. Loosen and undo the six 10mm headed screws, then lift the mudflap away. We’ll refit this later once the rock slider is in place, so don’t lose any of the fixings.

Undo the screws: The large sound deadening trays either side of the Defender need to be removed so they can be trimmed to clear the rock slider brackets. They are screwed to the underside with a series of 10mm-headed self-tappers; remove all the screws, noting their locations.

Sound deadening off: Once all the screws are undone, the sound deadening – which is made of a strange sort of fibrous cardboard-type material – can be wiggled away from the plastic sill covers and removed. Place it on a flat table or work top ready to be trimmed for clearance.

Sturdy mountings: It’s now easy to see all six points on the Defender’s tough monocoque body that the rock sliders will pick up on. The front four points use extra brackets that come in the kit, but the rock slider will butt up directly to the two rearmost ones with no extra bracket.
What does monocoque mean?
Traditionally, 4x4s were built using a ‘body-on-chassis’ design, which is exactly as the name suggests – a separate chassis holds the engine and supports the suspension, and the body is mounted on top. Think Series, original Defender, Discovery 1-4, Range Rover Classic and P38 etc.
Monocoque translates from French to mean ‘single hull’ – the body of the vehicle that you sit in is structural and integrates mounts for the suspension, engine and driveline through a series of mounts or subframes instead of a separate chassis. Land Rovers that use this design include Range Rover L322 and L405, Sport L494, Freelander 1 and 2, Evoque, Discovery Sport, Velar and new Defender.

Front bracket first: Take the foremost bracket from the kit and offer it up to the sill. The bolt holes should line up with the factory-fitted bosses, and the upper side of the bracket should sit on the Defender’s jacking point. This will safely spread the load from the slider to the body.

Align and tighten: Hold the bracket in place, then start the new bolts into the threaded bosses in the underside of the sill by hand, and nip them up. Adjust the bracket’s angle until it sits parallel with the body side, then fully tighten the bolts to secure it in place.

Measure up: The rock slider kit comes with paper templates that show you where the plastic sill trims need to be cut to allow the other brackets to bolt on. We don’t have those templates with this early kit, so measurements are taken from the mounting positions in the rock sliders.

Mark the plastics: The measurements are transferred to the sill trims, and lines are drawn to show where the plastic needs to be removed. As already mentioned, the kit comes with templates to make this part much more straightforward, but there’s no harm in double-checking.

Cut carefully: When you’ve marked where the trims need cutting, drill the corners and then use a combination of a fresh knife blade and a hacksaw to remove the plastic. Once you’ve cut them, tidy up the edges with a file or some emery paper for a smooth finish.

Drill mount holes: Where the rock slider bolts directly to the body, you’ll notice that Land Rover already made the holes for you on one side, but not the other. Take the template from the kit and drill two pilot holes, then enlarge them to 10mm. Drill out the riv nuts the other side.

Fit spire nuts: Fit the spire nuts with larger threaded inserts to the holes you just drilled. These give a more substantial mounting point for the rear of the slider, using beefier bolts than were designed to fit the factory-fitted riv nuts. Slide them in, and line them up with the holes.

Fit all brackets: Undo the two OE bolts that pass through the metal strip on the sill; these will be replaced with longer ones from the kit. Offer up the centre mounts, and start all the bolts by hand first, as per the front ones. If you’re working on a 110, you might notice a problem…

110 only: On 110 models, there is an extra bracket bolted to the body rail to support the sound deadening material, which is in the way of the centre bracket. Undo the bolts and remove it – the kit comes with new, longer bolts to pass through both brackets together.

Make a sandwich: Offer up the centre bracket and hold it in place, then refit the smaller sound deadening bracket over the top and wind in the longer bolts to sandwich the whole lot in place. Start all the other bolts by hand before fully tightening them to secure the brackets.

Get cutting: It’s now time to trim the sound deadening sheets to clear the newly-fitted rock slider brackets. Use the templates supplied in the kit to mark the areas, then cut them away with a sharp knife or saw. Take extra care – the material is razor-sharp when cut.

Check and trim: Lift the sound deadening up and into place, and make sure it doesn’t come into contact with the mounts when held up against the underside of the car. If there are any areas that still need a bit of a haircut, remove the material, trim, and re-test.

Refit insulation: When you’re happy with the fitment, screw the sound deadening back into place using the series of OE fasteners you removed earlier. Once back in place and fully secure, refit the small mudflaps in front of the rear wheels with the six 10mm screws each side.

Offer it up:Prepare all your nuts, bolts and washers ready to bolt the rock slider to the underside of the mounting brackets and the body – you don’t want to be faffing about when the slider is held in place. With assistance, lift the slider into position and start a few bolts to hold it up.

Start all the bolts:It’s important to start all the bolts in each bracket, the inner body rail and the rearmost mount before tightening anything. Look at the rock slider from above and along its length, and adjust its position so that it follows the line of the body tightly and evenly.

Fully tighten: Once you’re happy with the position, go ahead and fully tighten all the bolts to secure the rock slider to the mounts, not forgetting the two each side at the very back into the spire nuts. Once finished, lower the Defender off the ramps or stands.

Admire your work… Give the sliders a wipe over to remove any fingerprints – this is the last time they’ll look this clean! The tree bars are great for keeping the doors of less-considerate drivers off the slab-sides of the Defender, and your L663’s sills are now fully protected against off-road obstacles.

…then try it out: As the sliders pick up on the standard jacking points and effectively spread the load across both, they can safely be used to lift and support the weight of the Defender if needed. Always make sure the base of the jack is seated well, and that the jack itself remains as vertical as possible to prevent it slipping.
Like to have your own Land Rover library?
Try our Budget Digital Subscription. You'll get access to over 7 years of Land Rover Monthly – that’s more than 100 issues plus the latest digital issue. All issues are fully searchable so you can easily find what you are looking for and what’s more it’s less than 10p a day to subscribe. Click here to find out more details and start enjoying all the benefits now.