


07 September 2023
|
 Tristan takes out the air cleaner in preparation for removing the timing belt housing
: credit: © Trevor Cuthbert
Tristan takes out the air cleaner in preparation for removing the timing belt housing
: credit: © Trevor Cuthbert
A previous owner’s bad repair left this truck with a coolant leak. Trevor shows why aluminium components should never be levered apart
Need to know
Time: 5 hours
Cost: £29.15
Difficulty: 4 out of 5
Models: Defender 90, 110, 130 (200Tdi models, but applicable to all engines with aluminium parts).
Tools needed: Torque wrenches, spanners and socket spanners, fluid extractor, correction pen, putty knife.
Parts & costs: Gaskets – timing housing to engine block, timing cover, water pump, £12 for the set, BLRC Ltd; Gasket seal compound, £4.30, Motor Factors; Strong repair compound, £12.85, Motor Factors.
Work safely:
• Wear protective gloves and safety boots when handling heavy objects.
• Wear protective gloves when working with chemical repair compounds.
• Never work on the cooling system until it has fully cooled and depressurised.
Contacts: BLRC Ltd, 02897 511763, blrcvehiclespecialist.co.uk
My son, Tristan, and I have been rebuilding this Defender 90 200Tdi for him over the last few years. We worked on it whenever he was home from university because Tristan wanted to be involved with the build through every step of the way – a real father-son project.
The engine had been fully rebuilt a few years ago and held in storage since. So, effectively being a new engine, we had not anticipated any problems, though there had been signs of a minor coolant weep at the left side of the engine where the timing belt housing meets the engine block. This was irritating but not initially of major concern.
As the engine had been on the shelf for a long time, we’d renewed the timing belt as a precaution. When we started up the engine after this for the first time, the coolant weep had become a serious leak that we could no longer ignore. We would have to dig deep into the front of the engine to see what was wrong.
Having just renewed the timing belt before first running the engine, we knew our belt could be refitted and used again following the repair. Normally though, with a used belt, it would make sense to renew the belt while doing this work.
To reach the problem area at the front left of the engine block, there are a lot of components and systems on the front of a 200Tdi engine to be carefully removed before the timing cover housing could be separated from the engine block. Only then, could we investigate the cause of the leak. But the Land Rover has recently been put together and not yet driven, so everything would be fairly easy to take apart.
Removing the timing belt housing

Saving for reuse: Using a fluid extractor, as much of the good fresh coolant as possible was sucked up from the expansion tank and the radiator at the bleed plug.
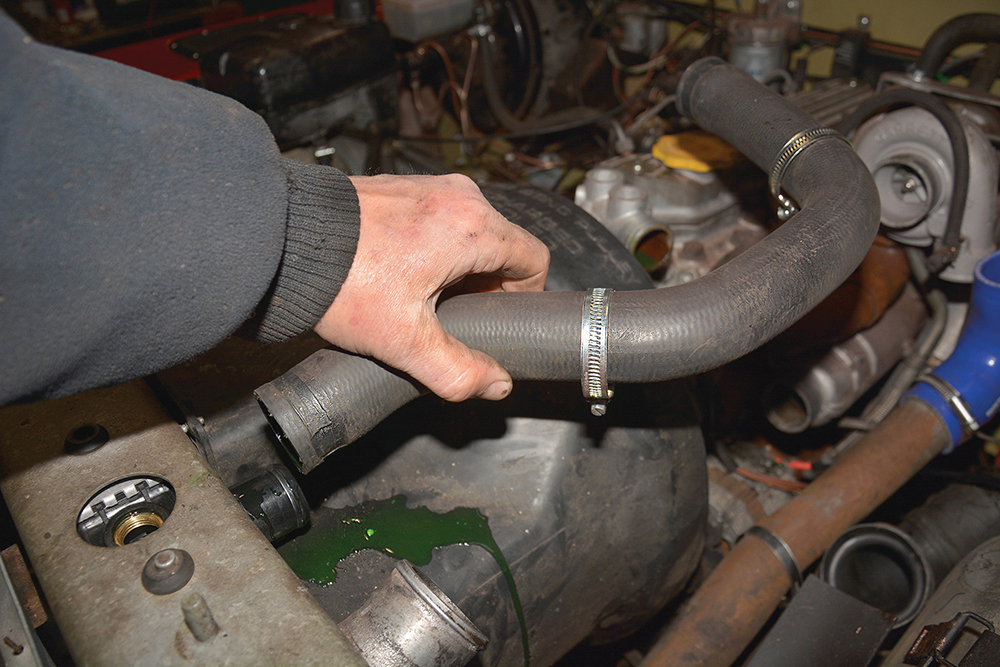
Gaining access: The air cleaner and intercooler hoses were removed to improve access, and the top radiator hose disconnected from the radiator and engine after releasing the clips.

Open space: With the top hose out of the way, the fan cowling and the fan itself have been removed, allowing easy access to remove the bottom hose.
Under tension: The bolts holding the water pump pulley and the power assisted steering pump pulley are loosened with the belts in place, keeping the pulleys from rotating.

Keep your bolts in order: The belt adjusters are slackened off, allowing the belts to be removed and, in this photo, the water pump is now removed by unscrewing the M8 fixings.
Plan ahead: The timing cover is lifted off, making sure to note the position of each of the bolts as there are numerous different lengths that need to go back in the same positions.
White correction pen: The engine has been placed at Top Dead Centre (TDC) and the injection pump locked using a timing pin, then all of the pulley and belt positions are marked.
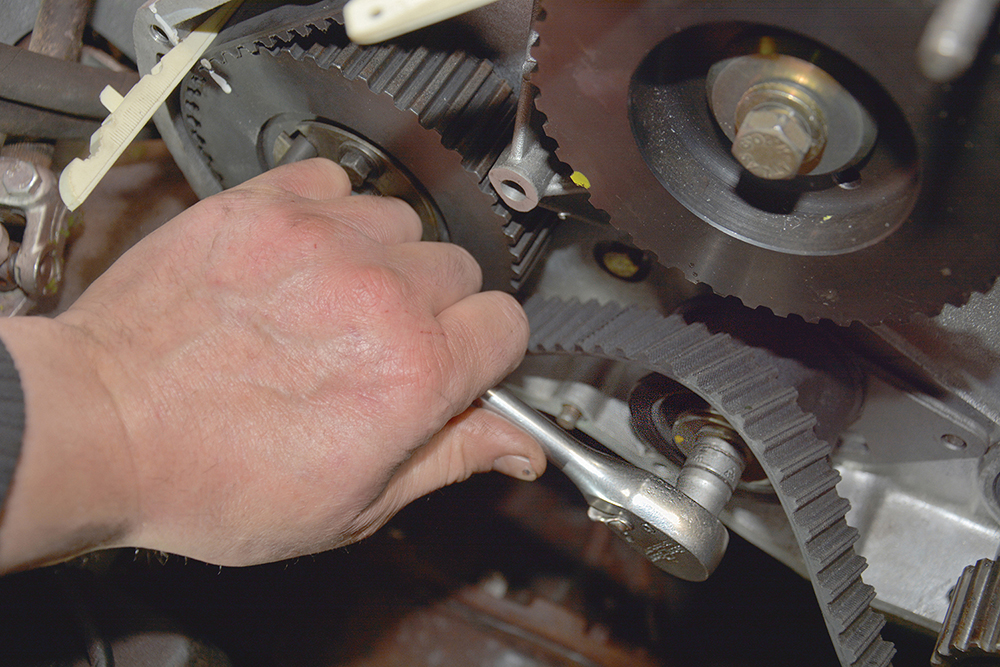
Make it slack: Timing belt tensioner is released and the belt becomes loose enough to remove from the engine. It’s been position-marked as it is new and will be refitted.
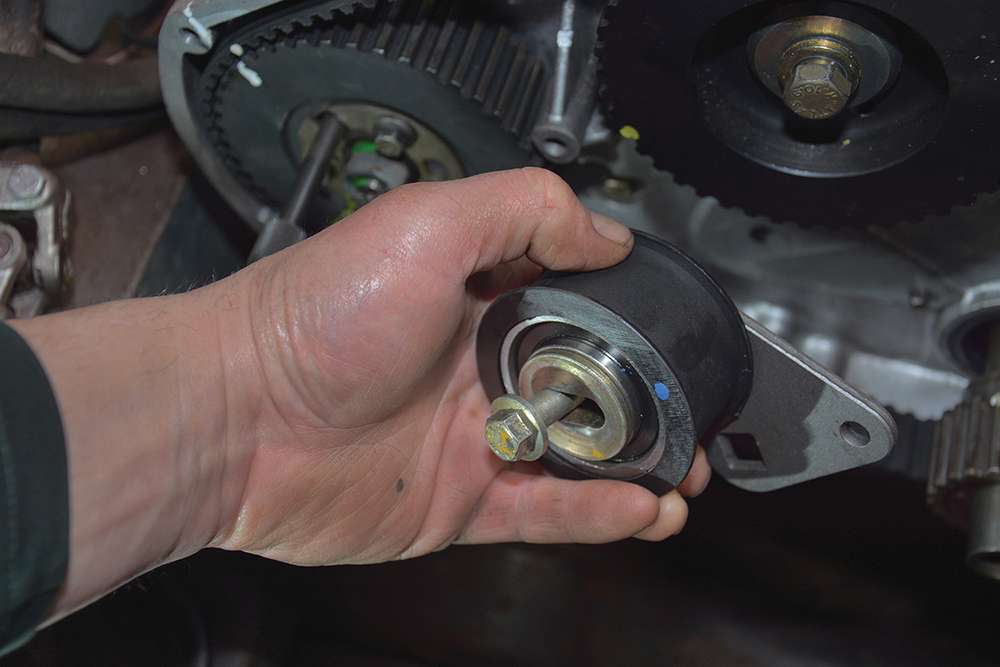
No wear at all: The belt tensioner pulley assembly is also new and is therefore carefully set aside with its bolt because it will be refitted during reassembly.
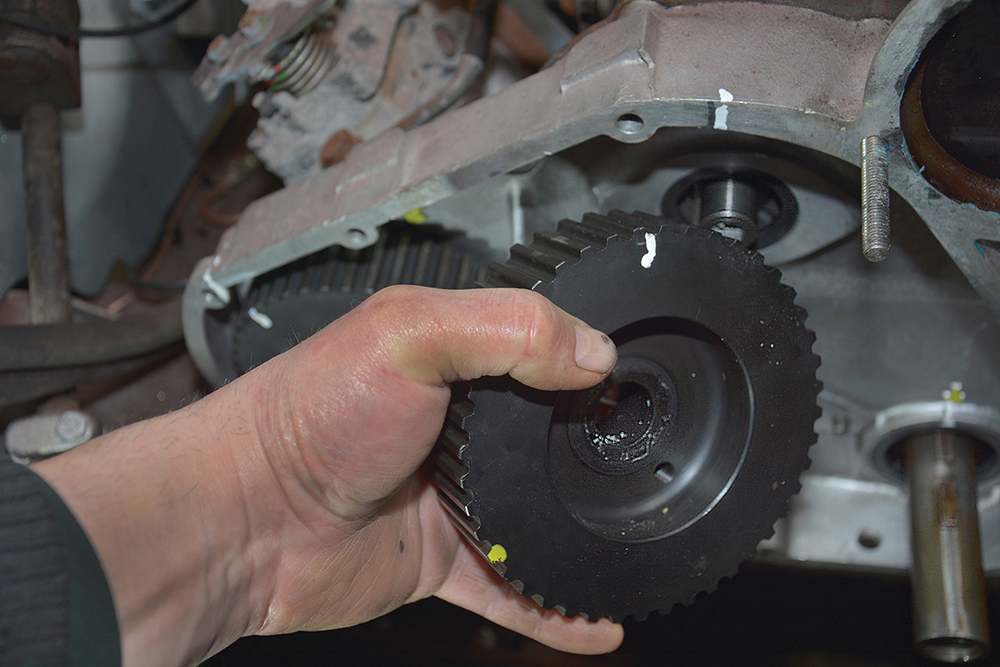
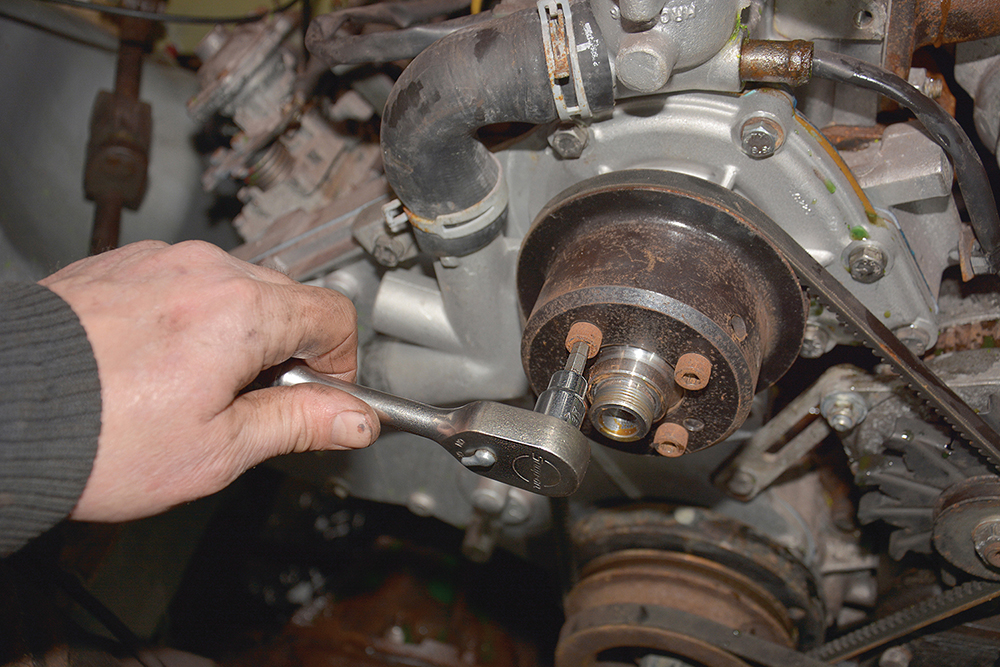
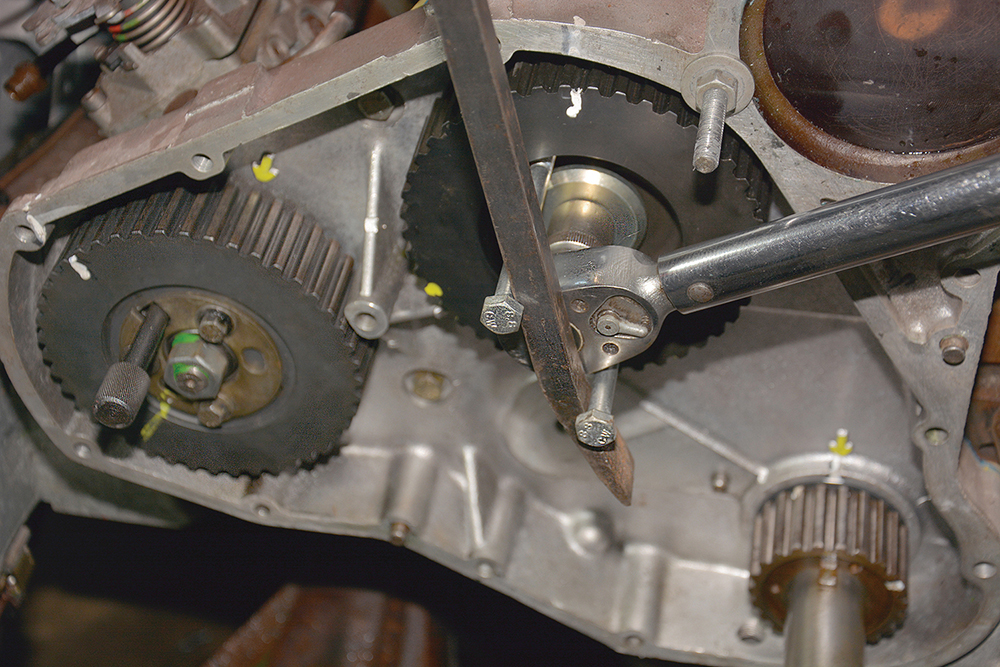
Timing remains: Cam shaft pulley is next to be removed, having loosened and removed the bolt and securing washer, making sure the cam does not rotate during the process.
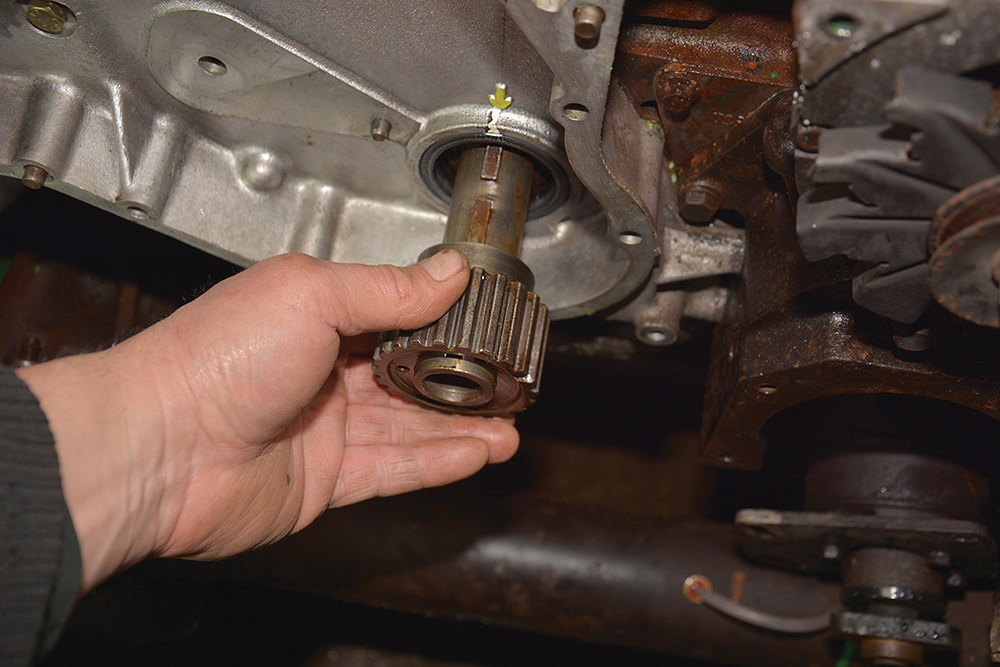
Slid off this time: The toothed pulley on the crankshaft is removed. On this occasion it did not require a puller to remove it, but sometimes this will be the case.
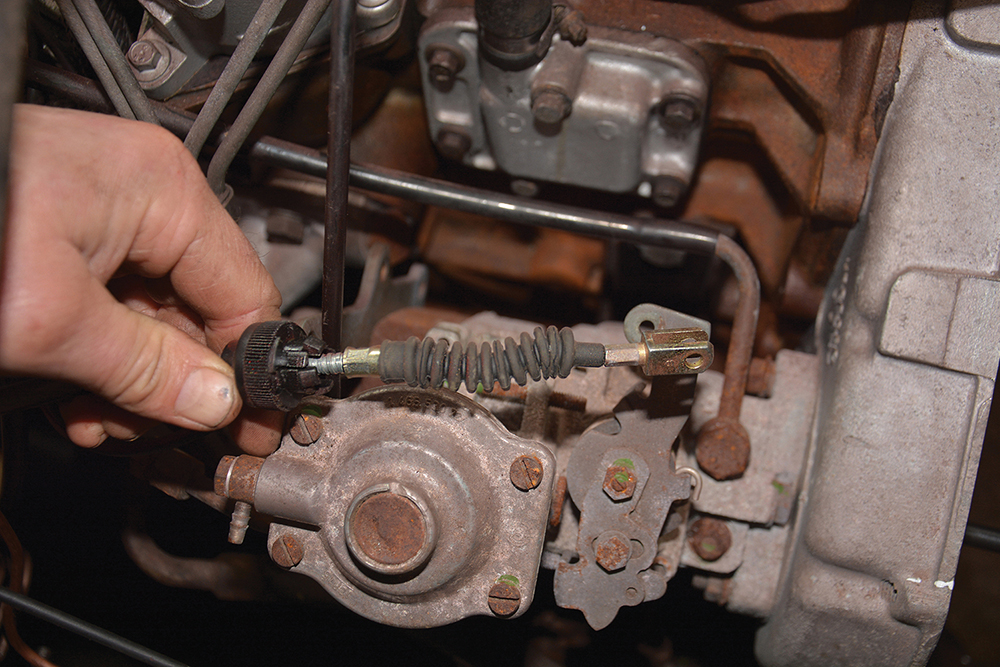
Accelerate away: The throttle cable is disconnected from the fuel injection pump by removing the clevis pin and detaching the plastic adjuster from the mounting hole.

Disconnection of power: This electrical connection to the injection pump,for the fuel cut-off
solenoid, is a bit unusual because a concealed security (bypass) switch has been installed.

Crack ’em off: The four fuel pipes from the injection pump to the injectors are loosened
(17mm spanner) and removed so that the pump can come off with the timing housing.
Main supply: The fuel line from the fuel filter to the injection pump is removed by undoing the banjo bolt. Likewise the fuel return (leak-off) hose is disconnected.
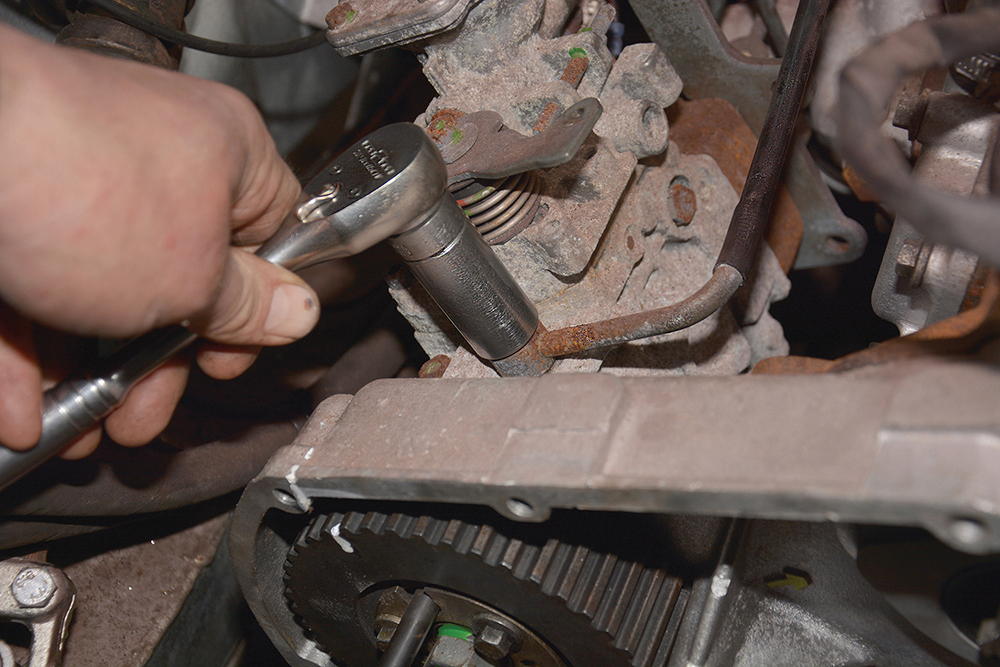
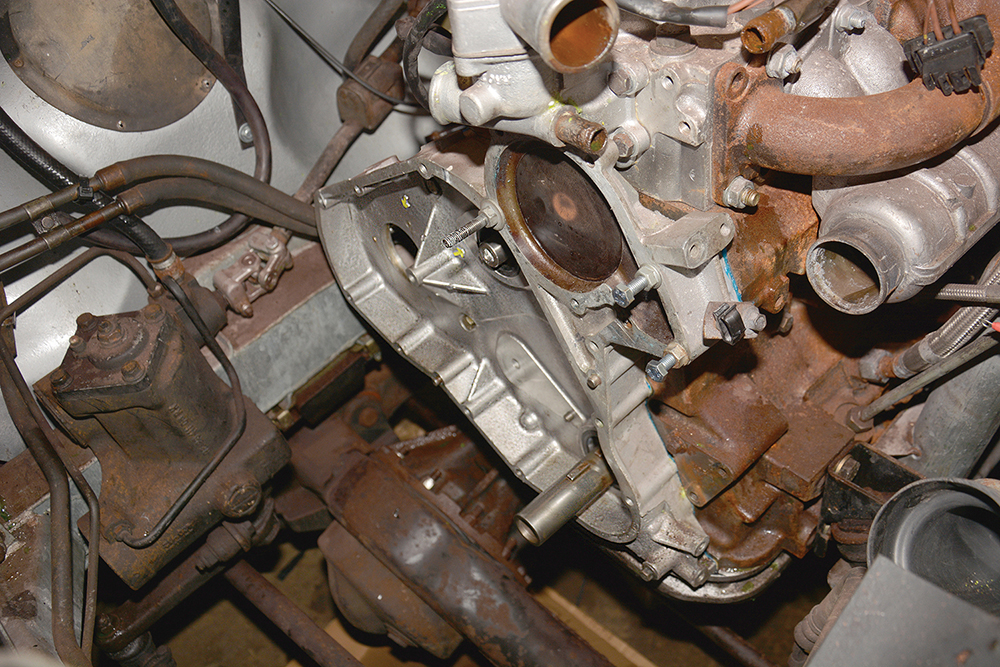
Housing removal: The timing housing can now be unbolted from the engine block by removing each of the M8 bolts using a 13mm socket wrench, or a 10mm for flange bolts.
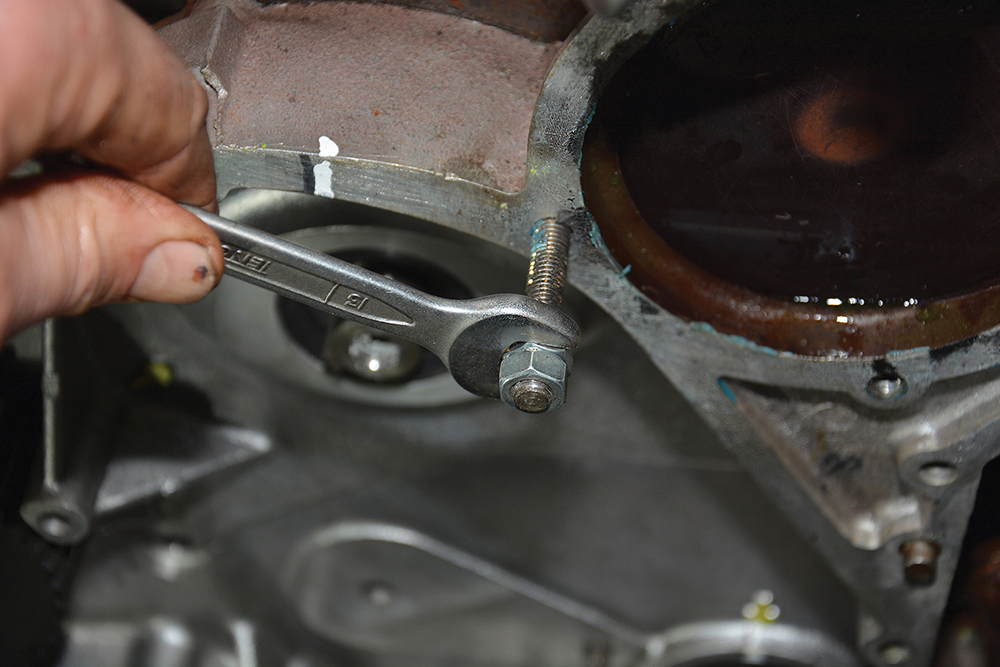
Effective method: This M8 stud also needed to be removed by using a pair of locknuts tightened together on it and then turning the inner one with a 13mm spanner.

Snagged up: The leak-off hose assembly had to be released from the injectors by undoing the banjo bolts, as it was fouling the fuel pipes when removing the timing housing.
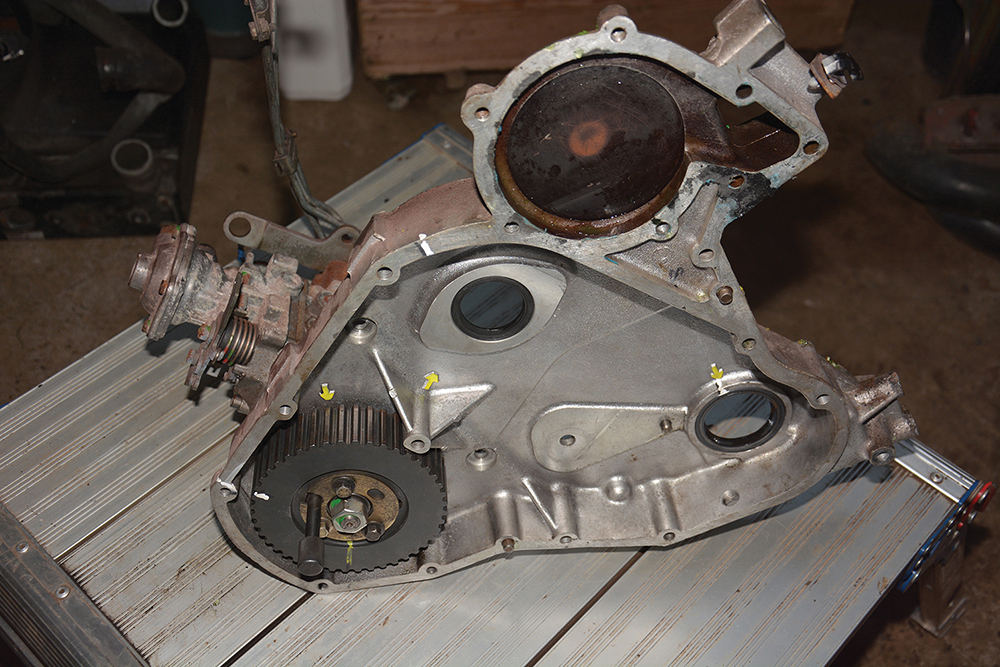
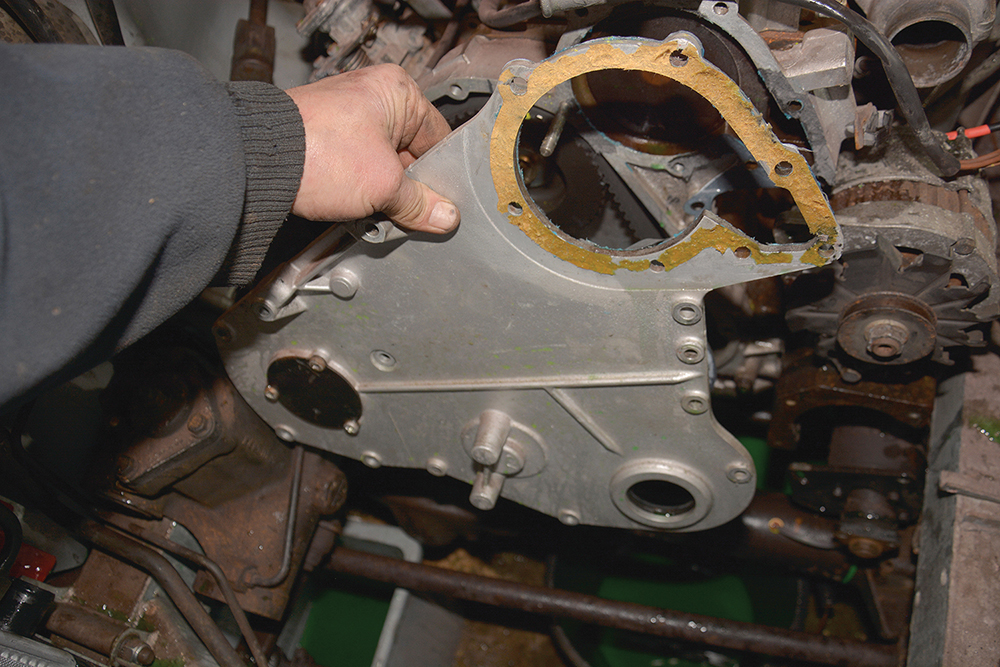
Landed safely: Now, successfully removed from the engine, the timing housing, with fuel injection pump still attached, is set on a bench for inspection.
Investigating the problem

All good: The mating surface on the engine block where the timing belt housing sits, is inspected for pitting and damage, and is found to be in good condition.
Nothing wrong here: The timing belt housing also accommodates the water pump, and the joint face on the engine block around the water channel was found in good condition.

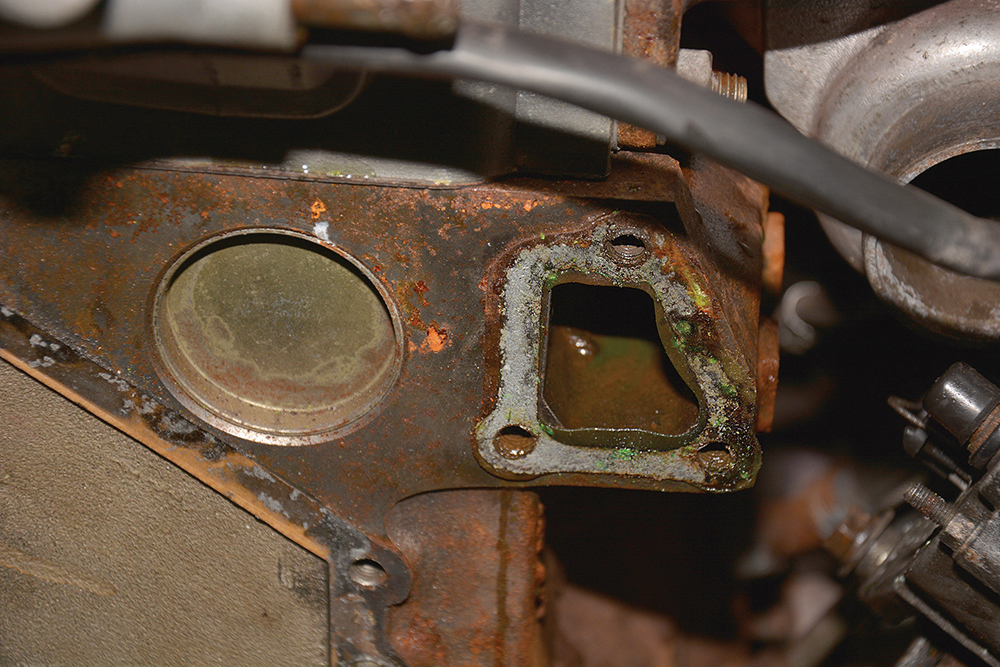
Here’s the problem: While most of the timing belt housing’s joint faces are good, those around the triangular coolant port (left in pic) behind where the water pump mounts, are damaged.
Down to the actual metal: The area is cleaned of old gasket and sealant and then sanded a little in order to properly see where the coolant had been escaping from.
Never use a lever: With the area around the water channel cleaned, we see the damage on the
joint face caused by a previous repairer levering the housing from the engine block.
Repairing the damage
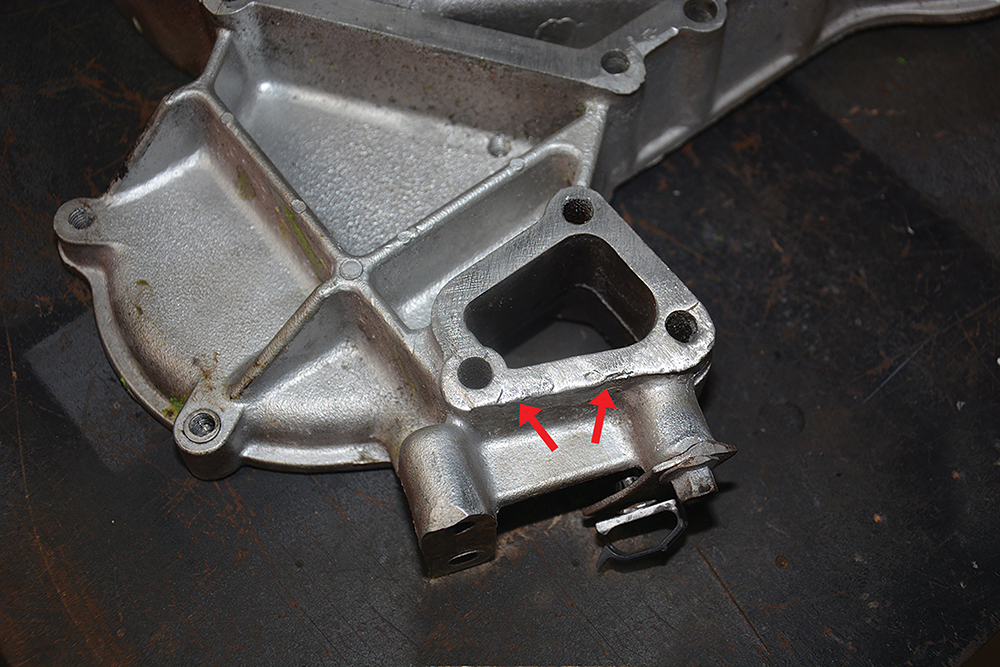
It seems the housing had, in the past, been levered free of the engine block with a screwdriver or similar, resulting in indentations in the soft aluminium housing, leaving only a minimal flat surface for the gasket to seal against. It’s always best to carefully tap parts free using a mallet to avoid this sort of damage. This bad news was compounded when we discovered that a new timing belt housing was not available – Land Rover doesn’t list it as a replacement part, and a secondhand item couldn’t be found. So the only option was to repair what we have.

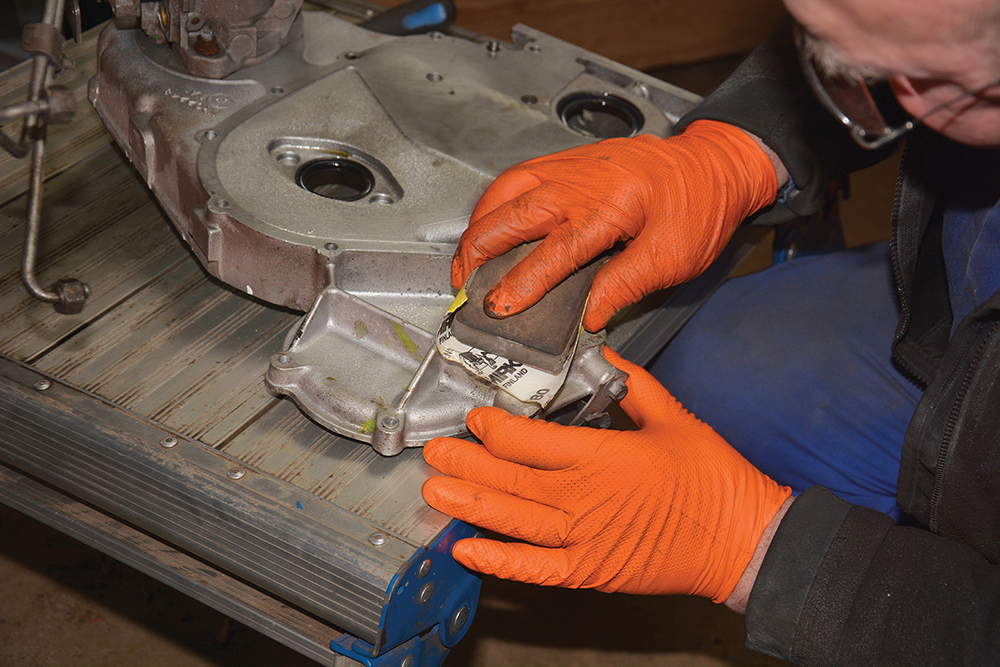
Two-part preparation: A strong, two-part repair compound (chemical metal) is mixed to harden very quickly, so it needs to be applied without delay to build up the damaged area
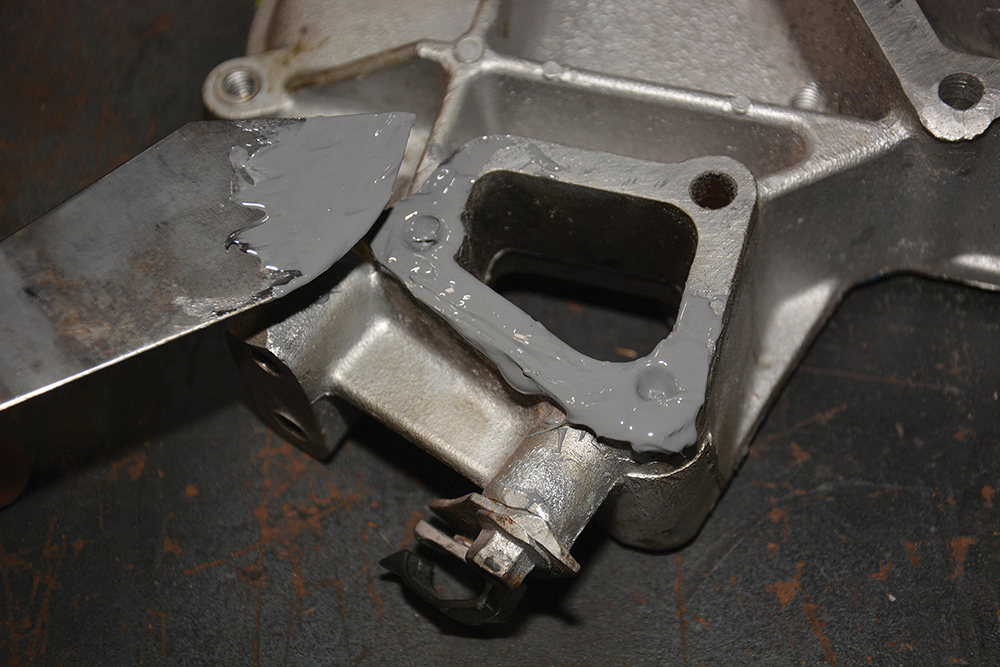
Time of the essence: The mixed repair compound is carefully, but quickly, spread over the compromised area of the housing to fill in the damaged areas and build it up again.

Make it flat: After the compound has hardened, the excess is sanded back to create a good new and level mating surface for a new gasket to seal against.
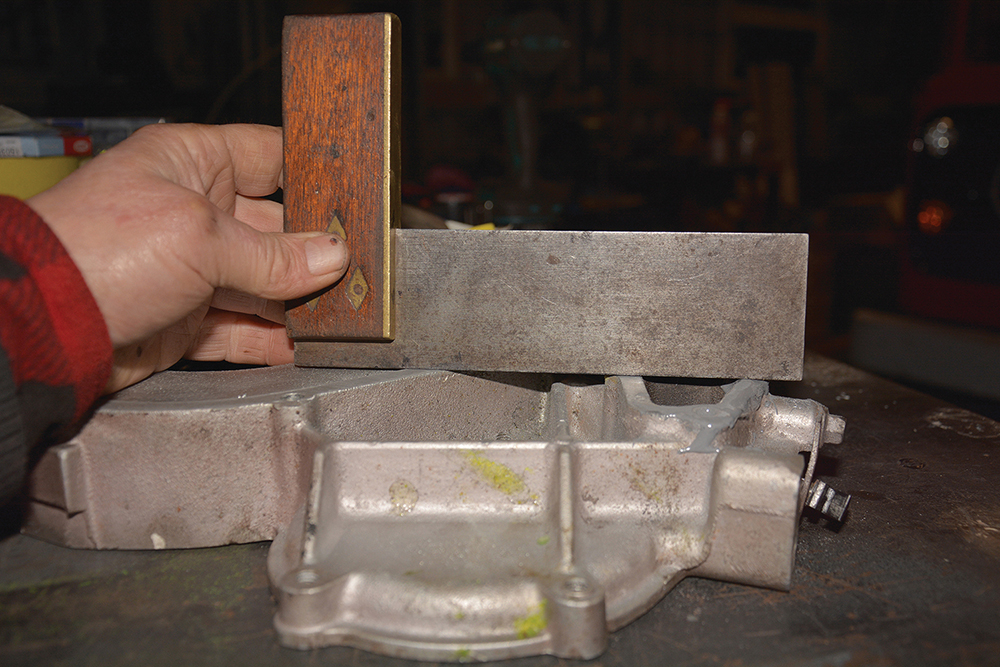
Flat and level: The new mating surface is checked with a straight edge to make sure that it is not sitting proud or lower than the rest of the timing belt housing.
Rebuilding
Giving it the best chance: The repaired housing can now be refitted to the front of the engine with a new gasket in place, plus a minimal smear of gasket sealing compound.

Stop any movement: A couple of temporary fixings are used to keep the water channel sealed until the pulleys and timing belt and bolts are fitted back in place.
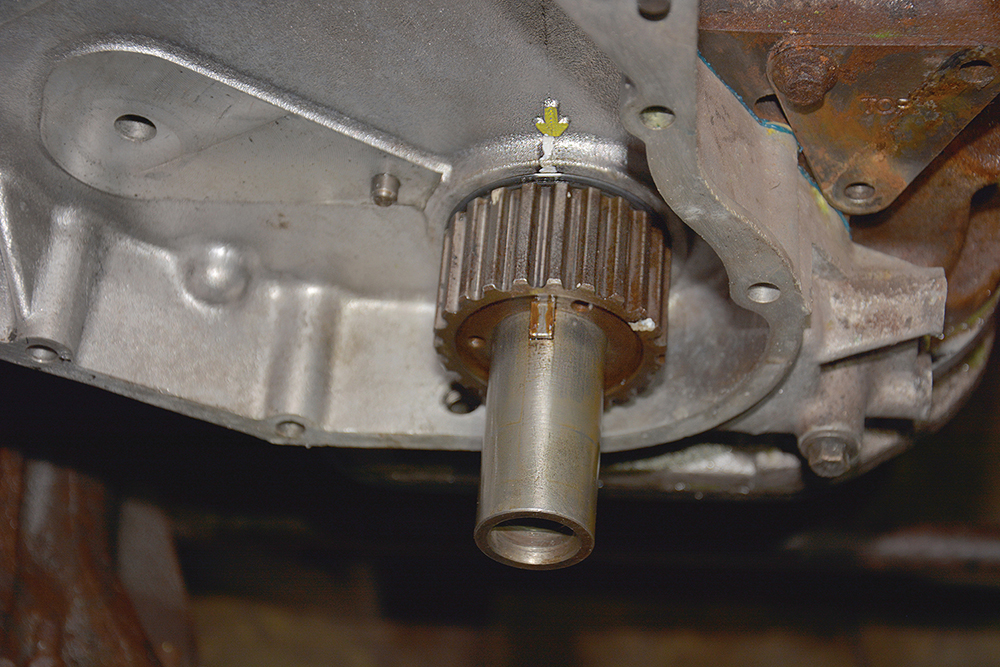
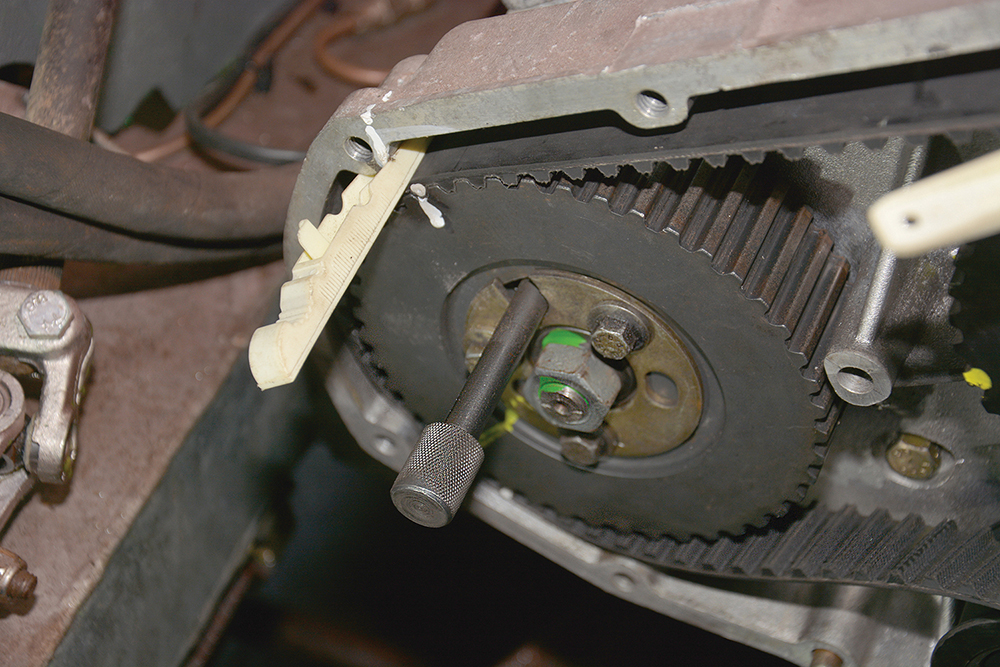
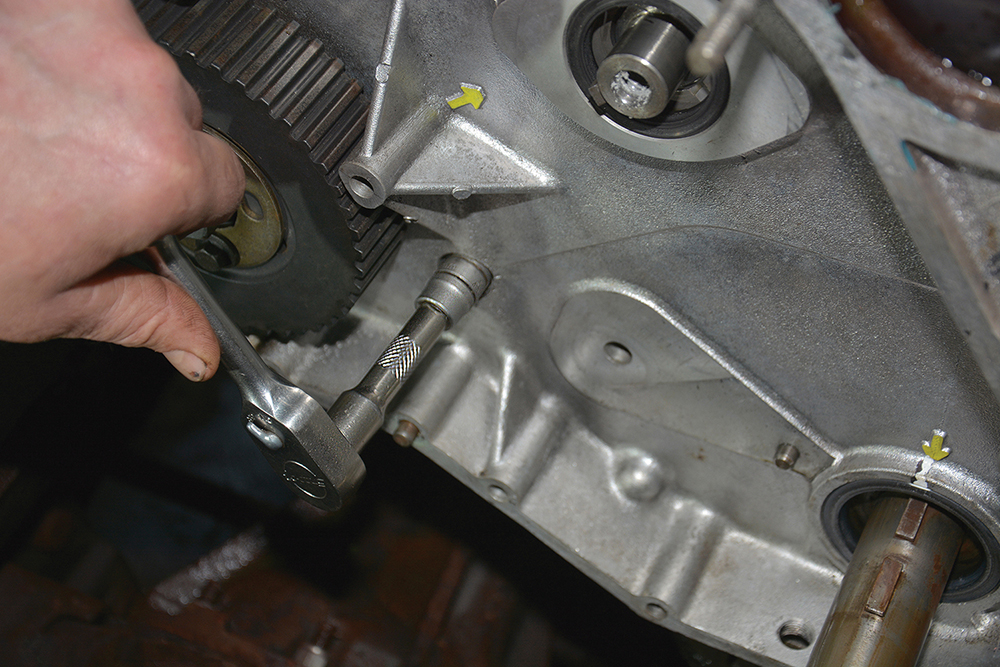
Still timed: The crankshaft sprocket is first to be refitted in place. The woodruff key is clearly in the correct position at the timing arrow, as nothing has moved.

Pin remains in place: The fuel injection pump had been removed from the housing to carry out the repair. It is now fitted back in place through the housing from the back.

Keeping them tight: A drop of thread lock is applied to each of the bolts that secure the pulleys. This bolt and washer is for the toothed camshaft pulley.
A good precaution: To ensure that the camshaft does not turn, a pair of temporary bolts and a pry bar hold the pulley firm against the rotation of the torque wrench.

Not a tooth out of sync: The timing belt is refitted with the tensioner lightly holding it while checks are made that every mark is correct (the pegs help hold it against the teeth).
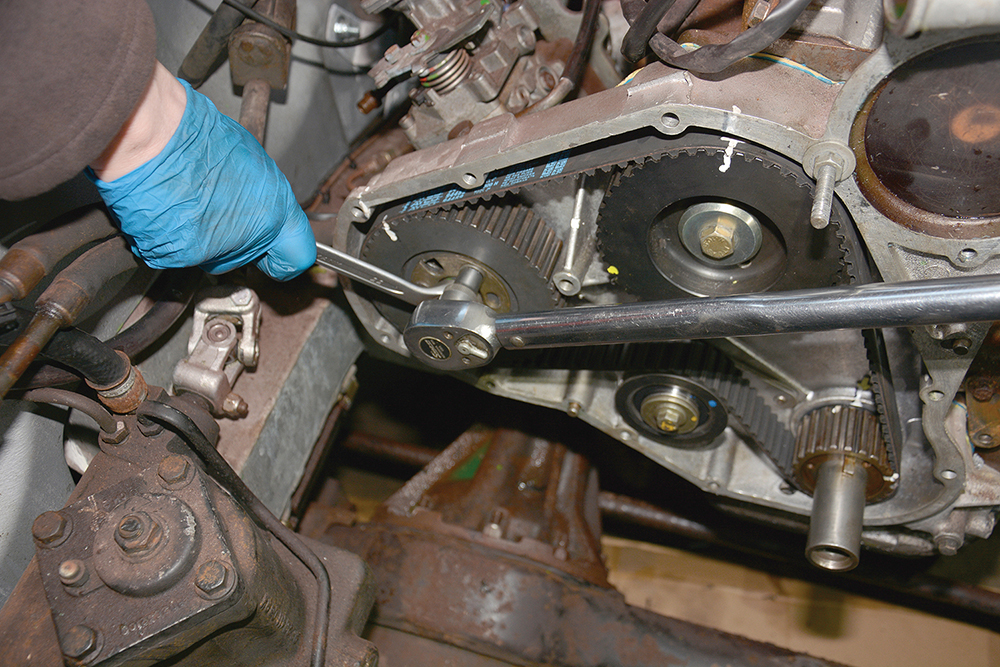
No movement: The fuel injection pump hub is held firm with a 17mm spanner, while the torque wrench tightens each of the bolts fixing the pulley in place.
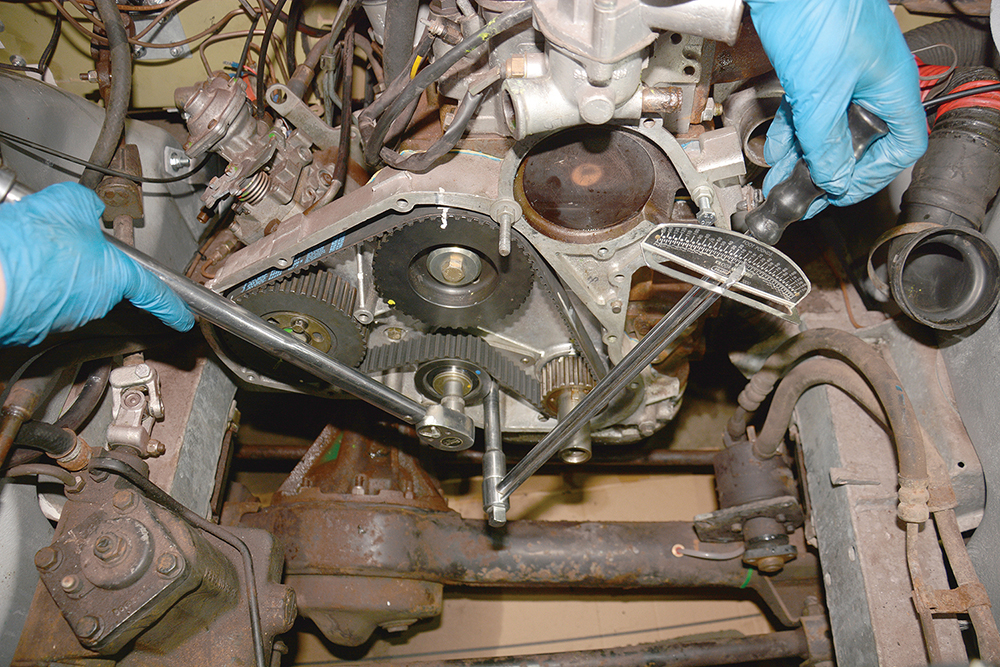
Taking the strain: The timing belt (recently renewed, remember) is now held to a tension of 19Nm while the tensioner fixing bolt is tightened to a torque of 45Nm.

Back to the marks: The engine is now rotated clockwise for two complete rotations (a complete timing cycle) and then checked that it has remained correctly timed.
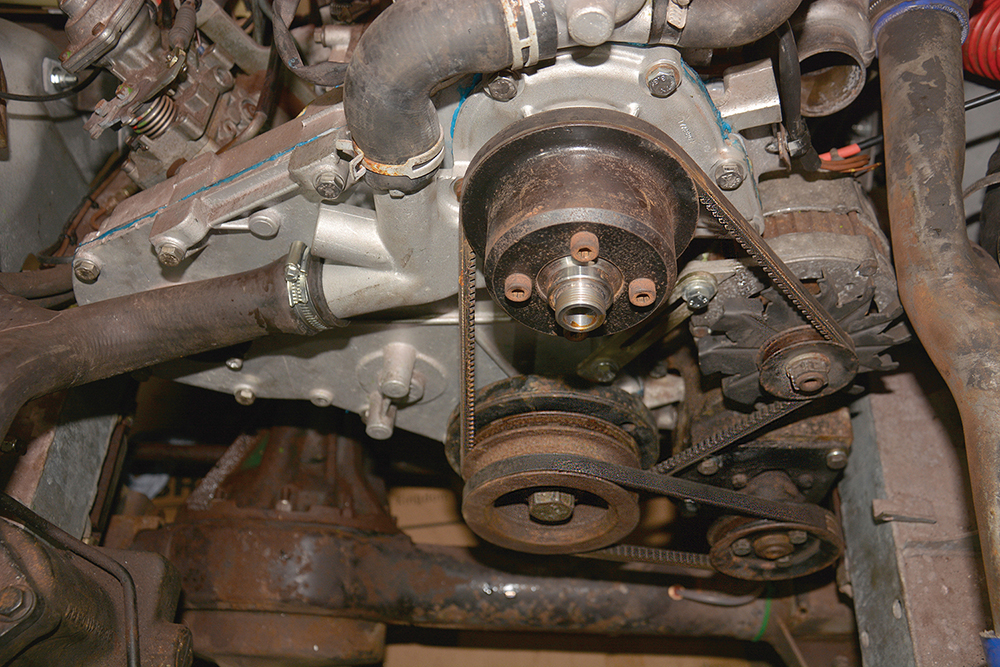
Built up: After refitting the timing housing cover with a new gasket, the water pump, pulleys, belts and hoses are all refitted to the engine.

Hit the road: Finally the radiator shroud is put back in place and the fan refitted. With the engine filled with coolant, it is ready to run again – and no leaks!
The right result
After this repair of the timing belt housing to cure the coolant leak, the Land Rover was test driven (up to full operating temperature) and no leaks were apparent. For the next few days, it was taken on longer runs locally and everything was fine.
The big test came when my son drove it from Belfast to his house in Exeter (via the Belfast to Liverpool ferry) a journey of over 500 miles. No further problems occurred. Tristan has been using the Defender to commute and for camping trips during his time off and it continues
to run very well and hold all of its coolant.
Like to have your own Land Rover library?
Try our Budget Digital Subscription. You'll get access to over 7 years of Land Rover Monthly – that’s more than 100 issues plus the latest digital issue. All issues are fully searchable so you can easily find what you are looking for and what’s more it’s less than 10p a day to subscribe. Click here to find out more details and start enjoying all the benefits now.