


21 September 2023
|
 A selection of the disposables you will need for the job
: credit: © Alisdair Cusick
A selection of the disposables you will need for the job
: credit: © Alisdair Cusick
Maintaining your Defender or Discovery 2 yourself can save cash and give peace of mind, as Editor Martin explains
Need to know
Time: 1 day Cost: TBA
Difficulty: 2 out of 5
Models: Defender 1998-2007, Discovery 1998-2004.
Tools: Socket and spanner sets, torque wrench, drain pans, T55 Torx bit, 32mm spanner, filter wrench or strap, funnel, grease gun, torch, brake fluid tester, pry bar, silicone spray, grease.
Parts: Defender and Disco 2 service pack with oil (DA6004COM) £67.99; Ravenol 80w90 GL4 oil 1-litre (DA4965) £10.80; Ravenol MTF2 75w80 1-litre (TYK500030) £18. Island-4x4.com
Work safely:
• Raise and support the vehicle securely on rated equipment.
• Wear the correct PPE at all times.
• Dispose of waste oils and fuels responsibly at your local recycling centre.
Taking on your Land Rover’s annual service yourself is one of the most rewarding and fulfilling jobs you can do – not only will it save you a few pounds, but you’ll get to know the vehicle’s mechanicals and their condition first-hand, and keep on top of any other things that you otherwise may not have known needed attention.
The Defender and Discovery 2 Td5 are ideal for home servicing. The filters are readily available and relatively simple to access, you only need basic tools, and there’s no online-only service history or complex service interval indicator to reset. If it’s your first time servicing a Land Rover yourself, set aside a day and take your time to work methodically through the items listed here; we’ve left out replacing the coolant as this Defender wasn’t due a change, and while the brake fluid needed changing we haven’t shown that as it’s having the calipers replaced soon which will also include a full fluid flush.
What we have included are all the driveline oils, which often go far too long between replacement. Even if your Land Rover isn’t due axle and ’box oils this year, be sure to check the oil levels and the condition of the oil carefully. Fresh oils and filters throughout keep everything moving smoothly and reduce component wear long-term, so it’s well worth keeping on top of. While we’ve quoted for the oils per litre, consider buying bigger containers – it works out much cheaper and will last for two or three services. Martin Domoney explains...
(Note: We’re showing a service here on a 2002 Defender 90. The process is similar on a Discovery 2, with some small differences. Ed Evans has added these additional steps at the end of this feature).
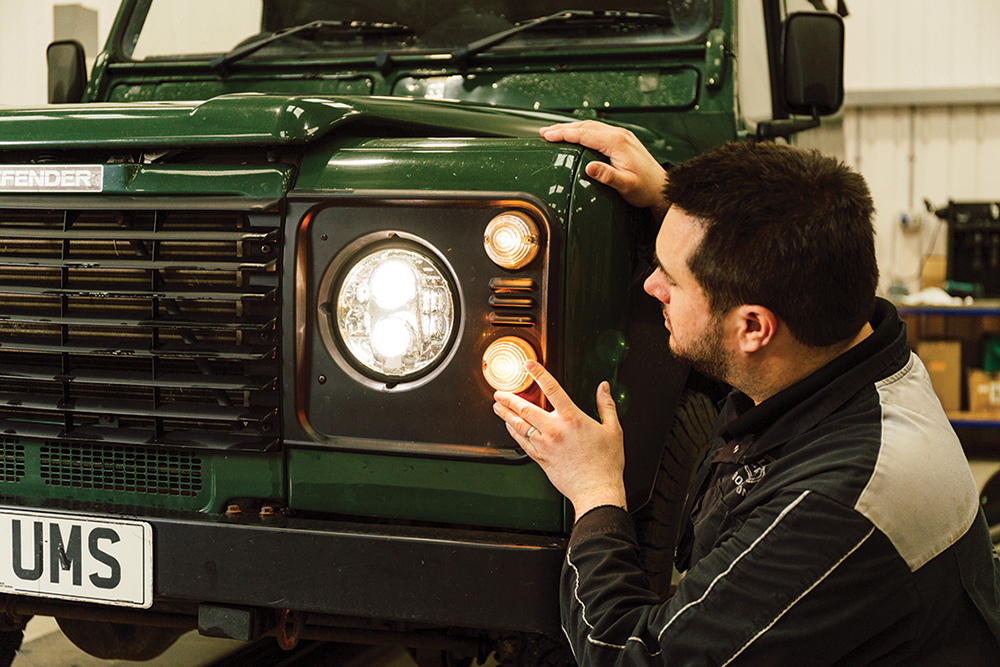
First things first: Before getting too stuck in, switch on all the lights and do a walk-around of the Land Rover. Check all the lamps for correct operation and security, and inspect the lenses and mirrors for cracks. Check the bodywork for damage and make sure none of the fittings are loose.

Wipers and washers: Pull the wipers off the screens and make sure they spring back into place. Lubricate the wiper arm pivots with silicone spray if needed. Check the wiper blades for splits and hardening, and replace if needed. Try the washers; unblock and adjust as required.

Go for a dip: Pop the bonnet and inspect the engine bay for loose wiring, leaks and rodent damage. Unscrew the power steering fluid reservoir cap, wipe it clean, then re-check the level on the built-in dipstick. Discovery 2s have a clear tank for the PAS and also ACE fluid, if fitted.

Check brake fluid: Check the level in the brake fluid reservoir – if it’s low, suspect worn brake pads or discs. Ideally, use a brake fluid tester to check the moisture content. If the content is high, flush and bleed the brake fluid with fresh DOT 4 fluid. Replace it every two years regardless.

Test the waters: Td5 coolant header tanks are notoriously hard to see through, so use a powerful torch to help illuminate the level. It should be bright orange in colour – weak coolant won’t protect the engine in high and low temperatures; replace it every third service. Top up washer fluid.

The first filter: We’ll tackle the air filter next. Release the two spring clips holding the intake pipe into the airbox, and wiggle it free. Unplug the air temperature sensor and single vacuum pipe from the airbox lid, then release the two spring clamps, hinge the lid open and remove it.

Remove and replace: Peel the old air filter element out of the airbox, and inspect it for oily residue which would indicate excessive crankcase pressure. Use compressed air to blow any leaves and debris out of the airbox, then place the new filter in and tuck the rubber lip in all the way around.

A fiddly lid: Locate the tabs on the airbox lid in the hinges, then close the lid ensuring the plastic lugs locate properly around the edge. Latch over the spring clamps and plug in the vacuum pipe and temp sensor. Inspect and lightly grease the big O-ring, then refit the intake pipe.
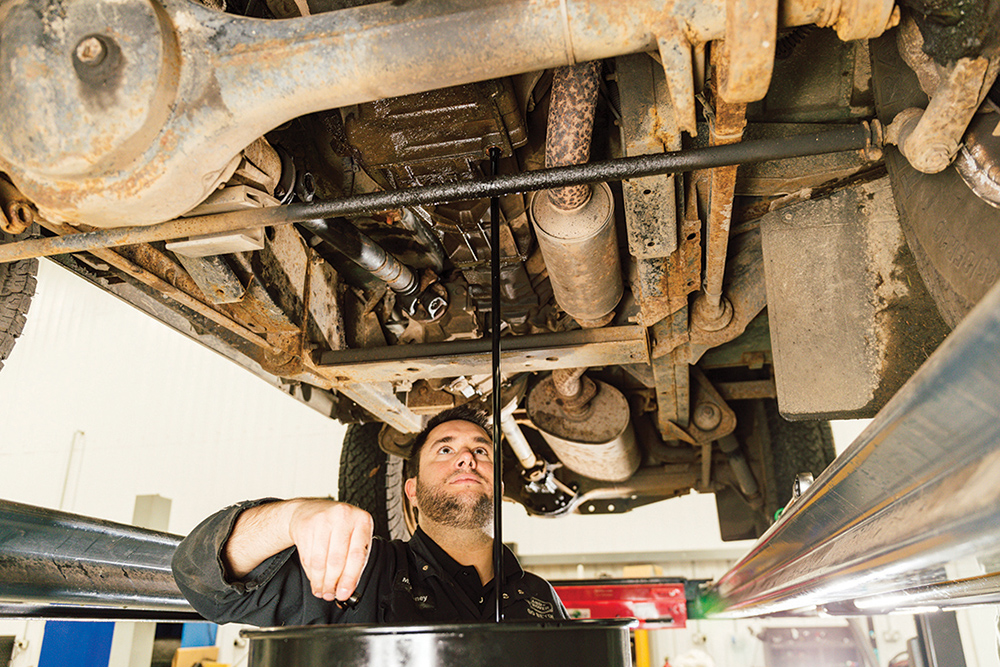
Drain the oil: Raise and support the Land Rover securely for access. Position your drain pan, then use a 17mm socket on an extension to loosen the sump bung. Once loosened, unthread it by hand maintaining upward pressure and then whip it out of the way and let the oil drain.

While you wait… While the oil drains from the sump, locate the grease nipples on the front and rear propshafts (one on each universal joint spider and one on each slider) and pump them with grease until you feel resistance or the rubber boot swells. D2s only have two greaseable universal joints.

Refit sump bung: When the flow of oil has slowed to a drip, make sure any stuck copper washers are removed from the bung and sump – this one had two! Clean the sump bung and fit the included new copper washer, then start the bung by hand and torque it to 17lb-ft. Clean the area.

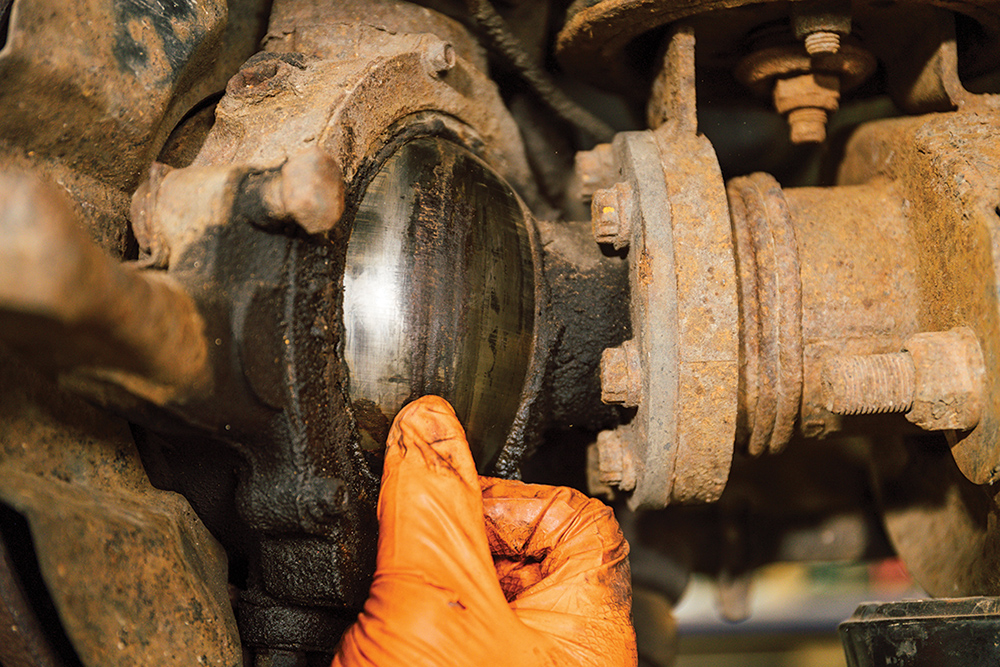
Axle oils out: Transmission oils should be replaced every two years or 24,000 miles to keep them fresh – these are due a change. Dig any mud out of the half-inch square drive filler and drain bungs, position your drainer and undo them. That diff pinion seal has seen better days.

Fills and spills: Once both axles are empty, refit the drain bungs. They’re tapered, so should be snug, but not over-tightened. Refill each axle with 1.7 litres of 80w90 or EP90 gear oil, until it just starts to dribble from the filler. Refit the filler bungs and wipe up any mess.

Transfer ’box next: Changing the transfer ’box oil is done using the same method as the axles. Undo the ½in-drive filler bung behind the handbrake cable first, then drain the oil. Fill the transfer ’box (2.2 litres) until oil dribbles from the filler hole, and refit the bung.

Tricky Torx bung: It’s especially important to loosen the filler bung on the R380 gearbox before you drain the oil – it can be fiddly to remove, and you don’t want to be stuck with a dry gearbox. Locate a T55 Torx bit fully in the bung, then use a ratchet to crack it free and wind it out.

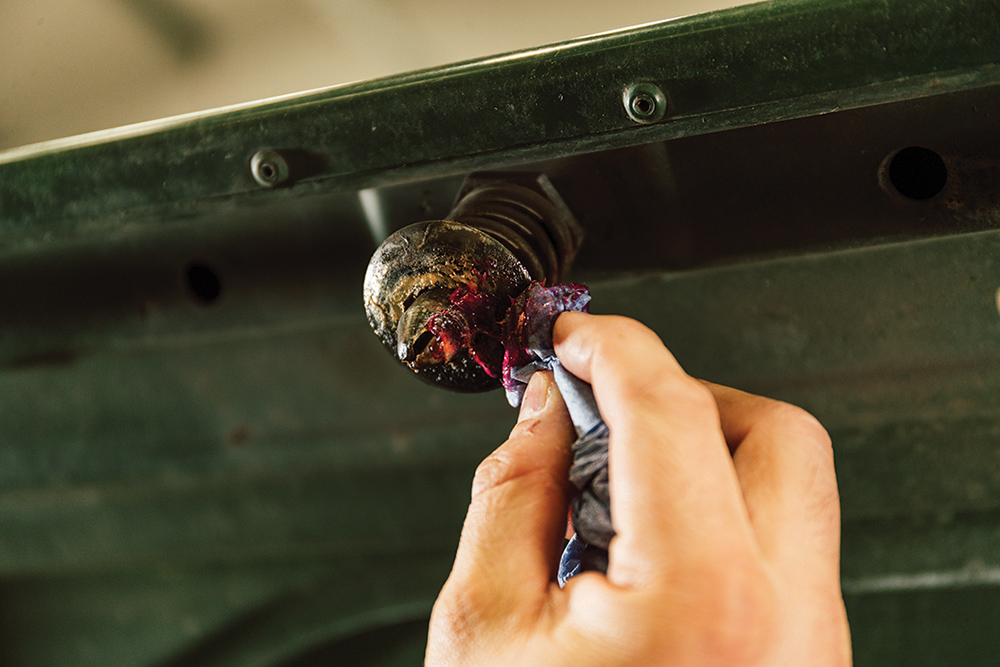
Drain the gearbox: The drain bung is a big one; you’ll need a 32mm spanner or shallow socket on a bar to loosen it. Let the oil drain; some R380 ’boxes will have red automatic transmission fluid in, but we’ll replace it with manual transmission fluid. Inspect and clean the magnetic bung.
Magnetic drain bungs
Undoing the gearbox and transfer ’box bungs can result in a bit of a shock – the magnets built into the bungs can have a scary-looking collection of metal shavings on them. Don’t worry, as they are designed to do this, catching any small pieces of material and preventing them from churning around inside the gears and bearings causing damage. A small build-up of fine shavings is quite normal, and will consist of light gear and bearing wear. Any larger chunks that are stuck to the drain bung may be more of a concern, however, so re-check the oil condition and bung sooner than the next service, and always clean magnetic bungs thoroughly before refitting.

Filling methods: The fill point is in a tricky place, so some ingenuity is needed to refill the gearbox with around 2.5 litres of fresh 75w80 MTF. We’re using a big oil transfer syringe, but you can also route a piece of hose from the engine bay and use a funnel to pour the oil in. Refit the filler.
Underbody inspection: Before lowering the Land Rover off the ramps or stands, spend a few minutes with an inspection lamp checking the chassis for corrosion, the components for oil leaks and the brake pipes for rust and wiring harnesses for damage. Make notes of any issues to fix.

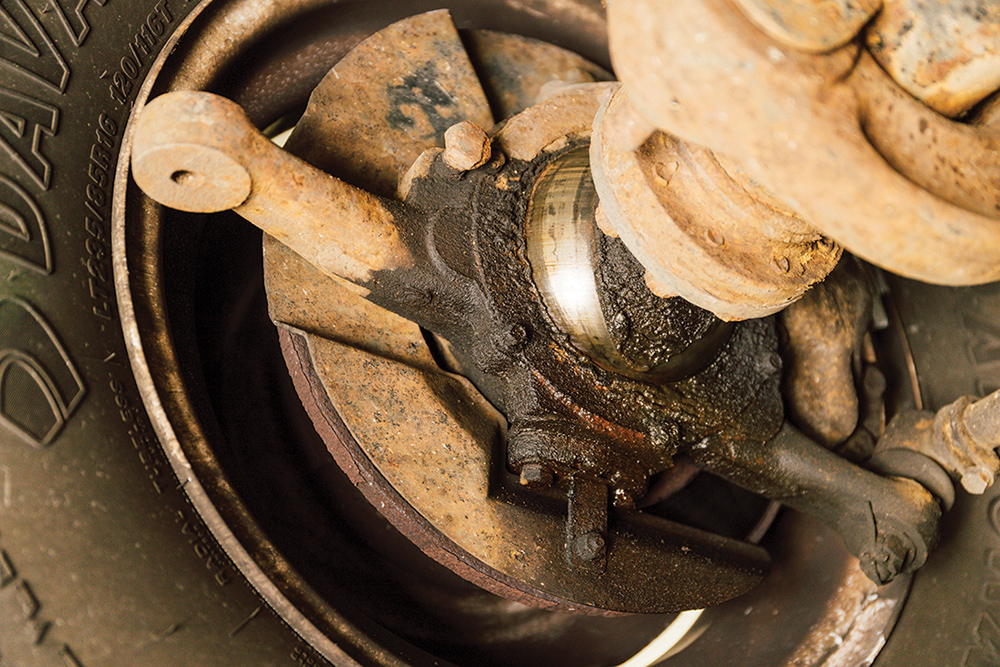
Bushes and ball joints: Grab hold of the steering drag link and track rod, and check for excessive play in the ball joints. Use a pry bar to check the damper, radius arms, trailing arm, Panhard rod and A-frame bushes for wear, and visually inspect all rubber bushes for cracking and perishing.

Free fuel filter: Next up is the fuel filter. Wire brush the area around the metal filter shield, then use pliers to turn the locking screw anti-clockwise to free the shield from its bracket. Position a suitable drain tray, then carefully loosen and remove the old filter with grips or a filter strap.

Spin it on: Make sure neither of the rubber seals from the old filter remain stuck to the housing, then lubricate the new filter’s seals with some fresh diesel and spin it on. Tighten it by hand; no need to use tools. Offer up the metal shield, locate the two lugs and secure with the screw.

Remove filter cap: Heading under the bonnet, it’s time to tackle the first of two oil filters – the centrifugal or rotary filter. Use a 10mm socket on a long extension to loosen the two screws securing the filter cap, then tap it gently to break the seal if needed and lift the cap away.

Replace rotary filter: Slide the old filter off its spindle, then fit the new one. The filter works by spinning at high speed, throwing oil to the outside and keeping any debris trapped in the material within. Replace the O-ring seal on the cap, oil lightly, then refit and nip up the two screws.
Stripped thread fix
Because the centrifugal filter cap is removed and refitted every service and the two steel screws thread into aluminium, it’s not uncommon for the threads in the filter housing to strip, making it impossible to tighten them up. If this has happened, try fitting a slightly longer screw in place of the original to bite into a fresh threaded section, and be extra-careful not to overtighten it. If this is still no good, you will have to consider removing the filter housing and either replacing it or drilling and tapping it to accept slightly larger diameter screws.
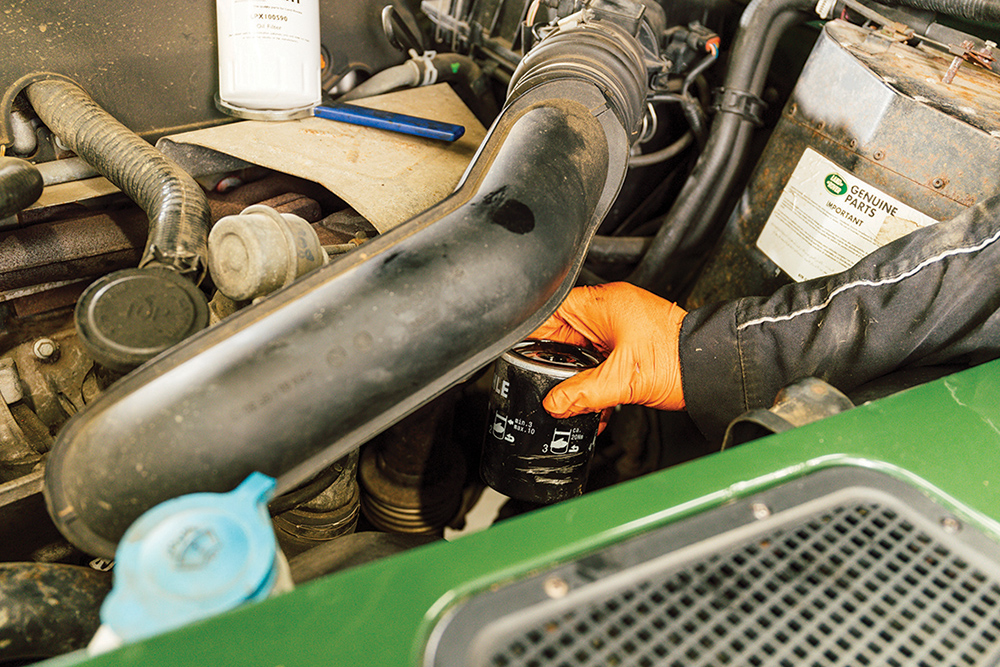
In full flow: Next up is the full flow oil filter, which screws into a housing beside the turbocharger. Use a filter strap or wrench to grab the base and twist it free – it can be fiddly if overtightened. Spin it off by hand and try to keep it as upright as possible to minimise spillage.

A clever idea: The new Britpart full flow oil filter has a casing that’s specially shaped to work with a compact filter spanner, so you don’t have to struggle with a strap or grips to remove it next time. The spanner is part number DA1117 and costs around £15 – a worthwhile buy.

Fit and tighten: Lightly oil the rubber seal, then feed the new full flow oil filter up and underneath the intake pipe and start the threads by hand on the boss. Tighten it by hand, or nip it up with the filter spanner. There’s no need to overtighten it; just enough to compress the seal.
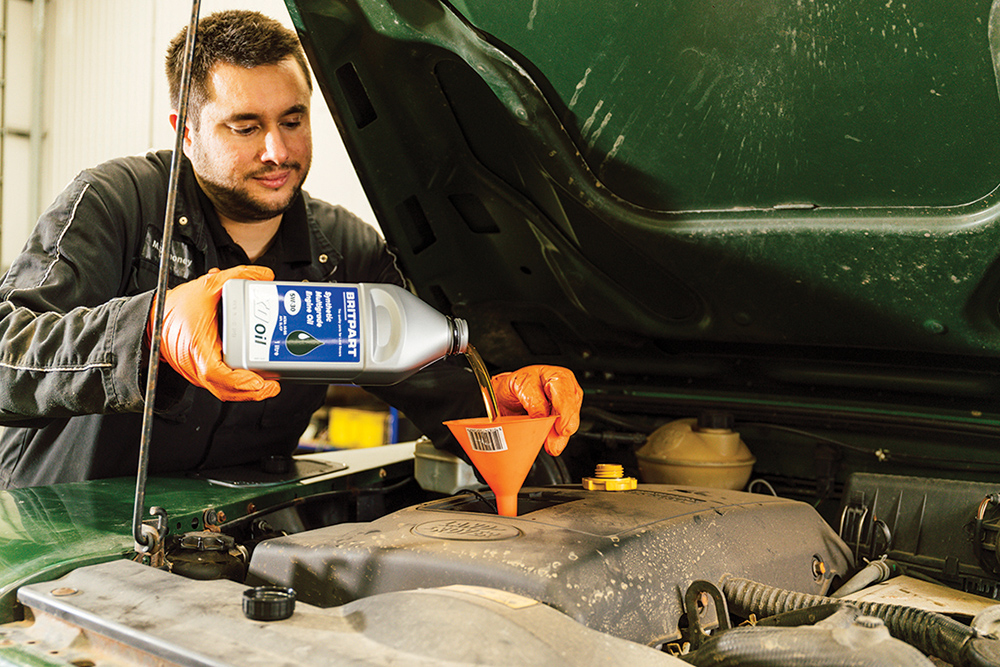
Fill ’er up! With both filters replaced and the sump bung torqued up, the engine can be refilled with fresh oil. Use a funnel to avoid spillage, and pour 7 litres of 5w30 oil into the filler. We’ll run the engine and check the level on the dipstick once the fuel system is bled.

Prime the system: The Td5 has a handy self-bleeding function for the fuel system, which you’ll need to run having changed the fuel filter. Switch the ignition on, then press and release the accelerator pedal five times until the engine light starts to flash. You’ll hear the fuel pump priming.
Make a note: While the fuel system primes, make a note of the date and mileage of the service, the filters and oils you’ve replaced, and any items you have noticed that need rectifying. Once the EML has stopped flashing start the engine, switch off, dip the oil and top up if needed.

Wheel inspection: For our final checks, we’ll inspect the wheels and tyres and take the wheels off to inspect the brakes properly. Check and adjust tyre pressures (28psi front, 38 rear on a 90, 48 rear on a 110), and measure tread depths. Rock and spin each wheel in turn to check hub bearings.

Pads and discs: Undo the five nuts from each wheel using a 27mm socket and an impact gun or breaker bar. Remove the wheel and check the inside of the rim for dents and damage. Check the brake discs for heavy lipping and corrosion, and pads for wear. Replace the pads at 3mm.
A closer look: Having the wheels off gives better access to things like the swivels, brake pipes and calipers. Check for leaks, corrosion and loose fixings, and rectify as needed. Once inspected, refit the wheels and torque nuts to the correct specification to your wheel type.
Hinges and catches: For the finishing touch go around the Land Rover and spray all the door hinges with silicone lubricant. Apply grease lightly to the check straps, and dab a smear on the bonnet safety catch and main latch and striker, shown. All done for another year.
DISCOVERY 2 Td5 SERVICE SUPPLEMENT

All the service points in the previous Defender-based service feature apply to the Td5 Discovery 2. But the D2 requires additional work, some of which is obvious, such as checking rear seat belts, lubricating the rear door locks and catches, and in the case of an auto, using the specified automatic transmission fluid. Others, including ACE and air suspension, need special mention to complete your Discovery 2 service. Ed Evans explains...
Active Cornering Enhancement (ACE)
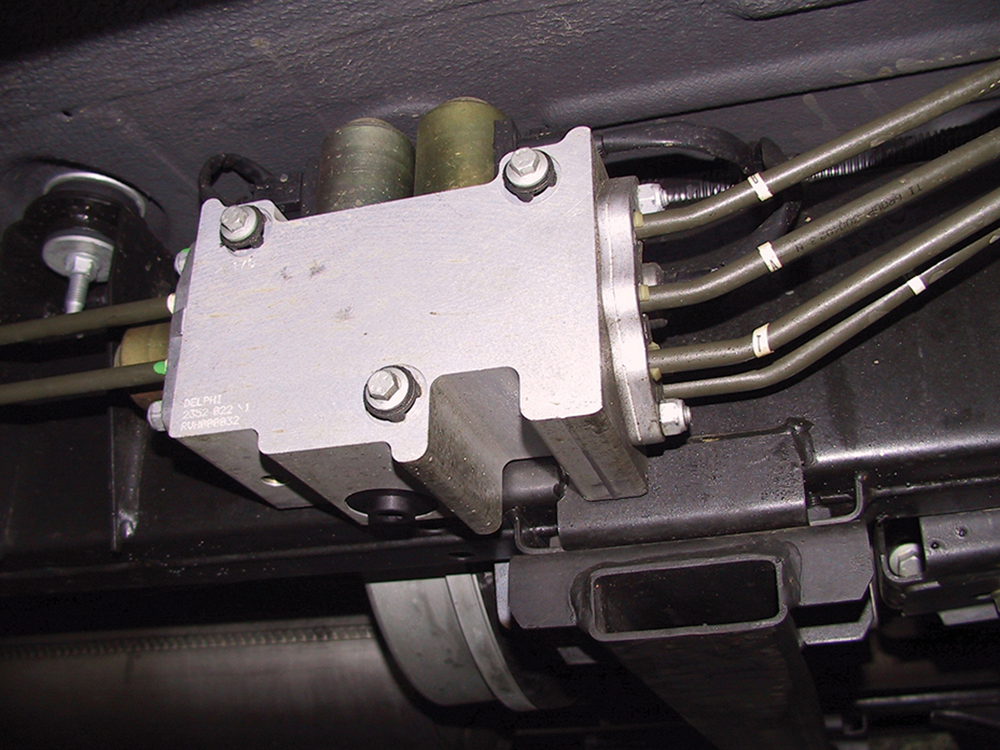
Valve block: On the right-hand side of the chassis, lightly clean dirt from pipes and flange nuts, and lubricate to prevent corrosion. Remove mud between valve block and chassis.

Filter swap: Replace the ACE filter every 75k miles. Thoroughly clean the underside, then remove the plug. Screw an M6 bolt into the base of the filter to pull it out.

Part RVJ100010: Clean the seal recess in the block, clean the plug and fit its new seal. Push the new filter in and refit the plug. Check the fluid level.

Leaks and corrosion: Inspect the ACE flexible hoses and pipes, rubber gaiters and screwed fittings. Apply oil to rusted connectors and fasteners to preserve. Check for play in roll-bar links.
Engine

Warped? Look for soot traces along the top of the exhaust manifold, indicating a warped manifold and broken studs. This one is advanced. This is less common on Td5 Defender.

Oil: After draining the oil, sniff it. If you smell diesel, it’s likely to be leaking in past defective injector seals or, less likely, a cylinder head internal crack.
Underside
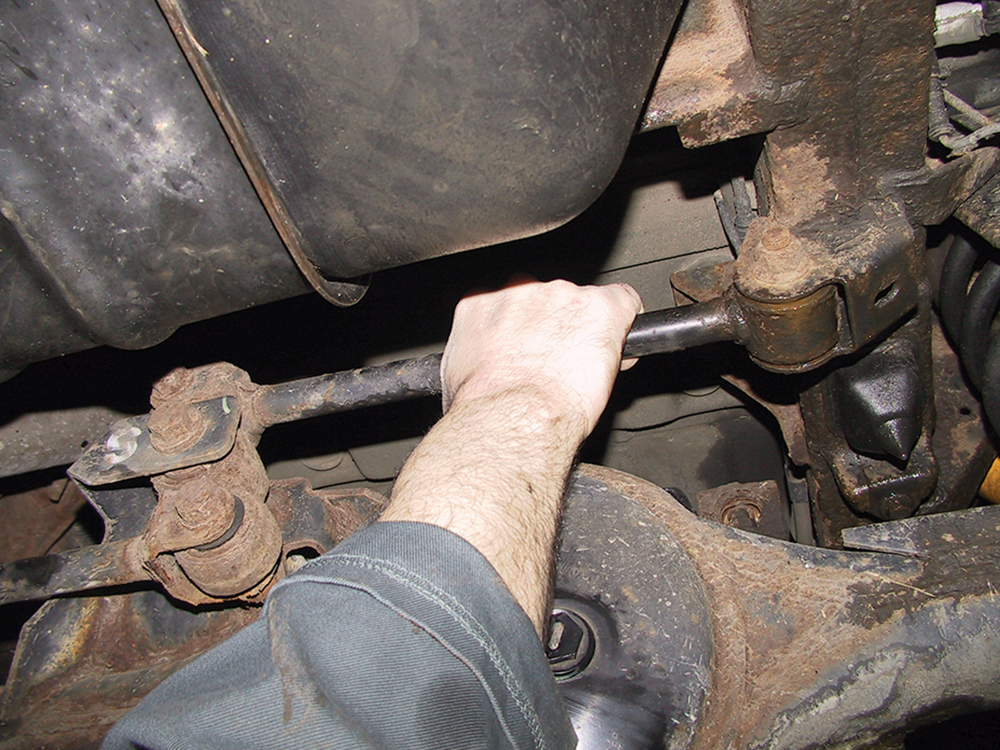
Watts linkage: This linkage controls lateral location of the rear axle in respect to the chassis (similar function to the front Panhard rod). Check all bushes for loose movement.

Air ride: On models with rear air suspension check the integrity of the height
sensor fasteners and joints; look for signs of splits and abrasion on the air springs.

Front axle: Test the front hub upper and lower ball joints (no swivel housing) for play using a pry bar, and check the condition of the axleshaft rubber gaiters.

Chassis: Monitor the chassis for corrosion around and rearward of the tow bracket forward mountings, and around the rear damper upper mountings. Tap with hammer to detect thinning from inside.
Outside

Wheels and tyres: Before refitting alloy wheels, clean the hub spigots and wheel centres and apply anti-seize grease. Tyre pressures are the same as the 90: 28psi front, 38 rear.
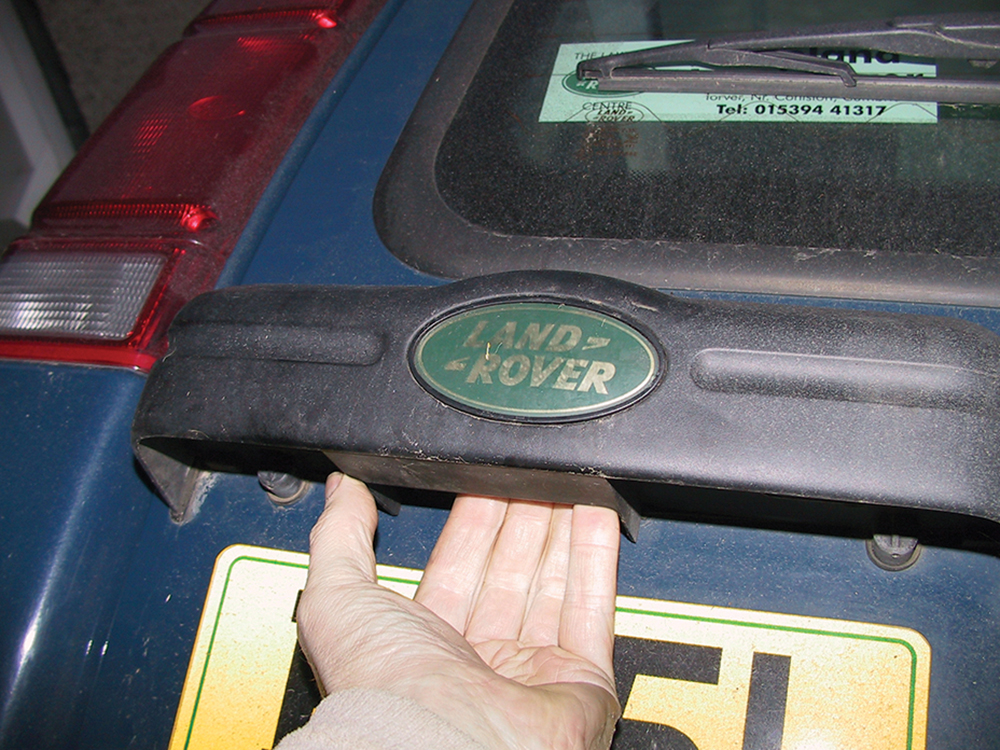
Tail door: The latch release mechanism inside the door handle cowl tends to corrode and seize. A regular spray of WD40 will ensure the door always opens. Lubricate hinges, too.
Like to have your own Land Rover library?
Try our Budget Digital Subscription. You'll get access to over 7 years of Land Rover Monthly – that’s more than 100 issues plus the latest digital issue. All issues are fully searchable so you can easily find what you are looking for and what’s more it’s less than 10p a day to subscribe. Click here to find out more details and start enjoying all the benefits now.