


15 December 2022
|
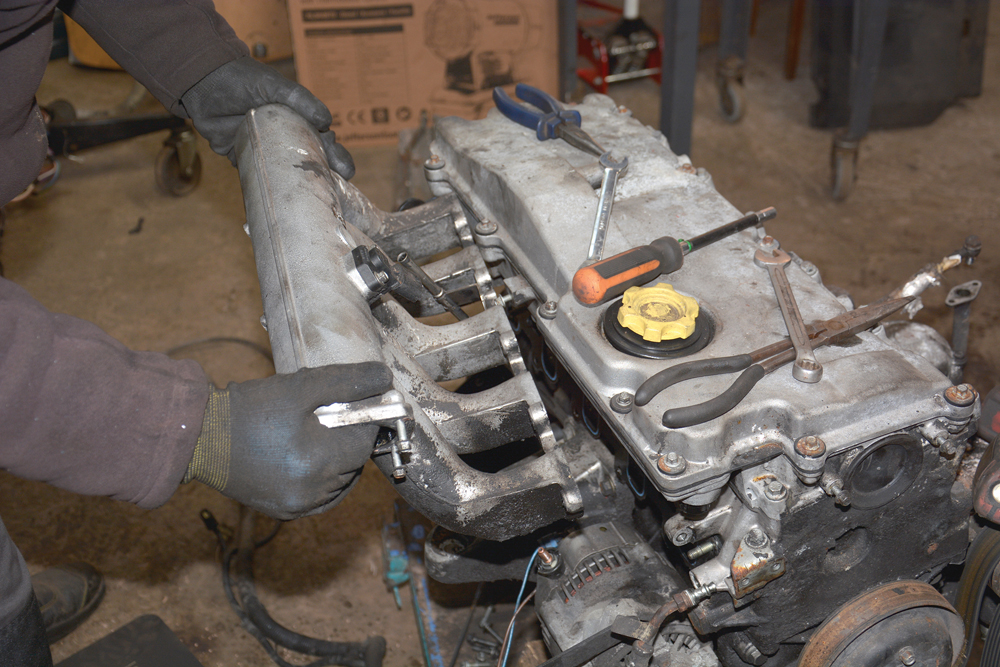
 Disco Td5 donor engine is prepared for it's new place in our Defender
: credit: © Trevor Cuthbert
Disco Td5 donor engine is prepared for it's new place in our Defender
: credit: © Trevor Cuthbert
Trevor checks and improves the Td5 Disco donor engine for his Defender 110
Need to know
Time: Around 4 hours
Cost: £102
Difficulty:
Models: Td5 Defender and Discovery
Tools needed: Engine stand, engine crane, torque wrench, general workshop tools – including socket set and spanners, bolt-grip set (rounded bolt extractor tool).
Parts & costs, all sourced from BLRC Ltd: Engine glow plug x4 (ERR6066), £4.50 each; intake manifold gasket (LKJ00010), £11.69; water pump OEM (PEM50040), £45.74; crankshaft oil seal (LUF100420G), £15.19; sump gasket (LVF500040), £8.95; oil pump pulley bolt (LYP101400), £2.33.
Work safely:
• Engines being worked on after removal from the vehicle should be safely supported and prevented from rolling or tipping, preferably using a purpose-made engine stand.
• Wear eye protection when cleaning dirty components.
• Wear protective gloves.
• Wear safety boots or shoes, given the weight of the engine units.
Contact: BLRC Ltd blrcvehiclespecialist.co.uk Tel: 02897 511763
The story so far: After a customer bought the battered body sections from this 110 Td5 hardtop, Trevor ended up with the remains including the wrecked engine and gearbox, rolling chassis, bulkhead and one wing. This near basket case was assessed (see part 1) in the best manner possible at the time and a plan of attack formed. But then the plan went pear-shaped when a detailed examination of the stripped down chassis proved it wasn’t worth repairing (part 2). The answer was to build the suspension and axle components onto a new galvanised chassis (part 3). This time, it’s the turn of the donor engine.
A key reason my Defender 110 was parked up and eventually robbed of body panels was because the 10P-type Td5 engine was in bad condition. This high-mileage engine had multiple issues, not least of which was a cracked cylinder head, resulting in engine overheating.
There are two types of Td5 engine. This earlier 10P engine was fitted to Defender and Discovery models from 1998 to 2002, when it was superseded by the 15P which had lots of improvements and refinements. While the 15P is less prone to cylinder head problems, they can still arise. But at least the cylinder heads do not move in relation to the engine block, because the earlier plastic locating dowels were replaced with rigid steel dowels.
Availability of replacement Td5 engines remains pretty good due to the continuing number of Discovery 2 vehicles that are beyond economic repair because of body and chassis rot. So the replacement of a bad Td5 engine can still be less expensive than repair or rebuild of the original unit.
In the case of my Defender 110, the route to getting back on the road was clear because of the availability of a known good 15P Td5 engine from a failed Discovery rebuild project.
Salvaging parts from the Defender’s old 10P engine
Taking an engine from a Discovery and dropping it into a Defender is a straight swap in terms of mounting locations, bell-housing bolt patterns and so on. However, the electrical systems on the Discovery engine are wired up differently, so the engine wiring harness routing is different. For example, the Engine Control Unit (ECU) is located to the front right of the engine in a Discovery (just behind the battery), while in a Defender the ECU is located under the right side front seat. This clearly means that the Defender’s original engine wiring harness would need to be retained to use with the Discovery engine.
There are other differences, such as the engine coolant hose routing and lengths, so the Defender hoses are transferred over, or renewed if they are perished. It’s also important to look out for little brackets, etc, that might be peculiar to the Defender engine, and differences to the fuel cooling system in certain instances.

Variations on a theme: The original 10P Defender engine on the left will provide some important parts to make the 15P engine from a Discovery usable in the 110 build.

Engine bay harness: The key component to run a Discovery engine in a Defender is the Defender’s original engine wiring harness. Other parts are more affordable to purchase.

Highly sprung: The ancillary belt tensioner is eased with a 15mm socket, allowing the belt to be slipped off over the pulleys. It’s sensible practice to fit a new belt.

Deleting air con: A shorter engine drive-belt will be needed anyway, because this air conditioning compressor is being removed, as the Defender is not fitted for air con.

Choose the best we have: In this case, the turbocharger from the 10P engine is actually in better condition than the 15P’s turbo, so we’ll fit that to the 15P engine.
The turbocharger can be checked by reaching in through its air intake and gripping the centre of the compressor impeller to determine how much axial movement is possible. There should be little or no movement – the more axial movement, the more worn the turbo bearings have become. Excessive wear could eventually result in an engine ‘run away’, where engine oil lubricating the turbocharger is drawn into the engine as ‘fuel’. The engine consumes its own engine oil and cannot not be stopped until the oil is all burned; the engine is destroyed.

Bolt-Grip to the rescue: There’s little space to access the turbo’s flange nuts and the heads are rounded, but this extractor tool just fit and gripped enough to get them moving.

Some are in tricky places: The exhaust manifold is removed after the turbocharger by loosening the M8 flange nuts, using a 13mm socket wrench and spanners.

Is it a good one? Whether the exhaust manifold has suffered the common warping or not, it is worth saving because the working face can be machined flat again.

Different versions: The 10P engine’s fuel cooler is released from the inlet manifold. It may be easier to connect on the 15P engine, as the Defender hoses will be fitted.
Keeping options open: Removal of the intake manifold will allow it to be properly cleaned and used on the other engine, assuming it proves to be in better condition.

Sorry state: The old 10P engine has three broken exhaust manifold studs (quite common), and the coolant channels are very silted up, based on what’s behind the oil cooler.
Preparing the 15P engine
The 15P was running perfectly before it was removed from the donor Discovery so, other than fitting the Defender wiring harness and coolant hoses, it should be good to go. However, there is no better time than while the engine is out of the vehicle for a thorough inspection and to replace ancillaries that are past their best.
As we’ll see, a few items were destined to fail in the short to medium term, such as an oil pump bolt that wasn’t very tight, a tired dual-mass flywheel and an elderly crankshaft oil seal.

Heater plugs: I’ll renew the glow plugs, using a 10mm deep socket to screw them out of the engine block. They rarely fail, but these are 17-years old now.

There’s always one! The last glow plug to be removed was seized, causing its hexagon head to shear off. Here, an M6 bolt has been welded on to aid the removal.

Brittle and cracked with age: The plug caps on the 10P engine harness that we’re using are cracked, so they’re cut off and replaced by the caps from the redundant 15P Discovery harness.

Grafted on: The plug caps are fitted using crimp connectors containing solder plus a shrink-sleeve protector – the application of heat melts the solder and shrinks the sleeve.

All sorted: All cracked plug caps have now been replaced with good ones. After carefully checking it over, this 10P harness is now ready to work on the newer 15P engine.

Playing safe: This coolant pump is probably the original and, although it looked in reasonable condition, a new OEM pump was fitted for peace of mind.

Wibbly wobbly: The dual-mass flywheel (right) had excessive axial and rotational play. It needs to be replaced. Here, the clutch is removed to access the flywheel bolts.

Vintage material: The date stamped on the back of the flywheel (late 2003) tells me that this (and probably the clutch) was fitted to the Discovery at the factory.
Crankshaft oil seal and oil pump bolt
Removing the sump (oil pan) from the 15P engine is now easy with the flywheel already off and the engine fully accessible on the engine stand. The sump needs to come off for replacement of the crankshaft oil seal because two rubber dowels on the sump gasket slot into the bottom of the oil seal assembly, keeping the gasket in line. The sump also needs to be off to check the oil pump sprocket bolt, which often worked loose and ruined early engines. In theory, Land Rover solved this problem – but is my oil pump bolt safe and secure? There is no better opportunity to check.

Oily mess: While there is no direct indication that a failed rear crankshaft oil seal has caused the leaks, it will be replaced anyway while access is easy.

Sump off: The sump needs to be removed (or loosened) to replace the crankshaft oil seal on a Td5, and fully removed to reach the oil pump sprocket bolt.

Partly drained: Every time I take off a Td5 sump, I am reminded that not all of the old engine oil drains out; there is always a fair amount left in the sump.

Aluminium housing: The rear crankshaft oil seal assembly is held to the block by a series of five M6 bolts. Here, they’re being removed using an 8mm socket wrench.

Break the seal: The gasket housing needs to be gently and carefully levered away using a blunt screwdriver, taking care not to mark or score the engine block behind the seal.

Keeping it in A1 condition: The new oil seal is supplied with a circular plastic insert which is left in
place to prevent the seal fouling when slid over the crankshaft end.

Job done: As the seal is pushed home over the plastic insert and onto the crank, the yellow circular piece pops free and is discarded in the recycling bin.

Critical bolt: The oil pump pulley bolt has been known to work free, particularly on earlier engines, and has wrecked many Td5s, costing huge sums of money.

Timely replacement: The oil pump bolt on the 15P engine was not very tight. It’s fortunate I opted to replace it with this new one, complete with thread lock material.

Refreshed and new: The sump is now fully drained and cleaned, ready to be refitted. First, the new gasket is carefully laid in place before the sump is offered up.

Torqued to 22Nm: The sump is first held in place with two bolts. Then it is bolted and progressively tightened from the centre, working out towards the front and rear alternately.
Coming in part 5: The 15P Td5 engine is well on its way to being ready. The final items will be fitted and then we will move on to fitting the new flywheel and clutch. The transmission, comprising the R380 5-speed gearbox and the LT230 transfer case will then be bolted to the back of the engine. With this work done, the engine and transmission combination can be set in place on the recently built rolling chassis.
LIKE TO READ MORE? Try our Budget Digital Subscription. You'll get access to over 7 years of Land Rover Monthly – that’s more than 100 issues plus the latest digital issue. The issues are fully searchable so you can easily find what you are looking for and what’s more it’s less than 10p a day to subscribe. Click here to find out more details and start enjoying all the benefits now.