


15 June 2022
|
 Now is the time to fix those old, leaky windows for good
: credit: © Alisdair Cusick
Now is the time to fix those old, leaky windows for good
: credit: © Alisdair Cusick
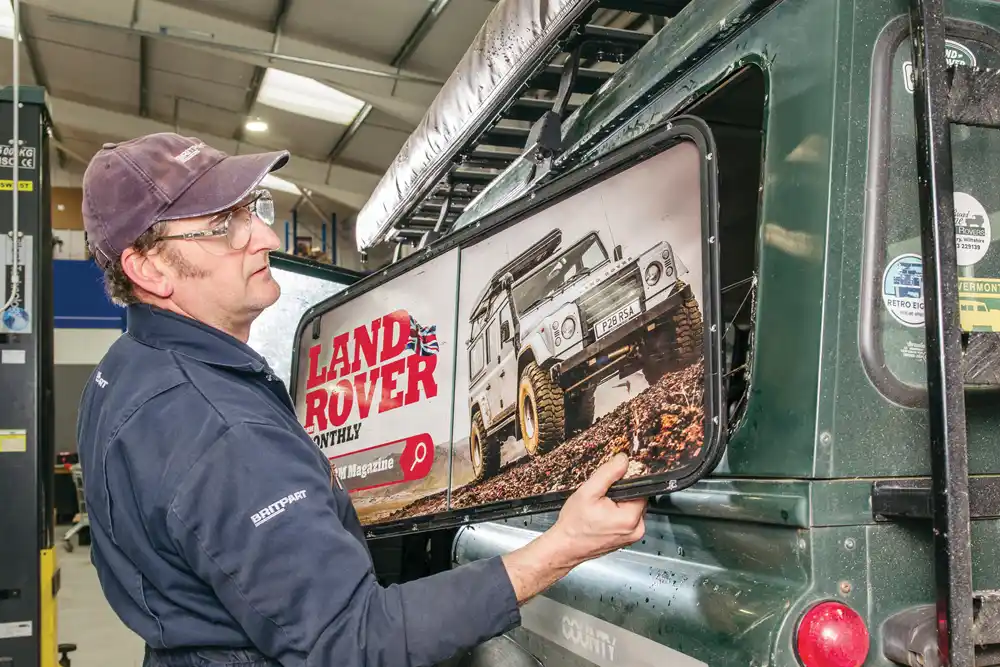
Replacing a Defender side window isn’t as difficult as you may think. Alisdair Cusick explains how to banish those rattling and leaking old windows.
NEED TO KNOW
Time: 2 hours
Difficulty: 3 out of 5 stars
Models: All Defender models.
Tools needed: Drill, rivet gun, plastic chisel/scraper, cloth, panel wipe, trim tools, caulk gun, skin pin and pliers.
Parts used: DA4033GREEN, £253.
Work safely:
• Be careful on sharp bodywork edges; wear protective gloves.
• Use the right tool for the right job.
• Always have assistance to hold window units in place when positioning on a vehicle.
• Store glass safely in the workshop.
Thanks to: Steve Grant and Britpart for their assistance with this feature, britpart.com
The rear side windows on a Defender can develop a number of issues as they age, from rattling glass to water leaking into the car. Failed individual components can be replaced within the window unit itself. But be warned, those fixes often involve removing the window from the vehicle and sometimes having to split the frame apart. There’s a balance to be struck between the amount of work involved in stripping and repairing the existing window, against simply fitting an aftermarket replacement window unit. It can make sense to simply replace the whole thing with a new part and be done with it.
If your truck is historically significant, then you’ll want to try and chase down replacement parts, fastidiously getting everything just right in the existing unit. For the majority of trucks, that could have one of many types of factory or aftermarket origin side window units taking in a 30 year time span, modern replacements are a no-brainer, and they are the go-to fix. They drop straight on, and in one go, everything is new on the window again.
It isn’t a tricky job, but we’re dealing with bodywork, so any mistakes will be visual, and can be hard to correct. The key points to watch out for are to remember not to enlarge the fixing holes, nor drill new ones on the edge of the bodywork. Both errors are easy to avoid. The other vital thing to be 100 per cent certain about before you order new windows, is to check if you need tinted glass and, if so, what colour.
As I always like to say in LRM technical: if you understand the process, and take your time, you can do this, too. Britpart’s Steve Grant shows us how he goes about the job, on editor Patrick’s 1998 110.

Get the correct side: Offer the new window up to the existing one. Ensure you have the correct unit for that side. Note our original window has a graphic sticker on it.

Start the job: Steve starts by removing the rubber seal around the window edge. It simply pulls out, and reveals the line of rivet heads holding the window on the car.

Out they come: The rivet heads are drilled off, avoiding enlarging the existing hole in the bodywork. There may be various size of rivets used if your window has been out previously.

Free it: Supporting the window at the top, Steve carefully eases the unit away from the body. Avoid scratching the paint. The aim is to break the hold of the sealant.

Window removed: The window can then be removed from the car. This silty water trail tells us there’s been a long term leak here. The sparse sealant is the culprit.

Old and new: New replacement window against old. Check again that you have the correct side: usually the latch sites at the top, otherwise the window opens the wrong way.

Cleaning the holes: The holes are cleaned very carefully with a drill. You want to remove the rivet without touching the body. Do not enlarge the hole, nor damage the interior panel.

Clean the face: Steve uses a plastic chisel to efficiently scrape off the majority of the existing sealant. Don’t push too hard as to scratch the paint or bodywork.

Chemically clean: Panel wipe, sprayed on a cloth, then cleans off any residue. This is important, as you want the new sealant to adhere to the body, and not allow gaps.

Check the rivets: Size the new rivets to the existing holes in the body. Here, this hole has already been enlarged by previous work. Use a larger rivet if so.

Trial fit: Dry fit the new window. Holding the window in, Steve uses a fingertip to judge edge fit. Gaps mean the body aperture needs to be gently pulled straight.

Magic trick: Steve uses skin pins to temporarily hold the window on the car. These are a mechanical bodywork fixing that is removable, commonly used when welding.

Dry fit: With two skin pins at the top, the window is held in position. Unlike a conventional rivet, skin pins allow adjustment if you aren’t happy with the fit.

Go for it: Confirming the window fits well, Steve removes it and applies PU sealant to the window frame lip. You need enough to seal without gaps, but not too much.

On it goes: The window then goes onto the car, held in place with four skin pins. Adjust until positioning is spot on. We’re about to fix it in place - permanently.

Drill new holes: Steve had already noticed the fixing holes are in a different place. New, correctly sized ones are drilled, avoiding damaging the interior trim panel.

Fix in place: Rivets are then fitted to fix the window tightly and permanently on the car. Sealant should ooze out slightly from the frame as the rivet pulls tight.

Clean back: There are two ways to remove excess sealant. Here, Steve uses panel wipe on a clean work roll to wipe away the excess. It takes time and lots of blue paper roll.

Second way: Alternatively, use a plastic scraper to neatly scrape away the sealant. You want to push sealant into the joint, not be digging it out when using this method.

Gap check: Inspect the edge closely for any sealant gaps. They can occur. Simply fill in with more sealant to that area, and scrape the edge again, like Steve does here.

Finishing touches: The line of exposed rivet heads need covering. Fit the rubber trim seal, starting at the bottom in the middle. It simply pushes tightly into the channel.

Don’t cut it short! Trim the end to fit. Steve’s top tip is to allow a good length of excess, push the ends flush then lose the excess back around the seal length.

Admire the job: Job done. One Defender looking super sharp, leak- and rattle-free. There’s just the other side to do. A cup of tea before that one though.
No windows, but want to fit them?
If you have a hard top Land Rover and want to fit side windows, the fitting process is obviously the same, you’re just missing the hole in the bodywork. This can be cut a number of ways, but accuracy is paramount. Some windows come with templates, but don’t discount the option of fitting take-off side panels already fitted with side windows.
For more great how-to instructions and advice, go to our technical section here.
Budget Digital Subscription
Get access to over 7 years of Land Rover Monthly – that’s almost 100 issues plus the latest digital issue. The issues are fully searchable so you can easily find what you are looking for and what’s more it’s less than 10p a day to subscribe. Click here and start enjoying all the benefits now.