


09 December 2021
|
 Improve the heating in your Defender
: credit: © Alisdair Cusick
Improve the heating in your Defender
: credit: © Alisdair Cusick
Being warm in a Defender needn’t rely on a four-season sleeping bag. Alisdair Cusick looks into fitting a diesel heater to banish chills for good
The cabin heater in a Defender doesn’t have the greatest of outputs. Working off the engine coolant, it’s only at working temperature when the engine is fully warmed up and running. If your Defender doubles as a camper or overland base, then you’ll need a better heat source than the standard system, which is where auxiliary diesel heaters come in.
Popular in camper conversions, and similar in principle to the gas powered systems used in motorhomes for years, their small size belies the heat they produce. A compact 2kW heater can provide 86 cubic metres of warmed air per hour: more than ample to heat the relatively small cabin space of a 110.
With the majority of Defenders running on diesel, most (but not all) installations simply tap into the host vehicle’s fuel tank for an ample fuel supply.
One brand catering for the Defender market is Wrexham-based Autoterm UK, retailing their Russian-made heaters. With silent fuel pumps, brushless fan motors and a three year warranty, they are used by the Russian military in vehicles operating down to -50˚C. For a Defender, they recommend a 2kW unit, as the harder the heater works, the cleaner it runs. I visited Autoterm to see their fitters, Gareth Story and Mark Law, fit a 2kW system to LRM editor Patrick’s 1998 petrol-engined 110.
Not got a diesel engine? Don’t worry
Most Defenders are diesel models and so the fitters tap into the vehicle’s existing fuel supply using a T-connector in the fuel line on simpler engine systems or, more usually, tapping directly into the fuel tank for a feed.
With a petrol vehicle, like this BMW 2.8 petrol engined Defender (or V8s), a small additional diesel tank is fitted. The mounting, size, and visibility of this tank is totally up to the individual, and may depend on the vehicle’s intended use and/or body design. Fairly obviously, safety concerns abound around fuel, the heater, and exhaust gases from the heater. If in any doubt, use an expert, like Autoterm UK.
Fitting

The kit: This is the supplied heater kit. Clockwise from top: fixings and brackets, heater body, fuel pump, and wiring and piping. In our case, we need a diesel tank, too.

Making space: The heater typically mounts between the front seats. It doesn’t have to, though. In our case, the first job is to remove the centre cubby box.
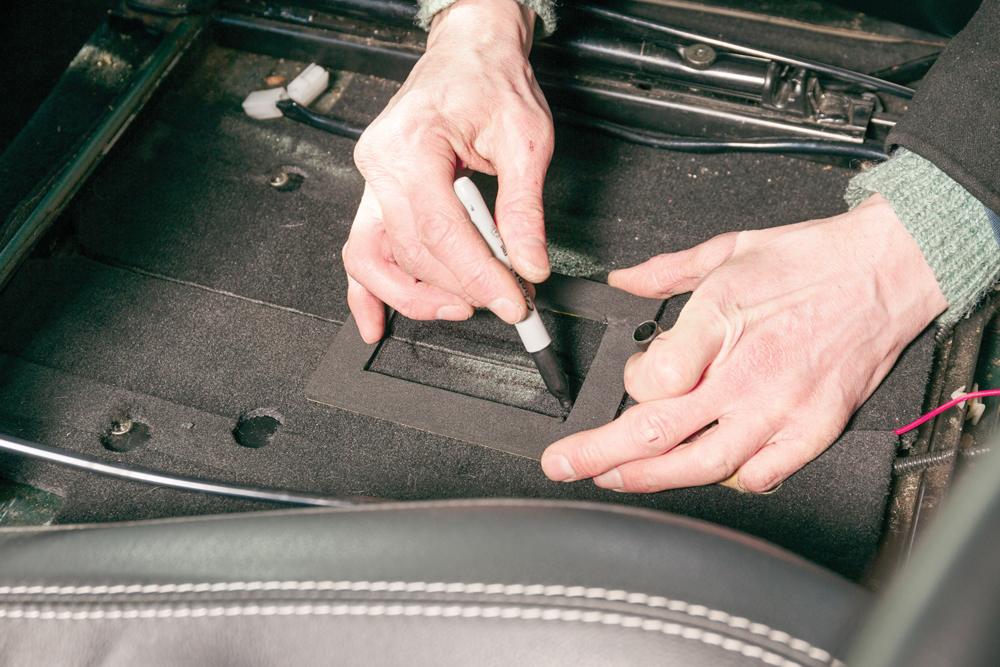
Pipe routes: The heater body needs pipework feeds for its inlet and exhaust. Gareth measures, then marks the centre panel where this needs to be.

Check before cutting: After checking the area for fuel pipes, wiring or anything else that may be damaged or ignite, Gareth forms the aperture for the pipes using a cutting disc.
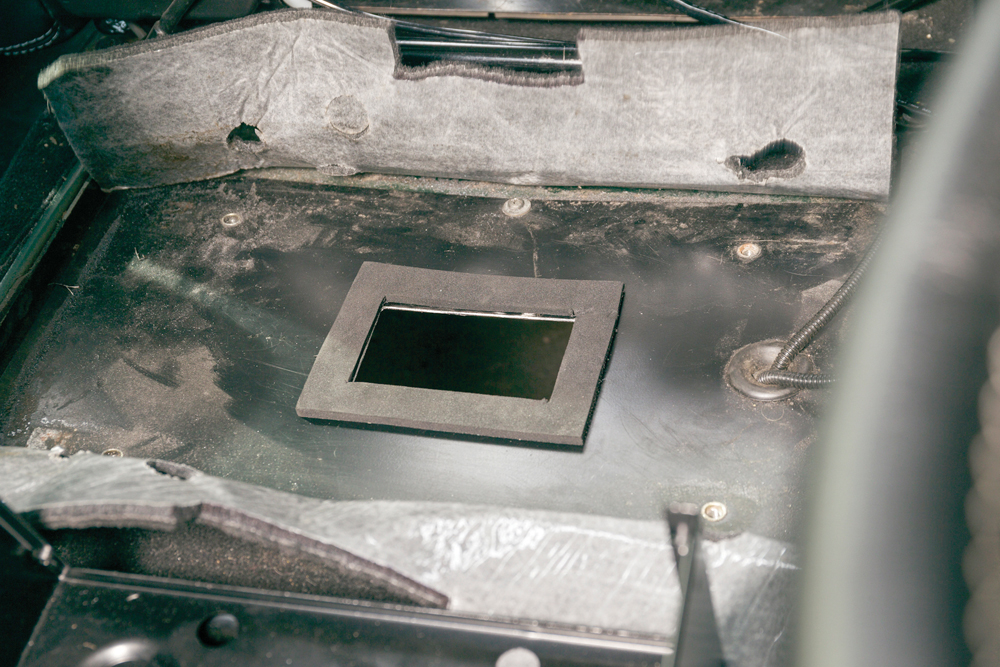
Made to measure: The carpet is trimmed, panel edges cleaned with a file, then the foam gasket is stuck in place. It is imperative no exhaust gases can enter the cabin.

Base assembly: The heater unit will mount on this inverted MUD UK heater box, to which Gareth attaches the intake and exhaust pipes, and fuel pipe. Exhaust (centre) is insulated.

Into position: The various piping is fed through the new body aperture, then fixed into position, taking care not to pinch, chafe to twist any of the pipework.

Wiring up: The wiring in the kit fits many vehicles. Fitter Mark trims the controller wiring to suit the Defender, then splices in the controller plug using heat activated solder connections.

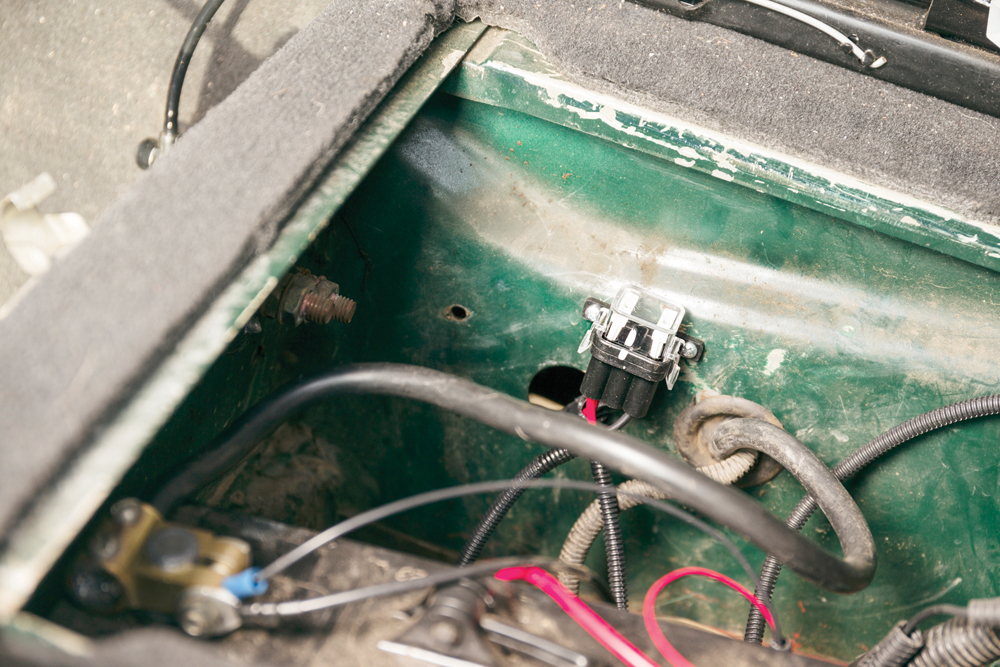
Top tip: The fuse and battery cables feed into the battery box via an existing body aperture, but are left disconnected, out of harm’s way. Never work on a live system.

Fuel tank: Our petrol Defender needs an extra diesel tank. Fitter Mark questions Patrick on how he uses the car, then works on fabricating an unobtrusive mounting solution.

Neat fit: The 7-litre tank is mounted in brackets using existing holes on the interior, and the fuel line exits via a hole drilled in the wheel box, routing under the car.

Thoughtful routing: The nylon fuel line will be sheathed for protection and routed to avoid damage from chafing, pinching, vibrations and off-road crud.

Fuel pump: The pump is mounted on an existing chassis bracket, out of the way. The fuel lines are connected (inlet and outlet), using rubber hose and fuel line clips.

Wired and protected: The pump connector is wired up using heat activated solder joints, then additional protective heat shrink sleeves. (Tape can attract then trap water, rarely drying fully.)
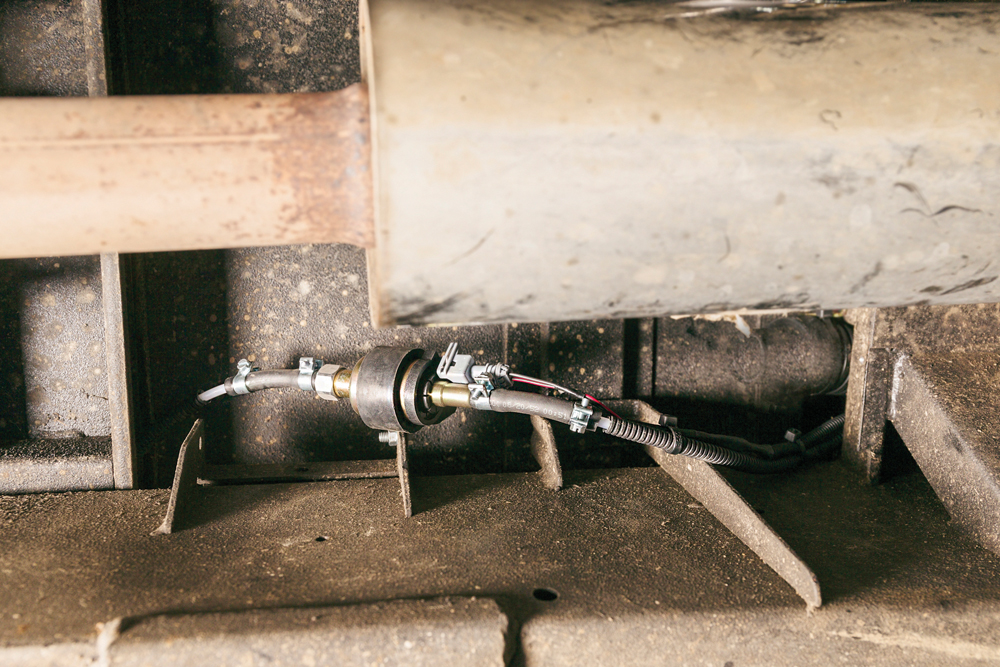
Proper job: The end result is a neat job, well protected from water ingress. Just visible is the heater intake, positioned facing backwards, too, for water ingress reasons.

Inlet, outlet: The new heater’s exhaust pipe must be routed away from the intake, for obvious reasons. This small silencer on the exhaust is screwed to the crossmember for support.

Back in the cab: The top cover of the heater box has the control wiring threaded through, with a grommet for protection, and the cubby can be fitted to the top.

Assembly begins: The front vent panel of the heater box is fitted. Care is taken not to pinch any wiring, especially the OBD diagnostic cabling for the engine ECU.

Connect it up: The controller wiring is connected, then the cubby box is refitted to the heater box without nipping any cabling. If in doubt, cable tie it out of the way.

Load of hot air: Ducting is fitted to the warm air outlet through the rear of the heater box. It’s longer than needed, so will be trimmed to fit, but not just yet.
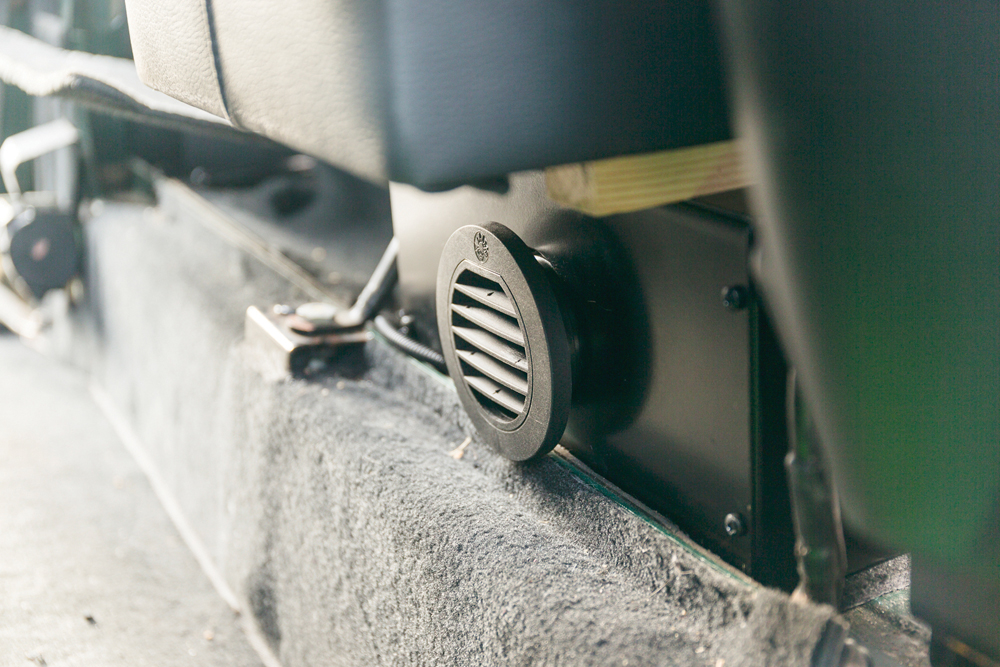
Directing the flow: The vent is trial-fitted, and ducting trimmed to suit. In a bodied camper conversion, you may want longer ducting to direct the flow to vents around the interior.

Control panel: Spend a little time thinking on the best position for the control panel. Pat opts for the front of the cubby. A hole is drilled, wiring is fed though and connected.

Safety check: Fitted, but minus power, the whole system is given a check over. When satisfied all is correct, only then is the heater connected to power at the Defender’s battery.
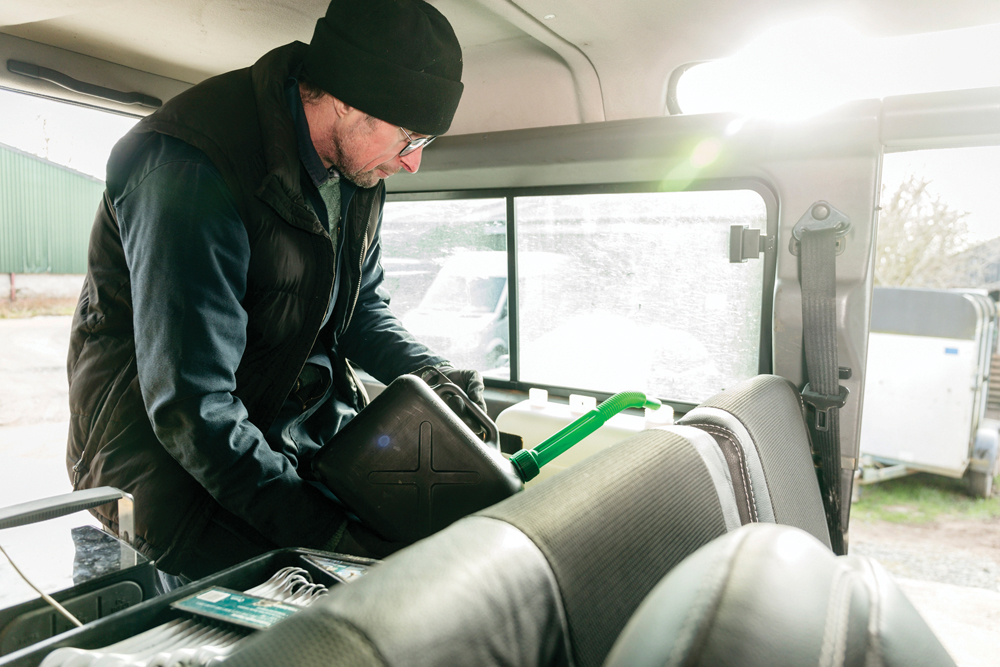
Go juice: In our case, we need to put some diesel in the heater’s tank. On a diesel vehicle , you’d normally be getting fuel straight from the vehicle’s fuel tank.
Vital fuse: Only now is the vital fuse inserted, and then the system has everything it needs to run. It should boot up, and the fuel system self-prime with diesel.

Hot machine: Finished – the time is set, and the system turned on. After a few minutes, the pump comes to life and hot air streams out.
See more helpful technical advice from our team of experts here.
Budget Digital Subscription
Get access to over 7 years of Land Rover Monthly – that’s almost 100 issues plus the latest digital issue. The issues are fully searchable so you can easily find what you are looking for and what’s more it’s less than 10p a day to subscribe. Click here and start enjoying all the benefits now.