


09 October 2021
|
 Looking for leaks
: credit: © Alisdair Cusick
Looking for leaks
: credit: © Alisdair Cusick
Utility Land Rovers are well known for letting in water, but they can be made totally watertight. The first job is to accurately identify the leak paths, as Alisdair Cusick explains
Time: 30 minutes
Difficulty: 1 out of 5 stars
Models: Defender, Ninety and One Ten, Series models.
Tools needed: Hose pipe and spray nozzle.
Thanks to: Steve Grant and Britpart
We all know the symptoms: opening the door, the car smells a little musty. After a few minutes driving the windows start to mist up, only it isn’t raining. After a sudden downpour when the truck is parked, we notice the windows are suddenly misty. All of these subtle pointers evidence the fact there’s water inside our Land Rover. The problem isn’t specific to the Defender and pre-Defender Ninety and One Ten models; Series Land Rovers have similar issues and much of this feature is relevant to them, too.
It is an old joke, and an ever-present issue throughout Defender and earlier production, that water will find its way inside the cabin. Principally, this is down to the design based on many separate body panels requiring joints that have to be correctly sealed to be watertight. When you realise that body joints can be up to 10 mm apart, it’s obvious there’s ample potential for water to enter the interior.
Sealing methods
Typically, joints are sealed by rubber strips, either fixed in position where panels fit together, such as bulkhead to screen seals, or door seals which fit to one side of an opening and work by creating a pad for another panel to push against. Some joints additionally use sealant to keep moisture out, like windows and roof joints. Sealant needs to be gap-free to be water tight. Equally, for a seal to work, the rubber needs to be plump and under pressure. Aged rubber can dry out, crack and shrink or compress from memory, allowing water to ingress. So the weather seals have a relatively finite lifespan. The factory also used Dum Dum putty, and butyl patches. These age too, and can be missing if panels have been separated in the past.
The fixes
Locating, curing and preventing further leaks in your Defender needs no more than a weekend. Many seals identified as having failed can simply be removed and replaced. Larger panel joints will entail more committed approaches. A roof, windscreen or hardtop may need to be separated or even removed if it’s necessary to replace a seal between panels. If the majority of a seal is in good condition it may be possible to effect a repair using a suitable sealer. We’ll come on to this in the second part of the feature, but this month we’re going to look at how to locate the sources of the leaks.
There’s a caveat before we start, in that we’re dealing with rubber seals allowing water ingress. We assume the bodywork of the vehicle to be in good, solid order. There’s no point investigating leaks if there is corrosion in panels, poorly-executed repairs or misaligned bodywork. If you have any of those, congratulations – you’ve probably found your leak source!
Rain, condensation or coolant?
Water in the vehicle comes from three sources. We know about rain, but any bare metal surface, such as a roof, allows condensation to form. If left in suitable conditions, and for long enough, large volumes of water can accumulate, eventually running down roof pillars and silently soaking into carpets. You can identify this as a source by removing an interior light to get a finger behind, feeling for a sweaty metal roof interior. Coolant can leak from a failed heater matrix, but coolant feels sticky, is coloured, and typically has a sweet odour. In this two part feature, Britpart’s Steve Grant show us how to identify failed seals, then how to deal with issues found.
Where to start and what to look for

Sound structure: We’re looking for failed seals, not rust. Corrosion like this is a bigger problem than malfunctioning body seals. A solid car is the base we want.

Classic example: This is typical of how an aged seal fails, seen on a 1990 Tdi windscreen. The rubber dries out, shrinks or splits, and eventually allows water in.

They all do it: Any rubber seal can have the same issue. Note the rubber splitting along the side window. If the drains clog, too, water invariably finds its way inside.

Panels, too: Panel joints can also fail, as can corroded rivets. The rear waist seals here are ageing, but may not even be present if a car has been modified.

Hot tip: The heater intake has a drain, low down by the heater assembly. If this blocks with crud or leaves, water can be drawn into the heating system.

Flow chart: Look at how water flows off the Defender. Large volumes flow over the screen and down the A-pillar. A defective door seal allows great volumes to enter here.
Liquid diagnostics

How to do it: To check, spray water over the bodywork. Use a wide sprinkle to mimic falling rain, not driving water. Allow time for it to flow over the car.

How not to do it: Here’s what we don’t want to do – never aim a forceful jet square on to the joints. This can drive water under pressure past even brand-new seals.

One exception: The one place to spray a jet is on the front face of the car, mimicking driving rain. Even then, be sensible. You’re wetting down, not power washing.

Look inside: Check around the interior for any evidence of water tracks under windows, or staining on headlining and carpets. Have a good sniff, too. Does it smell damp?
Aged, damaged or missing?
We’re looking for evidence and locating any seal that leaks. If we can then identify whether it is repairable or needs replacement, then even better. Here’s the process of what to look for, using editor Patrick’s 110. He’d been complaining of wet carpets and steamy windows, but a sniff inside immediately told me there was definitely damp inside the car. Britpart’s Steve Grant walks us around the job.

Bulkhead exterior: Bulkhead to screen seals can perish, as can the screen bracket gaskets. Vent seals also fail, but many owners simply don’t close them far enough.
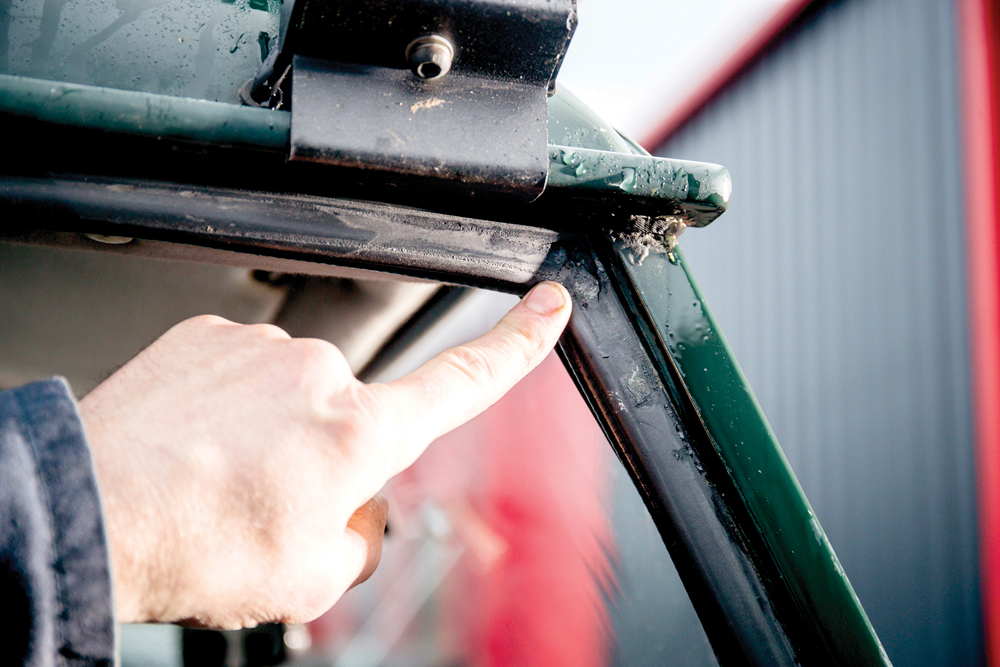
Main fail point: This joint is the classic water leak. Check the roof to screen seal is present, complete, undamaged, and the door seal isn’t split. Evidence of previous bodges is common.

What was I saying? Pat’s imported South African vehicle has foam seals crudely taped to the door skins, possibly for dust prevention or failing factory seals. This trapped debris won’t help.

Eyes higher: Inspect roof joints and headlining. Roof joints can gape, allowing water ingress. If so, they can be sealed, then tapped closed, forcing sealant in.

Splits or tears: Check each seal for splits or tears. Common damage occurs to the waistline area, but can appear anywhere. How can a seal work if it doesn’t have a fixed location?

Roofline: The sealant in the roof gutters can crack, especially if a roof rack is fitted. The volume of water collected here means the slightest crack draws fluid inside.

Check the joints: Underneath the seals, butyl tape should bridge the panel gaps. This can crack, dry out or migrate under pressure. If panels have been apart, it may be missing.

Window pain: Side window drains can block and channel seals crack, allowing collected water to enter the cabin. These vertical seals are shot, but the horizontal ones crack, too.

Look inside: Check the cabin for evidence such as stains, mould spots or damp carpets. This staining under the window tells us we’ve had a leak for quite a while.

Lift the bonnet: Look at the wiring grommets and pedal box gaskets. Splits here can allow water in, not to mention the potential danger of electrical issues if left unchecked.

Bonnet, too: Even the bonnet has a seal, on the bulkhead. If missing or damaged, water can stream down the front bulkhead face. Later Defenders also have wing seals.

Look closely: Having wet the car, inspect the interior for water trails, then identify the source. This drip is from a vent seal. Be aware, opening doors will allow drops in.

Check small areas: Don’t be afraid to re-soak localised areas with an assistant watching. Here, Steve soaks the pedal box area to locate water running off the clutch pedal.

Jackpot: Soaking the pedal box showed no water. But wetting the bulkhead vents gave a steady drip onto the pedal again. An assistant is useful, and plenty of light.
Verdict
Steve finds that Pat’s roof edges have slight cracking in the sealant, but are deemed okay. The under bonnet area is confirmed water tight, as are the body waist seals, alpine lights and windscreen seals. The door seals are all judged as needing replacing, along with leaking vent seals and the rear door seal.
The side window rubbers are perished, but Steve suspects the frames may be leaking, too. Side window leaks present a choice. It is possible to replace individual sliding window components, but to do this you need to identify the exact model of window, then the part. Often, this work entails removing the frame from the car. The work and cost involved in that needs to be carefully considered against simply replacing the whole unit with a new aftermarket window.
Sealing the leaks
Having now seen the effective ways to trace water leaks back to their source of ingress, Alisdair will next be looking at the best ways to seal the leaks, and finding its not necessarily an expensive or complicated job, too.
Budget Digital Subscription
Get access to over 7 years of Land Rover Monthly – that’s almost 100 issues plus the latest digital issue. The issues are fully searchable so you can easily find what you are looking for and what’s more it’s less than 10p a day to subscribe. Click here and start enjoying all the benefits now