


04 November 2023
|

Jake Shoolheifer explains bearing and oil seal replacement in the Series I rear axle
Need to know
Time: 2 1/2 hours
Difficulty:
Models: Series One (with the exception of a few very late production vehicles).
Tools: Scotch Brite, wire wheel, tall hydraulic press.
Work safely: Wear eye protection when using a hydraulic press and keep your hands away from any pressing surfaces.
One of the biggest changes between the Series I (except for a few of the last built) and any later Series vehicles, was the move to a fully floating-type rear axle. What does this mean? On later Series vehicles, the front and rear hub units are identical. The hub itself is mounted via two bearings onto a large stub axle bolted to the axle case. This means that the entirety of the vehicle’s weight is being supported by two bearings per corner, and the axle shaft ‘floats’ in the axle case with no stress acting upon it besides the torque of the engine.
Series I models (except some very late production vehicles) have a different back axle system. This is a semi-floating design, which means that the axle shaft also supports the weight of the vehicle. It is a simpler design with fewer components, but it has big drawbacks. Serviceability, replacement cost and safety are the biggest issues of this design, but these axles have their upsides and are a well proven, time-served design used by many manufacturers of the period. The axle bearings are really big, and in most cases have lasted 70-plus years. By now though, and with many showing their age, it’s time for a replacement.
Replacement parts are reasonably readily available to rebuild this type of axle, but are expensive in comparison to a later axle rebuild. Possibly the biggest issue with the rebuild is the bearing retaining collar. This collar is all that keeps the axle shaft attached to the vehicle and, if it fails, the wheel along with the axle shaft and brake drum can creep out of the side of the vehicle leaving it entirely brakeless and without a wheel. Although this is not hugely common, it is a more regular occurrence than you may think. Other marques using a similar design can also see these failures, so it’s not unique to Land Rovers.
Bearing supply for these axles is pretty good. Suppliers including P A Blanchards and Dingocroft supply good Japanese bearings, and genuine SKF bearings are also available (part numbers 07296 and 270604). But if you are based in an area with less than readily available Land Rover spares, there is a common part number with units found on V8 Fords from 1948-1970 and Ford F-series trucks from 1948-1956.
When replacing bearings, you will need to replace the retaining collars, as these really are one-time use only. You will also need a new oil seal. Before ordering parts though, you need to check your halfshafts are worth rebuilding or whether it is best to find another replacement set.
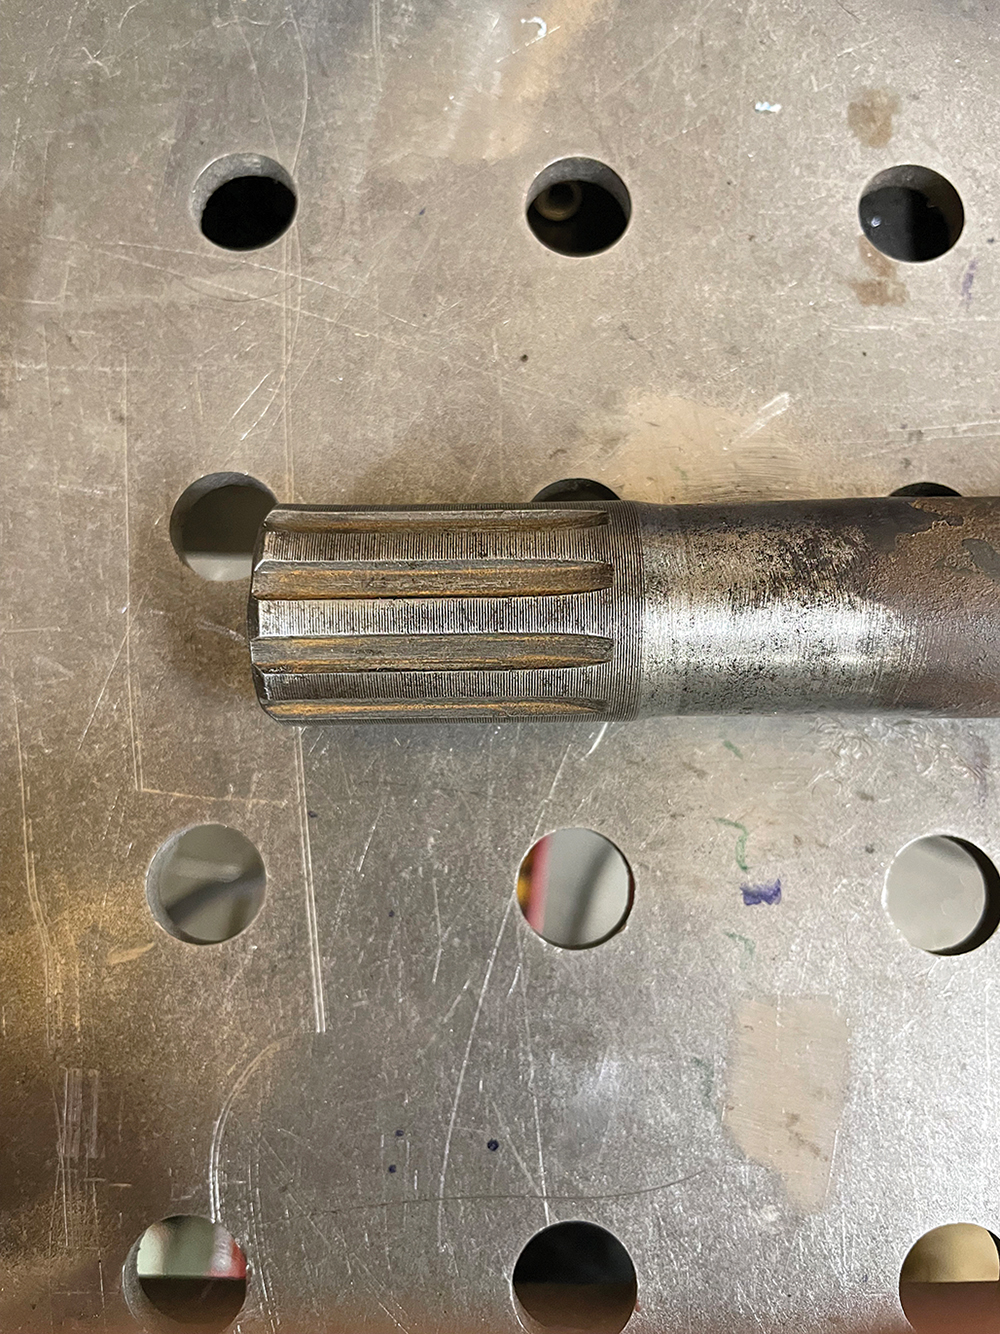
Check first: One of the most important things to check before rebuilding a halfshaft is the state of the splines and the studs – you don’t want to spend a lot of money replacing bearings to then find the halfshaft is weak or will later cause issues.

Damaged: This halfshaft, although not showing much wear in the splines, is definitely beyond the limit of what should ideally be re-fitted to a vehicle.

Original kit: The press we use is a factory tool and is very simple, relying on a large screw and breaker bar to separate the axle components inside the tube. It pushes on the end of the halfshaft and will release bearings that would otherwise max out our 15-ton press. Obviously, not everyone has access to this, but commercial vehicle or agricultural engineering workshops can usually do this job.

Pressed out: The flange of the bearing housing is bolted to the rear flange of the press here, with the halfshaft extending towards us inside the tube of the press. The threaded screw is turned using the bar, forcing the halfshaft through the bearing housing until the collar has popped off the halfshaft. Sometimes they go with a big bang and then they’re off, but others will fight all the way.

Bearing removal: With the collar and bearing separated from the halfshaft, I can now carry out any work needed to the individual components. A lot of degreasing is required before beginning the job. Here, I’m forcing the bearing, seal and seal housing out of the bearing housing using the hydraulic press with a suitably sized mandrel inserted into the bearing housing.

Clean-up: With the parts degreased, I can clean and remove the rust off all of the components. I use mainly a wire wheel and Scotch Brite to do this, which cleans the parts up really well.

New seal: I can now press the new seal back into the oil seal sleeve (or housing). The seal presses into the half with the deeper recess, with the front face of the seal up against the housing lip found running circumferentially around the inside of the housing.

Technique: These seals can be tricky to press in squarely, so I place the housing onto the seal in the press and then press down on the housing. To get the seal in the last little bit, I use the old seal (seen here on top) as a press tool to help push the new seal down the last few millimetres.

Pressing in: With the seal and housing assembled together, next I stack the seal housing on top of the bearing, and then press the bearing and seal housing into the axle bearing housing. This should not be a super-tight fit, but some pressure is required.

Fully home: Make sure the bearing is in all the way, flush with the recess in the bottom of the bearing housing, as seen here.

Spacer: The next job is to prepare the other components, remembering to put the small bearing spacer (or distance washer) onto the axleshaft and making sure it is sitting square and all the way down.

Backplate: It is very important at this stage to remember to position the brake backing plate, as it can’t be done once the shaft is assembled with the bearing housing. Also, be sure you have the backing plates the correct way round on the vehicle, with the adjuster hexagon facing the outside of the vehicle relative to which halfshaft you are assembling at the time.

Retaining collar: Finally, I insert the bearing retaining collar into the axle seal. This can be a little tricky to achieve, but angling the collar slightly helps a lot.

Final fit: With everything now stacked together correctly, I can then press the collar properly onto the halfshaft. Here, a heavy steel tube has been placed over the halfshaft, and it presses on the retaining collar to push it into position to secure the assembly. You don’t need a massively heavy-duty press to do this, but it must be tall. The collar should press on fully and requires around two to four tonnes of force. It is really important to make sure everything presses down square and true otherwise you can damage the components and stretch the collar.

Detail: In this close-up, you can see how the tube will press the retaining collar (arrowed) downward, forcing the bearing flange fully down. The driving tube needs to be a close fit to avoid marking and damaging the new collar. We use an old very oversized halfshaft collar underneath the long tube, which works really well and leaves no mark on the collar.
Like to have your own Land Rover library?
Try our Budget Digital Subscription. You'll get access to over 7 years of Land Rover Monthly – that’s more than 100 issues plus the latest digital issue. All issues are fully searchable so you can easily find what you are looking for and what’s more it’s less than 10p a day to subscribe. Click here to find out more details and start enjoying all the benefits now.