


25 November 2023
|
 Not all jobs need be high-tech
: credit: © Alisdair Cusick
Not all jobs need be high-tech
: credit: © Alisdair Cusick
Not all restoration processes are high-tech. Alisdair Cusick shows one method that relies on old materials and tooling
Need to know
Time: 6 hours plus
Difficulty: 1 out of 5
Models: All Series I models, through to Series IIA.
Tools needed: Vice, grips/pliers, hacksaw, press and tooling, craft blade, ceramic blade, spanner and wedge to remove, wire brush, heated press.
Parts used: Charlesworth Mouldings wheel restoration, £374.40. Owner-supplied steering wheel.
Work safely:
• Take care when removing the steering wheel to avoid it releasing suddenly and hitting you in the face.
• Use the right tool, for the right job.
• If in doubt, get an expert to do the job.
• Never take risks with heat or pressure.
• Wear breathing protection when cutting or handling aged materials which may create a dust hazard.
Thanks to: Charlesworth Mouldings for its help with this feature. Tel: 01675 470382, charlesworthmouldings.co.uk.
In LRM Technical we often show processes or repairs that incorporate the latest technology for an improved result. This time, we’re highlighting a restoration process that hasn’t changed in nearly 80 years. Rather than rely on electronic advancements, it relies on traditional materials and mechanical presses, as Land Rover suppliers would have used in-period, because that gives the best result.
How the steering wheel deteriorates
The 17in banjo-style steering wheels used on Series I and Series IIA all tend to suffer the same fate in time. Namely, the lacquer on the rim wears off with use, exposing the rim material which is hygroscopic, meaning it absorbs water. That water, from hand sweat, grease or oils, is absorbed into the rim which then slowly blows apart from the inside. That usually occurs around the spoke to rim joints, which then promotes corrosion to the steel rim, assuming lumps of failing rim material haven’t begun to break off by then. Have you ever had black, sticky hands from handling one of those rims? That’s the material coming away, and your hands probably putting moisture back into the rim, hastening the process.
Over the years, fixes centred around being cheap and easy, usually involving filling cracks with epoxy, rubbing that down, and repainting with plastic-type finishes. That did the job, but was more of a repair than a restoration, as the issues would likely return. Thankfully, these steering wheels can now be refinished to an incredibly high standard by Charlesworth Mouldings, in the Midlands. Based a long stone’s throw from the factory, it has been in business since the 1890s, but started making moulded products in 1924. The company still uses the equivalent processes (and indeed machinery) that was used when the cars were new in the 1950s and 1960s.
Removing the steering wheel for restoration
Steering wheels can be stubborn to remove, complicated by 80in and 86in Series I models having horn pushes that are housed inside the steering wheel.
On those early cars, remove the wiring at the junction box, and straighten the ends so they will pass up the steering column. Undo the control tube (also known as the stator tube) at the bottom of the steering box, which should allow the control tube to be then removed upwards through the steering wheel.
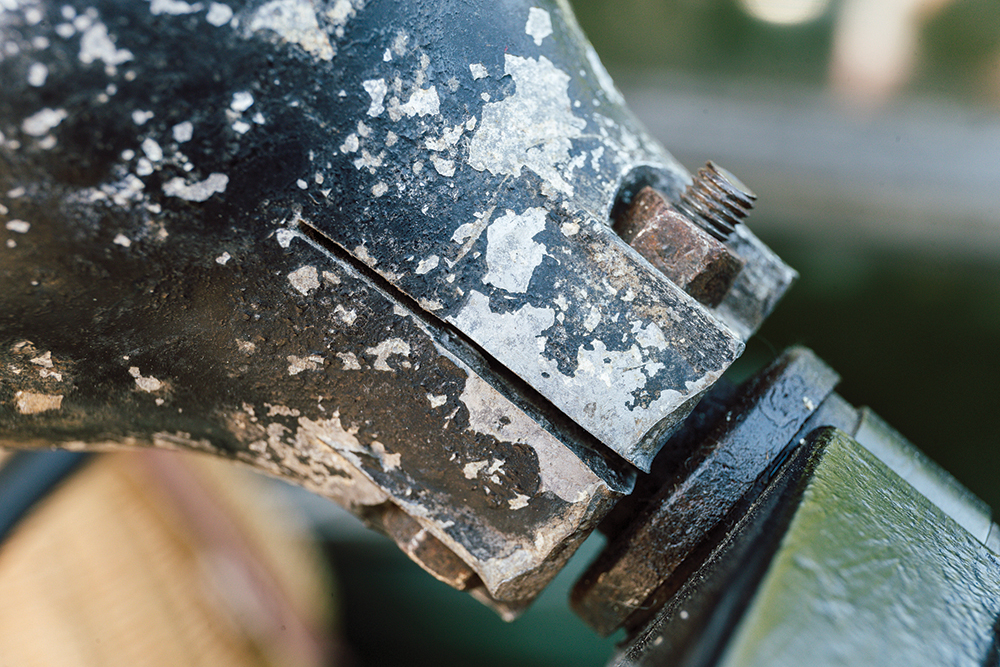
After releasing the pinch bolt, a wide flat lever can be carefully inserted here to gently ease the boss at the steering shaft (inner column) splines
To remove the wheel itself, on all models there is a pinch bolt. Having sprayed releasing fluid around the steering wheel splines, release the bolt and carefully prise open the split on the side of the steering boss. Use gentle force, and as wide a lever as you can, to spread the load across the boss. With patient wiggling, the wheel should work off. Do not pull excessively towards yourself, as this can result in the wheel hitting you in the face.
How the wheel is restored
With thanks to Ian and Sue Cummings at Charlesworth Mouldings, we’re able to show exactly how the steering wheel restoration is achieved, as Ian demonstrates the process from start to finish. And this is not the only service they supply, as we’ll see later.

The problem: This is the typical cracking issue that presents on banjo wheels. The cracks permit moisture in, which the rim material wicks in and traps, slowly blowing it apart.

Extreme example: A typically cracked rim, but note the warp. Excessively warped rims like this can fail after restoration. Beware if sourcing a rim to restore: flat is best.

Stripdown: Ian puts the wheel in a vice and begins breaking off the old rim material. Using a pair of grips, he pinches it and twists, breaking it off.

Stubborn bits: Any stubborn bits may need help. He saws laterally around the rim, to make a score mark, taking care not to touch the metal core, just the ebonite.

Old repair: It can be common to encounter hard material around the spokes, which is likely an epoxy repair. A small saw blade breaks into it, to encourage it off.

Stripped: The bare wheel. Slight twists may be straightened, Ian says, but the metal usually wants to spring back over time. The heated press will certainly flatten it later.

Rim prep: Ian then uses a wire brush to clean off any corrosion on the steel rim. The spokes, incidentally, are stainless steel not chromed steel, so will polish up.

Rustproofing: A special rustproofer is used on any corrosion, chosen so as not to react with the rim ebonite. Usual zinc-based treatments react, causing the rim to fail.

Replacement begins: Ian threads the ebonite though a spoke, then wraps it around the rim, as on a tennis racket handle. Note how even the material is around the rim.

Sections: The wheel is wrapped in three runs, between each of the spokes. Each loose end of ebonite length is tucked into a spoke to hold it in position.

Ready to press: The wheel now has a nice, even wrap of ebonite. Note the excess material in the spoke joints, which creates the short return up the spokes.

What is ebonite?
Ebonite is a rubber-based product made from a compound of zinc and sulphur that became popular in the 1800s when a process was devised to harden the material, curing it to a solid. The new hardened material was used in Victorian times as a substitute for jet, the gemstone, where it became popular for jewellery, but also was used to replace ebony wood. Hence the name, ebonite.
Many steering wheels used wooden rims, which took time and skill to fashion to shape. Thanks to advances in moulding techniques, ebonite was eventually used in its place as it could be mass-produced more quickly in factories. The material is still used by moulding specialist Charlesworth, in preference to more contemporary media.
“We could use a modern material for the rim,” explains Sue, “and though it would look nice, it wouldn’t give the correct feel in the hands, as ebonite.”

Aged machine: The press dates from the late 1950s or early ’60s. It presses to 100 tonnes force, and is heated to 140 degrees Celsius. No touchscreens, just dial gauges.

Prep work: Previous wheel is removed and the press tool is scraped of ‘flash’ (excess material from moulding process), then painted with carnauba wax release agent.

In the press: The wrapped wheel is placed in the press. The spokes locate in the press tool to ensure accurate positioning when the press closes and the curing process begins.

Cure time: It sits at 100 tonnes and 140 degrees for roughly three hours. The press moulds the rim, and the heat cures the ebonite, making it become rigid.

Cooking time is over: Ian opens the press, and releases the rim from the tool. We can see the recognisable shape of the rim, but also the excess flash squeezed from moulding.

Trim and proper: The large ears of flash crack off, then the smaller ends are loosely trimmed off using a sharp blade. Ian trims off as much as he can now.

Feel, trim, feel, trim: On the bench, Ian trims remaining flash using a ceramic blade. This cuts the flash off, but doesn’t damage the ebonite surface.

Ready for paint: The finished moulding is free from any burrs, and is trimmed neatly to the spoke ends. It looks superb, but needs sealing, which is the next step: paint.

Gloss finish: A painted rim gives a smooth surface in the hands, plus a deep, lustrous gloss. That gloss also seals the rim surface, in addition to its cosmetic purpose.

Which design? Various wheel types, clockwise from top left: flat four-spoke, dished four-spoke and flat two-spoke. Bosses tend to be left, due to the wide variety in preferences.
Other moulding processes – boots and knobs

Injection moulding: A similar moulding process can be used with rubber, to make injection- moulded parts like this Series model high/low lever boot.

Not only wheels... It isn’t just steering wheels that rely on old processes. Charlesworth also manufactures gearknobs using compression moulding like Land Rover did in the 1950s.

Starts with the mount: The gearlever screw mount is fitted to a mould locator peg, which then drops into the press tool. Unlike the steering wheel, the material isn’t flexible rubber.

Measured: Melamine is used for coloured knobs, phenolic bakelite for black. Powdered material is measured out on balance scales, then poured into a compression mould.

Press: The press tool closes to a force of 20 tonnes, and is heated to 140 degrees Celsius, where the knob cures in eight minutes. Unchanged since the 1950s.

Moulding complete: Eight minutes later, the press opens, and we have a gearknob, plus an amount of extruded flash. This time it isn’t attached to the item as before.

Final result: The final result, after the press tool locator peg is unscrewed. One brand new gearknob, ready to have gear change gate cut and painted, then proudly polished.
Like to have your own Land Rover library?
Try our Budget Digital Subscription. You'll get access to over 7 years of Land Rover Monthly – that’s more than 100 issues plus the latest digital issue. All issues are fully searchable so you can easily find what you are looking for and what’s more it’s less than 10p a day to subscribe. Click here to find out more details and start enjoying all the benefits now.