


01 August 2018
|
 : credit: © Alisdair Cusick
Alisdair Cusick shows how to change a window regulator on his Range Rover Classic and identifies a typical failure point
Models: Discovery 1 & 2, Range Rover Classic
Time: 30 minutes
Cost: £15.86 (Replacement part number LR 006374)
Difficulty: 1/5 stars
Tools needed: Ratchet set, socket and torque bits, screwdrivers, strong tape.
Work safely: Support glass carefully, and check the securing tape regularly.
• Beware of potentially sharp edges inside the door cavity.
Windows in cars used to be sliding affairs, as found in Series Land Rovers. Simple in operation and very little to go wrong with them, but they don’t look neat for car designers obsessed with lines. That’s probably why the later system came in, whereby one single pane moves up and down in the door top, controlled by a mechanism inside the door cavity. Originally a manual winding lever
controlled the mechanism; later, an electric motor. Either way, over the many years of this system, a myriad of designs, solutions and ideas have been tried to control the movement of the window glass. Channels, cables, gears – eventually they all suffer a few problems involving motor or mechanism failure.
A window regulator is a complicated solution which has to balance door shapes, glass size and available space inside the door. A number of Land Rovers share regulator designs, like early Discovery and Range Rovers of matching years, meaning the method to change regulators or window motors is similar. Interestingly, my late Range Rover Classic seen here shares the regulator design with the Discovery 2. So check which part you need after taking the door card off, rather than simply ordering on a website first.
My passenger window had been making a random clicking sound in operation for the six years I’ve had the car, but recently it failed completely. When pressing the button to lower it, the glass merely dropped an inch at one end then jammed solid, meaning I had to get in there to look. Removing the door card was a simple job, and revealed exactly what the clicking sound was, and further, why the regulator had failed.
Here’s how to change a regulator, and the reason why many will fail in time. Note also that if you only need to replace the motor, you’ll still need to remove the regulator, as below. The new motor is fitted to the regulator while the assembly is off the vehicle. This job on my Range Rover Classic is similar on Discovery 1 and 2s, and principles apply to other Land Rovers with electric lifters.

To get inside the door, the door card needs to come off. First prise and unclip the central locking button surround and remove it upwards.

Door handle fixings next. Prise off the two caps inside the handle recess to unscrew the two fixings and lift out the handle tray.
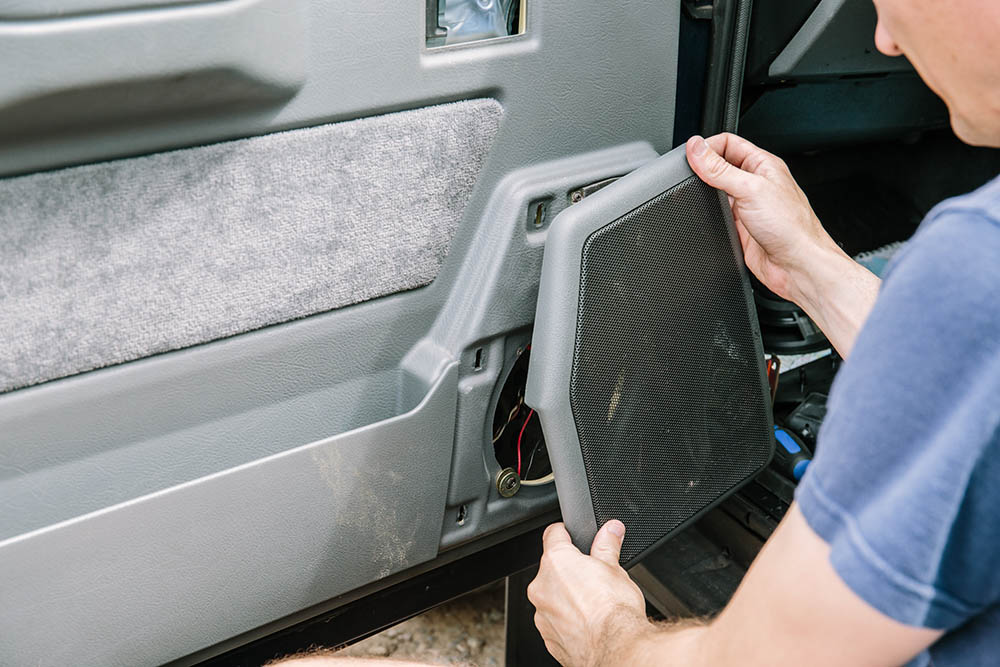
The speaker cover comes off next, taking care not to snap the clips. Remove the speaker, then unclip it from the wiring loom.

Pry along the edges to work the door card off the fixing pegs. Once it has moved about 5 mm, you can pull it off.

Ease off the moisture barrier, but avoid tearing it if you can. You only need to open the lower edge

With the glass lowered down, unbolt the two fixings holding the glass onto the regulator. Use an assistant to hold the glass if unsure.

Manually slide the loose glass up out of the way. Secure it with strong tape around the top of the frame. Check regularly for signs of the glass slipping.

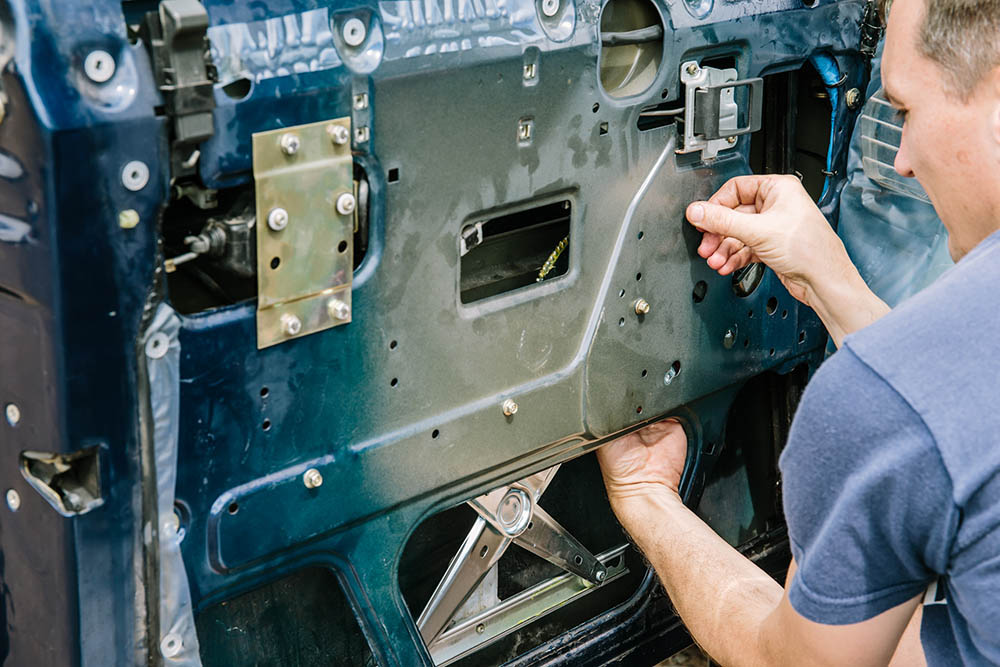
Unclip the window motor feed from the wiring loom. There’s not much room and the clip is awkward, so take your time. Small hands help here.

Undo the six fixings holding the window regulator in. Two on the left, and four around the window motor on the right.
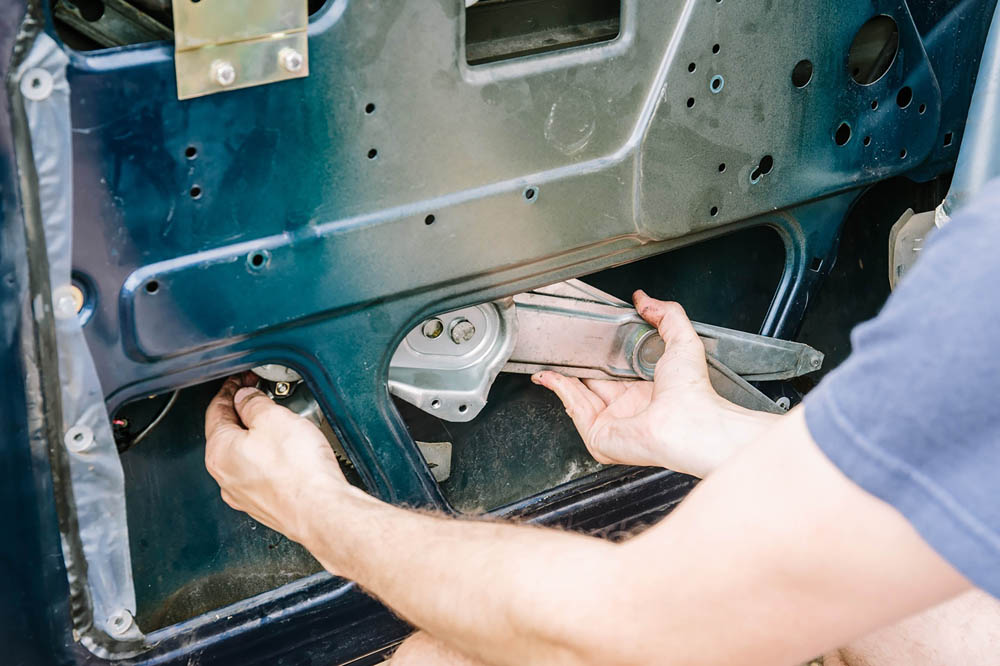
Slide out the regulator. There’s not much space, so rotate the regulator as needed to ease it through, working from each aperture. With patience it slides out.

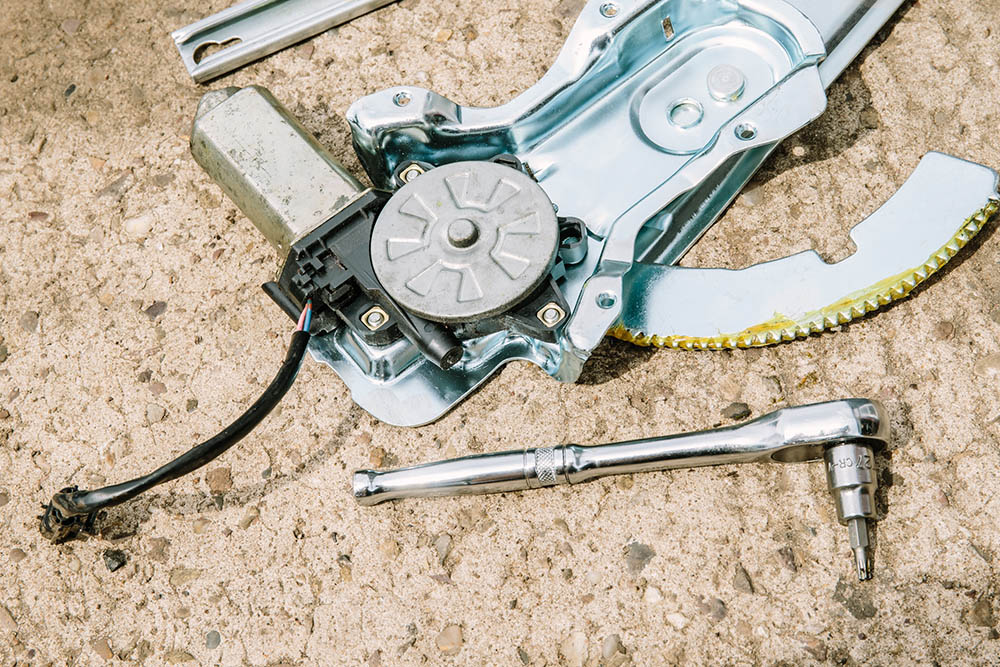
The problem. The nylon bush catches on the keyhole in the regulator arm and eventually splits. The arm then fell into the keyhole, locking solid.

Old and new regulators. If only your motor has failed, this is the point where you simply swap the old motor for a new one, and refit the regulator.
The motor is held on with three Torx head bolts which are a doddle to undo. Grease the regulator gearing now, and also the arm operating channels.

There’s also a small plastic support for the window glass. A self-tapping screw holds it on. It may be brittle, so don’t crack it.
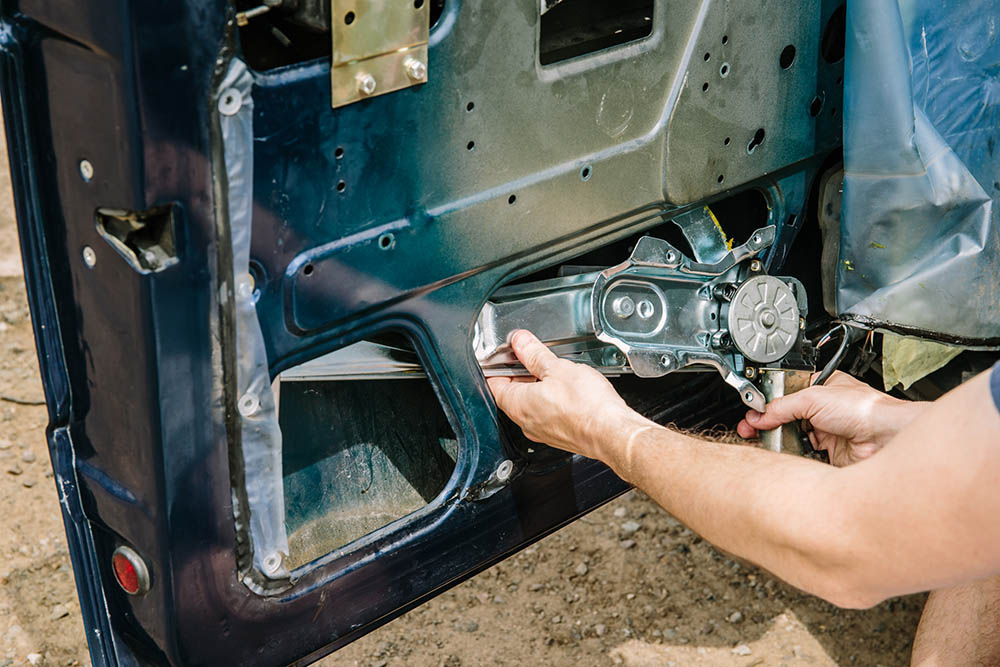
You’re ready to refit the assembly. Arrange the arms like this, and insert it into the door cavity, zigzagging it upwards to fit it into position.

Locate the two bolts on the left first, but don’t fully tighten them just yet, until all the bolts are in. Finger-tight is fine for now.
Manipulate the regulator until the four bolts around the motor locate. Once happy, fully tighten up all the fixings and reconnect the motor feed.

Supporting the window glass, remove the tape, and carefully lower it into position, over the plastic locator. Tighten the two fixings either end.

Refit the moisture barrier using tape if needed to seal against the door shell. Refit the door card onto the fixing pegs, taking care not to snap them.

The door card may eventually need a hefty bang. Refit speaker and wiring, door handle and the central locking surround, then test the window. Job done.
Did you know that you can now get access to the entire archive of Land Rover magazine content with our brand new digital archive? You can enjoy all the issues since the launch of the magazine – use the search bar below to find features, reviews and other great content: