


05 June 2024
|
 Parabolic springs are a popular replacement for standard Leaf springs
: credit: © Dave Barker
Parabolic springs are a popular replacement for standard Leaf springs
: credit: © Dave Barker
Replacing the springs, whether fitting originals or parabolics, is a simple job – if things come apart… Dave Barker explains
Need to know
Time: Around 2 hours
Difficulty: 3 out of 5
Model: 1978 Series III 88in.
Tools needed
General workshop tools including 18, 19 and 20mm spanners and sockets, socket extension bar, pry bar, torque wrench, angle grinder, drift, hammer and chisel. Jack and axle stand or a vehicle lift.
Parts and costs
• Parabolic three-leaf springs for Series SWB and LWB. Britpart kit DA4107 includes two rear springs with U-bolts and nuts. Prices from £236 to £380.
• Shackle pin bolts approx £1.10 each.
Work safely
• Ensure axle stands and lifting and supporting equipment is correctly rated and in safe order.
• Before removing the springs, the chassis should be additionally supported on axle stands, not jacks.
• Ensure the vehicle is secure, especially in the case of a wheel’s free post lift.
• Wear thick protective gloves and eye protection when using an angle grinder.
• Wear gloves or barrier cream to protect skin from fluids and sharp edges of components.
• Wear appropriate masks and eye protection as required.
• Never work under a vehicle supported by a jack.
• Standard springs are heavy and cumbersome – seek help with lowering and handling them.
Thanks to: Maddison 4x4, Water House Farm, Station Road, Topcliffe near Thirsk, YO7 3SG. Tel: 01845 587407, maddison4x4.com.
Leaf springs were fitted to utility Land Rovers until the launch of the coil-sprung Ninety and One Ten in the early 1980s. They were the most common type of suspension on cars until the late 1970s and are still fitted on many 4x4s today. However, some owners feel the standard leaf springs fitted to Series Land Roves are not the best when it comes to comfort and off-road ability; others would not agree.
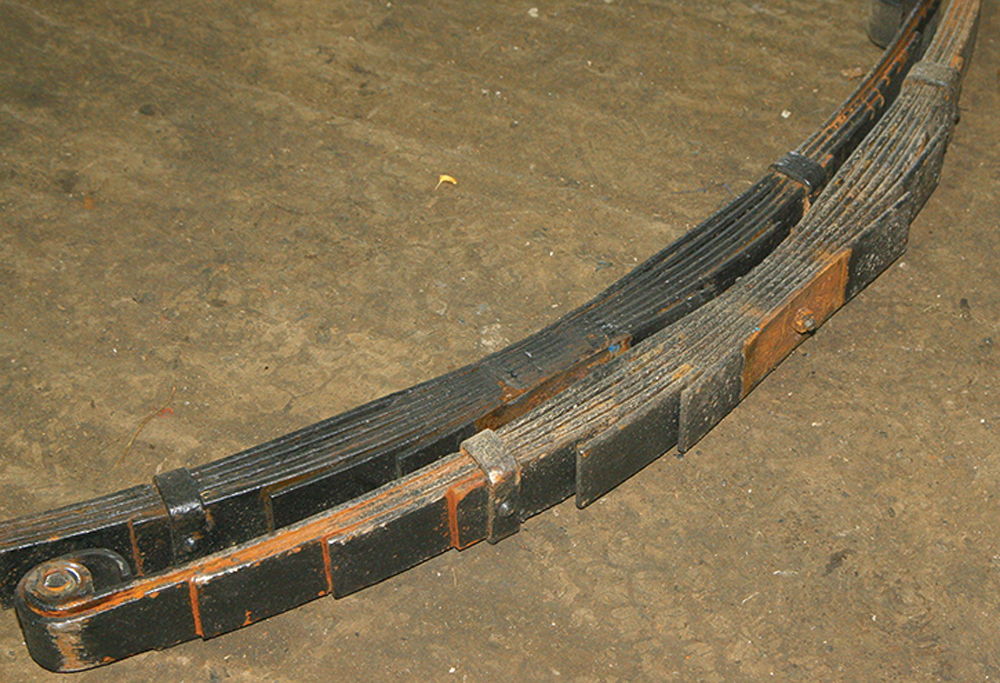
The most popular option to standard off-the-shelf replacement leaf springs or even specialist-made leaf springs, is to fit parabolic leaf springs. A basic leaf spring is in the form of an arc, shaped from differing lengths of spring steel, held together along their lengths by a centre bolt and various clips. Parabolic springs differ from the standard springs in having fewer leaves, often three, which are tapered from the centre to the ends in a parabolic curve with the only contact between the leaves being in the centre. Today, parabolic springs are fitted to many buses and can even be manufactured in composite plastic.
The method
Replacing the leaf springs is not a difficult job. The main problem is normally seizing of rusted U-bolts and nuts securing the springs to the axle, and seized bolts securing the spring shackle into the bushes. The chassis needs to be supported and, if you are working on the floor, it’s easier if the wheels are removed which, in turn, means the axle also needs to be supported. If working with the Land Rover on a vehicle lift, the wheels can be left in place, as in the case shown here. The chassis needs to be supported on axle stands, not jacks. Removing and fitting new springs at the rear on both left- and right-hand sides is the same process, as is the replacement of front springs. The only difference is likely to be just how many of the bolts are seized. In our case, all the U-bolts and the shackle bush bolts on one side were seized.
Into the workshop
The owner of this vehicle wanted to improve the ride of his Series III. Its old leaf springs were showing signs of age and starting to blow apart due to a build-up of rust between the leaves. Before starting the job, all fixings were wire brushed and doused in penetrating oil. Here, we show replacement of the right-hand rear spring, though with references to the seized bolts of the left spring. During reassembly, all fixings were coated with anti-seize grease to aid future removal.
Remove original springs
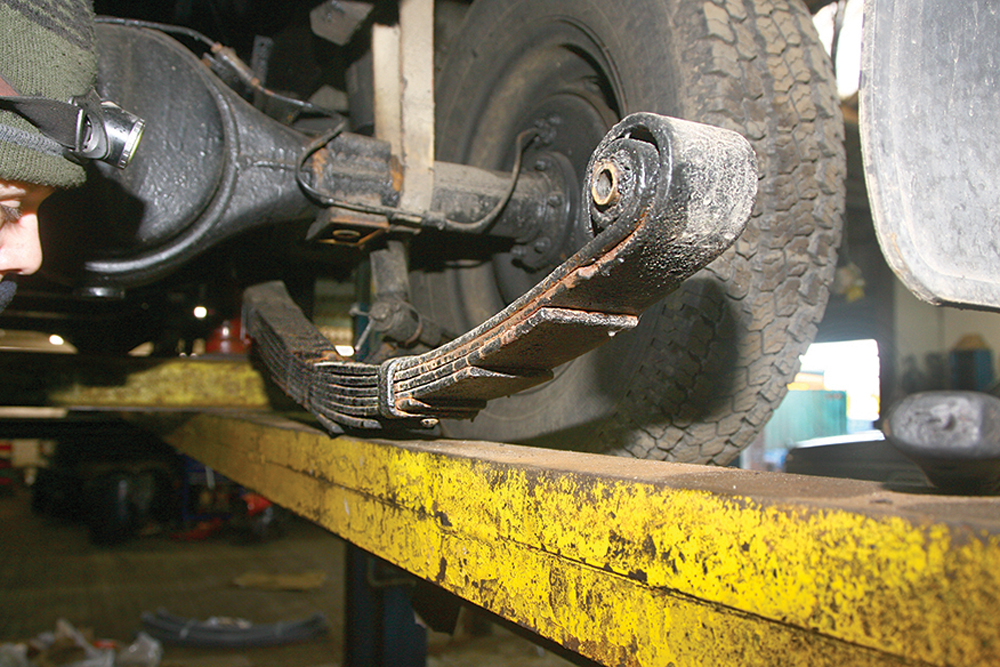
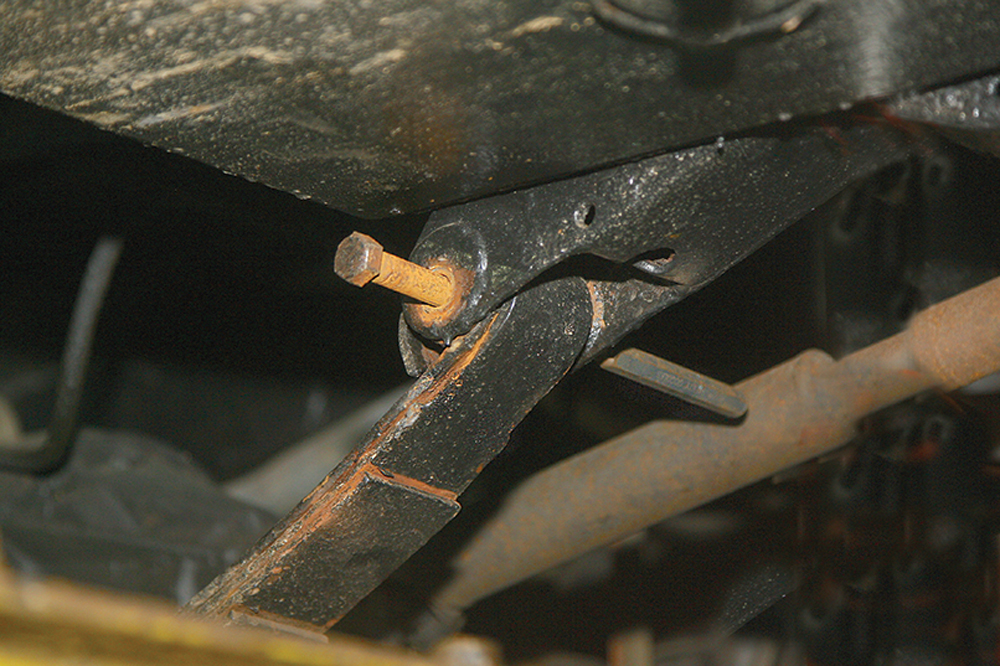
Worn and rusted: The old leaf springs had been fitted to the Series III for many years and were worn, rusted and now giving a poor ride.
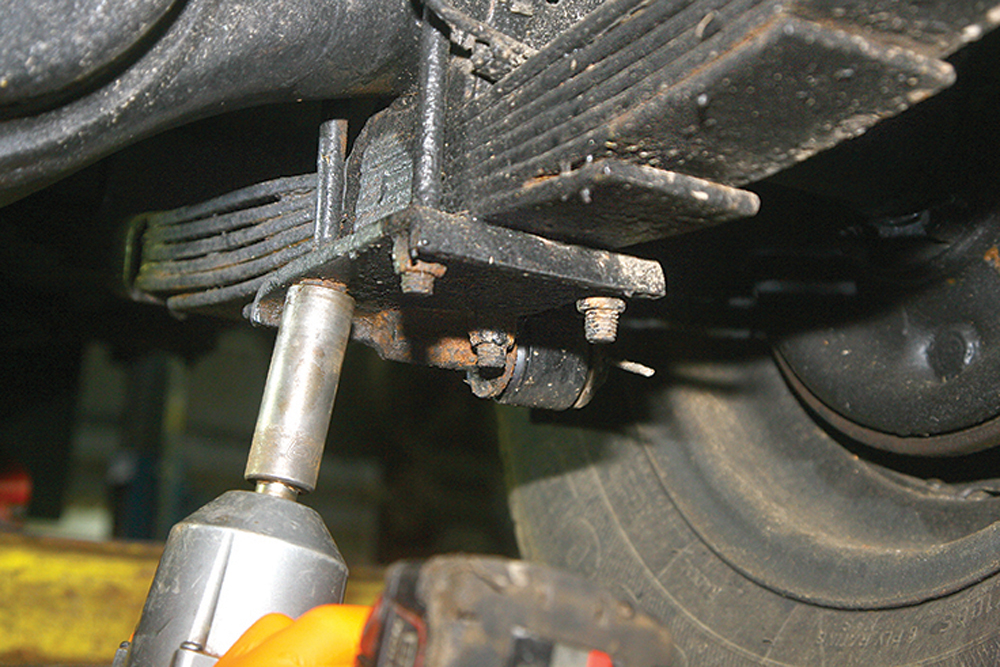
Try to undo: With axle stands supporting the chassis ahead of the forward spring mountings, an attempt was made to release the U-bolt nuts: both sides were fully seized.
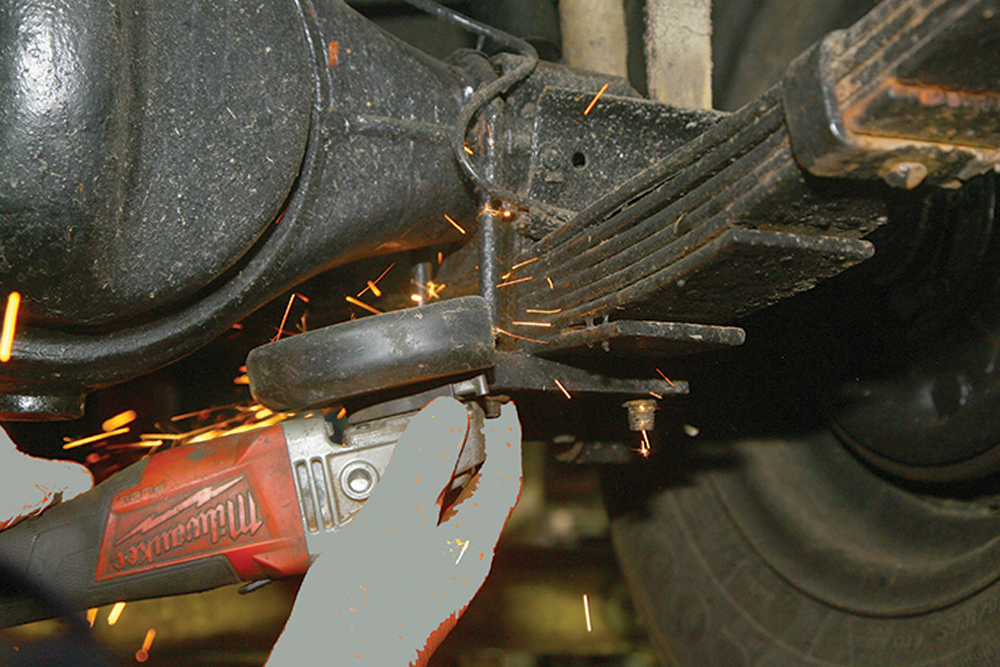
Just cut them: The right-hand side inner U-bolt was cut using the angle grinder so it could be lifted off the axle and freed from the spring clamping plate below.
More cutting: Because the Series III was stood on its wheels, it was impossible to cut the outside U-bolts, so the bottom of the bolts and nuts were cut.

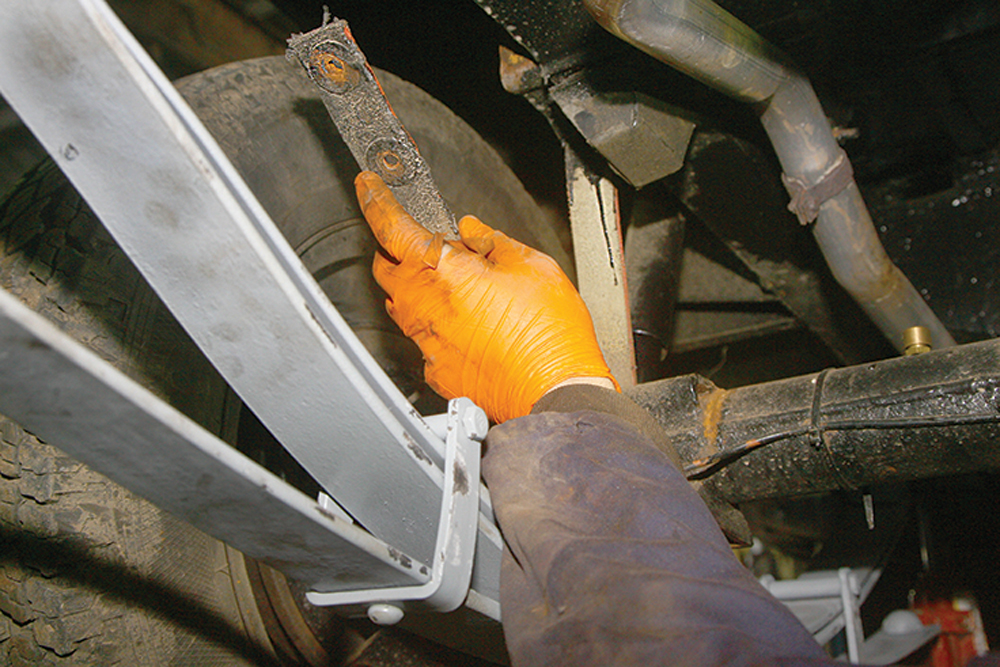
Split off: Using a hammer and chisel, the nuts were split off the bottom of the U-bolt and the outer U-bolt removed. Then the spring bottom clamping plate was removed.
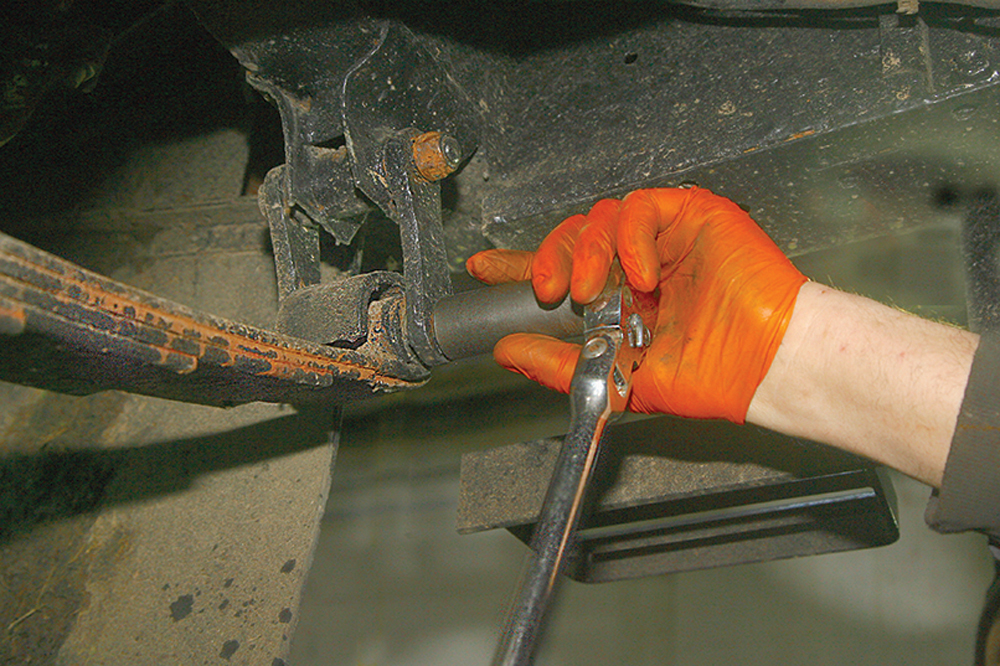
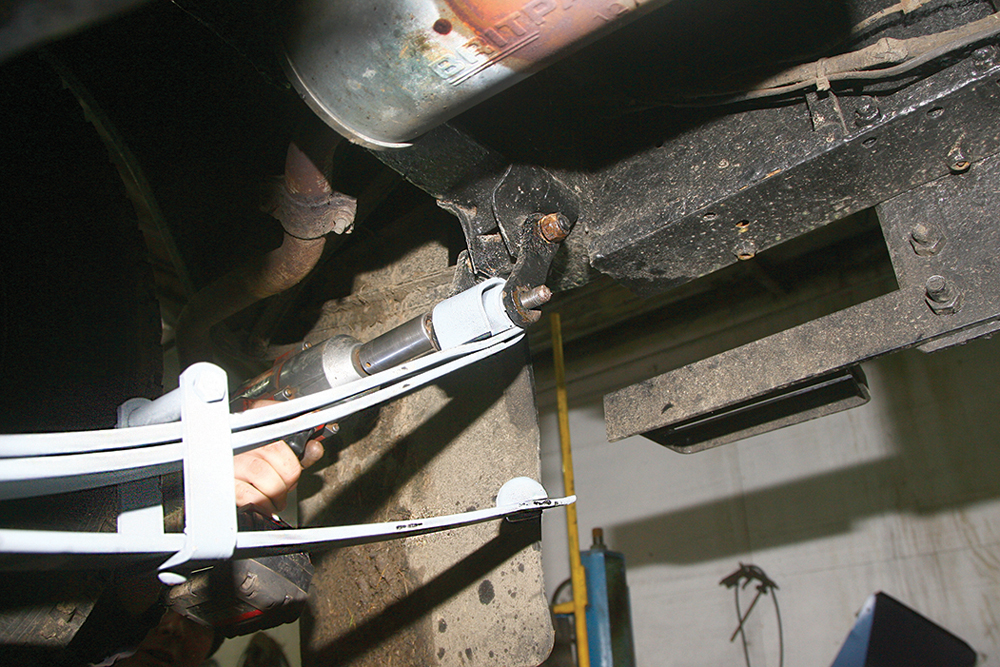
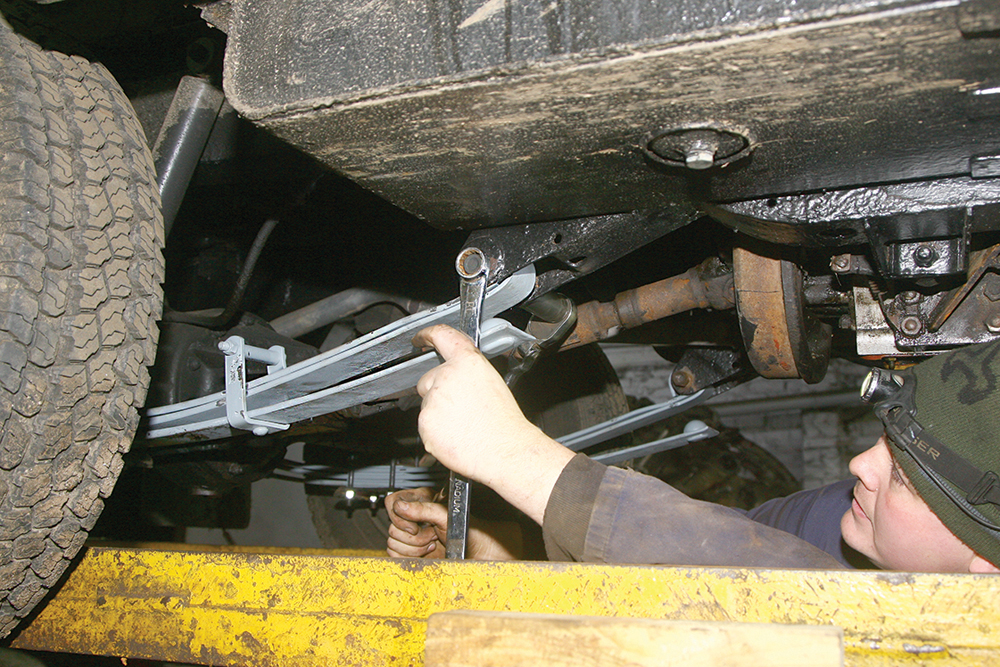
Seized bolts: The rear spring shackle retaining bolts and nuts were also seized, but the careful use of a long breaker bar managed to free the nut.
Unthreaded: With the nut removed, the bolt was unscrewed outward from the threaded inner shackle link, with just the last inch to knock through the plain outer link.
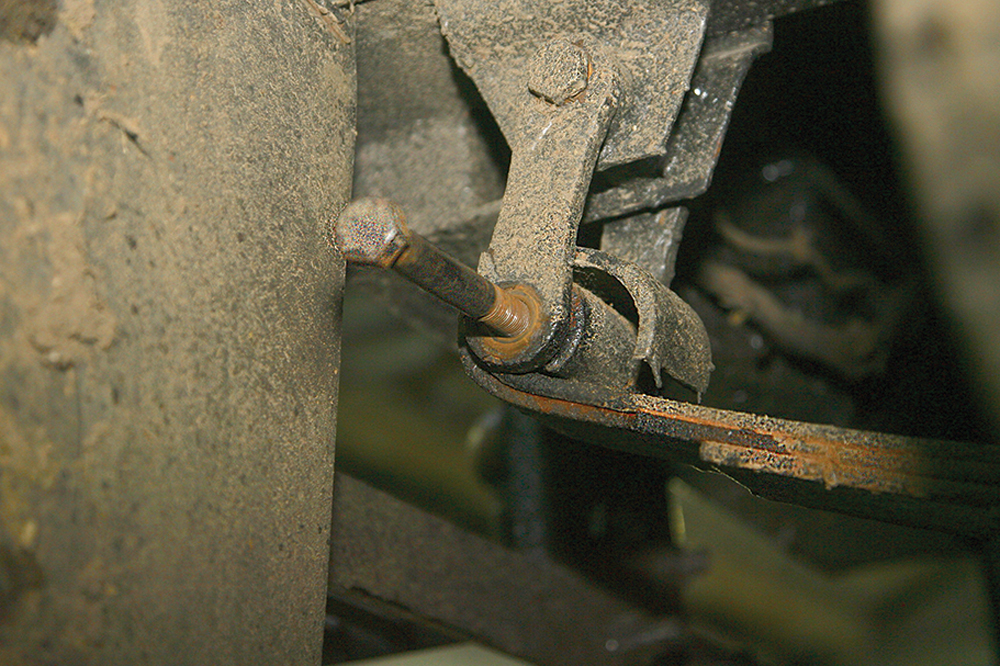
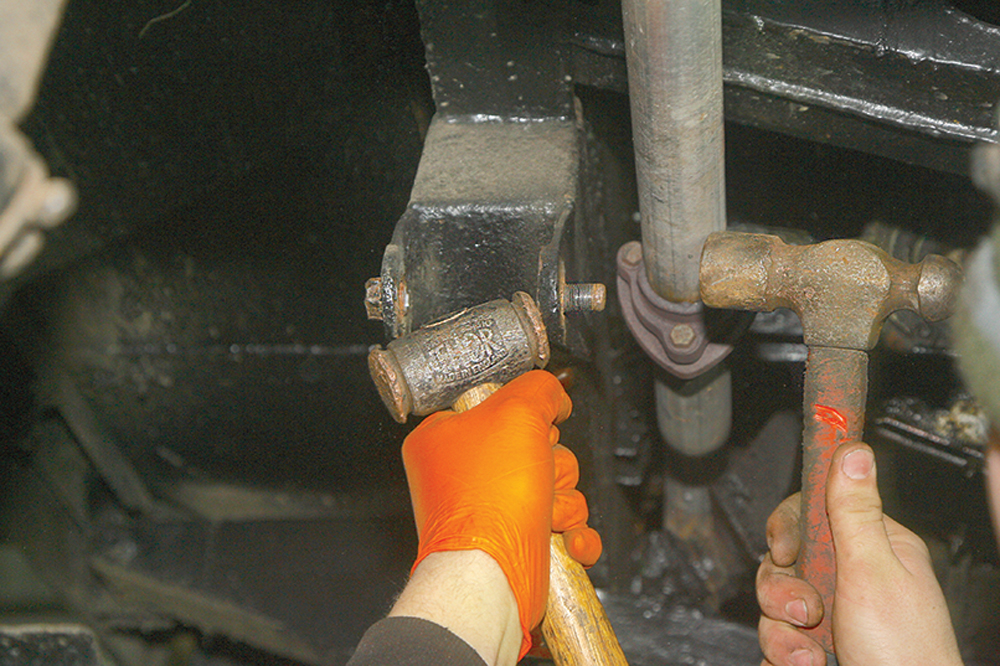
Carefully does it: The bolt is finally knocked out using a hammer and drift, taking care not to deform the bolt end, causing it to jam. More easing oil helps.
Lower the spring: The rear of the old spring was now free from the rear shackle and could be dropped down away from the vehicle, still attached by the forward bolt.
Not threaded: The nut on the spring’s forward securing bolt was undone easily. The bolt was knocked out of the shackle, and the spring removed from the vehicle.
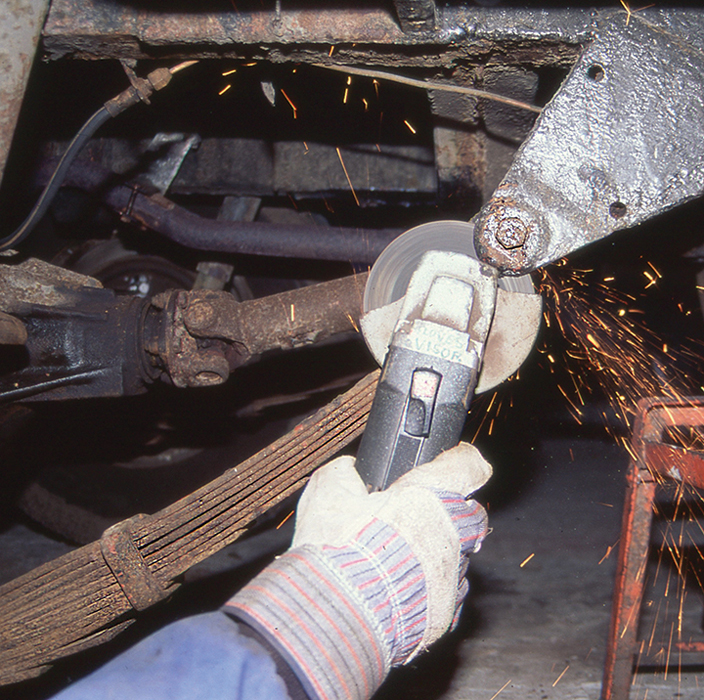
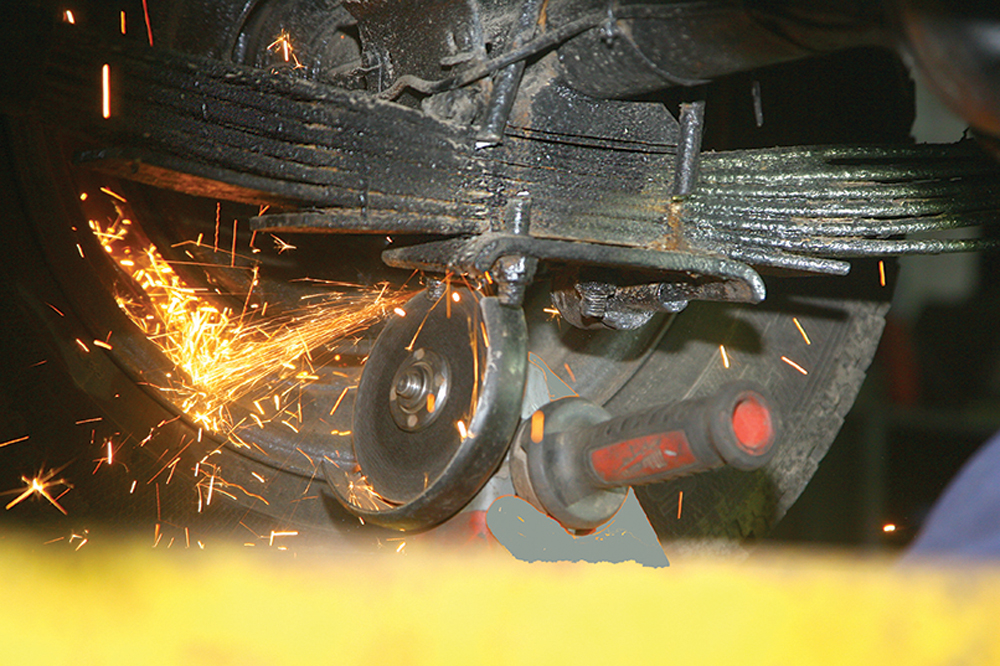
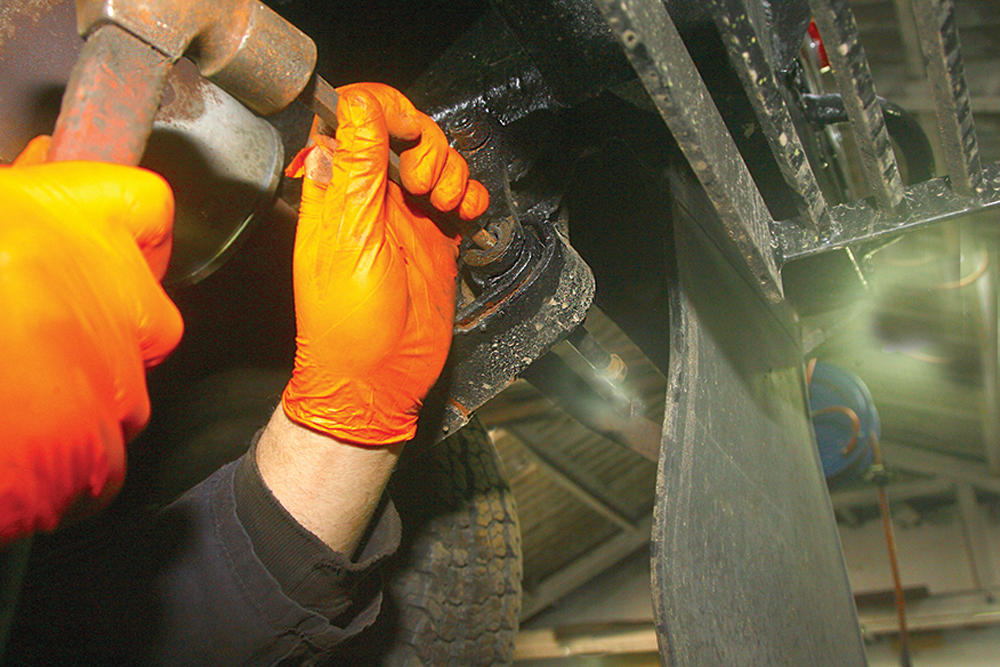
Carefully does it: The left-side forward mounting bolt was seized into the bush. An angle grinder was needed to cut through the bolt on both sides between chassis and spring.
Knock out: Once the bolt had been cut, the leaf spring was removed and then the remaining ends of the bolt were knocked out of the chassis mounting plates.
Fitting the new parabolic springs

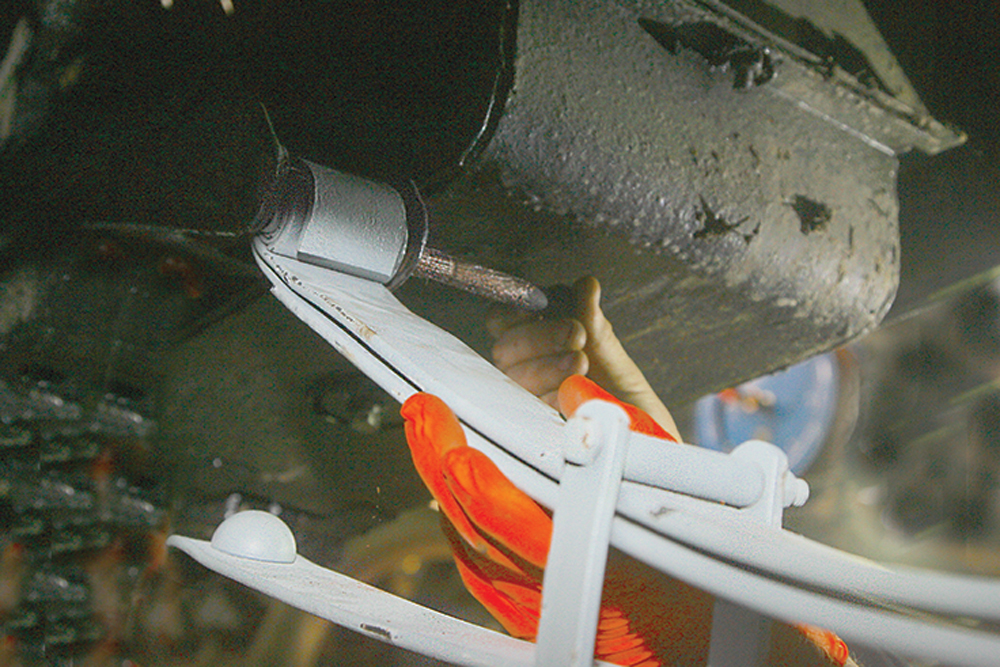
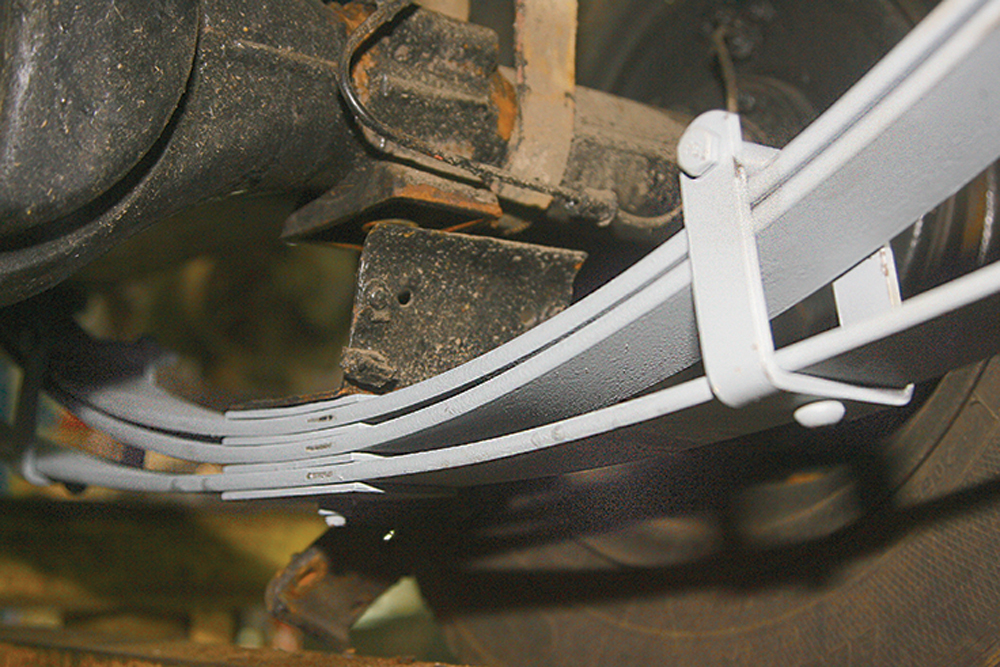
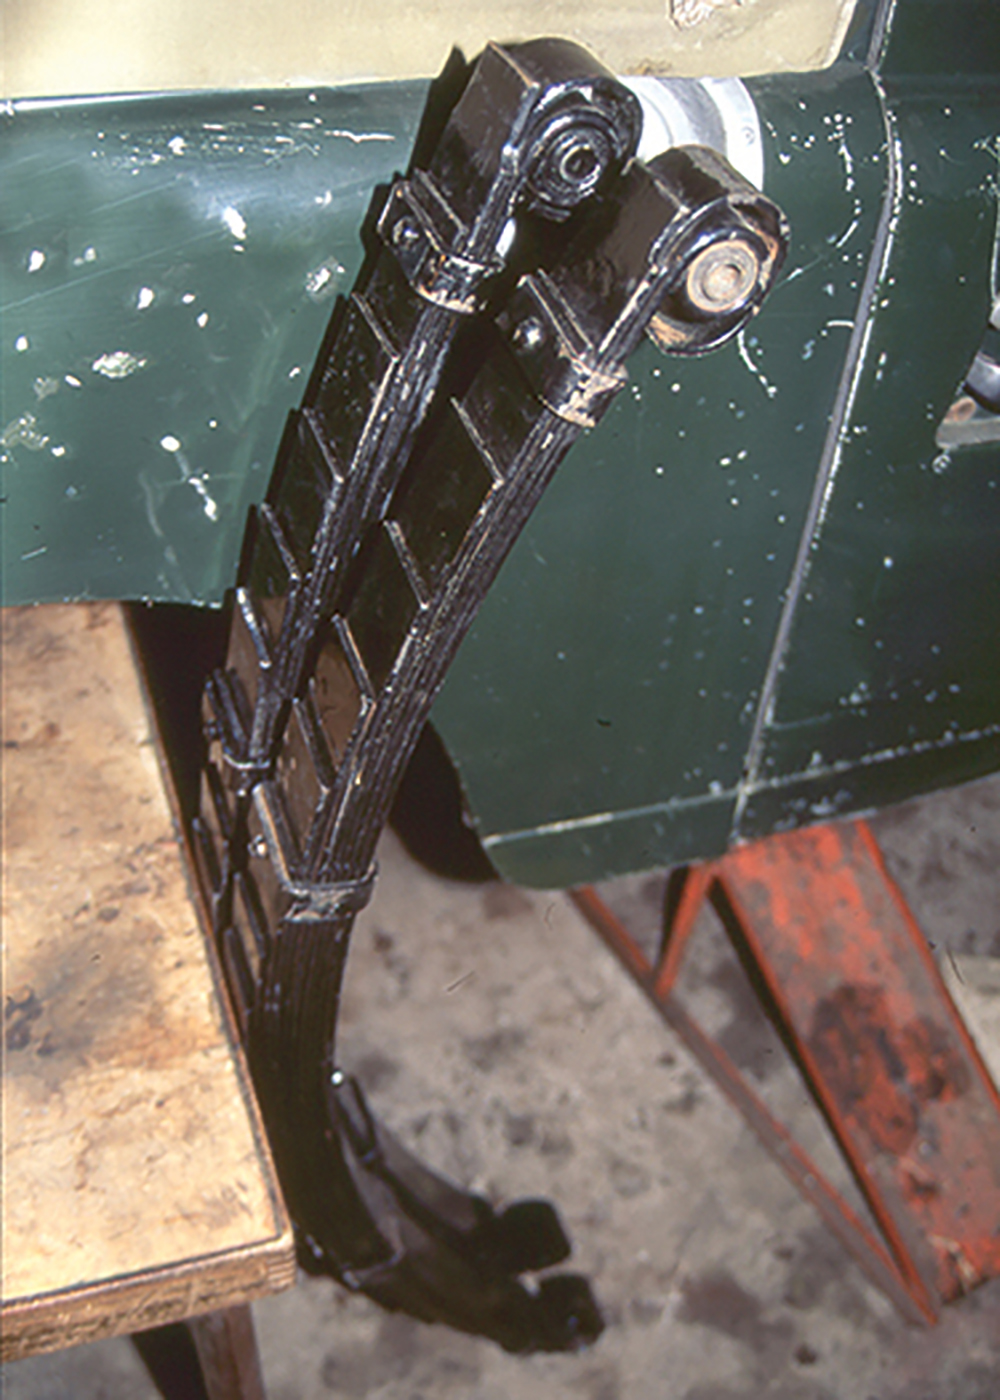
New springs: Individual leaves of the new parabolic springs are separated from each other by spacers, the lower leaf only coming into play when suspension is compressed.
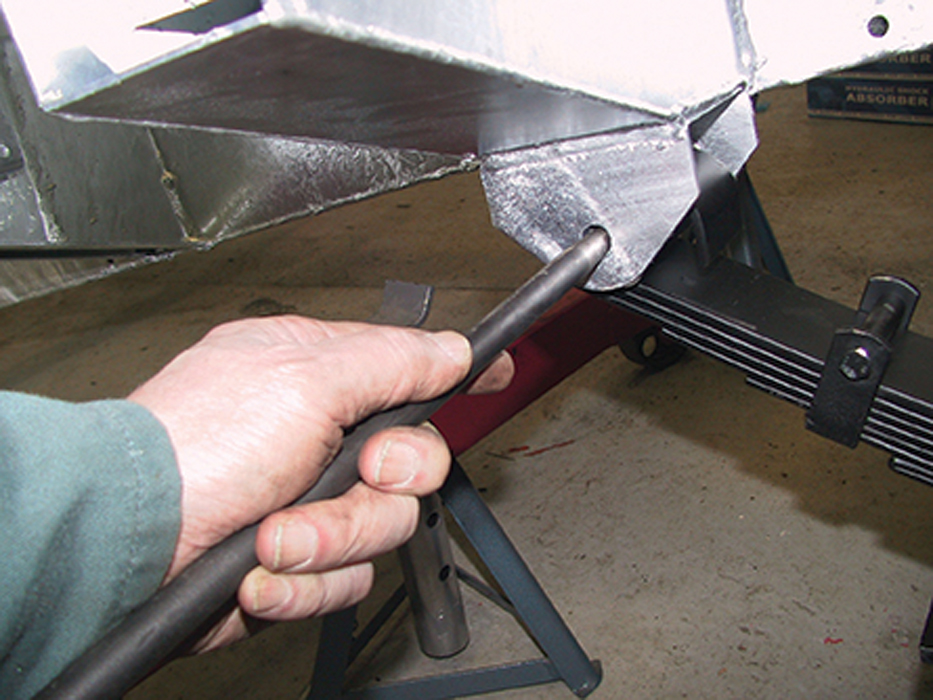
Into position: The new spring was positioned in the forward chassis mounting first, and a new mounting bolt, coated with anti-seize grease, was inserted from the outboard side.
Threaded into place: The rear of the spring was lifted into its shackle and a new greased bolt entered from the outboard side, and screwed through into the inboard threaded link.
Pipe bracket: Before the spring was secured under the axle, the brake pipe bracket which sits between the spring and axle, was positioned on the spring.
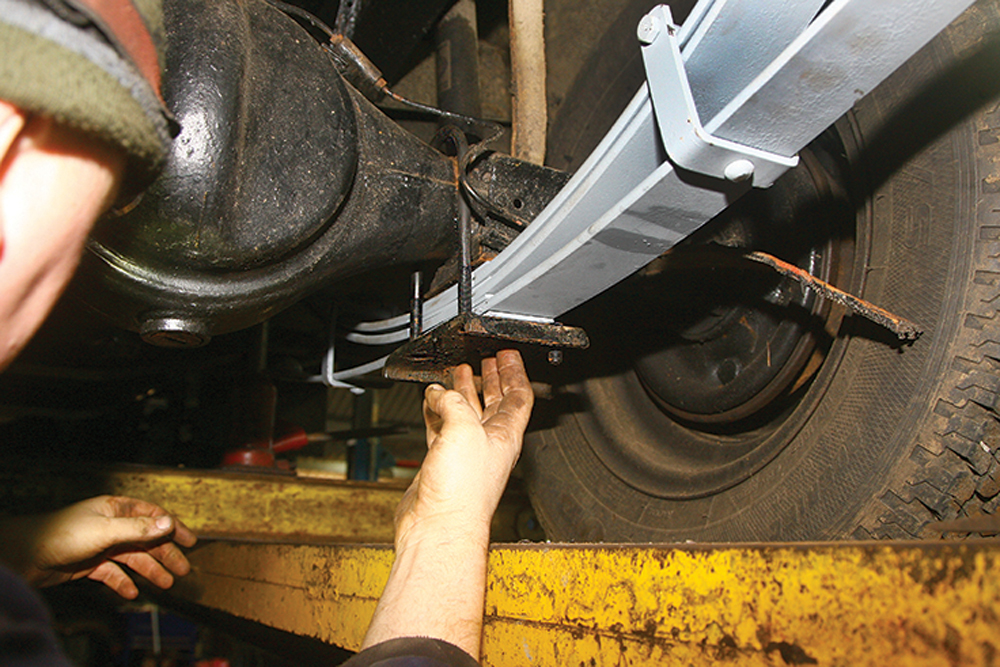
U-bolts fitted: New U-bolts were fitted over the axle, and the lower spring clamping plate positioned onto the bolts. The new nuts were fitted and just nipped up for now.
Tighten but not fully: Having checked that all parts of the spring, plate and fixings were correctly positioned, bolts and nuts were tightened sufficiently to secure the assembly for now.
Longer? At this point (and before refitting the dampers) the suspension can be extended and compressed to assess changes needed to the axle check-strap and brake hose lengths.
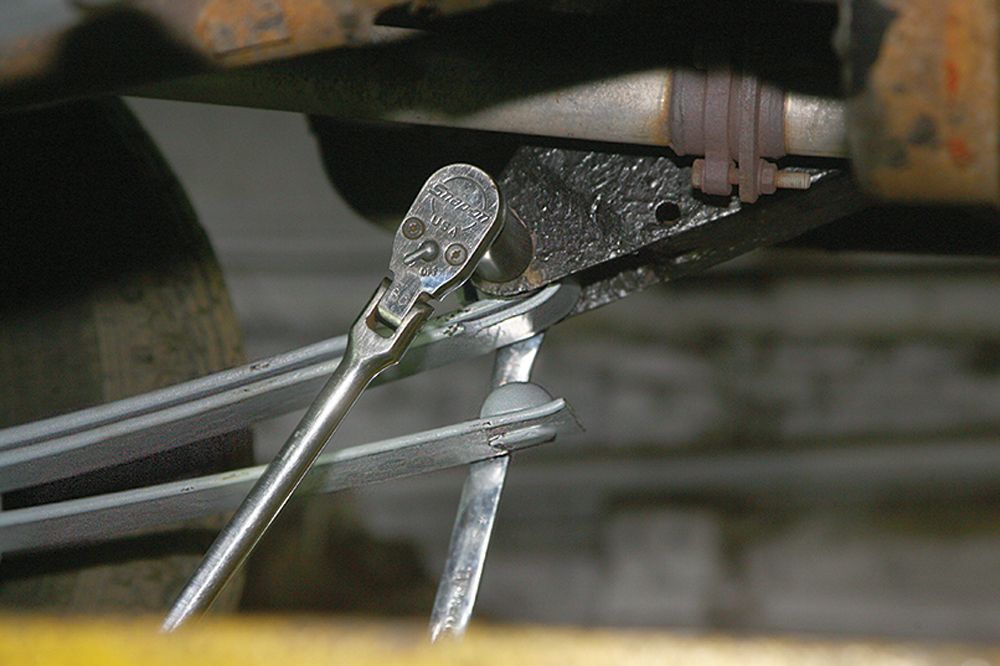
Final tightening: The stands under the chassis were now removed so the full vehicle weight was on the springs. Then all bolts and nuts were fully tightened and the rear spring shackle retaining bolts on both sides were also fully tightened.
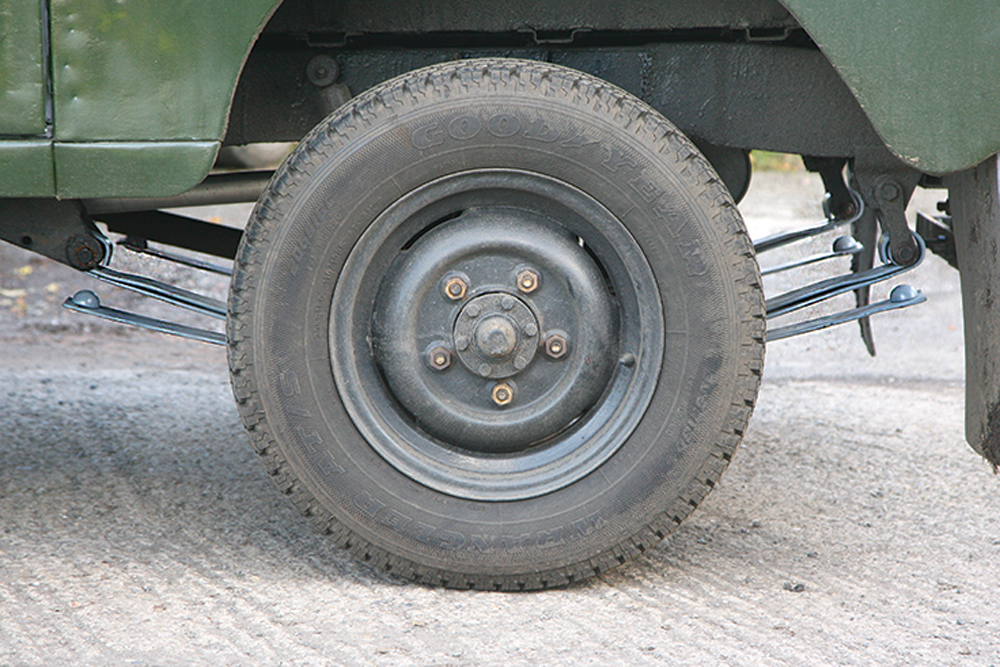
Completion: With the dampers refitted, the vehicle is driven to check the new spring action and, after a few miles to settle, fasteners are rechecked for tightness.
Additional fitting tips
The parabolic springs fitted here were not handed, but standard springs are. Identity is by part number, but the springs with deeper curvature are situated on the driver’s side.
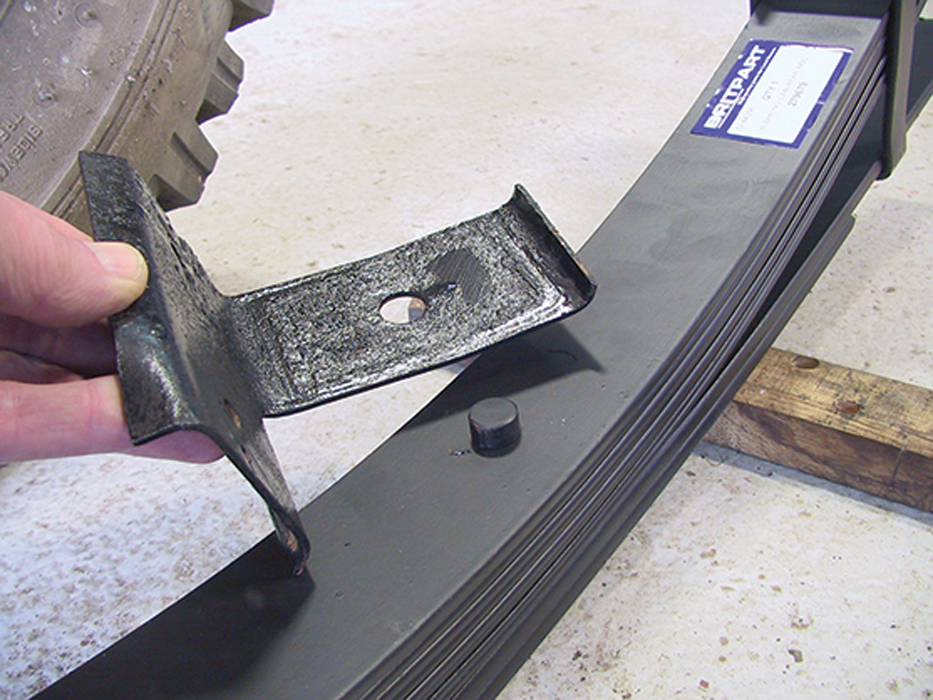

Note that springs have a centre stud which locates through the brake pipe bracket on the rears (slipper plate on fronts) and into the circular recess on the underside of the axle casing.
Standard or parabolic springs may need toggling to align with chassis holes. Toggle at one side to align, while entering the bolt from the other.
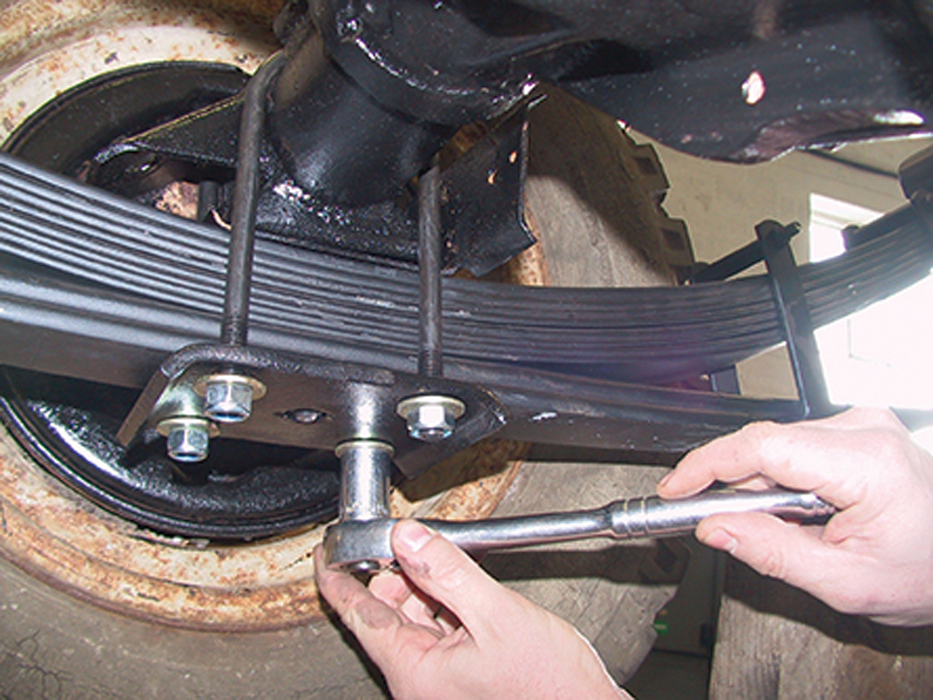
The rear spring bolts (seen here) are of equal length. But the front springs have shorter U-bolts on the outer side due to the axle casing shape.
Like to have your own Land Rover library?
Try our All-Access Digital Subscription. You'll get access to over 7 years of Land Rover Monthly – that’s more than 100 issues plus the latest digital issue. All issues are fully searchable so you can easily find what you are looking for and what’s more it’s less than 10p a day to subscribe. Click the link above to find out more details and start enjoying all the benefits now.