


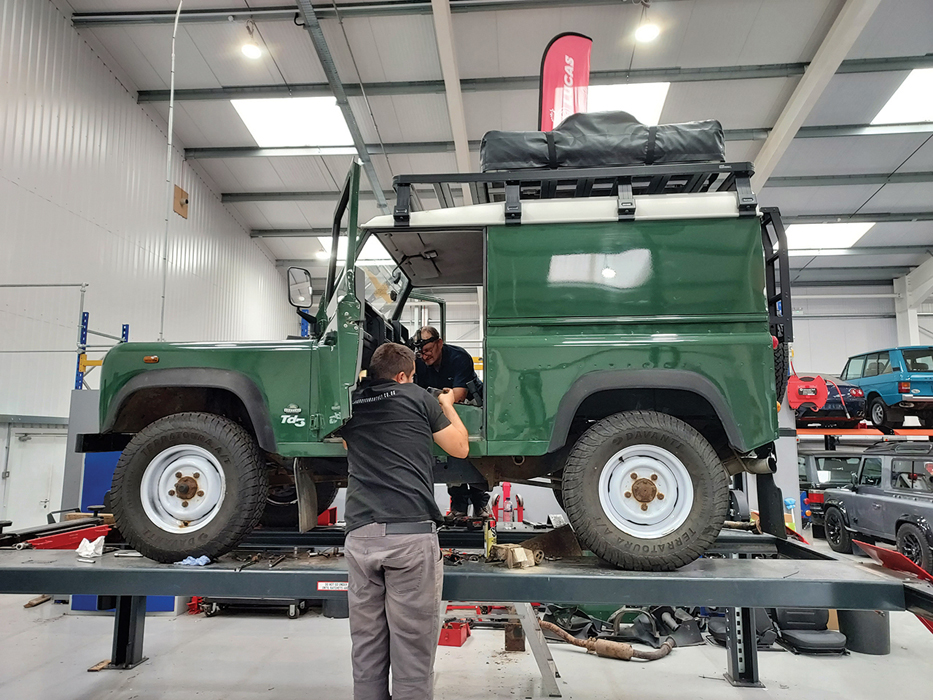
30 May 2024
|
 It's worth checking the Clutch while you're in there
: credit: © Martin Domoney
It's worth checking the Clutch while you're in there
: credit: © Martin Domoney
Make a Defender or Disco 2 drive like new again by renewing these common driveline wear points
Need to know
Time: Two days
Cost: £650
Difficulty: 4 out of 5
Models: Defender and Discovery 2 Td5.
Tools needed: Socket and spanner sets, screwdrivers, torque wrench, pry bar, trim tool, emery cloth, anti-seize compound, hammer, chisels, drifts, clutch alignment tool, trolley jack, minimum 3-tonne axle stands or ramp, transmission jack or cradle.
Parts and costs:
• Valeo clutch and flywheel kit (DA2357G), £630
• Clutch release bearing (FTC5200), £15
• Spigot bush (LFB500050), £3.69
• Clutch release fork bush (571161), £1.19
Island-4x4.co.uk
Work safely: Raise and support the vehicle securely on rated equipment. Wear the correct PPE at all times. Always disconnect the battery before commencing work.
Ever heard a Td5-powered Land Rover start from cold, and instantly fill the air with a loud wailing, screeching noise? If you’ve encountered a Defender or Discovery 2 with a failing spigot bush, you’ll know exactly the sound we’re talking about.
The part that causes this horrendous squeal is a small metal ‘oilite’ bushing, called the spigot bush, and its job is to keep the gearbox’s mainshaft perfectly centred in the middle of the engine’s crankshaft at all times. When it becomes worn, the gearbox shaft can move slightly inside the bush, causing the ear-piercing squeal and, in some cases, clutch judder when pulling away from a standstill.
In order to change this pesky bushing (a part that costs less than £4) the gearbox needs to be removed. If you are unsure when the Land Rover’s clutch was last replaced, it’s well worth changing that at the same time, as it’s a wear item. The same goes for the dual-mass flywheel; unlike a traditional, solid flywheel, the Td5 uses a two-piece unit that is damped to reduce noise, vibration and harshness. As the flywheel ages, the damper begins to break down, which can manifest in a rattle at idle, rough engine sound and clutch judder when changing gear. They’re a lot more affordable than they used to be, so it’s wise to spend the cash on one of these too if the Land Rover is still on its original example – you don’t want to have to take the gearbox back out a few months down the line to do the job all over again. Let’s get started.
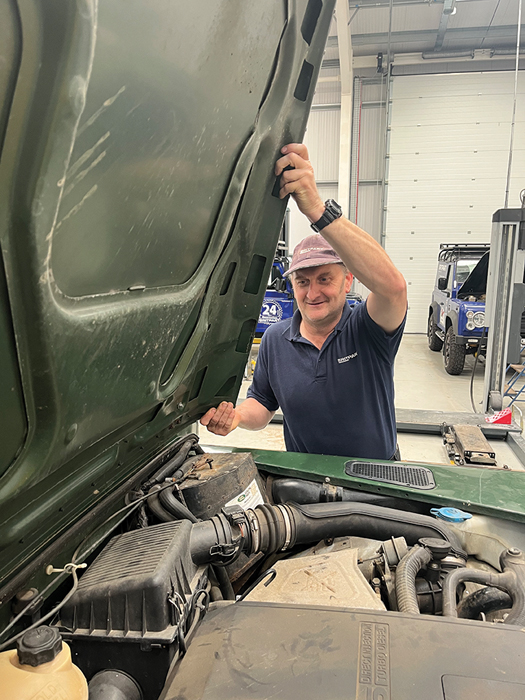
Make life easier: We’ll need access right down the back of the engine shortly, so it makes sense to lift the bonnet off completely. Stow the bonnet prop and tip it up vertical, then remove it with the help of an assistant. Store it carefully, somewhere it won’t get damaged.
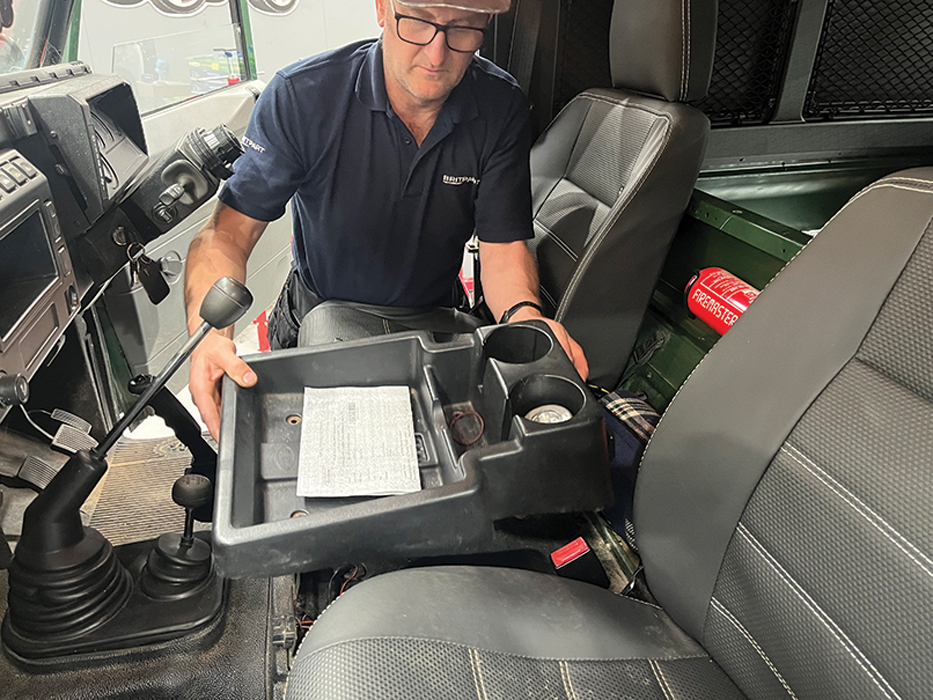
Gaining access: The gearbox tunnel and one-piece matting that sits on top of it will be removed, so undo the four screws securing the cubby box, tray or middle seat in place and lift it out. Loosen and remove the four bolts securing each seat, retrieve the spacers, and lift the seats out.
Remove the mat: Peel the rubber gearlever gaiter up and off the gearbox tunnel. Unscrew the OBD connector bracket, then use a trim tool to pop the securing pins out of the rubber matting and drill out the rivets securing the Special Vehicles plate if needed. Carefully wrangle the mat free.
Stick and cable: Undo the 17mm nut that secures the gearstick onto the selector turret, then mark the position of the splines before lifting the stick away. Peel back the rubber handbrake gaiter, remove the split pin, then retrieve the pin and washer to free the handbrake cable.
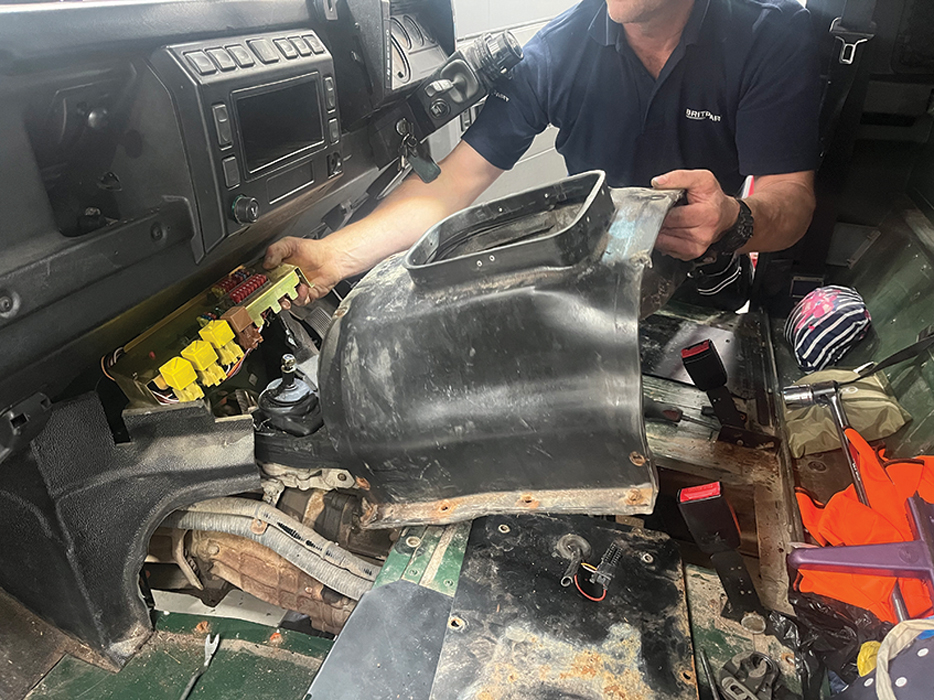
Gearbox tunnel out: Undo the large Phillips screws that hold the floor panels and gearbox tunnel down. Remove the two bolts that secure the fuse-box to the bulkhead and carefully reposition it up and out of the way. Taking care not to cause damage, wiggle the gearbox tunnel free and remove.
Free the wiring: With the tunnel out, we can see the connectors for reverse, diff lock and high/low ratio switches. Unclip them from the bracket and disconnect, then use a trim tool to unclip the big wiring harness from the holders all the way around the gearbox and transfer ’box.
Disconnect the linkage: We’ll be unbolting the selector turret from the gearbox shortly to reduce the chance of it snagging the bodywork as we remove the gearbox. Prepare for this by undoing the 10mm nut and bolt and clevis pin that hold the diff lock and high/low linkages to the selector.
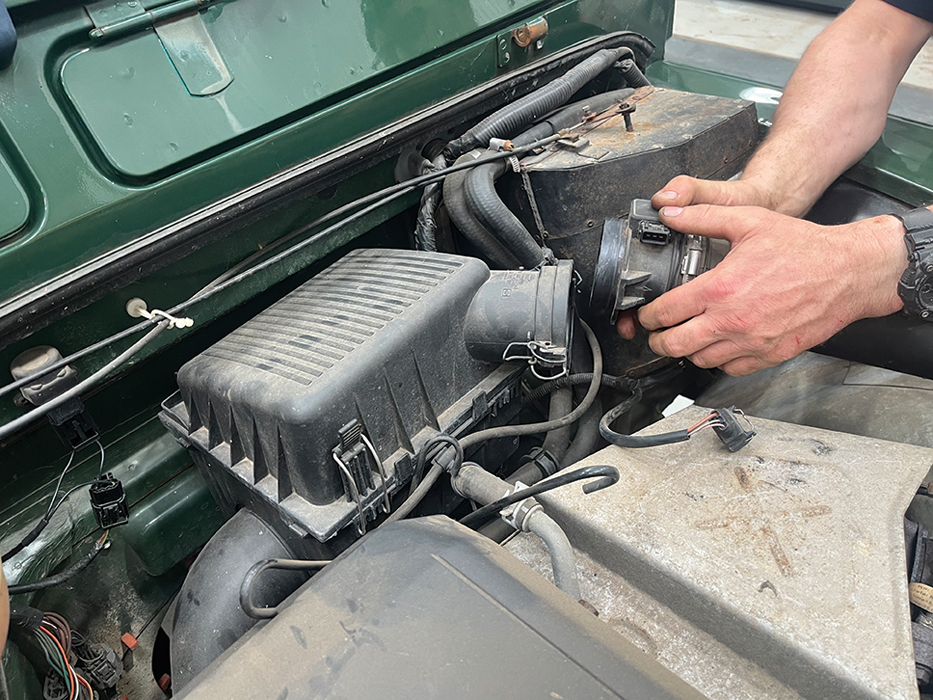
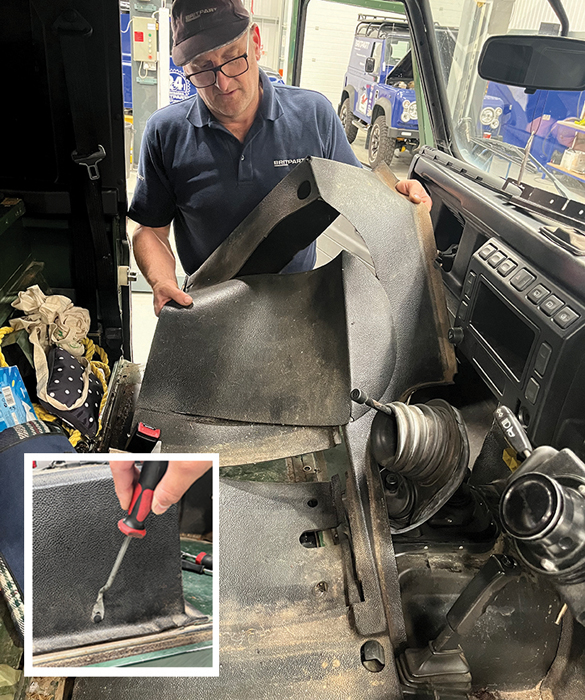
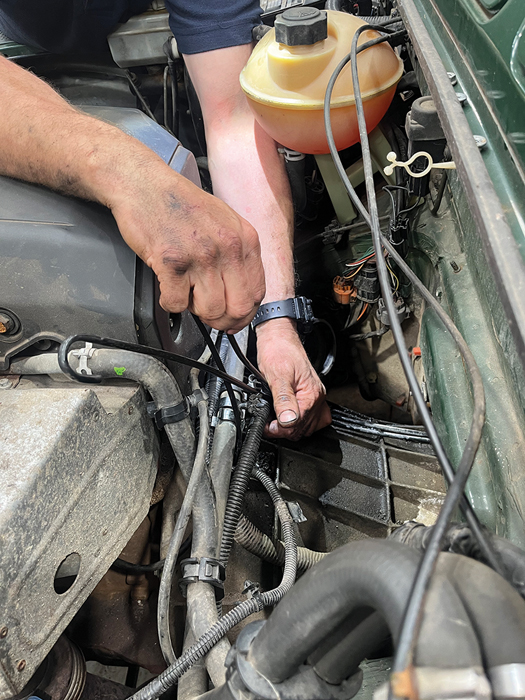
Airbox and breathers: Disconnect the mass air flow (MAF) sensor from the airbox, and unplug the air temperature sensor and vacuum pipe. Wiggle the airbox off its mounting grommets, and lift it away. Unclip the wiring harness and plastic breather pipes from their brackets.
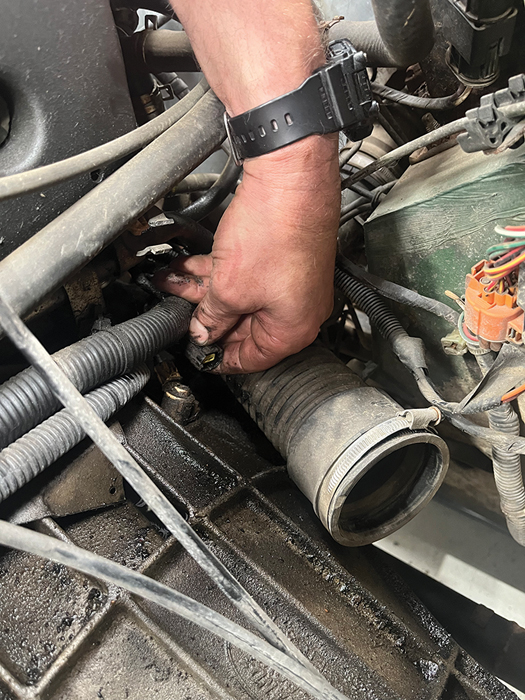
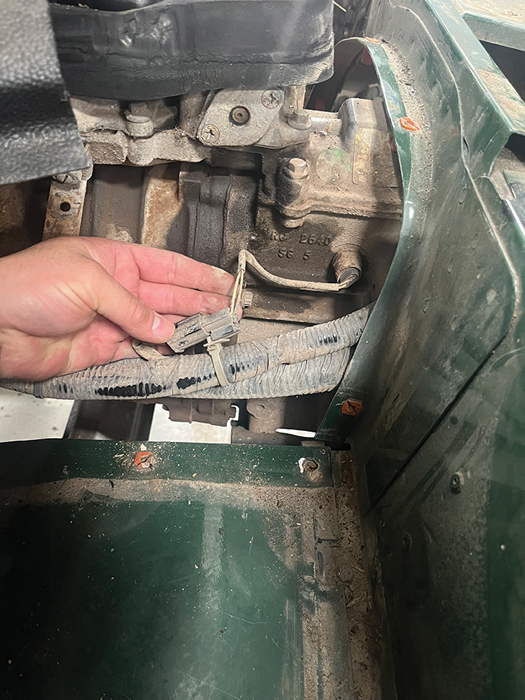
Crank sensor: Use a trim tool to release the thick wiring harness from its holders at the back of the engine, then reach down the offside of the gearbox bellhousing to locate the crankshaft position sensor. Depress the tab on the plastic connector and unplug the sensor
Start undoing bolts: It’s far easier to get to the topmost bellhousing bolts from under the bonnet than from beneath, so use a long 13mm spanner or socket to undo the
two uppermost ones. Undo the single 8mm-headed screw that holds the tin engine backplate to the bellhousing.
Tweak the tabs: The two metal tabs that secure the coolant rail to the back of the engine, that the two upper bellhousing bolts passed through, are right in the way of the gearbox coming out. Use a pair of channel-lock pliers to carefully bend them 90 degrees to clear the way.
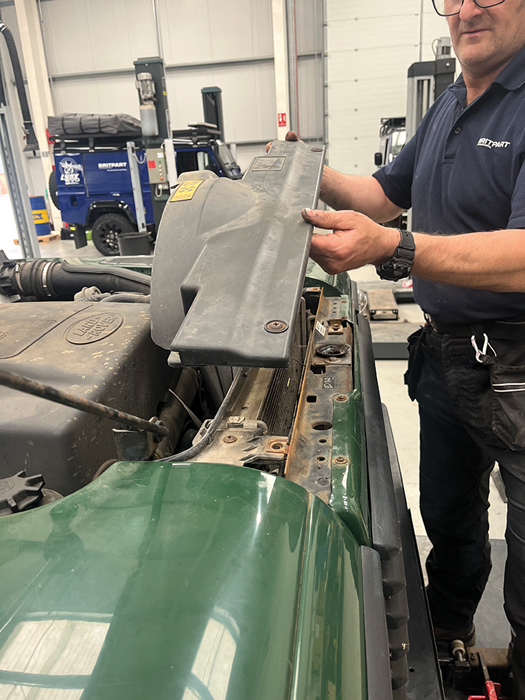
Fan cowl next: The engine will tilt downwards at the back when the gearbox is removed, so naturally it will tilt up at the front. Undo the four Phillips screws holding the upper fan cowl in place, unclip the coolant overflow line and remove the cowl to stop the fan from hitting it.
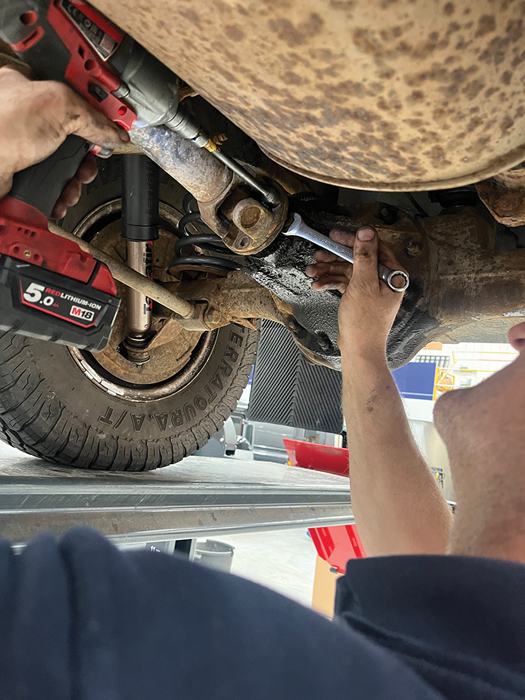
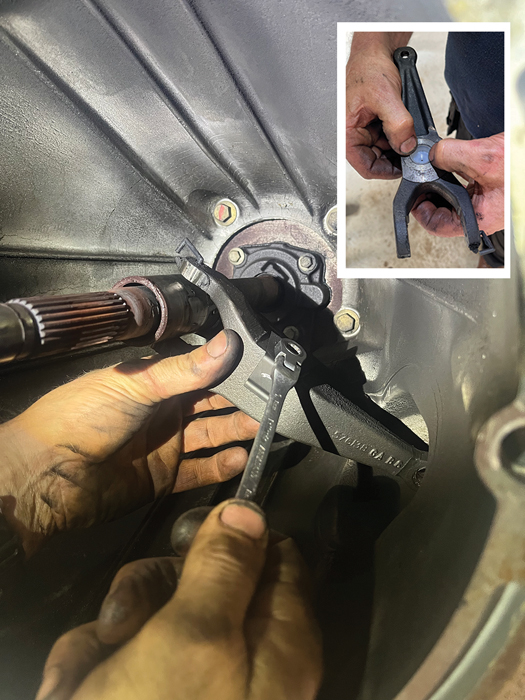
Head underneath: Time to get under the Defender and start removing all the things that are connected to the gearbox and transfer ’box, and clear the way of other parts that are in the way of it lowering out – starting with the front and rear propshafts. Undo the 9/16in nuts, and lift them off.
Propshaft fixings
The front and rear propshafts attach to the transfer ’box and differentials with 9/16in nuts and bolts. Because of the shape of the propshaft universal joints, it can be difficult to get onto the nuts with a traditional socket, and time-consuming to undo them with open-ended spanners. Happily, there are dedicated tools which have a slim shank and thin-walled socket to locate positively on the nuts and bolts and can be used either with a ratchet or impact gun – look up DA1065 for a 3/8in drive one, or DA1119 for the 1/2in drive version.
On the subject of propshaft fixings, it’s worth noting that the nuts are Nyloc, and should be replaced with new when refitting the propshafts; you don’t want them loosening off. Nuts are the same across most Series, Defender, Disco 1 and 2, and classic and P38 Range Rovers: 3/8 UNF thread and 9/16in spanner size.
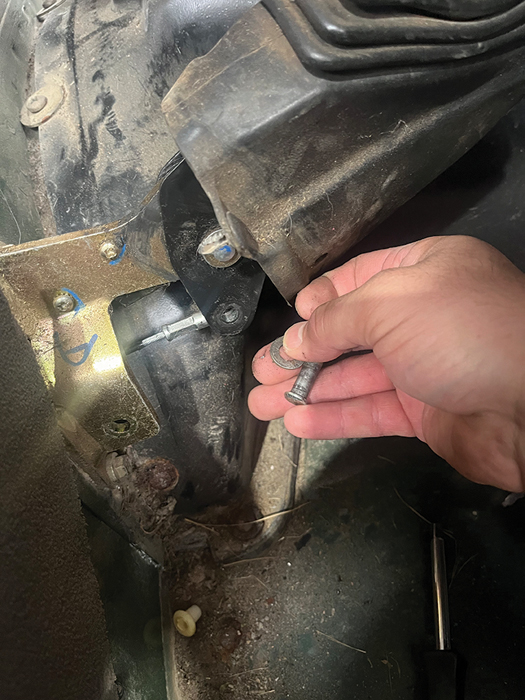
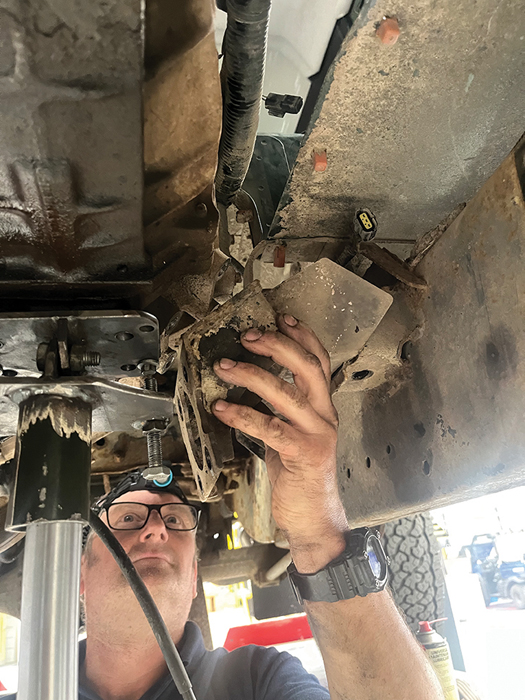
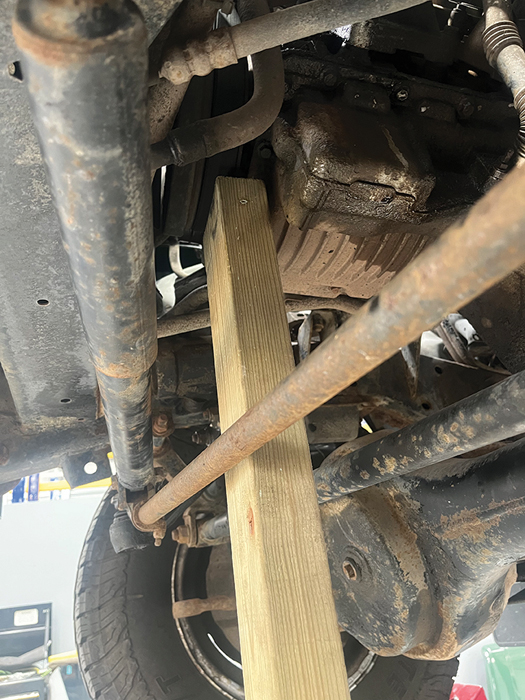
Unbolt crossmember: Next to come off is the crossmember that runs beneath the gearbox. Use a wire brush to clear any rust off the exposed bolt threads, then undo the eight bolts that hold it in place between the chassis rails. Keep the nuts, bolts and washers together for later.
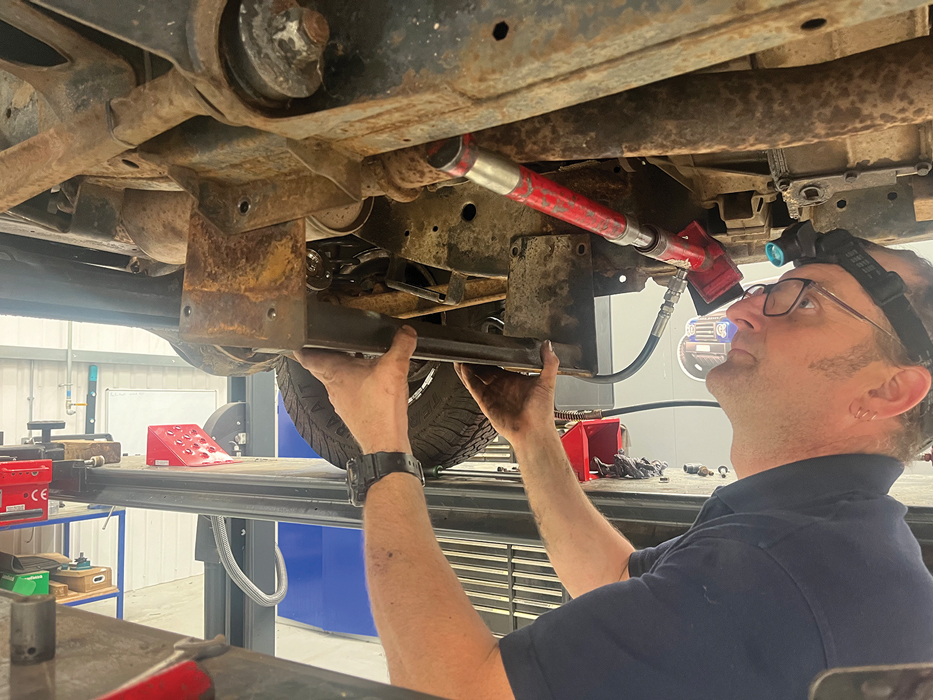
A tight squeeze: Here we are using a Porta-power hydraulic spreader to open the chassis rails up slightly to let the interference-fit crossmember out. If you don’t have one, gradually tap the crossmember down and out from between the rails with a copper hammer.
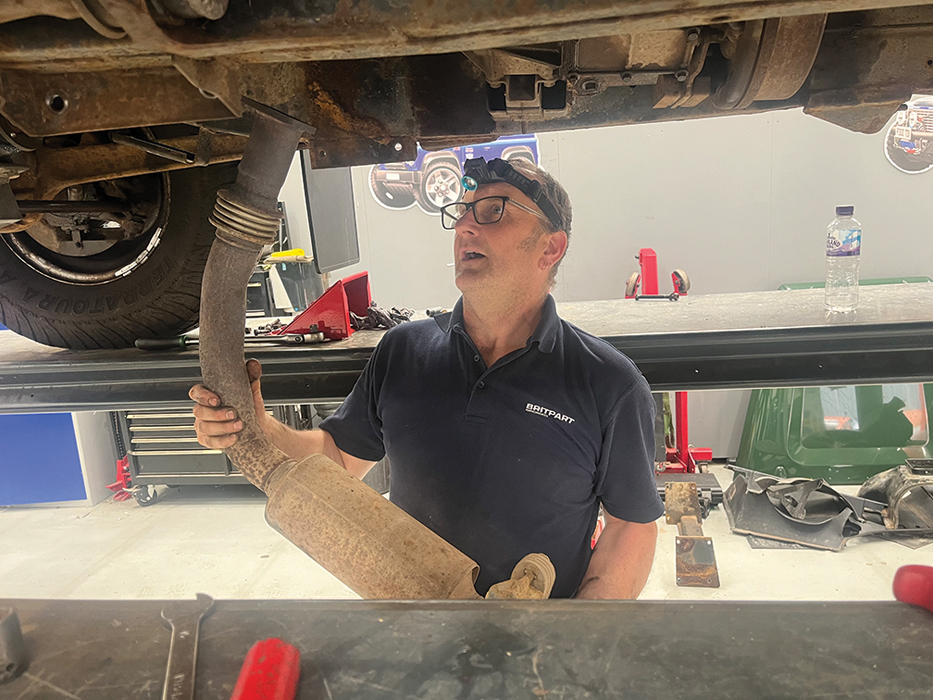
Exhausting work: Undo the two 17mm nuts that hold the exhaust downpipe to the rear section; use heat and penetrating oil where needed. Undo the three 15mm nuts that secure it to the turbocharger using long extensions; lever the rubber mount free, and remove the downpipe.

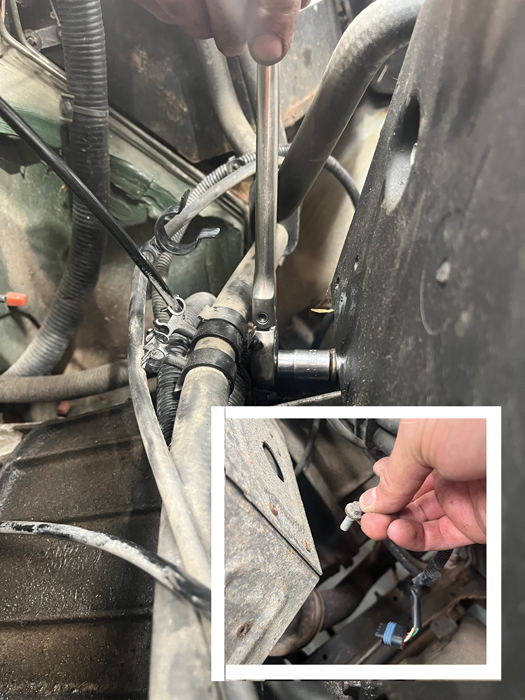
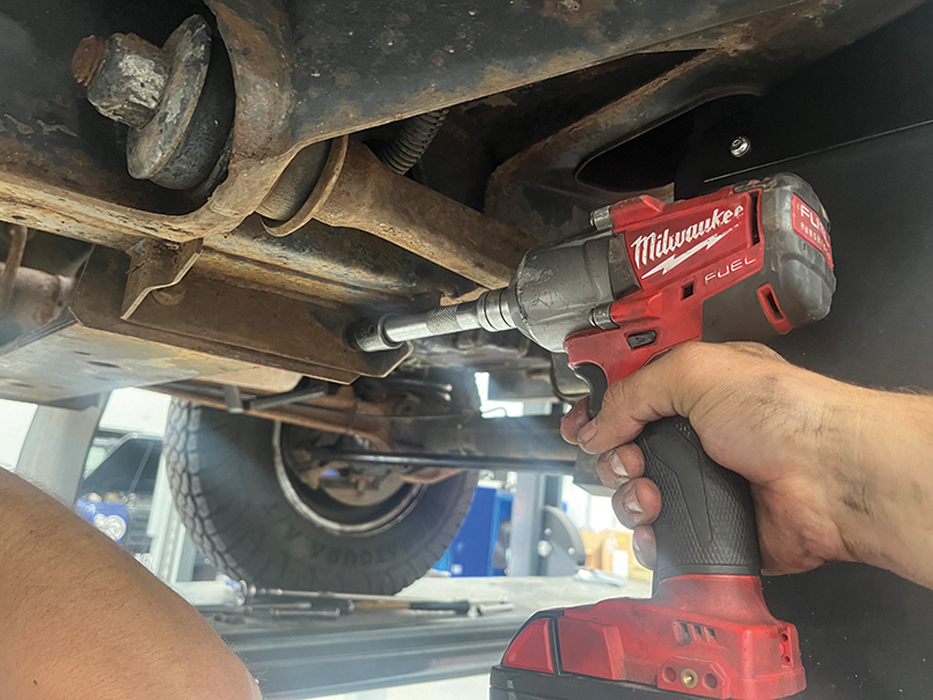
Feeds and earths: Loosen and remove the 13mm nut holding the main power feed onto the starter motor solenoid, and release the exciter wire’s spade connector. At the transfer ’box, undo the 17mm nut and 10mm bolt sandwiching the large and small earth cables onto the casing.
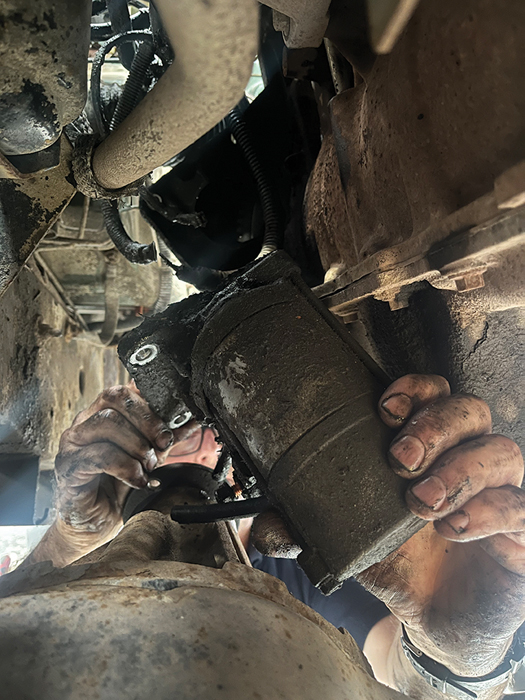
Starter motor out: With the wires now disconnected, the starter motor can be removed. Undo the two 13mm bolts and single 15mm nut – the latter is tricky to get to, and best accessed with long extensions working from underneath the inlet manifold. Once loose, remove the starter.
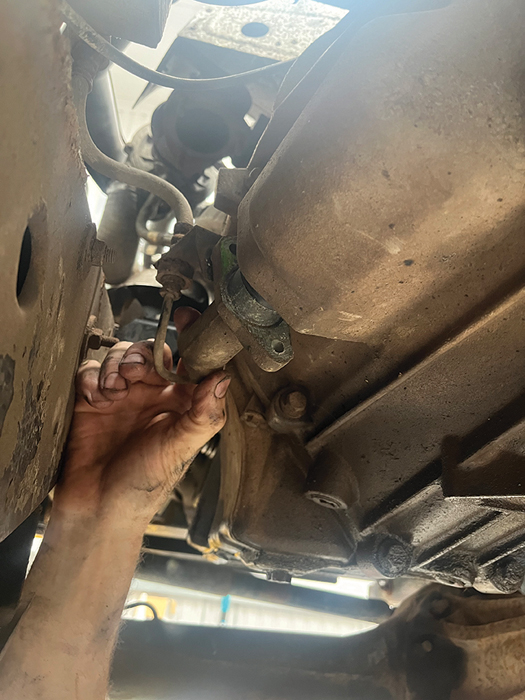
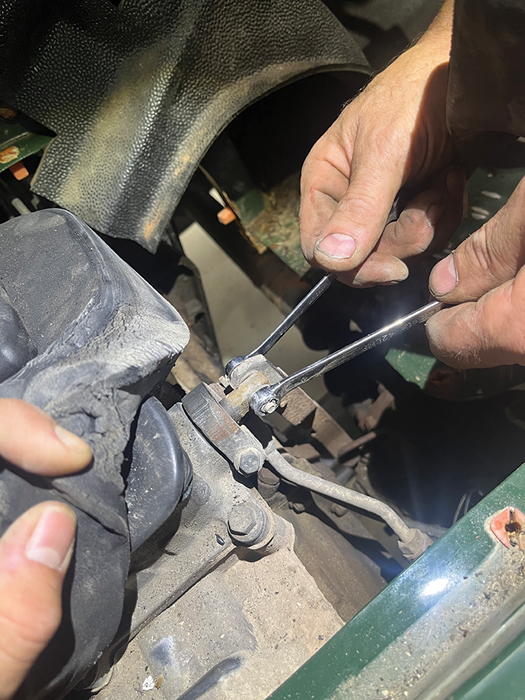
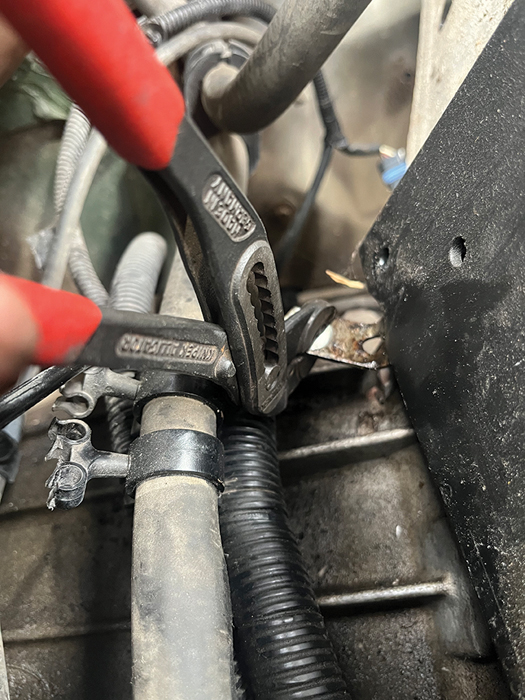
Slave cylinder now: There’s no need to break into the hydraulic system, which means no bleeding back up later. Simply undo the two 10mm-headed bolts and ease the clutch slave cylinder out of the bellhousing. Don’t worry if the pushrod comes unclipped, it can be reattached soon.

Unbolt the mounts: The gearbox mounts can now be unbolted from the gearbox and chassis brackets. Loosen and undo the four 15mm bolts each side, then remove the 15mm flange nuts from the threads. The gearbox won’t move until it’s lifted up, when the mounts can be withdrawn.
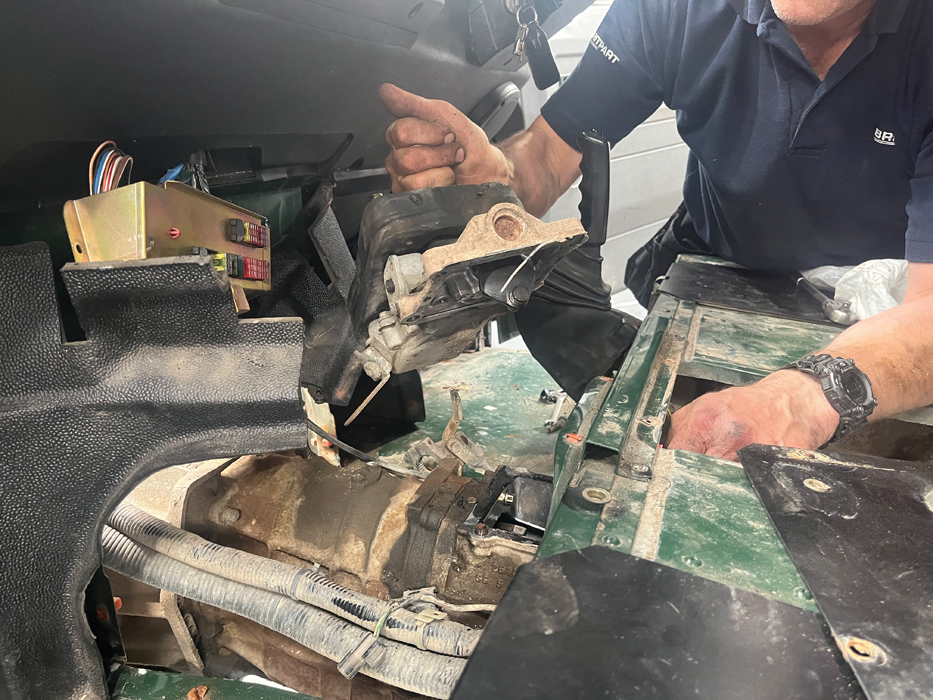
One last thing… To make it easier for the gearbox to come back and down without catching on anything, the gear selector turret is unbolted and removed. It’s held onto the top of the gearbox with four 10mm bolts – undo them then break the gasket seal and lift the turret away.
Mounts out: Position your transmission jack and attach it to the gearbox, then gradually lift the back of the transmission up until the mounts can come past the chassis brackets. Now that they are out of the way, the gearbox will be able to move freely to the back of the vehicle.
Get a tilt on: With the mounts clear, lower the back of the gearbox down to make access to the remaining bellhousing bolts easier, and give the gearbox a clear path rearward to be removed. Position another jack with a block of wood to support the front of the engine.
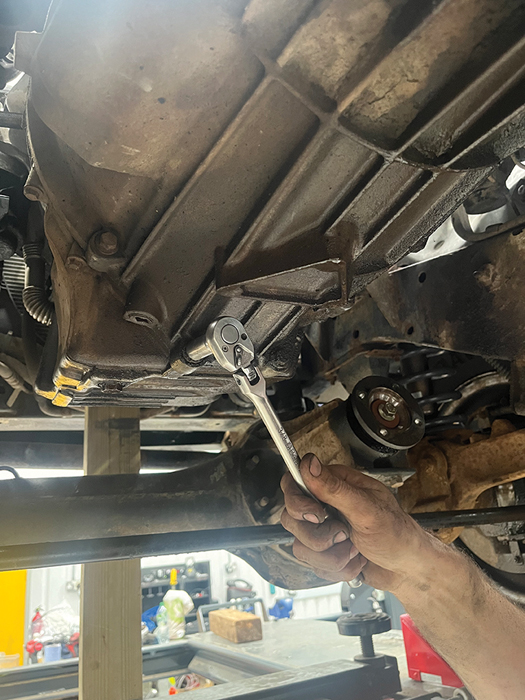
Last bolts out: The last few bellhousing bolts can now be undone and removed with a 13mm socket and ratchet. With the engine and gearbox tilted down at the gearbox end it’s much easier to get to the bolts up the side, but the top two would still be tricky, hence getting them earlier.
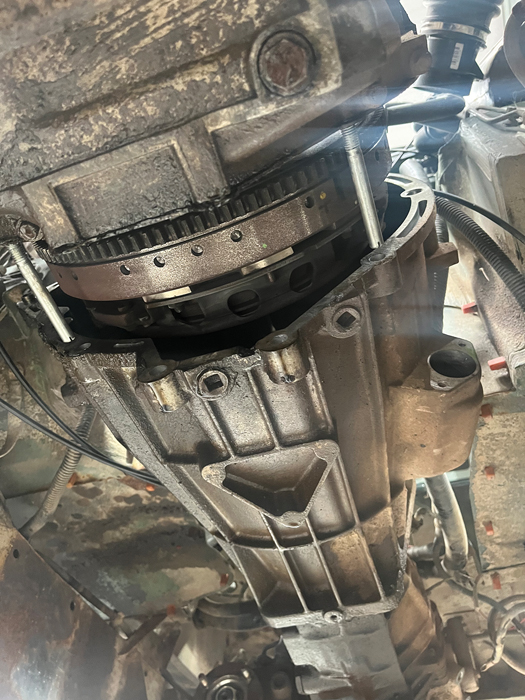
Ease it back: Once all the bellhousing bolts are out, the gearbox can be split from the engine. Use a flat-blade screwdriver or pry bar to pop it off the dowels, adjust the jack to take the weight, then wiggle and pull it away from the engine. We have fitted studs to aid realignment later.
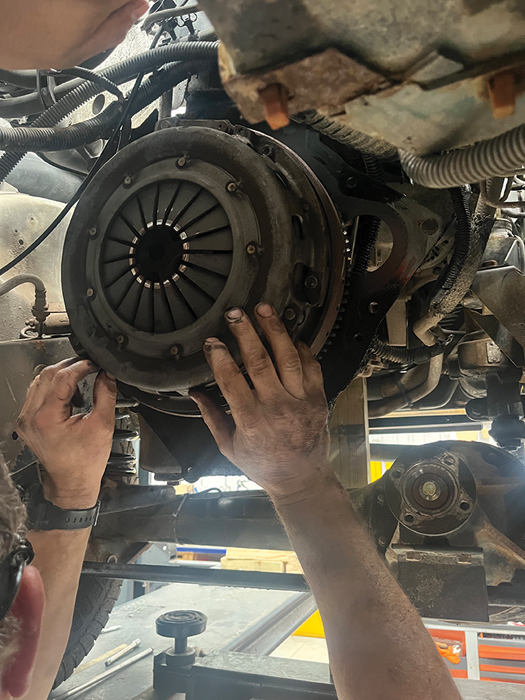
Clutch cover off: The clutch and flywheel are now exposed. Start by undoing the six 10mm screws that hold the clutch pressure plate, or cover, in place before lifting it away with the old friction disc. The polished centre of the clutch cover is where the release bearing acts on it.
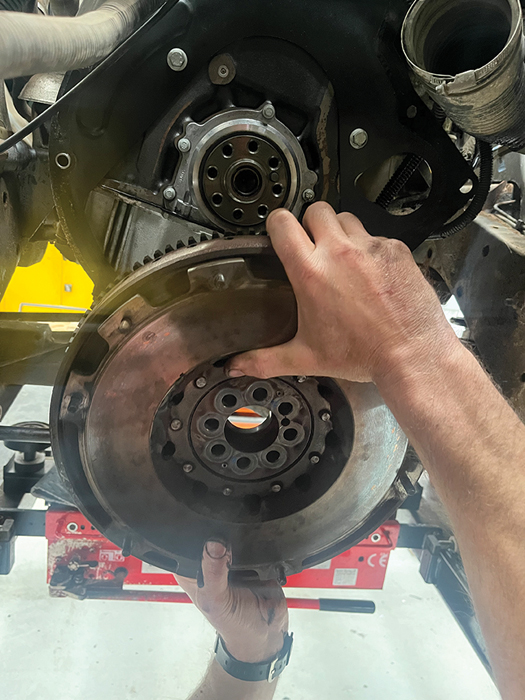
Undo flywheel bolts: Whether you’re replacing the flywheel or not, you’ll want to remove it to gain better access to the spigot bush. An impact gun works best, but if you don’t have one, stop the flywheel from turning with a bar and undo them manually. Once undone, lift the heavy flywheel off.
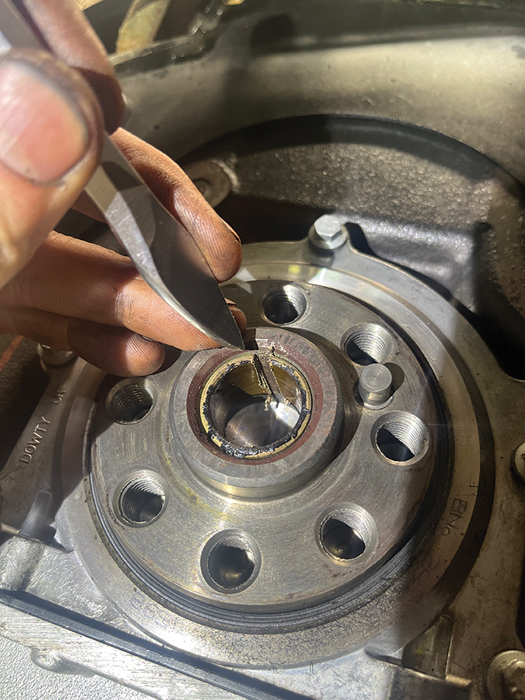
Get chiselling: The bronze spigot bush is now visible in the end of the crankshaft. There are several elaborate ways of removing it with hydraulic pressure using grease or even bread, but the most reliable way is to split it in one or two places with a hammer and sharp chisel.
Remove the remains: Once the chisel has split the bushing and the pressure is relieved, it will come out of the recess in the crankshaft easily, in one or more pieces. Be sure to clean the end of the crankshaft well, and that no small chunks of the old bushing remain inside.
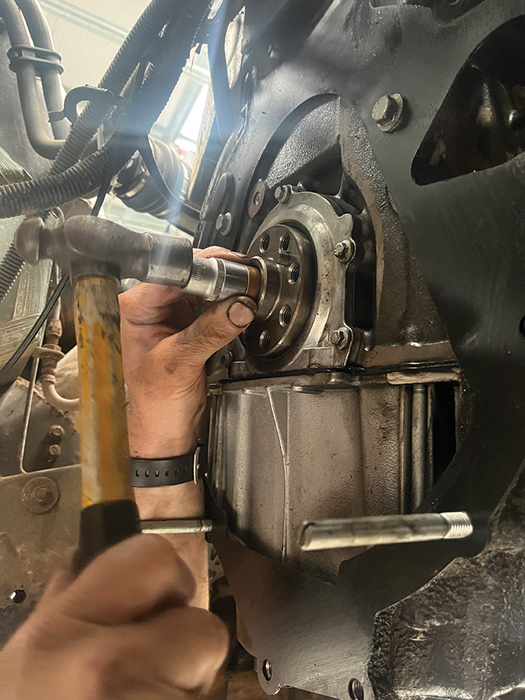
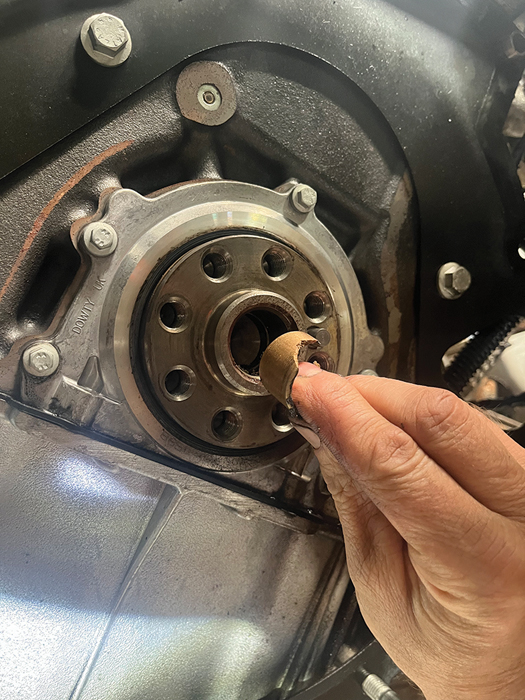
Fit new bushing: The new bushing will last longer if it’s pre-soaked in oil, as this is what provides the lubrication between the surfaces; the bronze is porous and holds the oil in. After a good soak in EP90 or moly grease, line up the bushing and tap it home with a suitable socket.
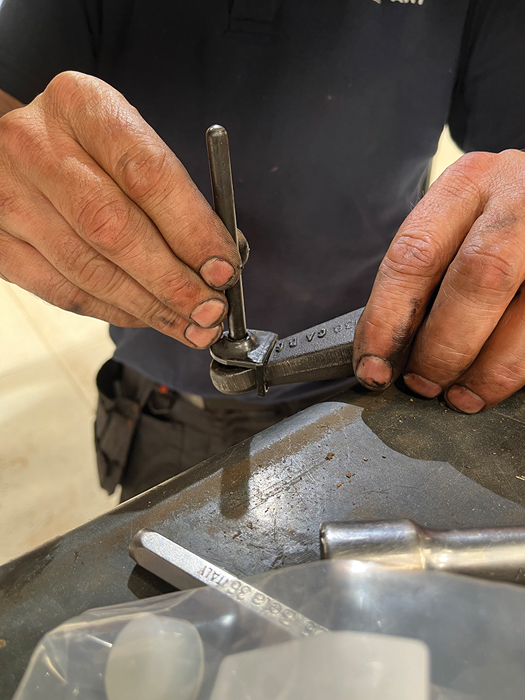
Release fork overhaul: While the gearbox is out, it makes sense to address other wear points. Undo the single 8mm screw that secures the clutch release fork, and remove it. Clean it up and lever out the old nylon pivot cup, then push in a new one and lubricate: part no. 571161.
Cylinder pushrod: It’s vital that the slave cylinder pushrod is clipped securely to the end of the release fork with the plastic retainer, so it can be fed into the slave as that is bolted back on. You don’t want to be trying to clip the rod into place when the gearbox is back in – it’s a fiddle.
New release bearing: Feed the slave cylinder pushrod through the hole, then lubricate the pivot and bolt the release fork back on. Some clutch kits come with a new release bearing and some don’t, but you’ll want to replace it either way. Lubricate the tube it slides on, and clip it to the fork.
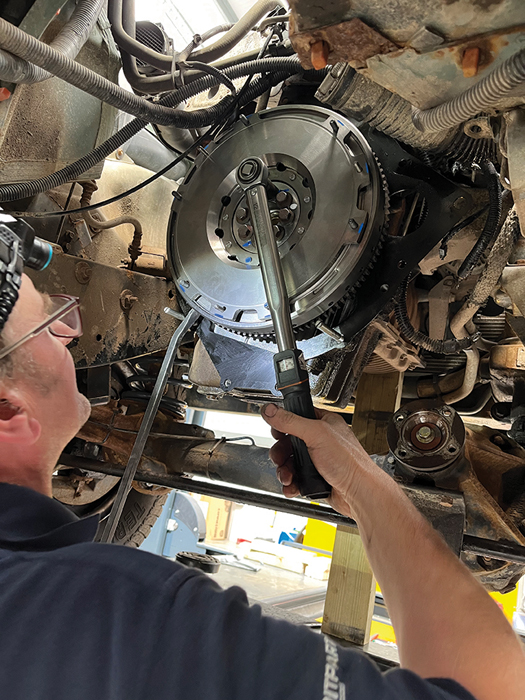
Fit the flywheel: The Valeo kit comes with a new dual-mass flywheel which will replace the 22-year-old original. Lift it onto the dowels, fit the bolts with locking compound, then stop the flywheel from turning with a pry bar before torquing the bolts evenly to 110Nm.
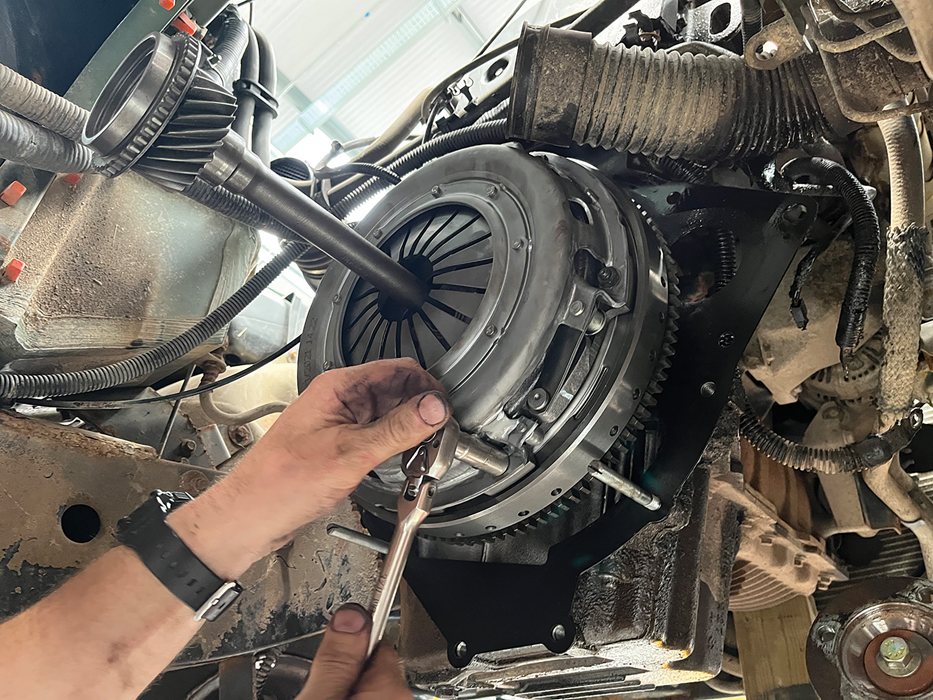
Install new clutch: Degrease the flywheel with brake cleaner, then offer the clutch friction disc up, noting the orientation marked on the disc. Position the clutch cover over the top and fit the bolts loosely, then use an alignment tool to centre the disc, and tighten the six bolts gradually.

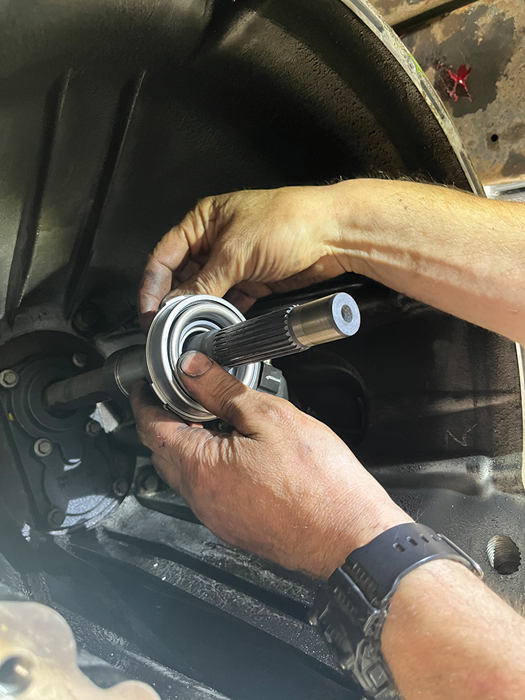
Mainshaft inspection: It’s important that the gearbox mainshaft is free from burrs and scratches, or the new spigot bush will wear prematurely. Degrease with brake cleaner, inspect and sand any burrs, then lubricate the end of the mainshaft with a smear of grease or light oil.
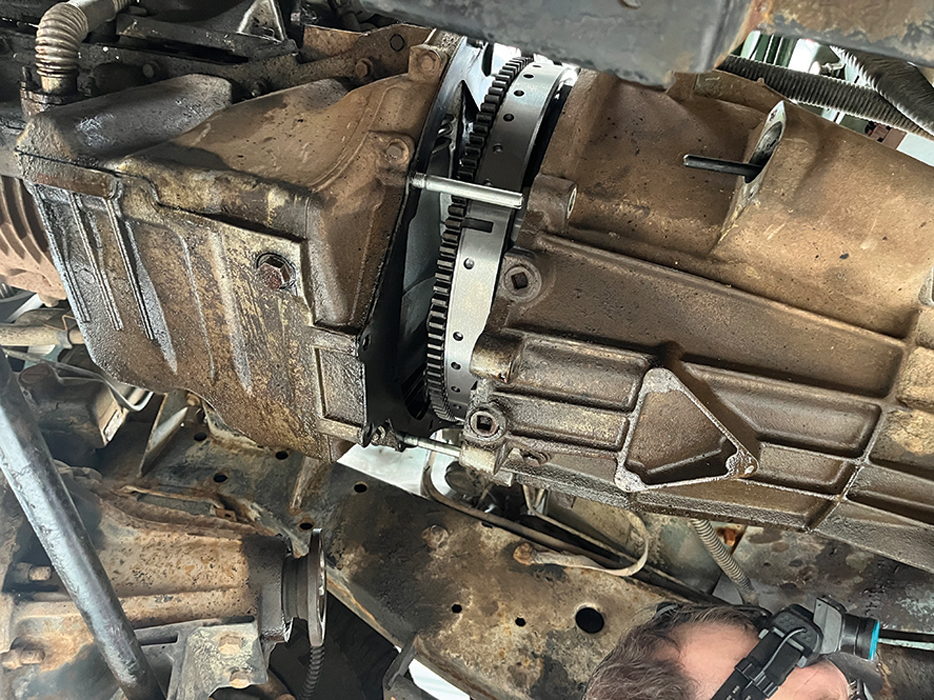
Refit the gearbox: With the new spigot bush, flywheel, clutch and release bearing in place, the gearbox can mate back to the engine. Take your time, make angle adjustments and don’t force anything – you may have to rotate the engine with the crank pulley to align the splines.
Check up the top: With the wiring and breathers all fighting for space at the top of the bellhousing, it’s important to make sure nothing falls between the gearbox and engine as they come together. Once located on the dowels, fit and tighten the eight bellhousing bolts.
Refitting is… the reverse of removal, to quote the famous manuals. Bolt the mounts, props, exhaust, crossmember and slave cylinder back on, and reconnect and secure the wiring and coolant rail. Refit selector and interior and enjoy quiet, smooth clutch operation once more.
Like to have your own Land Rover library?
Try our All-Access Digital Subscription. You'll get access to over 7 years of Land Rover Monthly – that’s more than 100 issues plus the latest digital issue. All issues are fully searchable so you can easily find what you are looking for and what’s more it’s less than 10p a day to subscribe. Click the link above to find out more details and start enjoying all the benefits now.