


02 August 2021
|
 You might have to see the professionals for this one
: credit: © Dave Barker
You might have to see the professionals for this one
: credit: © Dave Barker
Swapping the rad on a modern Land Rover needs plenty of time, and some help from your local garage, as Dave Barker explains
Time: 4 hours
Cost: See below
Difficulty: 4/5
Model: Freelander 2
Tools: General workshop tools, including 8, 10, 13, 17 and 19 mm spanners and sockets, a vehicle lift or suitable jack and axle stands.
Parts & Costs: Radiator for Freelander 2 diesel, six-speed manual (part LR 039623), £122 to £370 depending on make and supplier.
Work safely:
• Before working underneath a vehicle, ensure it is securely supported using equipment that is appropriately rated for the job and is in good order.
• Wear protective gloves or barrier cream to protect the skin from oils and sharp edges of components.
• Allow the engine and coolant system to fully cool down before working on the coolant system, or opening the coolant filler cap.
• Always open the coolant filler cap slowly and carefully in case of residual pressure inside.
Thanks to: Maddison 4x4, Water House Farm, Station Road, Topcliffe near Thirsk, YO7 3SG. Tel: 01845 587407, maddison4x4.com.
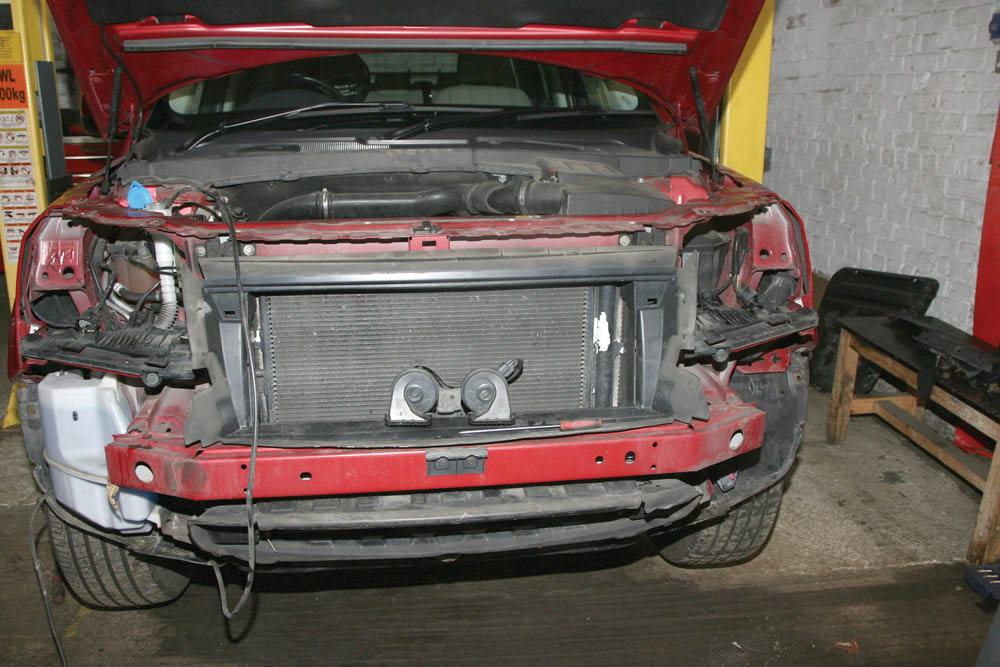
This 2013 Freelander 2 with 75,000 miles on the clock had no signs of overheating, just a puddle of leaked coolant under the front while parked up and a ‘low-coolant’ warning message on the dash. A pressure test confirmed a leak from the bottom edge of the radiator where corrosion could be seen, confirming a replacement radiator would be required.
The last radiator I replaced in a car took around 15 minutes – just two bolts and two compression clips to undo, lift the old one out and drop the new one in – and the radiator cost about £40. I was shocked that almost the complete front of the car had to be dismantled on this Freelander 2 to replace the radiator. The radiator isn’t overly expensive but, if air conditioning is fitted, its condenser needs to be removed, involving draining and refilling the refrigerant, at extra cost. Then there’s around four hours labour costs. Anyone doing this job themselves will need to take the Freelander to a garage to have the air conditioning refrigerant safely removed and stored before starting the work, and then return for the system to be re-charged after completion.
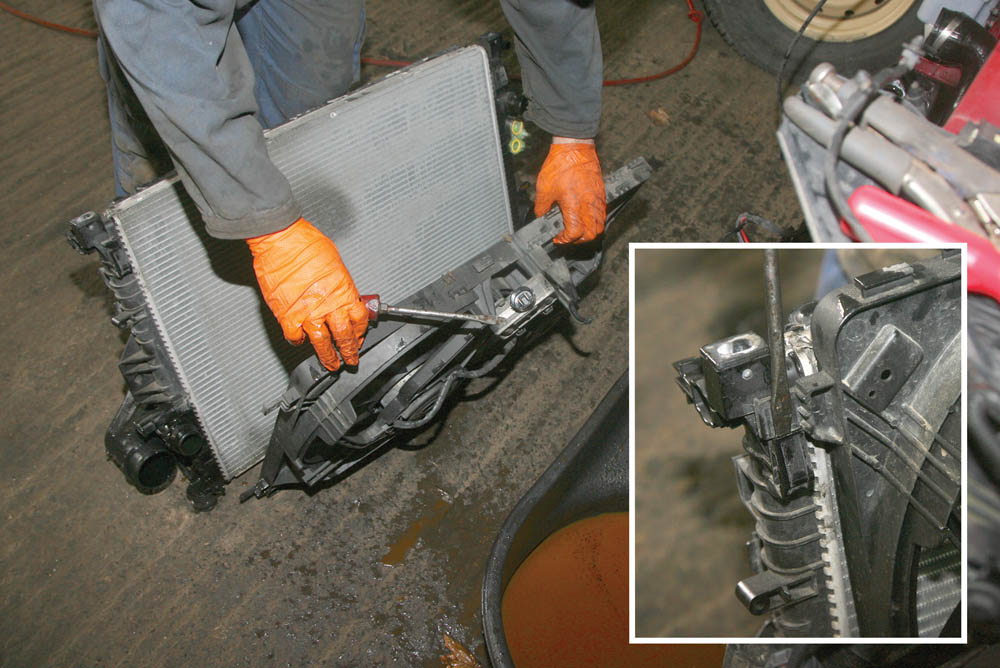
Note: As this Freelander has air conditioning, the refrigerant in the system needs to be removed and later replaced. This work needs to be carried out a garage with the appropriate equipment.
Wear eye protection when disconnecting the air conditioning pipework even though the refrigerant has been removed.
Reaching the heat exchanger pack

1. Leak located: With the Freelander up on the lift and the engine undershield removed, a damp area and signs of corrosion could be seen along the bottom of radiator.

2. Trim pieces: Under the bumper, this towing eye cover is removed (two screws), and also the black deflector panels (one seen to the left here), one on each side.

3. Headlamps: Both headlights are unclipped from the bumper and securing bolts removed, then they are pulled forward, the multiplug disconnected, and the lamps removed.

4. Cover bolts: The bumper cover is secured in position on its lower edge by a bolt at each side to the main bumper armature – these are removed next.

5. Hidden bolts: The wheel arch liner is released from the bumper cover and pulled back, then a securing bolt each side securing the bumper to the inner wing can be removed.

6. Releasing the grille: The four securing bolts along the top edge of the bumper cover/grille assembly that secure it to the bonnet latch panel are next to be undone and removed.

7. Hidden bolt: At each side in the headlamp recess there is a bracket securing the bumper cover to the front of the body shell, which needs to be released.

8. Disconnecting: The bumper cover is pulled outwards and released from the front of the Freelander. These fog lamp multiplugs and the headlamp washer jet pipes are disconnected.

9. Lift off: The front bumper/grille assembly is cumbersome for one person to lift off. Before doing so, prepare a space where it can be laid out safely without risking damage.
10. Exposed: With the bumper cover removed, we see the air conditioning condenser sat in front of the coolant radiator, so there’s more work before the radiator can be tackled.

11. Remove the deflector: Next to be removed was the rubber air deflector section which sits in front of the main radiator assembly, a clip each side holds this in position.

12. Strictly a garage job: The refrigerant in the Freelander’s air conditioning system needs to be pumped out using an air conditioning service machine, and stored, to be replaced later.
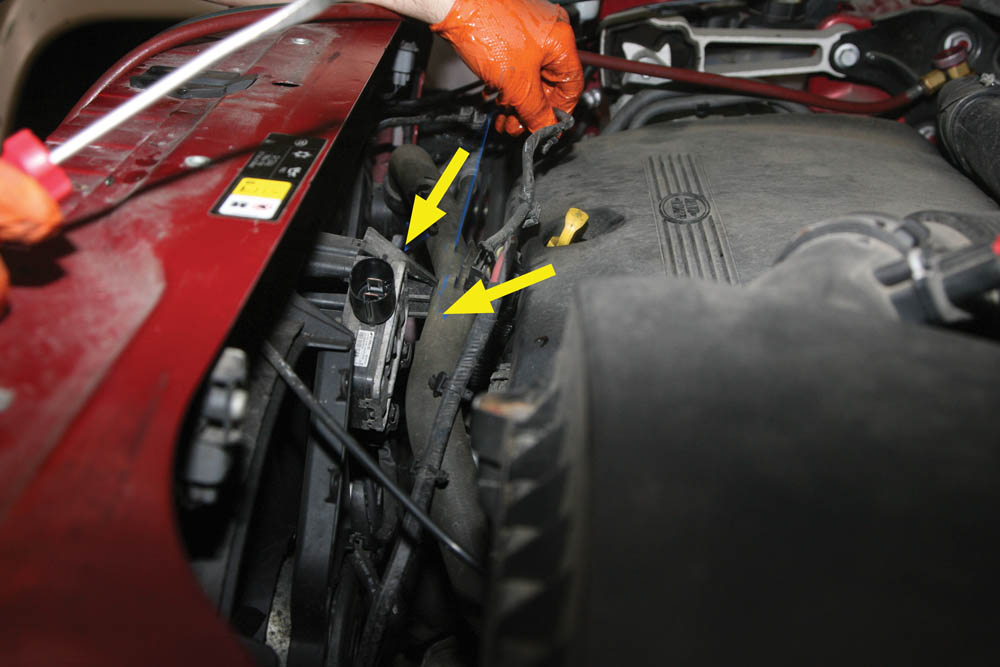
13. Unplug and clamp: The multiplug connections to the twin electric fans’ control module is now disconnected and then the coolant top hose of the radiator is clamped off.

14. Unbolt: The front bumper armature is next to be undone. This is secured into position by four captive bolts/studs and nuts at each side of the Freelander’s main body shell.

15. Lift away: Once all eight securing nuts have been removed and the multiplug to the twin horns disconnected, the bumper armature can be lifted off from the Freelander.
16. Another deflector: With the bumper now removed, the larger inner air deflector around the heat exchangers, including the charge air cooler (intercooler), is unclipped and removed.

17. Intercooler connections: The charge air cooler sensor multiplug is now disconnected, then the intercooler to turbo and inlet manifold hose clamps are undone and the hoses pulled off.

18. Squeeze and unclip: The coolant hoses are pulled off the radiator by squeezing their quick-release spring clips and prising up a little. The coolant is drained into a clean container.

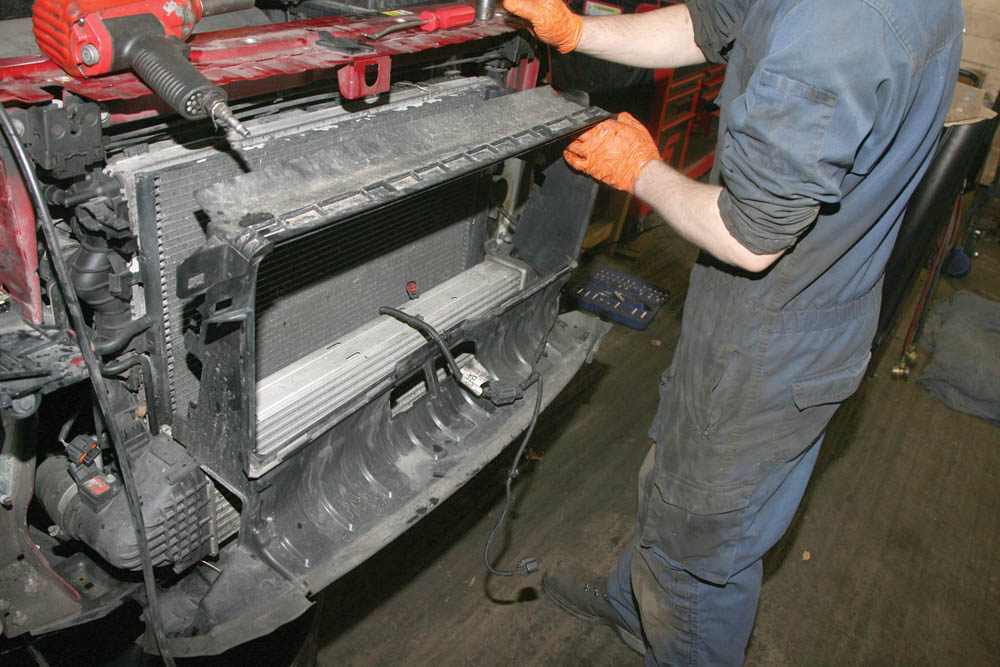
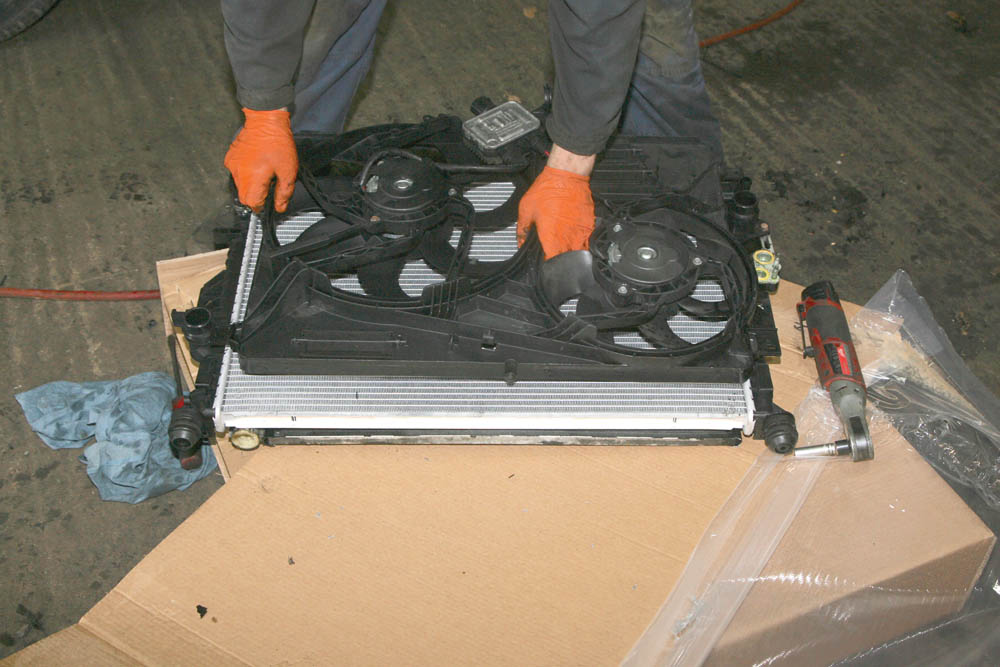
19. Unbolt the bracket: The heat exchanger pack, consisting of coolant radiator, air con condenser, intercooler and fans, is secured to the front bonnet latch panel by a bolt at each side.
20. Pipes removed: With refrigerant gas extracted, both air con pipes can be unbolted from the condenser, wearing eye protection. Cover the open ends – cleanliness is essential.

21. Removed at last: Now that everything has been disconnected and unbolted, the complete heat exchanger pack assembly can be lifted out and away from the Freelander.
Extracting the radiator
22. Take the fans off: The twin fans are removed from the assembly by releasing a securing clip (inset) on each side of the heat exchanger pack, and lifting the fans upward.

23. Charge air cooler: The mounting bracket (inset) at the bottom of the coolant radiator is unbolted, allowing the charge air cooler to be lifted off the coolant radiator.

24. Unclip and remove: With the charge air cooler removed from the front of the heat exchanger pack, the air-conditioning condenser (foreground) simply unclips off the coolant radiator.
Rebuilding the heat exchanger pack

25. New part: The new radiator with plastic headers is almost ready to fit. But first, a number of parts from the old radiator need to be transferred to the new one.

26. Retrieve bushes: Before the old damaged coolant radiator is discarded, the two lower rubber support bushes in the bottom corners are removed, and then fitted into the new radiator.

27. Pull out plugs: Located in the top corners of the old radiator are two rubber plugs. These are also removed and then refitted into the top corners of the new coolant radiator.

28. Upper supports: The radiator top support brackets, plus various other locating clips and brackets, are also removed from the old radiator and fitted onto the new one.
29. Reunited: The air conditioning condenser is clipped into position on the new radiator, then the assembly is turned over and the twin electric fan assembly is clipped into position.
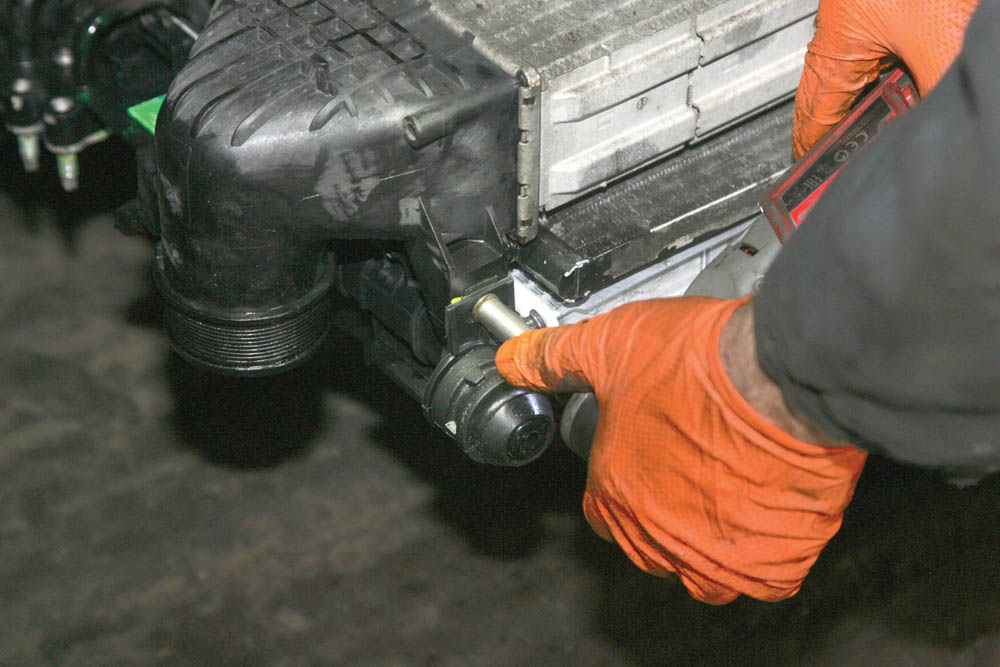
30. Completing the pack: Now the charge air cooler is positioned
in front of the air conditioning condenser and securely bolted back into position to complete the heat exchanger pack.

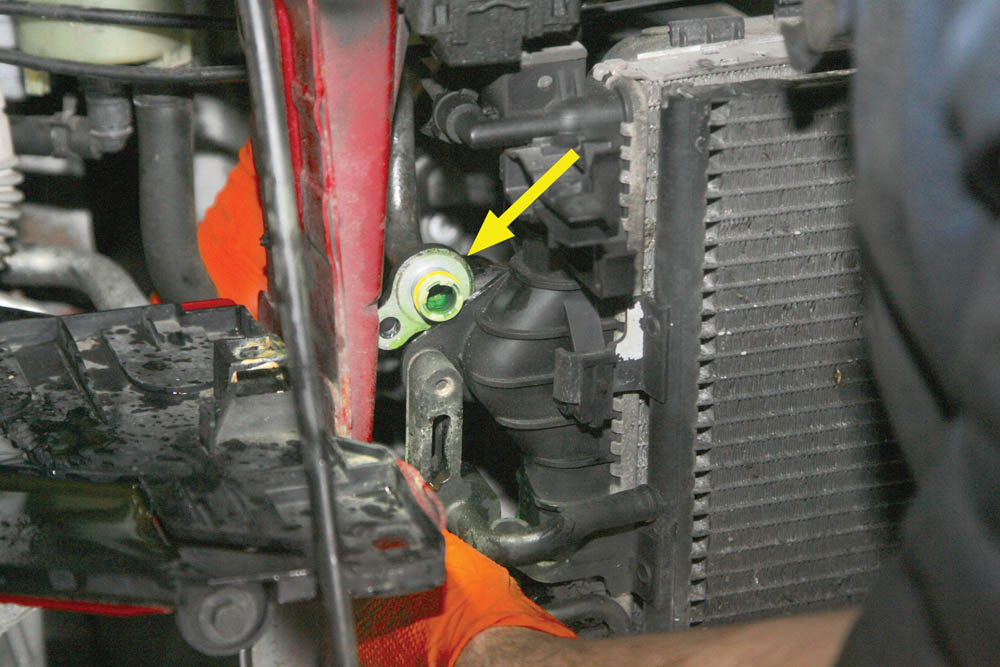
31. Back in position: The heat exchanger pack is lifted in, locating the two lower rubber support bushes, before securing it to the bonnet latch panel by refitting the two upper bolts (inset).
32. Hear the click: The coolant hoses are fitted to the radiator. As the spring clips are pressed in, they can be heard and felt clicking into place, but worth double checking.

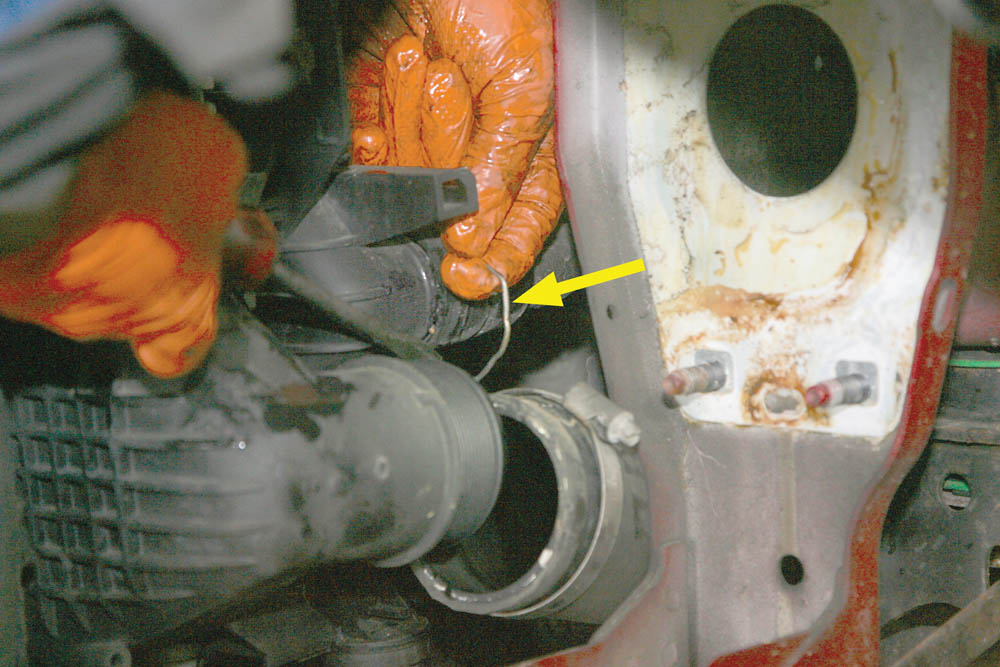
33. Plug in: The hoses to both sides of the charge air cooler (intercooler) are now refitted and the hose clips tightened. The sensor multiplug is then reconnected.

34. Bolt in position: Next both air conditioning pipes are fitted back into position on the charge air cooler/intercooler and then the securing bolts refitted and tightened.

35. Armature on: The bumper armature is refitted and the securing bolts to the front body tightened to 48 Nm. The two air deflectors are clipped in, and the horns are reconnected.

36. Lift into place: After reconnecting the headlamp washer pipes and fog lamp multiplugs, the front bumper cover is lifted back on and the various fixings securing it to the body are tightened.

37. Lights in: With the front bumper cover and front grille now in position, the headlights are refitted, and also the lower towing eye cover and the two trim deflectors.

38. Replacing refrigerant: The air conditioning refrigerant that was removed is now put back into the system and topped up to the correct quantity according to the label in the engine bay.
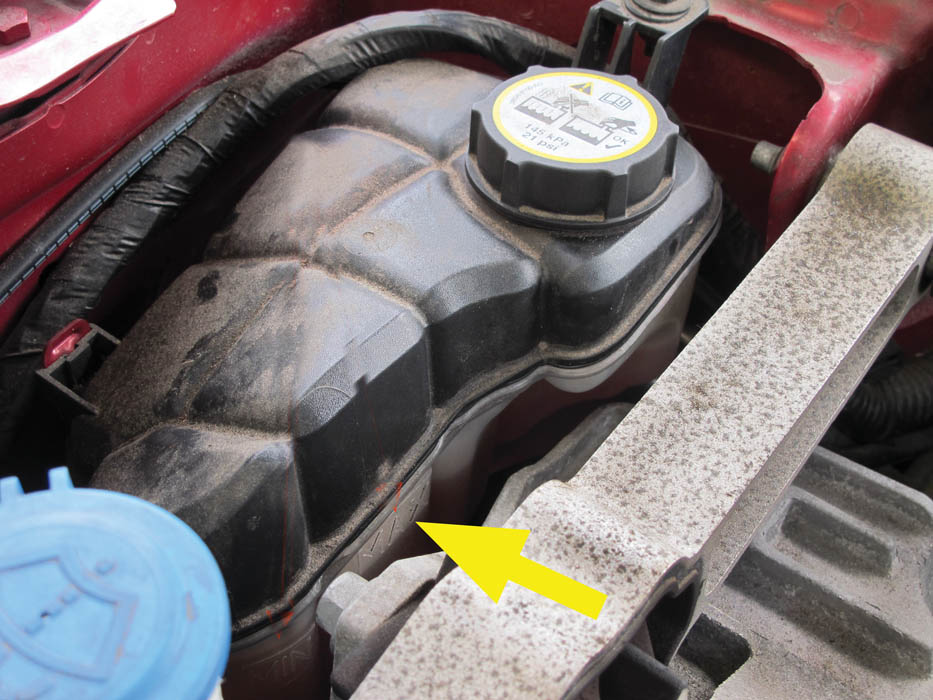
39. Coolant fill: The coolant system is refilled with the correct antifreeze solution, the engine run to temperature, then switched off before checking for coolant leaks. After the system has fully cooled, the coolant level is re-checked and topped up if needed. The level should be checked occasionally for the first few miles, allowing it to cool before topping up again if needed.
Did you know that you can now get access to the entire archive of Land Rover magazine content with our brand new digital archive? You can enjoy all the issues since the launch of the magazine – use the search bar below to find features, reviews and other great content: