


04 January 2024
|
 Trevor begins the satisfying task of final fittings
: credit: © Trevor Cuthbert
Trevor begins the satisfying task of final fittings
: credit: © Trevor Cuthbert
With the new bulkhead in place, it should be an easy job to fit it out – easy if you have a lot of time that is… Trevor Cuthbert explains
Need to know
Time: Around 36 hours.
Cost: £226.17.
Difficulty: 3 out of 5
Models: Defender 90, 110, 130.
Tools needed: General workshop tools, sealant gun, metal file.
Parts and costs: Sound insulation material, £50, widely available online or local Motor Factor; Tiger Seal adhesive sealer, £9, local hardware store; brake pedal housing gasket, ANR6333, £12.88, BLRC Ltd; clutch pedal hosing gasket, ANR6332. £22.69, BLRC Ltd; heater to bulkhead seal, STC952, £28.63, BLRC Ltd; air intake to heater seal, FF007292, £9.95, BLRC Ltd; steering column to bulkhead seal, FF004875, £12.50, BLRC Ltd; door hinges kit, DA1070, £80.52, BLTC Ltd.
Work safely:
• Use appropriately rated axle stands to support a raised vehicle.
• Disconnect the battery before major dismantling work.
• Get assistance when handling heavyweight components.
• Wear gloves to protect from sharp edges, otherwise barrier cream to protect from oils.
• Ensure the vehicle is fully stable before commencing work on it.
Contact: Richards Chassis Ltd, Tel: 01709 577477, richardschassis.co.uk
BLRC Ltd, Tel: 02897 511763, blrcvehiclespecialist.co.uk
The heavy lifting has been completed. The old bulkhead has been removed from the Land Rover and the new galvanised replacement is now securely bolted in place. As with many Land Rover projects, the heavier physical work is only a small part of the job, with the fine detail tasks often taking the lion’s share of the time, especially when it comes to a bulkhead change.
There are many components attached to a Land Rover bulkhead both on the cabin side and the engine bay side, because almost every system in the vehicle has some connection to the bulkhead. Hence, this section of the job is the longest and most involved, and if this painstaking work is carried out slowly and methodically, the finished vehicle is all the better for it.
The work described here will jump around a little bit. While adhesive is drying, or while waiting for a gasket seal to be delivered, there is always another area of the job that can be progressed.
Final preparation and insulation
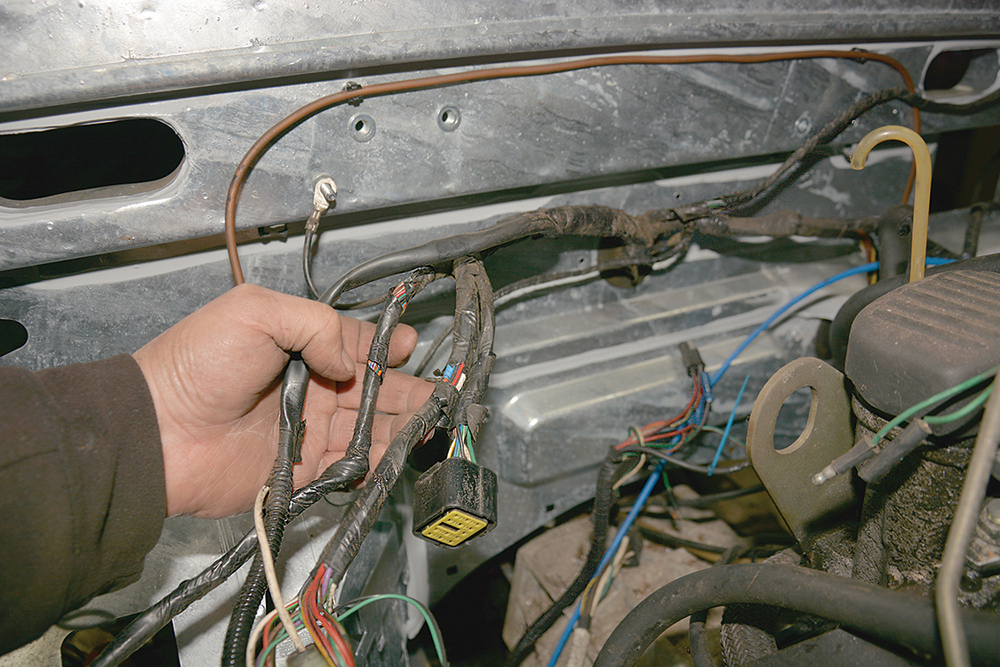
Getting organised: The bulkhead wiring loom has been arranged according to where each section needs to be routed around the engine bay, but it needs some support.
Beware of the other side: The wiring loom’s plastic cover was held to the bulkhead by plastic fixings, but here I’ve drilled the bulkhead and used 5mm blind rivets to secure it.

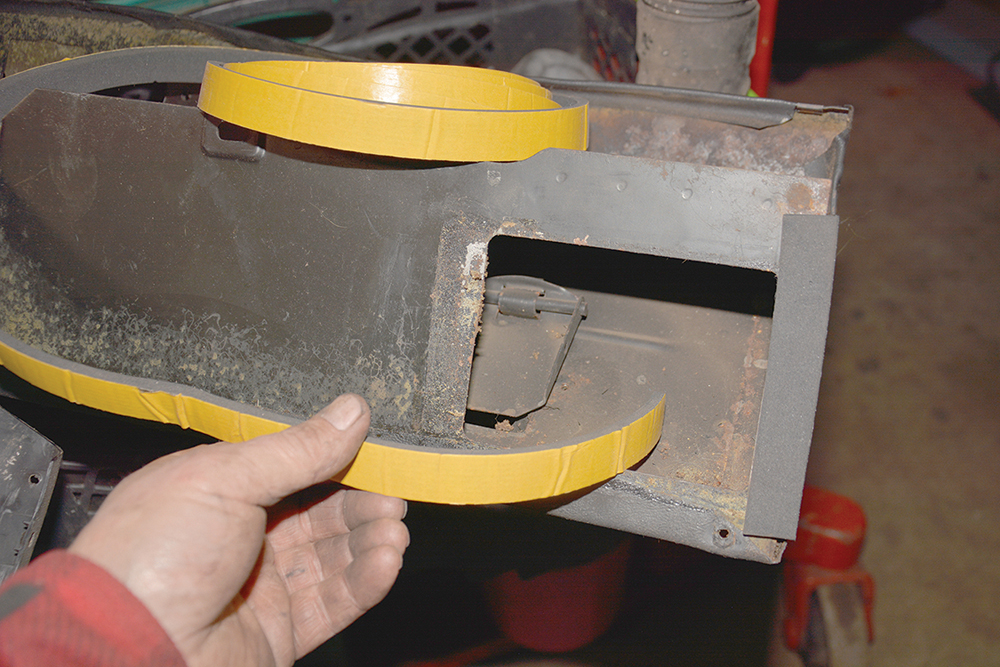
Retaining quality material: Sound and heat insulation on original bulkhead was in good condition and worth re-using. With patient use of a sharp scraping knife, it comes off largely intact.
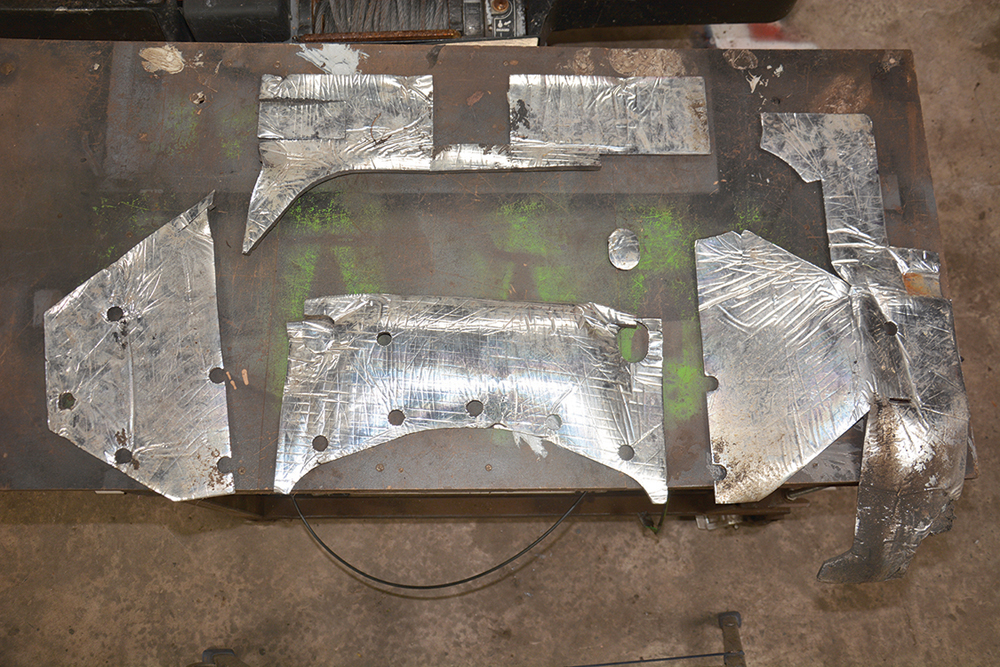
Best chance of sticking: The old insulation is wiped clean and, when fully dry, each piece is coated with a strong adhesive sealant, ready to be stuck in position on the new bulkhead.
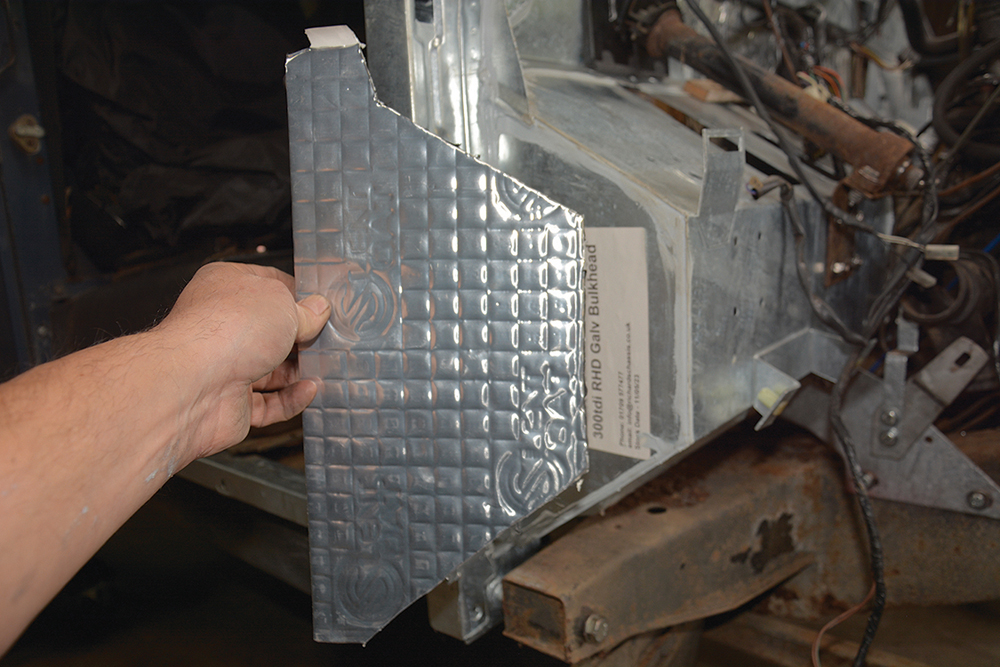
Peace and quiet: Additional self-adhesive sound-deadening insulation (peel backing paper off and press on) was applied to the bulkhead to strive for a quiet Land Rover.
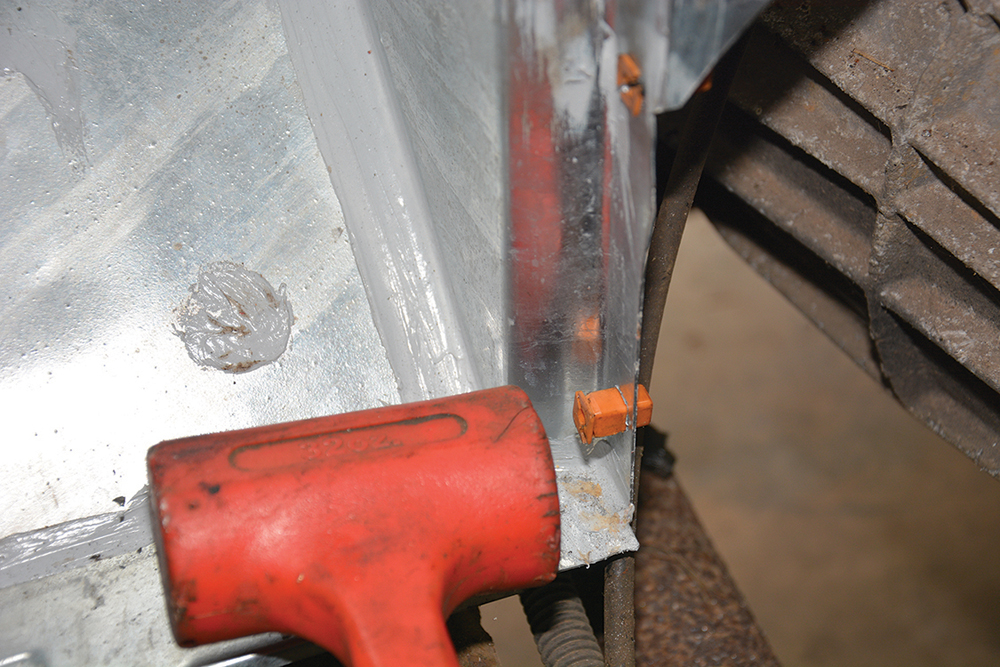
Snug fit: There are three different sizes of plastic Lok-Nuts used in a Defender bulkhead. Most of the originals were salvaged and re-fitted by tapping in with the mallet.
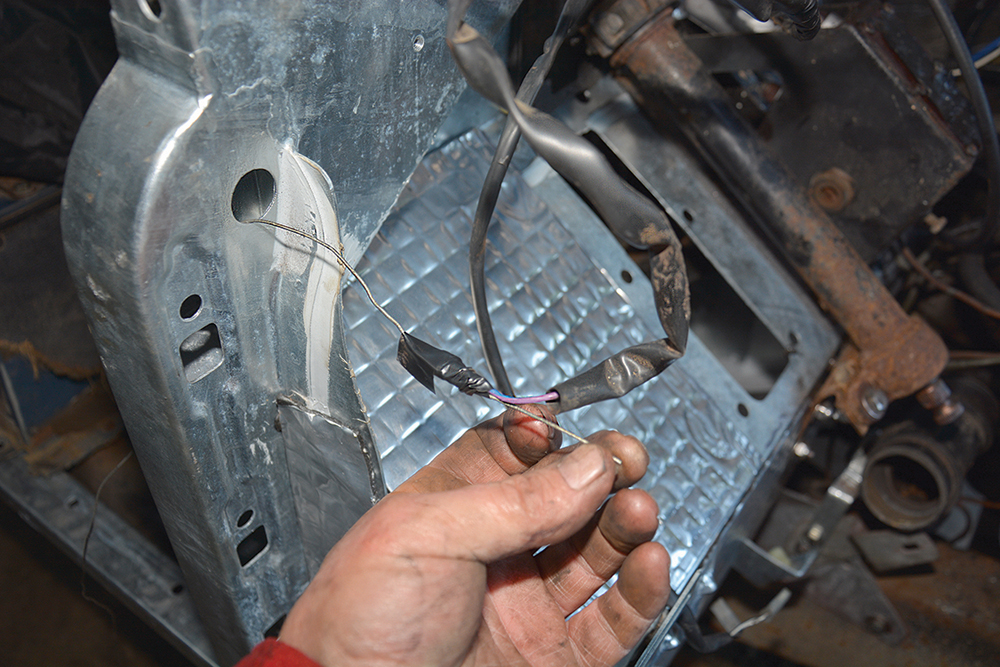
Important details: While the A-posts are still unencumbered by wings (fitted last month) and doors, thread the wiring through for the interior light switches.
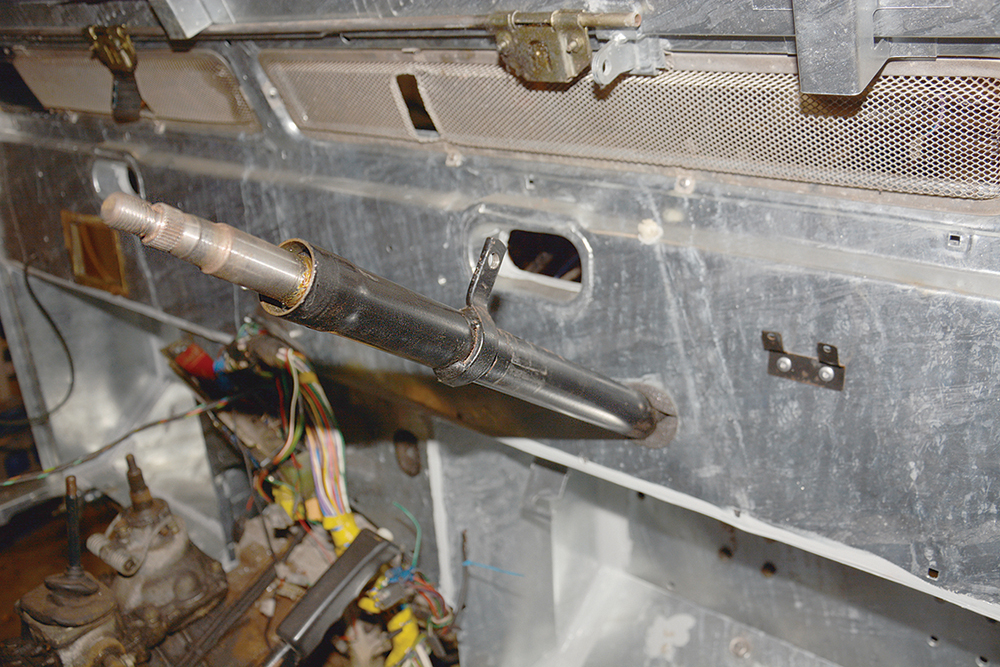
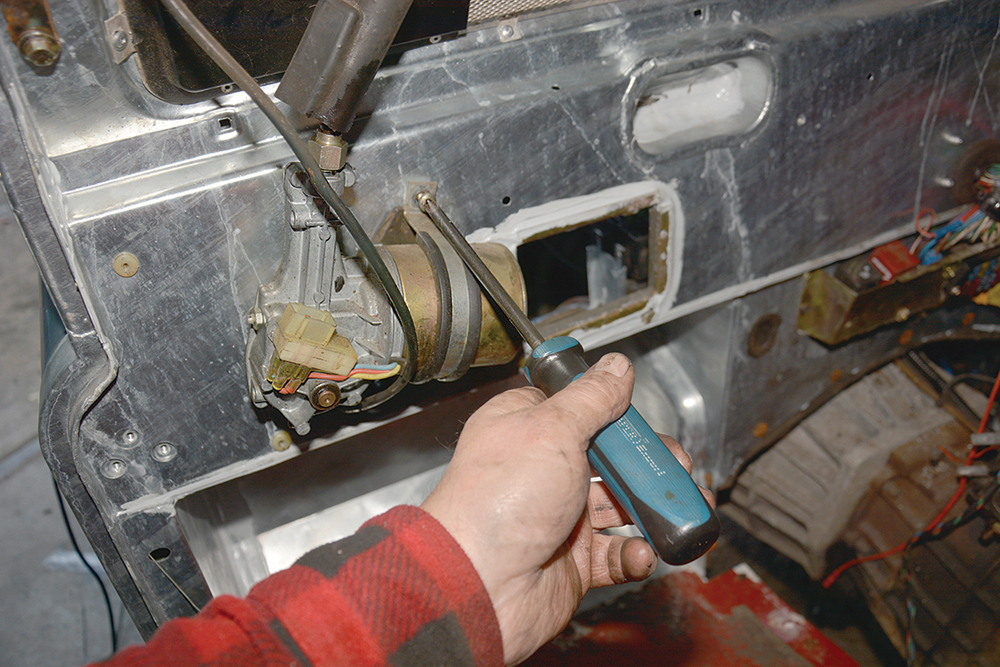
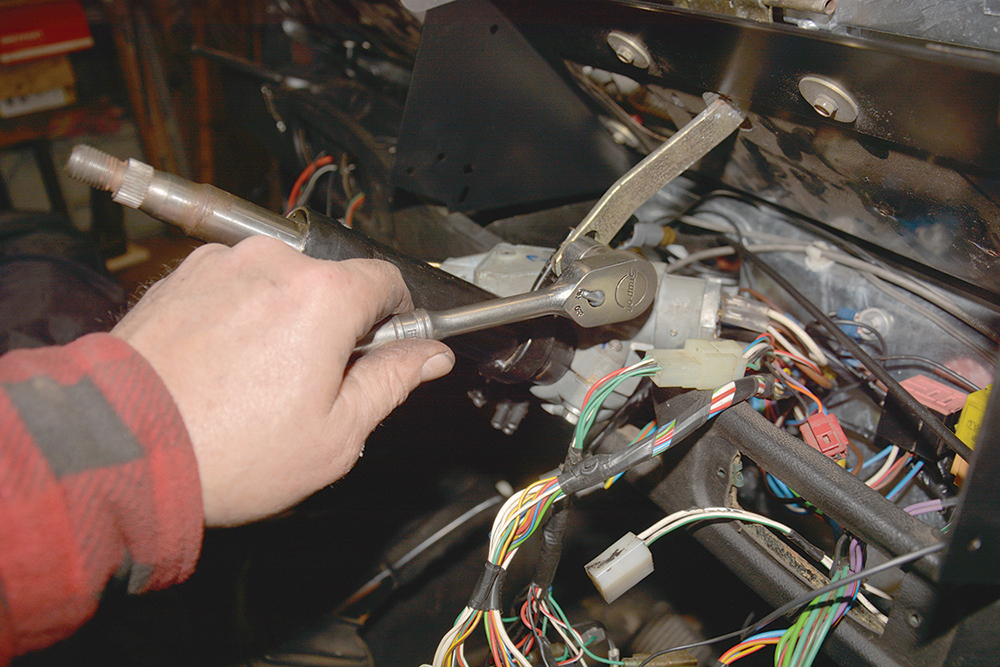
We build around this: We’re working on both sides of the bulkhead, so the steering column must be loosely in place at this stage, before other dashboard components are fitted.
Inside the cabin
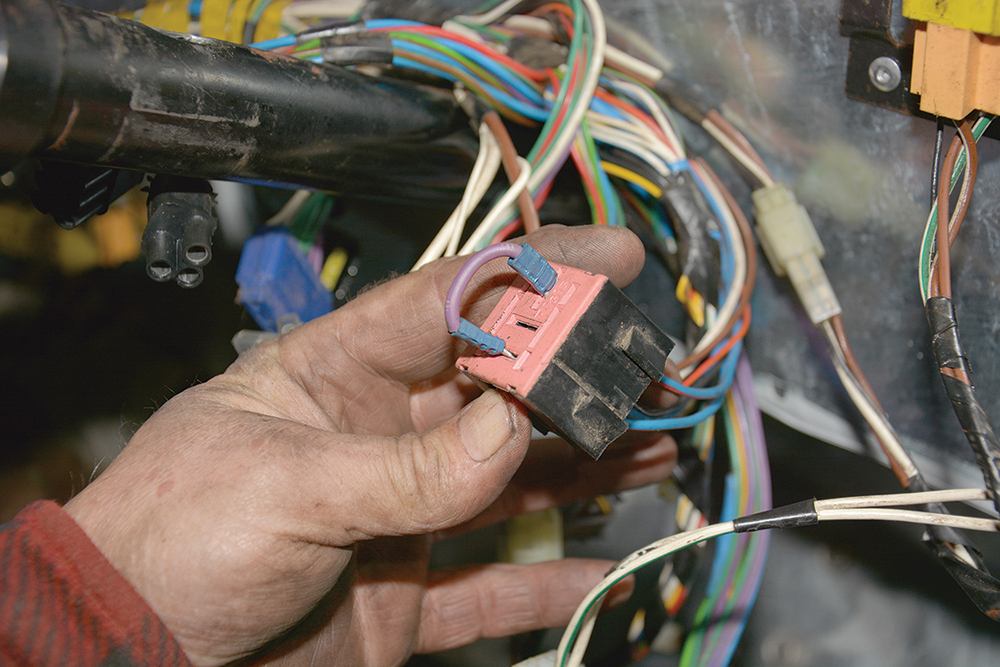
Remove a problem: The troublesome dim headlights function in Defender is no longer a requirement, so the relay has been discarded and this electrical bridge wire is created.
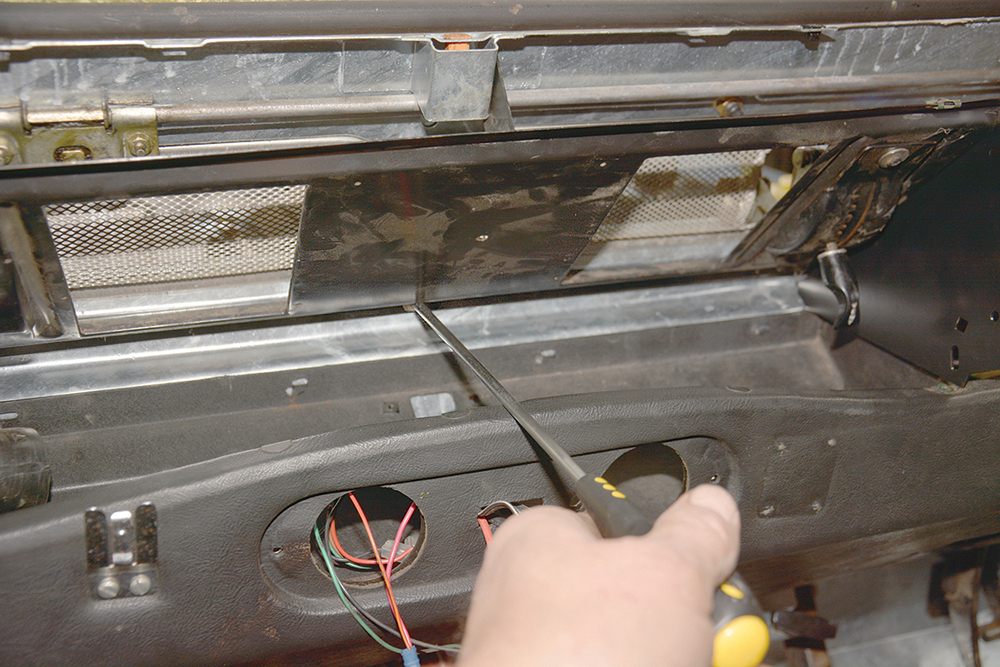
Inspected and re-greased: The wiper motor with insulating pad is fitted using the threaded M6 holes, so the wheel box operation can be checked before being concealed by the upper dash.
Air sealing: To ensure that the heater air intake on the lower dash panel is well sealed to the bulkhead, this self-adhesive spongy rubber tape was fitted.
Slotted bolt holes: The lower dash is offered up to the bulkhead, and the two M5 bolts are fitted to the threaded holes to hold it loosely in position, until alignment is set.
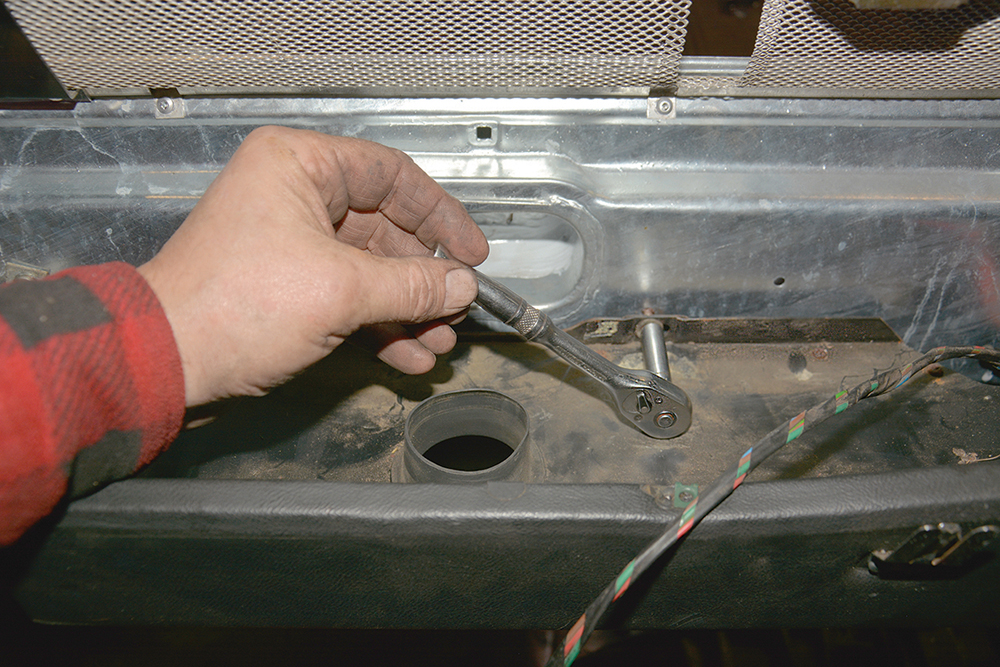
Driven home: The original transmission tunnel diaphragm is fitted using the original screws into the Lok-Nut fasteners that were earlier tapped into place.
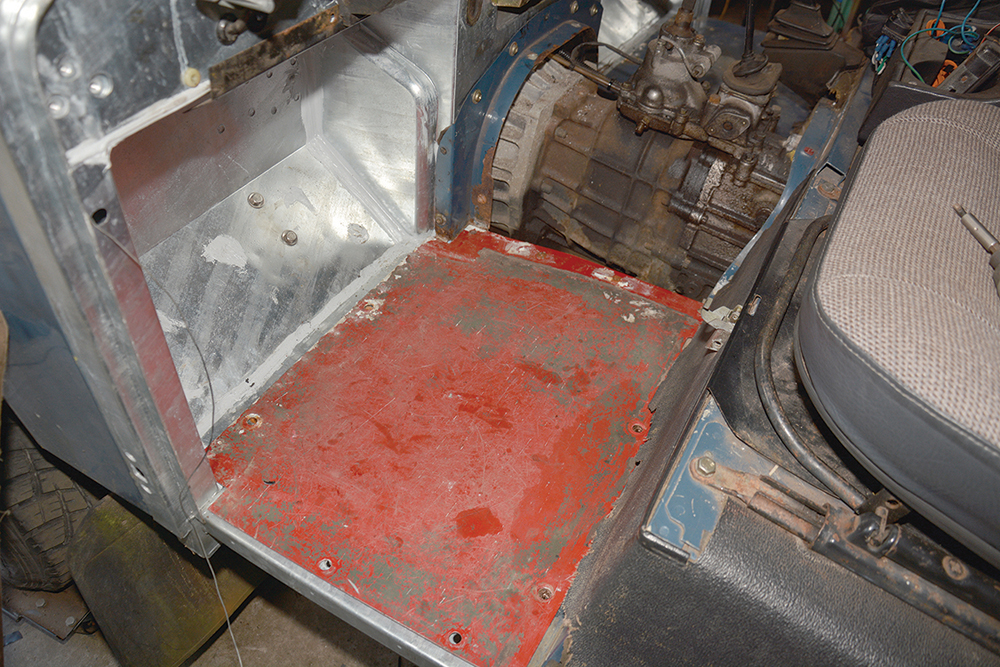
Lining up beautifully: The floor panels are now set into place, before the glassfibre transmission tunnel is added. When everything is aligned, all of the screws are tightened down firmly.
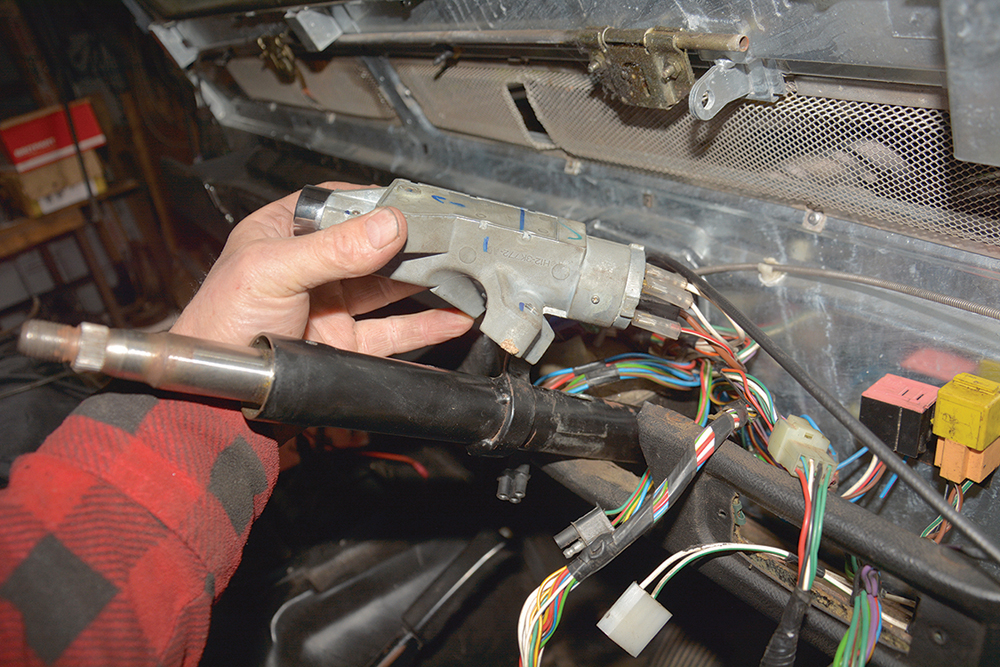
Wired correctly: The combined ignition switch and steering lock assembly is plugged into the wiring loom (as per the earlier reference photo) and fitted on the steering column.
Check everywhere: The upper dash panel assembly is now manoeuvred into place, checking that all wires and cables are routed correctly and not likely to become trapped.
Fish them through: The vent flap levers are negotiated through the vent grilles as the upper dash is moved into place. This ensures that the flaps can be later attached.
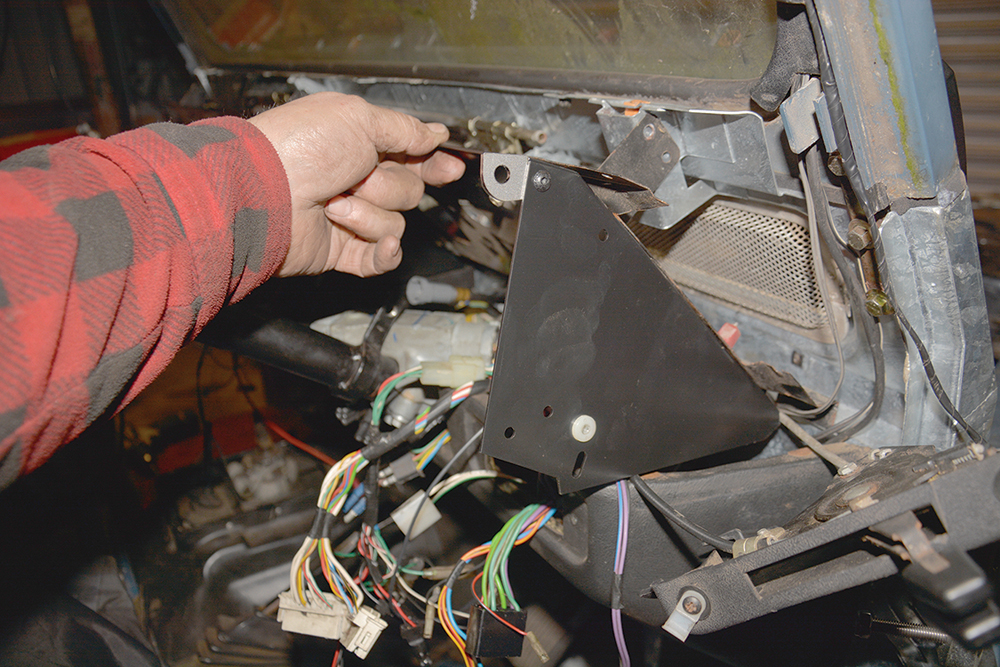
Firming it up: The steering column support bracket can now be attached to the bulkhead and to the steering column, and tightened using the original M10 fixings.
Lining up perfectly: There are five screws that secure the bottom of the upper dash to the bulkhead. These are driven into five small black Lok-Nut fasteners.
Every little detail: At the top, the upper dash panel is secured using three small screws which are driven into convenient pilot holes, again, created at the factory.

Reverse how it came out: The plastic tray on the lower dash, and the grey trim assembly are now fitted in position, with the left vent tube already in place to feed the windscreen vent.
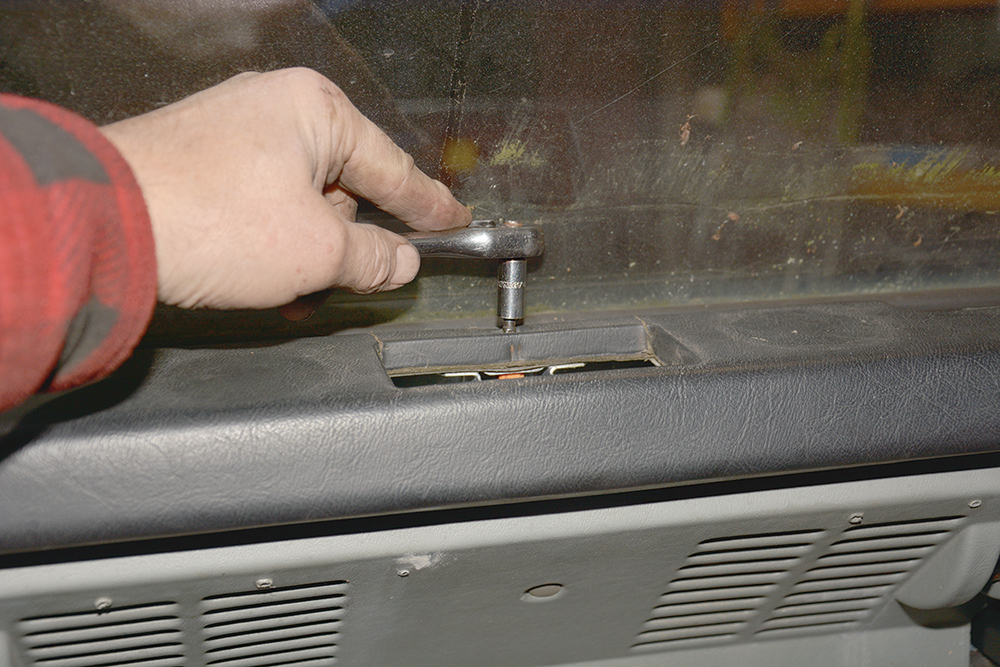
Restricted by windscreen: The dash top is now fitted over the upper dash panel and the grey plastic trim, and secured to the bulkhead using three large self-tapper screws.
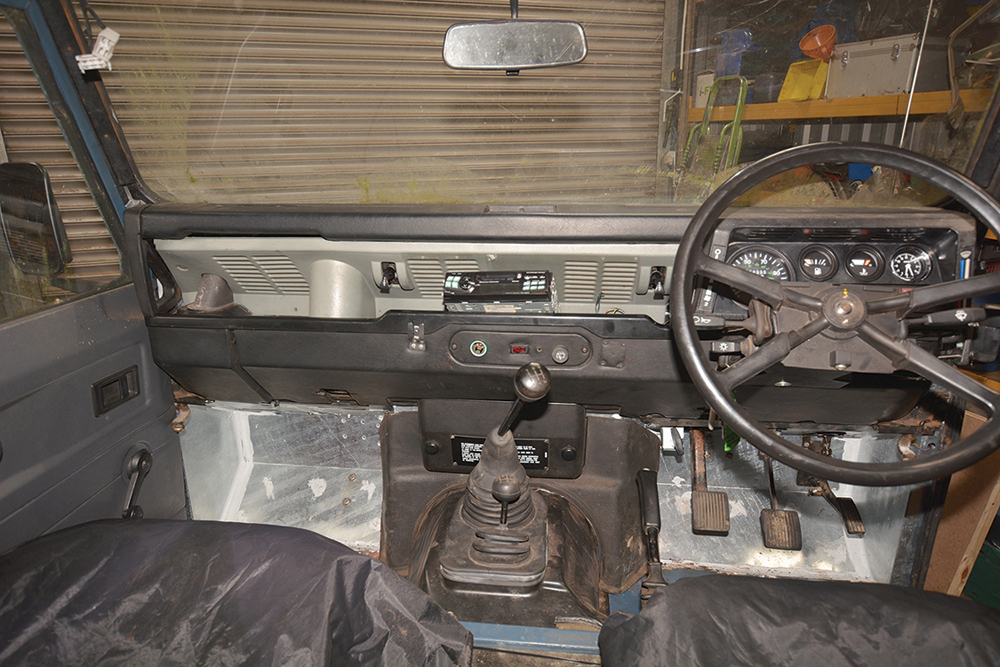
Coming together: Dashboard switch panel is fitted and connected to loom, followed by instrument binnacle, steering column switches and cowls and the steering wheel.
Fitting out the engine bay side:
Now bolt it in: The steering column had earlier been placed through the bulkhead and left loose. With the cabin work now complete, it is tightened to its mounting brackets.

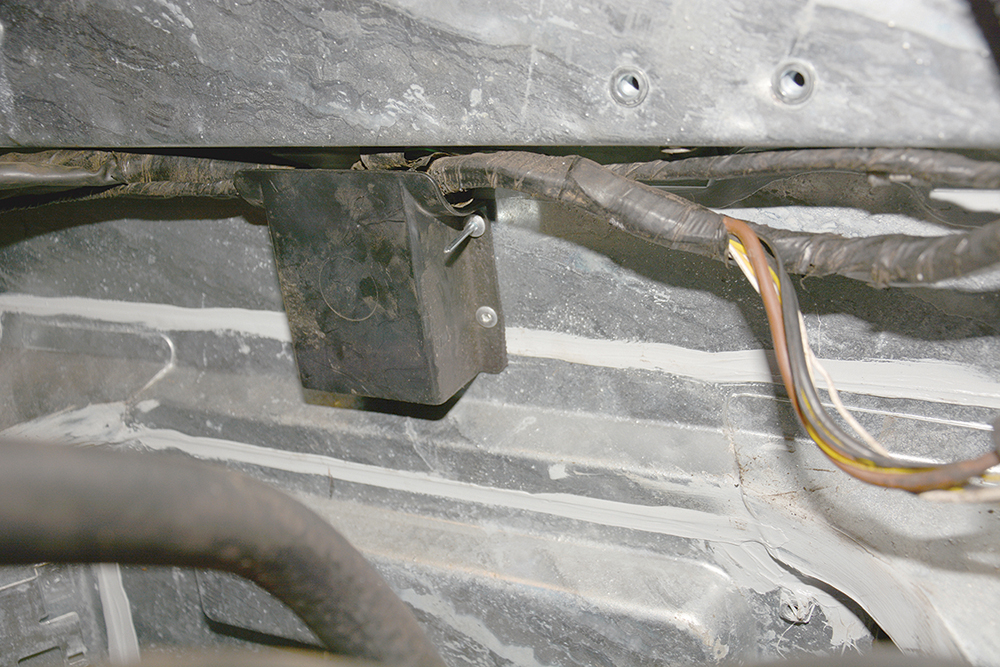
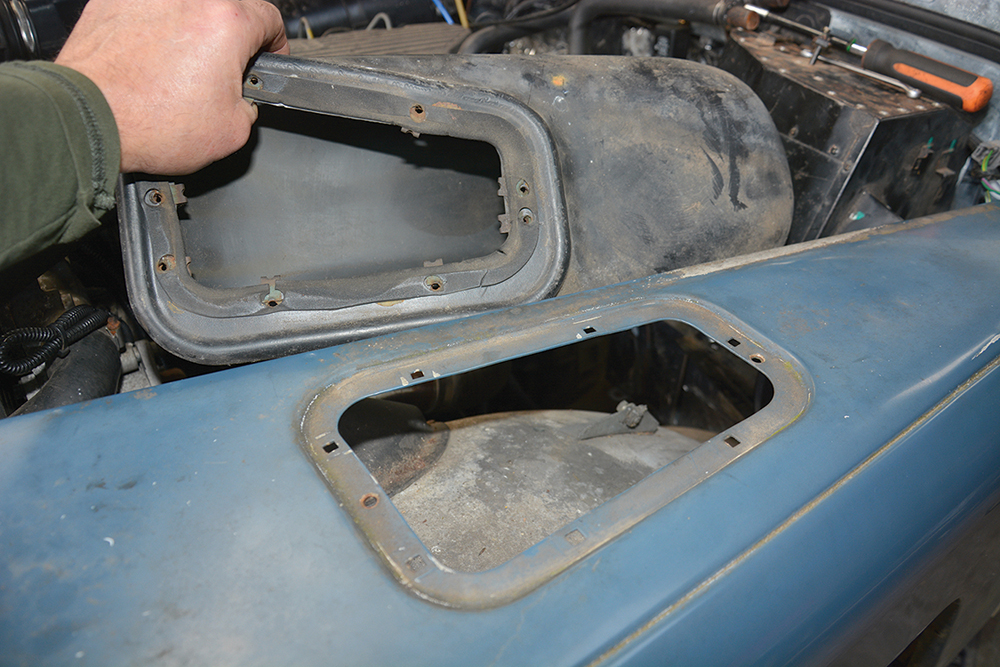
Covering the aperture: This left-hand cover is simply a blank on this RHD vehicle, so it is fitted in place with the original screws, with a little adhesive sealant applied.
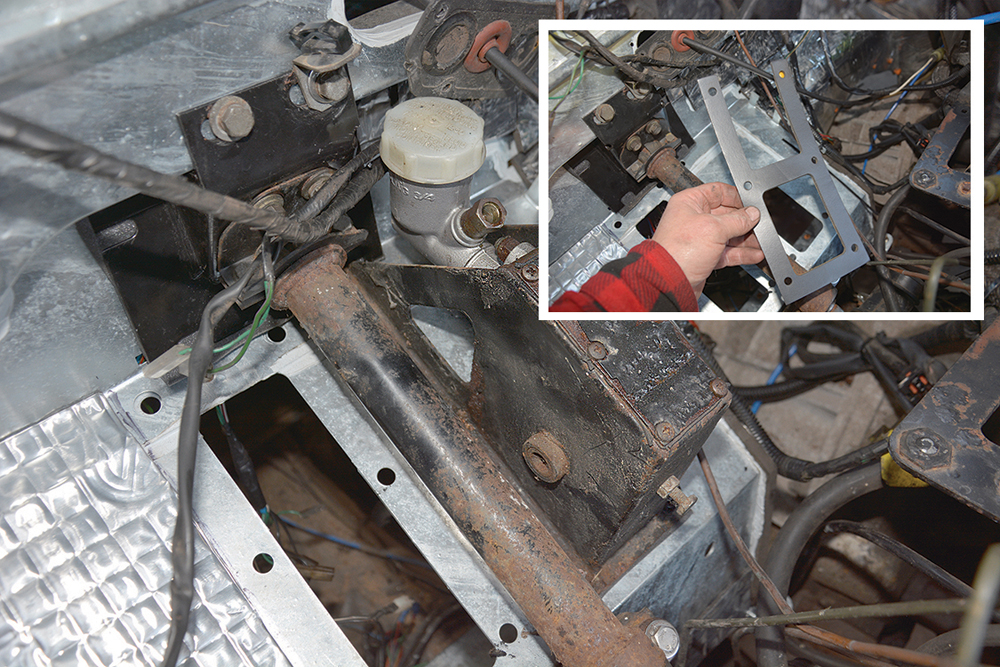
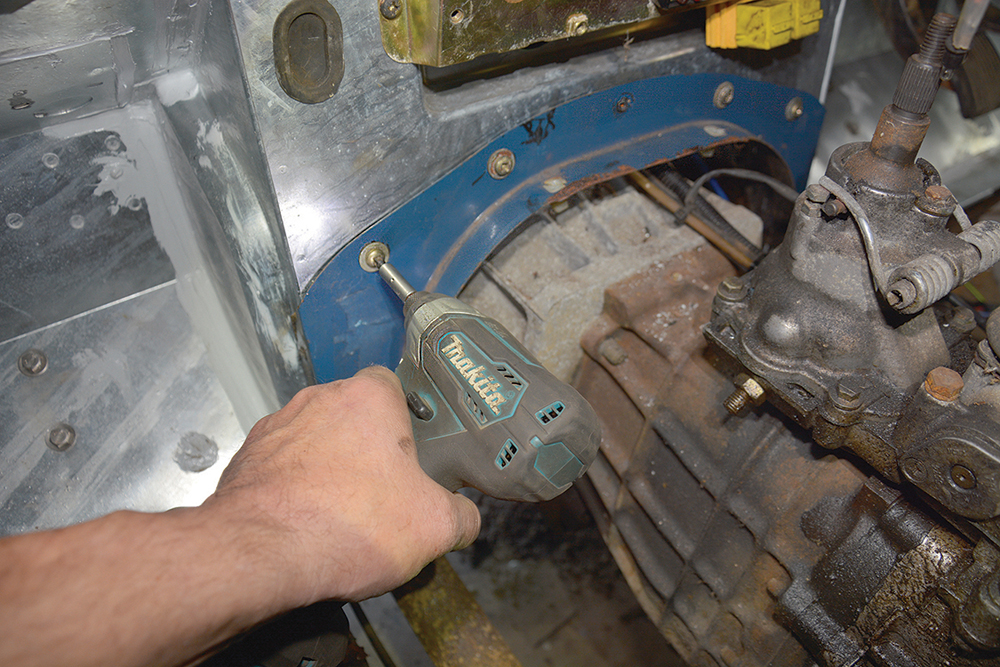
Clutch pedal assembly: Self-adhesive gasket (inset) is placed on the bulkhead footwell before slotting clutch pedal housing into place, after negotiating the pedal through the aperture.
Bolted up: The pedal housing (and the brake pedal housing later) is secured using the six original bolts which screw into captive nuts in the base of the pedal housing.

Max warm air: A new seal (inset) ensures maximum warm air to the cabin and screen. Best glued to the heater box to prevent it being dislodged when fitting the heater.
Fully sealed: A new seal between the heater’s intake and the air intake box is bonded for good air flow and to prevent engine bay fumes passing to the cab.
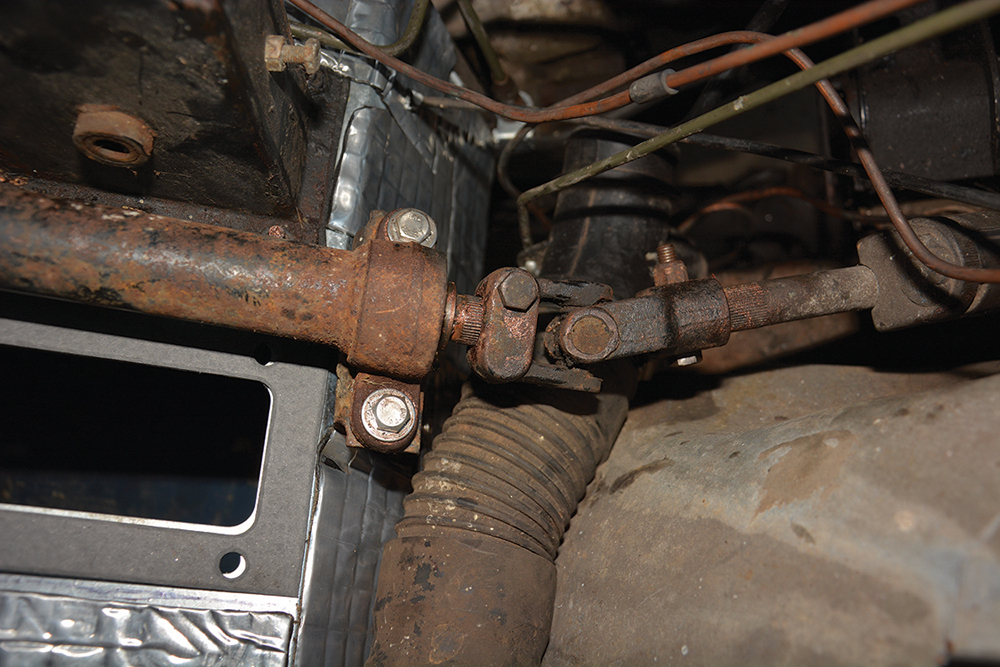
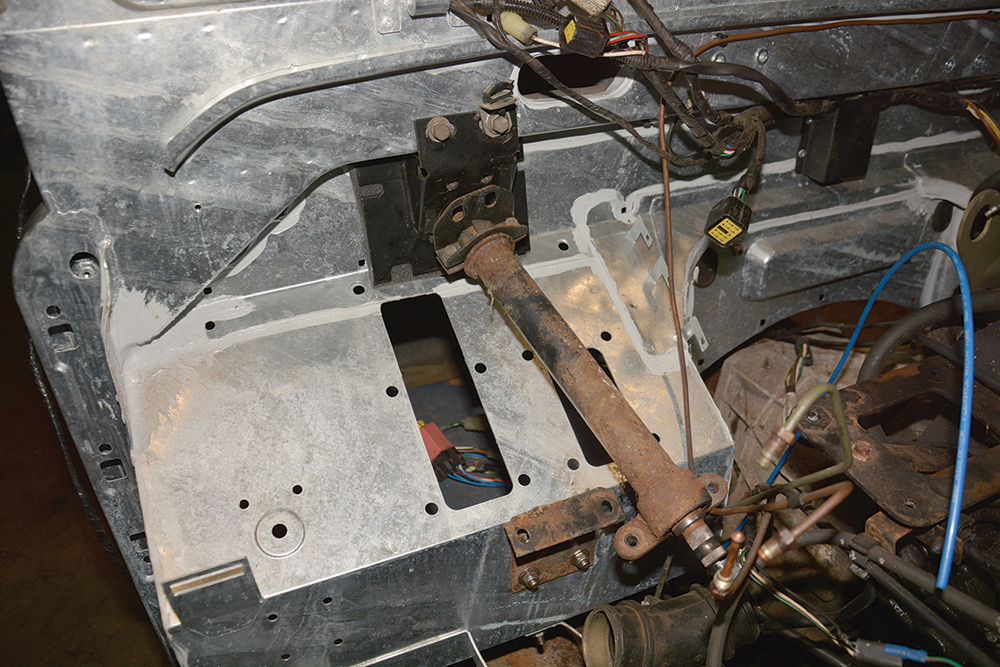
Check U/J condition: Now the steering linkage is fitted between the bottom of the steering column and the power steering box at the front. Renew if U/J’s condition in doubt.
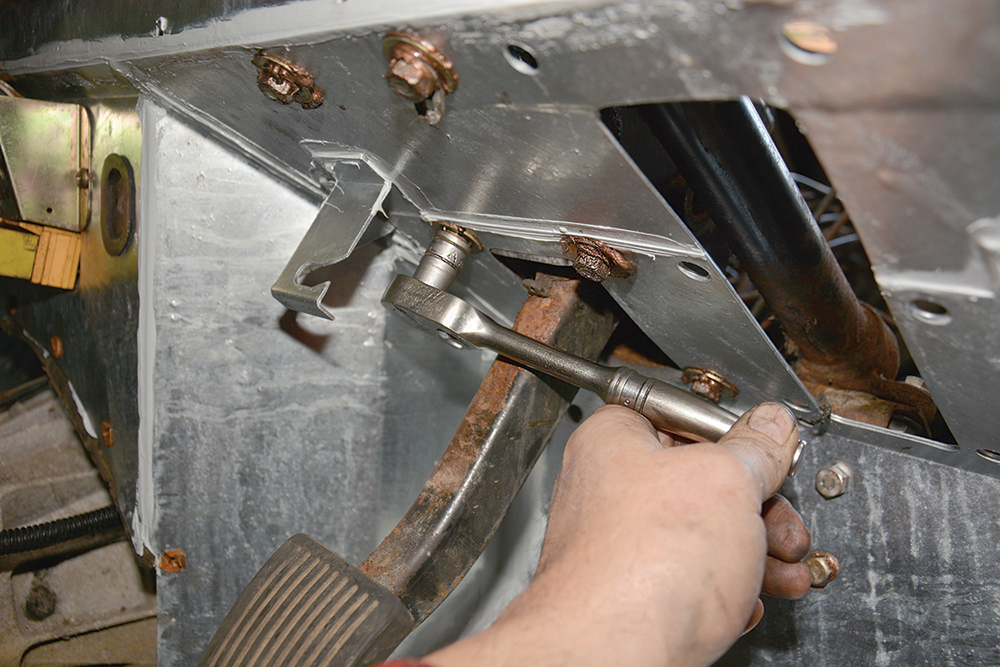
Eased in carefully: Similarly to the clutch pedal housing, the brake pedal housing is positioned with a new gasket. Before bolting, attach the brake light switch, while access is easier.

Back in their place: The power steering fluid reservoir, fuel filter housing and coolant header tank are reattached to the wings, and the air cleaner refitted with a new filter element.
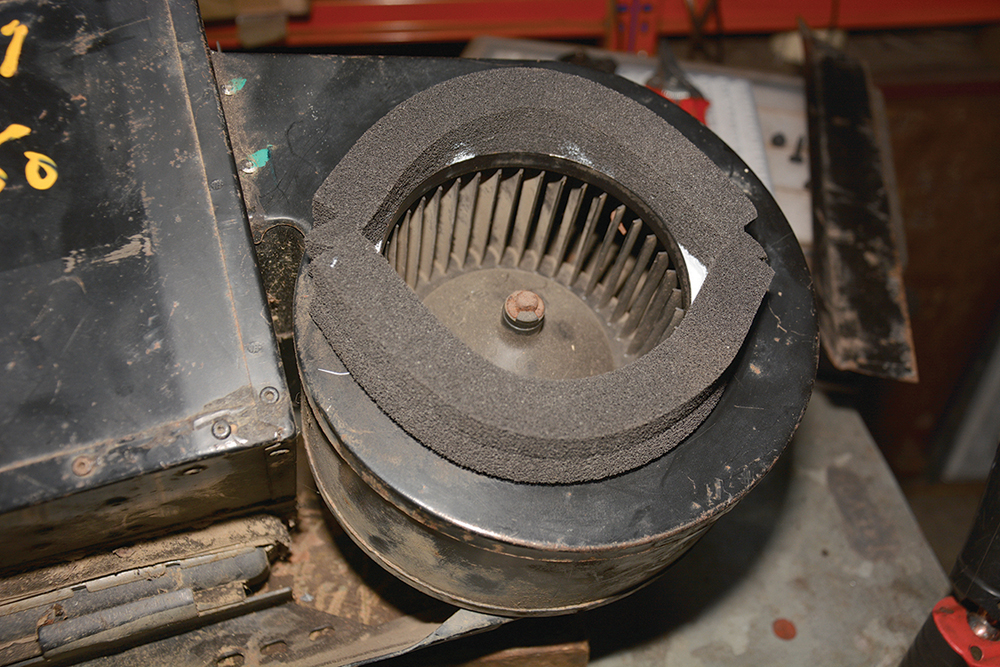
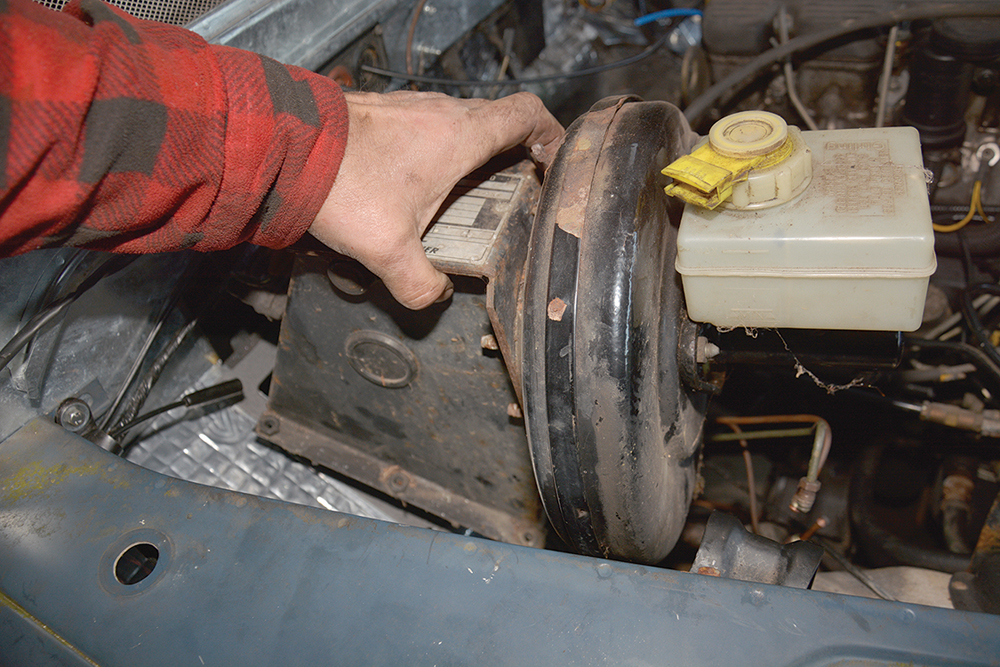
Take your time with this: Now that the seal adhesives applied earlier have fully set and the seals are secure, the heater unit is wrestled into place on the left side of the bulkhead.
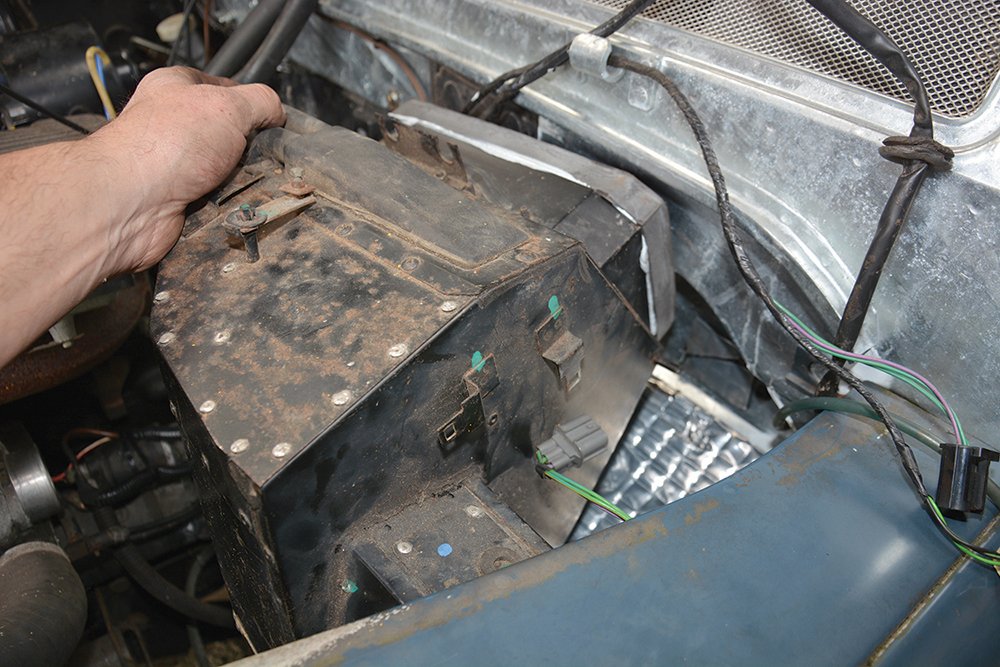
Another tight spot: The air intake box can now be fitted in front of the heater unit and in under the wing-top. It takes a little force to compress the new seal, which is good news.
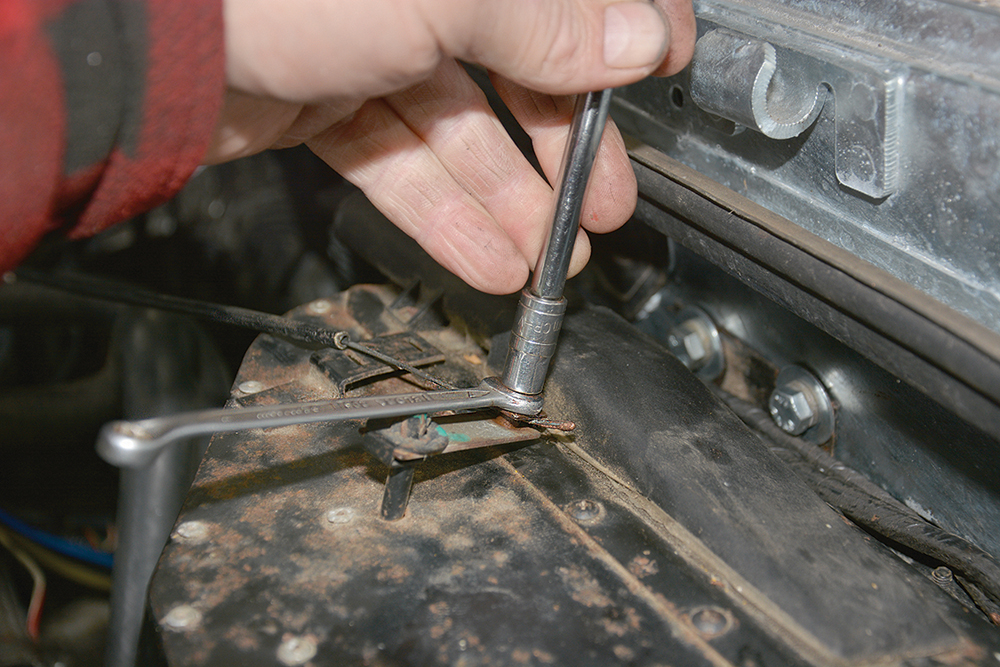
Heater connections: After attaching coolant hoses, heater control cables are fitted and adjusted through the trunnion before the pinch bolt is tightened with a 7mm socket and spanner.
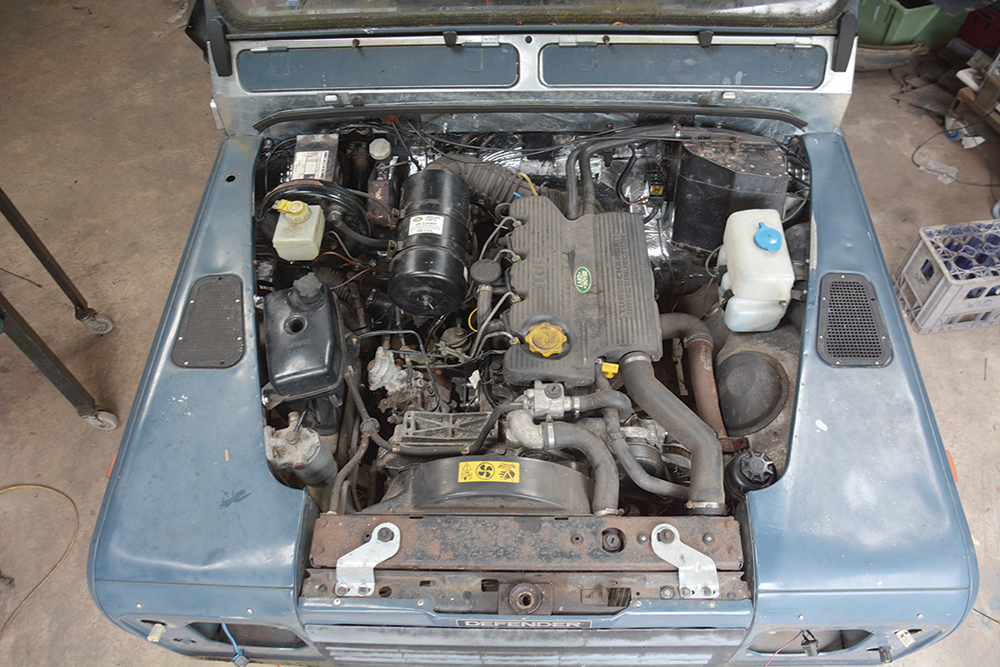
Excellent result: With the exception of a couple of ancillary items, such as radio antenna, the engine bay is now complete and, pleasingly, looks like a factory installation.
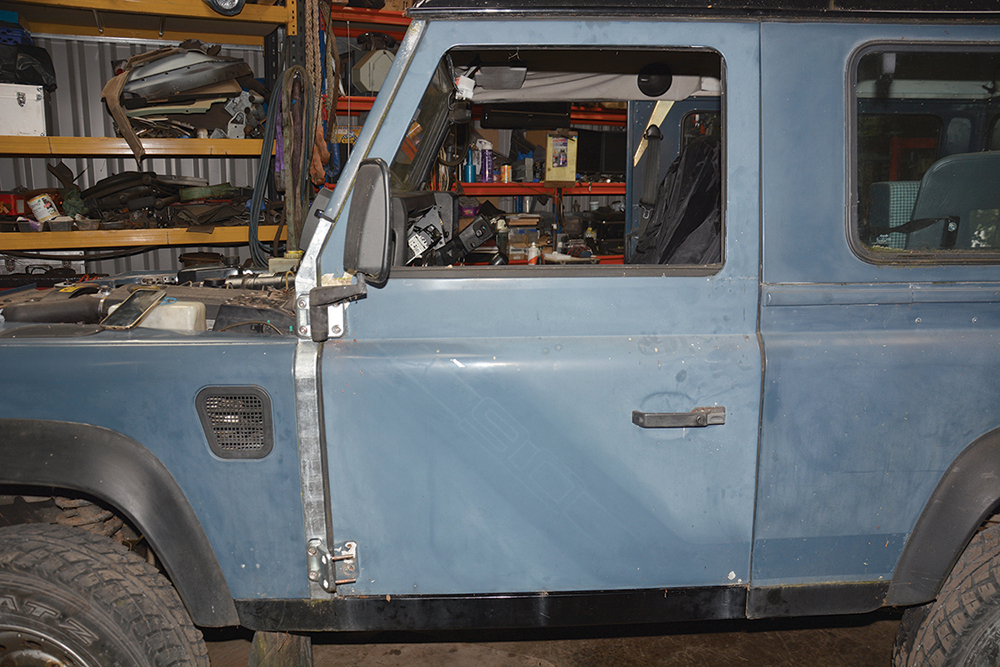
Fitting the doors
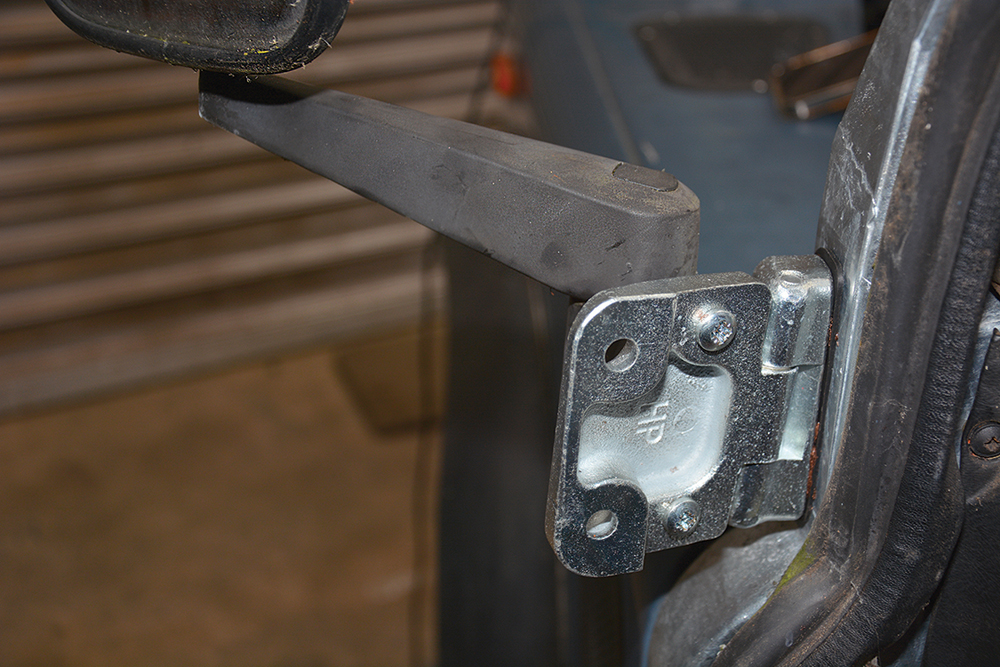
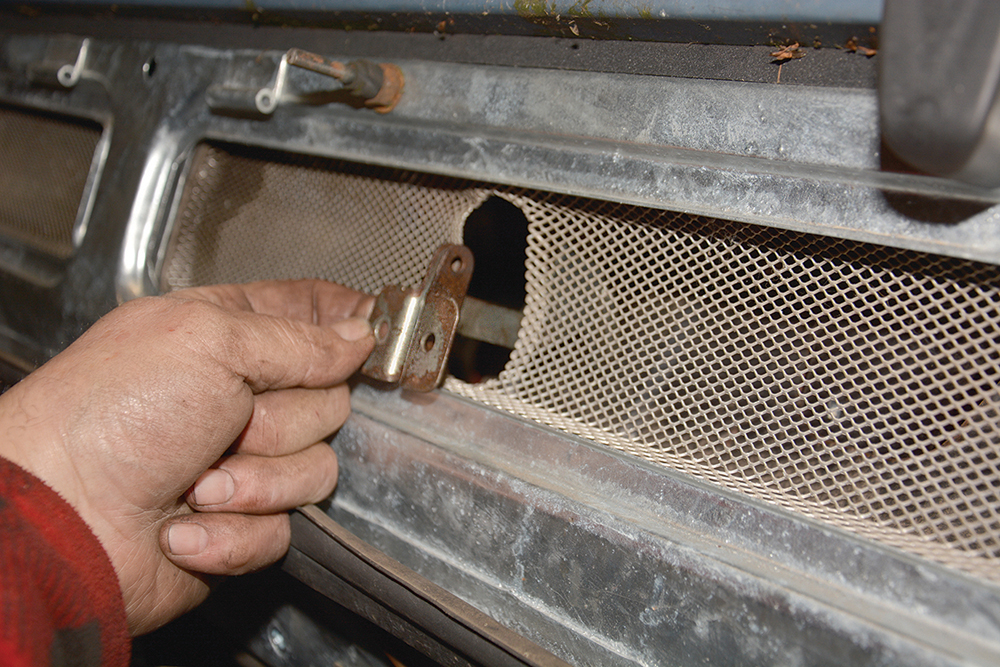
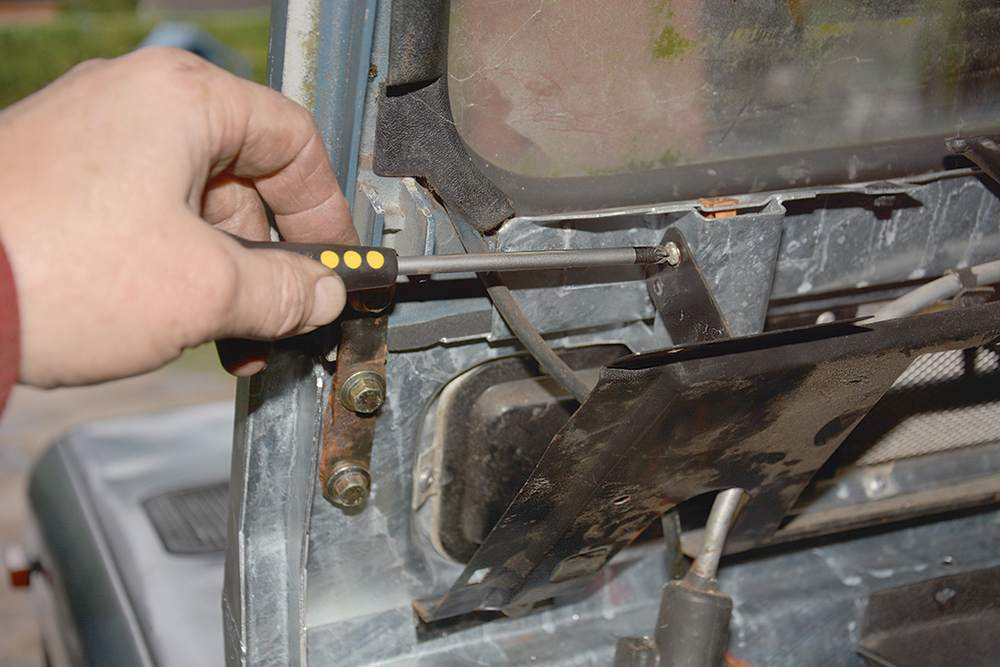
Hidden screw holes: New door hinges are fitted to the bulkhead (originals worn). The mirrors need to be screwed on from the back of the top hinges before the doors are attached.
One person operation: When fitting a door single-handed, offering it up and latching it at the jamb will hold the weight of the door safely, while getting the hinge bolts fitted.
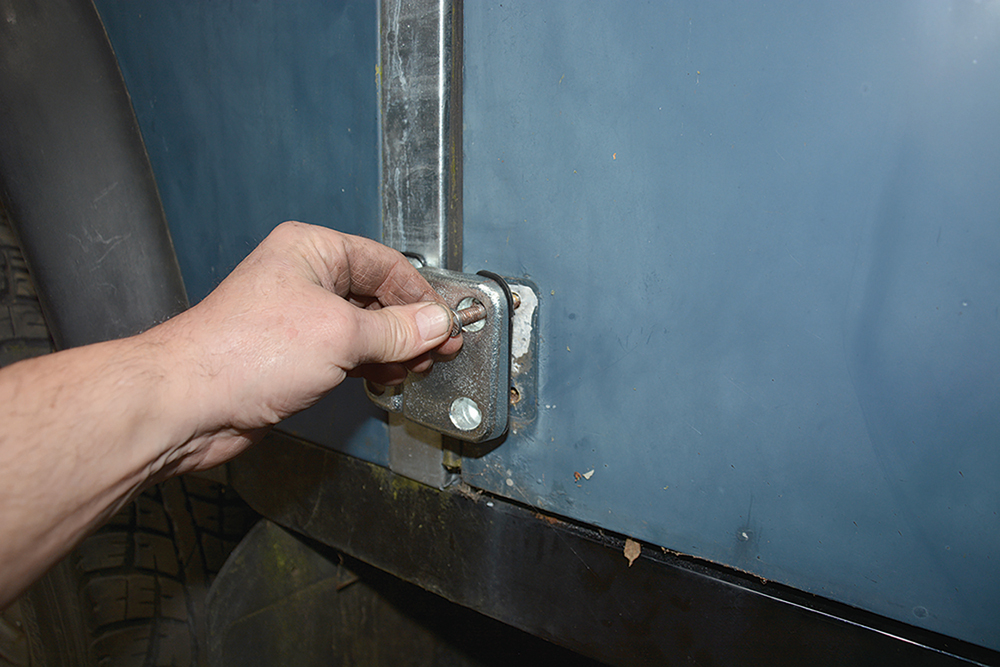
Taking the weight: The bolts are now inserted through the hinges and doors, and M8 nuts tightened on the inside. Don’t forget the gaskets under each part of the hinges.
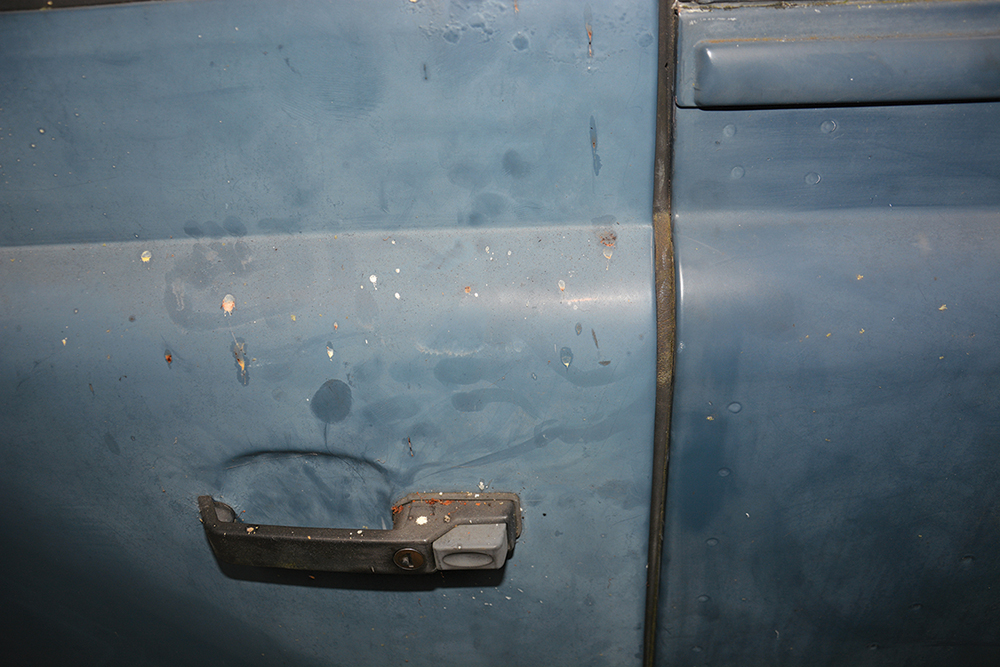
Exactly as before: The even door gap and perfect latching of the lock confirms the bulkhead is correctly positioned. Otherwise, the front part of the hinge can be slightly repositioned.
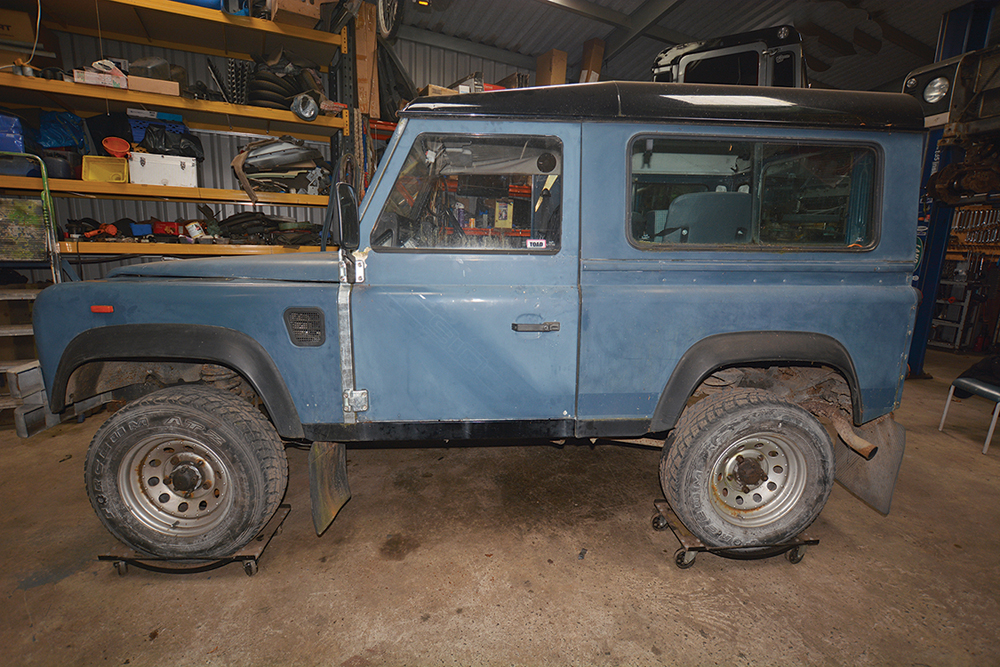
Ready to polish: The bulkhead change is complete, and the truck is running again. The faded paint will now benefit from a serious polishing job to restore the colour and shine.
Like to have your own Land Rover library?
Try our Budget Digital Subscription. You'll get access to over 7 years of Land Rover Monthly – that’s more than 100 issues plus the latest digital issue. All issues are fully searchable so you can easily find what you are looking for and what’s more it’s less than 10p a day to subscribe. Click here to find out more details and start enjoying all the benefits now.