


01 February 2019
|
 : credit: © Trevor Cuthbert
Damaged flaps and holes in the supports mean wheel spray will rot the chassis and floor. Trevor Cuthbert explains how to replace them
Model: Discovery 2
Time: 4 hours
Cost: £169
Difficulty: 2/5 stars
Tools needed: Drills, drill bits, hammer, centre punch, spanners, socket wrenches,
rivet gun.
Parts: Galvanised mudflap bracket kit, YRM Metal Solutions (£108); genuine front mudflap, BLRC Ltd., (£30.58 each).
Contact: YRM Metal Solutions, Tel: 01388 488150 (yrmit.co.uk); BLRC Ltd, Tel: 02897 511763, blrcvehiclespecialist.co.uk
The Series II Discovery had improvements to the body shell to protect from rust attack, which had been a significant problem for the earlier model. Consequently the bodies of the Td5 Discovery 2 models are lasting quite well. Cutting out the rear boot floor, to replace it with a new panel, is quite a common job on the first Discovery models, but is practically unheard of on the D2. One area of the Discovery 2 body that does rust quite seriously, is a much easier repair, and can be remedied without the use of a welder or major fabrication work.
The Problem
The rear mudflaps on the vehicle are fixed to panels in the back of the rear wheel arches, and are directly in the line of fire from road water, dirt and mud. The panels afford protection to the fuel filler hose and breather hose on the right hand side of the vehicle, and the exhaust tail pipe on the left side – as well as hanging the mudflaps in place. These mudflap panels don’t have the same level of corrosion protection enjoyed by the rest of the body, and they can rust away to nothing in worst cases. However, the panels are simply held in place with large rivets and some screws – and the mudflap itself is held to the panel by rivets with a spreader plate, so they’re fairly easy to work on. In the case shown here the Discovery is raised on a vehicle ramp before the wheels are removed, but the job could be carried out on the floor using suitable axle stands.
Typical problems

YRM Metals Solution Ltd is the supplier of this kit of parts to replace the rear mudflap panels with galvanised ones and also to fit front mudflaps.

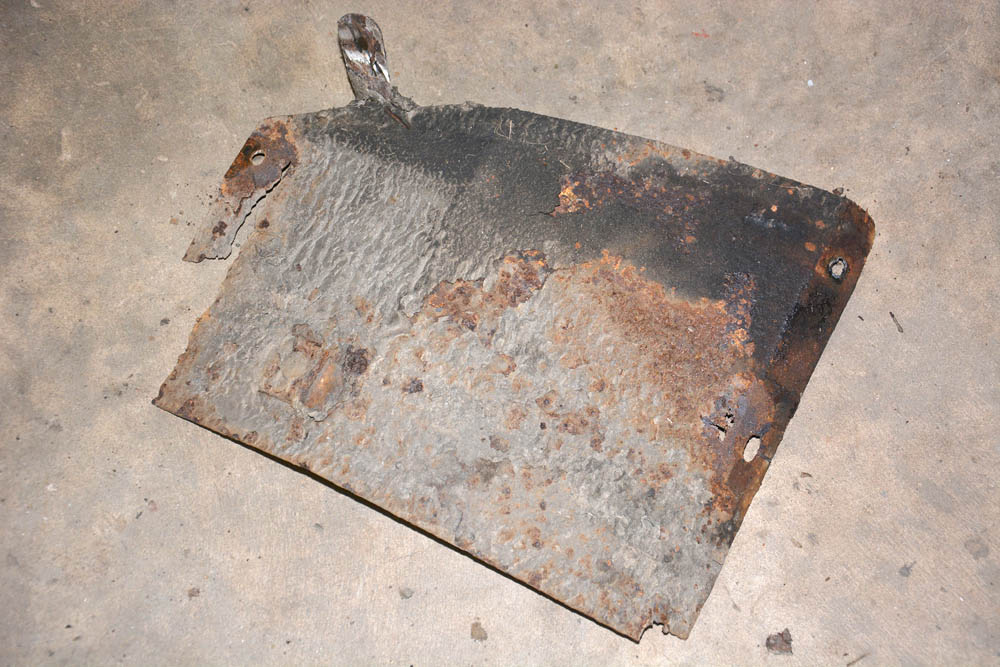
The rear right side mudflap panel is in a very bad state, with several holes having formed in the structure, which also supports the lower rear body panel.
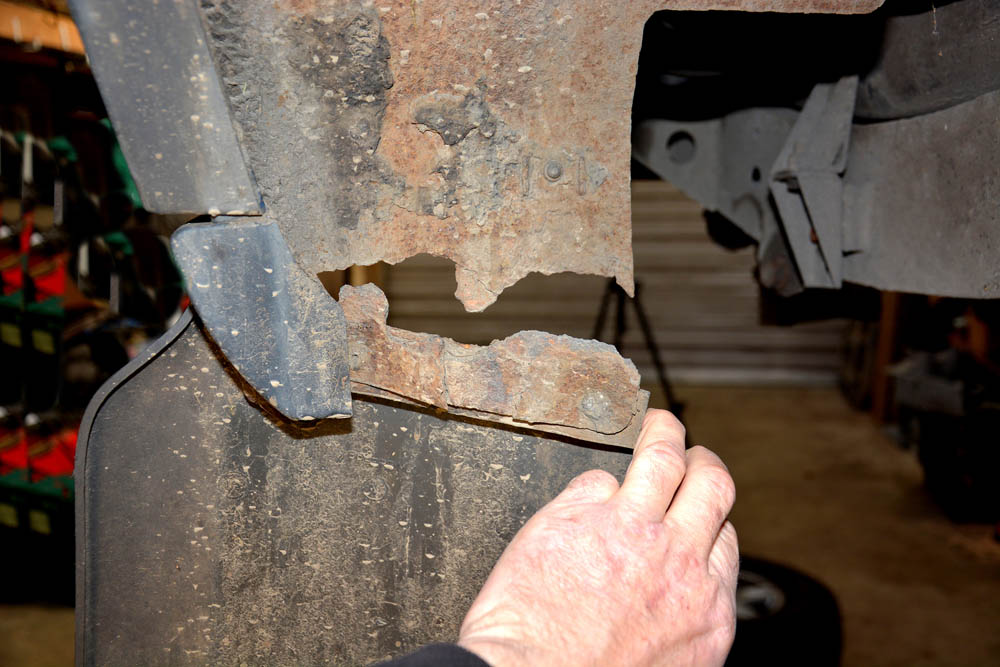
The mudflap itself is almost detached from the panel and is really only being held in place by the screws through the plastic sill.
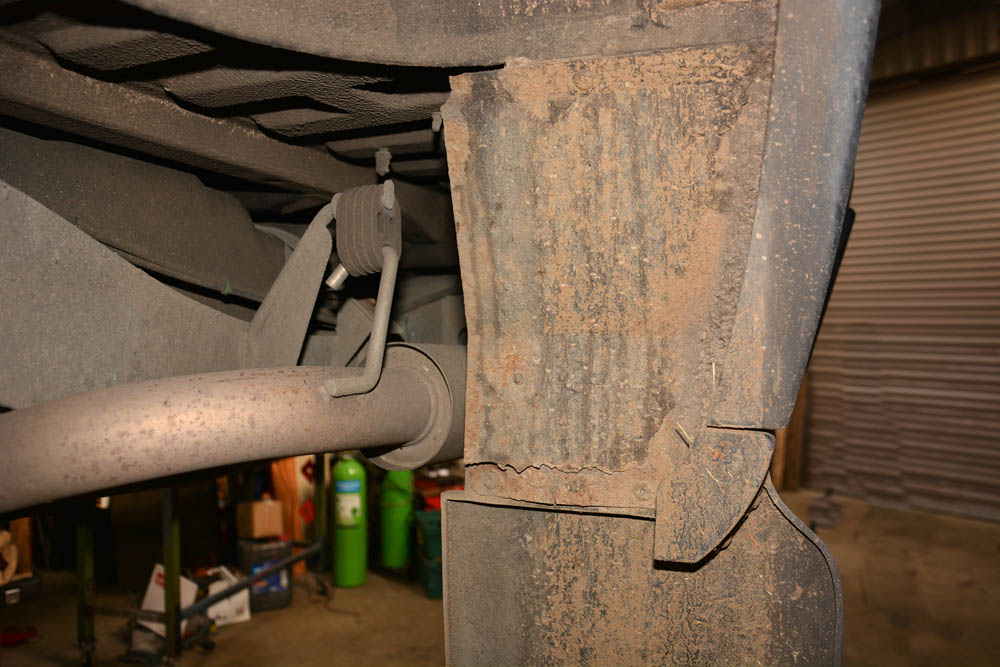
The rear left side mudflap panel is in poor condition too, but is more intact than the right and still providing structural support to the lower body panel.
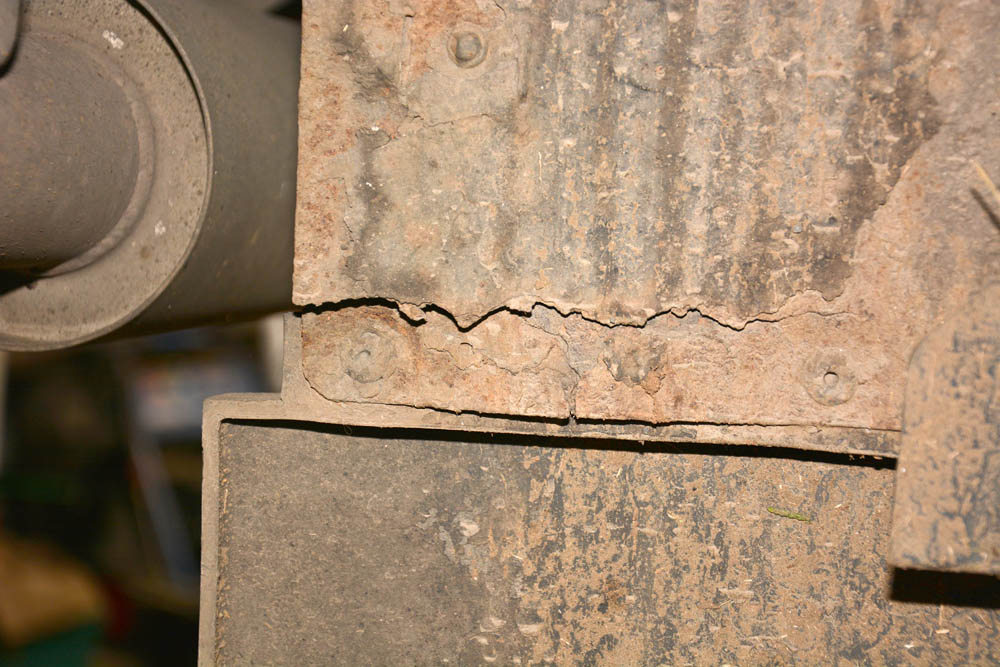
Lower down, the left rear panel is cracking along the bottom above the mudflap rivet line due to corrosion and it will soon break off.

The left side mudflap panel is supported from behind with bracket that triangulates to the boot floor. This has corroded and come away from the panel.

Conversely, the right side triangulation bracket is still in place and doing its job, helping keep the rusty mudflap panel in place.
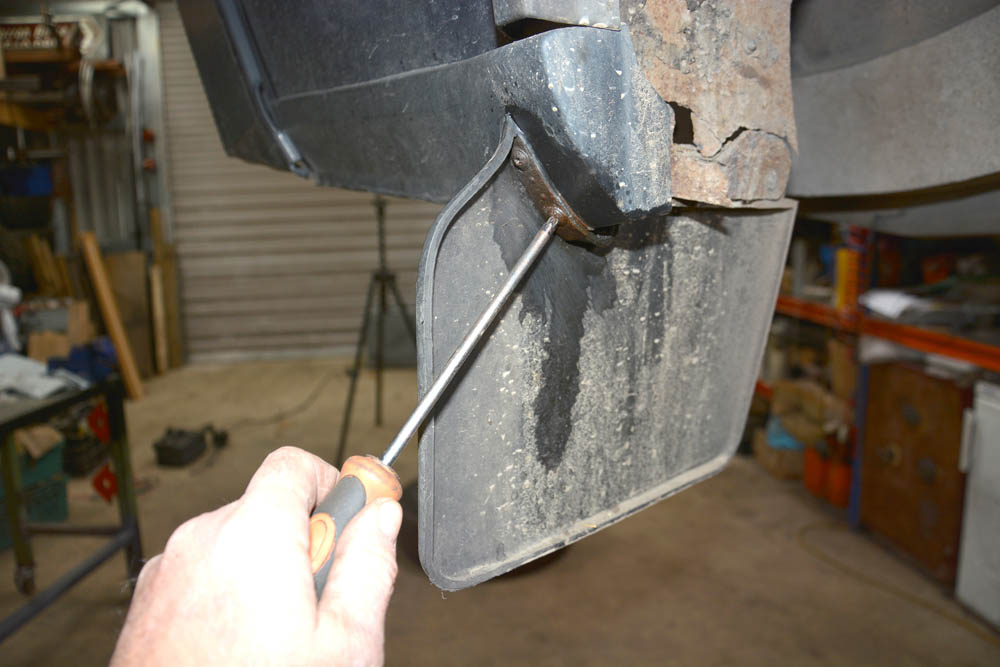
Despite spraying with releasing fluid, the correct size of Pozi-drive screw driver would not shift the screws. Perhaps the plastic flap could stay in place?
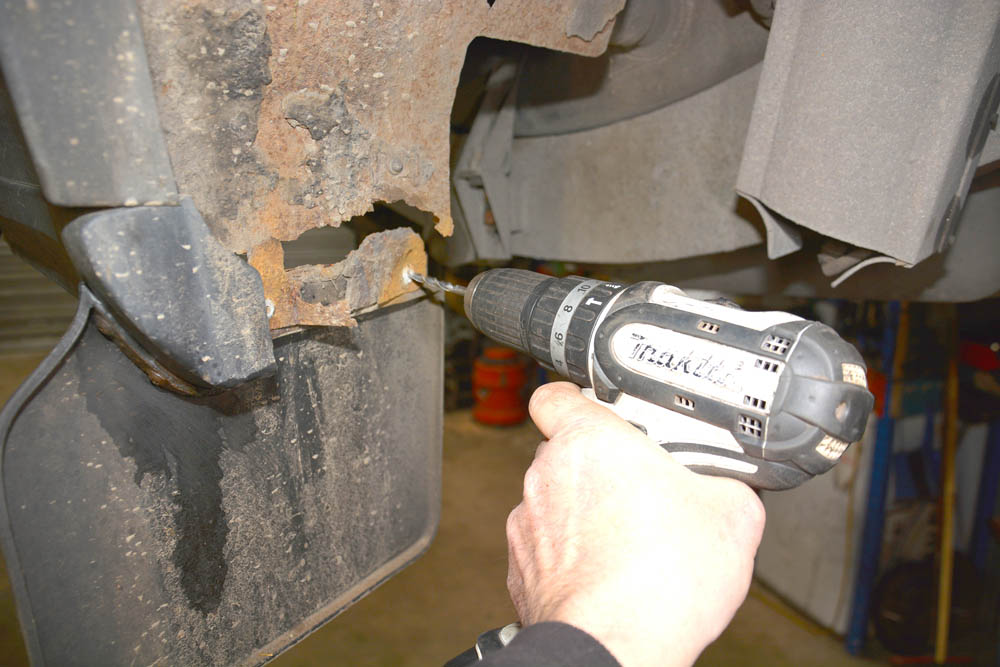
After wire brushing to expose them, the lower rivets holding the mudflap to the panel are drilled out using a 5 mm drill bit followed by a 6 mm bit.
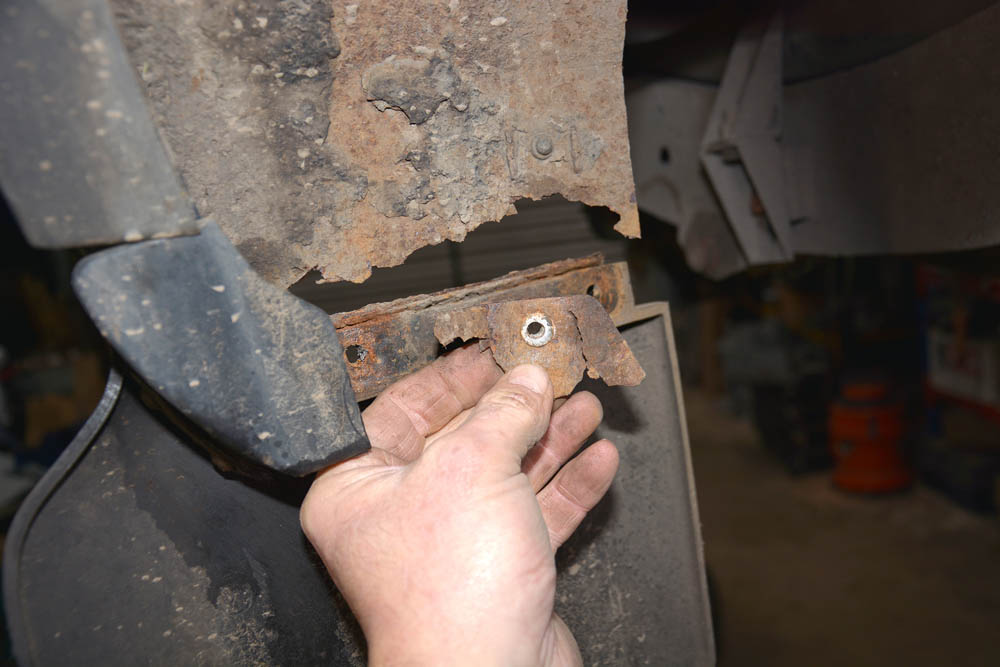
This rivet came free of the mudflap and spreader plate, bringing a piece of rusty metal with it; such was the deterioration of the steel bracket.
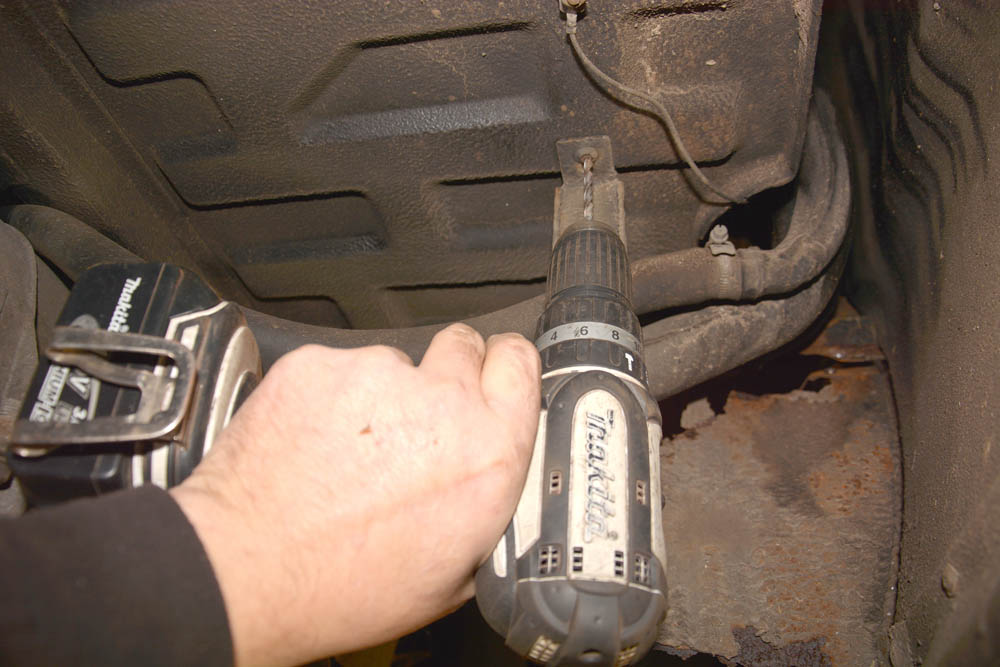
The rivet through the boot floor, securing the support bracket, is also drilled out – taking care not to go too far through with the drill.
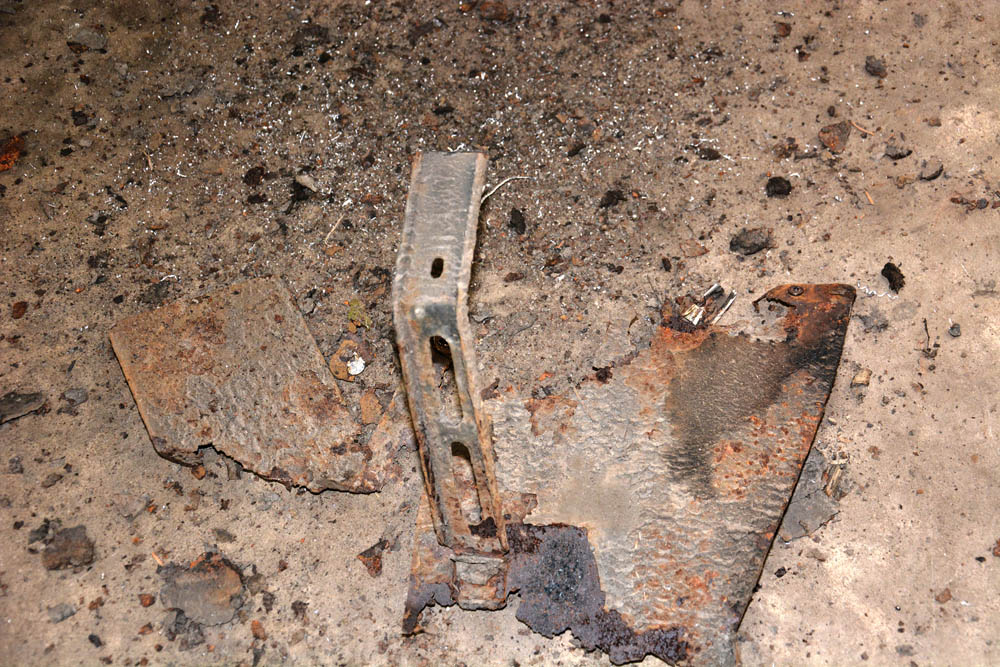
The remains of the right side mudflap panel land on the floor with other debris and there is not much left of it at all.
The left hand panel came away more intact. This could be used as a template to fabricate a replacement panel, instead of purchasing one.
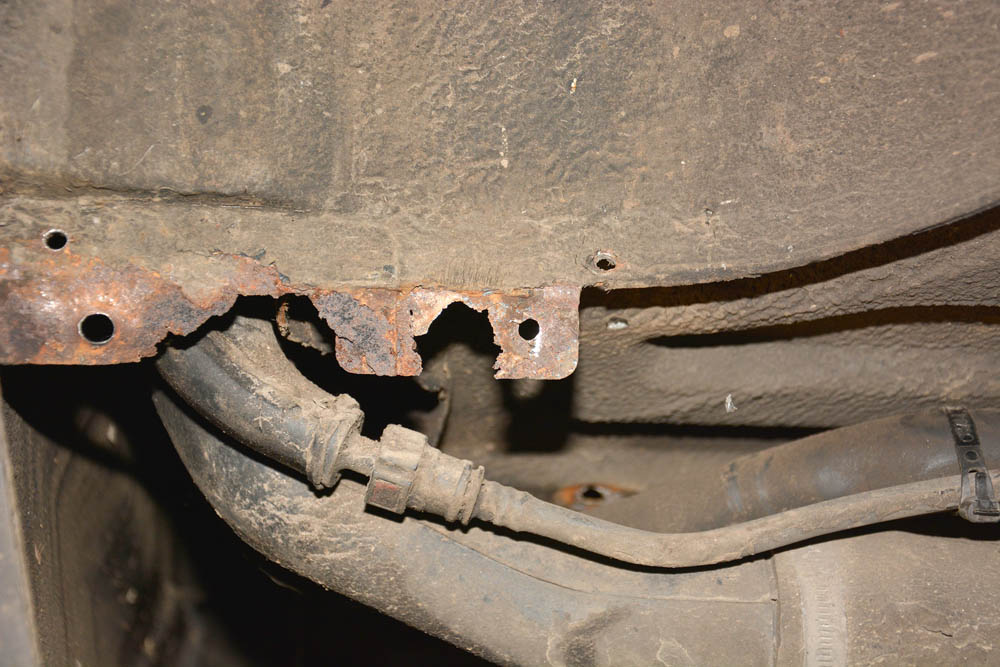
The section of bodywork that the mudflap panel attaches to has been attacked by rust, due to a water trap between the two parts.
For the purposes of this feature, and until a proper welded repair can be carried out, a makeshift bracket is put in place to attach the panel to.
Fitting new galvanised rear mudflap panels
Having managed to remove the old rusty mudflap panels and the associated fixings without too much trouble, the new galvanised parts can be offered up and trial fitted. As well as the excellent kit from YRM Metal Solutions Ltd, the parts could be sourced from your local Land Rover parts supplier or dealer, but these will probably be simply painted black – the galvanised kit from YRM will certainly last much longer.
The most difficult (and dirty) part of the job is complete – bolting in the fresh new components, with new fixings, is a more pleasant experience and very straight-forward.
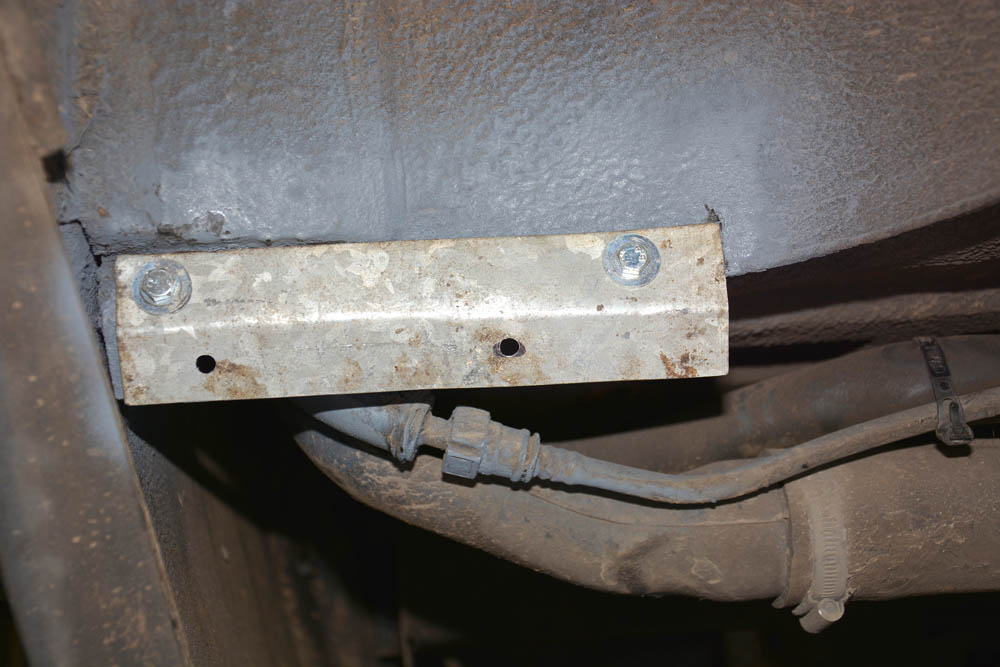
The right side mudflap panel is secured to the new temporary bodywork using M6 x 20 bolts with OD20 Penny washers and nylon lock nuts.
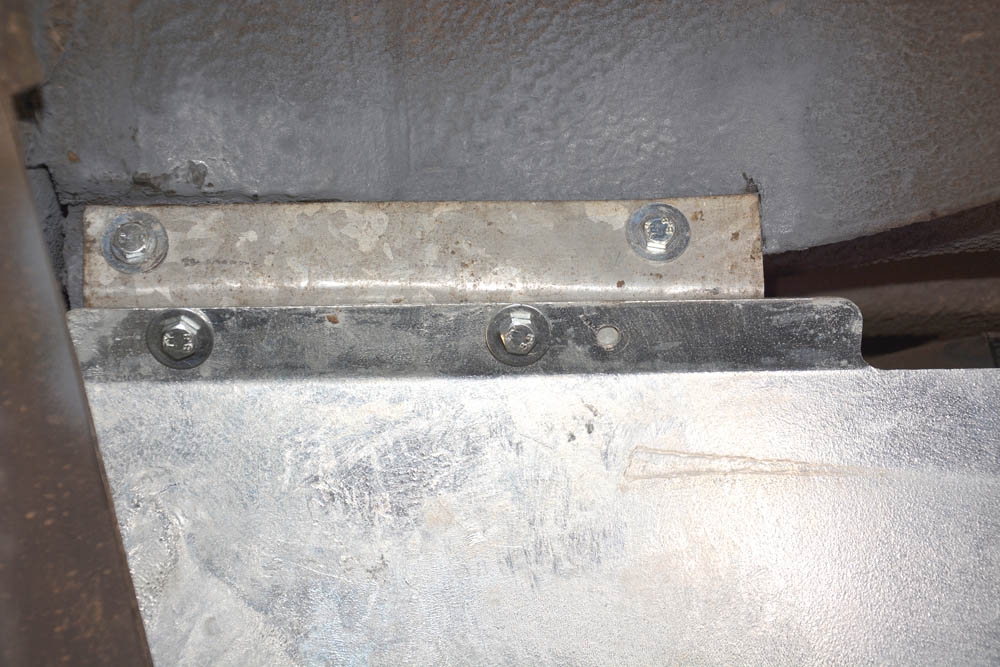
The panel is also attached to the rubber mudflap with the same bolt sets. Everything is kept loose for now, until the complete assembly lines up.
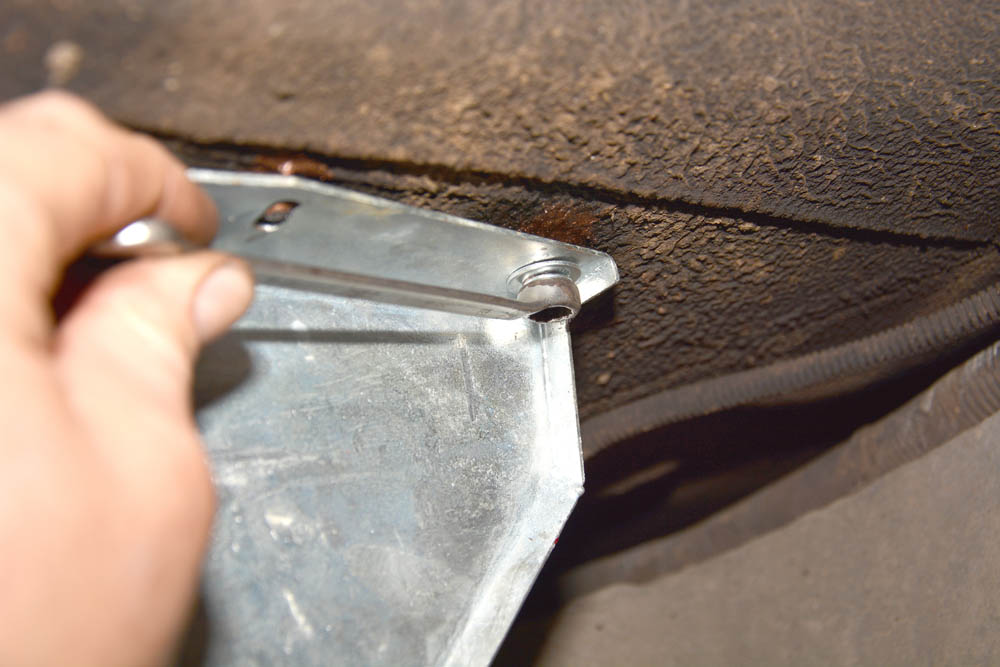
Spreader plate here is fitted incorrectly, but the picture shows the need for lining up before tightening – the side bracket needs to be pulled towards the body panel.
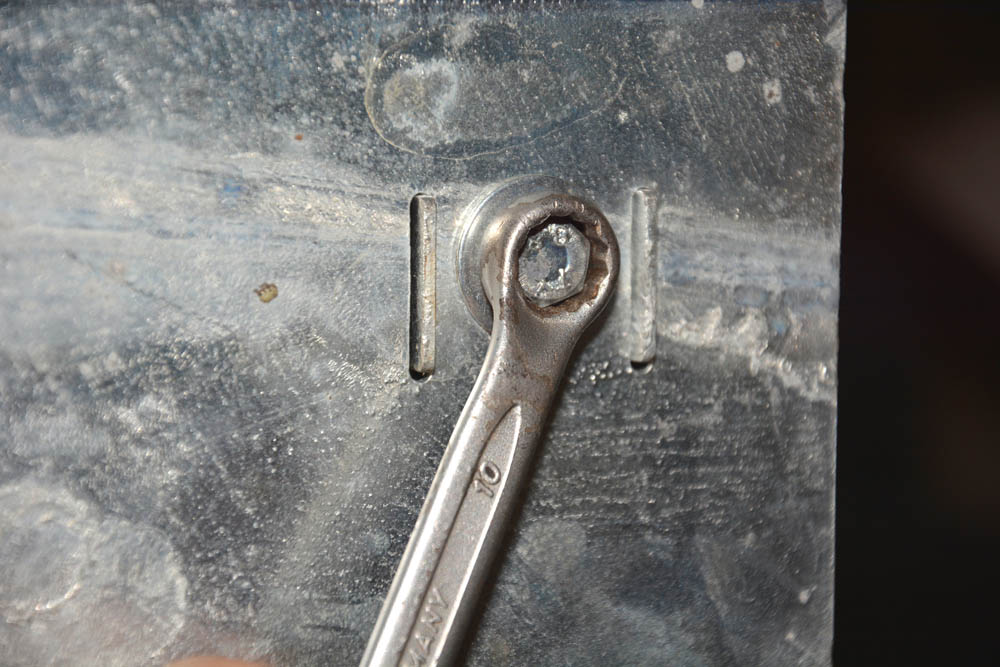
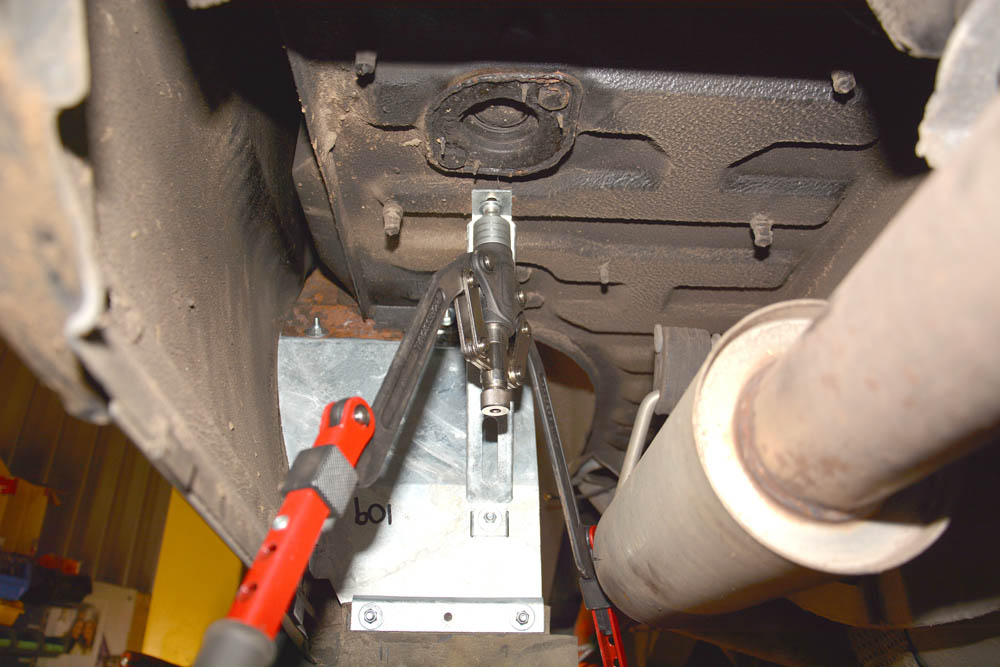
Once everything is satisfactorily in position, the bolts can be tightened up using a 10 mm socket wrench and a 10 mm spanner.
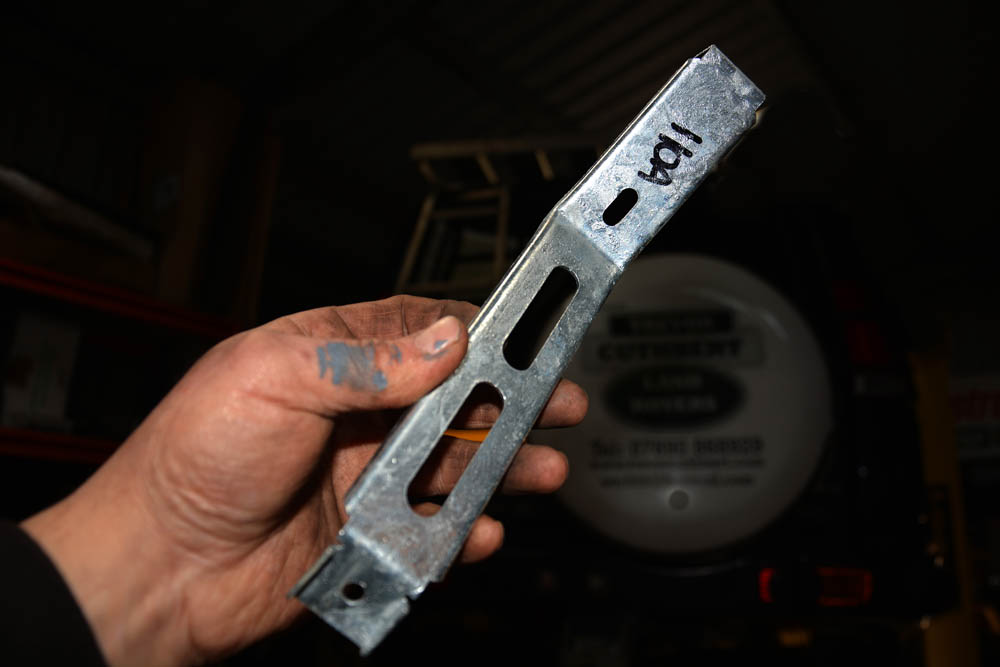
The kit of parts from YRM Metal Solutions comes with replacement support brackets, which are also galvanised for protection from rust
The support bracket mates up into slots in the mudflap panel for an easy and accurate assembly and fixed with another M10 bolt set.
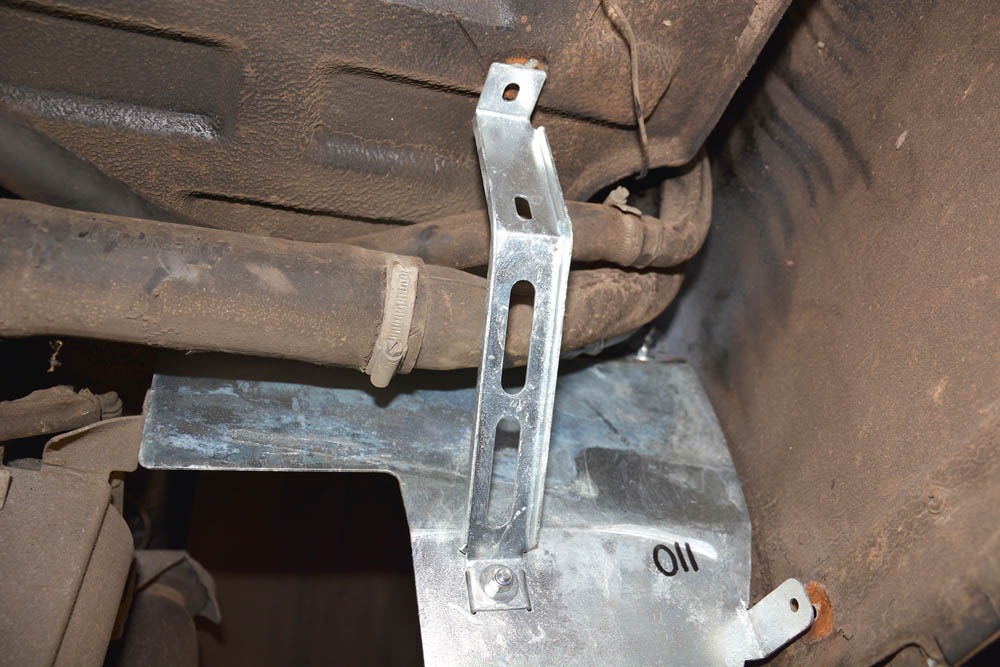
The right side support bracket is shaped to go over the fuel filler hose and breather hose and represents a nicely engineered solution.

I used large 6.3 mm x 30 mm blind rivets to fix the support bracket to the boot floor and the mudflap panel to the side bodywork.
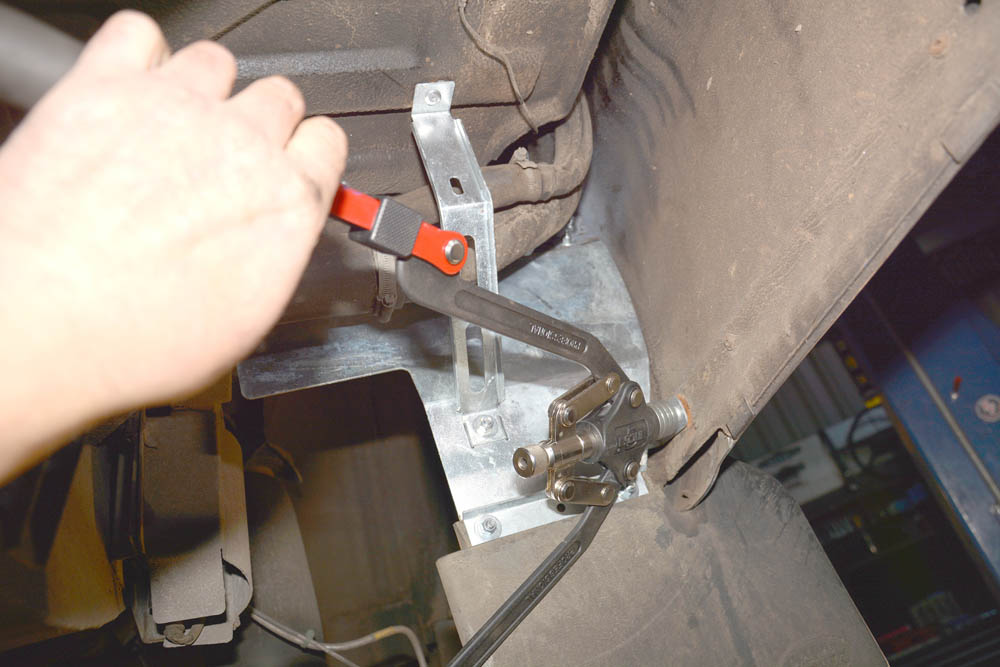
Large rivets will need a suitable rivet gun to fit them. This one is from a Rivnut fixing kit that came with the riveter option.
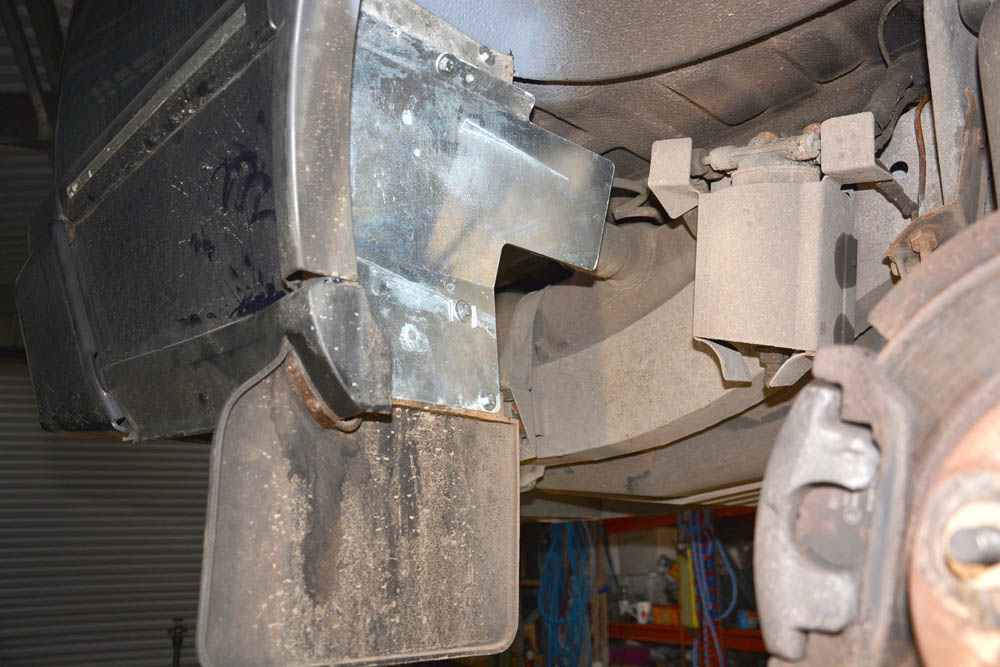
The completed job on the right side is a vast improvement on the rusty mess that had been there and is well worth the effort and cash.

Fitting the new left side mudflap panel and support bracket on the right side is very similar job. A small impact gun is used here for speed.
The exhaust tailpipe makes it a challenge to operate the riveter, but an orientation was found to allow the handles to move in and out.
Replacing front mudflaps
This Discovery 2 previously had OEM side steps fitted, which had integral mudflaps – of a different design from the conventional. So, when the side steps were discarded, because the frames had rusted out, the truck was left with no mudflaps on the front at all.
The Discovery has a set of three M6 studs on each side, under the rear of the front wheel arch, which are there to fix a mudflap to. They usually have an M6 nut on each to protect the threads. But after several years exposed, the nut becomes bonded to the thread by rust and the stud can shear when attempting to get the nut off.
On this Discovery, neither of the studs nearest to the sills sheared, but the other four did. However, three of these have sufficient thread remaining to fit the bracket to. The final stud had enough thread to maybe allow a nut to catch two or three threads at best.
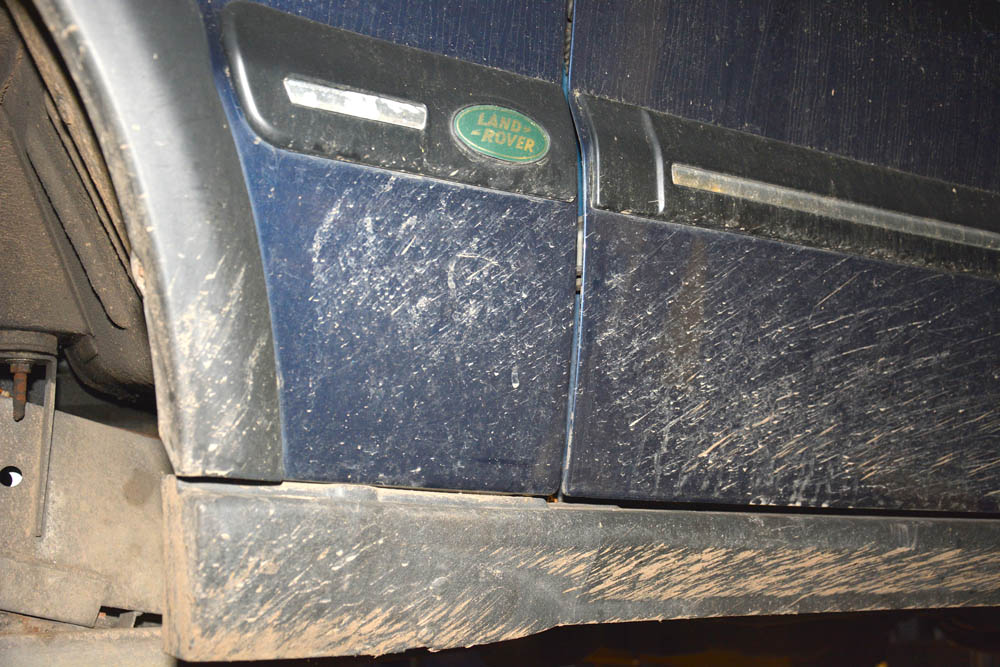
The lack of front mudflaps on the Discovery is evident by the pattern of dirt along the plastic sill, lower wing panel and lower door.

On both sides of the Discovery are three studs in place for fitting front mudflap brackets, but are they all long enough for the job?
To figure out how the new kit fits to the Discovery, it was loosely fastened together before being offered up to the appropriate side of the truck.
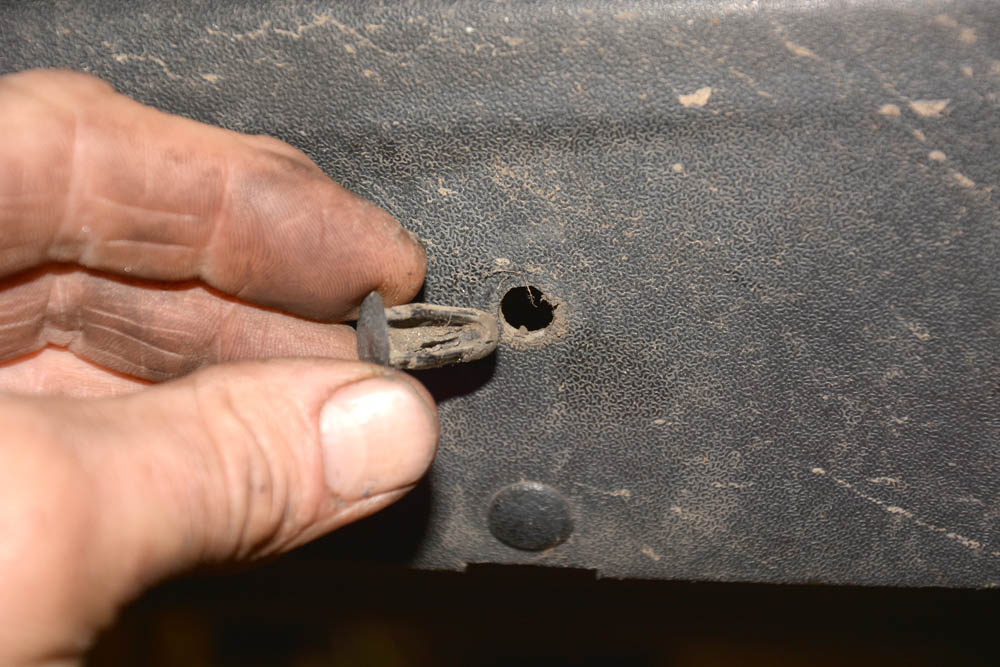
The plastic sills are pre-drilled for fitting the moulded mudflap to them; these blanking plugs are squeezed from the inside to remove them.
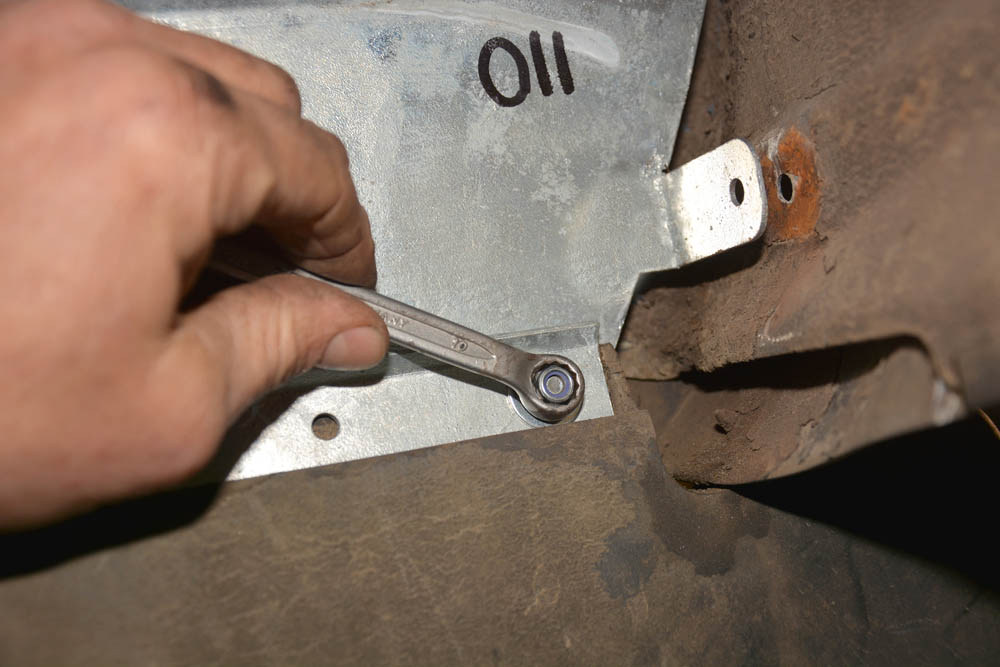
The new galvanised mudflap bracket fits perfectly over the three studs under the body, and M6 flange nuts are loosely screwed on to hold it there.

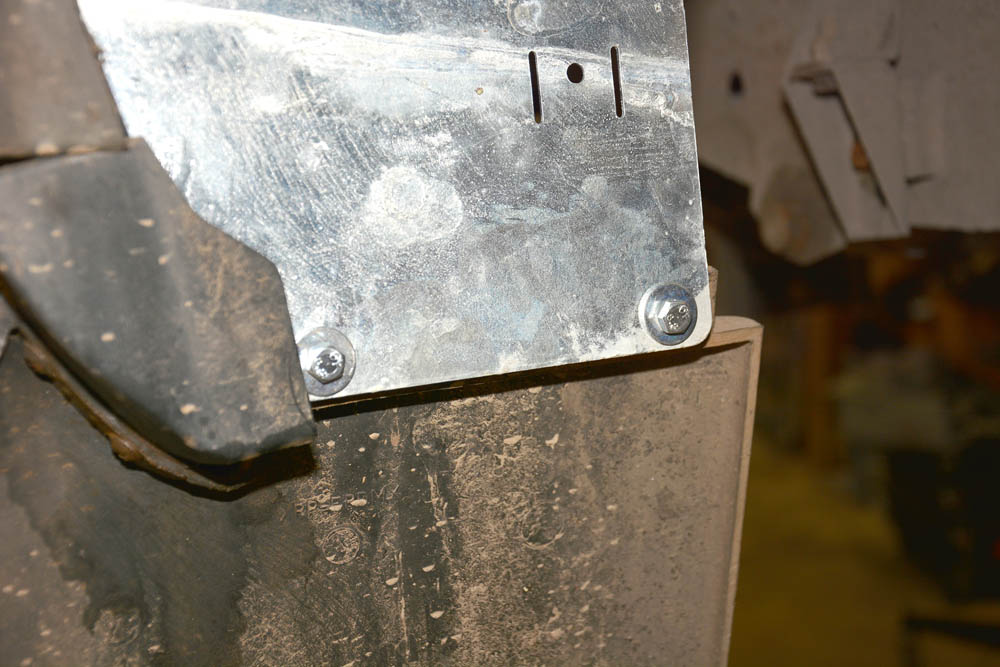
The mudflap’s moulded top is bolted to the sill. There should be a spreader plate under the heads (forgot to order it) which I’ll fit later.

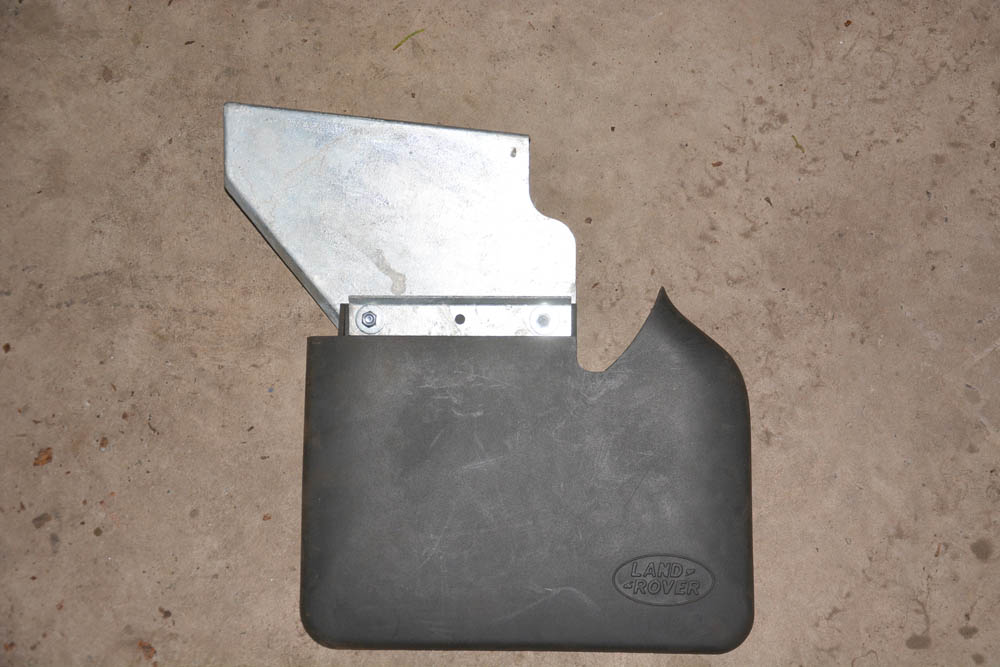
The new mudflap is a perfect fit where it moulds around the sill, and sufficiently tough to withstand off-roading contact, secure on its new bracket.

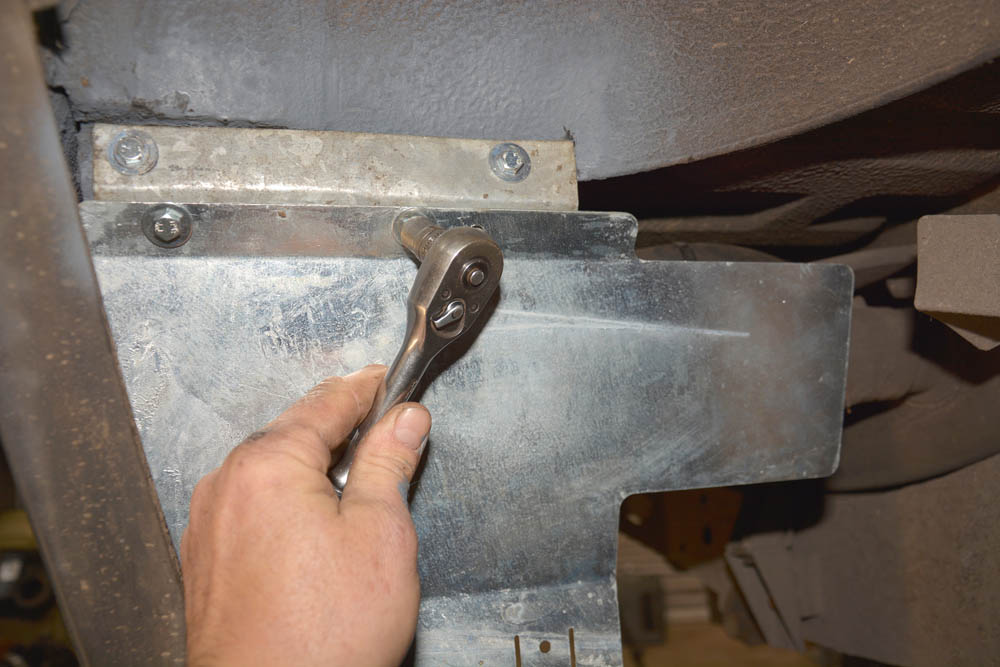
Looking from under the front, the right hand assembly is fitted in exactly the same way. The whole kit will protect this Discovery for a long time.
Did you know that you can now get access to the entire archive of Land Rover magazine content with our brand new digital archive? You can enjoy all the issues since the launch of the magazine – use the search bar below to find features, reviews and other great content: