


26 December 2023
|
 Renew the ride on your Range Rover Sport or Discovery 3/4
: credit: © Ed Evans
Renew the ride on your Range Rover Sport or Discovery 3/4
: credit: © Ed Evans
Ed Evans shows how to bring a Range Rover Sport’s ride and handling back to near-new when the air suspension shows sign of ageing
Need to know
Cost: From £230 (OEM) to £780 (JLR) per corner
Difficulty: 3 out of 5
Models: Discovery 3 and 4, Range Rover Sport 1, similarities with other air suspension models.
Tools needed: General workshop tools, sealant gun, angle grinder with 1mm cutting disc, nut splitter tool.
Parts and costs: Available from Britpart stockists.
The following part numbers apply to this 2006 Range Rover Sport diesel. When ordering, quote your particular vehicle type to ensure parts are correct:
• Rear suspension units x2, LR041110.
• Front suspension units x2, LRO41108.
• Upper securing nuts, x12, FY110056.
• Lower damper bolt rear x2, RYG00461.
• Lower damper flanged nut front and rear x4, FX116056.
Work safely:
• When clearing dust and debris from the top of the suspension units, wear a particle mask and eye protection.
• When disconnecting the air pipes wear eye protection.
• Release the air pipe Voss connections slowly until air is heard escaping, then stop undoing the nut. Only when the internal air pressure is fully depleted should the nut continue to be slowly released, but still listening for escaping air and stopping again if it is heard hissing.
• The final tightening of the damper lower bolts needs considerable leverage, so first check the vehicle is fully stable.
• It’s advised that this job is only tackled on a suitable vehicle lift. Attempting this work with the vehicle on the ground and supported on stands is not advised, on grounds of safety
and impracticality.
Thanks to: Britpart for facilities and Steve Grant for doing the work and adding his tips and comments.
Air suspension on the Range Rover Sport meets a tall order in providing off-road ride height, generous axle articulation, a high quality ride and relatively sporting handling in a vehicle weighing over 2.5 tonnes. Credit goes to the manufacturer of the air springs and dampers, Delphi, and to Land Rover’s overall design and layout. And the proof is that my own Range Rover Sport was riding and handling reasonably well after nearly 170,000 miles on the original units – on a basic coil spring vehicle you can expect the dampers to be trashed after anything above 60,000 miles, depending on use and abuse.
So, no complaints on longevity but, yes, the suspension was tired. The rear end was plummeting a bit through the potholes and I could tell the dampers were no longer controlling the air spring action in the way they used to. And while the front suspension was still riding well in a straight line, dealing with a tight curve or powering out of a roundabout would have the front end leaning over like a tired old dog that I’d have to yank round with the steering wheel as the weight of the beast attempted to continue in a straight line.
That spoils the driving, which matters to me because I’d originally chosen this Sport over its sister ship, the Discovery 3, as it handles so much better – not any more. More importantly, worn-out dampers are dangerous. The deteriorated handling may feel safe under normal driving but, in an emergency manoeuvre or when hitting ice, gravel or aquaplaning on a flooded section of road, damper condition can make the difference between correcting it or losing it.
Later model air suspension units are generally sold as a combined air spring and damper. That’s okay because, by the time the dampers are worn, the air springs will have suffered abrasion, cracking and possibly hardening of the material, so it makes sense to renew the lot and bring the ride and handling back to near new – that’s assuming the other suspension bushes are good and the suspension geometry is still correct (if not, it’s worth bringing any defective parts up to scratch and having four-wheel alignment carried out).
On this vehicle, other suspension components are all good and four-wheel alignment has been done a couple of thousand miles ago. So here we are in the Britpart workshop with technician, Steve Grant, carrying out a straightforward spring/damper unit replacement. And, of course, that’s not as easy as it sounds, not even with the usual precursor of wire brushing all the exposed threads and soaking with penetrating fluid.
The air system can be de-pressurised before starting the job if you have the necessary diagnostic system. Otherwise, as Steve shows here, the air connections can be slightly slackened to allow air pressure to escape from each unit. But care must be taken when doing this, slackening the Voss connector slowly and waiting for the sound of escaping air to cease, then continuing to release with caution. For safety, wear face protection and, to prevent dirt ingress, clean debris from the area before releasing.
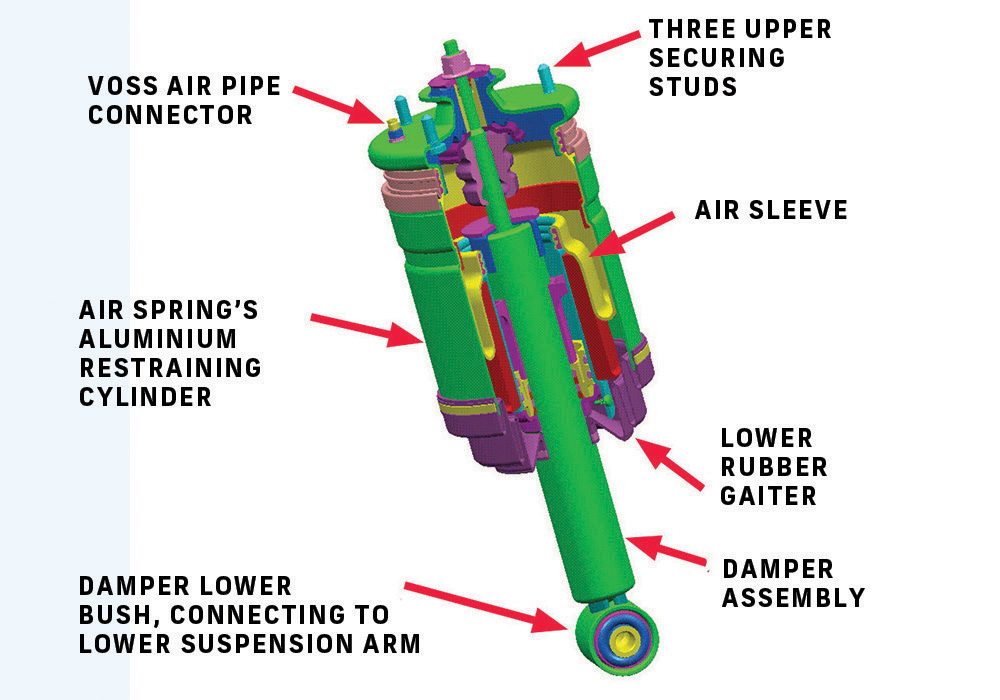
Inside view: These suspension units can be difficult to remove, but at least new units have a new Voss connector pre-fitted, so reconnecting the air supply is the simplest part.
CHANGING THE REAR UNITS
Tackling the top end
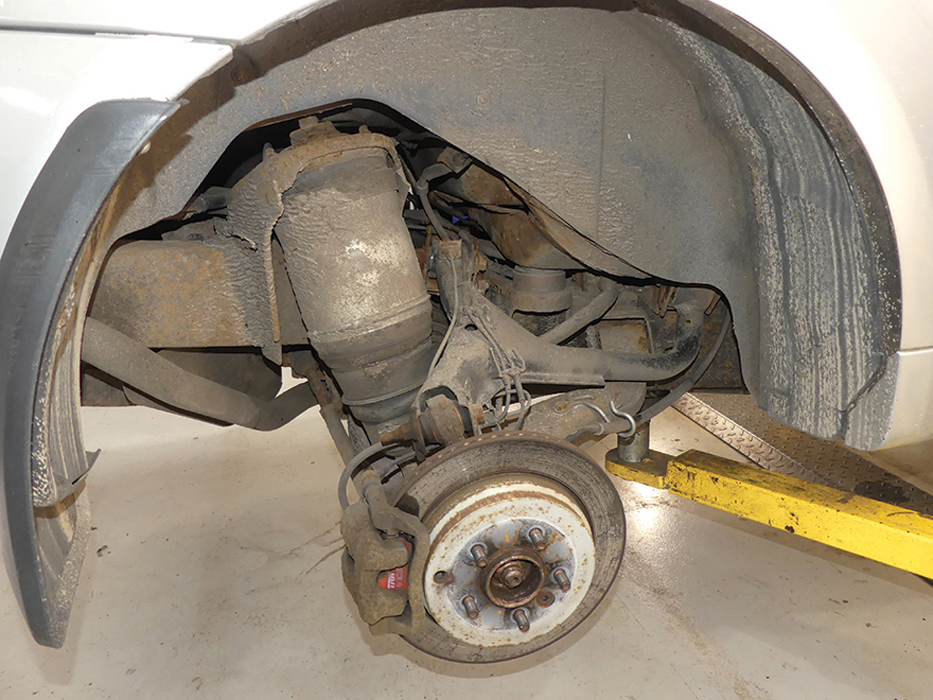
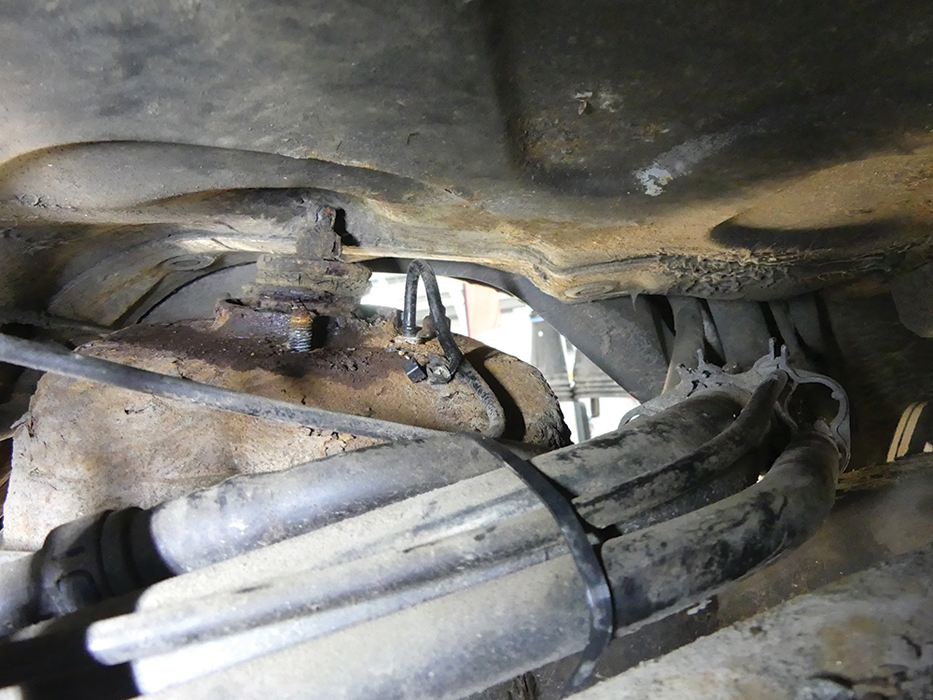
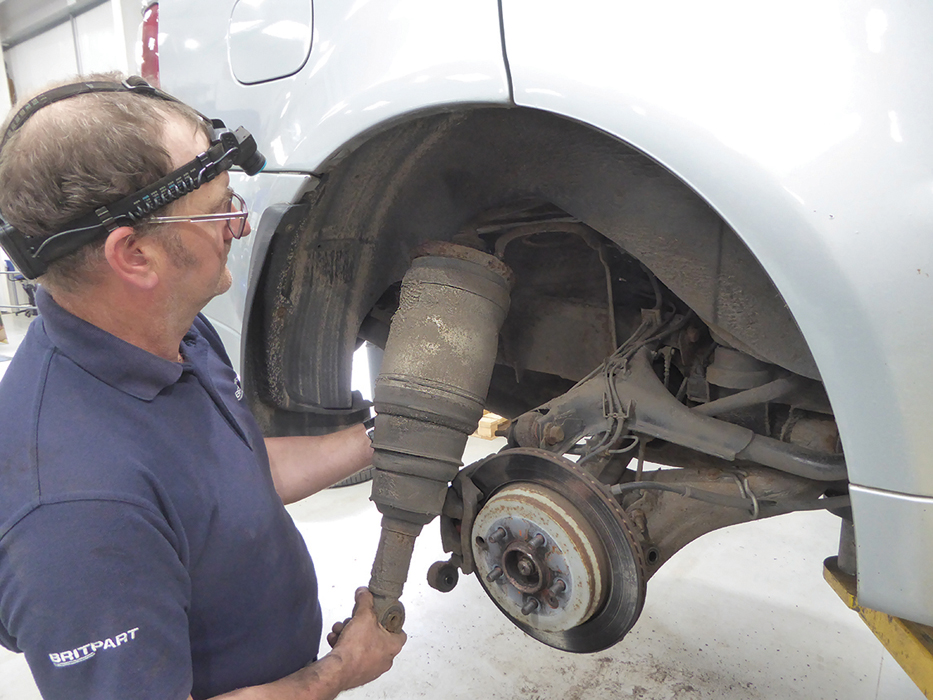
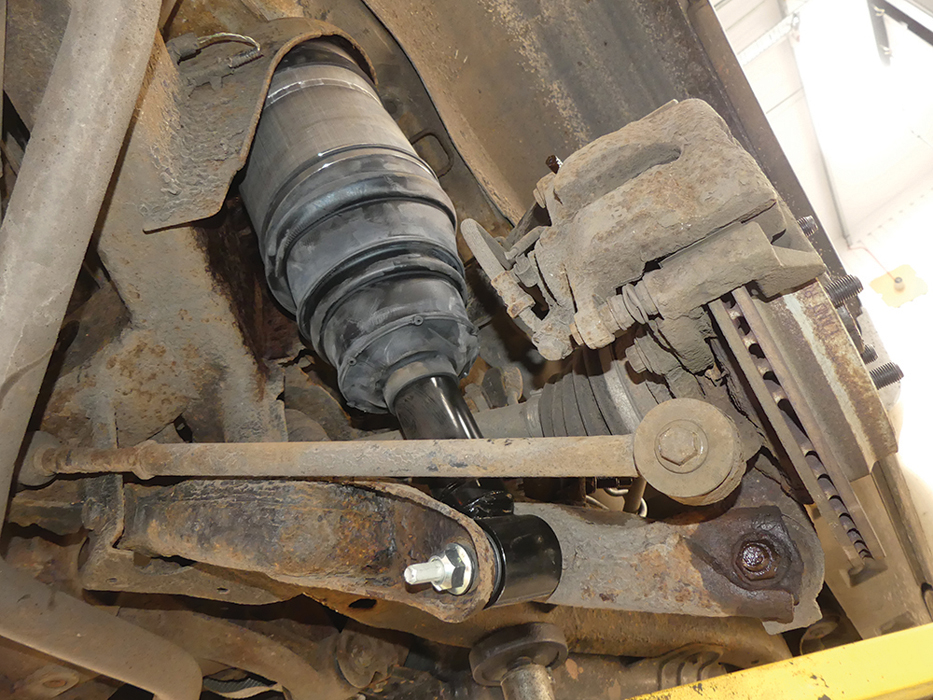
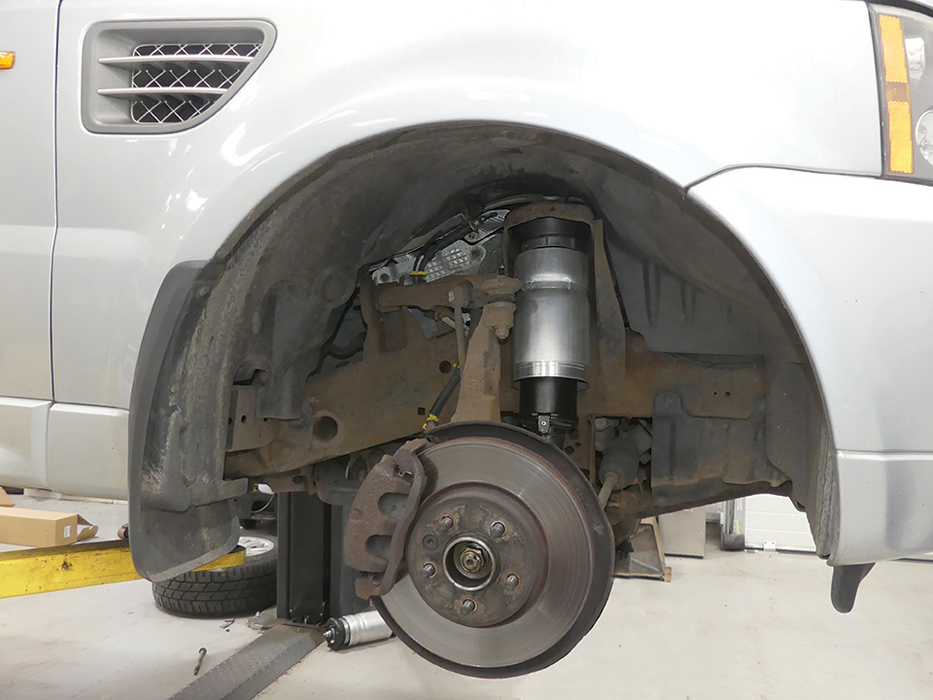
Deception: With the chassis supported on the vehicle lift and the road wheel removed, this rear air spring/damper unit appears easily accessible. But it really isn’t.
Trouble: At the top of the unit, the nuts holding the spring’s three upper studs to the chassis upper mounting are usually heavily corroded and need careful handling.
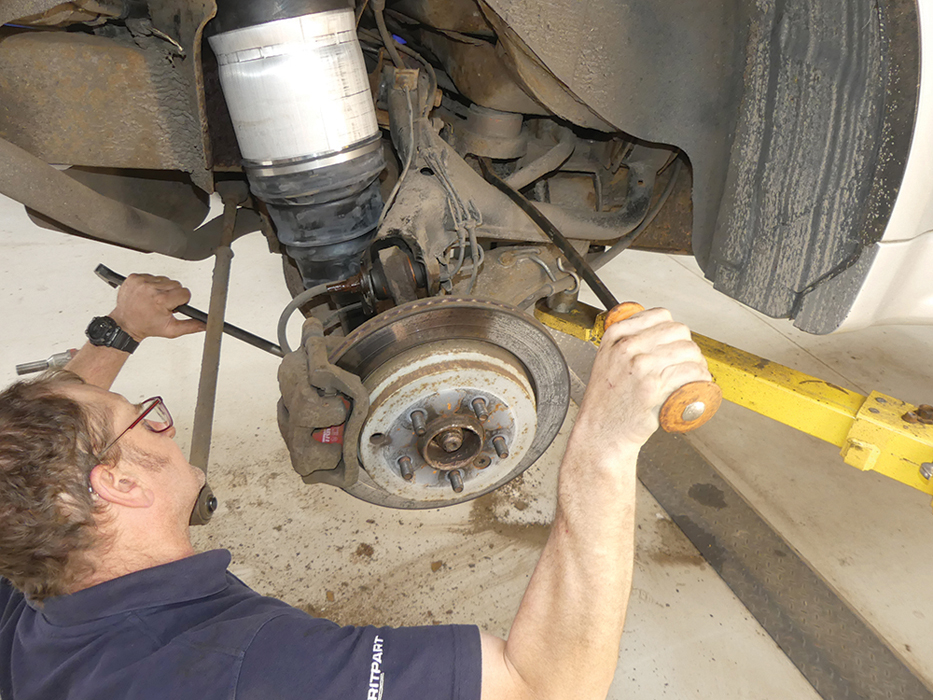
Easiest: The two outer nuts are removed using a quality 15mm ring spanner with additional leverage – there’s little room to get a socket and wrench in here.

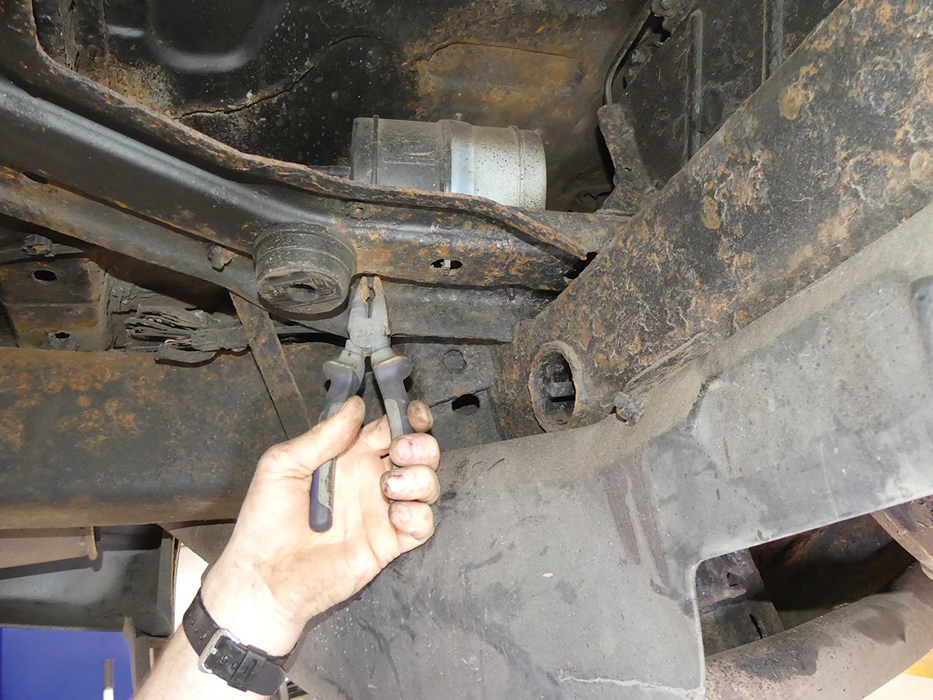
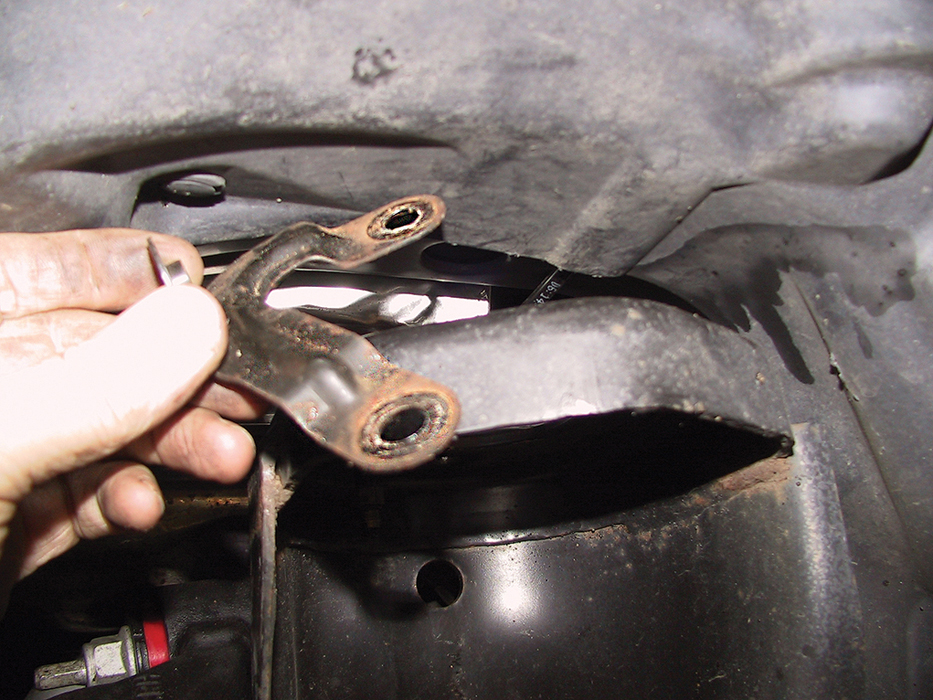
Tricky: The inboard nut is reached from underneath after removing the spare wheel. The flats are rusted off this, so it’s attacked with a hammer and cold chisel.
Shocking: The shocks from the hammer eventually break the bond between the threads of the stud and the nut, and it’s laboriously wound off using mole grips.
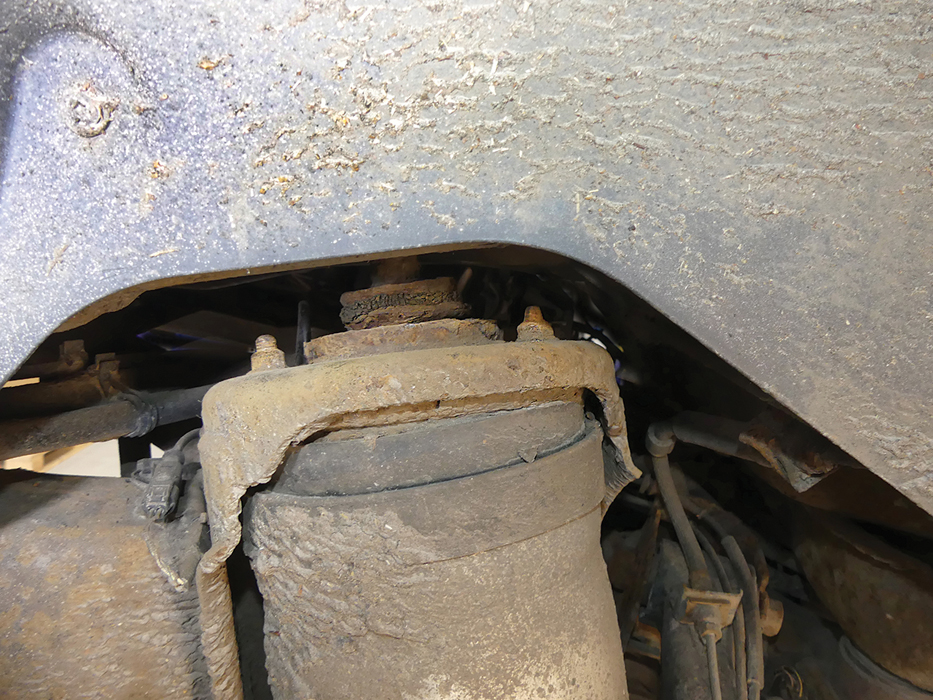
Opposite side: To reach the same nut on the left rear suspension, the suspension air silencer is unclipped from the chassis (by squeezing the rubber plugs) and moved aside.
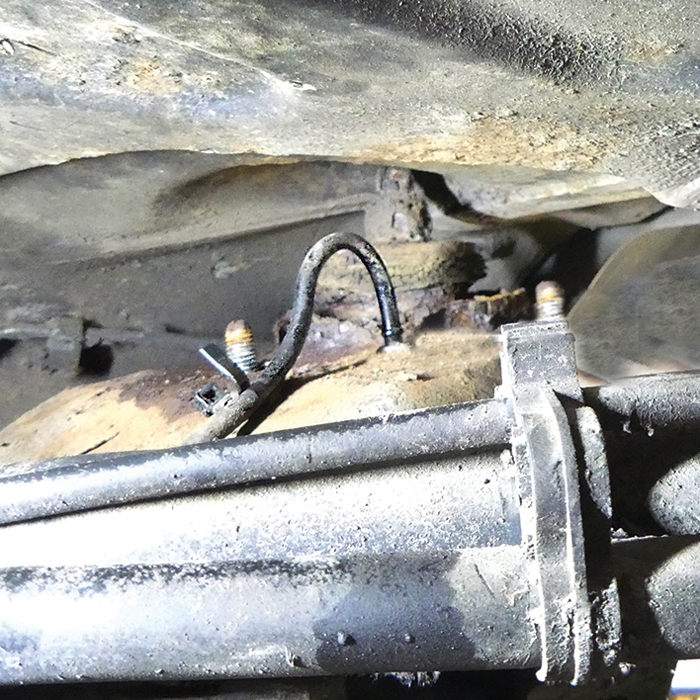
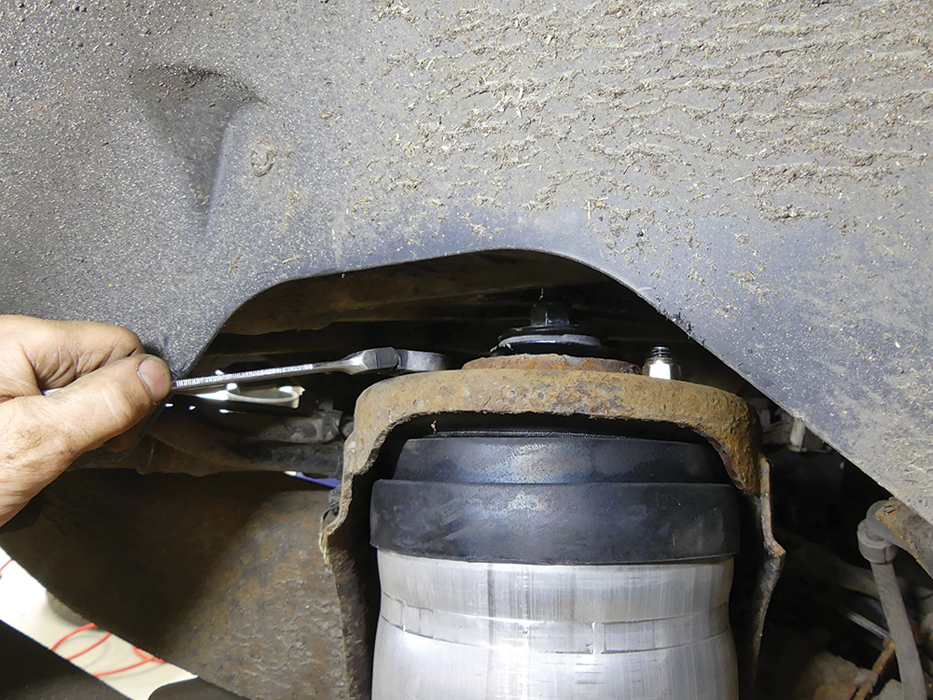
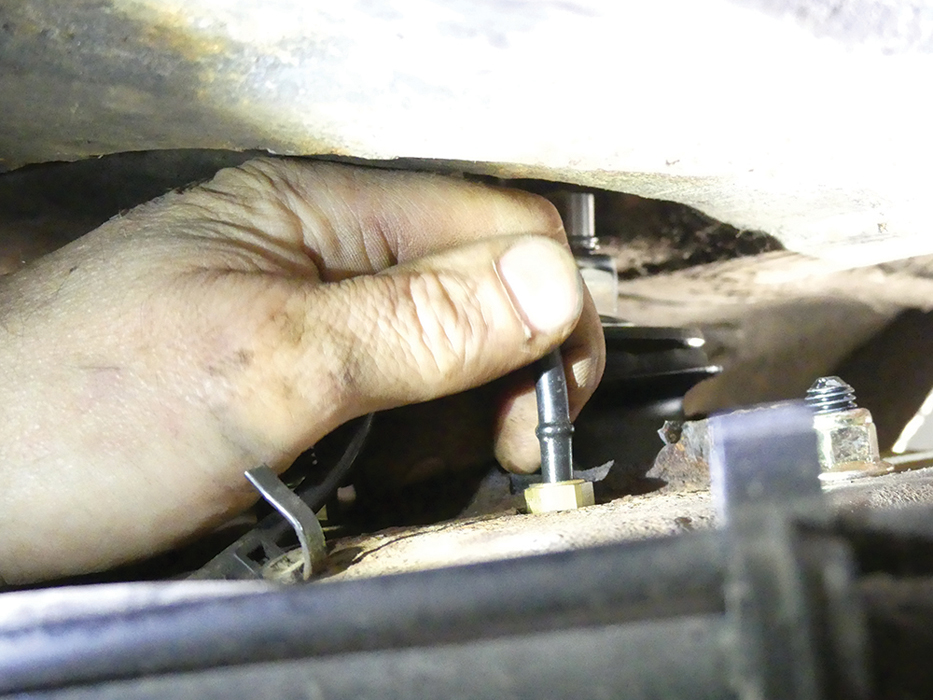
Air pipe: The clip securing the pipe on top of the unit is released, and debris cleared from around the Voss connector which locates the pipe into the suspension unit.
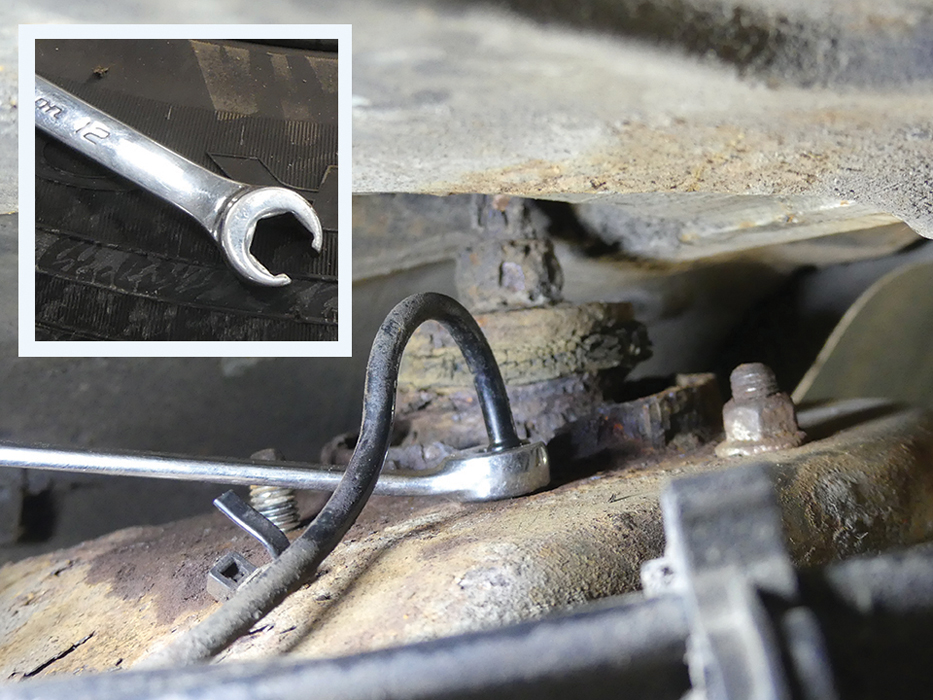
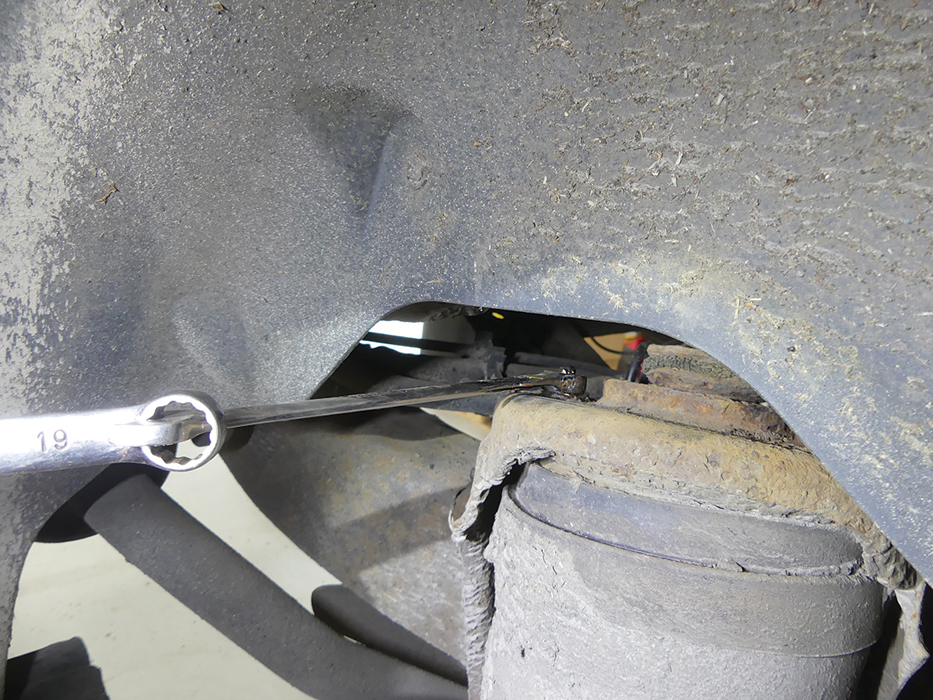
Slow release: A 12mm split ring spanner (inset) turns the Voss nut slowly until air is heard hissing out. Only when the air pressure is depleted, is the nut released further.
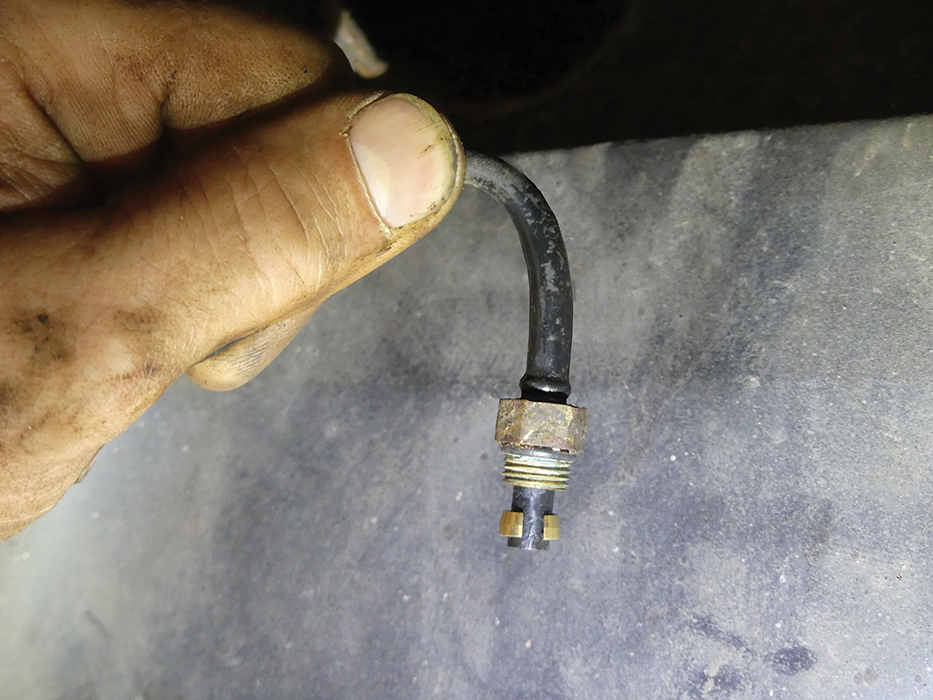
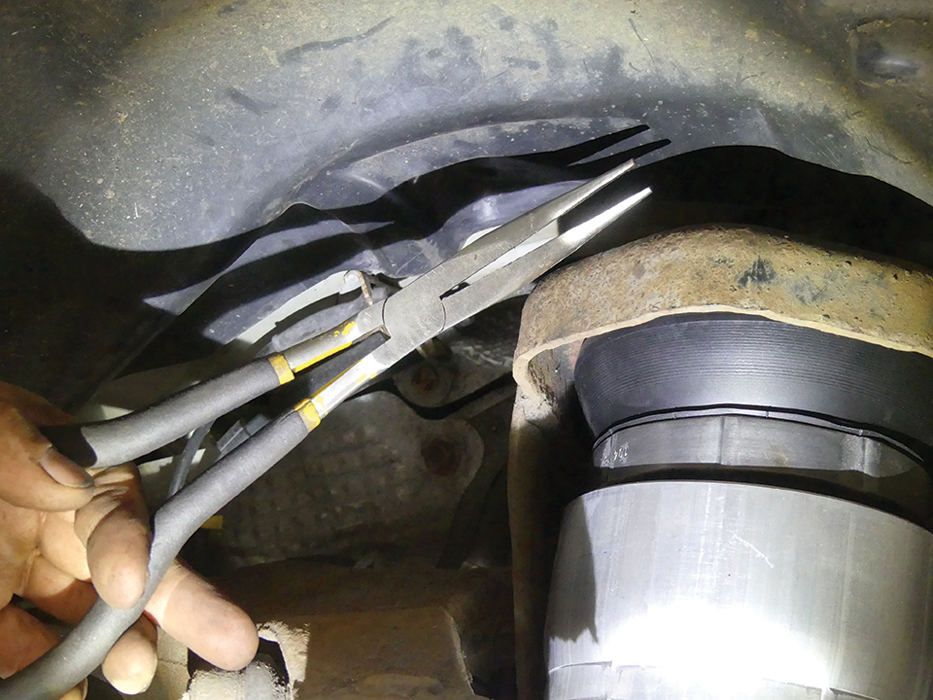
Preparing pipe: The pipe is lifted out, then the union nut is raised to carefully prise the split collet off without marking the pipe, then the nut can also be removed.
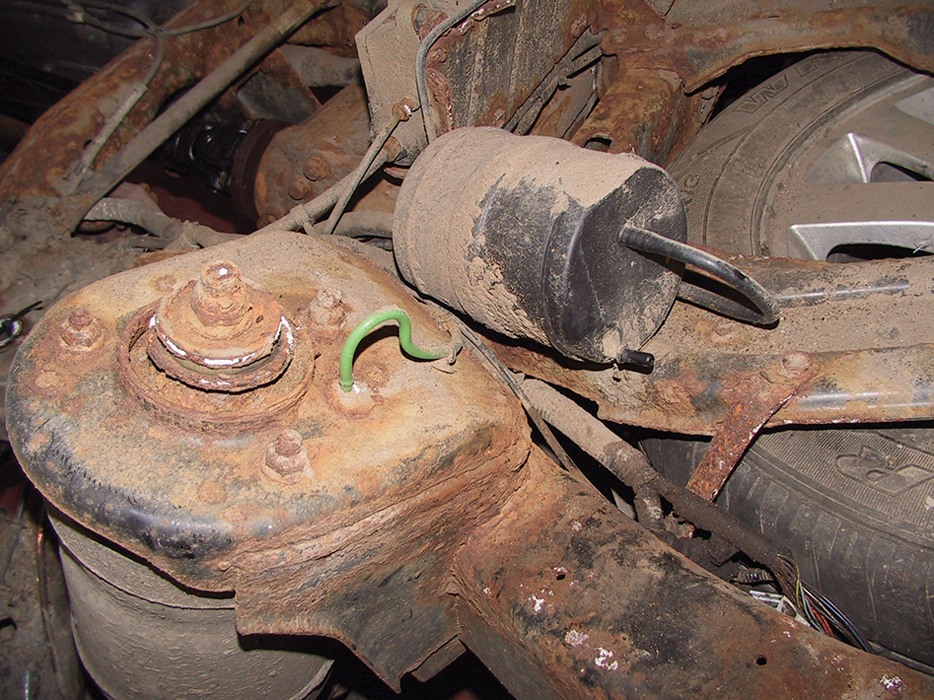
Looking back: To recap, this body-off photo of a Discovery 3 left-hand unit shows the air silencer, green air pipe into Voss connector, and three hopelessly corroded top nuts.
Releasing the bottom end, and removal
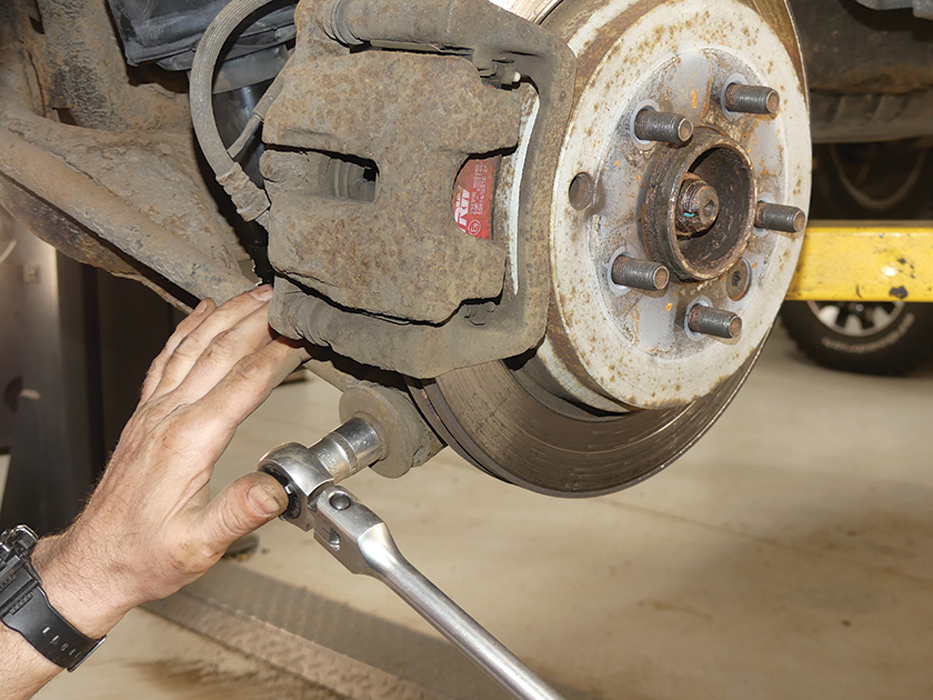
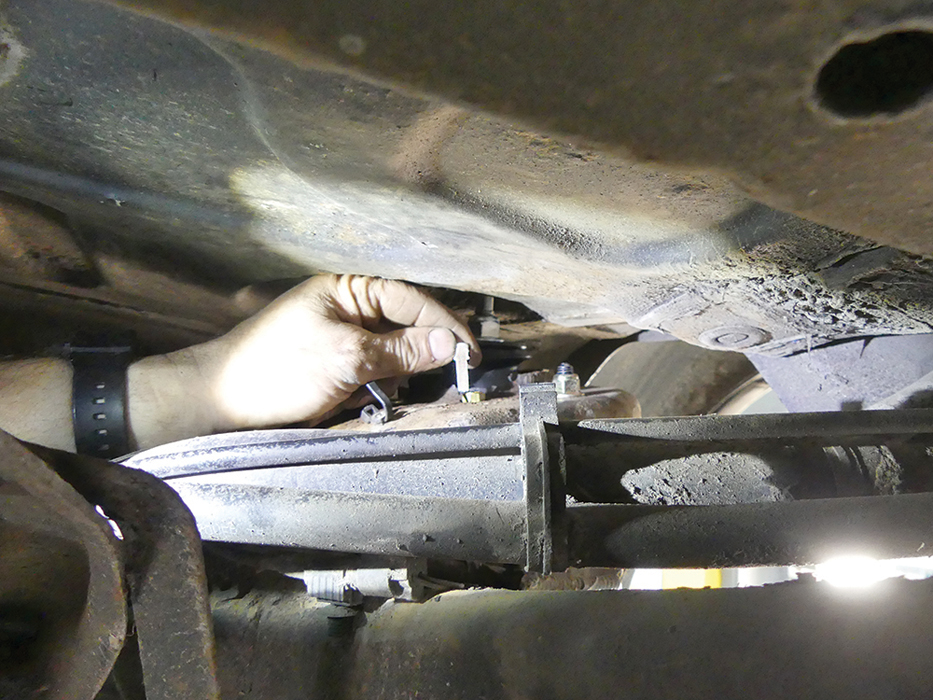
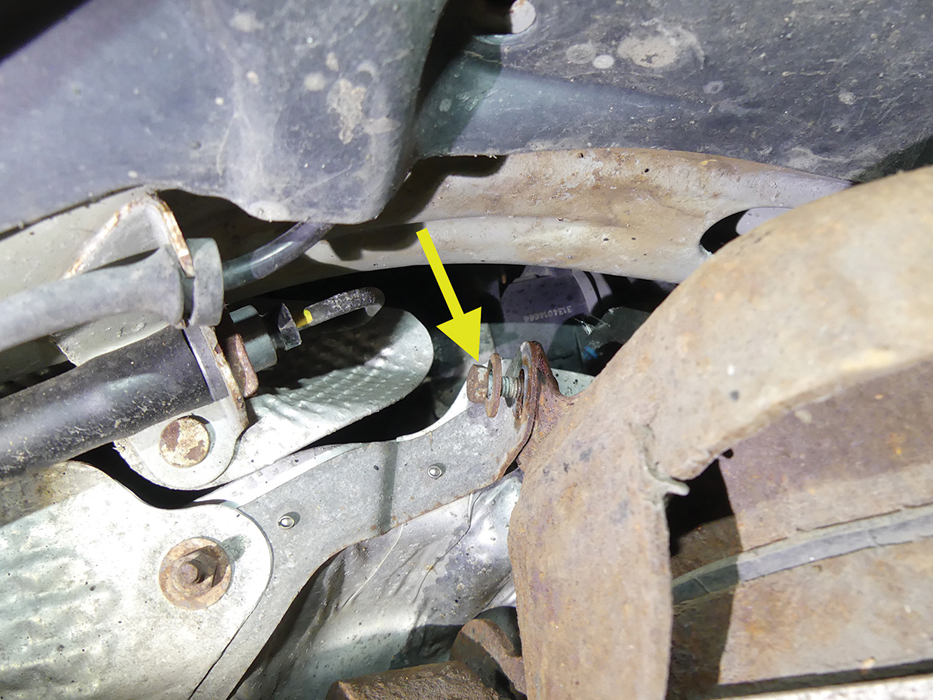
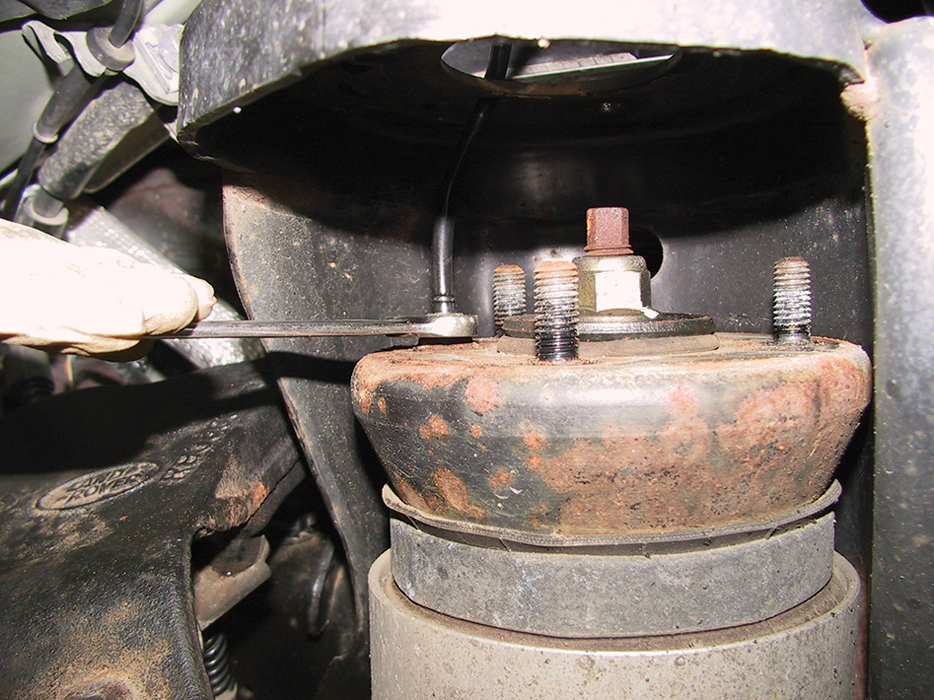
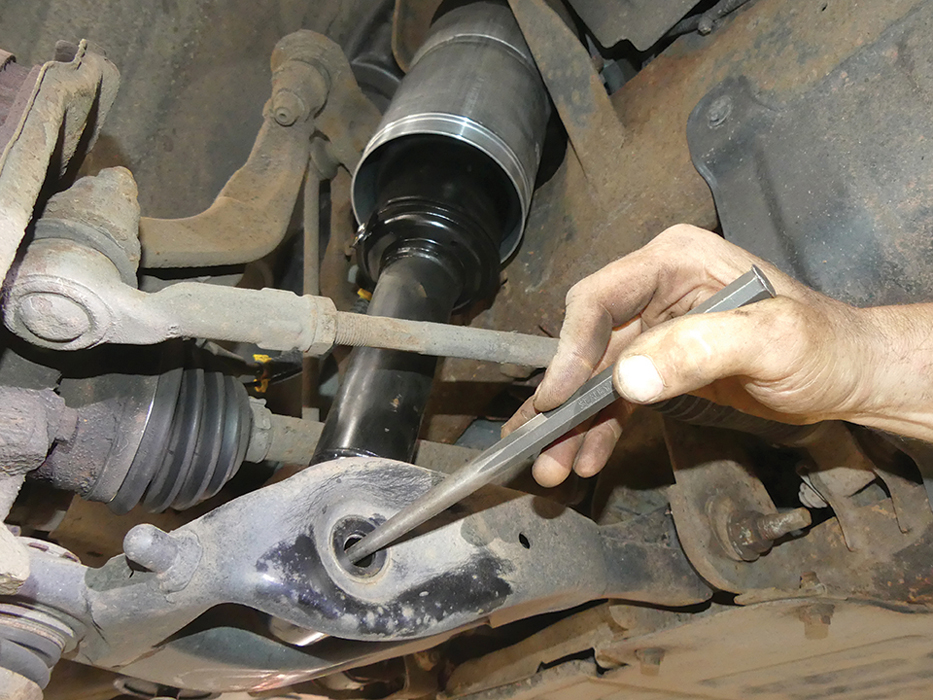
Creating space: The transverse toe link needs to be disconnected by removing the single 18mm AF head bolt to allow the lower part of the suspension unit to be withdrawn.
Damper mount: The damper bottom mount is released from the suspension arm (21mm AF bolt and 24mm nut), having loosely refitted one top nut to prevent the unit dropping.
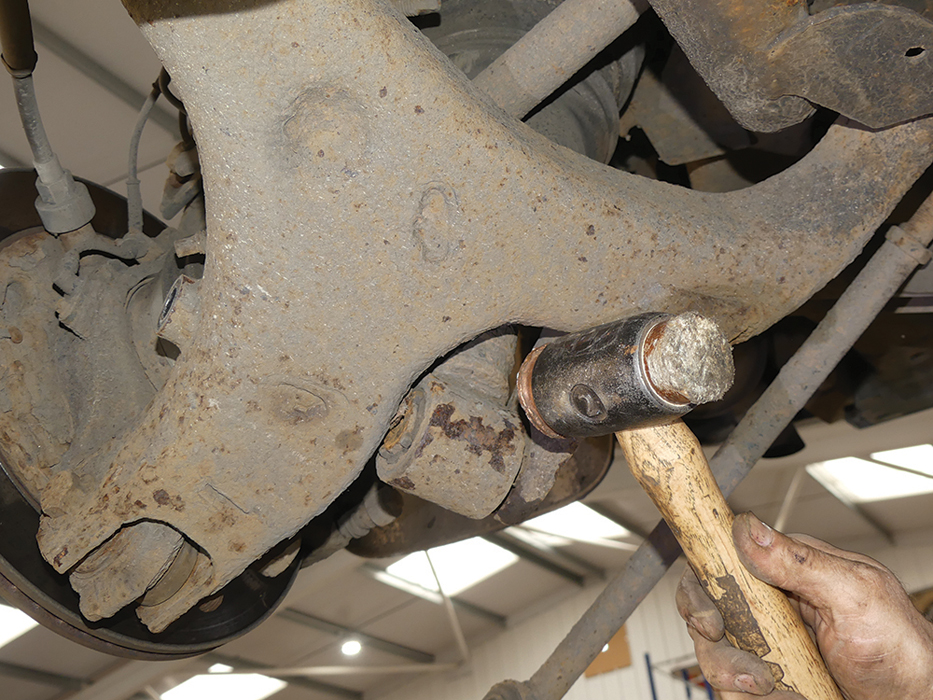
Parted: The damper bolt is initially driven through using a hammer and punch, before withdrawing. A whack with a mallet frees the damper from the suspension arm.
Up and out: After removing the single remaining top nut while supporting the unit, it is lowered slightly, then lifted out upwards from rear side of the suspension assembly.
Fitting the new suspension unit
When fitting the new suspension units, new fixings should be used all-round, including the three top nuts, the lower damper nut and bolt and the transverse toe link bolt. It’s important to fit the bolts dry, without any form of grease, because the fastening torque is specified for dry bolts, and any lubrication can cause the bolts or nut to be over-tightened, causing threads to be deformed or even shearing the bolts. The lower damper mounting bolts will all be fully torqued later when the vehicle is standing on its wheels with the suspension weighted to its normal position. Confirm tightening specifications for specific vehicle types.
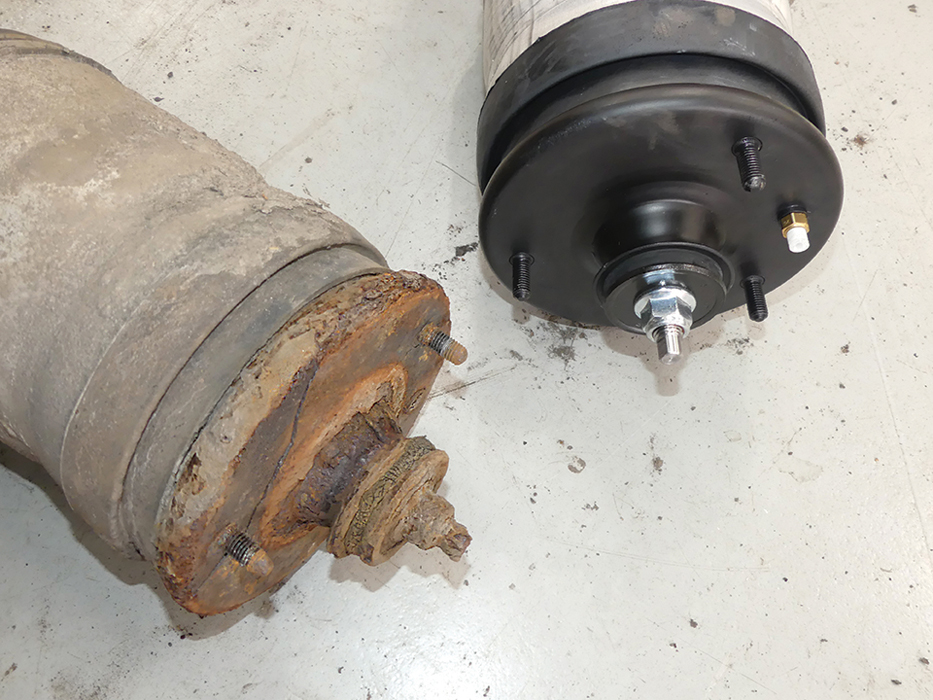
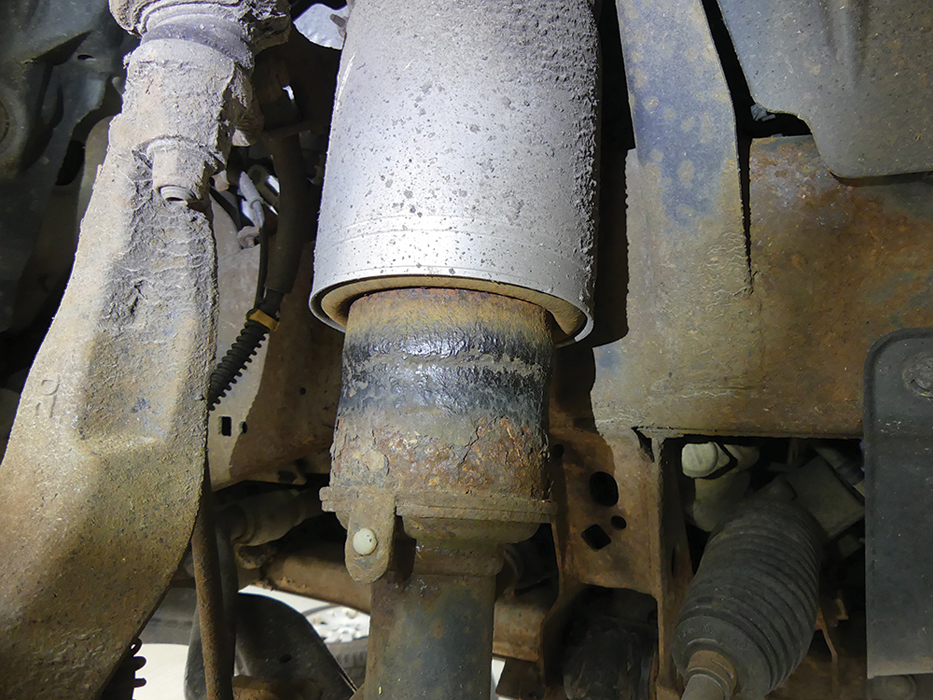
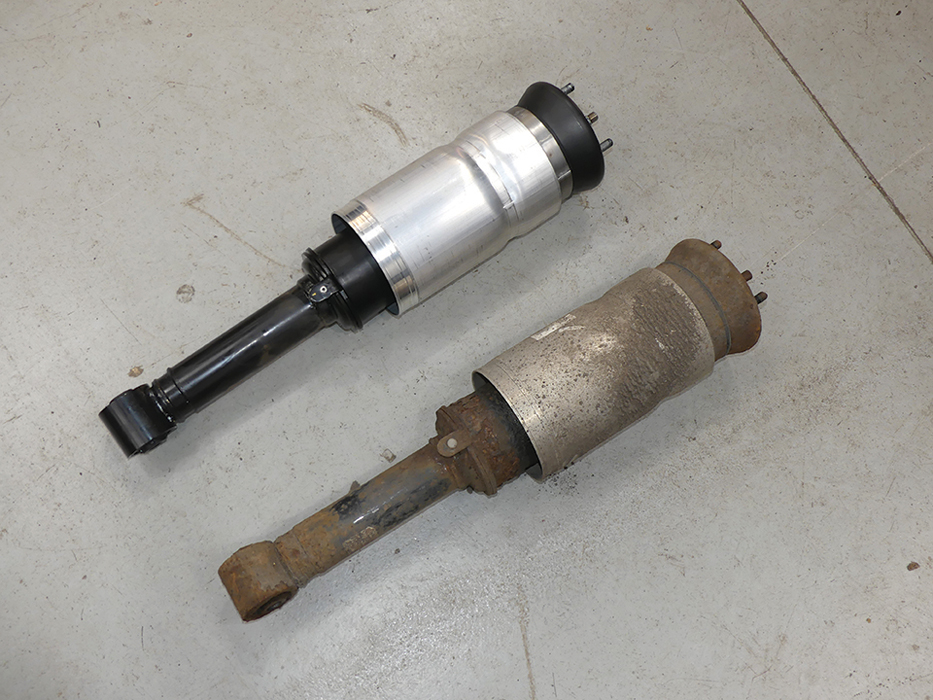
Deterioration: Compared with the new unit, the original has deep corrosion on the top mount assembly, upper nut and damper rod, and the rubber isolator is perished.
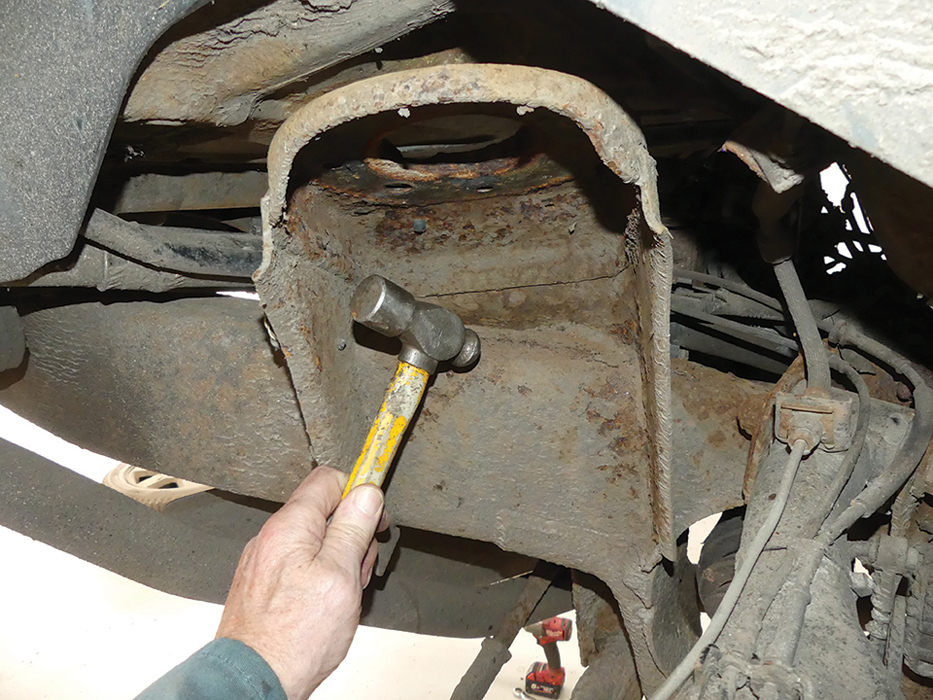
Brave pills: While there’s access, it’s worth being brave and checking the solidity of the chassis here, and applying protection. The underside of the turret needs cleaning off, too.
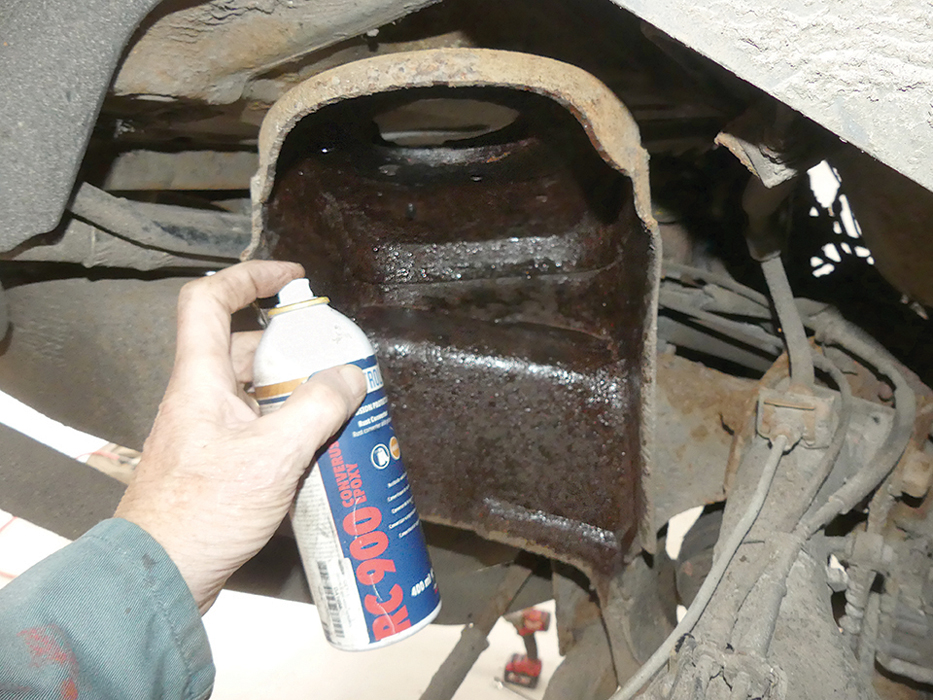
Preservation: After scraping and brushing the surfaces, rust convertor is applied to the chassis and turret and left to dry before applying a top coat and wax oil protection.
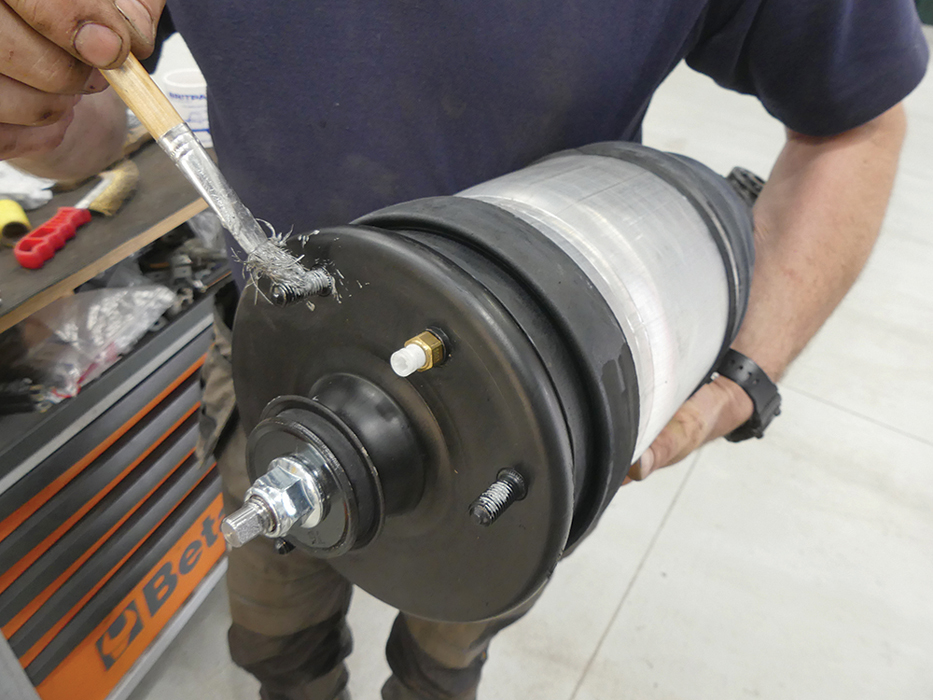
Easier next time: Steve applies anti-seize grease to the upper mounting studs of the new unit, but I’m hoping they won’t need to be removed for another 160k miles/17 years.
Only fit one way: The new unit is lifted up into position, engaging the top studs through the turret holes (they only fit one way) and running the nuts on loosely.
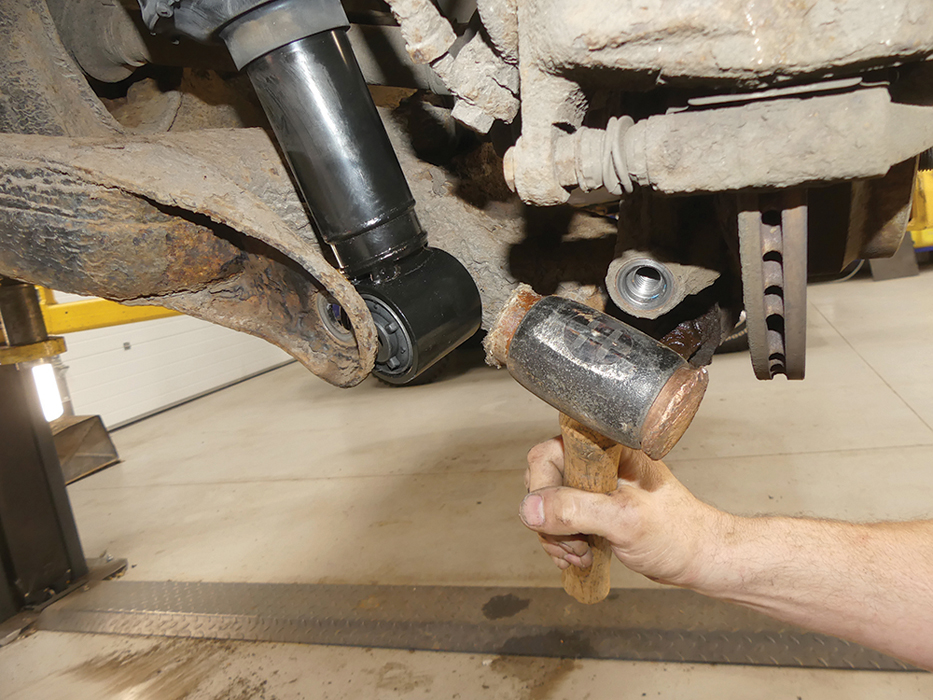
Squeezed in: Down below, the damper lower mounting and bush needs to be tapped inward and upward into its position in the lower arm using the mallet.
Damper bolt: A pry bar levers the suspension, joggling the damper and lower arm holes into alignment before inserting the new bolt. The nut is only nipped up for now.
Link refitted: Steve refits and tightens transverse link to the hub knuckle with a new bolt, applying thread lock (Loctite 243). Damper bolt tightened later, after completion.
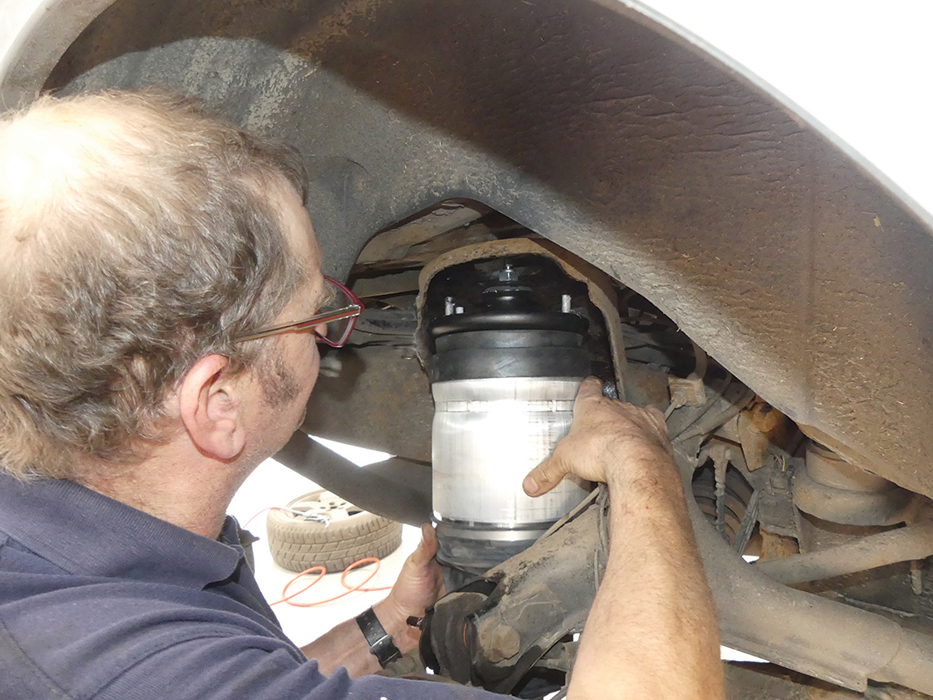
Top end: Three new nuts are fitted and tightened to secure the top of the suspension unit inside the chassis turret. It’s difficult to get a torque wrench in here.
Clean first: Again looking from the spare wheel bay, dust is cleared away from the area, then this protective white plug is removed from the pre-fitted new Voss connector.
Air connection: The cleaned air pipe is pushed into the new Voss connector. A smear of grease helps it slide in. A pull on the pipe confirms it’s properly installed.
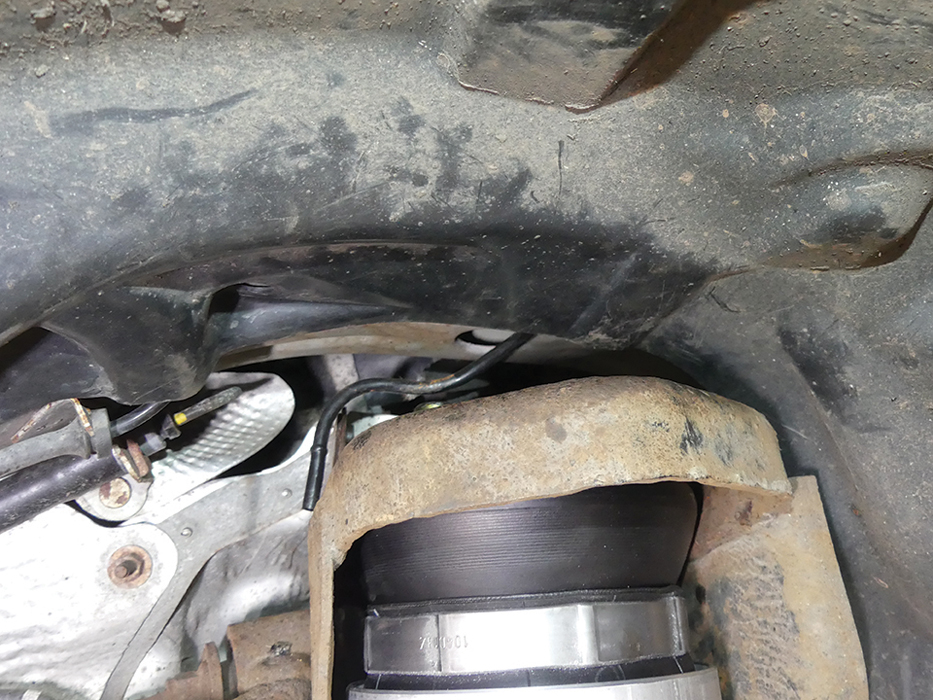
Almost done: That’s the rear units completed for now, though we’ll return to tighten the damper bolts later. Don’t forget to refit this air suspension silencer at the left side.
CHANGING THE FRONT UNITS
The procedure for the front units is similar to that for the rears. The same safety precautions apply in wearing eye protection when clearing dust away, and ensuring the air pressure is fully released before freeing up the Voss air pipe connections.
The three top nuts holding the unit to the turret are less exposed and so less likely to be severely rusted, but it’s still prudent to brush the threads and apply easing oil to all fasteners before work begins. Access to these nuts is tight, though it could improved by removing the inner wheelarches. However, this is likely to involve more hassle with corroded screws.

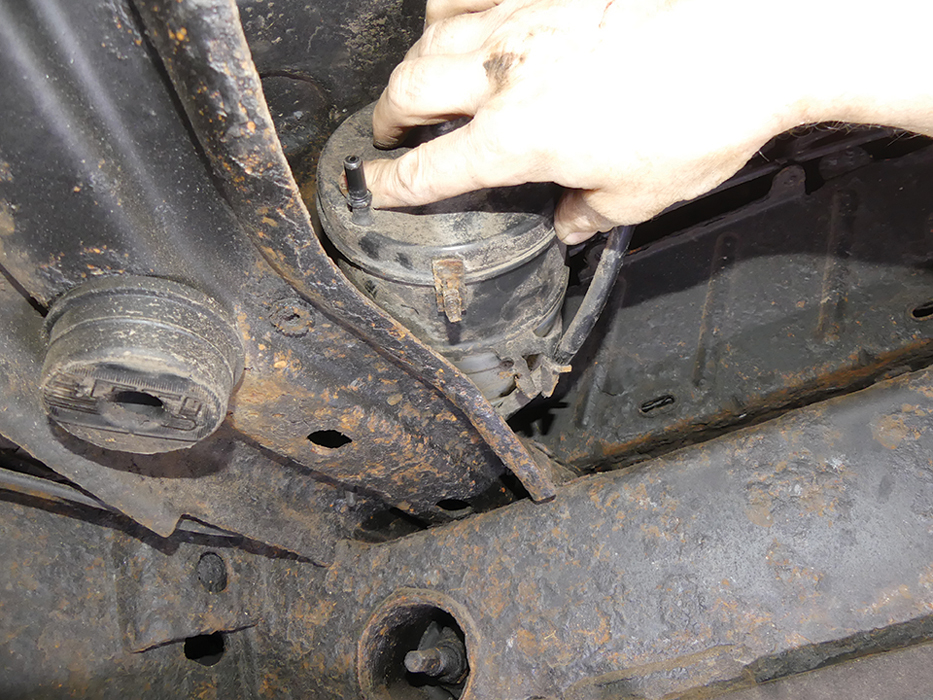
Similar access: Access to the front units is still restricted. The three top nuts are accessible only from the wheel side, though they will be less corroded than the rears.
Point to watch: Absence of a lower gaiter means the damper is exposed and can corrode, potentially damaging the air sleeve as it rolls up and down the damper.
Heat shield: This bolt (arrowed) holding the heat shield needs to be removed. It holds the shield to a bracket positioned over two of the upper studs.
Steve’s top tip: To see what he was workingwith while releasing the top three nuts in the confined space, Steve puts his phone on photo mode and angles it in to see the rear nut on the screen. That helps get the spanner on correctly. It’s a useful trick that has many applications all over a Land Rover.
Nut sequence: After removing the rear nut and the difficult inner nut, the heat shield attachment bracket can be lifted off. Remaining nut slackened, left on for support.
Voss disconnection: When the damper lower bolt and final top nut are removed, the unit is lowered and held while carefully detaching the air pipe just below the turret top.
Old and new: The unit is lifted back upward, then hinged outward and down to remove. The old suspension unit is deeply corroded below the aluminium casing.
In with the new: The air pipe is pushed up and out of the turret, before inserting the new unit and fitting three new top nuts loosely (remembering the heat shield bracket).
Damper bolt: The damper eye and lower arm boltholes are toggled into alignment before fitting the new bolt and nut and just nipping up. Raising the hub knuckle can help.
Nuts and pipe: The three top nuts are now tightened, and the air pipe inserted into the connector. Given space restriction, long/bent-nose pliers are used to confirm the pipe is firmly located.
All fitted: The heat shield is bolted to its bracket, held under one of the top nuts. After a final check over the work, the road wheels can be refitted.
Final jobs
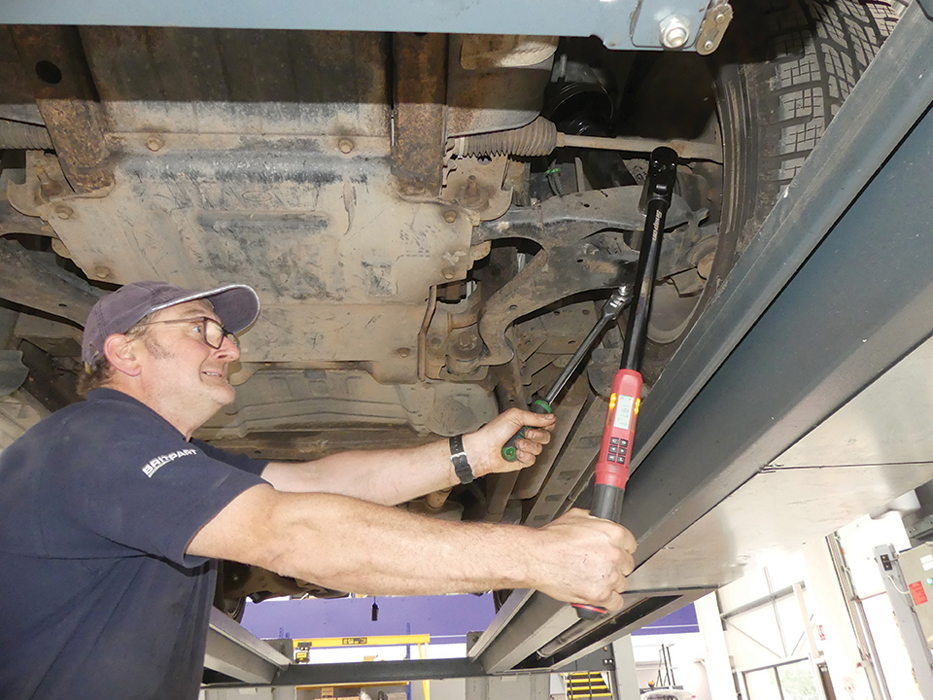
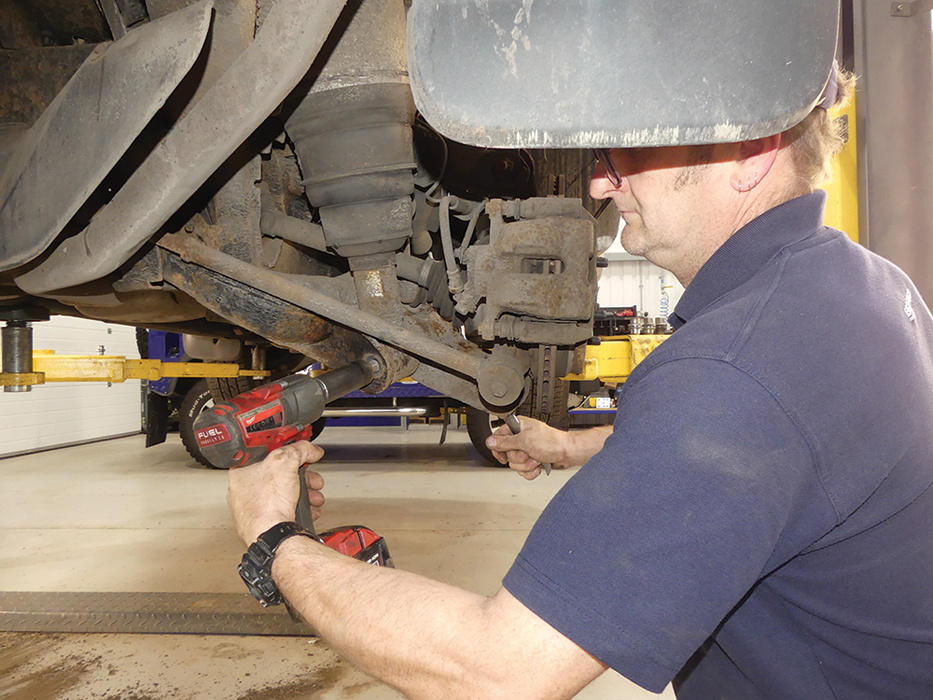
Damper bolts: With the vehicle now standing on its wheels and the suspension compressed, all four damper bolts are tightened to 300Nm using a torque wrench (check your specific model).
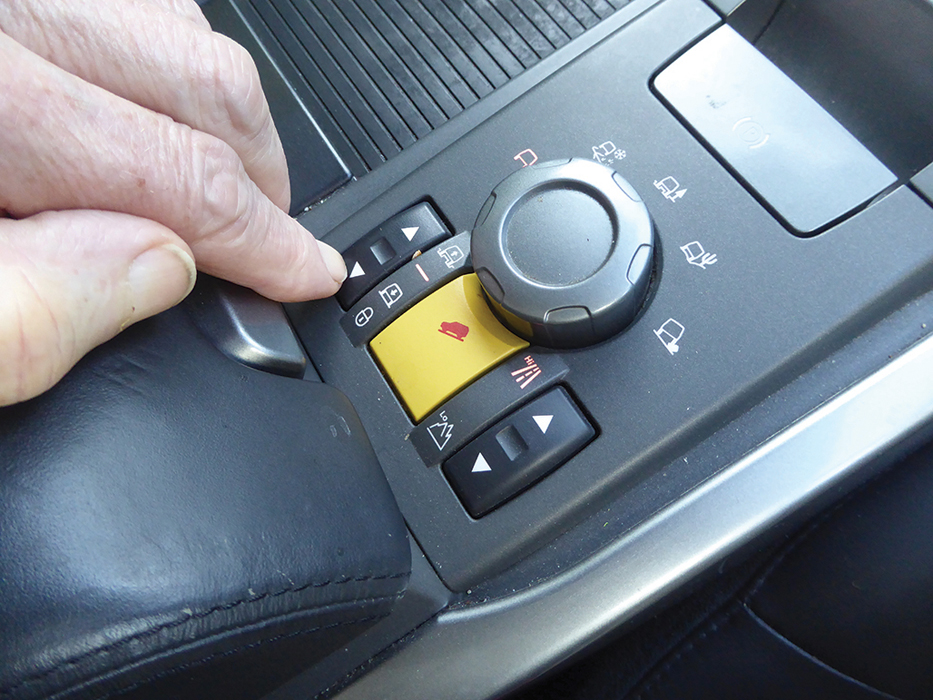
Starting up: On starting, the ride height warning may appear because the suspension has been over-extended during the work. We press the height selector switch down once to clear this, then down again to select standard road height.
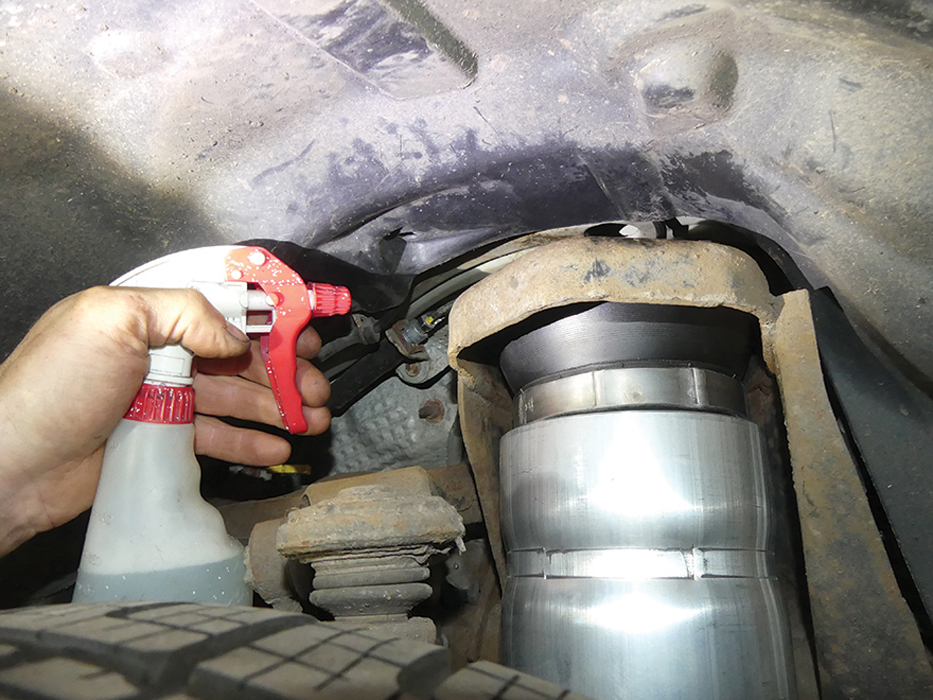
Leak test: With the suspension system now fully pressurised again, a soapy water solution is sprayed on each Voss connector and adjacent air pipe to detect any air leakage.
Transformation
The new suspension made the Range Rover run more quietly due to improved vibration isolation. The vehicle felt a little more taut but, otherwise, I noticed little difference on the congested roads driving back from Britpart to Cumbria.
Next morning, on open roads with little traffic, I realised the truck had been transformed. The pure driving pleasure had returned. Once again, I could set the vehicle up to deal with a bend, and power out of it feeling the tyres holding the road accurately and the car obeying my intended line and acceleration. It’s still a big, heavy car, but now it can be thrown around with as much exhilaration as you can expect from 2.5 tonnes, and exits roundabouts on rails instead of behaving like it’s about to capsize.
On a private road I tested emergency actions such as swerving and hard braking – all perfectly controlled and stable. The original suspension had done nearly 170,000 miles, but I should have changed it earlier, for both safety and pure driving enjoyment.
Like to have your own Land Rover library?
Try our Budget Digital Subscription. You'll get access to over 7 years of Land Rover Monthly – that’s more than 100 issues plus the latest digital issue. All issues are fully searchable so you can easily find what you are looking for and what’s more it’s less than 10p a day to subscribe. Click here to find out more details and start enjoying all the benefits now.