


02 May 2023
|
 Fitting a shiny new turbocharger
: credit: © Trevor Cuthbert
Fitting a shiny new turbocharger
: credit: © Trevor Cuthbert
Trevor completes the Td5 engine with improvements to the cooling, injection and turbocharging systems
Need to know
Time: 9 hours
Cost: £1742.76
Difficulty: 3 out of 5
Models: Defender 90, 110, 130.
Tools needed: General workshop tools.
Parts & costs: Parts from BLRC Ltd, except where stated. Fuel injectors harness, AMR6103, £27.46, Britpart OEM; rocker cover gasket, LVP000020G, £9.70, OEM; hose heater inlet Td5, AWR 6235, £38.80 Britpart; hose heater outlet Td5, JHC000060, £61.17, Britpart; hose fuel cooler return, PCH114650, £8.88, Britpart; hose pump to expansion tank Td5, PCH117190, £27.18, Britpart; expansion tank, PCF101530, £46.97, Britpart; Thermostat assembly, PEM100660G, £27.60, Britpart OEM; Td5 aluminium radiator and intercooler package, £295 Toyosports (UK) Ltd; VNT turbocharger and remap package, £1200, Td5 Inside/Performance Inside.
Work safely:
• Disconnect battery before work begins
• Ensure cables are secure and protected from sharp objects
• Wear gloves or barrier cream as appropriate to protect from oils and sharp edges of components
Contacts: BLRC Ltd, 02897 511763, blrcvehiclespecialist.co.uk, Td5 Inside/Performance Inside, td5inside.pt
Up to this point in the project, the 110 Td5 has been a non-runner, ever since the original truck limped into the workshop and the tired old engine was shut down for the final time. Now, with the donor Discovery’s engine and transmission in place and the dash built up with the wiring largely completed, we’re getting close to the point where the engine can be started for the first time. Soon after this, the Land Rover will be able to move under its own power, rather than being pushed about on wheel skates.
Getting the engine running is always an exciting breakthrough moment for me, and a significant steps towards getting the project finished to the point of being a fully functioning, working Defender. But first, there are systems to be completed and improvements to be made.
See previous parts here.
Completing and upgrading the cooling system
The replacement 15P Td5 engine from the 2004 Discovery 2 has had much work carried out, including a new water pump, flywheel, main oil seal and clutch. The cooling hoses on the Discovery engine differ from those on a Defender, and while all of the hoses were available from the old 10P engine, many were very soft and perished, and at least two were going to fracture under coolant pressure imminently. In fact, with reliability and preservation of the Defender in mind, all but one of the hoses were renewed because the truck will be put to work and the last thing I want is a breakdown or a cooked Td5 engine.

One good hose: All hoses were renewed, except the top hose (with bleed valve). Factory hose clips are fiddly without a correct tool, so were replaced by screw compression clips.

Powder corrosion removed: Lower coolant hose is fitted after cleaning water pump outlet. It’s clamped with Jubilee hose clips – more expensive than budget clips, but worth it.

Just to be certain: The old engine had cooling issues and, while there was no reason to blame the thermostat, a new one was fitted to replace the ancient factory-fitted unit.

Well-travelled: This hose, part of the lower assembly at the pump, provides a feed from the expansion tank, which will be attached to the left stub of the T-piece.

Neat welds:Replacing the old and damaged original radiator, this all aluminium heat exchanger will offer excellent cooling capacity and appears to be well made.

Good cooling capacity: The replacement intercooler, which came as a package with the radiator, is not the biggest on the market, but will offer an improvement over the original.

Looking purposeful: The new radiator slotted perfectly over the mounting pins on the chassis and is secured in place for now by attaching the coolant hoses.

Hugs it perfectly: The new intercooler fits in front of the radiator on lower locating pins, with two M6 bolts into the radiator mounts keeping it secure at the top.

Plastics added: The lower part of the fan shroud assembly is slotted into place and secured at either side by an M8 bolt into a captive nut in the radiator.

Paired up: The heater inlet and outlet hoses are held together by the original clips, and are now in place ready to be attached when the heater unit is fitted.

Good looks: The original expansion tank was shabby and no longer translucent enough to see the coolant level, so a new one was fitted to complete the cooling system.
Replacing the fuel injector harness
A common issue with the Td5 engine was also dealt with. Engine oil making its way to the ECU via a failing seal in the injector wiring harness connection can cause misfires and other problems. So it’s worth renewing the injector harness at this stage, and fitting a new rocker cover gasket.

Time saving: The M8 bolts securing the rocker cover are spun out using an 8mm socket on the electric impact gun, taking care not to lose the rubber bushings.

Manoeuvre it off: The rocker cover is eased away from the rubber gasket, taking care not to drop any dirt or foreign material into the exposed cylinder head.

One by one: The spring clips for the wiring to each of the five injectors are pressed, in turn, to allow each of the injector plugs to be wiggled free.

Out with the old one: After unplugging from the engine loom under the front of the cylinder head, the injector harness is withdrawn from the engine and discarded for recycling.

Injector codes: As this engine is new to the vehicle, each injector code (marked on the top, here) is entered into the vehicle’s engine ECU.
Fitting the new turbocharger
José Amorim of Td5 Inside/Performance Inside visits my workshop twice per year to carry out remapping clinics, so I took the opportunity to purchase one of his turbo remap packages. While the original turbocharger still has a lot of life left, an upgraded VNT (variable nozzle turbine) turbocharger with a tailored ECU remap will give the Defender a useful boost in performance to help with normal load-lugging duties and modern traffic performance. It will also provide improved fuel consumption – assuming the additional power and torque are utilised for economic driving, and not for fast acceleration.

Side by side comparison: The new VNT (variable nozzle turbine) turbocharger has a much larger housing for the turbine, where the vanes open and close according to driving demand.

Complete package: The VNT turbo kit includes all of the gaskets and fixings needed to fit it to the engine. The original oil feed and return pipes are used.
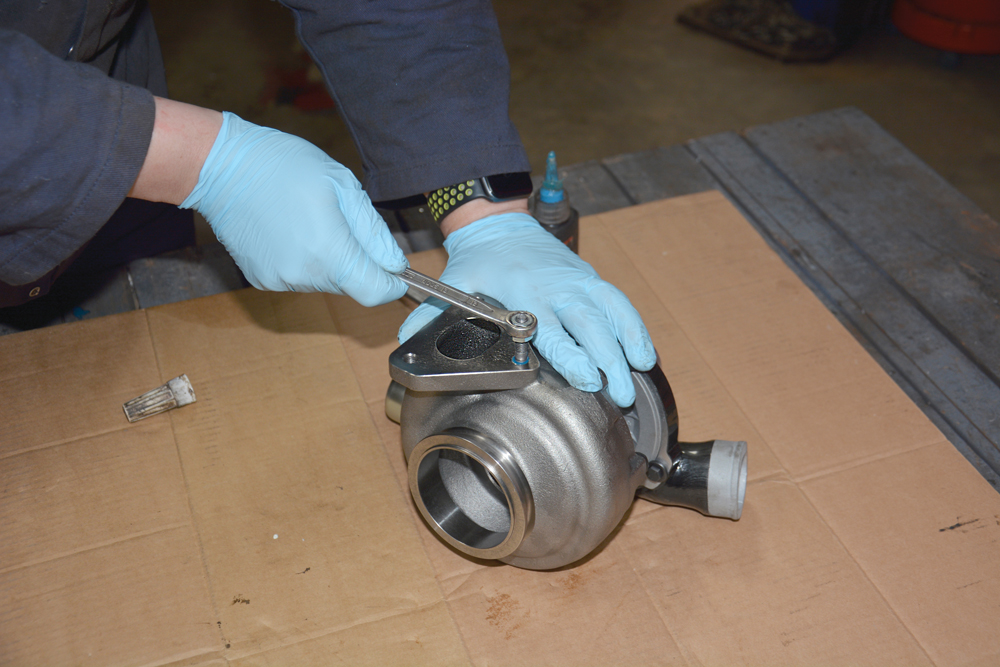
Mounting studs: The new studs are screwed (with thread lock fluid) into the flange that mates with the exhaust manifold, using two M8 nuts locked together and 13mm spanner.

Effective method: Because the exhaust system was already fitted, we found it easier to loosely fit the turbocharger to the downpipe and then negotiate it onto the manifold.

It’s home: The studs on the turbocharger are now entered into the exhaust manifold flange with the gasket in between, and the flange nuts can now be fitted and tightened.

Job done: All of the hardware is now firmly bolted in place on the manifold and on the exhaust downpipe. The oil feed and oil drain pipes have also been attached.

Routing the air: Finally, for this stage of the build, the hose from the turbocharger to the intercooler is fitted and is being clamped in place with quality hose clips.
Additional work
While the engine remains largely exposed, and the left-side wing and front slam panel with radiator panel are still not fitted, I took the opportunity to finish up a few other jobs, both on the engine and engine bay. The clutch pipe was fitted between the master cylinder and the
slave cylinder and Cunifer (copper nickel alloy) brake lines were made for the complete braking system.

Brake lines: Most jobs are complete in the engine bay/bulkhead area. The brake pedal assembly is in place and new brake pipes fashioned using gentle curves for the bends.

Bulkhead fixings: The work on the right-side is mostly complete, so the right wing assembly can be fitted. Here one of the screws is fitted to slot the wing onto.

Taking shape: The wing assembly is in place with bolts loosely fitted. It will not be fully tightened down until all the body alignment has been completed.
Assuming the engine start-up goes according to plan – and there is no reason to fear that it will not – the braking system will be bled, the transmission and axles fluids checked and the power steering system filled with fluid and bled through. The Defender 110 will then be mobile and it will be time to crack on with building up the bodywork. Many of the remaining panels are lined up at the paint shop to be finished in Portifino Red, although the cab, wheels and some trim items will be painted in Limestone.
LIKE TO READ MORE? Try our Budget Digital Subscription. You'll get access to over 7 years of Land Rover Monthly – that’s more than 100 issues plus the latest digital issue. The issues are fully searchable so you can easily find what you are looking for and what’s more it’s less than 10p a day to subscribe. Click here to find out more details and start enjoying all the benefits now.