


01 November 2018
|
 : credit: © Alisdair Cusick
Alisdair Cusick explains the rebuild process, similar for brake and clutch cylinders on most models
Models: Most beam axle models
Time: 1 hour 30 mins
Cost: £25.48
Difficulty: 1/5 stars
Tools needed: Imperial spanner set, pick, hammer and punch, wire brushes/wheel; for bleeding: clear tube, container, assistant.
Parts: Replacement part brake master cylinder repair kit (part number 278524), £25.48
Brakes are something we probably take for granted most of the time. We press the pedal with our foot, and the resulting force affects the wheels. It sounds simple, and indeed it is on pre-ABS systems. Your foot pressure pumps brake fluid out of the master cylinder via a piston, through the brake lines into the wheel cylinders. The extra fluid entering the cylinders then forces apart the cylinder pistons, pushing the brake pads onto the drum, thus slowing the wheel. It is a straightforward system that makes troubleshooting and any rectification work fairly simple.
Developing problems
Aside from the brake shoe friction material and the brake drums wearing, problems will arise with the rubber brake hoses perishing with age, and steel brake pipes corroding, allowing fluid to leak. Wheel cylinders can leak where a seal is perished, and the pistons can seize from lack of use. The other age-related issue to rear its head is failure of the seals in the master cylinder causing fluid leakage and a loss of pressure at the foot pedal. With brakes being a vital safety system on a vehicle, any detectable symptoms of these issues will result in an MoT fail.
How it works
The foot pedal moves a piston inside the master cylinder, creating pressure in the fluid inside, and that pressure is transmitted along the pipe circuit to operate the pistons in the wheel cylinders to act on the brake shoes. Seals are fitted to the internal piston which press against the wall of the cylinder, preventing fluid seeping past the piston, thus ensuring it becomes pressurised. When the seals wear or become distorted, fluid seeps past them and less pressure is developed in the line, rendering the brakes less efficient and possibly allowing fluid loss resulting in total loss of braking. It is those seals that we’re going to change here. We’re working on a late Series I, but the basic principles are similar on other models, and for clutch master cylinders which operate in the same way.
Top tip for doing this job is cleanliness. Any grit entering the cylinder will likely damage any of the rubber seals, causing a leak, and in turn the loss of pedal pressure. Take it slowly, working with the parts on a clean towel, being meticulous as you reassemble the unit, and the component should be restored to give many years service again. It is a straight-forward job, but being a vital part of the brake system, confidence in workmanship is paramount. James Holmes runs us through the steps.
Dismantling the master cylinder
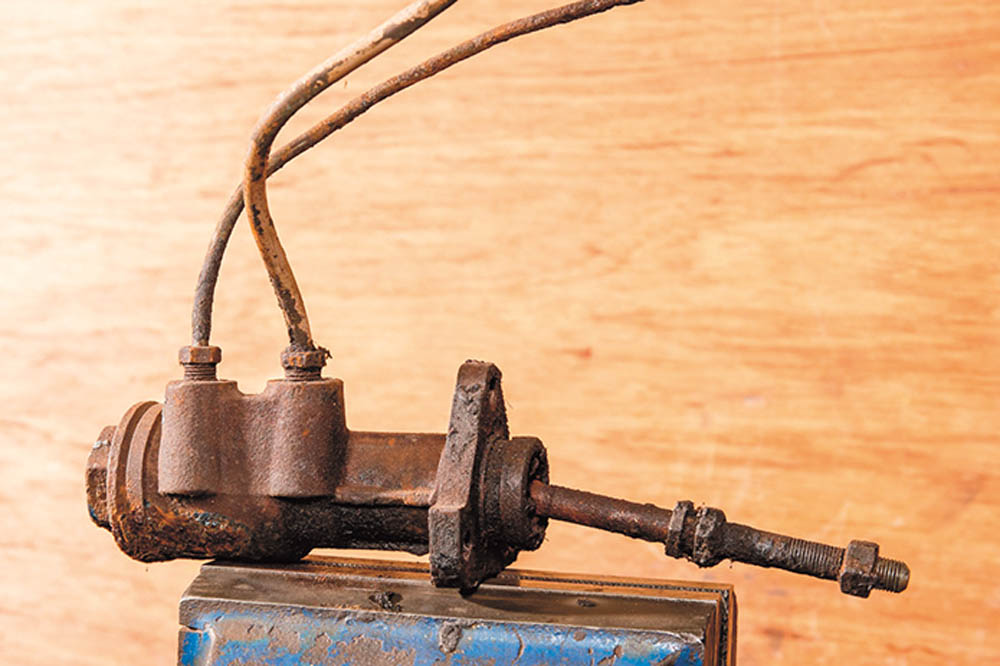
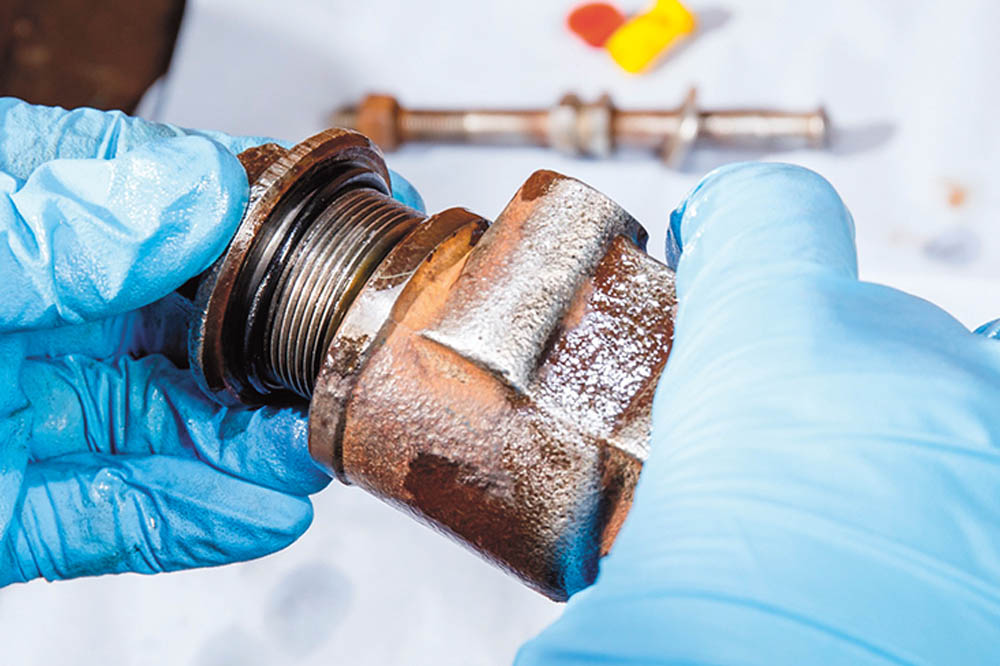
We’ve removed our master cylinder from the car for photography, leaving on the pipes for illustration. This is typical of how an aged master cylinder will look.
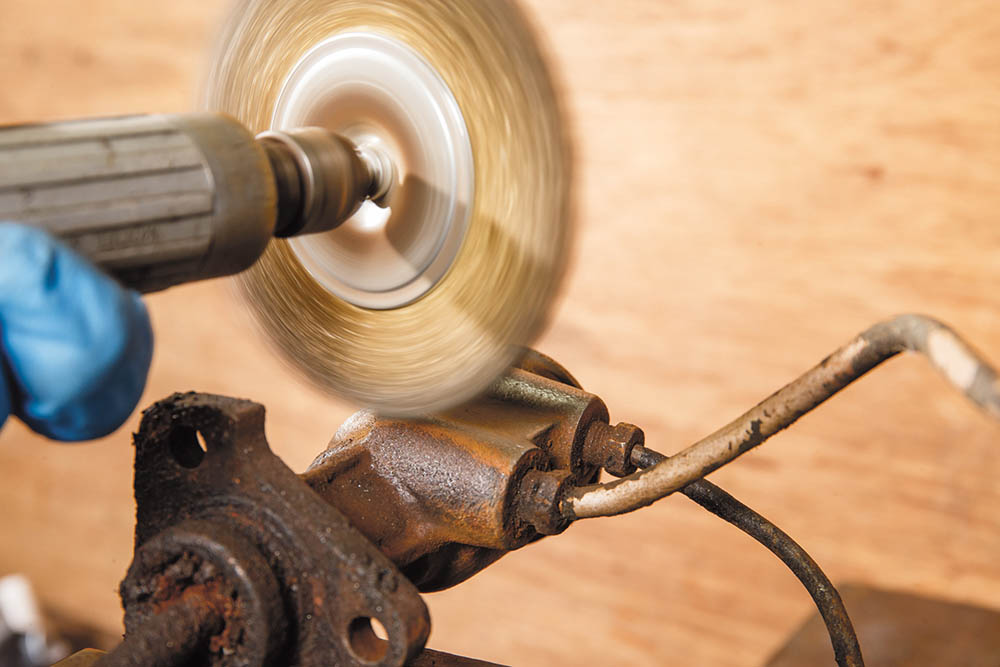
Start by cleaning the unit, even using a wire wheel if needed. Leave the pipes on to keep muck out of the innards, or plug the holes.
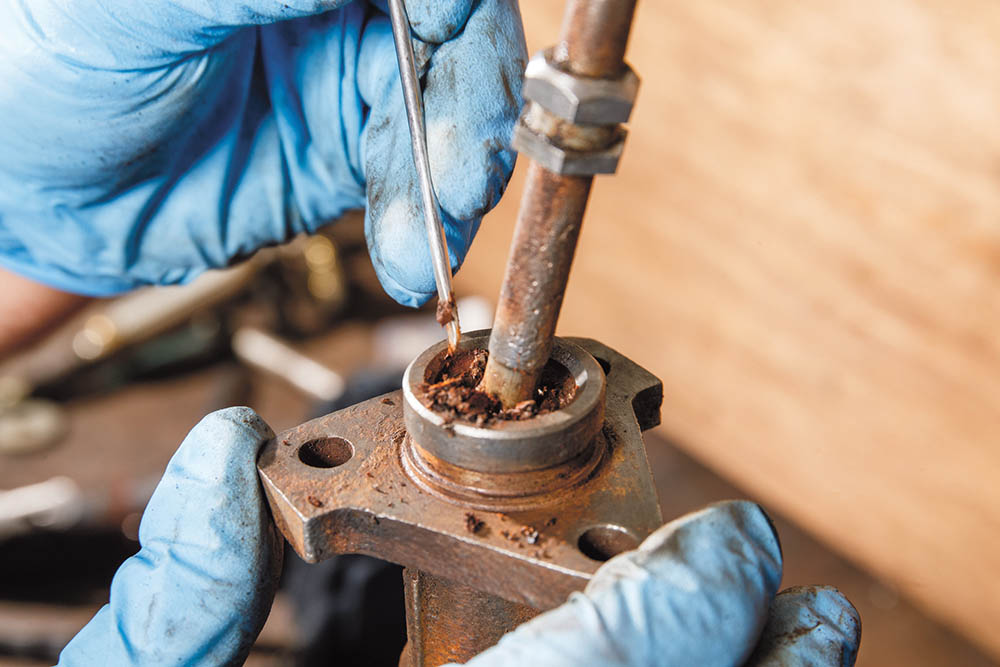
Clean every nook and crevice before dismantling. Ten minutes with a sharp pick, a careful blow off with compressed air and we’re ready to begin.
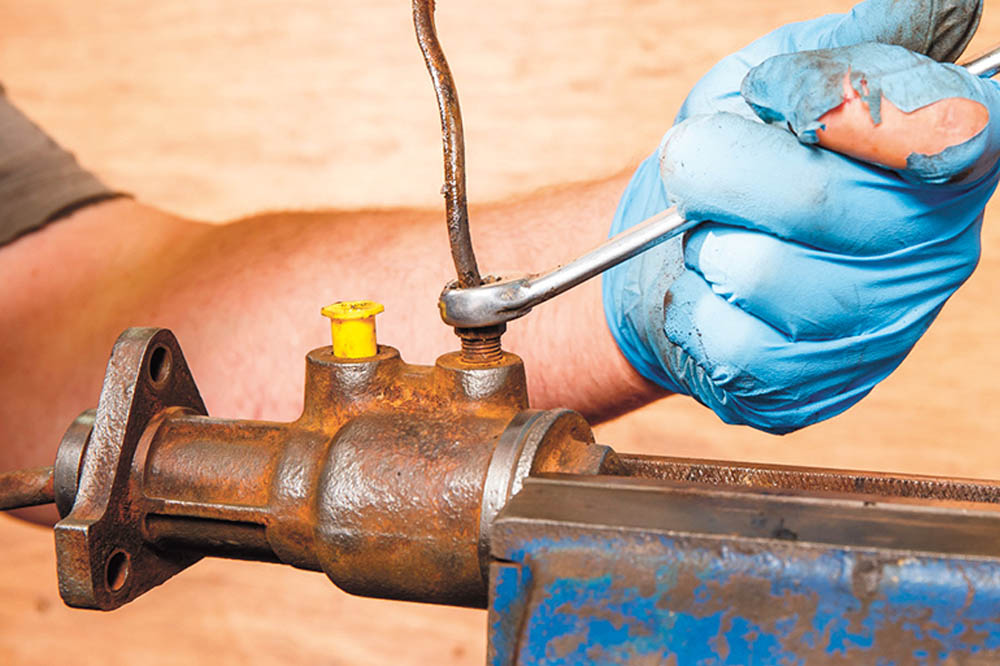
Loosen the pipe fittings using a brake spanner. It’s good practice to cap off the open fittings, to keep dirt out. Dirt will ruin the new seals.

Undo the large end cover and remove the rubber seal. Examine all the parts as they come off. Split seals will be the cause of a failed unit.
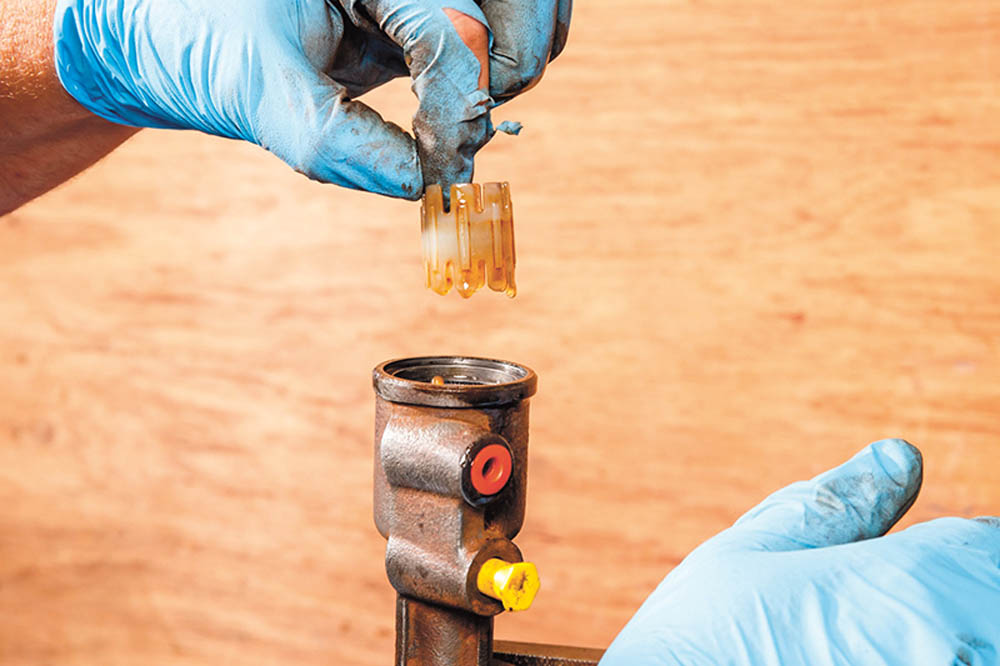
Remove the piston return spring and examine it, along with this plastic spacer. Avoid damaging any parts, as they may not be available easily – if at all.
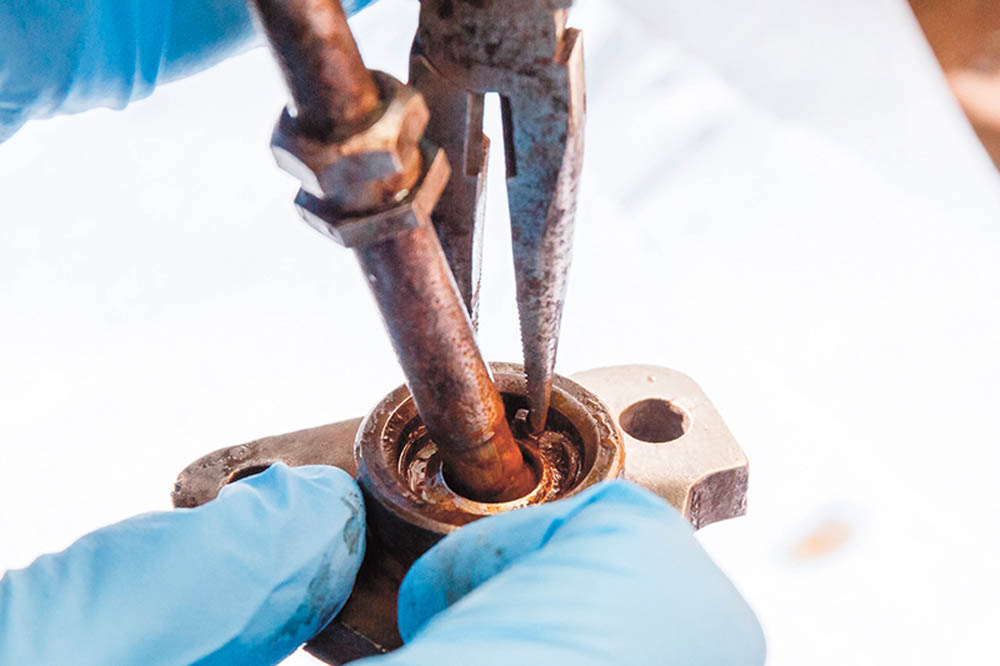
At the other end, carefully remove the circlip on the push rod and the retaining washer. Then withdraw the piston from the cylinder.

This is what you should then have. The cylinder and the piston separated. Examine the unit to learn exactly which seal has failed, and why.

Here the new components are laid out next to the old, with everything completely stripped apart. Make sure you have all you need before continuing.
Rebuilding the cylinder
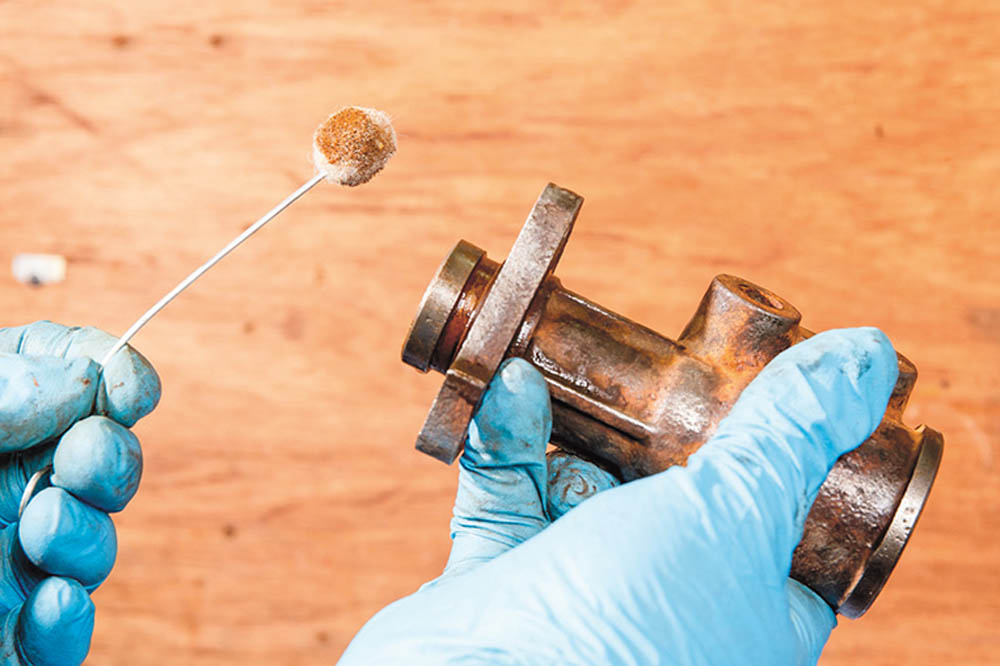
Start by thoroughly cleaning inside the cylinder with brake cleaner on a soft pad. Check for internal abrasions or pitting which would cause seals to leak.
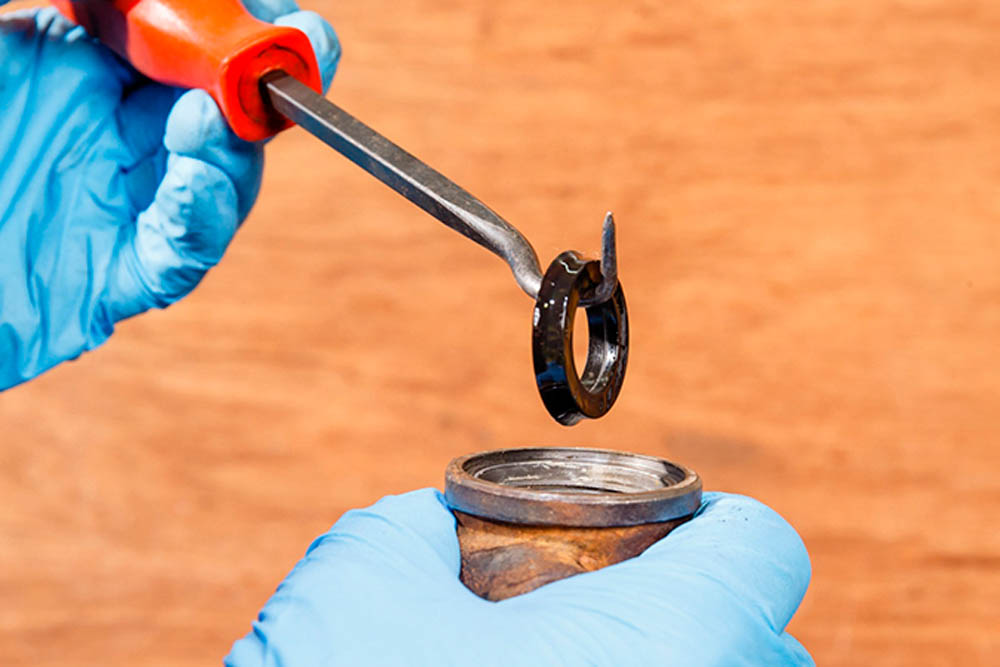
Carefully pick out the large recuperating seal and the matching shim. It should come out easily. Don’t go gouging around the cylinder!
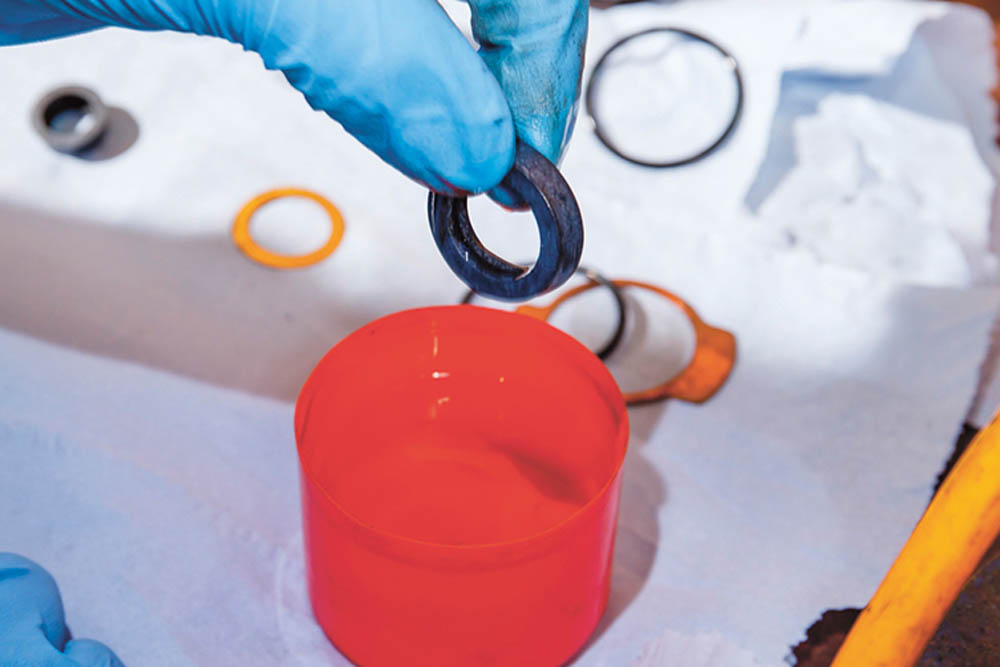
Refit the new recuperating seal and shim, dipping it in new brake fluid first. This helps avoid it tearing as you fit it, and lubricates it ready for action.

Fit the new seal to the piston (lubricating it with new brake fluid), take care not to tear, stretch or split it as may not seal tightly on the cylinder wall.

Refit the piston (with a splash of brake fluid) gently into the cylinder and through the recuperating seal. It may need a push, but not excessive force.

After gently cleaning using brake cleaner and a toothbrush, the spotless piston return spring and the plastic spacer go back in, ready for the cover.
Fit the new rubber seal for the cap, then screw down the cap. Don’t overtighten, or you risk splitting the seal and undoing all your careful work.

Refit the push rod at the other end. It operates against the piston end face, so a dab of lubricating copper grease can’t hurt to minimise future wear.

Secure the rod with the circlip. It’s a tight fit, so tap into position using a punch. Ensure it is fully seated in the cylinder locating recess.

Finally, refit the rubber boot over the push rod and onto the cylinder. This keeps water and dirt out, so it's a vital part. That’s the rebuild done.

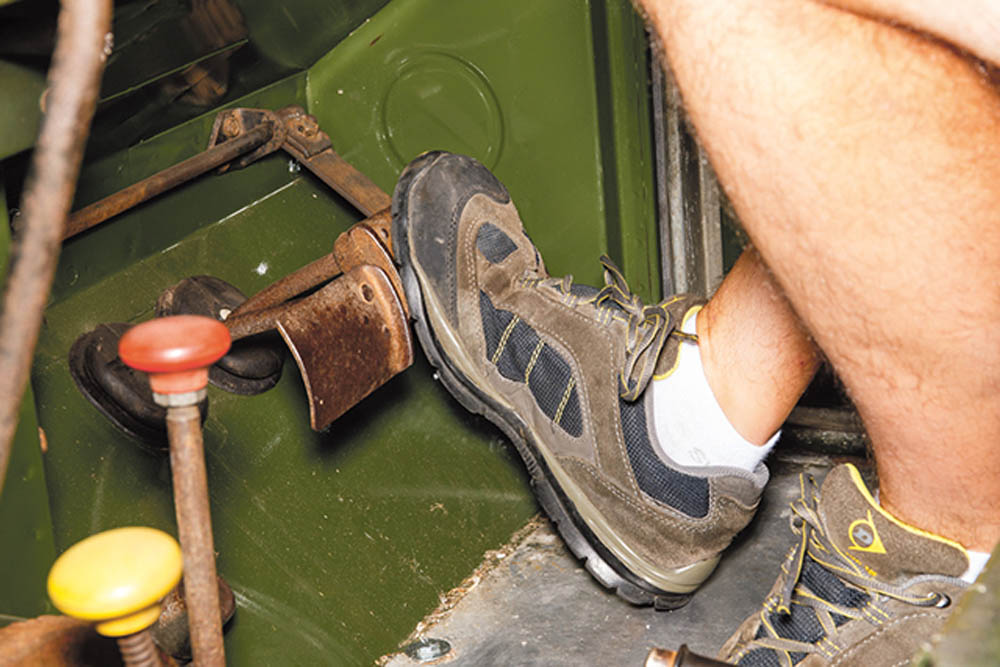
After painting, the cylinder is secured to the chassis outrigger with three ©-inch BSF bolts. The brake and reservoir pipes are fitted, and the pedal rod is connected.

After bleeding the system, I’d spend five minutes getting a nice, high action to the pedal. This is done by adjusting the pedal rod where it threads to the master cylinder push rod.
Final adjustment
We’d also suggest adjusting the brake shoe action to really get the best out of the refreshed brake system. That’s usually a spanner on the adjuster on the brake backing plate, which operates a notched snail cam to spread the brake shoes onto the drums.
For that, jack the wheel off the ground, spin the wheel, and turn the adjuster nut until the brakes stop the wheel, then back it off a notch on the cam. It's a simple ten-minute job, but one that really reaps rewards, keeping the brake components’ actions on top form.
Bleeding the brakes
Read the internet and you’d be forgiven for believing Series brakes were all but impossible to bleed easily. My experience says otherwise. The usual method worked just fine for me, starting at the furthest wheel from the master cylinder, and working inwards. Usually, this is the nearside rear, but may be different on your vehicle depending on specification, and being left- or right-hand-drive. You’ll need a length of clear hose to go over the brake cylinder bleed nipple at one end, the other to go into a bottle. Pour some fresh brake fluid in there, so the hose just sits under the level. Then you need an assistant, and a spanner for the bleed valve. Here’s what to do then.

Refill the brake reservoir (under the driver’s seat on an 86-inch UK Series I) using quality, fresh brake fluid.

With a spanner on the bleed nipple, and the hose over the outlet, crack open the bleed nipple. Some fluid may trickle out.
Have your assistant press the brake pedal down, slowly. Fluid is steadily pushed out the open brake nipple, usually with air bubbles in. Close the bleed nipple at the bottom of the pedal stroke, and repeat the process until no air bubbles are present.
Repeat this simple step, working down the next furthest wheel cylinder from the master cylinder, until you finish at the shortest length. Keep an eye on the level in the reservoir, keeping it topped up as needed. You will have started with a spongy, soft brake pedal and it should now be firm. Job done!
Did you know that you can now get access to the entire archive of Land Rover magazine content with our brand new digital archive? You can enjoy all the issues since the launch of the magazine – use the search bar below to find features, reviews and other great content: