01 May 2018
|
A botched repair will always lead to failure – in this case needing a replacement transfer box, as Dave Barker explains
Model: L322 Range Rover
Time: 5 Hours
Cost: From £1200
Difficulty: 3/5 stars
Tools needed: General workshop tools, including 13, 14, 16 and 19 mm spanners and sockets, single hex 8 mm socket, E6 and E10 Torx socket, ramp/lift and a transmission jack.
Parts: In this case a fully reconditioned transfer gearbox was fitted supplied by a local automatic gearbox specialist. The transfer gearbox for this vehicle is part number IAB000033. A Genuine Land Rover transfer gearbox is priced at £5856 but can be found for less. Aftermarket boxes start from around £1800, and reconditioned exchange units cost around £1200.
Contact: Maddison 4x4, Water House Farm, Station Road, Topcliffe near Thirsk, YO7 3SG; Tel: 01845 587407; maddison4x4.com
Work safely: It’s advisable to wear protective gloves or barrier cream to protect the skin from oils and sharp edges of components, and eye protection as required. • Wear eye protection and suitable protective gloves when handling the windscreen, and be aware of the possibility of it breaking.• Ensure other personnel are clear of the area when removing the old screen.
This 2008 L322 Range Rover with the 3.6-litre TDV8 engine suffered complete drive failure after the transfer gearbox seized due to loss of oil. We suspect the oil had been leaking out of the transfer box for some time, unnoticed. The oil had leaked out through a hole in the transfer box case caused by corrosion where a steel transmission support insulator is bolted onto the cast aluminium transfer box. As the oil level dropped, the remaining oil would have become overheated and caused the transfer gearbox itself to overheat and then seize.
The transfer gearbox on the L322 Range Rover does the same job as on other permanent four-wheel drive Land Rover vehicles, in providing drive from the gearbox to the front and rear axles, while also allowing for the selection of high and low output ratio gears. Unlike earlier transfer boxes on the beam-axle Land Rovers, high and low ratio in this transfer box is selected and engaged by means of an electronic switch and motor fitted into the side of the transfer case.
Various options are available when thinking about replacing the transfer gearbox. A new box is listed by Land Rover Genuine Parts at almost £6000, aftermarket boxes (mostly reconditioned) are available at around £1800. In this case, a fully-reconditioned replacement exchange transfer gearbox was provided by a local independent ZF Automatic Gearbox specialist. The transfer box is used on a number of vehicles, including the BMW X5.
Removing the transfer box

Step 1: The transfer gearbox is attached to the rear of the main gearbox and is located and supported in position by a subframe with mounting bushes.

Step 2: The transmission gear oil seems to have been leaking out from under a steel transmission support insulator that is bolted onto the cast aluminium transfer box.

Step 3: The cable clip securing the earth lead to the transfer box and the multi-plugs to the high/low stepper motor and sensors are released and leads disconnected
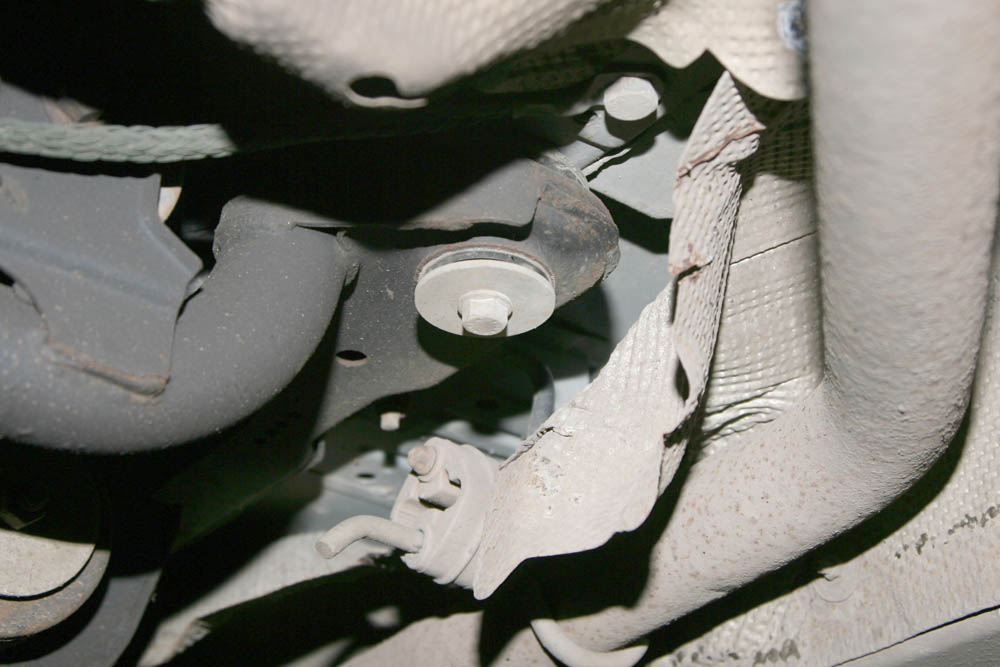
Step 4: The transfer gearbox support sub frame is secured to the body by six bolts, which are located under sections of the exhaust heat shield.
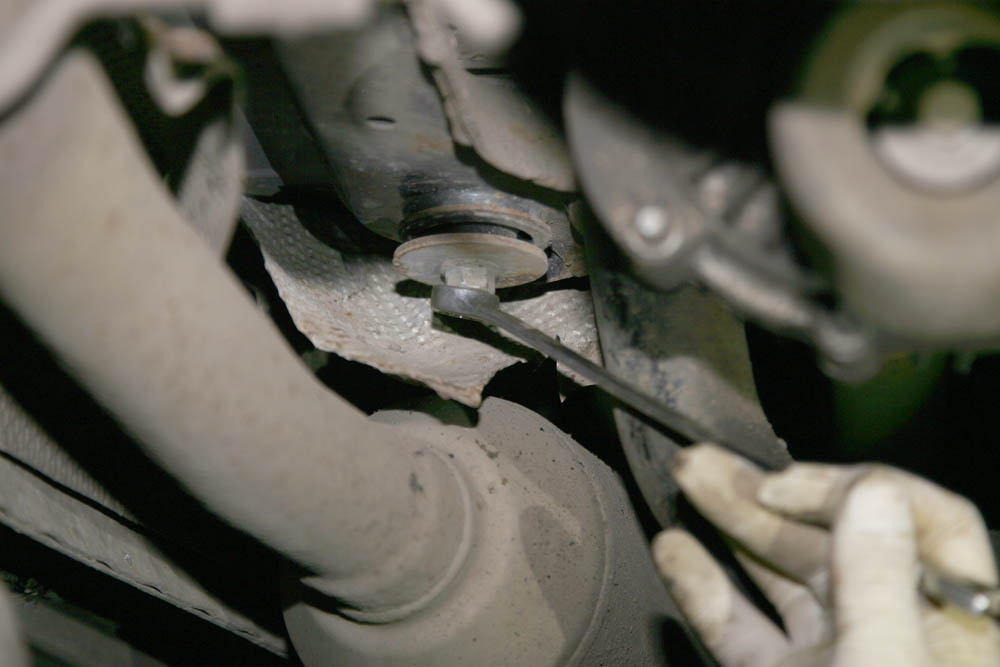
Step 5: The heat shield retaining bolts are loosened before bending the edges over to access the six sub-frame securing bolts. They are loosened, but not removed.

Step 6: The long bolt and nut securing the transmission support insulator to the transfer box and the sub frame is loosened.
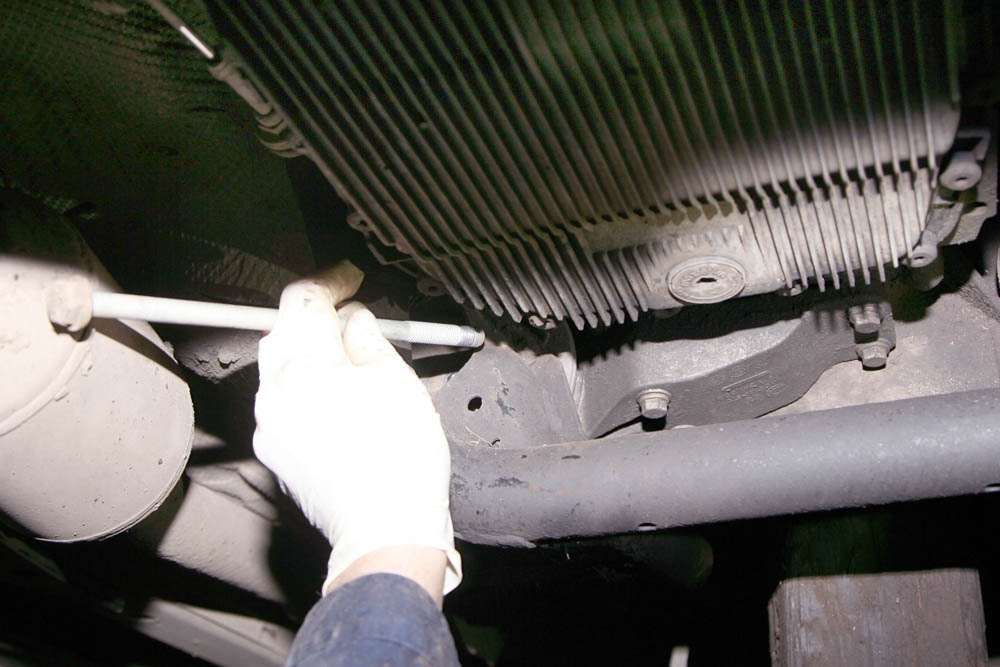
Step 7: With the nut removed, the support insulator is collected from the sub frame and the long bolt was then pulled out from the front side.

Step 8: In preparing to remove the sub frame, the main gearbox and the transfer gearbox are supported as a unit before the securing bolts are removed.
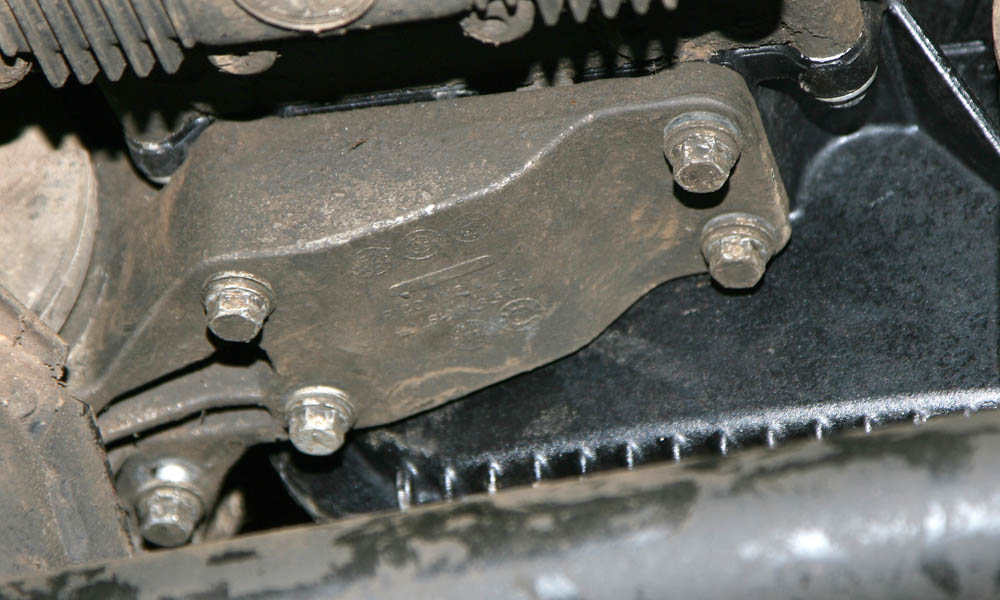
Step 9: The five securing bolts that are holding the transmission support insulator assembly to the transfer gearbox are undone then removed.

Step 10: Once the bolts have been removed, the transmission support insulator was then pulled free from its mounting in the sub frame and then withdrawn.
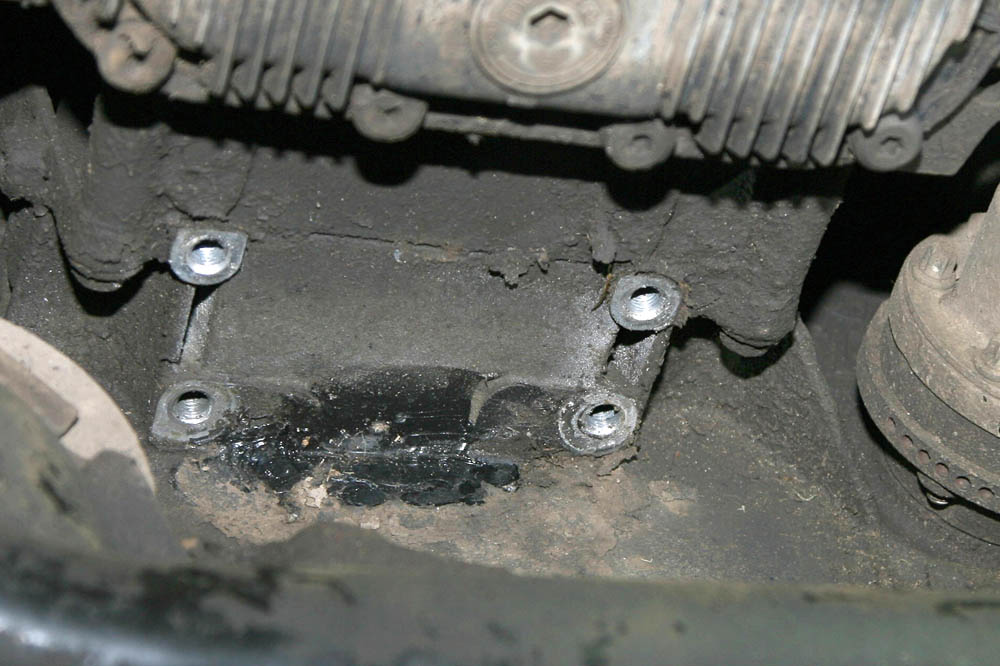
Step 11: With the support insulator removed, we see an earlier attempted repair on the corroded area of the transfer box casing, which caused the oil loss.
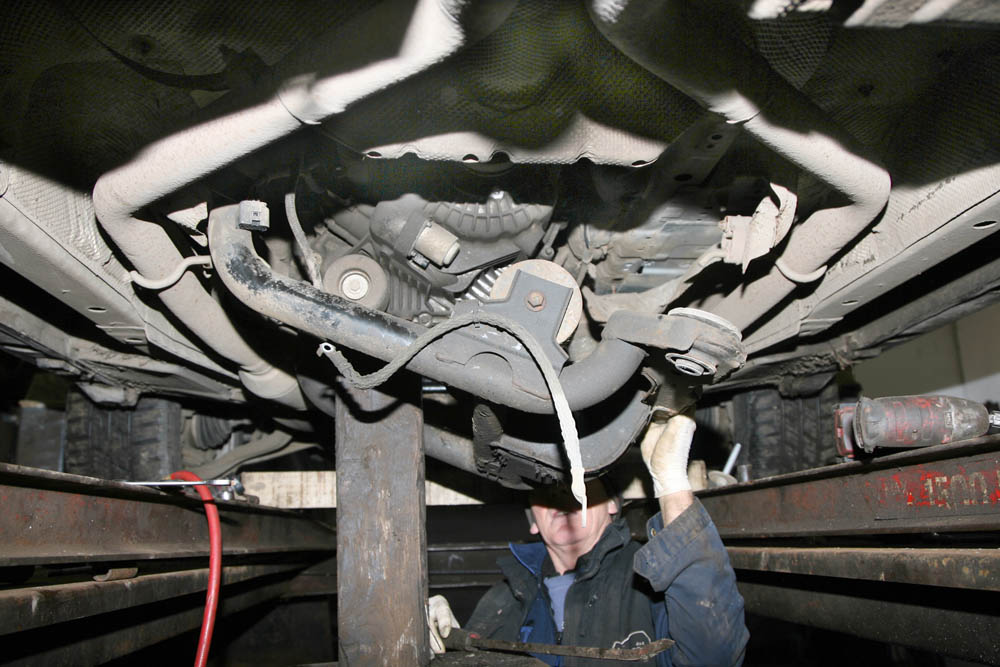
Step 12: The six sub frame securing bolts are then fully undone and removed, then the sub frame was carefully lowered down and cleared of the transfer box.

Step 13: After removing the six Torx bolts and washers securing the front propshaft to the output flange, the propshaft was moved clear of the transfer box and secured.

Step 14: The six Torx bolts and washers holding the rear propshaft to the output flange of the transfer box are removed and propshaft secured clear of the transfer box.

Step 15: Before the transfer box was removed, the drain plug was removed and any remaining oil was allowed to drain into a container to be properly disposed of.

Step 16: Next the transfer box was supported on a suitable transmission jack, and the eight bolts securing the transfer box to the main gearbox removed.

Step 17: Before lowering the transfer box the breather pipe was located. After depressing the locking ring, the breather pipe is pulled from the transfer box.

Step 18: Once all the bolts had been removed, the transmission jack was lowered and the transfer box removed from the vehicle.
Preparing the new box

Step 19: Before fitting our reconditioned transfer box into the Range Rover, some parts need to be salvaged from the old unit and built onto the new one.
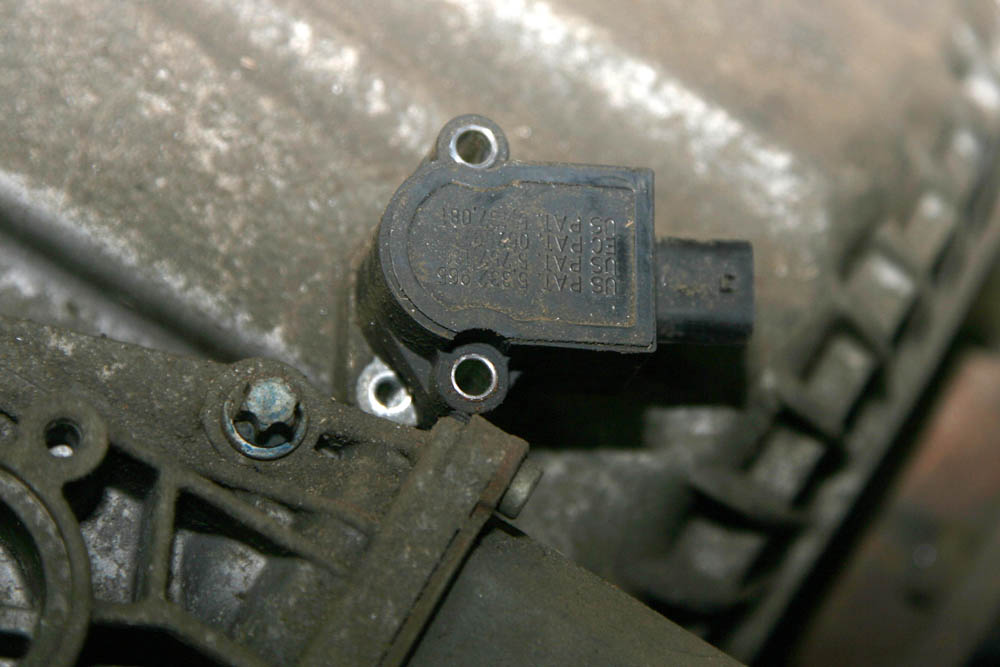
Step 20: Working with the transfer box now removed from the Range Rover, the two Torx bolts that secure the low/high range sensor were undone and removed.
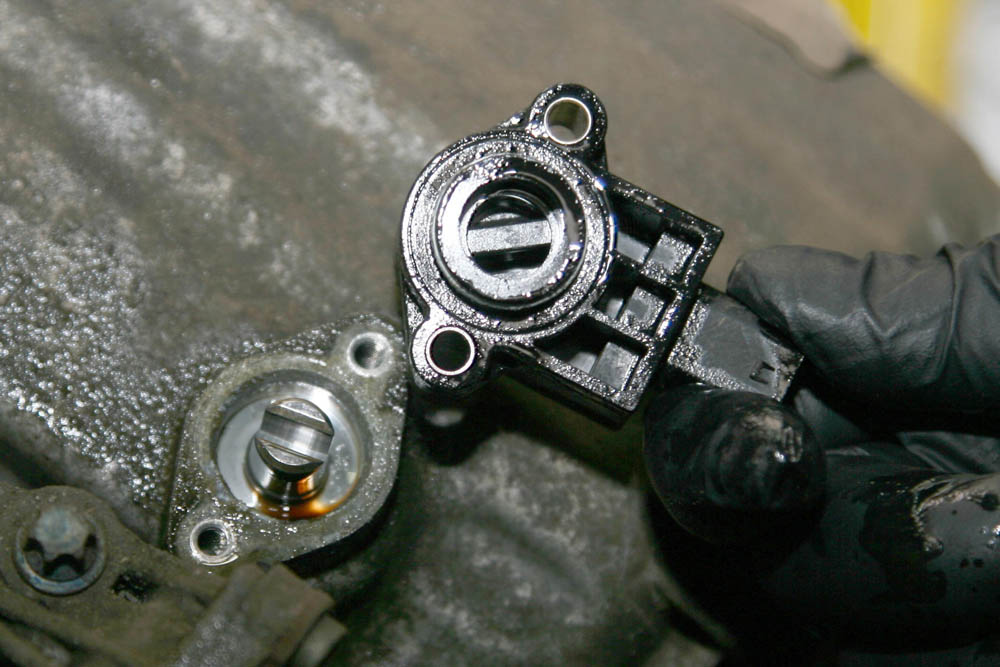
Step 21: The sensor’s drive connection, seen in the centre of the underside here, was checked for damage, as this will need to be fitted to the new box.
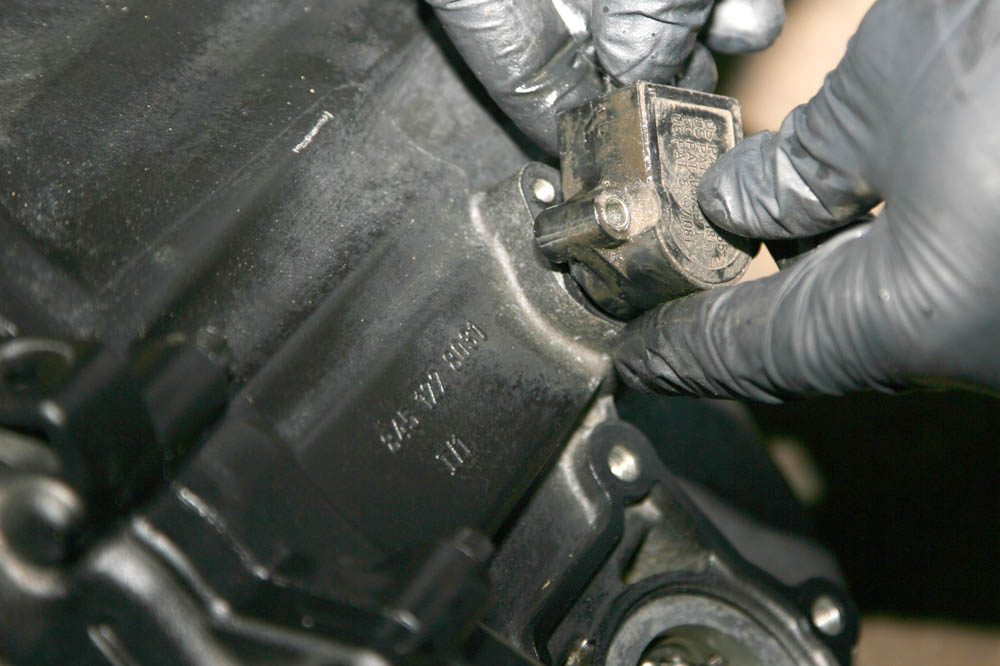
Step 22: The low/high range sensor is in good order, so is fitted onto the new transfer box and secured with the two Torx bolts and tightened to torque.

Step 23: The four bolts which are holding the high/low shift motor to the transfer box are undone and the shift motor is removed from the old transfer box.

Step 24: In this case it was important to check for any damage to the high/low shift motor’s drive splines that may have been caused when the transfer box seized.
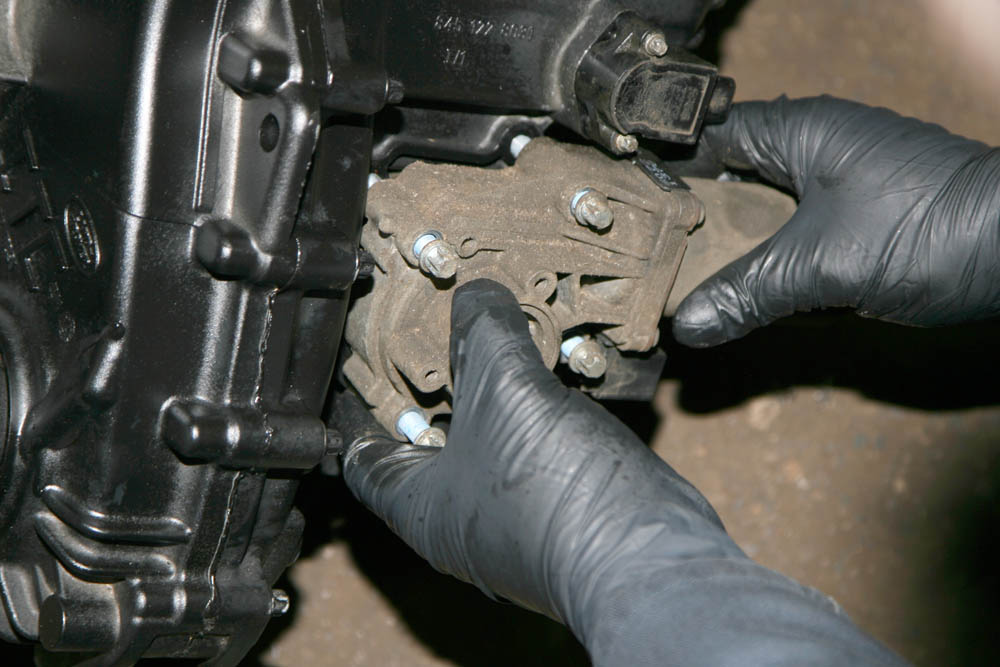
Step 25: Once checked and found undamaged, the high/low shift motor was fitted onto the new replacement transfer box and tightened to the correct torque.
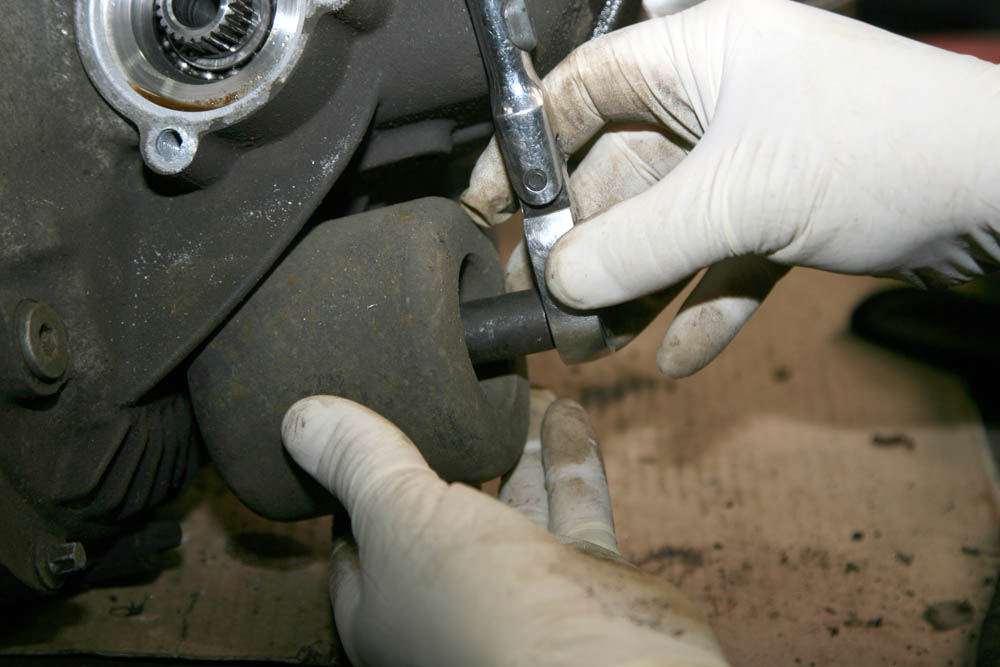
Step 26: The single nut and bolt securing the mass damper on the old unit is removed, and the mass damper fitted to the transfer box and torqued up.
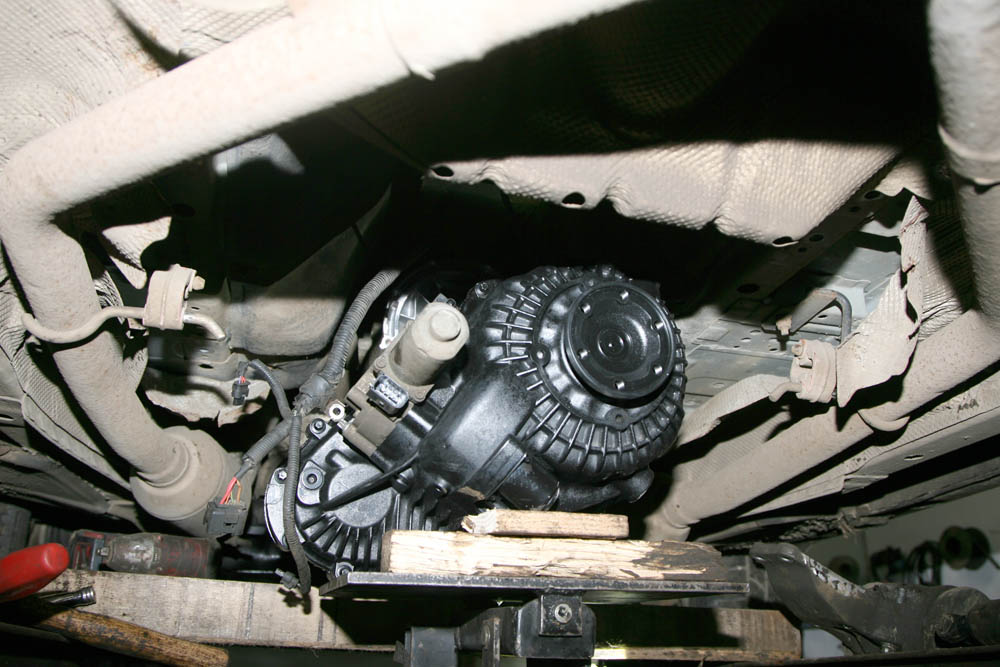
Step 27: Once all the ancillaries have been refitted onto the new transfer box it was then lifted into position and reconnected onto the main gearbox.

Step 28: The eight securing bolts that hold the transfer box to the main gearbox were refitted and tightened to the correct torque setting.
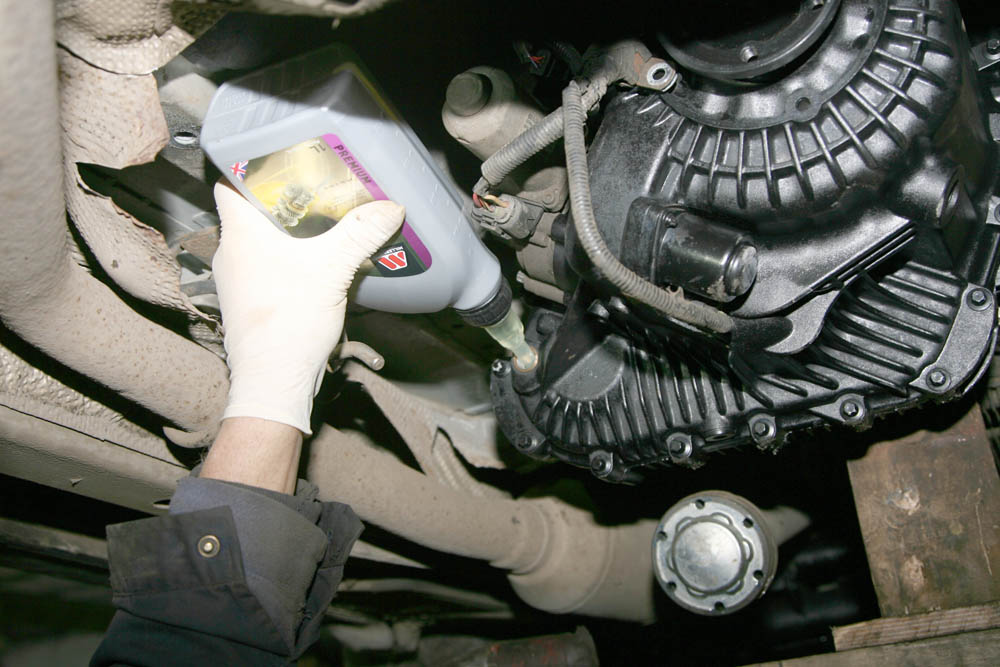
Step 29: The transfer box was then filled with the recommended grade of oil to the correct level and the level/plug fitted, this is easier done before the sub frame is refitted.
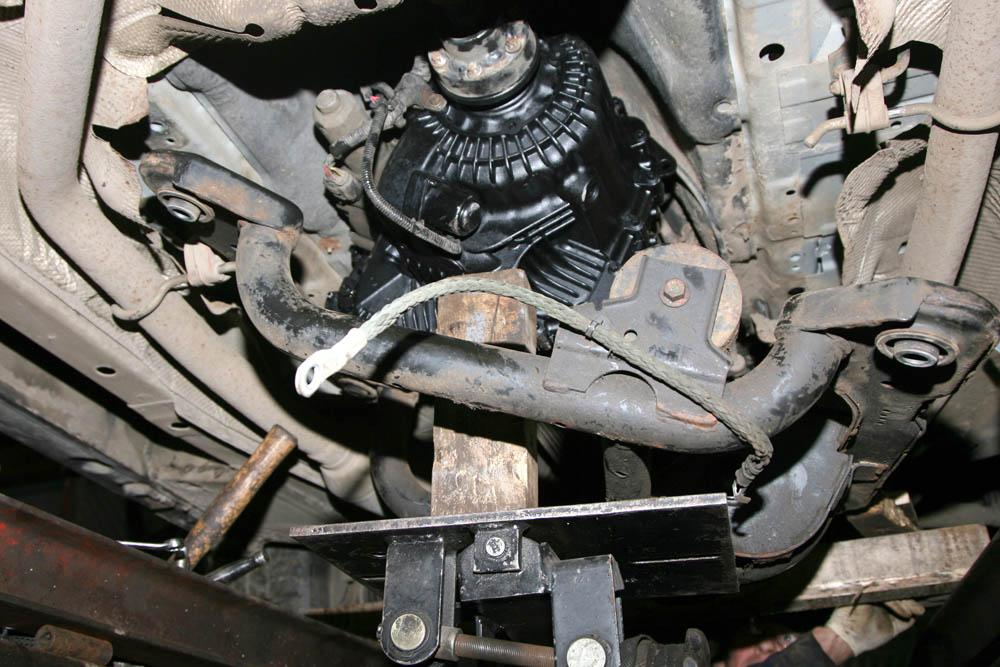
Step 30: With the wiring and the two propshafts reconnected, the transfer box sub frame is positioned, aligning its locating holes with the chassis bolt holes.

Step 31: Before the support bolts were refitted, the transmission support insulator is bolted onto transfer box and then fitted into its mounting on the sub frame.
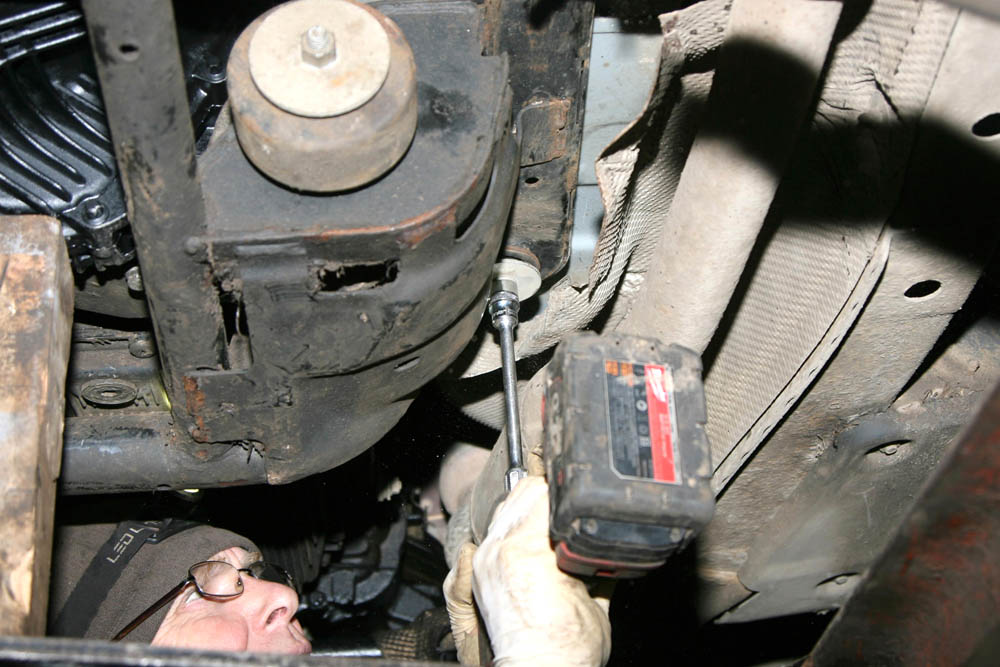
Step 32: The six securing bolts which hold the sub frame to the chassis are then refitted and tightened to the correct torque setting.
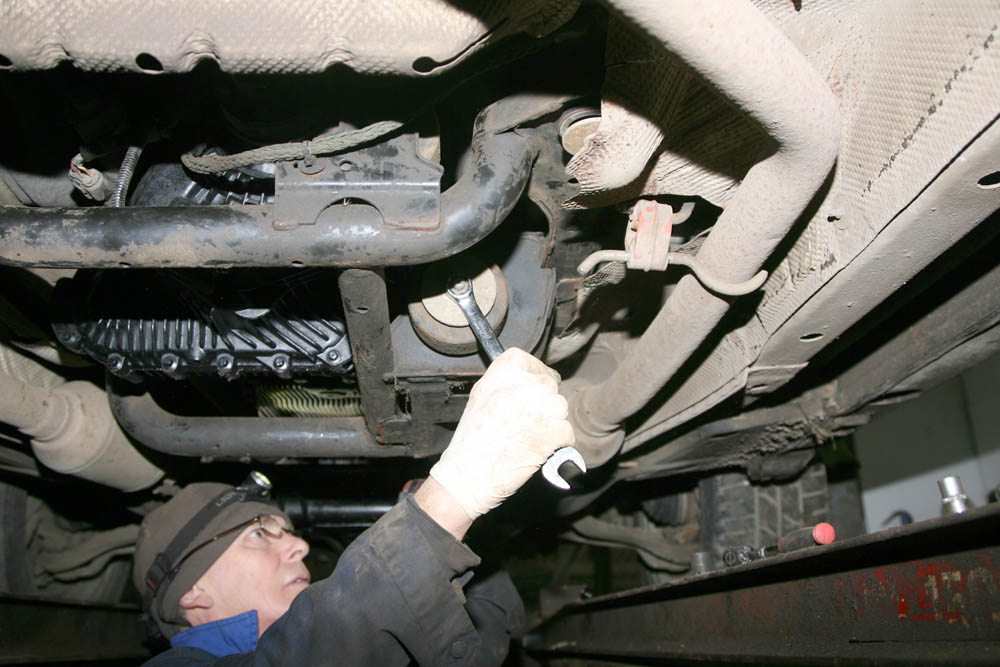
Step 33: With the sub frame bolts tightened, the transmission support insulator and bolt is fitted and torqued, and the heat shield straightened and re-bolted.

Step 34: On completion, all securing bolts, multi-plugs and the transfer box oil level were re-checked, but there’s one more task to do.
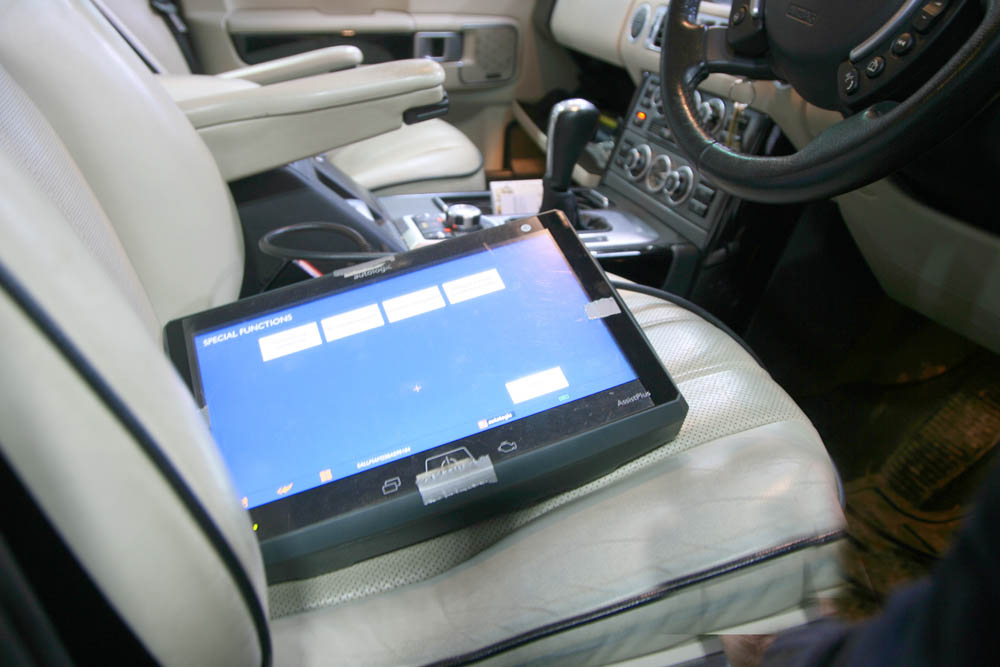
Step 35: Finally, the Range Rover is connected to Autologic diagnostic equipment and the transfer box systems recalibrated and any previous faults cleared from the ECU.
Did you know that you can now get access to the entire archive of Land Rover magazine content with our brand new digital archive? You can enjoy all the issues since the launch of the magazine – use the search bar below to find features, reviews and other great content:


