


01 January 2019
|
 : credit: © Alisdair Cusick
Depending on your experience and equipment, this retro-fitting job on a Discovery 4 lays somewhere between a DIY task and a pro job, as Alisdair Cusick explains
Models: Discovery 3 & 4, Range Rover Sport 1.
Time: 2 hours (4 hours DIY)
Cost: £220 from Ian Bodsworth
Difficulty: 4/5 stars
Tools needed: T30 bit, 10 mm socket, T20 driver, posi-drive screwdriver, plastic trim removal tools, grips, soldering iron/heat shrink, 2 pin connector, copper slip.
Work safely: Be wary of sharp edges when working on vehicle body cavities, and be confident with electrical wiring – use a specialist if in doubt.
There were a bewildering array of options to choose from when ordering a brand-new Discovery 3 or 4. Buyers of used models don’t get that choice, as often the decision to buy a particular car comes down to condition, rather than specification. That’s one reason why the fully-loaded HSE models are the default choice in the used market. However, thanks to the way the cars are built, it is possible to retrofit a large number of optional equipment items onto these older vehicles. So, rather than trading up to a higher-spec car, if you have your heart set on a particular feature, you might be able to simply add it to your existing vehicle.
There are a few specialists who are very well regarded for knowing this era of Land Rovers inside out; one of whom is Ian Bodsworth. Ian has spent the last decade doing more and more with Discovery 3s, 4s and Range Rover Sports, including gearbox flushes and electrical upgrades. His niche is feature enabling on these models, adding an assortment of options including Bluetooth phone kits, reversing cameras, software updates and timed climate control. Specialist knowledge like this means our beloved cars can – in true Land Rover style – continue to be modified to do more, despite appearing more complicated under the skin.
In this feature we’re adding a reversing camera to a 2010 model Discovery 4. The camera is to be fitted into the tail door’s handle assembly. Being an XS model, it already has the touch screen sat nav, and the reversing camera actually works off the back of this unit. To add the camera to the car, broadly speaking we just need to fit the hardware, wire it in, and then tell the car that it has it. There are differences between model years, so this is a broad illustration of the possibilities, rather than a definition. Eight speed Discos, for instance, have different front end wiring requirements than our six-speed model shown here.
There’s more to it than just plug in and play, of course, as Ian Bodsworth shows. I’ve marked this as a four spanner rating due to the fact you’ll need decent diagnostic software to complete the job, and you have to be confident with electronics. It is a DIY task for the competent, but if you’re not – or can’t justify the software investment – then Ian can fit it quickly, simply, and very affordably, using his knowledge of exactly what can be added to which car. Either way, expert Ian helps show us that with knowledge and experience, these supposedly complex models can be modified just as the previous generations could. If you have an option wish for your car, then a chat with Ian might surprise you with what is possible.
Setting the ECM
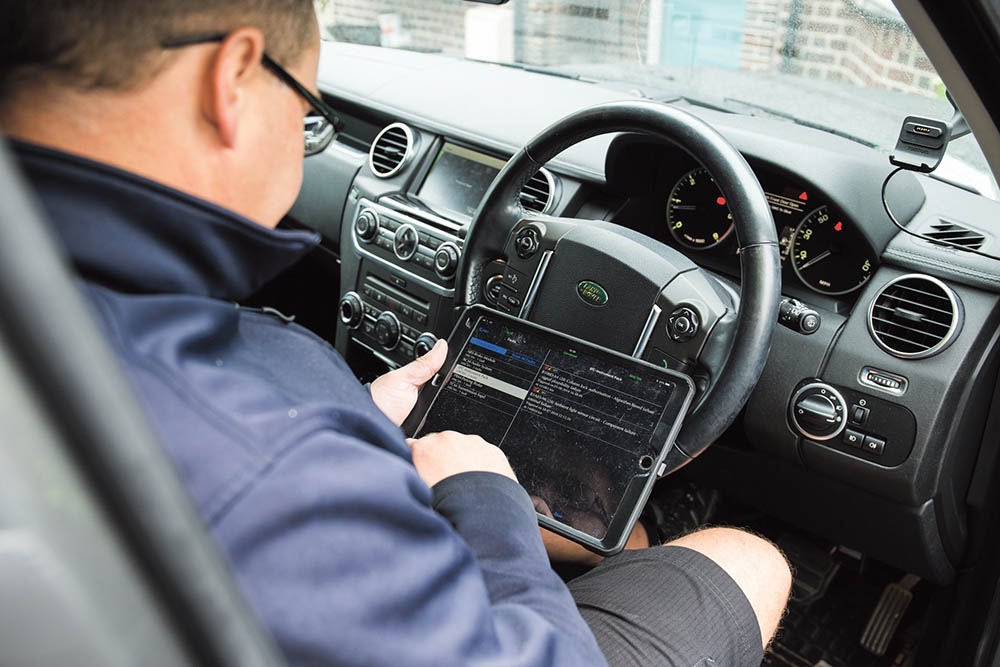
Ian starts by connecting his IID Pro diagnostic software to the car, via the On Board Diagnostic (OBD) port just above the pedals.

He first confirms there’s no underlying issues to stop the camera working, by checking and clearing fault codes on the car’s 26 ECUs.
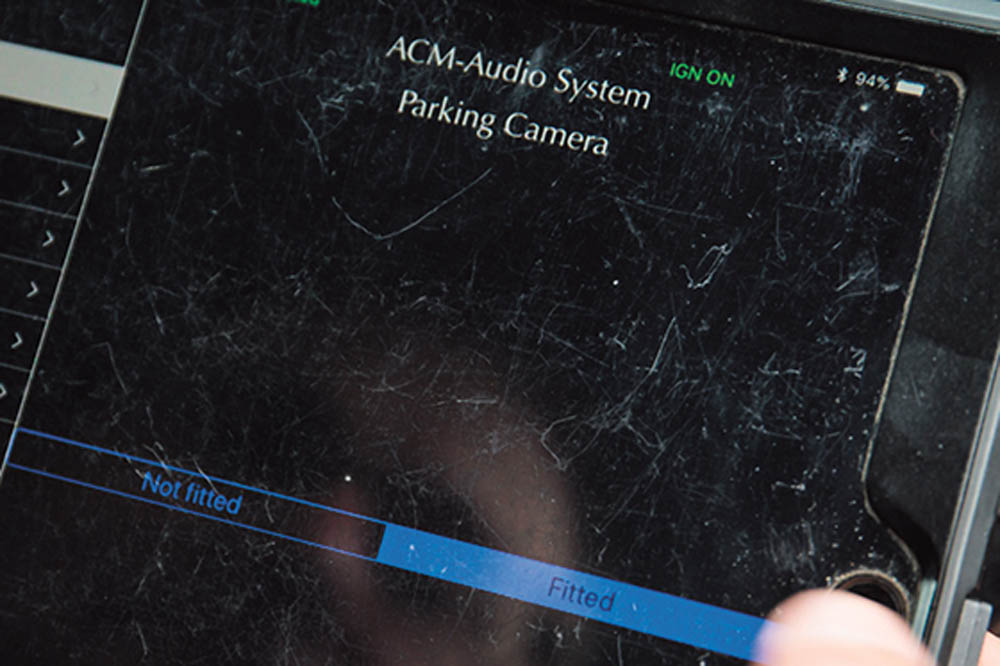
Satisfied all is well, he then goes into the options, and selects the Parking Camera, and changes the setting to tell the car it is fitted.

This information is then written from the diagnostic software to the car. The car will turn itself off then on again as part of the process.
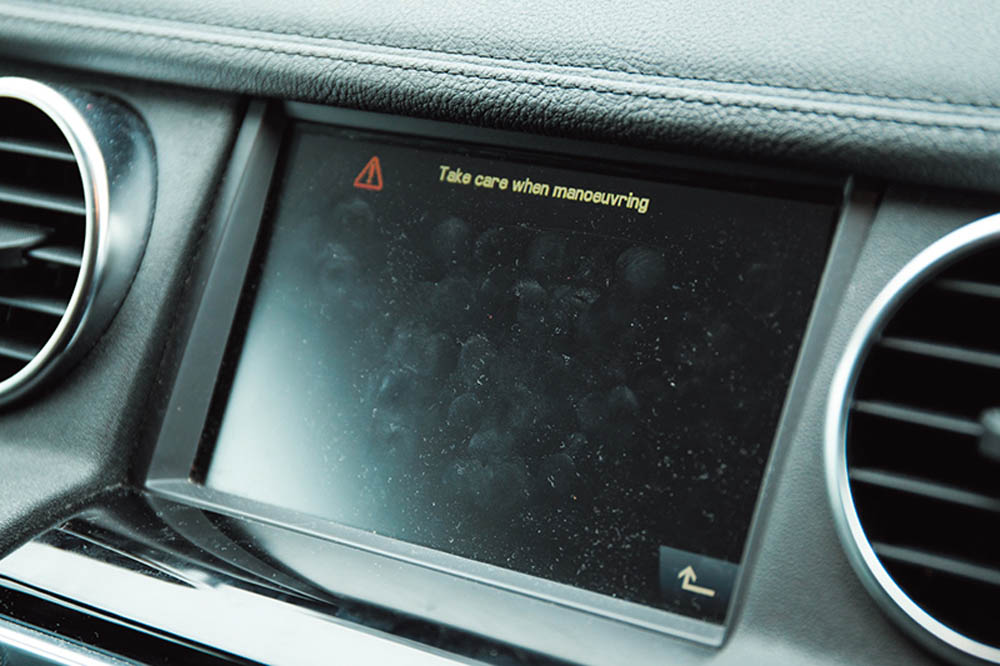
With the car in reverse, the facia screen now shows the reverse camera display, evidenced by the message ‘take care when manoeuvring’.
Preparation

The LR Genuine Parts camera is available, but is very expensive. These aftermarket ones work just as well. Ian favours a metal bodied item.

Ian removes the various fixings and small bits of retaining trim on the upper tailgate, then carefully eases off the large interior panel.

There’s three bolts to remove on the leading edge. These are hidden from dirt so usually come out fine, but that isn’t always the case, as we’ll see.
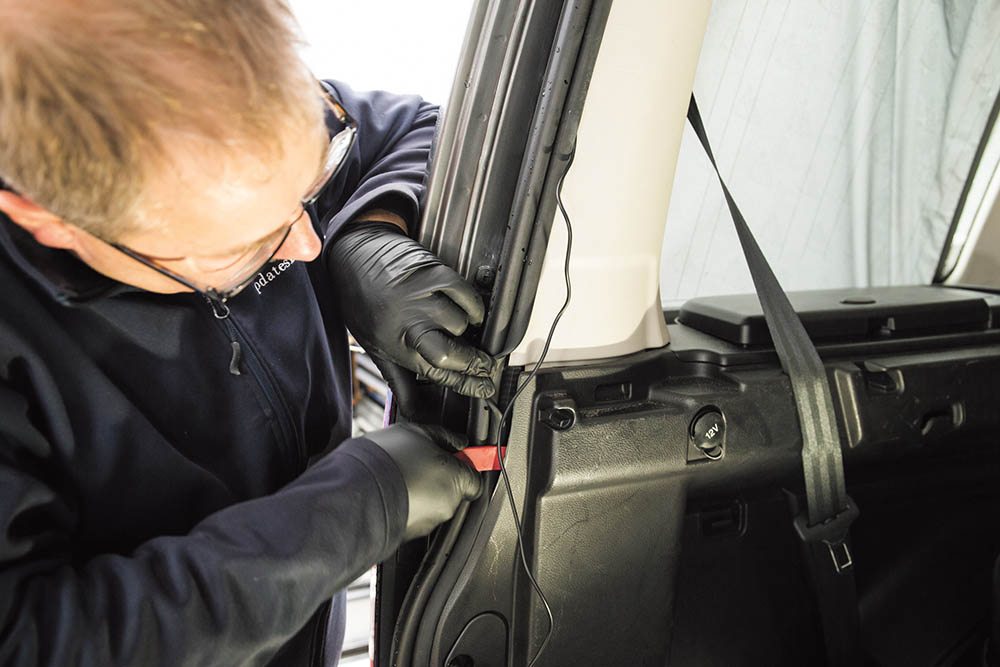
Remove the tailgate side trim, then inside the car, carefully prise off the centre trim at the edge of the roof lining. Do keep this clean!

There are four Torx bolts securing the handle. Typically, these corrode and can be tricky to undo. Use caution, and feel. Do not mash the heads.

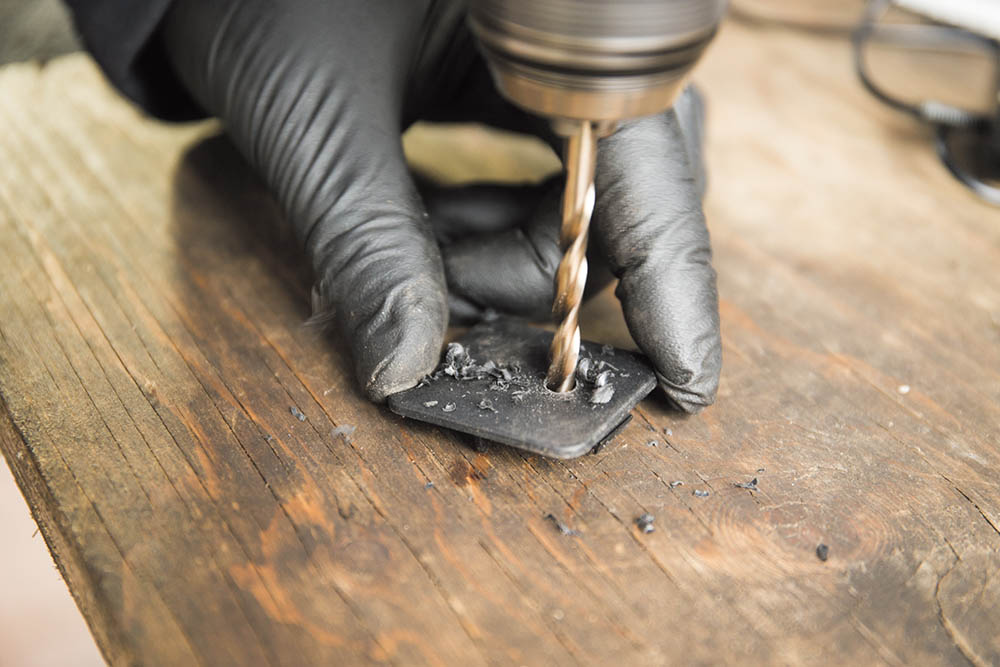
Sure enough, two came straight out, two just spun. Load up the insert using pressure from a trim tool, and the bolt should release. If not, get the drill.

Remove the handle assembly. The corroded inserts are now removed. Note the corrosion at the tips, effectively locking the thread tight.
Installing and wiring the camera
The LR camera fits straight in, and requires a full tailgate loom replacement to wire it. We have to drill a hole for ours in the blanking plate.
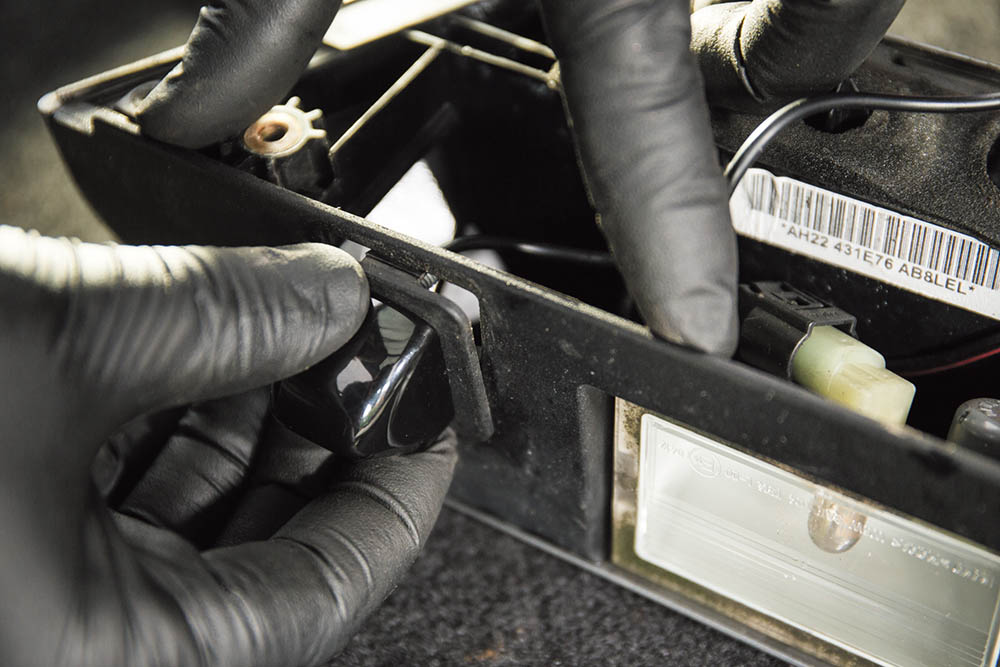
Build up the camera on the plate, then fit to the handle mechanism. Note the direction – it has to face the painted side, not the wiring.

Carefully route the cabling to the centre, and thread in through the existing hole in the sponge. Ensure the cable won’t be pinched anywhere.

With the camera in position, mount the handle on the car, using the interior fixings for now. Thread the cable roughly into position, avoiding pinching it.
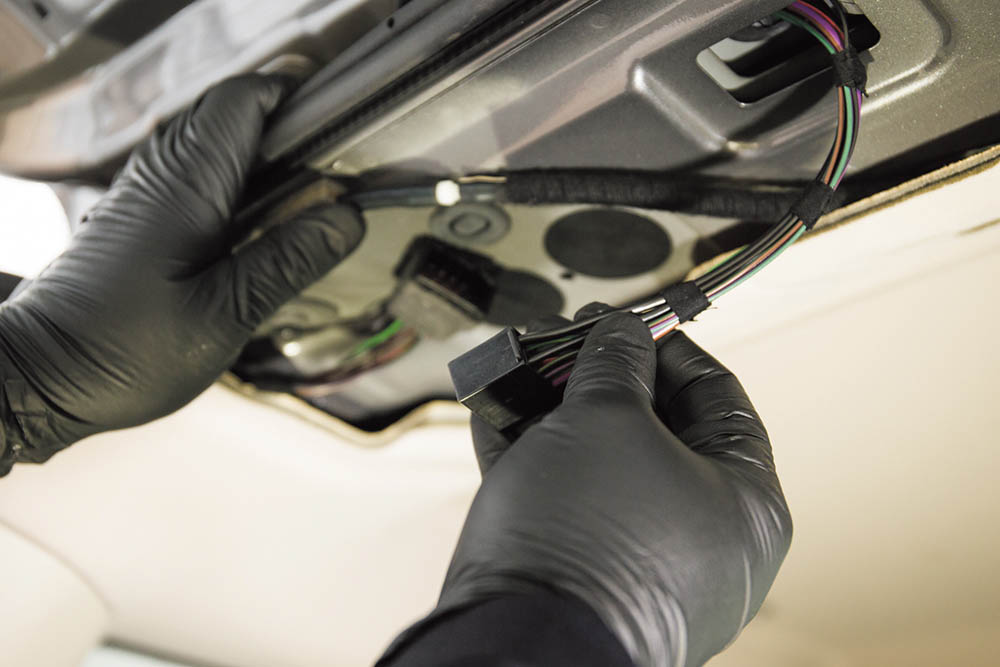
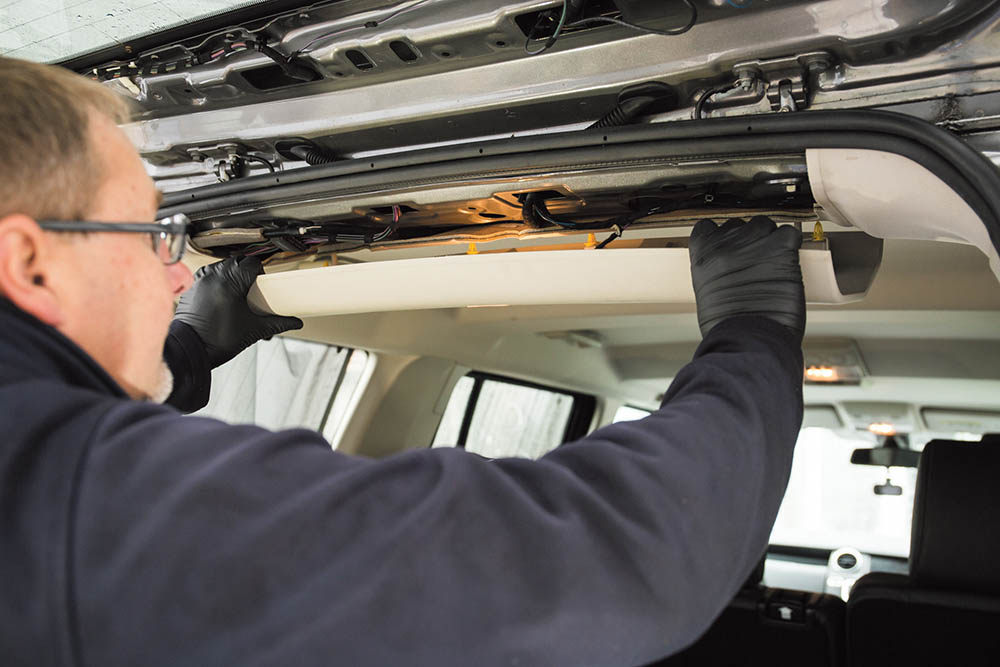
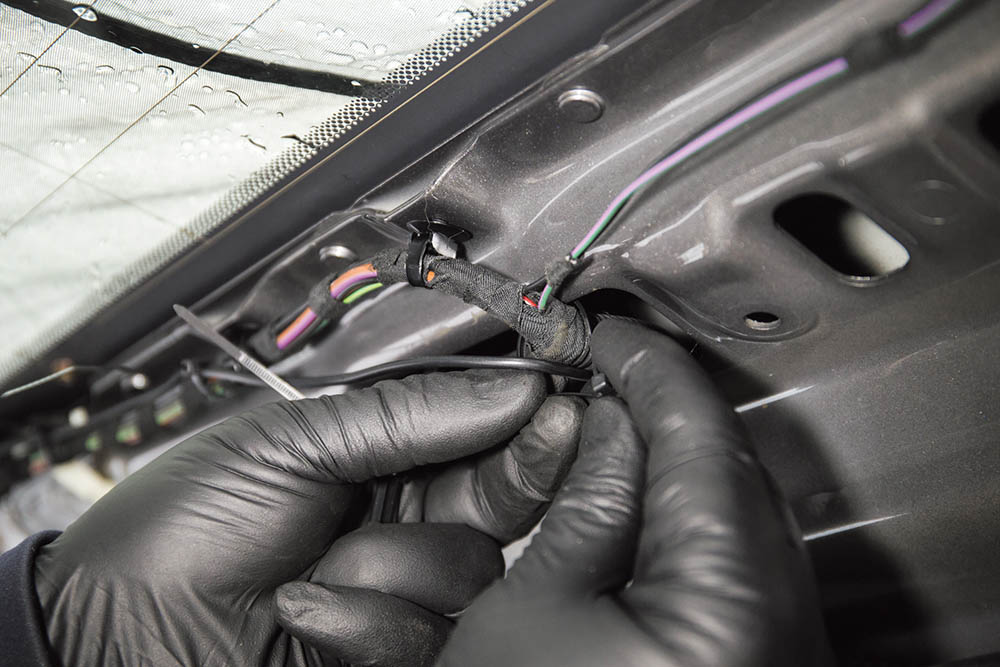
Working at the roof, unplug the centre wiring loom, and carefully ease out the rubber wiring boot between tailgate and body.
Feed the camera wiring through the body, and then through the rubber boot. Silicone spray can help, but take great care not to damage any wiring.
Heading forwards, thread the wiring behind the interior panels. There’s plenty of room there, but be sure the wiring isn’t pinched between panels.
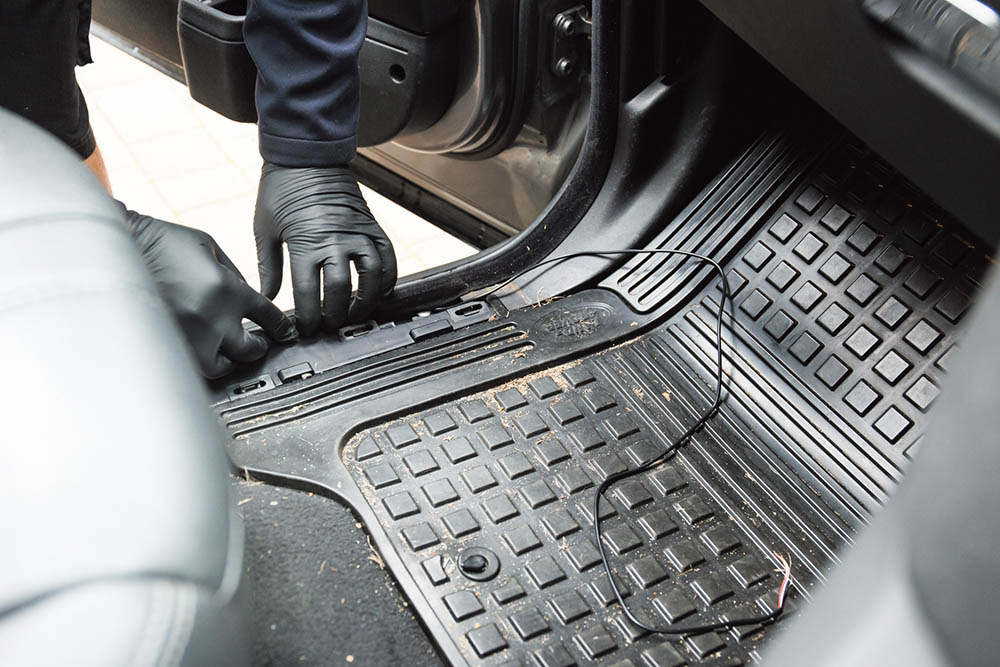
Deal with each panel in turn, until you end up here, at the front. You may need to lift trim sections for access. Be careful not to damage any.

The cable for the particular camera we’re fitting only reaches the front footwell. Ian makes up an extension, with the correct plug for the nav screen.

Inside the car, we need to access the back of the screen. First, the trim has to come off. Ian favours a business card to start it off.

Next he unscrews the fixings for the centre clock trim. The trim scuffs very easily. Mash the edges, and you’ll be looking at it forever!

Out with the cup holders, and the centre console fixings are then unscrewed. Move the gearlever by pressing the release underneath.

With the handbrake definitely applied, gear lever in neutral, a very sharp tug upwards releases the lever trim. Out comes the console trim.

The clock trim and clock unit come out, then both side trims. They need a good tug, but can be damaged if careless. Be careful!

The nav screen is then unscrewed. Notice the empty sockets at the rear; all ripe for feature enabling. Ian selects the right pins and connects the extension lead.

Working downwards, carefully feed the extension lead down behind the glovebox, to the A pillar area. Avoid pinching, as before.

Ian joins the camera cable to the extension lead, soldering the joints, and using heat shrink. He used the fuse box to pick up a power feed.

After a quick test that the camera feed works, the many trim parts are refitted again. Make sure you remember every loom connector, too.
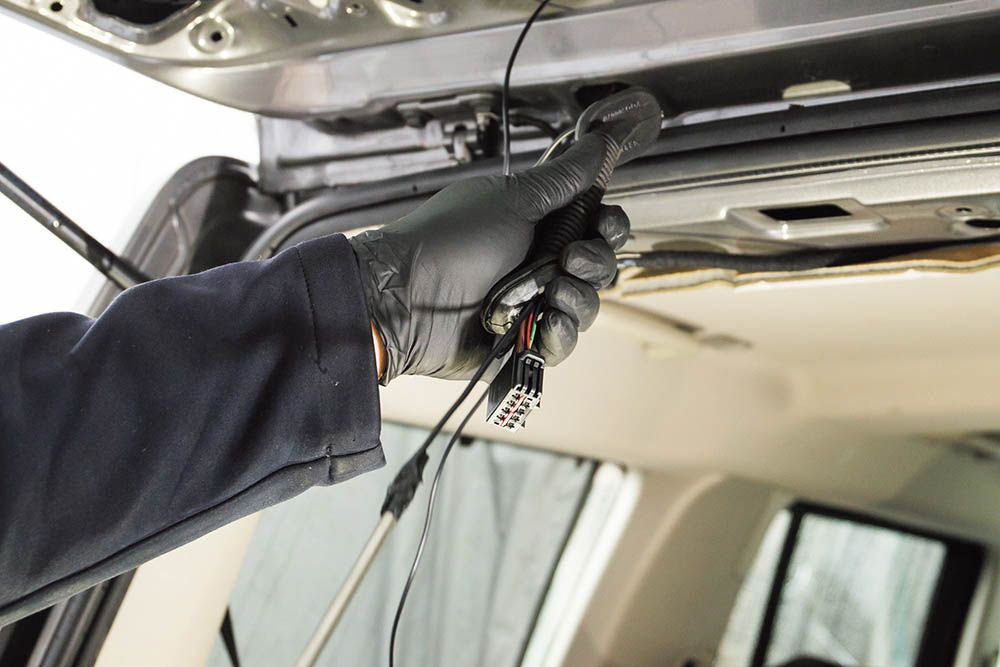
A final touch: at the back of the car, the rear wiring is neatly cable tied to the loom, and the camera connector taped to prevent it vibrating apart.

A bit of forethought goes into those pesky exposed handle fixings. A liberal dose of copper grease will help avoid trouble next time.

The final job: start the car, select reverse, and check the nav screen jumps straight to the camera view. Note the tow ball is included in view, too.
CONTACT: Ian Bodsworth has been specialising in the Disco 3 and 4 and Range Rover Sport market for the last decade. Well regarded and active on most internet forums, he’s become the go-to specialist for updating this era of cars. He travels the UK updating customers’ vehicles and offering everything from a gearbox flush (six and eight-speed), reversing camera, timed climate activation, EGR blanking, remaps, dashcams, Bluetooth modules and more.
[email protected], Tel 07770 638023.
Did you know that you can now get access to the entire archive of Land Rover magazine content with our brand new digital archive? You can enjoy all the issues since the launch of the magazine – use the search bar below to find features, reviews and other great content: