


11 December 2021
|
 Side door seals are a common leak point
: credit: © Alisdair Cusick
Side door seals are a common leak point
: credit: © Alisdair Cusick
Previously we have investigated our leaking Defender, pinning the blame on failed seals. Here Alisdair Cusick shows how to make the truck fully watertight
Need to know
Time: 3 hours
Difficulty: 2 out of 5 stars
Models: All Defender, Ninety and One Ten models, Series types similar.
Tools needed: Screwdrivers, 7 and 8 mm spanners, scraper, panel wipe and cloth, plastic blade, drill, rivet gun, pliers.
Parts used: Bulkhead vent flap seals, JAE000030 x2, £5.98 each; Butyl seal pads (straight), LR028972, 42p for 12; Butyl seal pads (right angled), LR028971, 36p for 8; Taildoor lower seal (floor), LR055354, £7.44; Taildoor aperture seal, LR044314, £9.77; Front door seal (RH), LR077687, £10.90; Front door seal (LH), LR077686, £10.90; Rear side door seal (LH), LR077683, £10.90; Rear side door seal (RH), LR077684, £10.90; Stainless steel retainer for tail door floor seal, AFP710120SS, £29.99.
Work safely: Never use a sharp blade on bodywork.
• Use eye protection when working under a vehicle.
• Use the right tool, for the right job.
• Beware of sharp edges on bodywork.
Thanks to: Steve Grant and Britpart
With nothing more than a hosepipe and some time, we were able to exactly pin down the leaks on our sample Defender, editor Patrick’s 1998 110. The source of water ingress was evidenced primarily as failed vent seals, but around the car, Britpart’s Steve Grant also spotted a number of door seals that were either torn, perished, or otherwise defective.
Our test mule, at 22 years old, tells a typical story of aged rubber. Just as you wouldn’t expect two decade old tyres to be any good, so it is with rubber weather seals. Older Nineties and One Tens will likely also see original windscreen and alpine light seals as having perished. Due to the age now of any Defender model and the likelihood of modifications, those passing years may have involved seals of various qualities being used, or indeed all manner of bodges.
Body alignment can also create issues. On the production line, one particular assembly process involved physically pulling the upper door frame if alignment was unsatisfactory. Older cars present even more opportunity for variance, be that from the door simply not being true, off-roading or slam damage, or corrosion. So adjustment of the Defender bodywork itself can be necessary for good weather sealing.
The jobs list on our sample car involved simply swapping the seals for new ones. If you have side window leaks on riveted-in windows, it can be possible to re-seal the edges of those without removing the frames from the car. Beyond that, the cost and hassle of identifying the relevant failed internal seals and removal of the frames on those units has to be weighed against simply replacing them with completely new aftermarket window units.
Alpine light and rear quarter light seals use a compression strip inserted into the seal. The windscreen seal involves feeding string into the seal recess and pulling the string out as you offer the seal to the bodywork, which holds the seal lip over the body. A fiddly job, it isn’t too tricky for the average DIYer but needs patience.
Britpart’s Steve Grant walks us through the job list on Pat’s 110, and offers tips for how to make sure the new seals work as intended.
Re-sealing the tail door frame

Off with the old: The rear tail door seal simply pulls off the body frame flange. Pull into the middle of the door aperture, not backwards, which can bend the mounting flange.

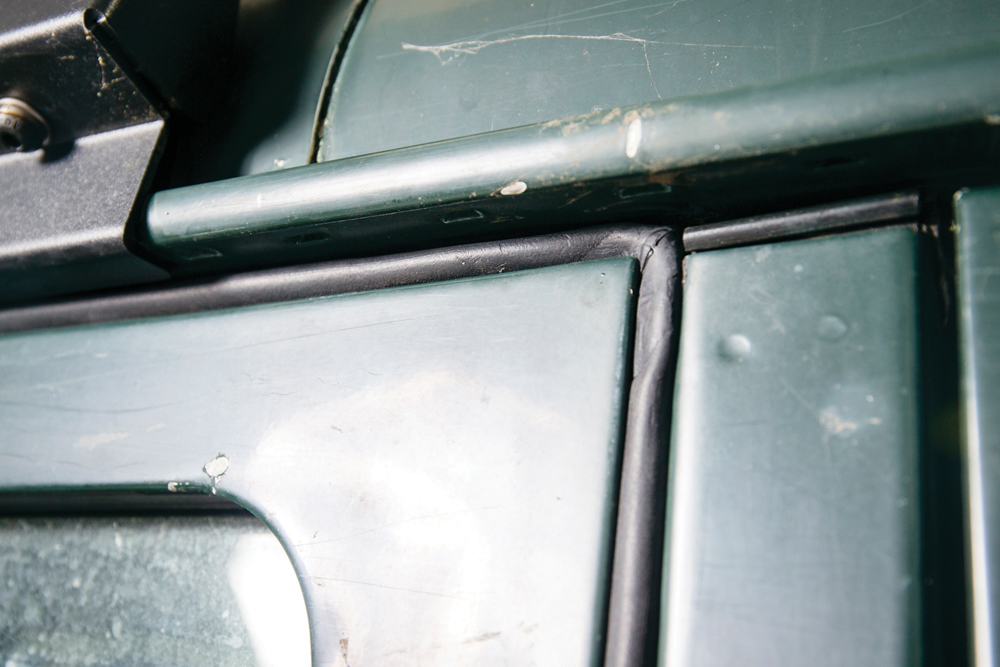
History revealed: Steve holds the butyl tape which bridges body joints on the seal flange, but you may find sealer, too. The orange colour is sand on this ex-South African car.

Eyes down: The tail door lower seal is held to the body by a metal strip. Steve removes the screws and seal. Any corroded screws may need drilling out.

Clean back: Remove the existing butyl joint tape. Steve uses a scraper to dig into the material without touching the bodywork. Gentle heat may help stubborn bits.

Spit spot: The seal lip needs to be as clean as possible as we want the adhesive to stick on the new butyl tape. Steve uses panel wipe on a cloth to chemically clean the lip.

Spotless is best: Wipe around the whole lip, cleaning back to a spotless surface. Take care not to damage the factory sealant on the adjacent roof joint.

Top tip: Carefully use pliers or grips to align the sealing lips across the body joints. They need to be true for the butyl tape to work effectively.

Vital seals: The inexpensive butyl seal tabs come on large sheets. These are for the straight joints, there are a few different shapes for joints that aren’t straight.
Bridge the gap: The tabs work by fixing to each side of the body seal lip, effectively bridging the gap between the joint. Each side of the lip needs a seal.

Mind the gap: Despite a butyl seal, there may still be a gap in the corner of a joint. Steve injects PU sealant into it. No gaps for water ingress now.

Get it on: The new seal is tapped onto the body lip using a mallet. Start at one end, compressing it around the lip. Avoid stretching, which would damage the seal.

Don’t cut it short! If you reach the end and have seal spare, go back and lose some length by compressing it lengthwise around the flange. Never trim it, because seals shrink.

Acceptable cut: The only acceptable cut is when trimming around an interior panel, as here. Note, only the mounting ridge is trimmed. The seal profile should remain untouched.

Lower body seal: A new plump seal is fitted to the rear edge of the load bay to seal the door bottom, held by a smarter bright stainless steel retainer plate.
Fitting front and rear side door seals

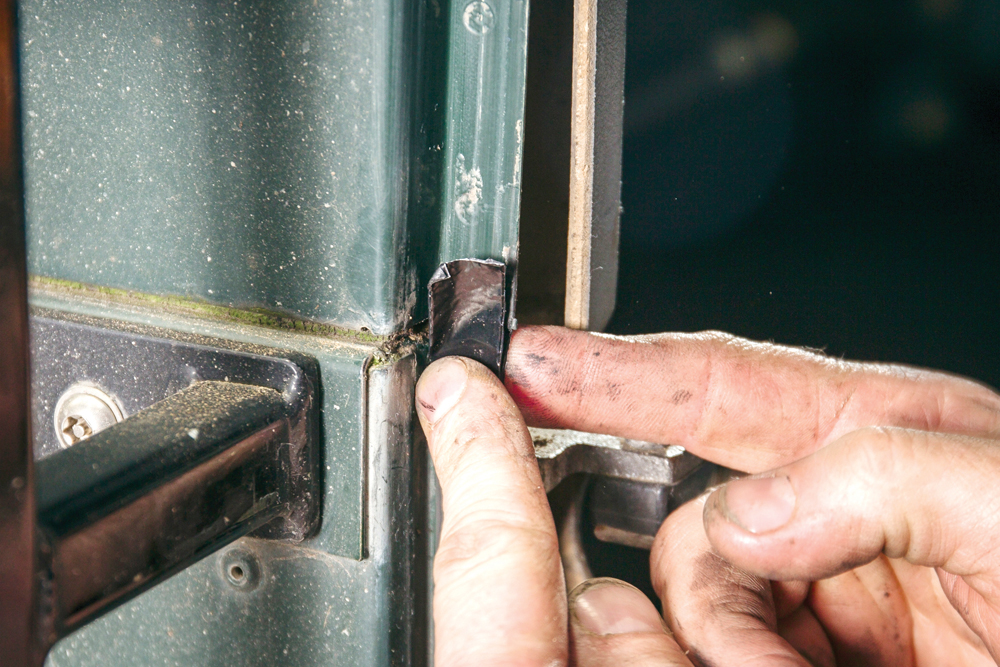
Common leak point: It’s a similar process for the side door seals; in this case the front passenger door. These have more joints to bridge: the main culprits for water ingress.

Bodge fest: Removing the seal reveals this festival of previous bodges. There’s factory sealant, silicone, adhesive and poster putty, doing nothing but making a right old mess.

Check the joints: Clean back the edges, as before, with panel wipe. Note this gap: a measured 10 mm between bulkhead and windscreen flanges. No wonder leaks can occur.

Do it right: A butyl tab goes on the outside face, and a second on the inside face. A narrow blade can help get the back tape into just the right position.

100 per cent sealed: To seal it fully, Steve injects PU sealant in the gap between the tape and the foam windscreen seal. Otherwise, water would still flow behind the door seal.

Fit the seal: As before, the door seal is tapped into position. Two upper corners need to be located, and there are body curves to deal with lower down.

Rear doors: The rear passenger door seals are fitted similarly. Notice the right angle butyl tape used for the body corners (using two layered straight pieces would permit a leak).

Same drill: As before, a butyl patch goes on front and back side of the flanges, with a touch of PU sealant if needed. The door seal’s corner joints are located first.
Proper job: The final result shows nice plump seals, compressed by the closed door. Note the door may need a firmer slam to compress the new seals.

Down low: Don’t forget the lower door seals, fitted to the door itself. These are riveted on, so are removed by drilling out the rivets. You may be surprised to find corrosion, too.

Riveting: The new one is pre-made with holes. Line them up, and rivet the strip on the door. Notice the lip being lower now, which will help keep Pat’s carpet dry.
Bulkhead vent seals

Spanners out: The vents need removing to change their seals. Fxings are removed with two 7 mm spanners. Be aware that they can be corroded in – ours are fine.

Vent off: An 8 mm bolt then holds the vent to the opening mechanism. Go steady, it can be tricky to access. Not a fixing to round off using brute force.

Seals off: The foam seals just pull off the vent. Any glue, sand and accumulated muck left behind needs cleaning off before the new seals can go on.

Is that a shine? Panel wipe removes the old flaky adhesive and tape residue. We also unearth the only bit of gloss paint on Pat’s 110. Patina is the buzzword, isn’t it?

Fit the new: The new self-adhesive seal is formed of two sandwiched layers of differing foam densities. Make sure you get it to the outer edges, so it seals when closed.
Tight again: Refitted to the car, Steve tries the vent. It should feel tighter and close well. The final notch can take some force to close with new seal fitted.
Seal repairs
Replacing a part is one thing but, if you locate a leak to a small area, it may be that you can effect a repair. Say, the edge of a windscreen seal, a side window,or the roof channel. All those areas can be made waterproof by applying sealant via a caulking gun.
Dave Wright, of Vehicle Glazing Specialists gives us a top tip here, from his 35 years making and fitting glass to Land Rovers. Dave suggests making sure you use the right product for sealing, and that means a PU sealant. “Never use silicone, which doesn’t even seal a bath,” says Dave. “Nothing sticks to silicone, meaning you’ll never get paint right if you ever need work.” He says that PU sealer will bond to the bodywork, and some types are UV stable, and may allow over-painting. That’s useful if you want to take your paint right up to the frames, or colour code the window frame.
For roof channels, having cleaned out any flaking sealant – or all the factory sealant if very far gone – and cleaned back the channel, it is best to apply the new sealant then smooth it down with a gloved hand. Roof racks can still damage roof channel weather sealing if over-tightened, so be warned.
For screens and side windows, the sealant can be injected in, as Steve demonstrates for us.

Fillers: With the nozzle cut to a suitable size for your work area, inject sealant around any gapped joints. Be neat, but don’t apply too little sealant.

Clean back: Using a small plastic scraper (to avoid scratching paint), scrape excess sealant from around the joint, but also working it into the joint as you go.
Verdict
After all of Steve Grant’s hard work on Pat’s truck, did it make it watertight?
A week later, after plenty of November rain, I check in with Pat. “It is dry once again, I don’t have wet feet anymore,” he reveals. The one issue he did report was that the doors were harder to close. The low temperatures no doubt meaning the seals remain a little firm and may take a little longer to bed in. It does prove though that there’s no reason for your Land Rover to be anything but leak-free.
Find more of our expert help and advice here.
Budget Digital Subscription
Get access to over 7 years of Land Rover Monthly – that’s almost 100 issues plus the latest digital issue. The issues are fully searchable so you can easily find what you are looking for and what’s more it’s less than 10p a day to subscribe. Click here and start enjoying all the benefits now.