


11 March 2024
|
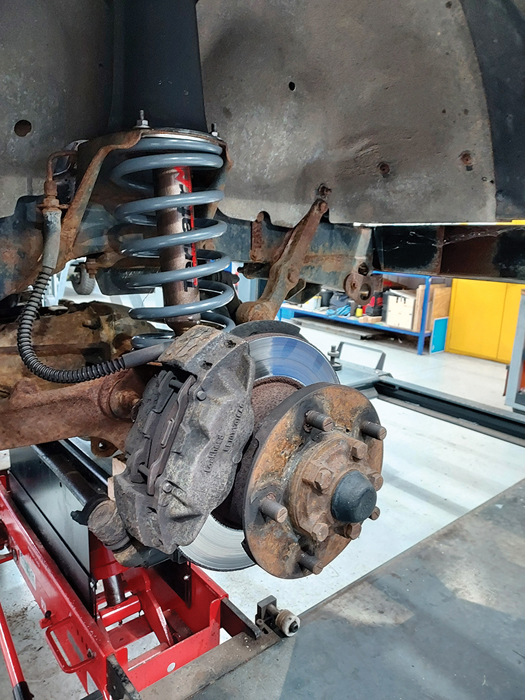
 Brakes are located in a very exposed position
: credit: © Martin Domoney
Brakes are located in a very exposed position
: credit: © Martin Domoney
There’s more to wear out on your braking system than just discs and pads, as Martin explains
Need to know
Time: One day
Cost: £30 to £500
Difficulty: 3 out of 5
Models: Defender(all models), Discovery 1 and classic Range Rover.
Tools needed: Socket and spanner sets, 12-point ½in socket, 52mm socket, pipe spanners, circlip pliers, drain pan, torque wrench, pry bar, wire brush, emery cloth, anti-seize compound,
brake bleeder.
Parts and costs:
• Front brake discs, solid (LR017951G), £59.31 pair.
• Rear brake discs, solid (LR017953G), £60.57 pair.
• Front brake pads (SFP000260G) £23.49.
• Front brake pad fitting kit (RTC5001) £3.85.
• Rear brake pads (LR032954G) £19.81.
• Rear brake pad fitting kit (STC8574) £2.76.
• Front calipers (SEB500440 R/H, SEB500450 L/H) £62.46 each.
• Rear calipers (SMC500110 R/H, SMC500240 L/H) £36.28 each,
• Automec brake pipe kit (DA7441) £139.53,
• DOT 4 brake fluid 500ml (LR052652) £6.55.
Work safely:
• Raise and support the vehicle securely on rated equipment.
• Wear the correct PPE at all times.
• Don’t let children or animals near brake fluid, and dispose of it responsibly at your local recycling centre.
• Only work on safety-critical systems, like brakes, if you are confident in your abilities.
• If you’re not, it’s far safer to leave it to the professionals.
Contact: Maltings4x4store.co.uk
When we think about Land Rover brake components needing replacement, our minds tend to picture worn-out pads, and sometimes discs, from thousands of miles stopping the vehicle from all sorts of speeds. And for the most part, it is mileage that finishes off the consumable parts in the braking system. But, as you’ll see in this guide, time can be just as unkind to brakes as hard miles, and rectification work is needed to keep the brakes strong and performing consistently.
Because the brakes are positioned where they are – on the ends of the axles – they are subjected to grit, muck and salt on the road, and mud and water off it. All these corrosive substances land on the often-hot brakes, baking on and promoting rust. The cycle continues, with layers of damaging crud eating away at the surfaces of the brake calipers and discs, as well as degrading the rubber flexible brake lines and steel pipes that deliver the hydraulic pressure that squeezes the brake pads onto the spinning discs.
These issues might not be apparent until it’s MoT time, or when you need to carry out other maintenance that involves removing the caliper or hub, for example. As well as rusty bolts, the pipe unions and ferrules (or the metal brake pipes themselves) can turn to dust at the sight of a spanner, and the bleed nipples may well be seized solid in their calipers.
With so much aftermarket support and parts available at very reasonable prices, a full brake overhaul needn’t cost the earth, and that’s what we’re doing today.
Front end first: Raise the Land Rover and support it on rated stands beneath the axle, ensuring the handbrake is on and the wheels are chocked. Loosen and undo the wheel nuts, then lift the front wheels clear. You may need to use one later on when fitting the new discs.
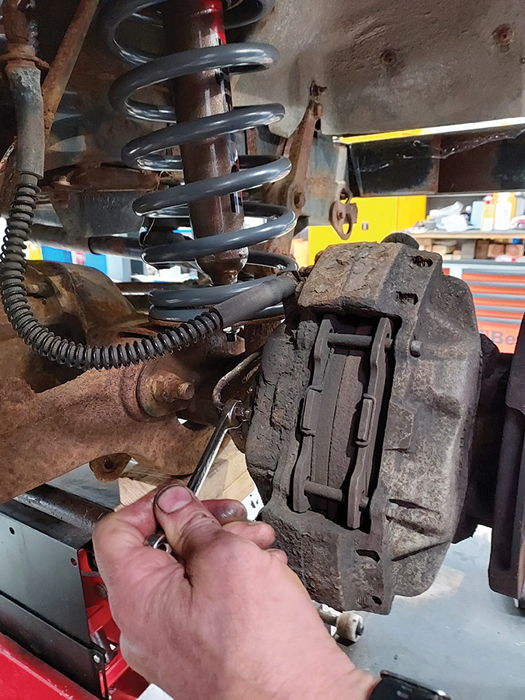
Release hard pipe: As we’re going to replace the calipers, there’s no need to strip the old pads out first. Start by undoing the hard pipe from the back of the caliper with an 11mm pipe spanner. If it’s too rusty and rounds off, use vice grips, or cut the pipe and use a socket. Catch the fluid.
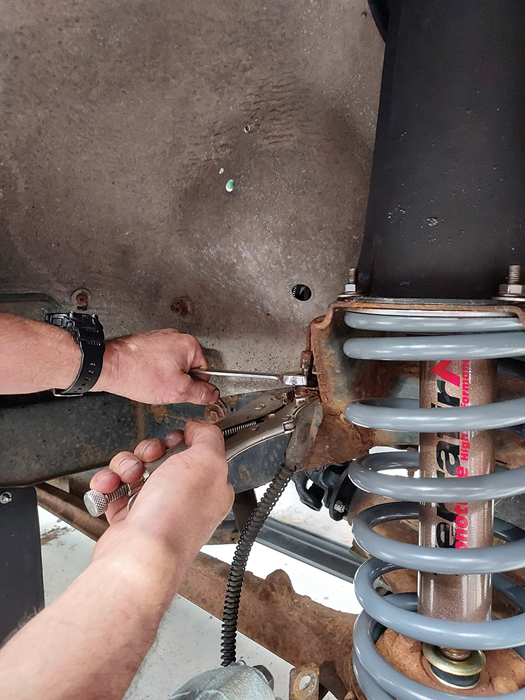
Ferrous ferrules: The rubber flexis are going to be replaced too, so need to be disconnected from the bracket on the chassis. Again, it’s likely that they will be heavily corroded, so use grips and pipe spanners to release them. Undo the 17mm clamping nuts and remove the flexi line.
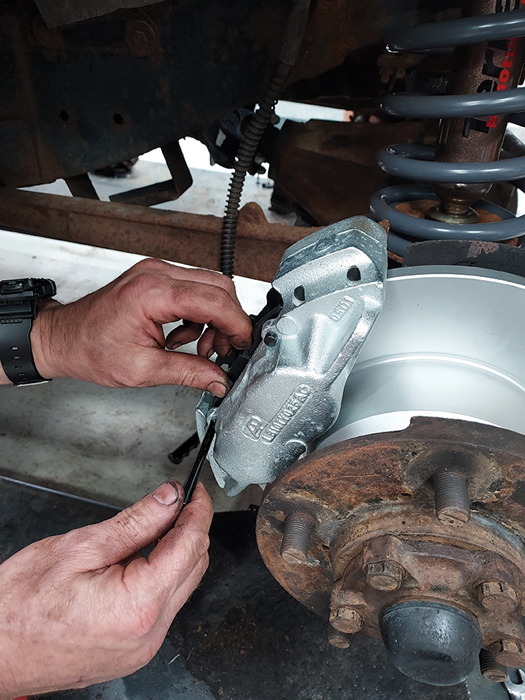
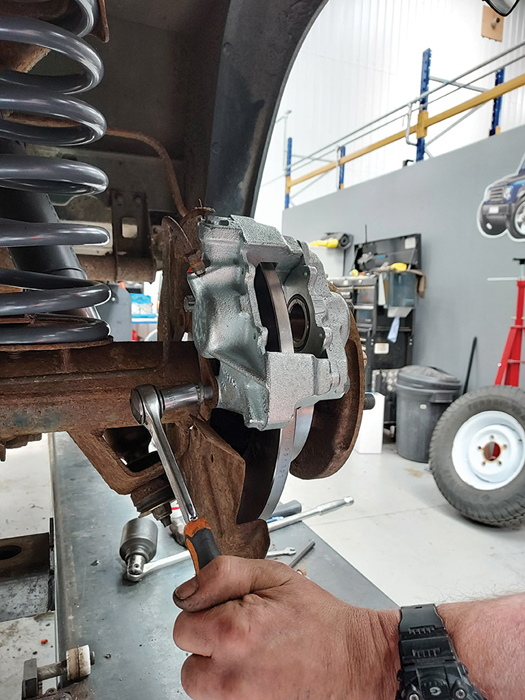
Unbolt the caliper: The two bolts that secure the caliper can be tricky to get to and the heads often corrode, so wire brush them off the best you can to avoid rounding before undoing them with a ½-inch 12-point socket on a ratchet. A long, flexible-headed ratchet makes the job easier.
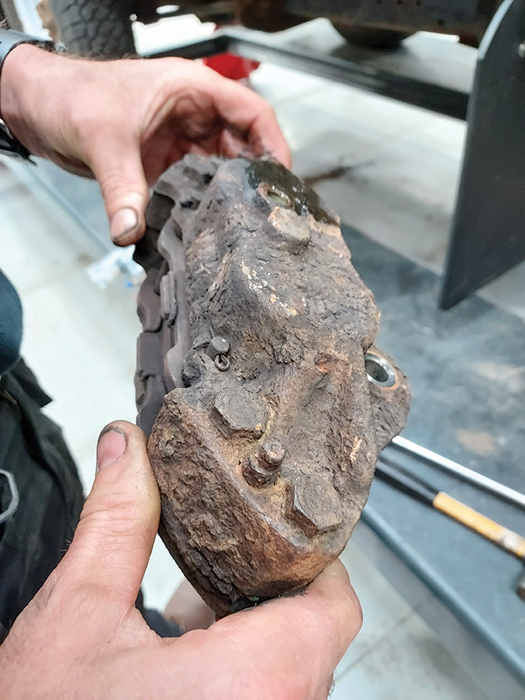
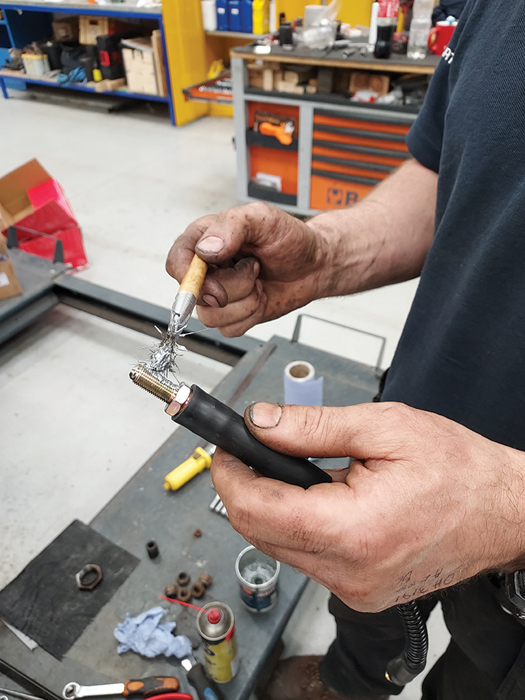
A rusty mess: Use a flat-blade screwdriver to push the pistons back in the caliper so the pads can come over the lip on the disc, then remove the old caliper. As you can see, there is heavy rust scale on the back of this one, with the bleed nipple almost unrecognisable.
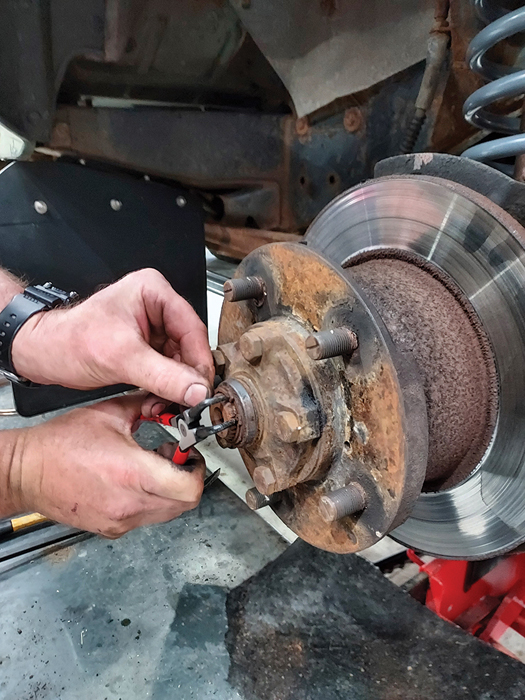
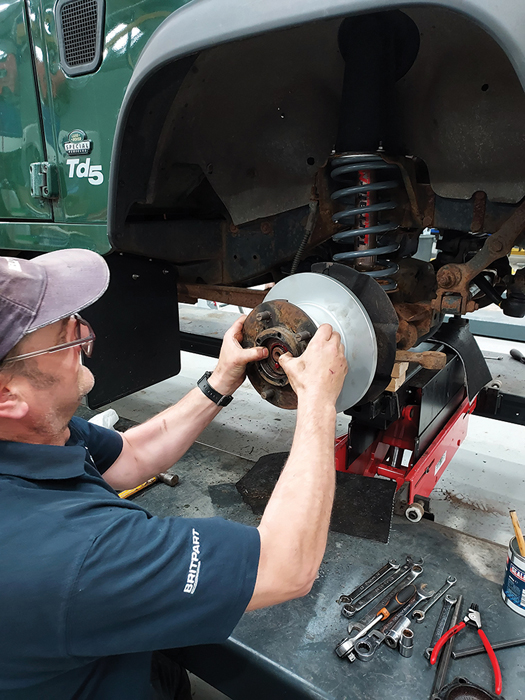
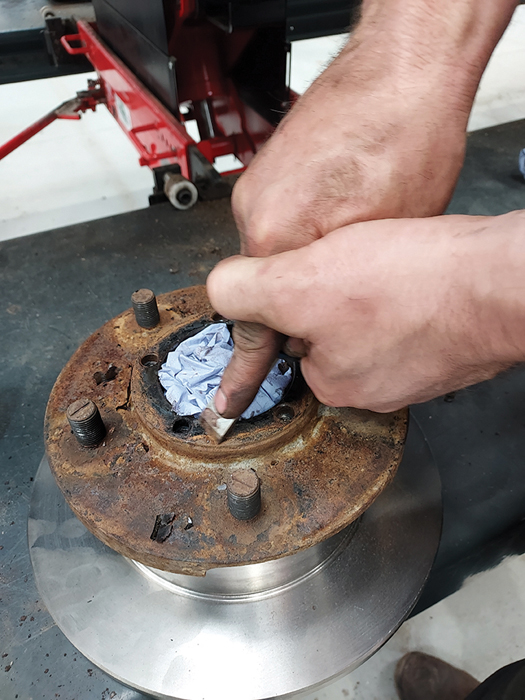
Remove circlip: Time to start removing the disc which, unlike more modern Land Rovers, is bolted to the back of the hub rather than sitting conveniently on the front face of it. Pop the rubber end cap off the front drive flange, then use circlip pliers to release the clip. Retrieve the shims.

Free the flange: Stop the hub from turning by wedging a long lever bar between the wheel studs, then use a 17mm socket on a ratchet to undo the five bolts that secure the drive flange. Once free, carefully prise the drive flange away from the hub. Inspect the splines for wear.
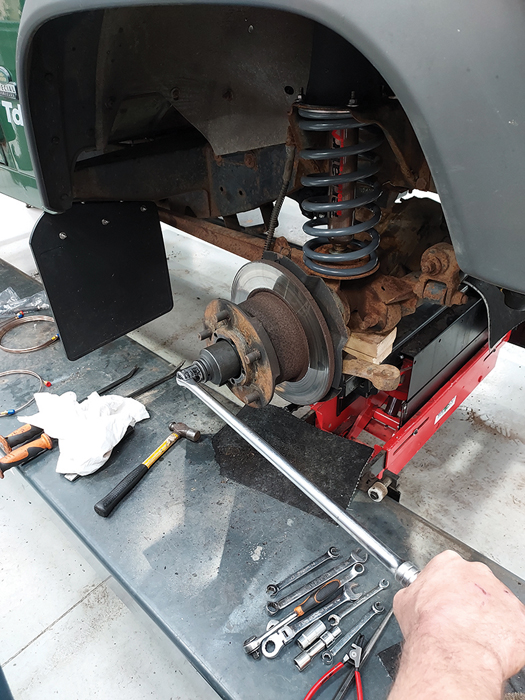
Undo hub nut: As this Defender is post-1999, it uses the single hub nut and wheel bearing spacer set-up rather than twin adjustable nuts. Use a 52mm socket on a long breaker bar to undo the hub nut, then withdraw the washer. Slide the hub assembly off the stub axle.
Inspect stub axle: Check the condition of the stub axle before going any further. Grooves in the sealing surface or damage to the threads warrant its replacement; this one is okay. Give it a good clean with brake cleaner and a cloth, then wire brush the driveshaft splines, and apply grease to them.
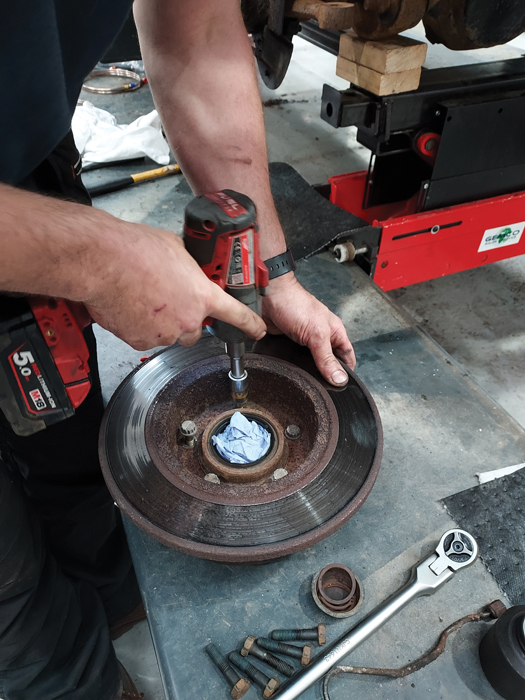
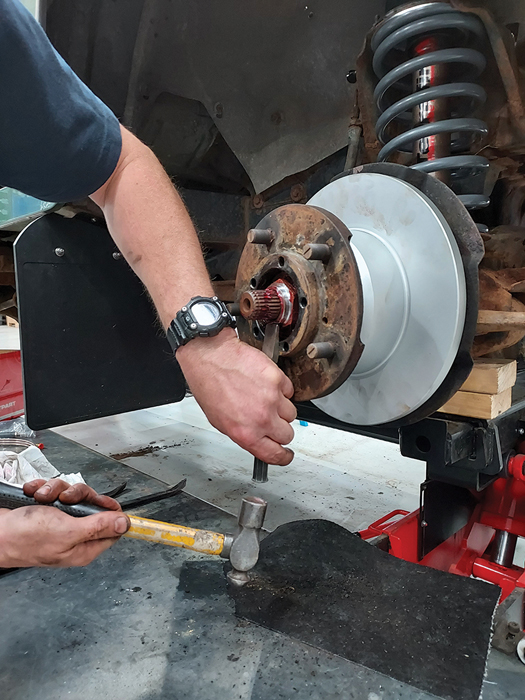
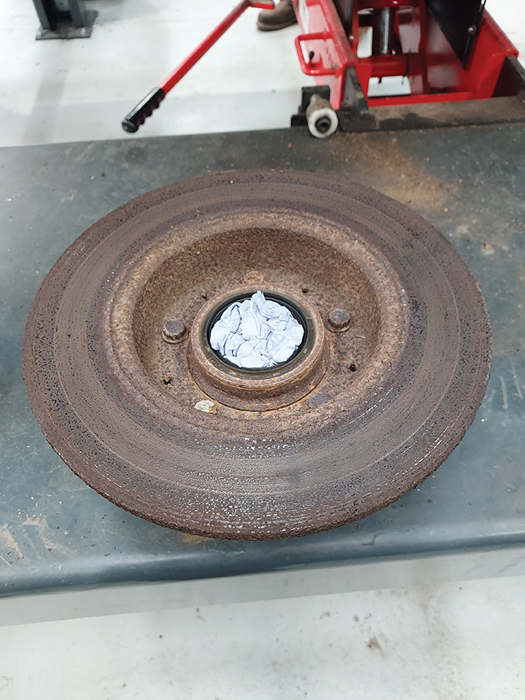
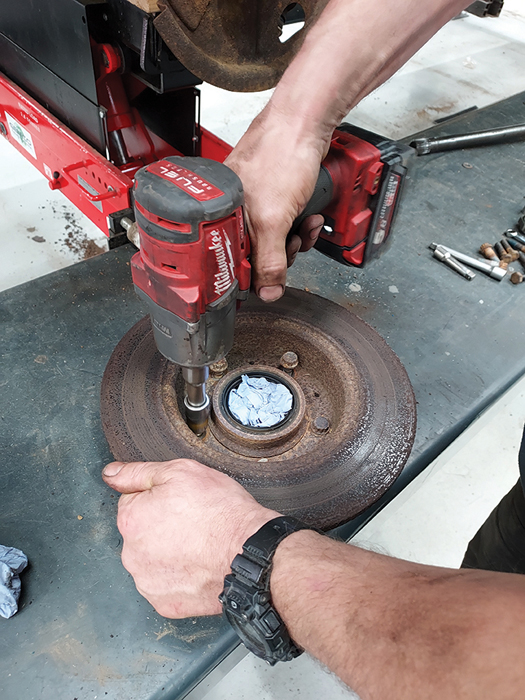
Undo disc bolts: Stuff clean paper towel inside the hub to stop dirt getting into the bearings. Place the hub on a flat surface, then use a 14mm 12-point socket to undo the five bolts. An impact gun makes the job easy, but you can also place the hub in an upturned wheel and use a bar.
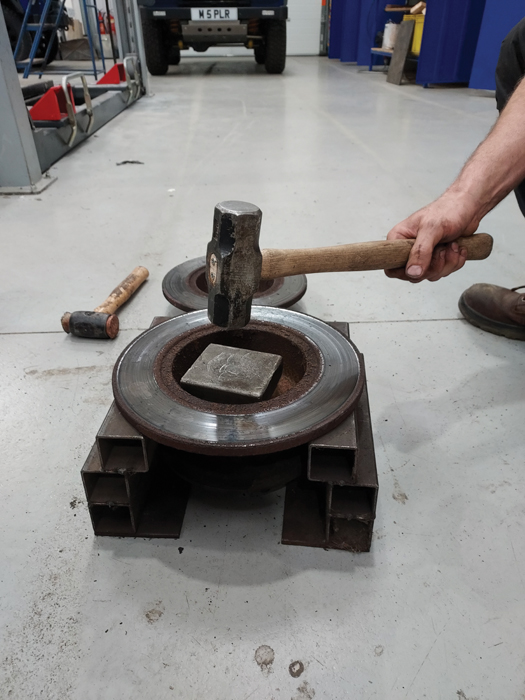
Hit it! Given how corroded everything is, it’s highly likely that the disc won’t come off the hub easily. Support the outer edge of the disc (Steve at Britpart has made his own holder, but you can use blocks of wood) then drift the hub out of the centre of the disc with a hammer.
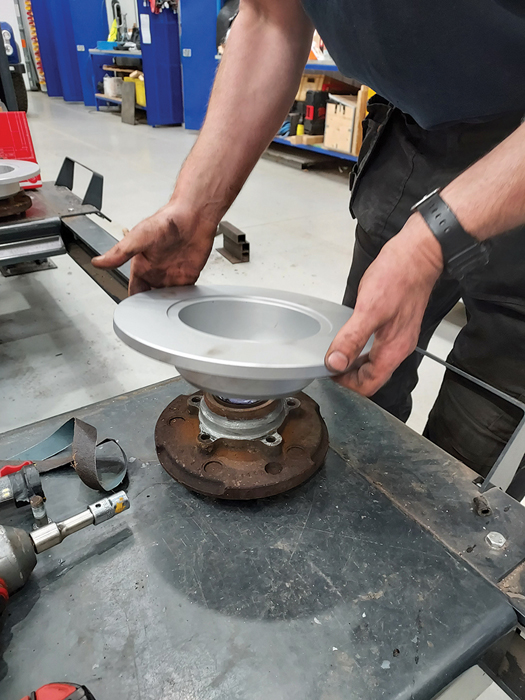
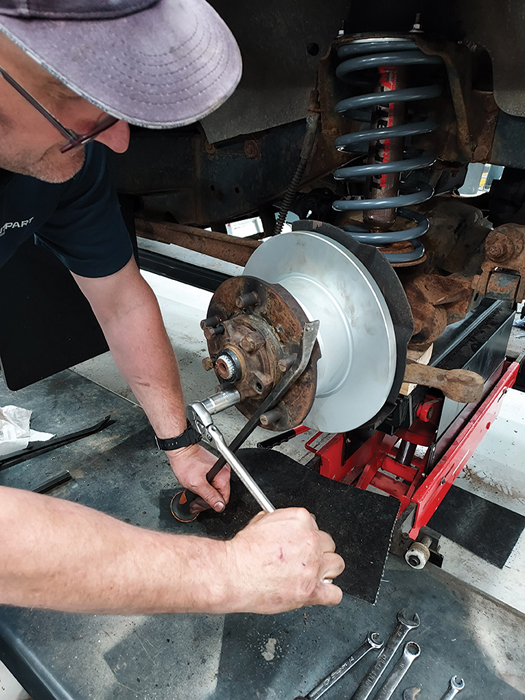
Prepare the hub: Use emery paper to remove rust build-up from the hub, then apply a coating of anti-seize compound around where the disc sits to help prevent future corrosion. Lower the new disc onto the hub, then apply a drop of threadlock to the bolts and start them all by hand.
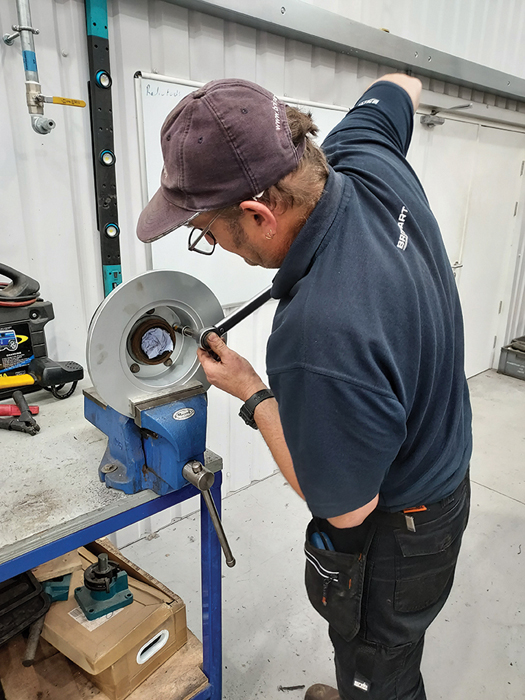
Torque it up: Relocate the hub assembly to a vice fitted with jaw protection pad, or sit it back in one of the wheels you removed from the vehicle, to hold it securely while you tighten the five bolts. Working in a star pattern, tighten the bolts gradually, then finally torque to 73Nm with a torque wrench.
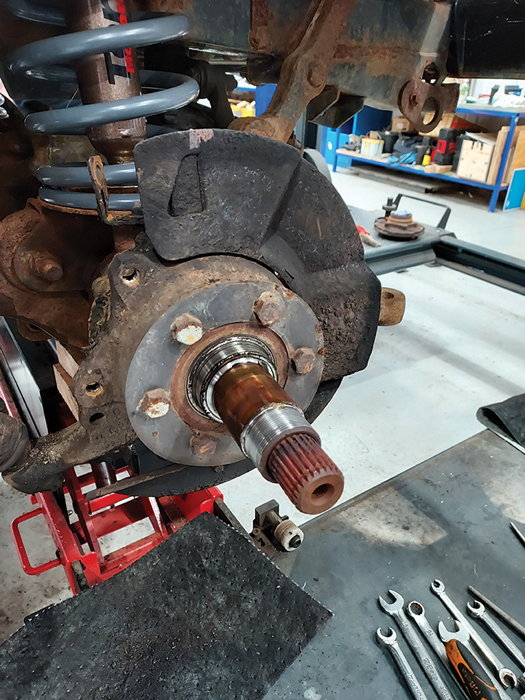
Refit hub assembly: Repack the outer bearing with grease, then offer the hub assembly up to the stub axle, holding the preload spacer and outer bearing in with your thumbs. Push it all the way home, then fit the thick washer and spin a new locking nut onto the threads to hold it all in place.
Torque and stake: Use the 52mm socket on a torque wrench to tighten the new hub nut up to 220Nm. Give the hub a spin to seat the bearings and check smoothness, then stake the nut over the flat part of the stub axle with a blunt chisel or drift with a hammer.
Refit drive flange: With the old gunk cleaned off and a new paper gasket fitted, the drive flange can be slid onto the greased splines and secured with the five bolts, each with a dab of threadlock. Once secure, refit the driveshaft shims and circlip, and push the end cap back on.
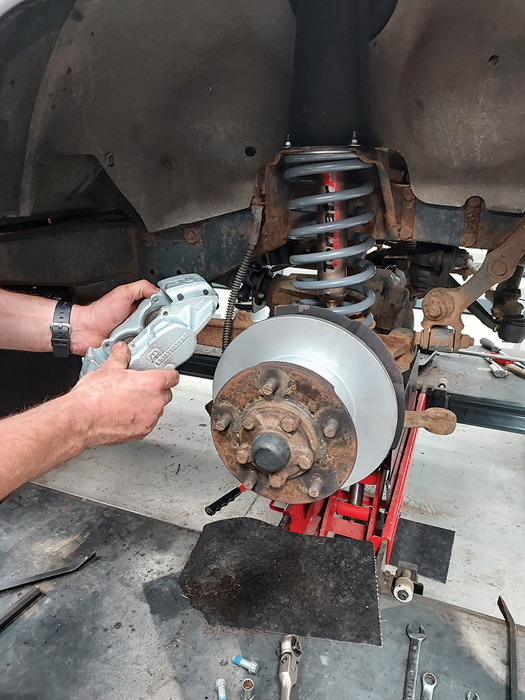
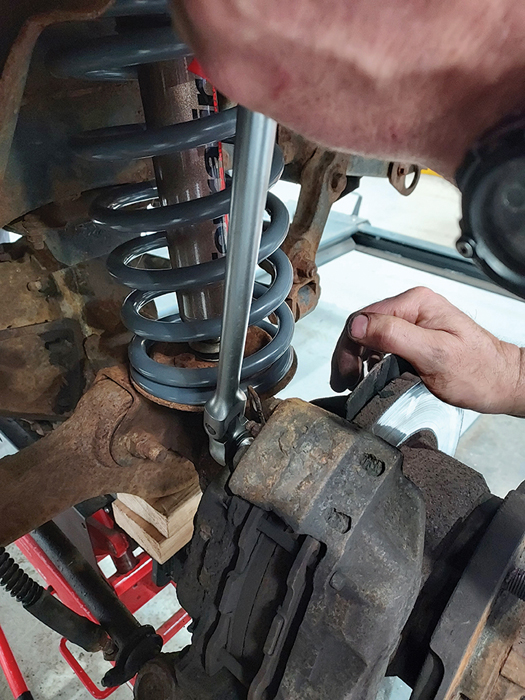
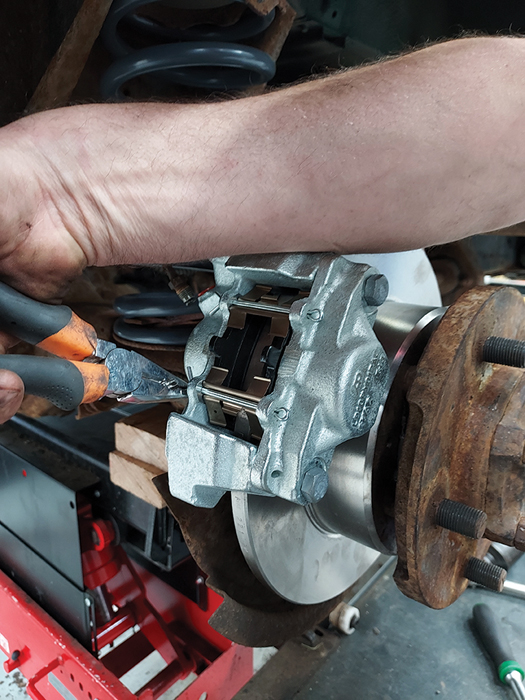
Install new caliper: Offer up the nice new caliper to the wheel station, ensuring you have unboxed the correct side – the bleed nipple needs to be at the top of the caliper body. Slide it over the disc and secure with the two threadlocked bolts, then torque them both up to 82Nm.
Fit new pads: Apply a smear of anti-seize compound to the outer ‘ears’ of each new brake pad, taking care to avoid the friction material, then slide them in with the chamfered edge at the bottom of the caliper. Slide the new retaining pins and anti-rattle springs in, and secure with split pins.
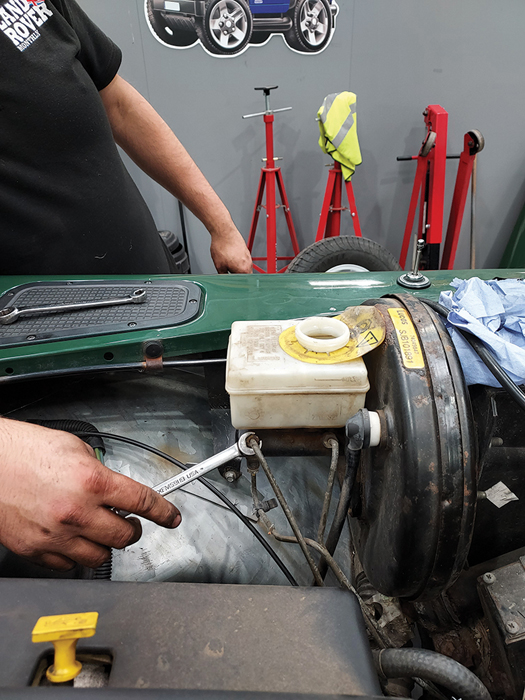
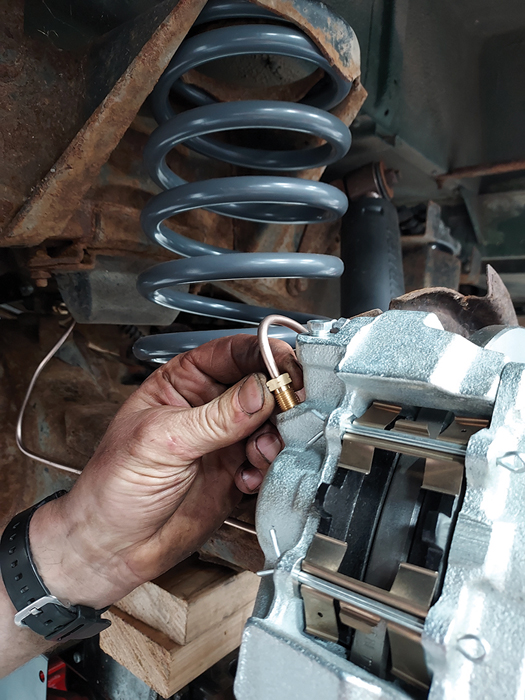
Time for the pipes: The ends of the hard brake lines are heavily corroded, so both pipes that run from the master cylinder to the front wheel stations will be replaced with Automec pipes from a full vehicle kit. Undo the unions from the master cylinder, and catch the fluid that spills.
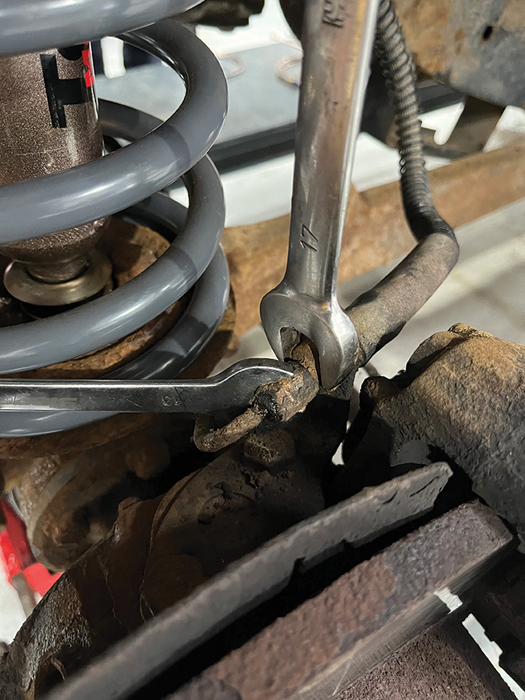
Release from bracket: The flexible lines can now be split from the brackets that secure them on the axle. Use pipe spanners to first disconnect the hard line that runs from the caliper to the bracket, then undo the twin 17mm nuts that hold the flexible line in place. Discard the flexi.
Unclip old pipes: The offside hard pipe has a fairly short and straightforward route from the master cylinder to the chassis bracket, but the nearside one runs across the bulkhead. Carefully unclip the old pipes from their holders, and release the plastic separator clips with a screwdriver.
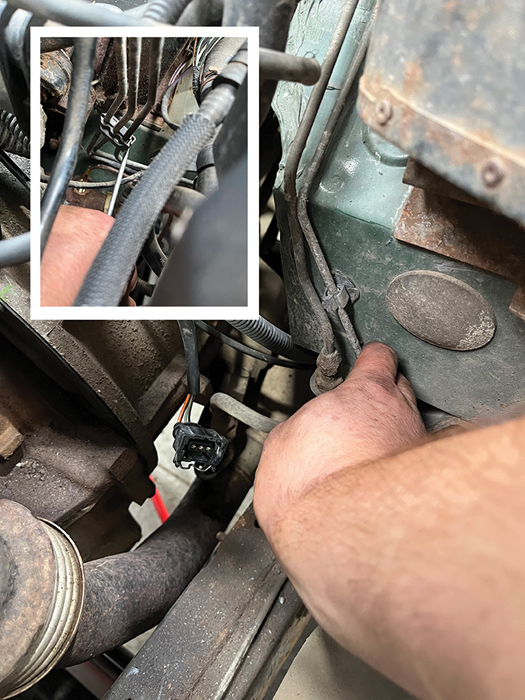
Note the routing: The longer of the two front brake pipes passes underneath wiring harnesses, the coolant header tank, the air intake hose and a few other bits, so be sure to take note of how it runs. Release the wiring plugs and remove the air intake hose for access. Withdraw the pipes.
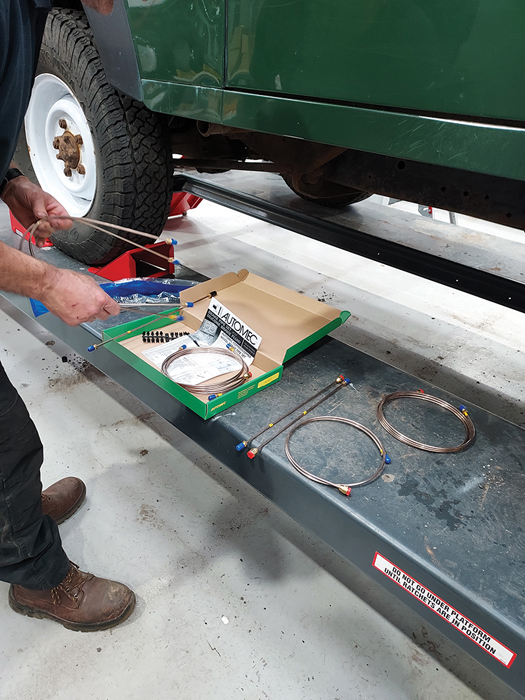
Making it easy: Here’s a better look at the Automec brake pipe kit we’re using on the 90. All the pipes come cut to the right length and fitted with the correct unions, so you don’t need a brake pipe flarer or cutter. Automec kits are available for lots of models, through Britpart stockists.
Make your own
While the Automec brake pipe kits offer great convenience and are very reasonably priced for the amount of time they save, you do of course have the option of making up replacement brake pipes yourself. You’ll need a roll of 3/16in copper-nickel brake pipe, the correct size and thread unions (which can differ between imperial and metric depending on vehicle year) and a quality brake pipe flaring tool that can make SAE and DIN flares – again, this will depend on the age and model of your Land Rover. Making brake pipes is one of those jobs that can seem a bit of a dark art at first, but gets easier with practice. And a perfectly-formed fresh brake line is the height of satisfaction when you do nail it.
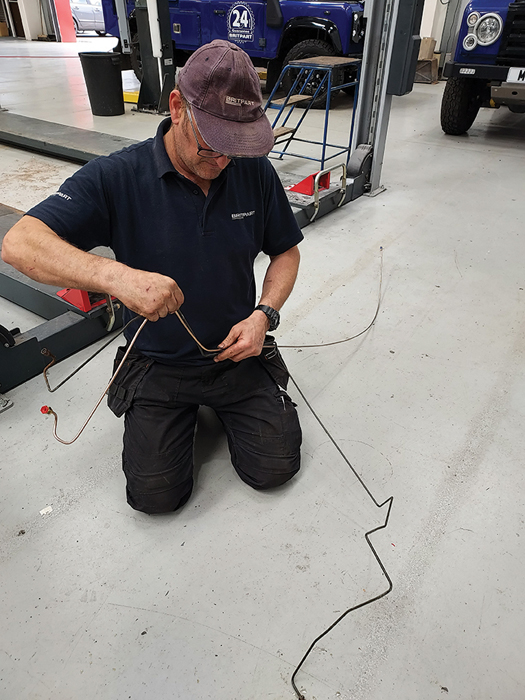
Replicate the shape: Steve runs the new front brake pipes through a straightener, though you can also do this by hand on a flat surface. Once straight, he uses the old brake pipes as a template to bend the new ones to the correct shape, using a combination of finger pressure and a shaping tool.
Fit and tighten: Once the new pipes follow the same shape as the old ones, they can be fitted to the vehicle following the same route as the originals, and clipped into place. Always start the unions by hand before fully tightening with a spanner, to prevent cross-threading.
Futureproofing: To help keep the new brake pipe fittings in the best condition possible for the longest time possible, anti-sieze compound is applied to the threads of the new flexible pipes, where the clamping nuts run. Once the job is finished, the pipes can be greased or rustproofed.
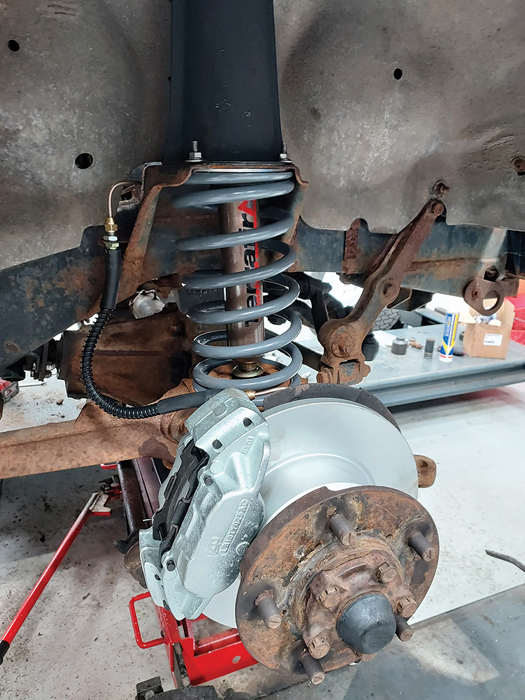
Looking fresh: With the new flexible lines fitted and Automec link pipes installed on the back of the new calipers, the front brakes are complete. If you’re just working on one end of the vehicle, you can bleed the hydraulics now. We’ve still got the back to do, so will wait until later.
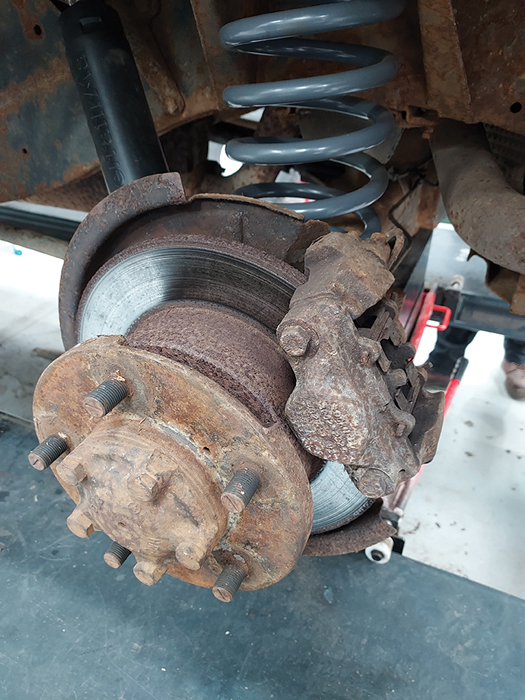
To the rear: It’s a similar story at the back of the Defender, if not slightly worse than the front. The brake discs are heavily pitted and scored, and the calipers have similar levels of corrosion. Again, the brake pipes will be replaced as part of the overhaul, as they are rusty.

Easier access: The bolts that hold the caliper to the axle tube aren’t as heavily recessed as they are on the front, but the coil spring can get in the way of the ratchet head when undoing the upper bolt. Using a combination of sockets to drive the ½-inch, 12-point socket, undo the bolts.

Shaft out, hub off: Lift the brake caliper off the disc, then undo the five bolts that hold the drive flange to the hub. There’s no need to remove the flange separately on the back – the halfshaft can be slid out in one. Keep the shaft clean while removed to avoid contaminating the axle oil.
Severe scoring: With the hub laid stud-down ready for disc removal, it’s clear to see just how scored and pitted the disc surface is. This could be caused by a sticking caliper and the pads being worn down to the metal, or purely through age. Either way, it’s in dire need of replacement.
Impact needed: The bolt heads on the back were in a worse state than the ones on the front discs, so extra care is taken to clean them up before trying a socket. Using a 14mm 12-point socket, same size as the fronts, an impact gun is deployed to shock the bolts out of the hub.
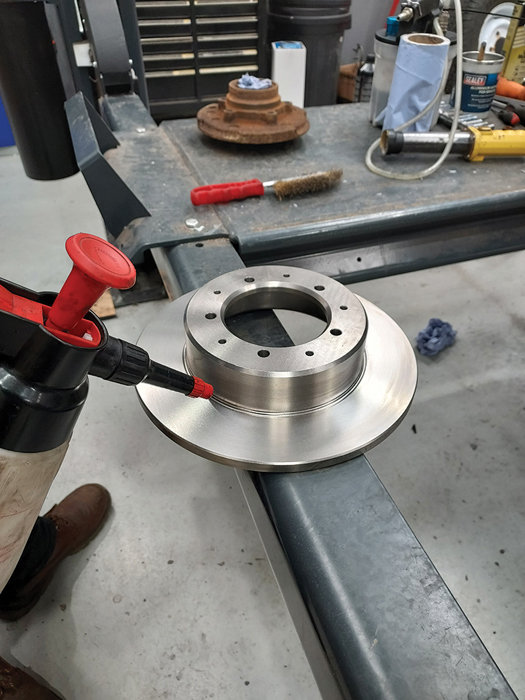
Prepare new parts: The discs are degreased with brake cleaner before fitting, as they come lightly oiled to prevent corrosion during storage. Steve removes rust build-up with emery paper, brushes on some anti-seize, then bolts the new disc to the hub, torquing the bolts to 73Nm.
Remove old gasket: It’s vital that the sealing surface on the hubs and drive flanges are as clean as possible and that a new gasket is fitted when they go back on, to avoid leaks and oil splattering all over the wheels. Use a scraper and scotch pad to remove traces of old gasket and sealant.
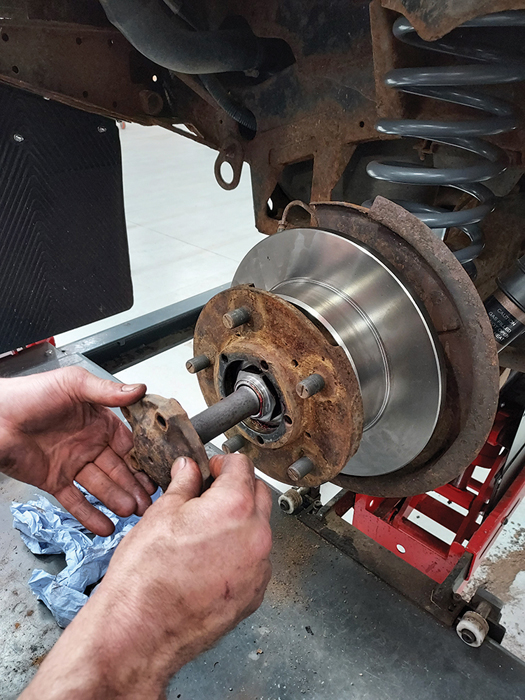
Refit the hub: Grease the outer hub bearing, then refit it and the preload spacer to the hub and slide the hub onto the stub axle. Fit the spacer and new stake nut, torque to 220Nm and stake the nut. Fit a new gasket to the drive flange, slide the shaft into the axle and tighten the bolts.
Shiny and new: Slot the new rear caliper into place and start the two bolts by hand before tightening up and torquing to 82Nm. We’re using new bolts here as the heads of the old ones are worn. The new caliper comes with the pistons fully retracted, making pad fitment easy.

Slide pads home: Take the new brake pads from the box and apply a smear of anti-seize to the outside of the metal backing plate, avoiding the friction material. Fit the rear pads to the caliper with the rubber anti-rattle pad at the top. Make sure the brake pads are fully seated.
Secure with pins: Unlike the front pads, the rears are held with a pair of long split-pins and spring clips. Position the springs as pictured here, compressing enough to slide the split-pin through, then open up the split-pin with a pair of pliers. Now continue to fit the second pin and spring.
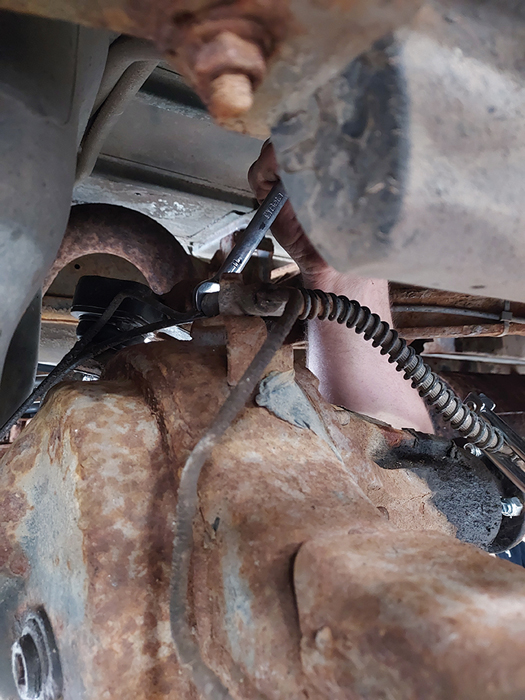
Tackle the T: There’s a T-piece bolted to the top of the axle that splits off to each wheel station. It’s important to hold it steady with a spanner or pair of pliers while undoing the two brake pipe unions, or the bolt can snap or bracket can bend. Replace the rear brake flexi.
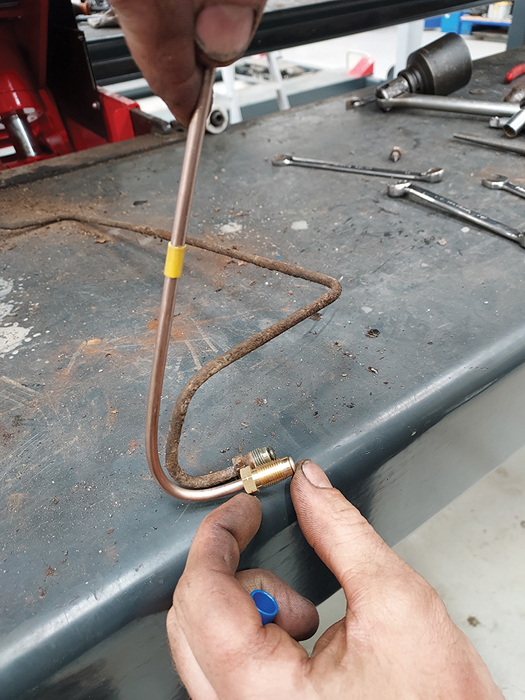
Bend new pipe: The rear lines that run from the T-piece to the calipers are shorter than the front ones, and slightly easier to replicate with the Automec pipes. They are, however, more visible than the fronts as they’re on display on the back axle, so take your time and get them right.
Fit and plumb: When you are happy with the shape of the pipes, offer them up and start the unions both ends by hand, then clip them into the plastic holders on the axle tube. You can make any adjustments to the pipes at this point to make them look as professional and neat as possible.
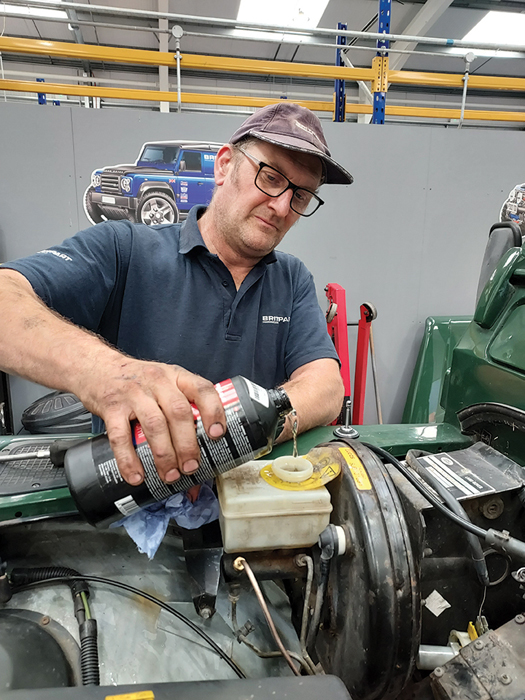
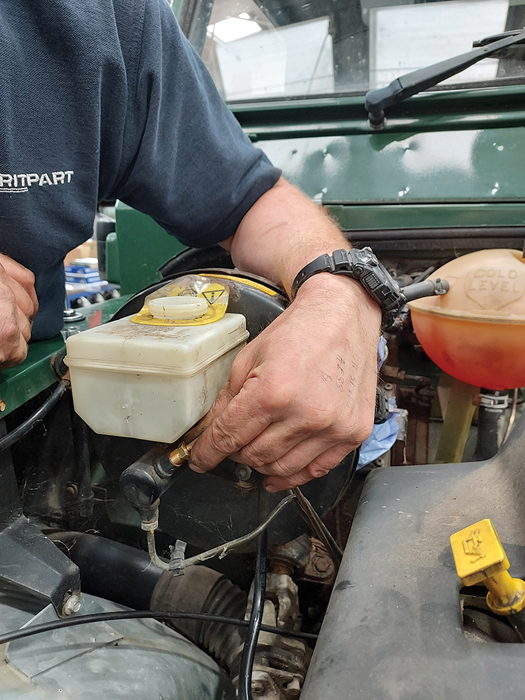
Fill with fluid: With all the unions on the brake pipes and flexis that we’ve replaced nice and tight, Steve fills the master cylinder with fresh DOT 4 brake fluid. It’s vital that the level in the reservoir is kept topped right up as the brakes are bled, to avoid introducing air to the system.
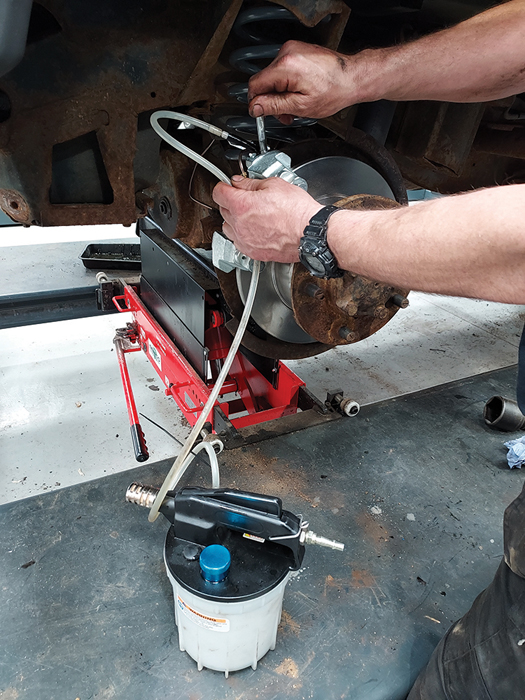
Bleed the brakes: Starting at the caliper furthest from the master cylinder, in this case the nearside rear, Steve loosens the bleed nipple and vacuum bleeds the line until no air bubbles remain. You can also do this manually by pumping the pedal. Work your way towards the master.
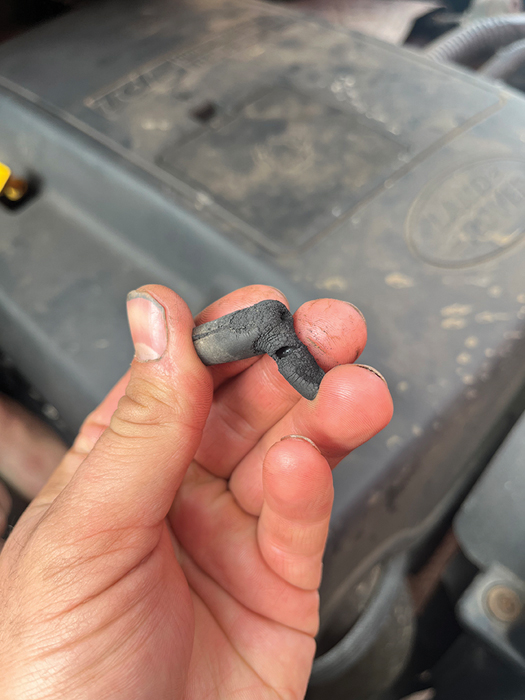
Check vacuum system: Once the hydraulic system is fully bled and the fluid level is adjusted to the maximum, refit the road wheels and torque the nuts to spec. Finally, check all the vacuum lines for damage or splits, and repair if required. Check for fluid leaks, then let the brakes bed in for the first few hundred miles, then enjoy stronger, more consistent braking and a much improved pedal feel.
Like to have your own Land Rover library?
Try our All-Access Digital Subscription. You'll get access to over 7 years of Land Rover Monthly – that’s more than 100 issues plus the latest digital issue. All issues are fully searchable so you can easily find what you are looking for and what’s more it’s less than 10p a day to subscribe. Click the link above to find out more details and start enjoying all the benefits now.