


26 January 2023
|
 Fitting a locking diff will give you more traction
: credit: © Alisdair Cusick
Fitting a locking diff will give you more traction
: credit: © Alisdair Cusick
Want more traction? You need a locking differential in your axle. Alisdair Cusick looks at how to fit one, and why
Need to know
Time: 4 hours.
Cost: See below.
Difficulty: 3 out of 5
Models: Defender 90, Defender 110/130 (front), Discovery 1, Discovery 2 (front and rear), classic Range Rover (24-spline front and rear).
Tools needed: Socket set, spanners, filter pipe grips, screwdriver, soldering iron, wiring stripper and crimper, two axle stands, jack/hydraulic vehicle lift, pry bars, heat guns, drill, silicone gun, wire brush, 100Nm torque wrench, brake cleaner, thread lock, freeze spray and maintenance spray.
Parts & costs: Terrafirma E Locker, TF450, from £700; Bearings RTC3095 (x2), £5.53 each.
Work safely:
• Wear eye protection when working under a vehicle.
• Always support a vehicle in a stable manner on suitably-rated stands, never rely on a jack.
• The differential is heavy; take care to avoid strain injury and the risk of dropping it. Think before you lift.
• Wear eye protection when removing and fitting spring clips.
• Use the right tool for the right job.
• If in doubt, get a professional.
Thanks to: Eddie Priscott and Terrafirma, and This is Your Garage, for their able assistance, too.
terrafirma4x4.com
One of the reasons for a Land Rover’s supreme off-road abilities is the lockable centre differential. Manually selectable, or engaged automatically via a viscous coupling (as on post-1989 Range Rovers), it is a simple and effective tool for extra traction. A centre diff lock will get you a surprisingly long way into the rough stuff, but if you’re wanting to get even further through difficult terrain, you need to fit lockable differentials in the axles themselves. That way, with centre, and front and rear diffs locked, you guarantee four constantly powered wheels.
The full setup probably falls to the wish lists of the keenest off-roaders chasing the greatest constant traction. In reality, fitting a locking diff in the rear axle provides sufficient extra grip in most cases. Continually rotating wheels provided by an axle diff lock means less inertia may be needed to negotiate an obstacle, reducing stress or risk of damage to the vehicle and driveline.
Here, we fit one of the simplest locking differentials, a Terrafirma E Locker. Being electrically controlled, the new diff simply replaces the existing one, and needs only electrical power to operate. A steady day’s work, it is easily possible to fit this on a DIY basis. Fitting is straightforward, helped with an understanding of setting bearing pre-load and perhaps experience with troublesome fixings that may be encountered.
It’s possible to do the job on a driveway provided the vehicle can be supported in a safe and stable manner firm, level ground, and that you are able to manhandle the diff out and back in. But the job is easier on a hydraulic lift, as Terrafirma’s Eddie Priscott shows by hiring a workshop bay with lift at This Is Your Garage, near Abingdon (thisisyourgarage.com).
We’re fitting the locker to the rear of a 2002 Discovery Td5 Metropolis, but the principles are the same, whether fitting front or rear, or to a Defender, or any other model listed in the Need to Know panel.
How the diff lock works
The axle differential is just one component inside the final drive unit, housed within the casing. It’s the link between the ring gear (to which it is bolted) and the two axle halfshafts. As standard, Land Rovers have open differentials in their axles, which always allow the axle halfshafts to turn at different speeds, for example when cornering. This is essential on-road, but it can create a problem in certain off-road conditions where traction is difficult.
Let’s imagine we have a Defender parked with the left side front and rear wheels on soft mud or ice, and the two right-hand wheels on dry track. Under throttle, drive would take the least line of resistance through the centre and axle differentials, and all the torque would go to the wheels on mud, which then spin without moving the vehicle. Even with centre diff locked, the torque would still go through each axle differential to the wheels on mud, which again spin without moving the vehicle.
A locking axle diff works by locking the drive across the pinion gears inside the differential unit, meaning drive goes to both halfshafts equally, and constantly. In our imaginary scenario on mud or ice, with a locking diff engaged in, say, the rear axle, both rear wheels would be driven equally, and the right-hand rear wheel on dry track would have traction and move the vehicle forward, regardless of the left wheel having no grip.
The Terrafirma E Locker uses an electromagnet, pushing pins to lock the four pinions. Flick the switch, and power goes to the electromagnet, engaging the pins. It is simple, but incredibly effective. Deactivate the locker via the switch, and return springs force the E Locker back to an open diff again.
Extracting the differential assembly

The kit: The Terrafirma E Locker differential unit simply replaces the standard (open) differential.
It’s supplied with a wiring harness, clutch locking bracket and dash-mounted switch.

Drain the diff: First, with a ½-inch drive, check the filler plug will undo. Once you’ve proved it does, then undo the drain plug, and empty the fluid into a catch tray.

Tight thread: Undo the drop link, then unbolt the bracket for the harmonic balance weights. The drop link thread is typically corroded. A dose of freeze spray encourages it.
Rear propshaft: Undo the fixings to the rear propshaft, then cable-tie securely out of the way, being careful not to pinch a brake line, nor ACE line, nor a height sensor (if fitted).

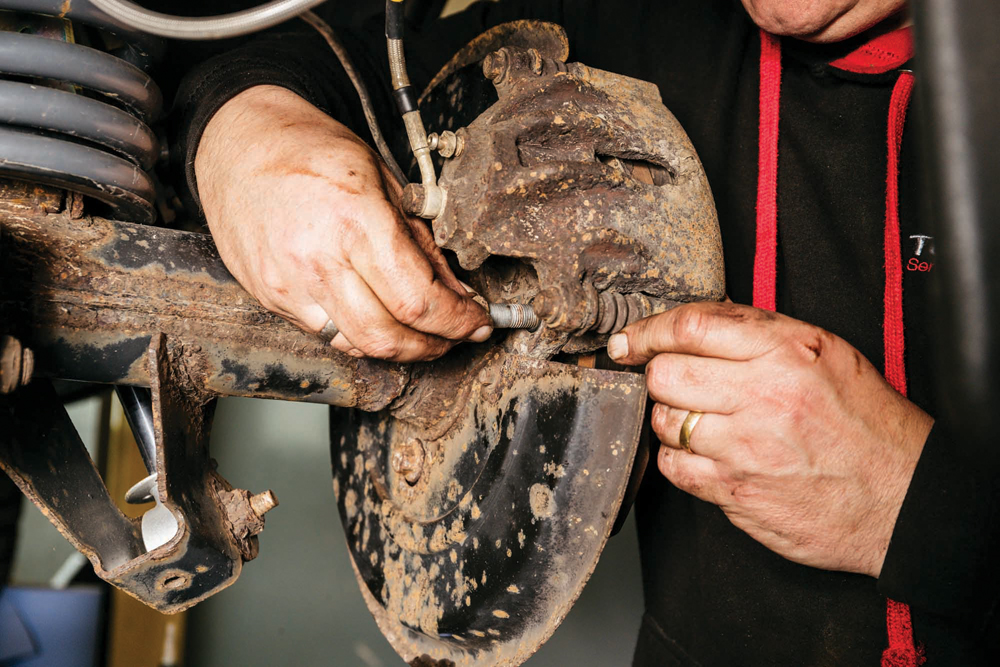
Driveshafts: Remove both rear wheels. To get the diff out, we need to disengage the driveshafts from the diff. We do that on a D2 by unbolting the hubs from the axle.
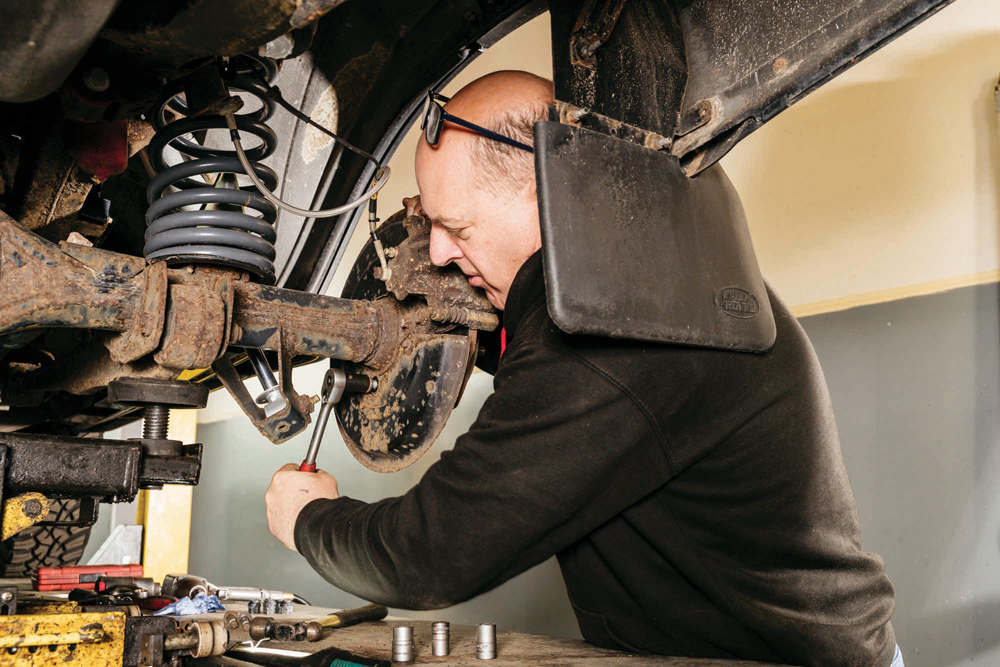
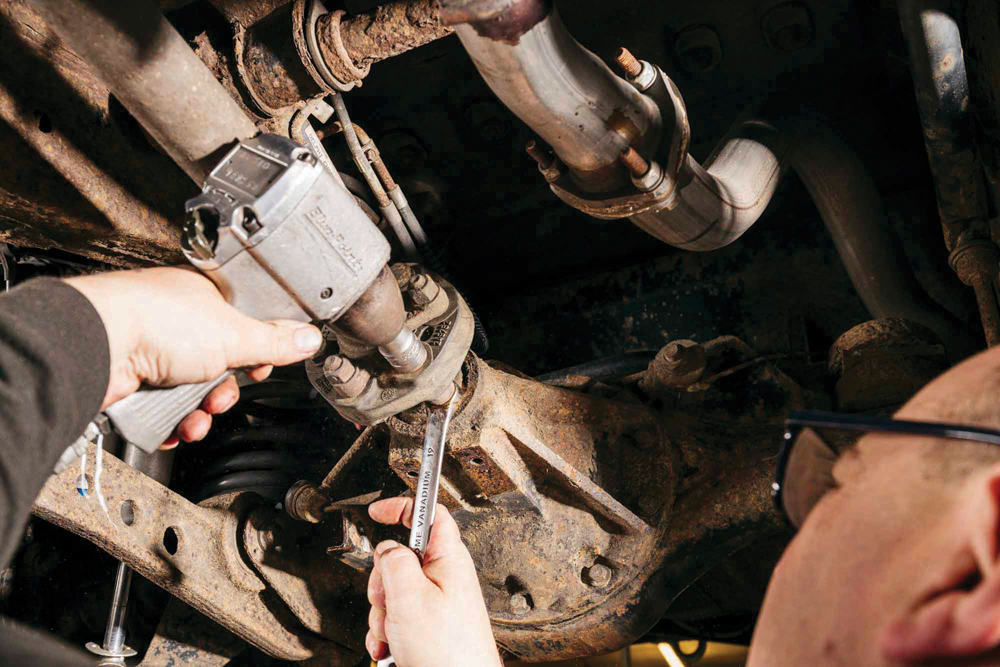
Hub nuts: The hub fixings are on the inside of the assembly. They can be stubborn, but normally come out. Use a six-sided socket, making sure it is well on the head.
Brakes off: Next are the caliper fixings. Use the correct 6mm hex socket and a breaker bar for control. They can round off. If they do, try the next size socket down.
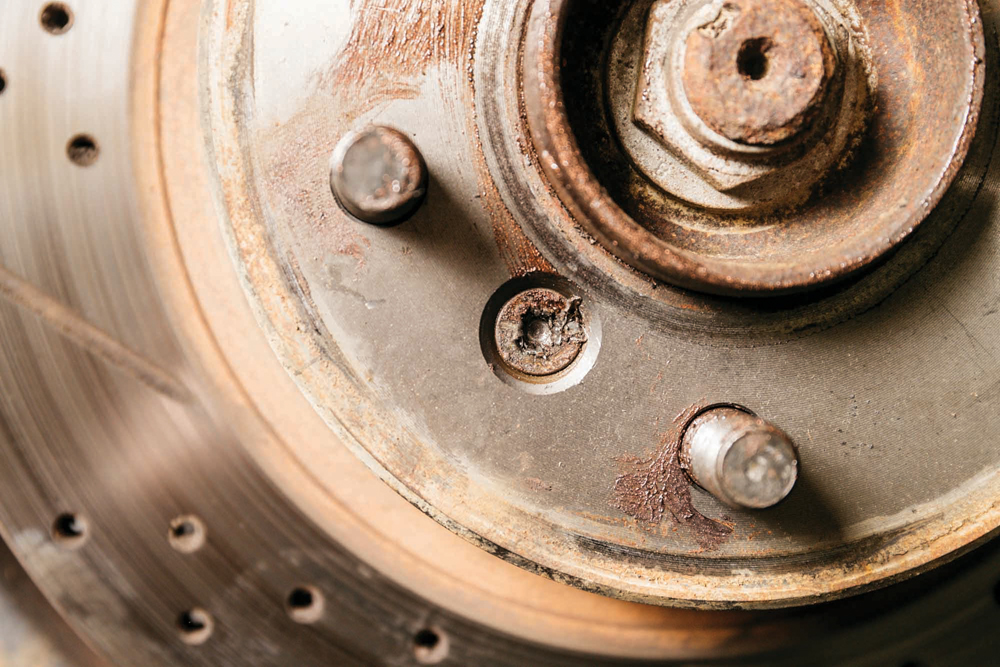
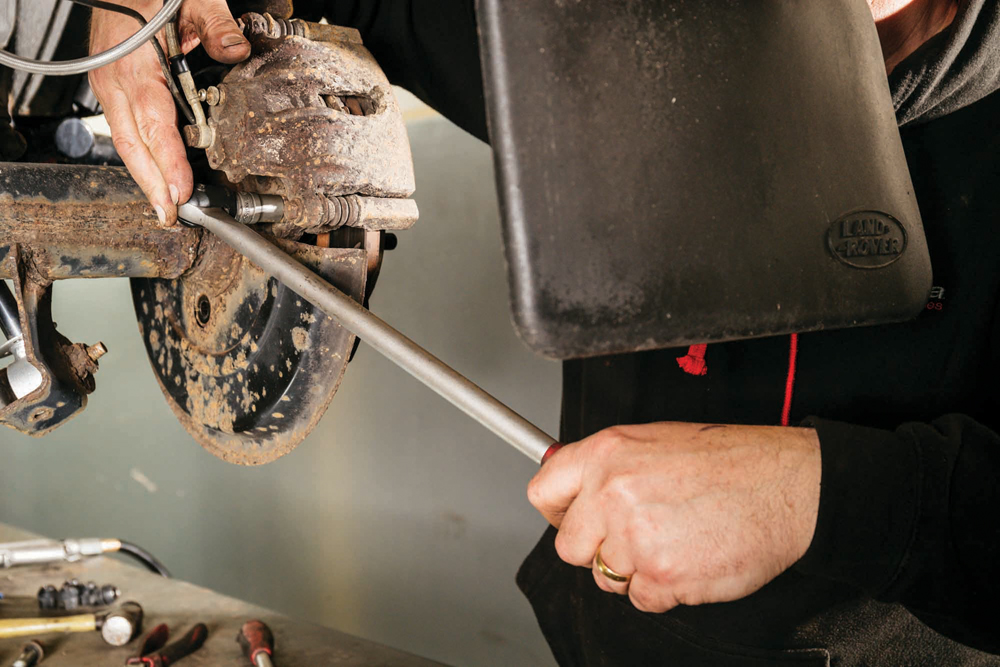
A classic problem: The brake disc comes off next. The single crosshead fixing can be rounded off. A whack with an impact driver usually persuades them. Replace if in any doubt.
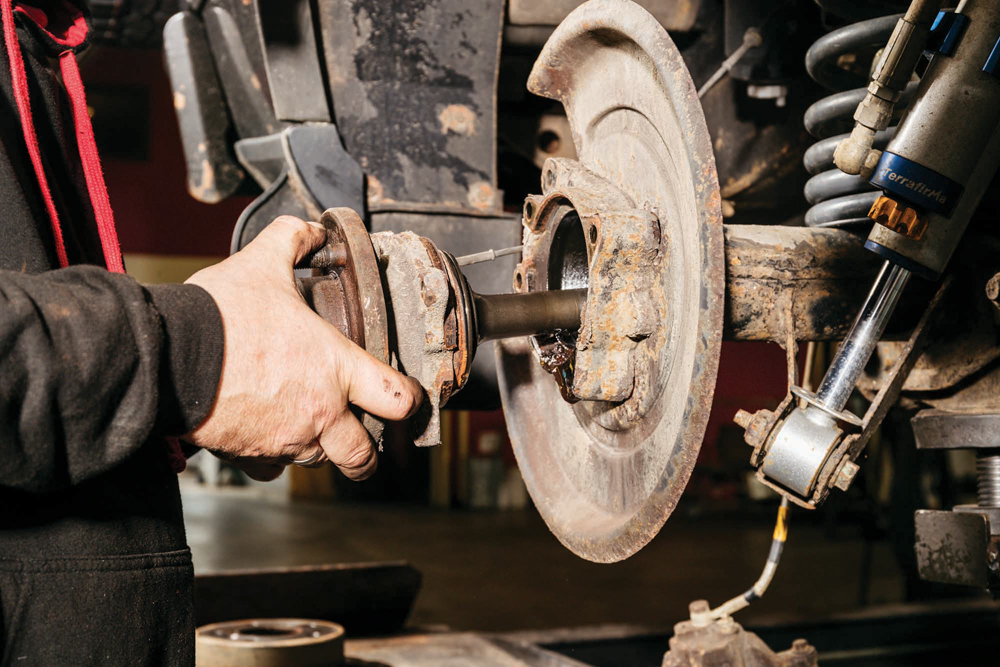
This far out: Carefully tap or pry out the hub from the axle. Once pried apart, pull it out just enough to disengage the splines from the diff. Don’t tear the rubber seal.
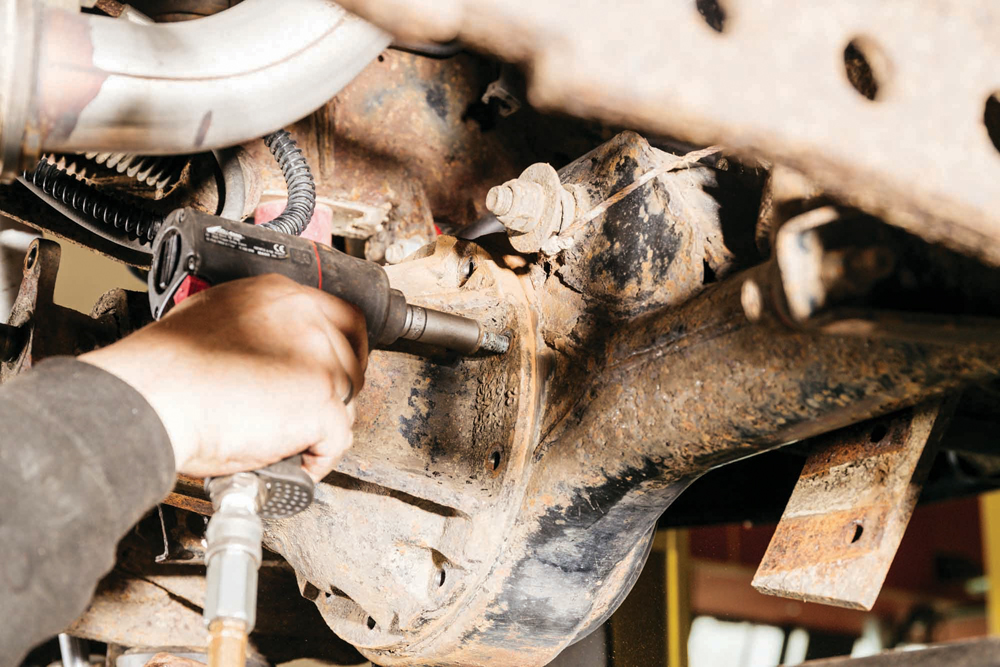
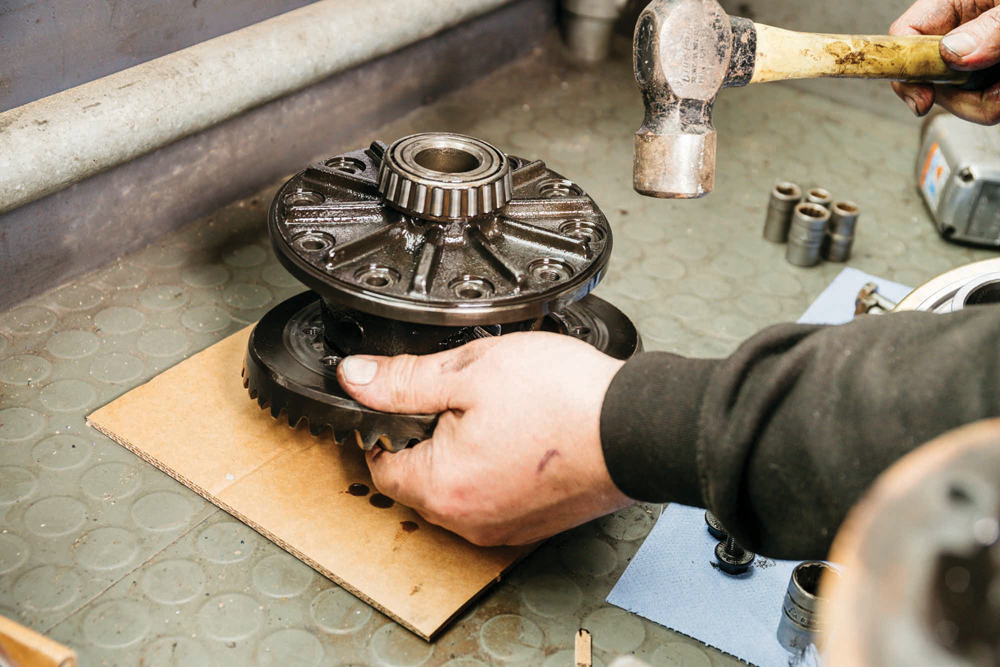
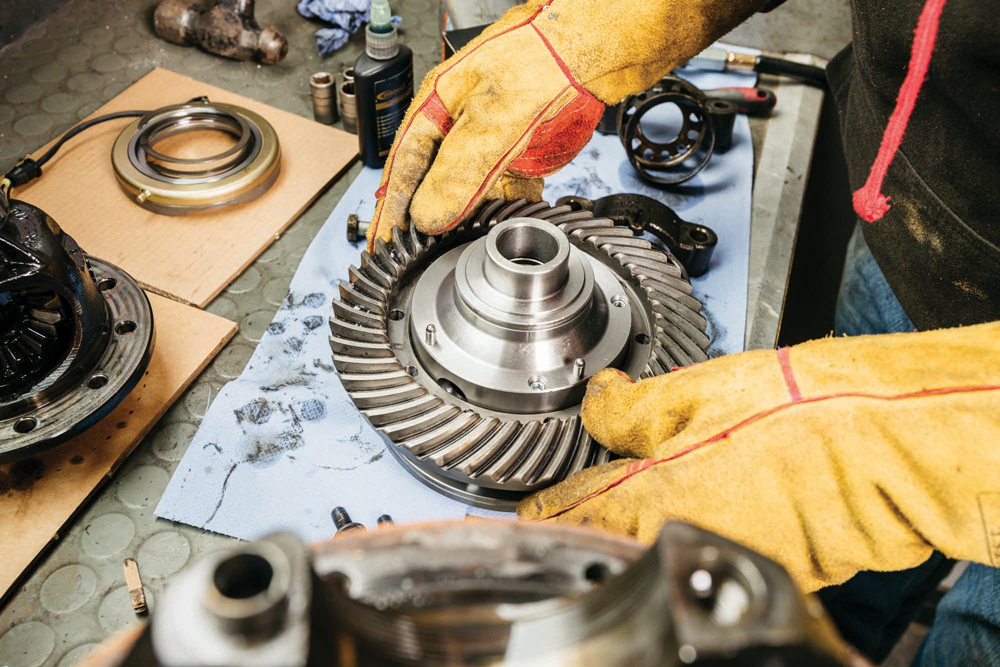
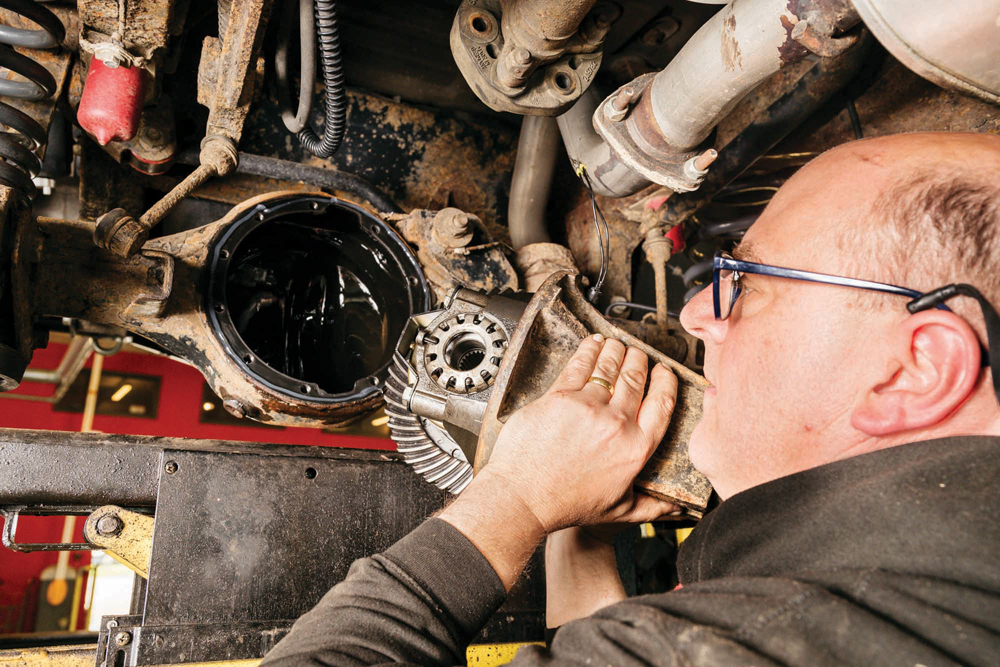
Repeat, then you’re good: Repeat for the other side, then you’re ready to get the diff out. Undo the bolts holding the diff to the axle casing. The diff is heavy. Be warned and be careful.

Take the weight: Use a helper if needed. When you’re ready, take the weight of the diff, and move it forwards. If it won’t move, you haven’t moved the driveshaft out enough.
Fitting the locking differential
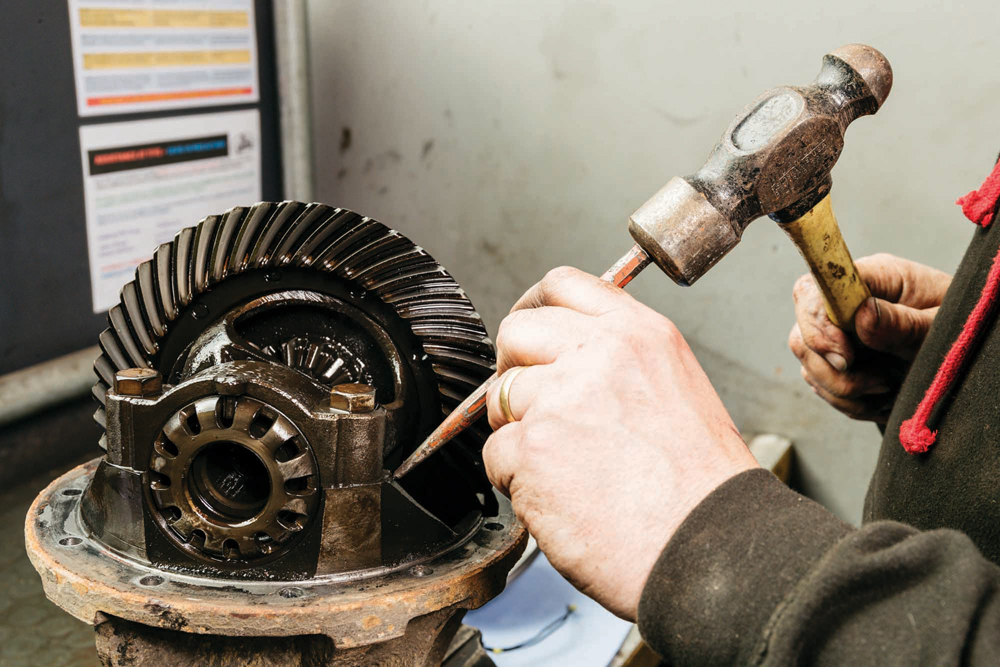
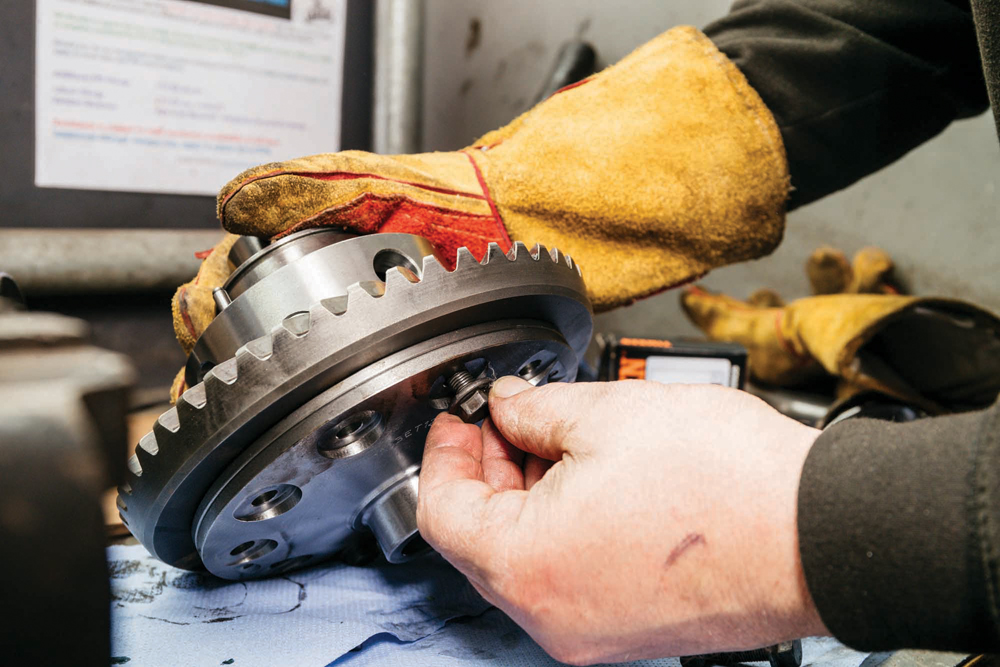
On the bench now: With the final drive assembly secure in a vice, we first mark the bearing caps. They’re side-specific, so punch identifying marks on the carriers and caps each side.
Caps off: Remove the caps, and tap the locking spring pin (top centre) outwards, flush with the cap face, ready for refitting. Take care not to damage the pin.

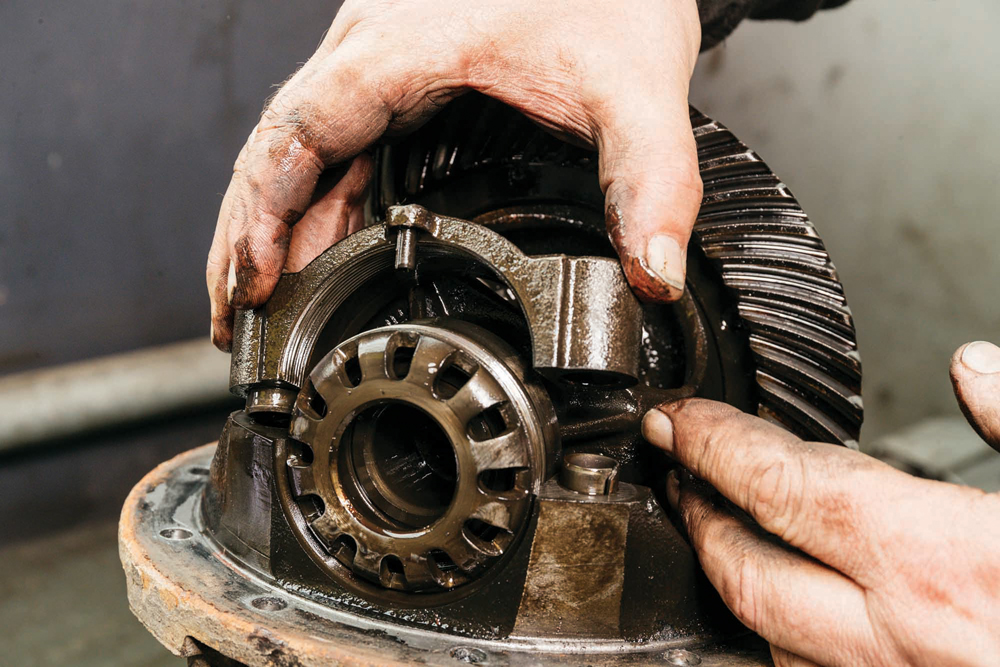
Outwards and onwards: The assembly lifts out of the carrier. The differential is the only part we’re replacing, splitting it from the large ring gear. There’s a trick to that though.
Undo, tap: Undo the bolts, then tap the ring gear off the diff. That tap is because it is a tight fit which, you might realise, throws up a problem refitting it.
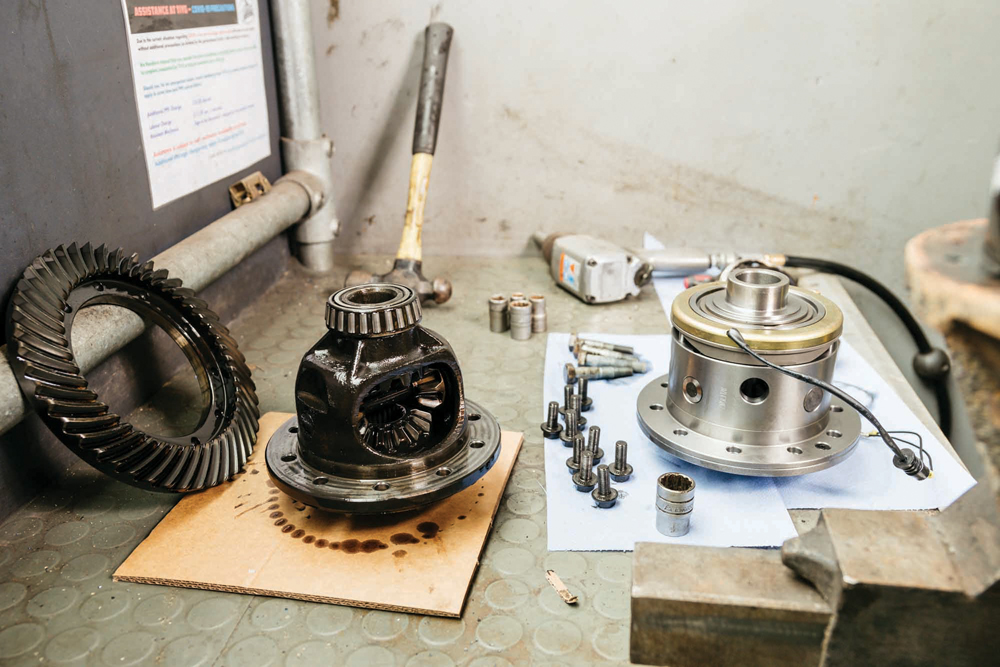
Money shot: Old and new. You can see the locking diff is a straight swap, plus power feed. The ring gear won’t yet drop onto the new diff though.
Wear eye protection: First we remove the electromagnetic clutch, held in place by a belleville spring. Ease out the end with a screwdriver, then rotate it off and remove the clutch.
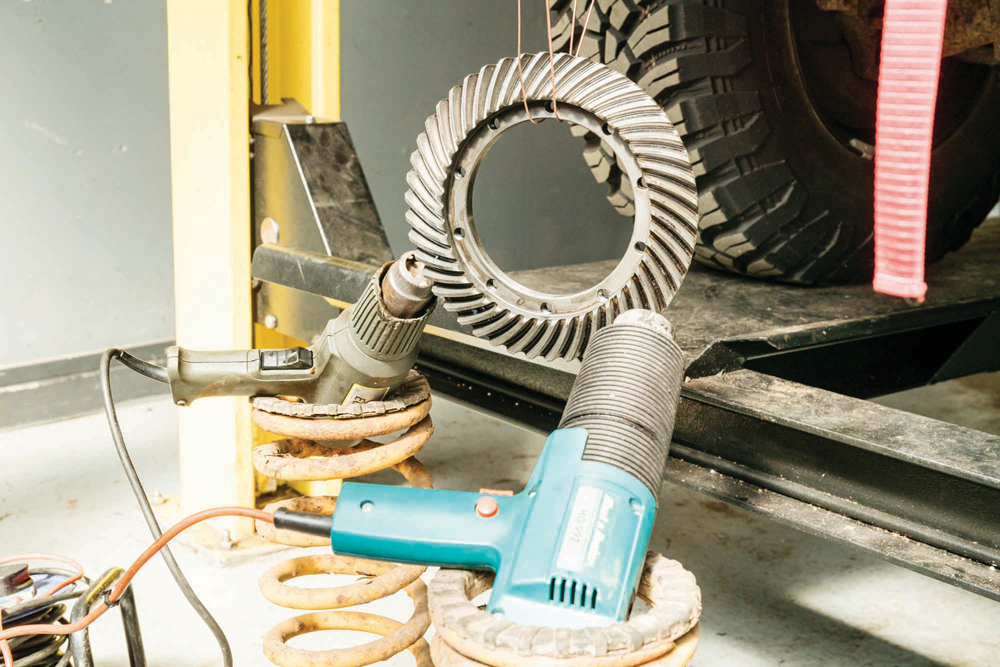
Interference fit: Clean off the ring gear with brake cleaner, dry it, then heat it up. This expands the gear enough to aid refitting. Two heat guns and 15 minutes does the job.
Hot stuff: Having cleaned the fixing bolts and applied thread lock ready to refit – and donned welding gloves – drop the ring over the diff. This one goes straight on like a charm.
Cool it: Allow to cool as the heat dissipates into the new diff, then refit two opposing bolts to the ring gear, so it fixes squarely. Refit the remaining bolts, torquing to 70Nm.
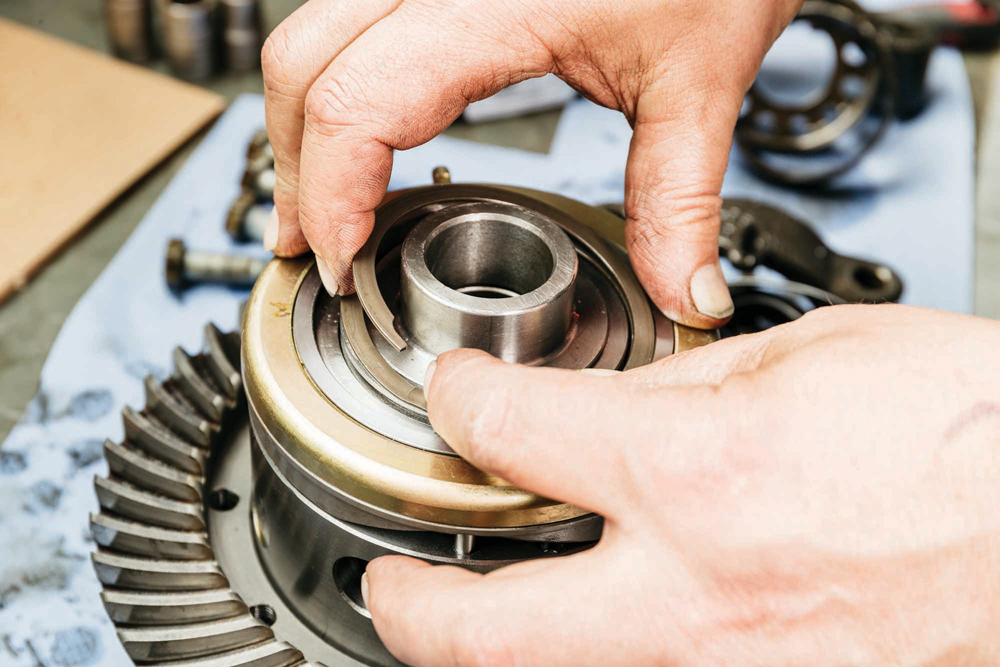
Now the clutch: Refit the electromagnetic clutch, then secure by refitting the belleville spring. Ease it into the securing recess, then work around. That’s the diff almost ready.
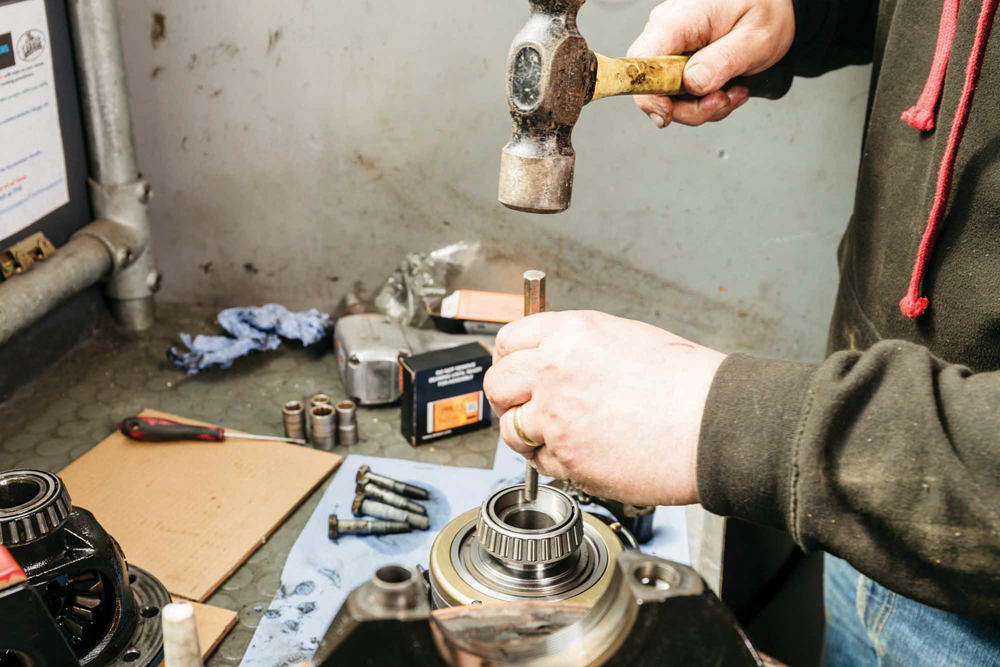
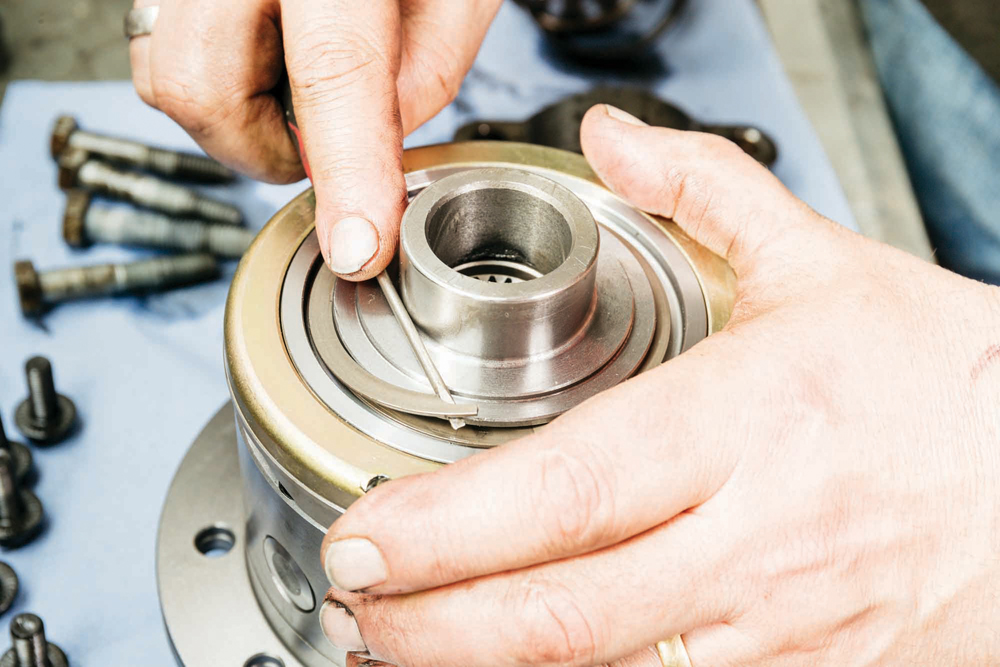
Bearing down: New bearings are best practice, as is choosing a quality brand. Tap them on, working them down with a hammer and soft punch, tapping in the centre.
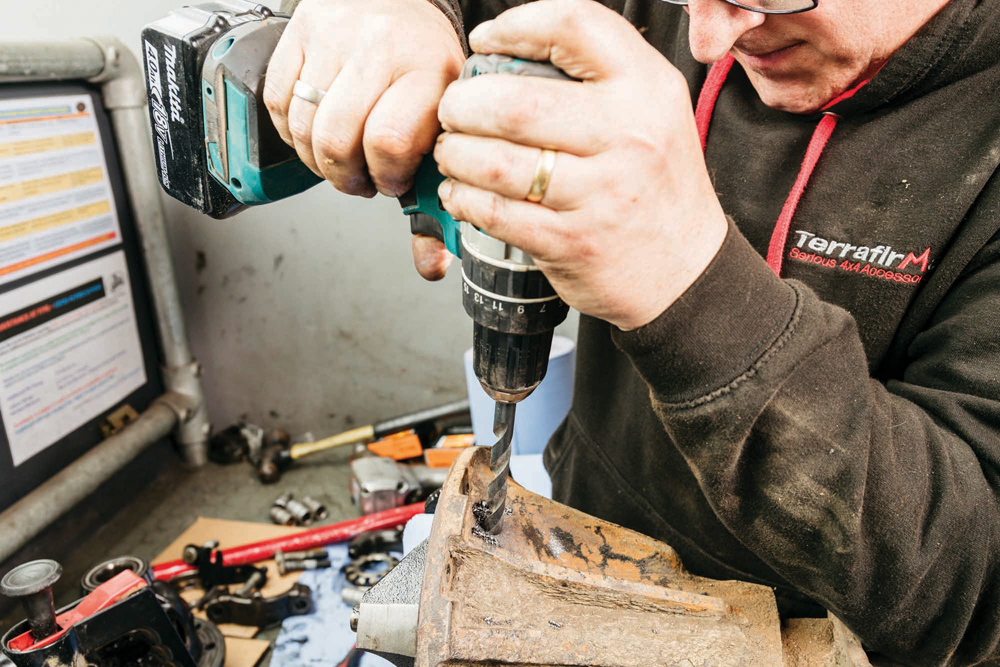
Hole on top: The casing needs a 12mm hole for the power supply. Use centre-punches, then drill a pilot hole, re-drilling steadily larger to get to the 12mm required.
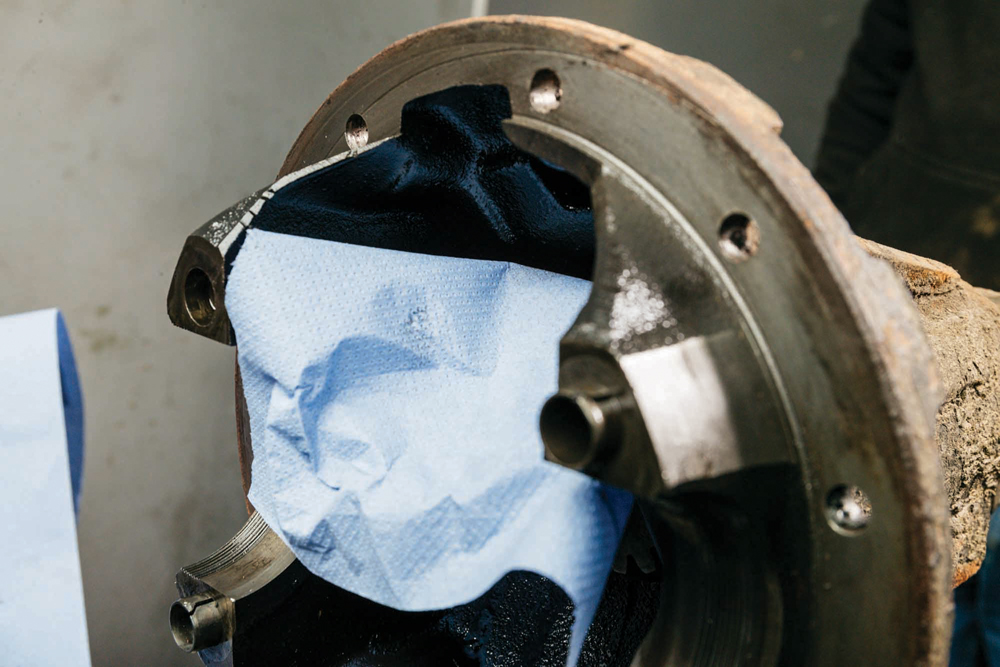
Keep it clean: While drilling, we don’t want any swarf inside the casing. You can use a paper wipe to catch the swarf, but ensure all traces are removed.
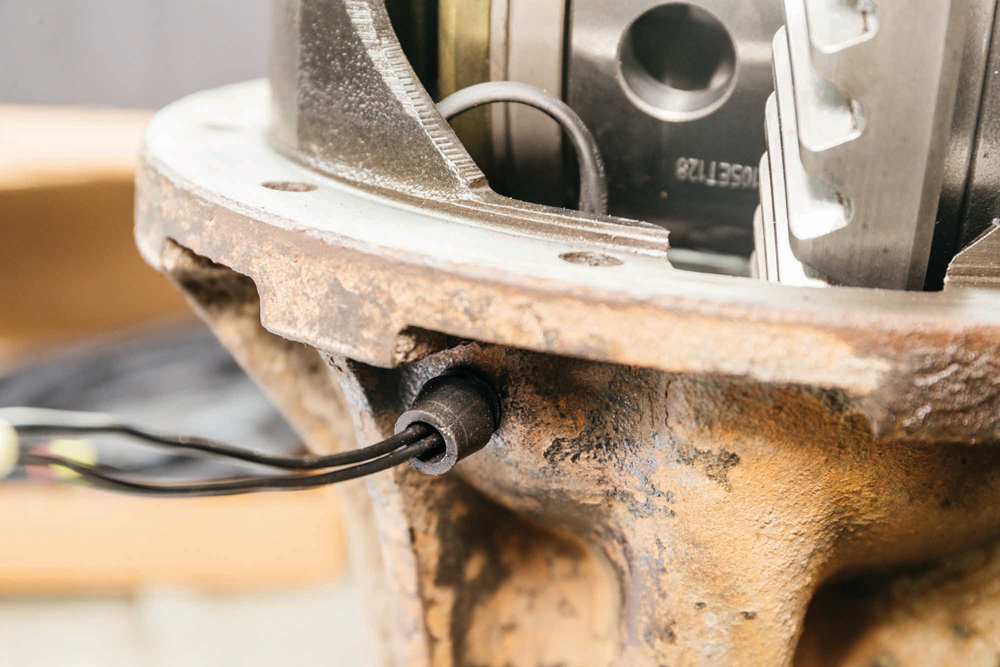
Fill the gap: Feed the wiring through, and fix the grommet into the new hole. It might be tight; encourage it but don’t tear it. A drop of silicone seals the centre.

Building up: With all parts thoroughly clean, lower the new diff with crown wheel onto the casing bearings. Next, the bearing caps are seated, but not bolted down.

Setting backlash: Set pinion backlash by tightening the bearing adjuster by feel (officially 0.10mm using DTI), then tap the lock pin down. Clutch locator bracket goes under bolt heads.

Job done: After a final check, the bearing cap bolts are tightened to a torque of 85Nm. We’re now ready to refit the locking diff assembly to the axle casing.
Refitting the diff assembly
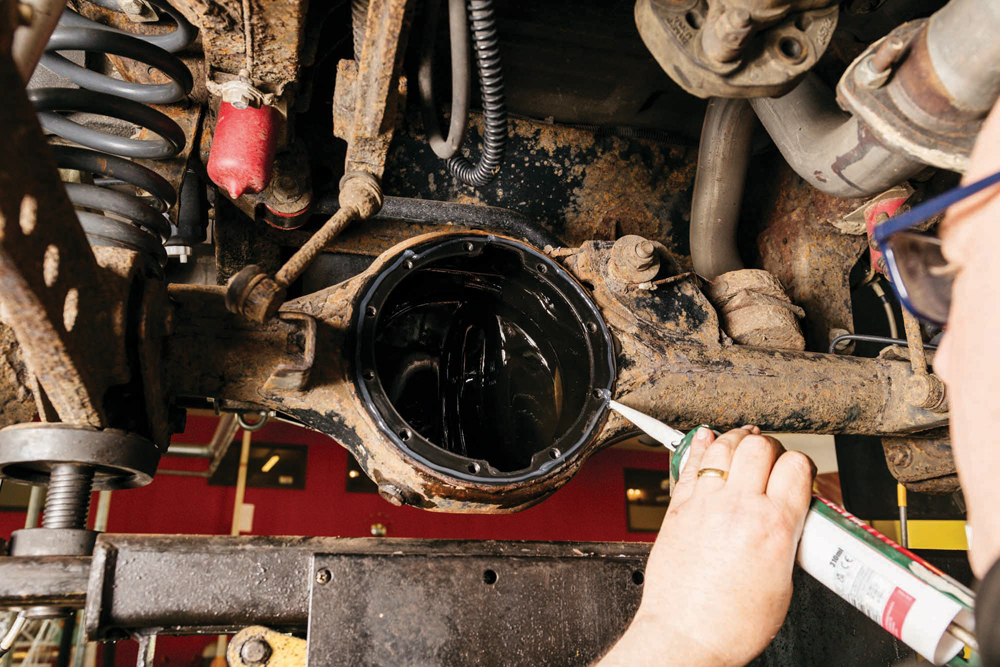
Facetime: The axle casing’s mating face is wire brushed clean, then wiped spotless. A generous bead of silicone is laid outside the fixing holes, ready for the diff.
Up and in: The assembly is weighty, so with good purchase on the unit, lift it up and guide it steadily into position on the axle. A handy fixing bolt is useful.

Fixings: The joint is bolted down, then the propshaft, harmonic balancer and drop link are refitted. Fill the unit with oil, and that’s the dirty bits finished with.
Reverse of removal: Refit the hubs, brake discs, calipers and road wheels. A dab of thread lock on hub and brake fixings is good practice. Not on the wheel studs, though…
Connecting the electrical system
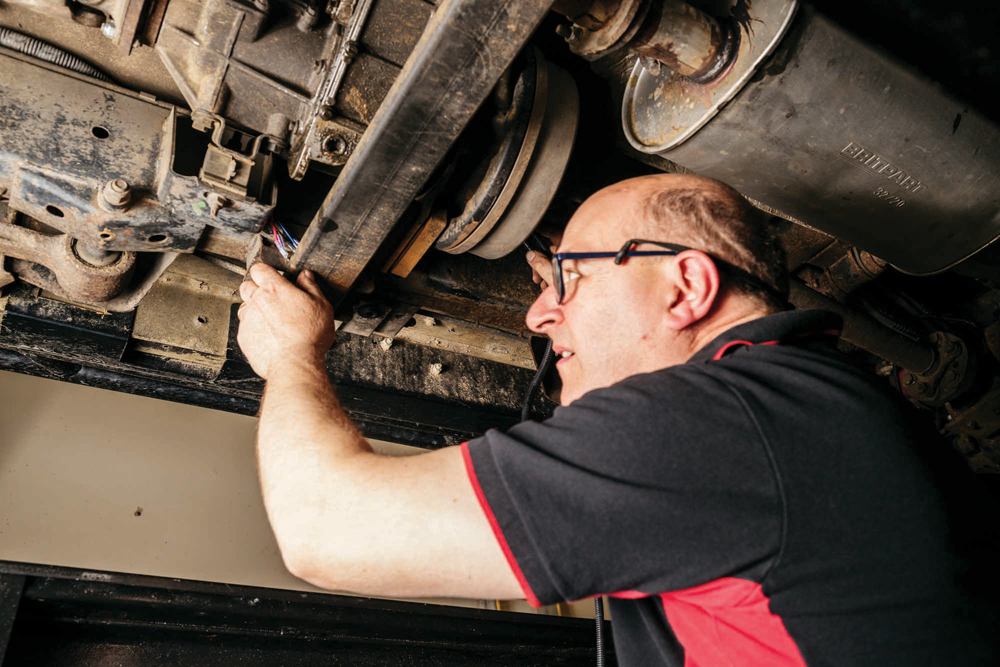
Electrics next: Connect the loom to the diff, then thread it forward on top of the chassis rail, secured from anything rotating or hot, then inside through a bulkhead grommet.
Into the cab: We need an ignition live feed, a feed to illuminate the switch, and an earth. The harness is led up into the Discovery’s fusebox for connection.
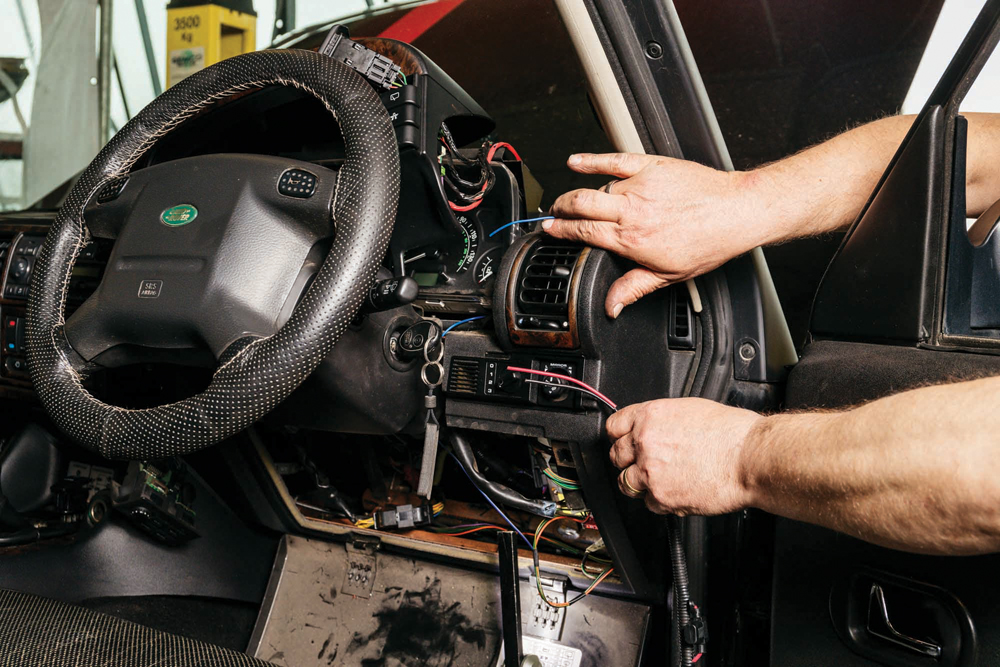
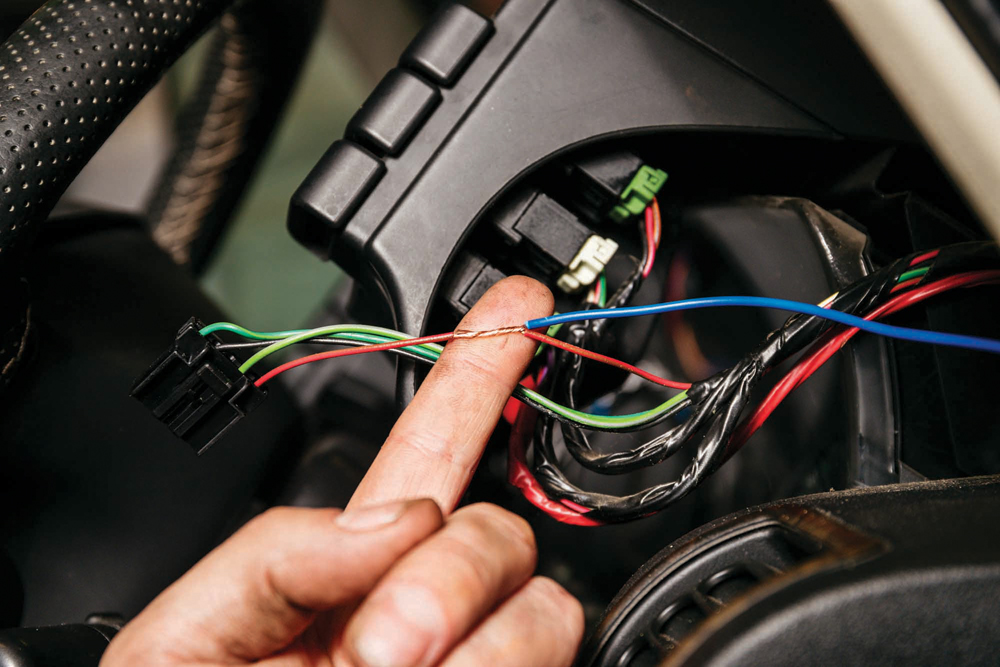
Lesson in neatness: Adam Luckett, of VolksTechnics jumps in to connect the electrics, showing how the pros do such jobs. A few minutes with a meter, and suitable feeds are confirmed.
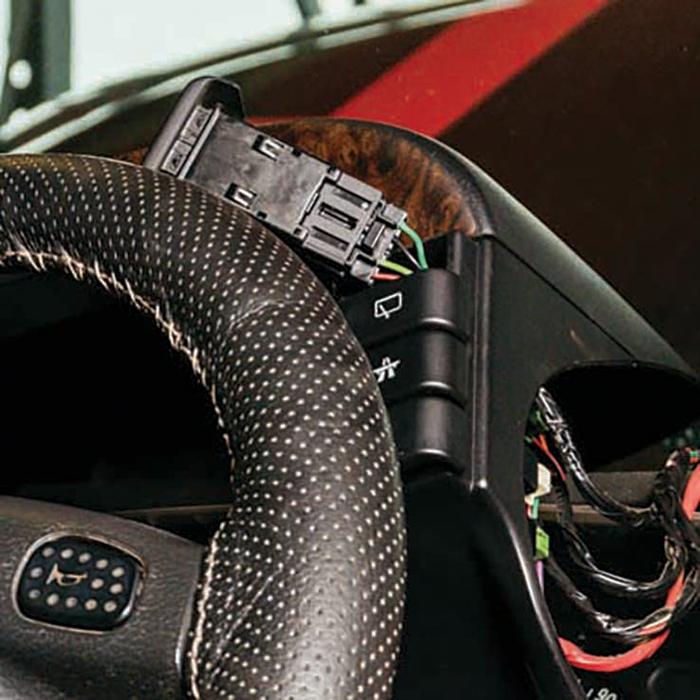
Lighting supply: Illumination for the diff lock switch is taken from the illumination supply for the rear wash/wipe switch on the binnacle (live when the driving lights are on).
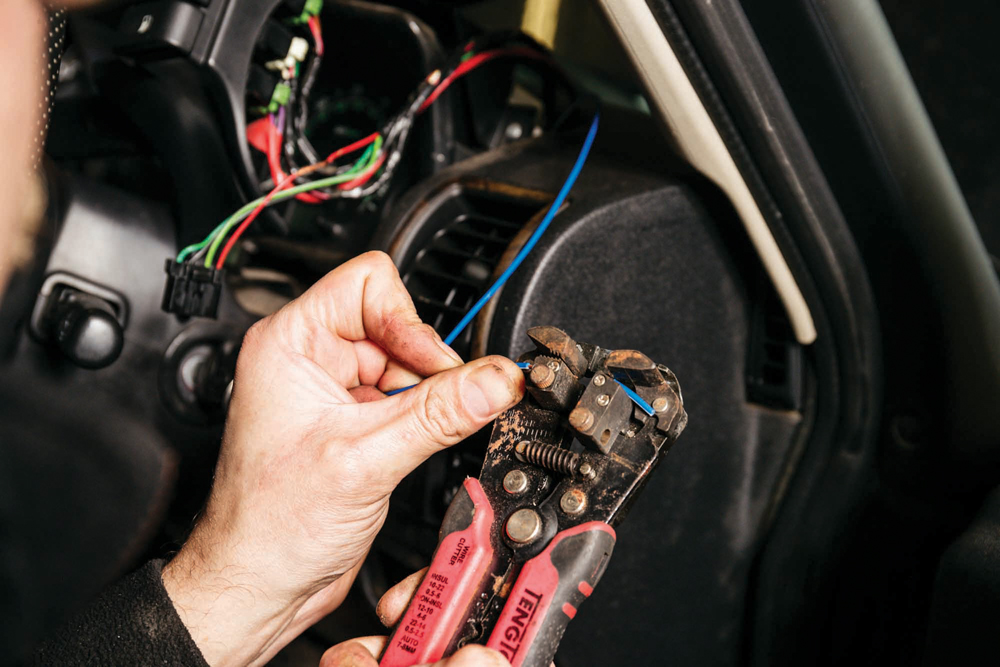
A neat splice: Splice into the binnacle wiper switch cable for illumination feed. Insulation is striped, and a lineman twist mechanically joins wires prior to soldering.
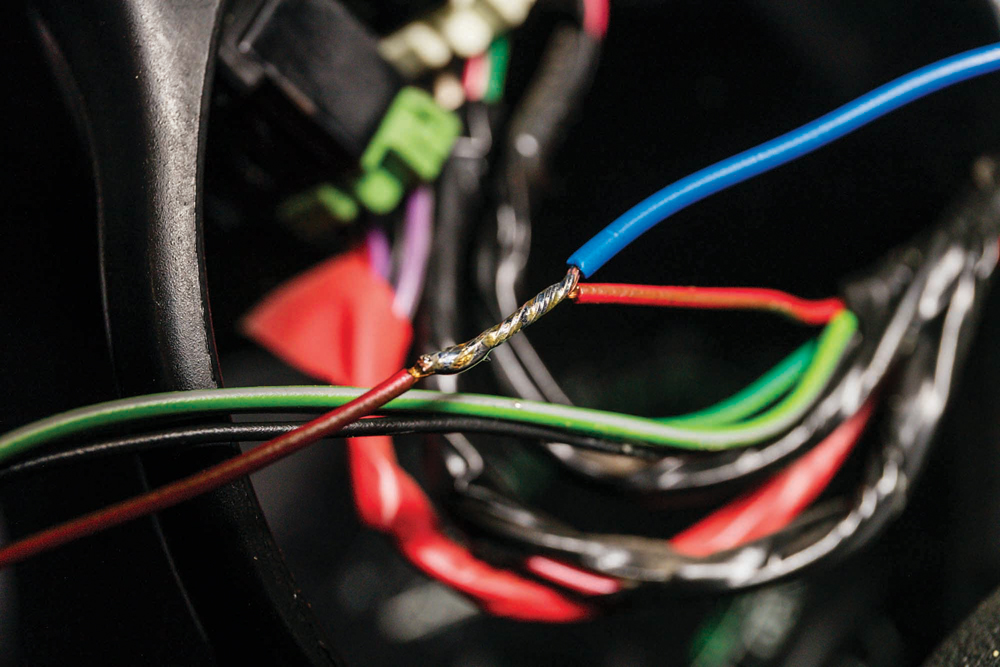
Lovely job: A dab of solder, and a solid, reliable and safe joint is made, ready for insulating. This won’t vibrate, rub or separate. Are your solder joints this neat?
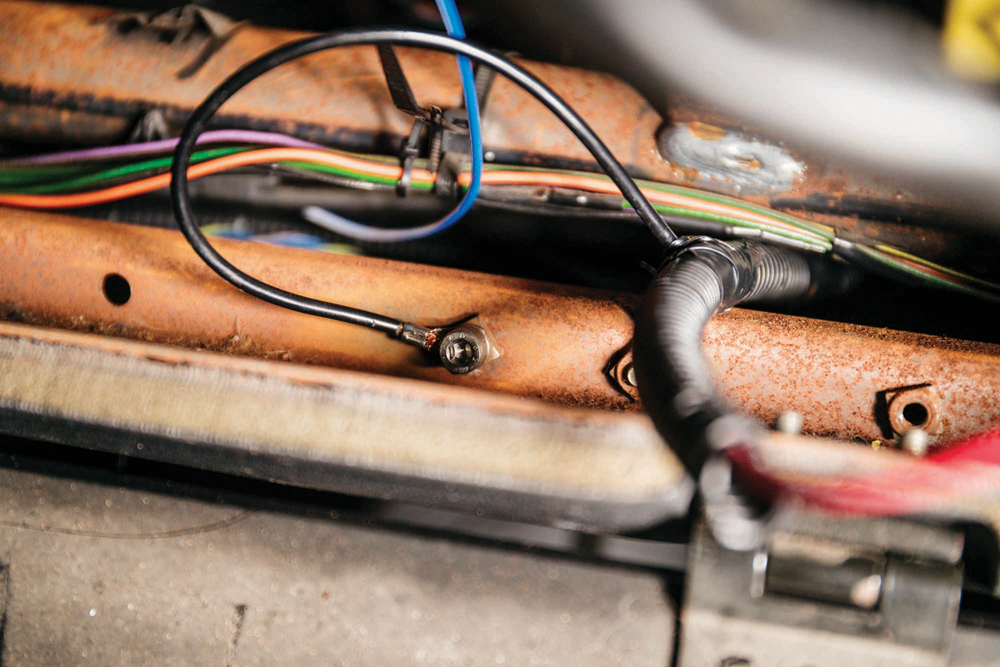
Live and earth: A vacant threaded hole is found to bolt the earth cable. An ignition live between fusebox and ignition switch is chosen for the diff’s ignition feed.

Testing: When connected, the switch illuminates with the lights, and powers with the ignition. To test the diff lock, jack a rear wheel, engage diff lock and it shouldn’t be possible to rotate the wheel by hand, or – Eddie Priscott’s preference – engage the diff and drive in a tight circle on a loose surface: you should feel the inside tyre scrubbing.
LIKE TO READ MORE? Try our Budget Digital Subscription. You'll get access to over 7 years of Land Rover Monthly – that’s more than 100 issues plus the latest digital issue. The issues are fully searchable so you can easily find what you are looking for and what’s more it’s less than 10p a day to subscribe. Click here to find out more details and start enjoying all the benefits now.