


27 January 2024
|
 Characteristic cracks from weight of spare wheel
: credit: © Trevor Cuthbert
Characteristic cracks from weight of spare wheel
: credit: © Trevor Cuthbert
Tail door frames can crack under the weight of the spare wheel, and corrode outer panels, so you may need to fit a new door. Here’s how
Need to know
Time: Around 5 hours
Cost: £353.60
Difficulty: 2 out of 5
Models: Series II, IIA, III, Ninety, One Ten, Defender.
Tools needed: General workshop tools, drill and drill bits, hole saw and metal file.
Parts and costs: Galvanised safari door, £270, BLRC Ltd; rear door glass, heated, MTC8951, £68, BLRC Ltd; butyl seal putty tape, black, 3x19mm, £15.60.
Work safely:
• Get assistance for handling heavy components.
• Wear eye protection when drilling and using a hole saw.
Contact: BLRC Ltd, Tel: 02897 511763, blrcvehiclespecialist.co.uk
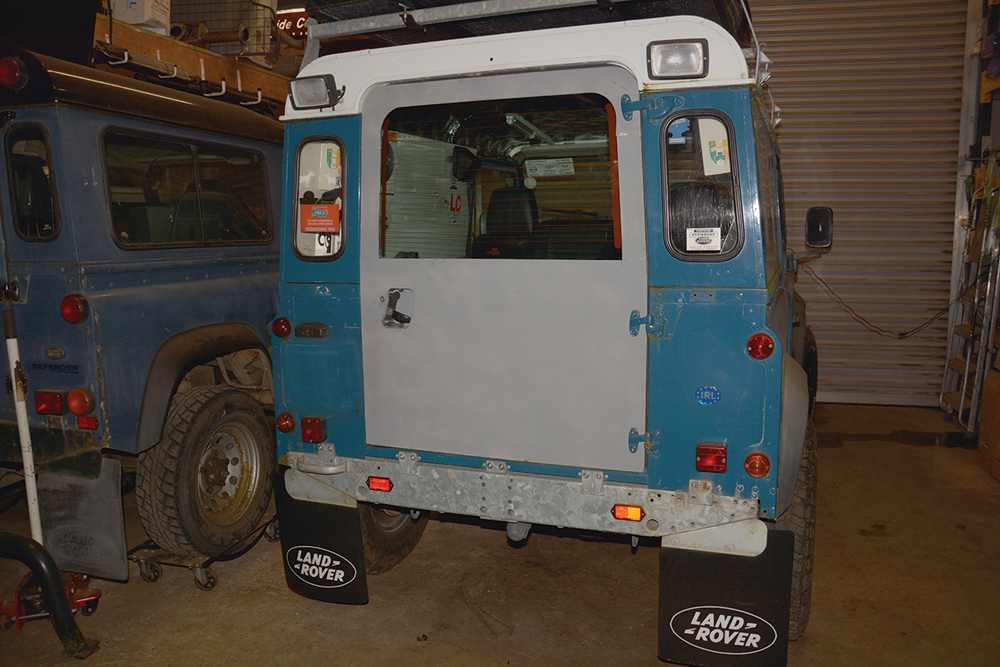
The rear door on early utility Land Rovers and Defenders is known as a safari door. The design remained little changed from the Series II, through Series IIA, Series III and up to the Defender of 2002. In 2002 the design and construction of the safari door changed to a one-piece construction, although the physical size of the door and the gap that it filled remained unchanged.
Just like the front doors of a Land Rover, the safari door is prone to all the rigours of everyday use. They are generally working vehicles and can suffer dents, scratches, corrosion and impacts such as from stray jockey wheel handles and the like.
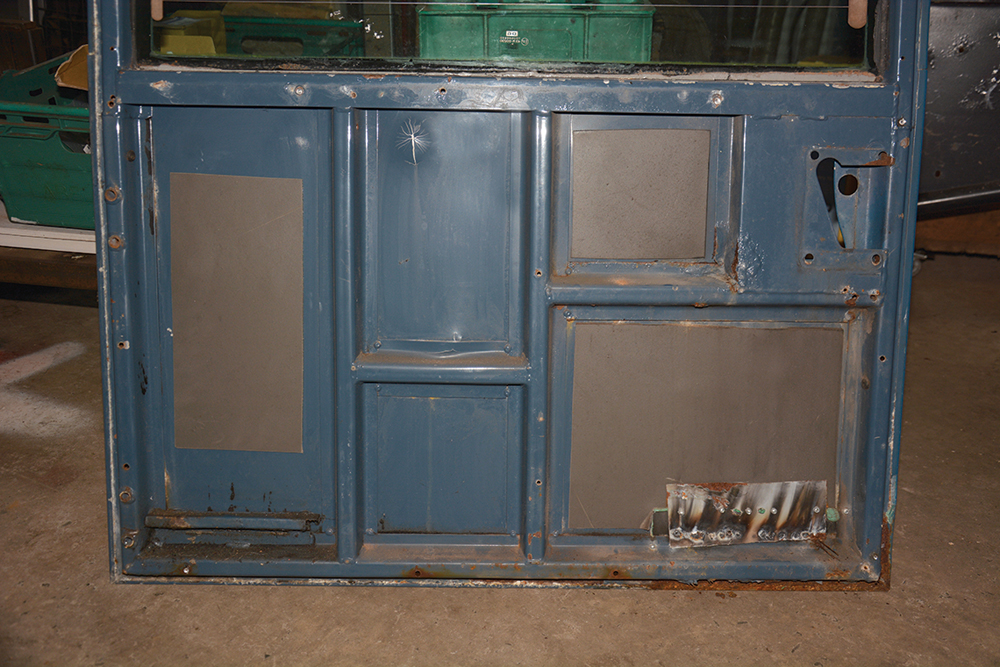
Another issue with the safari door, particularly the pre-2002 design, is fracturing of the inner frame because of the weight and vibration of the spare wheel mounted directly to the door. The fracturing will be seen on the inside of the lower window frame, and when it appears here you can be sure the inner frame (hidden behind the door card) will also be breaking up.
The good news is that a safari door is not particularly expensive compared with the cost of a front door, and is easy to replace. So if your safari door is suffering from any, or all, of the issues above, you can bring your Land Rover back to its former glory without too much pain. Please note that the owner of the Defender shown here opted for a more costly galvanised door.
I like to dismantle any assembly as far as possible while still on the vehicle. This has a number of benefits – mainly lightening the structure by the time it comes to lifting it off. But it is also held firmer and more stable in situ for dealing with any stubborn fixtures and fittings. With that said, even a fully dressed safari door is not particularly heavy, so you can remove it before strip-down if you prefer. Whichever method is chosen, it will be necessary to remove all of the parts from the door that are going to be refitted to the new replacement item.
Removing the old door
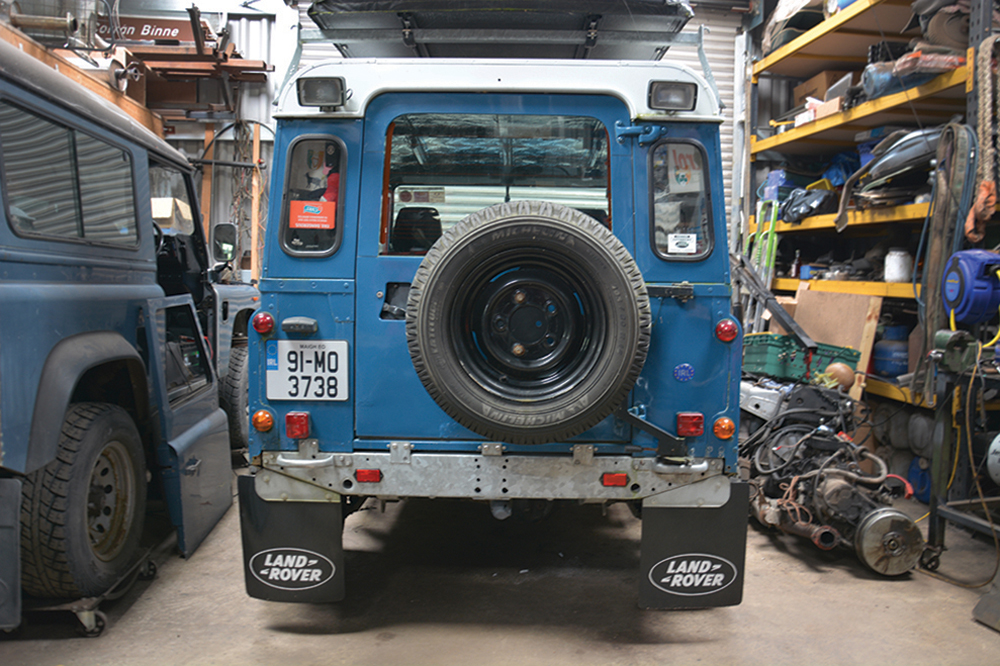
Only skin deep: At a glance the safari rear door looks to be presentable and is functioning okay, but under the skin there lurks multiple issues which the owner wants gone.
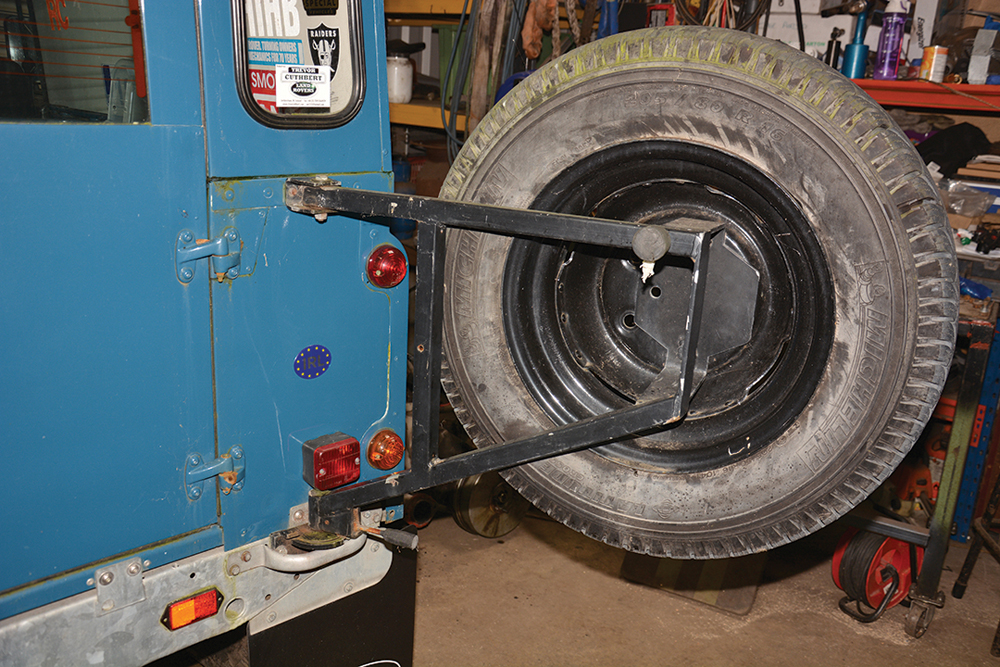
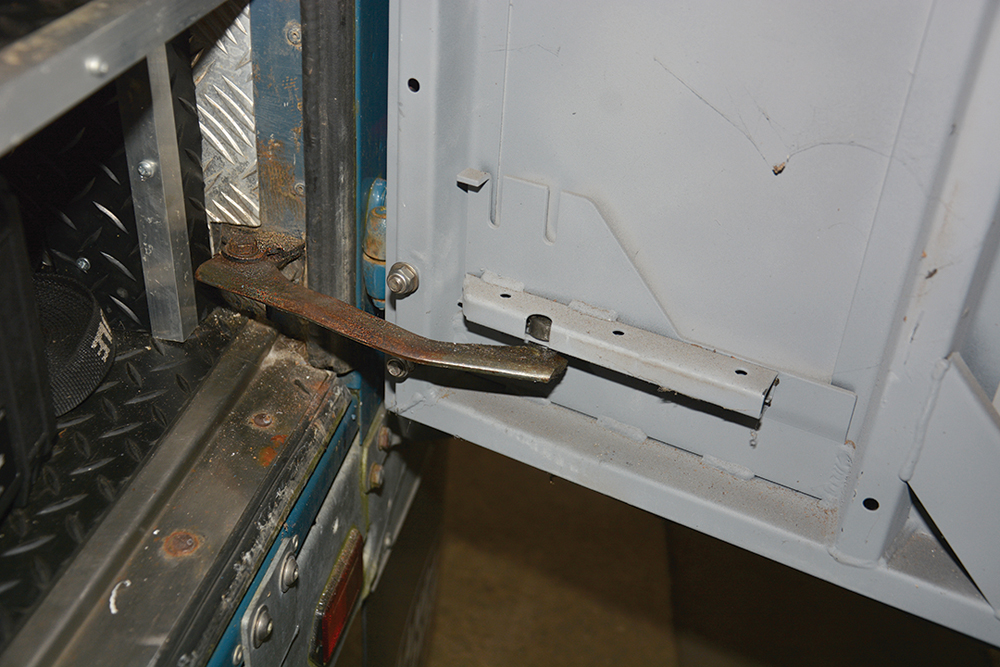
To be replaced: This damaged swing-out spare wheel carrier mounts on the body, rather than the door. It rubs against the lower door hinge, is not strong enough, and it vibrates.
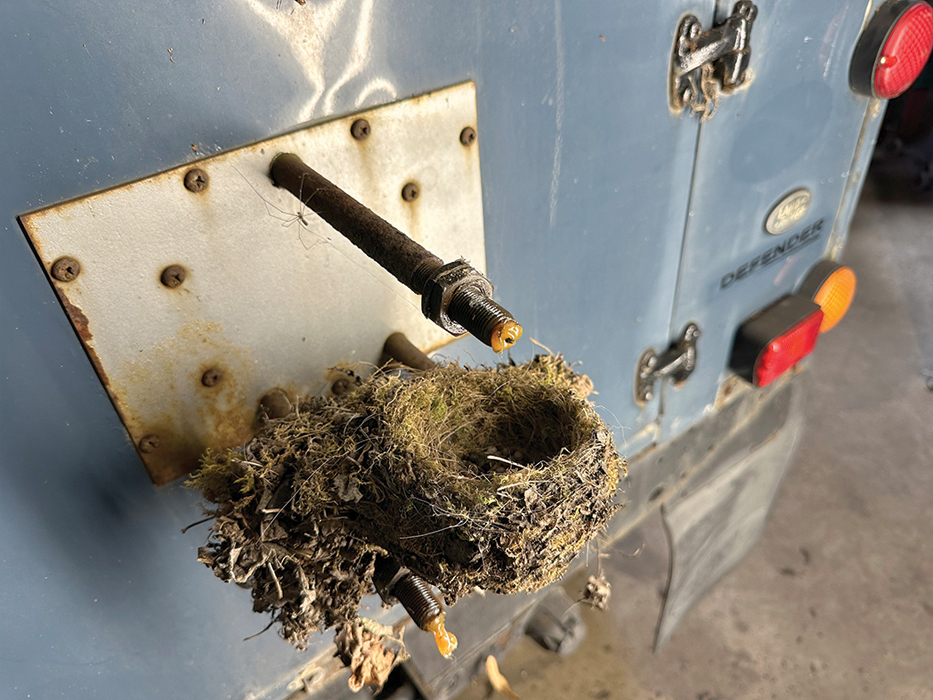
Factory fitment: This standard spare wheel carrier is more common, but the weight of the wheel and tyre can crack the door frame. The bird’s nest was a surprise.

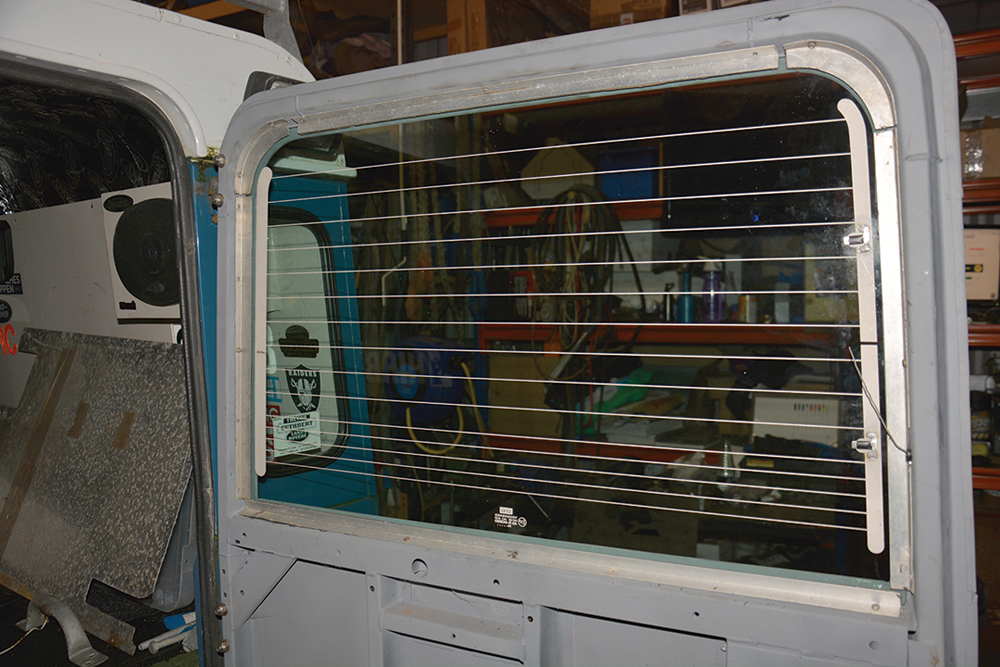
Old school: This type of rear door, fitted up to 2002, has a set of aluminium strips that secure the window glass to the frame, held by self-tapper screws.

Belt and braces! After removing the screws with a Pozi #2 screwdriver, the lower aluminium strip is removed. This one needed persuasion, as it was also glued in place.

All the way around: Likewise the side strips, top strip and the curved corner pieces are all removed by taking out the screws and gently prising them free.

Easy access: The rear door lock assembly is held in place by four fixings. The two top screws were the first to be removed, from inside the door.
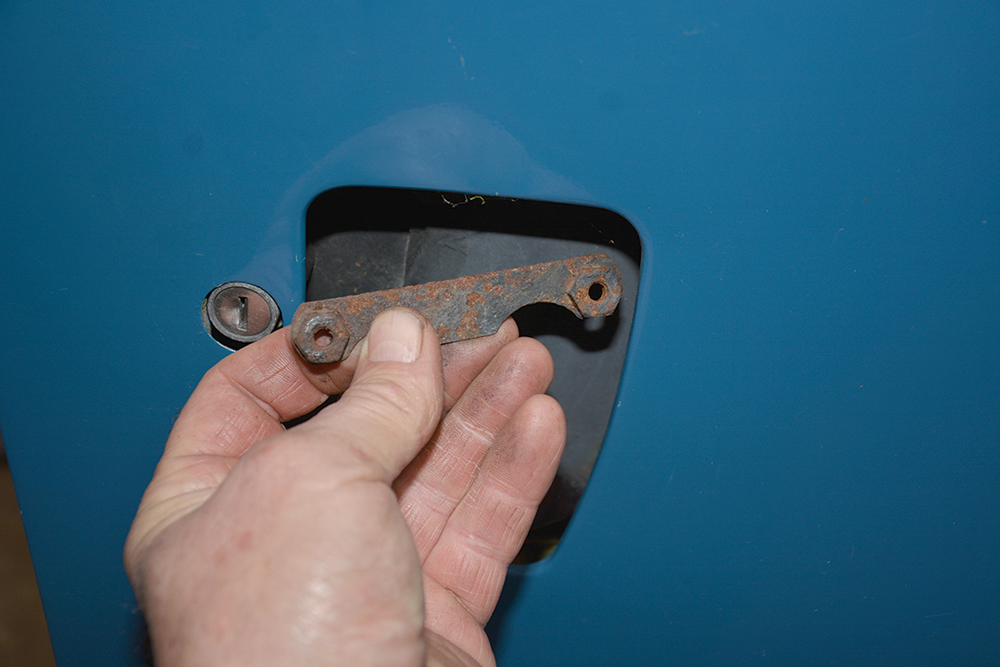
Very convenient: The top screws had been in this captive nut plate, which now drops out of the door at the outside. The lower fixing is a stud plate with M6 nuts on the inside.

Twist and pull: The door lock assembly is now eased out of the door handle recess carefully, taking the gasket with it, as with luck this may be reusable.
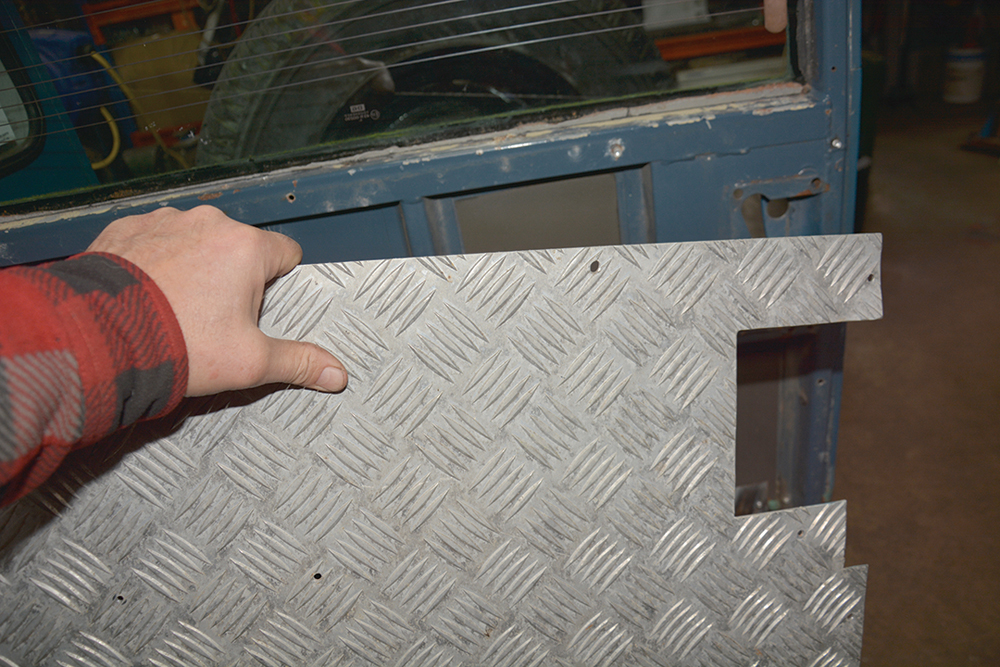
Trim tool not needed: The inside door card has been replaced with aluminium chequerplate, riveted on. The rivets are drilled out to remove the panel, exposing any wiring.

Damaged elements, too: The only electric cable present on this particular door ran to a fractured terminal at the window glass, for the heated rear window.
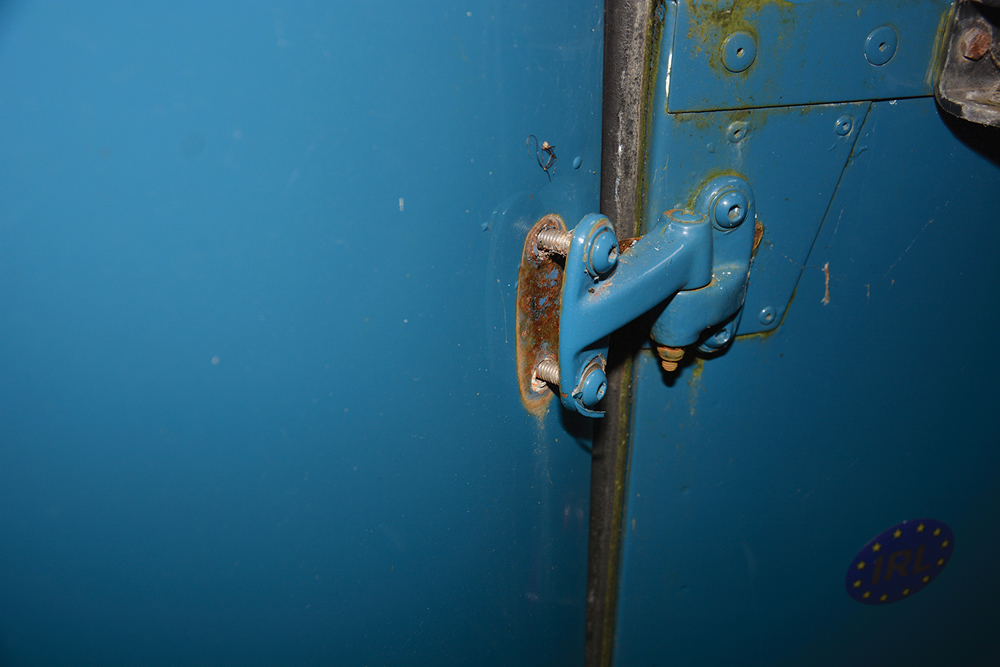
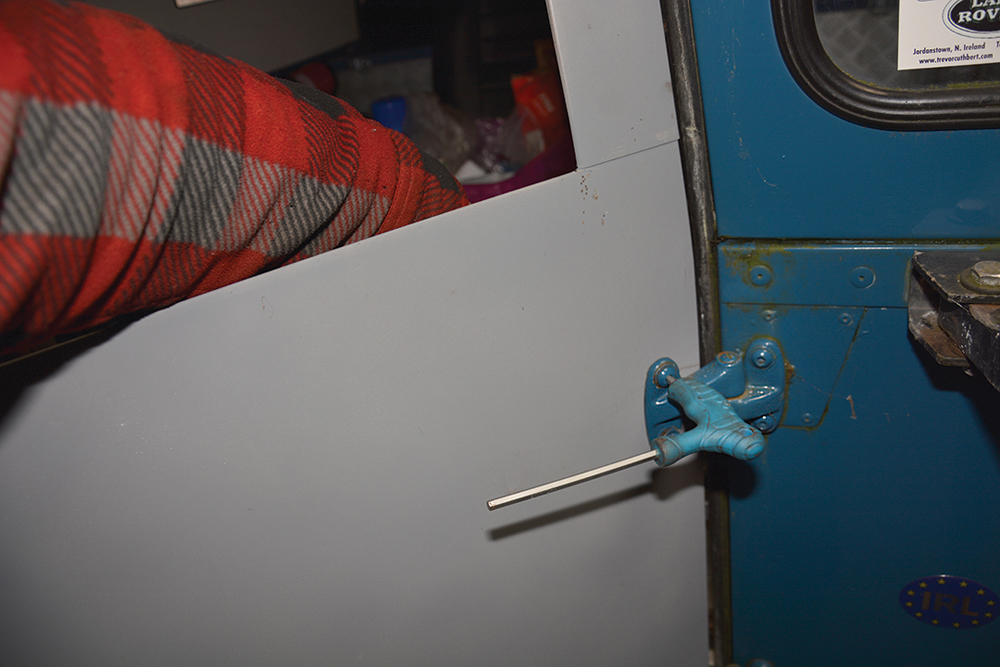
Easy removal: The door check-strap is unbolted from the pivot bracket on the rear of the body and slid out of the runner, for reuse in the new door.

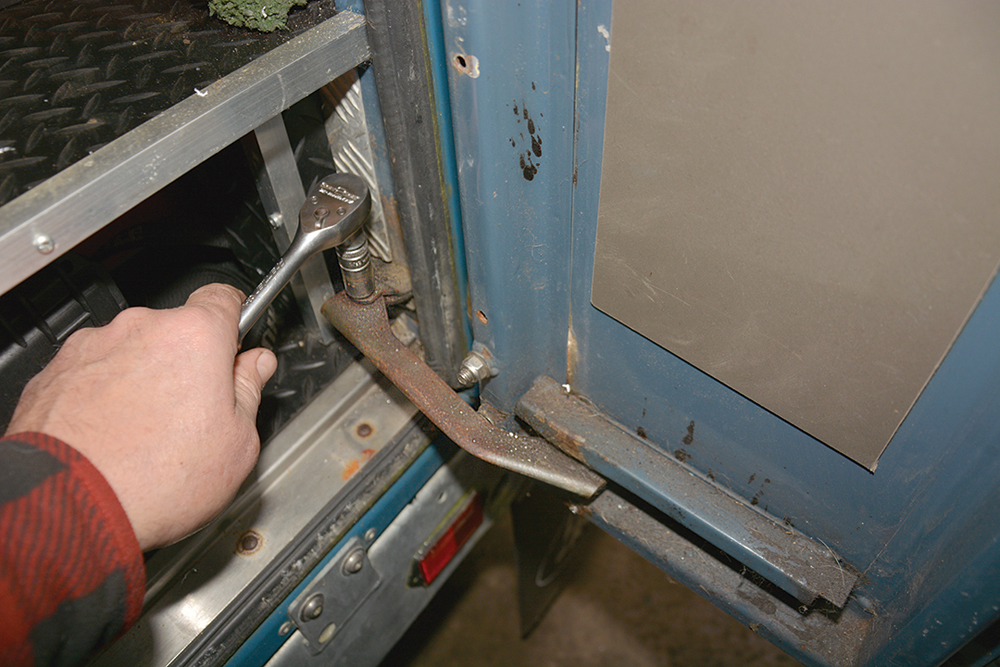
Door hinges: A long-handled 13mm ring spanner allows you to hold the nut on the inside by reaching under the door, while loosening the bolts on the outside.
Held until ready: All six of the door bolts (two on each hinge) are eased partly out with the nuts removed, but still supporting the door, ready to lift it off.
And free: Even with the glass still in place (firmly glued) the door is not very heavy and can be lifted off by one person. Note the construction of the inner frame.
Fitting the new door
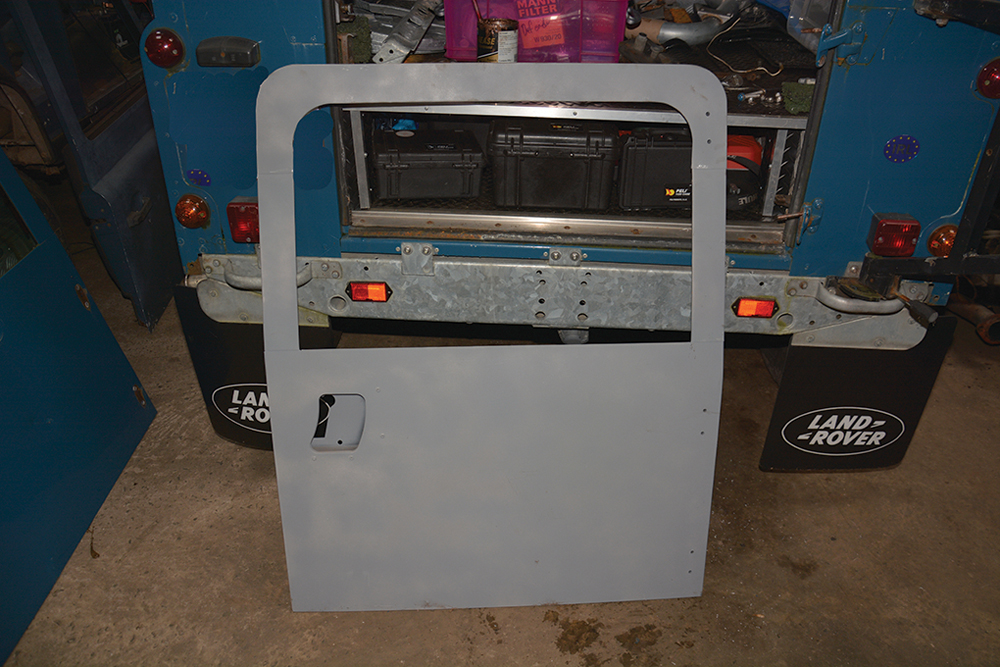
Ready to offer up: The new door with galvanised frame and sprayed in primer, will be hung on the original hinges still on the body, using the existing stainless bolts and nuts.

Improved design: Replacement doors have corner gussets built into the frame (top left and bottom centre) giving extra strength, especially for the weight of the spare wheel.
Less stretching: With the rear glass not fitted yet, it is easy to access the inner nuts and bolt heads for each hinge by reaching through the window aperture.
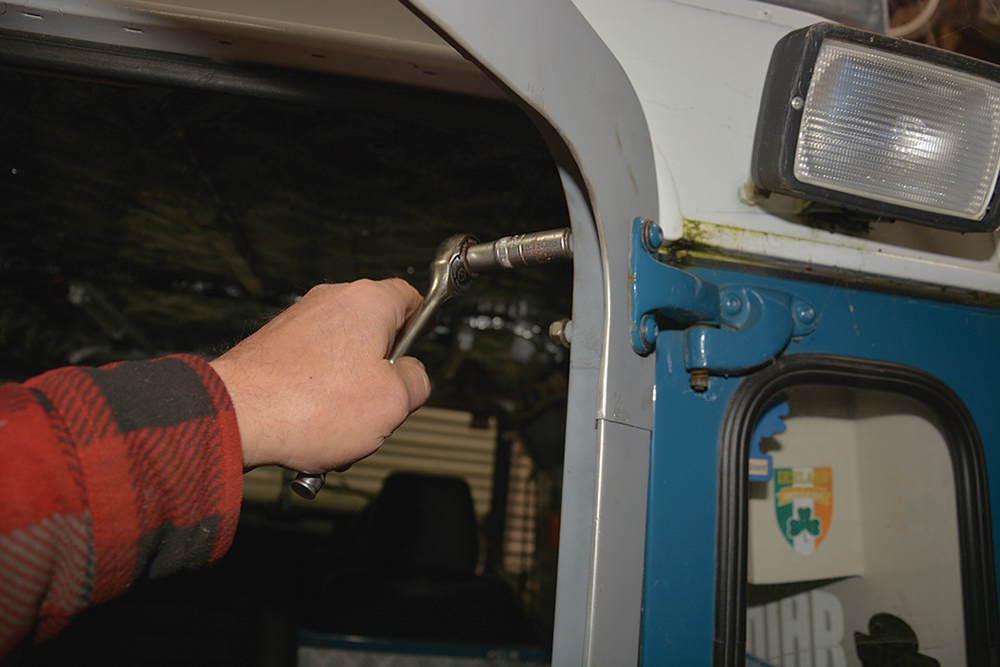
Tighten right away: The bolts run through fixed tubes in the door, so there is no positional adjustment available. But if the door is accurately made, it will align just fine.

Pleasing result: With the bolts tightened, the door is checked for alignment around the frame. If the door frame seal is damaged, now is the time to renew it.
Fitting out the new door
The various fittings can now be transferred onto the door. Some Land Rovers will vary from this one: for example, there will probably be a rear window wiper to fit and a door-mounted spare wheel carrier or maybe a third brake light.
This particular vehicle has the bare minimum fitted, and even the heated rear window was not connected to the chassis wiring harness. However, all of these fixtures are pretty much a reversal of how you removed them from the old safari door.
Back in place: Refitting the rear door check-strap is a straightforward job of sliding it into the runner on the door and rebolting the other end to the pivot bracket on the body.
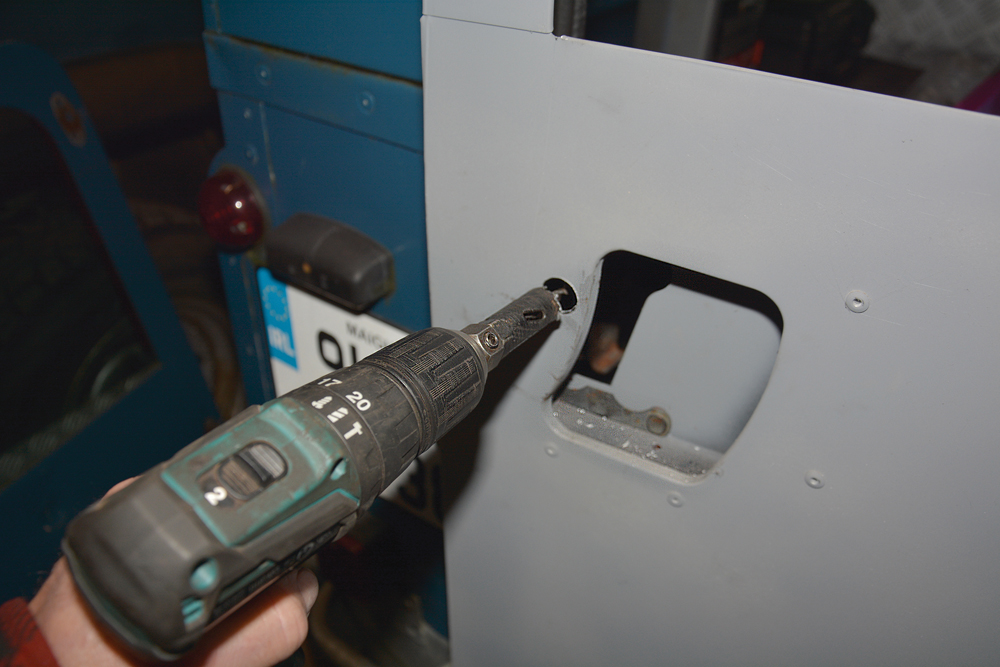
Missing hole: Unusually, this door does not have a lock barrel hole. Measuring from the old door, a pilot hole is drilled, then enlarged with a slightly undersized hole cutter.

By trial and error: The hole for the lock barrel is now enlarged to the exact size needed using a round file – with frequent trial fits of the door lock assembly.
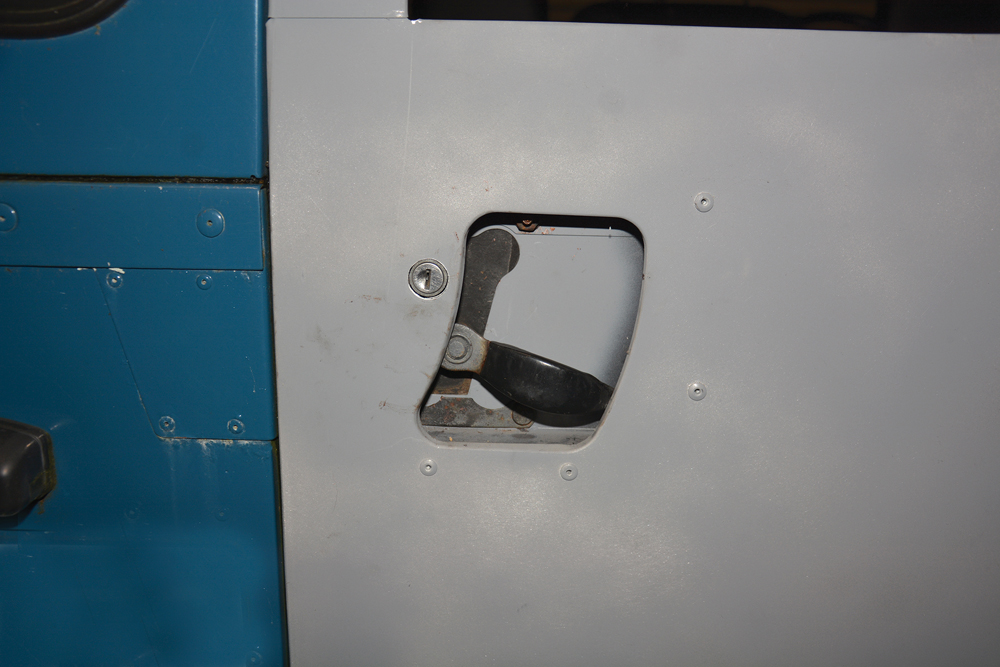
Success: After enlarging the cut hole to size using a round file and frequent trial fits, the lock assembly and barrel are refitted – that work shouldn’t have been necessary.
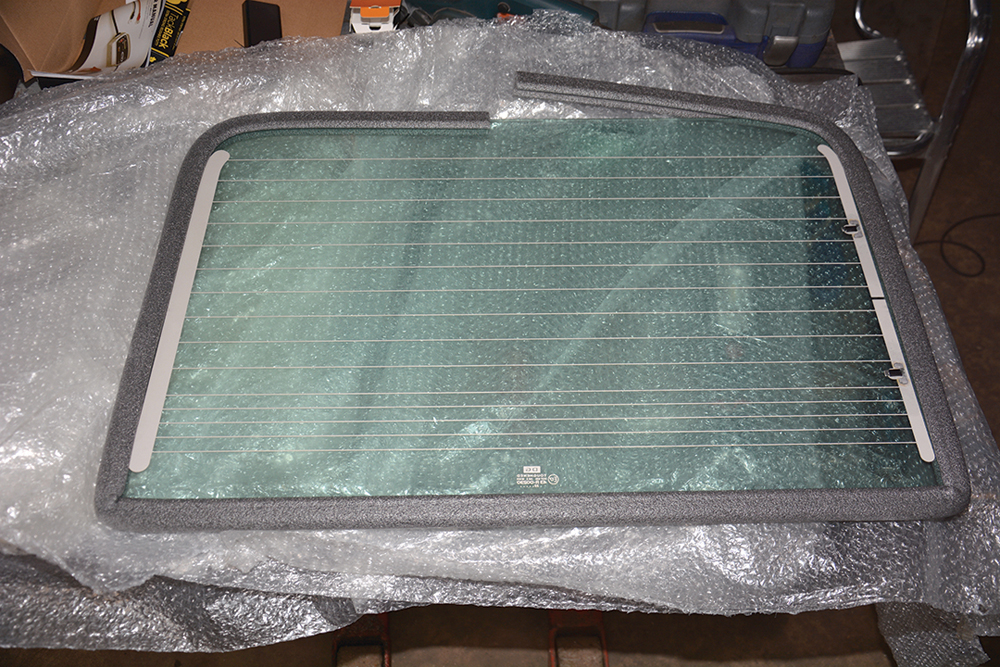
Mission impossible: The glass had been bonded to the old door, damaging parts of the heated rear window element (HRW), so this new glass will be fitted to the door.

Plan for power: Ahead of fitting the glass, provision needs to be made for an electrical feed to the HRW. Here a pilot hole is drilled in the frame at the appropriate location.

8mm for this one: The pilot hole has been enlarged to suit a rubber grommet, which will be essential to protect the electric cable from chafing on the edge of the hole.

Fishing: A length of thin stiff wire is fed through the door frame. The electric feed for the HRW will be attached to this wire to pull it through the door frame.

Fitting the glass: The window glass will be sealed to the door using a bed of non-setting black putty sealant material (butyl putty tape) around the whole of the frame.
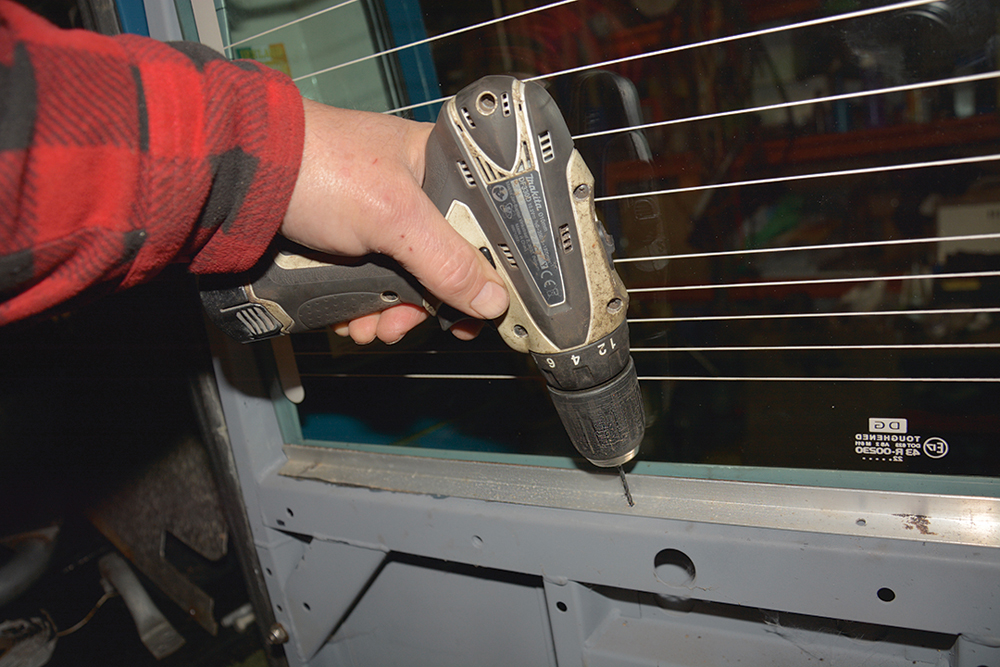
Self tapper holes: The new glass is bedded into the putty and is now secured by refitting the aluminium strips, having first drilled 3mm holes for the self-tapping screws.
Safe and sound: The window glass is now secure, and all that remains is to add the wiring for the HRW and refit the chequerplate inner door cover, or a standard door card.
Colour change looming: A new swing-away wheel carrier will be fitted after the Land Rover has been resprayed. Galvanised frame and stronger design will eliminate corrosion and cracking.
Like to have your own Land Rover library?
Try our Budget Digital Subscription. You'll get access to over 7 years of Land Rover Monthly – that’s more than 100 issues plus the latest digital issue. All issues are fully searchable so you can easily find what you are looking for and what’s more it’s less than 10p a day to subscribe. Click the link above to find out more details and start enjoying all the benefits now.