


06 January 2024
|
 Upgrading to discs brings reliability and consistency, which means less maintenance
: credit: © Martin Domoney
Upgrading to discs brings reliability and consistency, which means less maintenance
: credit: © Martin Domoney
Martin explains how to swap your Series’ front drum brakes for more modern discs
Need to know
Time: One day.
Cost: £775-1171.
Difficulty: 3 out of 5
Models: Series II, IIA and III.
Tools needed: Socket and spanner sets, drain pan, torque wrench, 10mm Allen bit, 52mm box spanner, grease, hammer, punch, chisel, pry bar, pliers, bearing driver, brake bleeder.
Parts and costs: Front disc conversion kit, £432; flexi hose kit, £114; pre-machined hubs, (576844/FRC3875), £396, designdevelopmenteng.co.uk; Calipers, (SEB500440/SEB500450), £53.40 each; pad fitting kit, (STC8576KIT), £2.28; disc x2, (LR018026G), £38.12; M10 x25 bolts, (SH110251L), £0.29; M10 spring washers x10, (WL110001L), £0.14; Wheel bearing kit x2, (RTC3537G), £28.69, paddockspares.com.
Work safely:
• Raise and support the vehicle securely on rated equipment.
• Wear the correct PPE at all times.
• Wipe up spilt brake fluid and dispose of waste responsibly at your local recycling centre.
• Wear a particle filter face mask to avoid inhaling brake dust.
When the Range Rover was first launched in 1970, one of the major technological advances that it was launched with was all-round disc brakes. This step away from the drums that had been fitted to Land Rovers since the beginning, and continued to be standard issue on the utilitarian Series vehicles, meant more reliable, consistent braking in all conditions.
As well as being able to shed mud, water and debris far quicker than drum brakes, discs offer almost maintenance-free running. Without shoes to keep properly adjusted, you can leave disc brakes completely alone between servicing; all that’s needed is to ensure the brake fluid is changed on time, and to change the pads and discs when they become worn out. Discs definitely have their advantages.
Hampshire-based specialist Design Development Engineering has been offering brake disc conversions for Series Land Rovers for a couple of years now, as a genuinely bolt-on solution. The kit allows the drum and backplate to be removed and replaced with a billet caliper bracket, to which standard Land Rover calipers are bolted, which act on a standard Defender non-ventilated disc. The only wear items that aren’t standard Land Rover parts are the pads, which DDE manufacturers specially. A rear kit is also available for non-Salisbury axles.
As you’ll see, fitment is really straightforward – but as with all safety-critical jobs, if you lack confidence or are unsure of your skills on the tools, have a pro carry out the work for you. Also worth noting is that standard Series and Defender wheels won’t clear the calipers, so you’ll need Wolf, Discovery 1 or wider offset rims.
Make a start: Raise the front of the Land Rover on a jack and support it on stands, then remove the front wheels. Use a ½-inch spanner to turn the two brake shoe adjusters anti-clockwise until they stop, indicating the shoes are backed fully off. Celebrate never having to adjust them again.

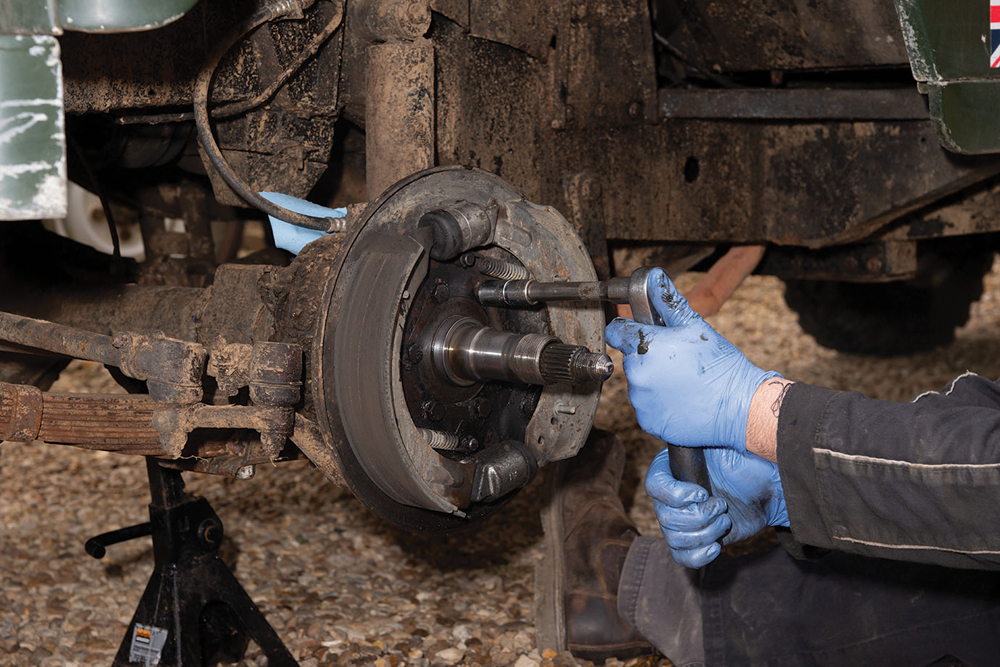
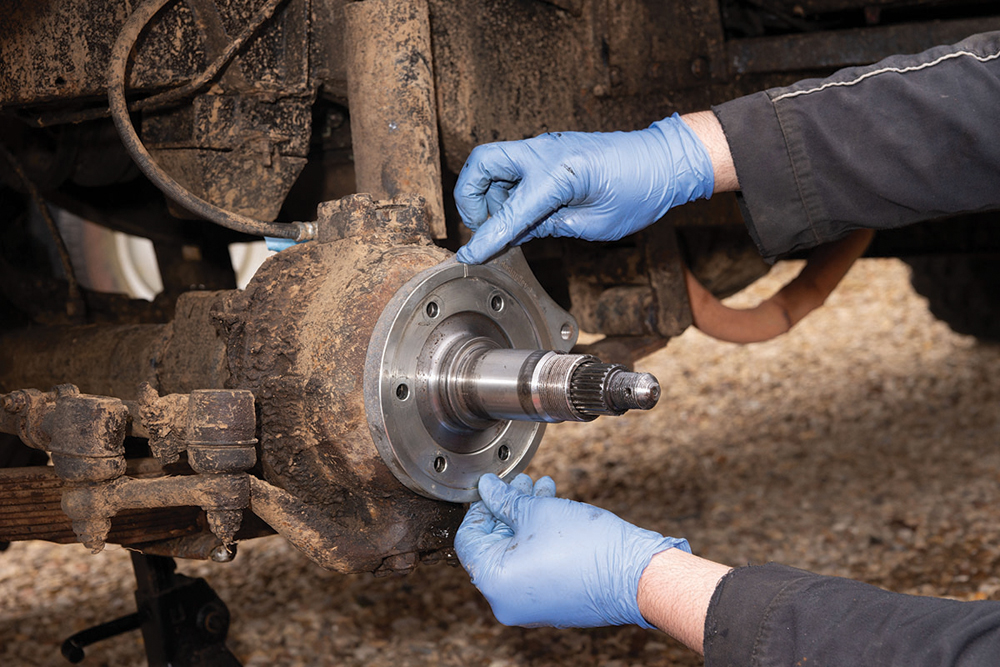
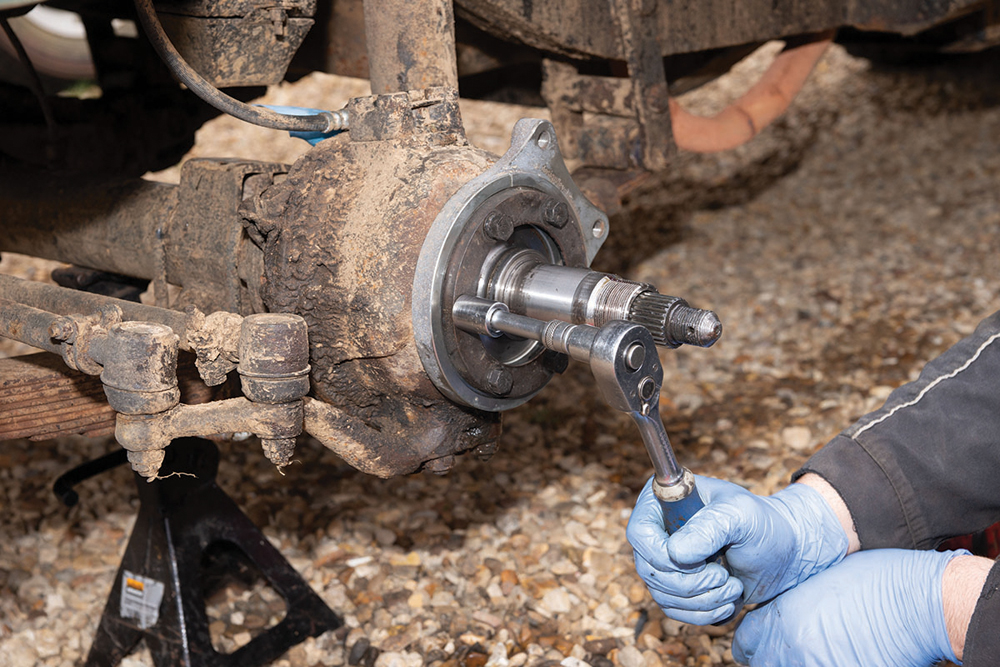
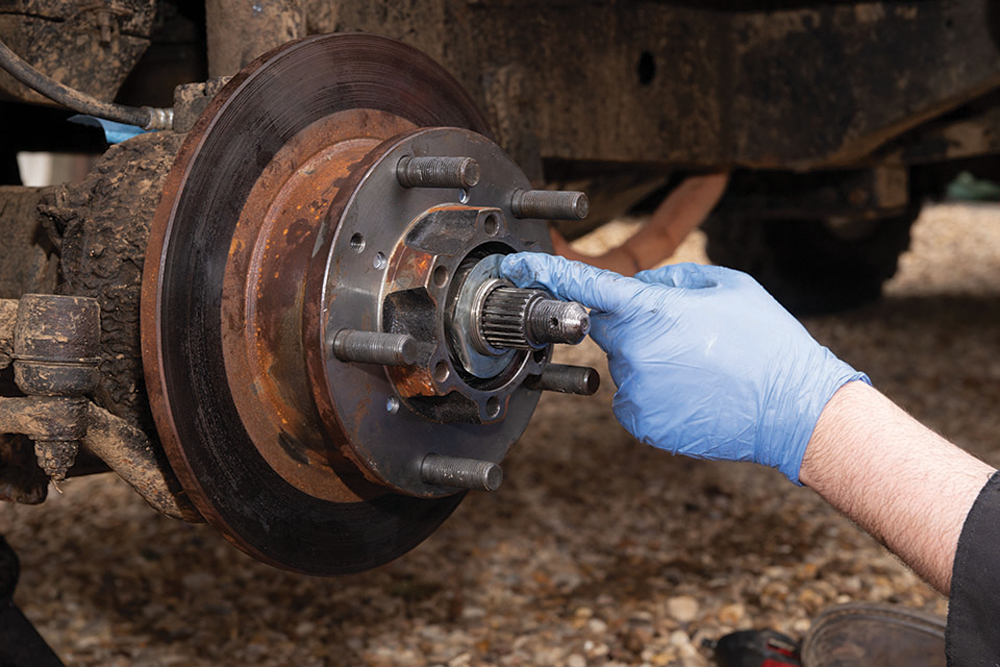
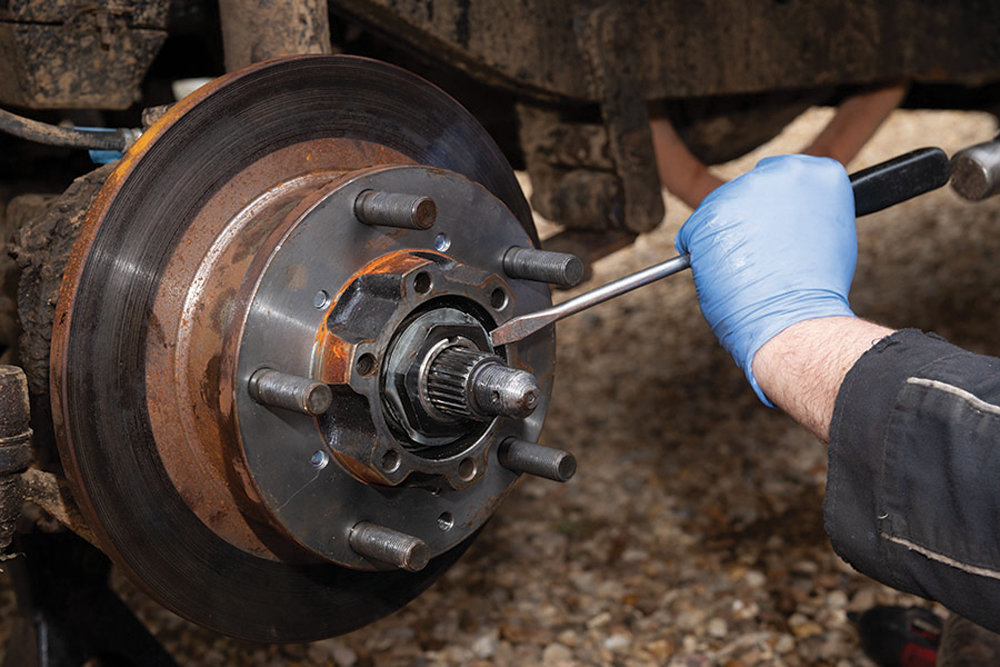
Disconnect drive: Stop the hub from turning with a pry bar, then loosen and undo the five bolts securing the drive flange or freewheeling hub. Use pliers to straighten the split pin, then wiggle it out. Remove the driveshaft nut and retrieve the washer from behind; remove the drive flange.
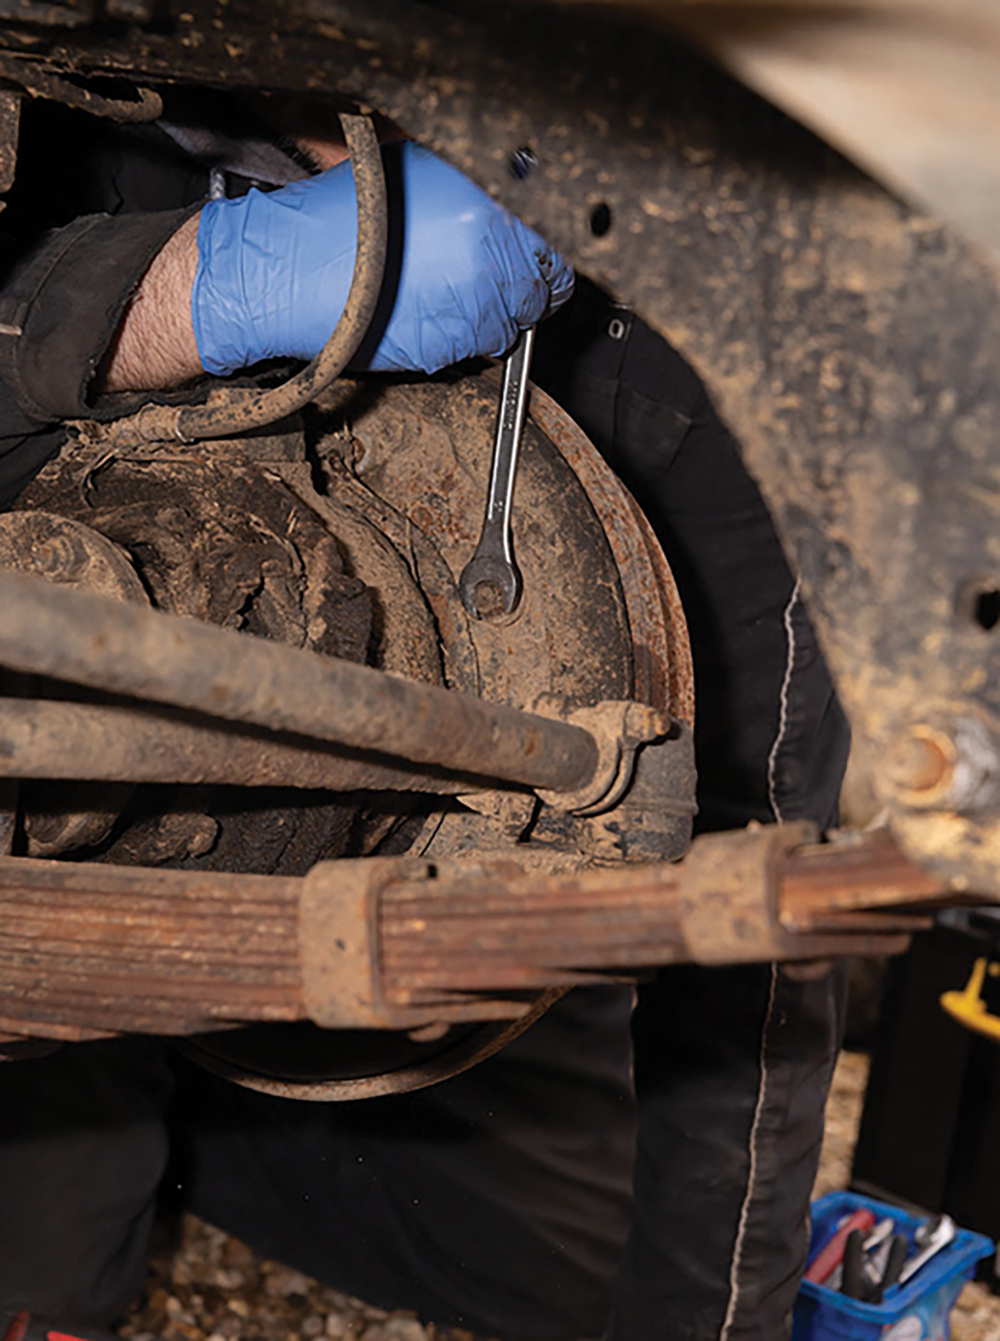
Undo the nuts: Use a chisel to bend the lock washer securing the wheel bearing outer nut flat, so you can get your 52mm socket onto the nut. Break the outer nut free and remove it along with the old lock washer. Undo the inner nut and retrieve the thick washer and bearing.
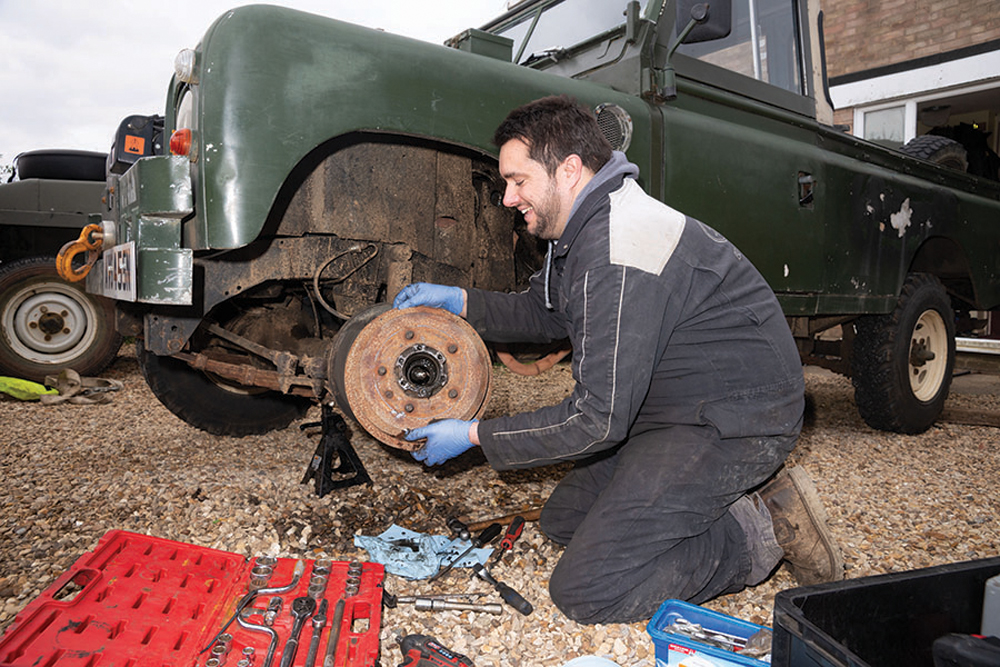
Hub and drum off: The wheel hub and drum assembly can now be slid as one off the stub axle. If you’ve got new hubs already machined, you can set it aside. If you need to have your current hubs machined, take the drums off. DDE’s kit includes clear instructions for a machine shop.
Know your hubs
The disc brake conversion kit from Design Development Engineering requires the Series II/IIA/III hubs to be machined, drilled and tapped to allow fitment of the brake discs. DDE supplies a brilliant technical drawing in the kit to make this easy for your local machine shop.
If you choose to buy a second pair of hubs, so you can leave your originals unmodified, you have two choices. The first is to buy them pre-machined from DDE, ready to go on. Or, you could buy a pair of new or used aftermarket ones and have the machining done yourself.
In either case, you need to make sure you buy the correct hubs for your axle. Earlier ones have a larger inboard bearing and a smaller outboard bearing – these are part number 576844. Later hubs (FRC3875) use equal-sized bearings. Make sure you check which hub type you have and order the correct hubs and bearing kits before you get started.
Release brake line: Position a drain tray under the wheelstation, then use a 9/16-inch spanner to loosen the female union on the hard pipe where it connects to the brake flexi. The DDE brake flexi kit also includes new longer flexis, but as these ones are pretty much new, they will remain.
Backplate bolts: Use a flat chisel to knock the lock tabs flat on the stub axle retaining bolts, so you can get a socket onto them. Use a 5/8in socket to loosen them all off; expect some axle oil or one-shot grease to drip out as the stub axle separates from the hub, so don’t move the catcher yet.
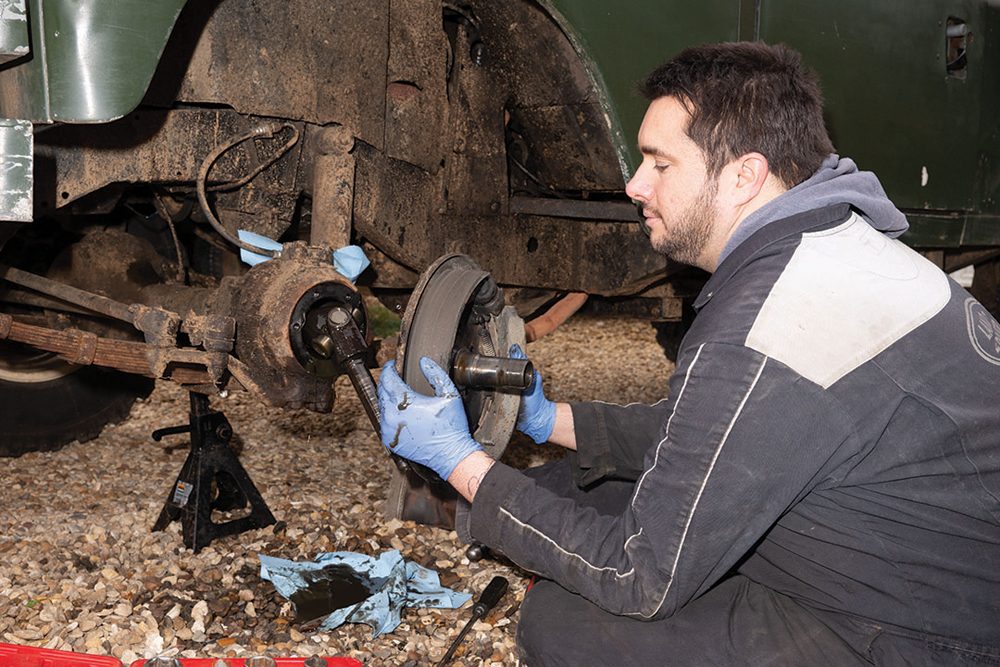
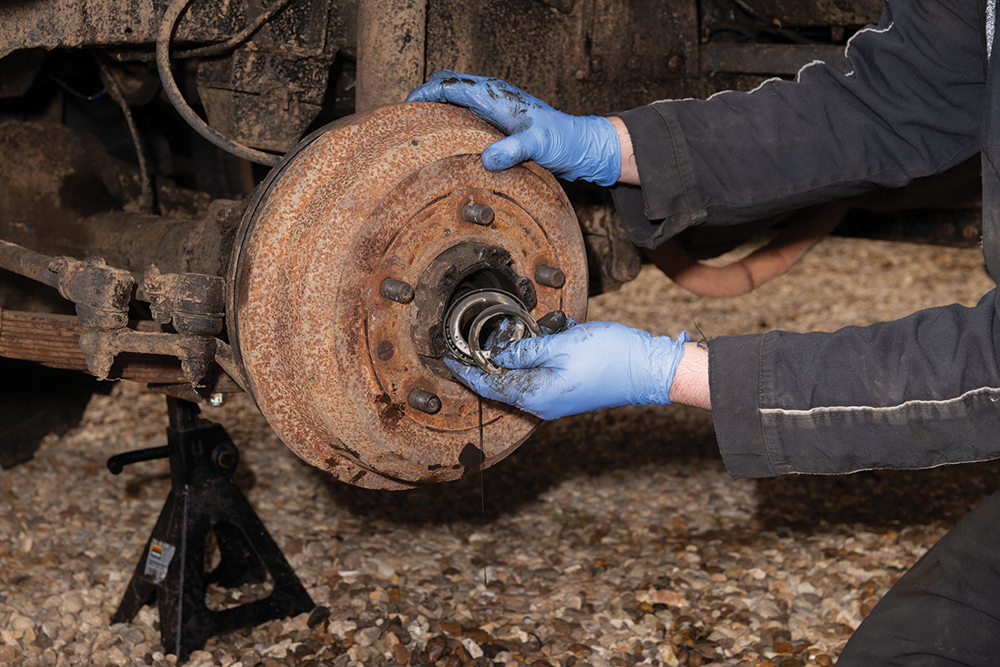
Slide it away: The drum brake backplate and shoe assembly can now be lifted away from the axle. It’s likely that the stub axle will come with it, so clean up the mating face on the swivel housing and have a new gasket ready for reassembly. Store the drum brake parts safely.
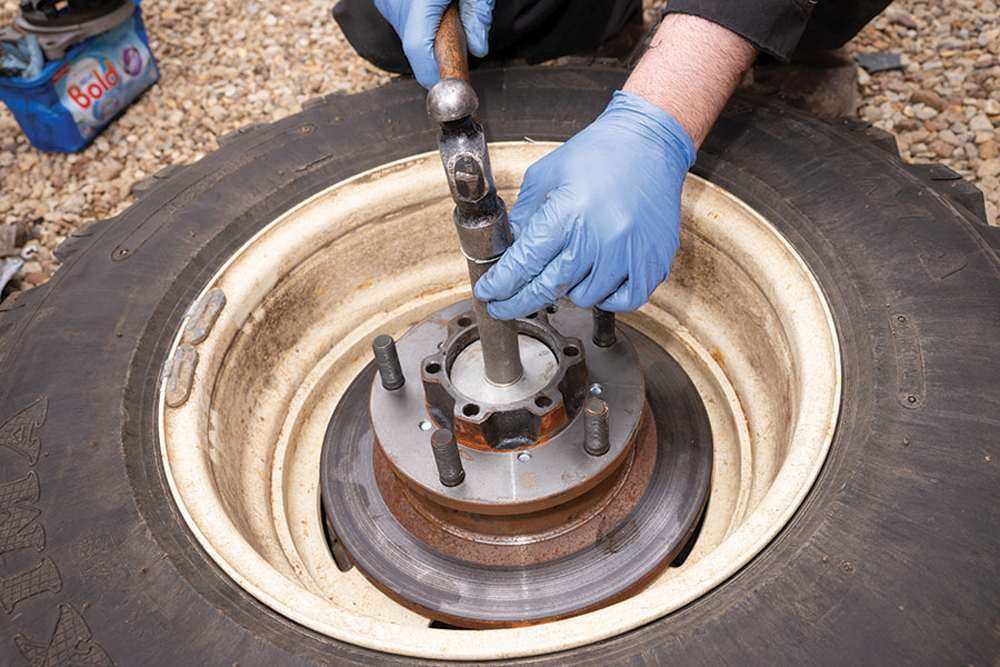
Assemble new hubs: If you got new machined hubs from DDE, happy days, you can crack on with this straight away. Otherwise, once your originals are back from machining, you can turn them wheel-studs-down and bolt the Defender discs to them with the M10 bolts and spring washers.
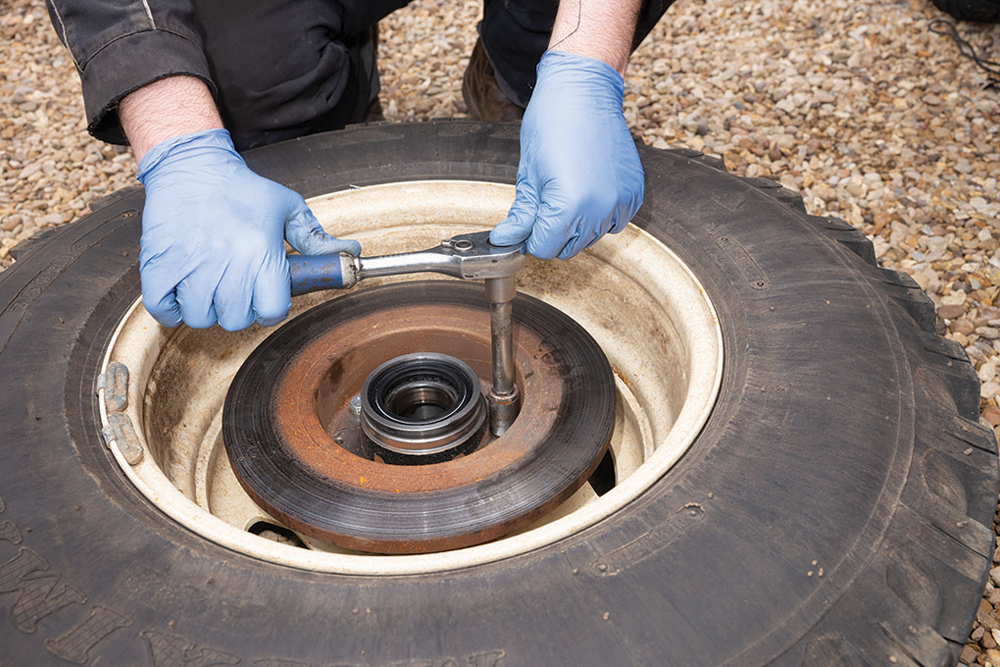
Get your bearings: Take your new wheel bearings, and fit the outer races into the new hubs with a bearing driver or punch, keeping track of the pairs. Pack the inner races with fresh grease, and sit the inboard one into its outer race (with the wheel studs pointing downwards).
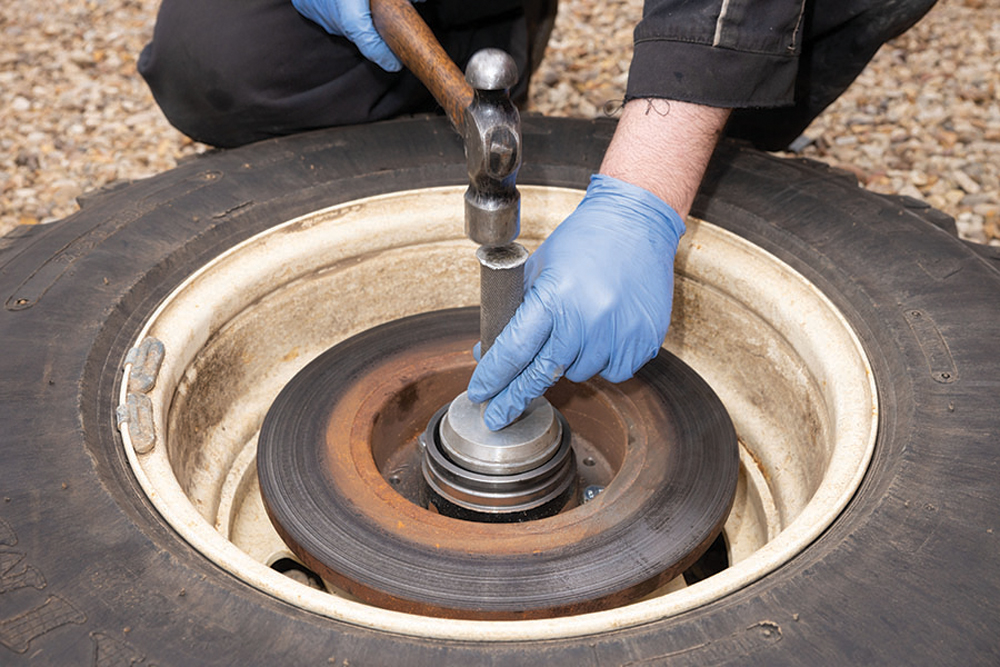
Hub seal home: Once the inboard bearing is seated correctly in its race, smear the outside of the new hub seal in grease and push it into the bore of the hub by hand. Flip your bearing driver die over and tap it in evenly. Alternatively, use an old bearing outer to carefully tap it home.
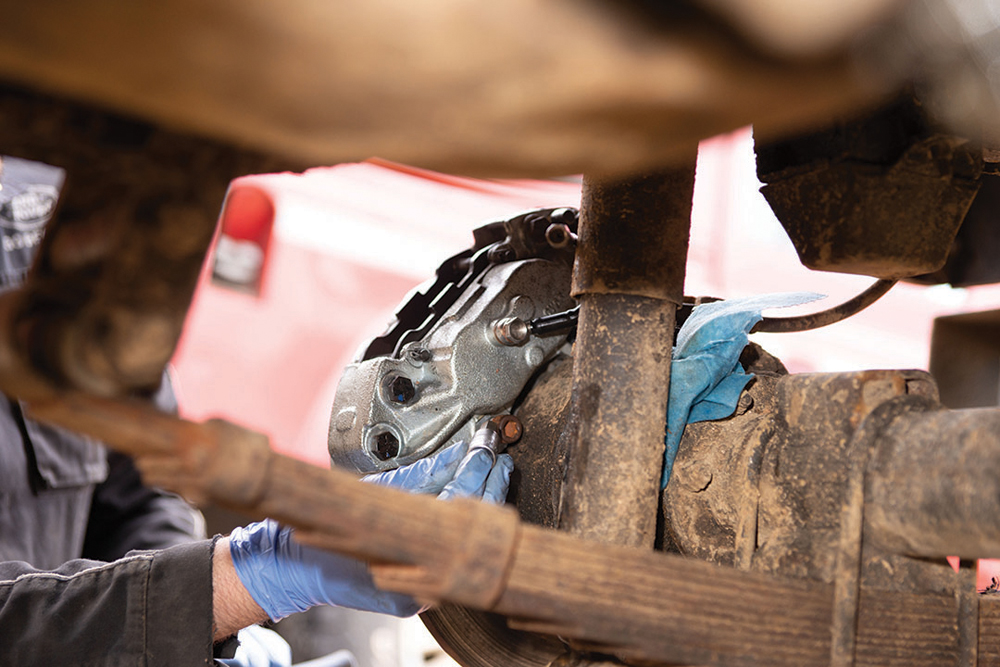
Install caliper bracket: Now for the shiny bits! The new DDE caliper brackets are handed, so don’t get them mixed up; the small notch at the top of the bracket should be at the 12 o’clock position (see photo). Refit the stub axle with a fresh gasket, then offer up the caliper bracket.
Sandwich it on: Fit the six bolts with spring washers back through the spacer plate, and then slide them through the caliper bracket and stub axle and start them in the threaded holes in the swivel housing. Tighten them in a star pattern to secure the assembly together.
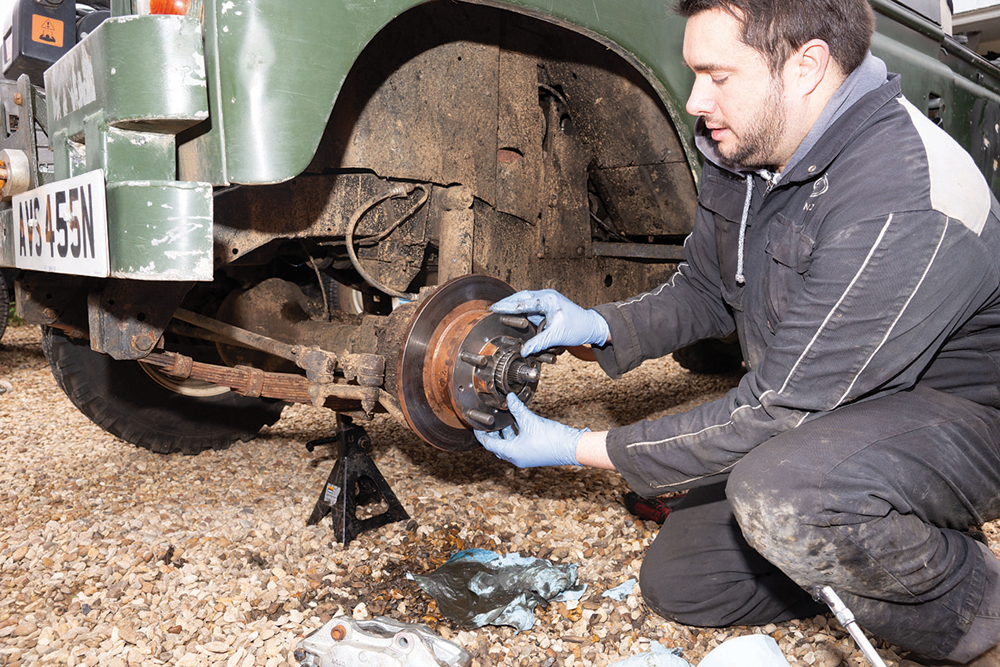
Fit hub and disc: Make sure the stub axle is clean. Lightly grease the inside of the hub seal, then lift the new hub and disc assembly onto the stub axle and push the outboard bearing race in. Slide the spacer washer over, then spin the first of the two locknuts on to hold the hub in place.

Set the bearings: Nip up the nut and settle the bearings; give the hub a few spins to make sure it turns smoothly. Back the nut off until the hub spins freely, but there is no end float or free play when rocking it. The outer nut will add further preload, so don’t overtighten at this point.
A new washer: Your wheel bearing kit will include a new lock washer. Slide the washer onto the stub axle threads, then fit the second nut over the top. If you like, you can pre-bend the lock washer over the inboard nut by putting it in a vise and tapping it over. Don’t disturb the nut, though.
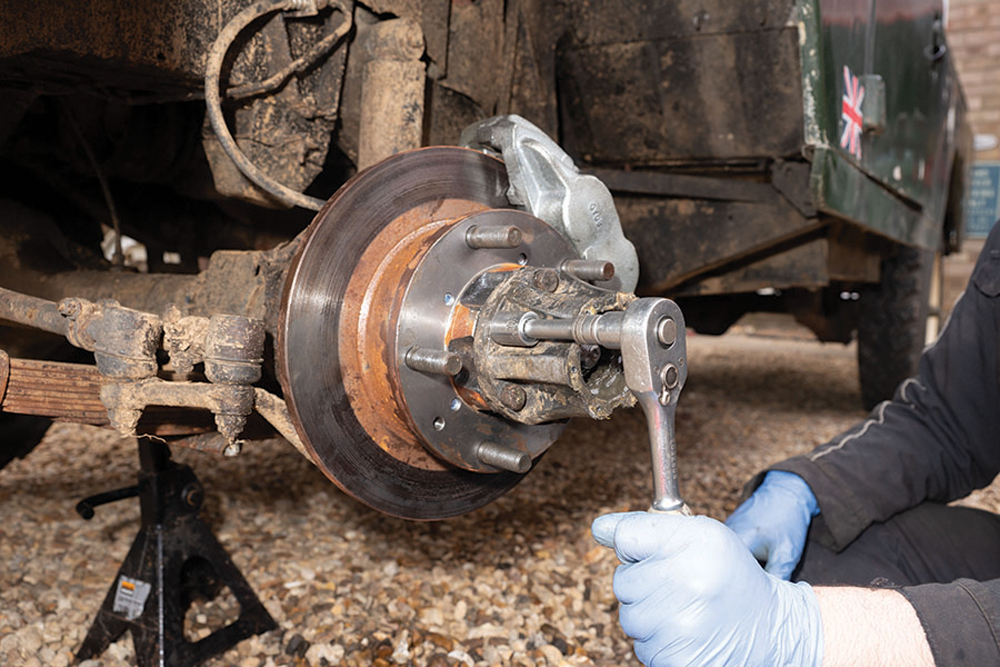
Lock and check: Tighten the outer locking nut, then give the hub a final spin. It should turn freely with no notchiness or binding. If there is, remove it and check the hub seal hasn’t snagged. Once happy, ensure the outer nut is tight and then bend the lock washer over one of the flats.
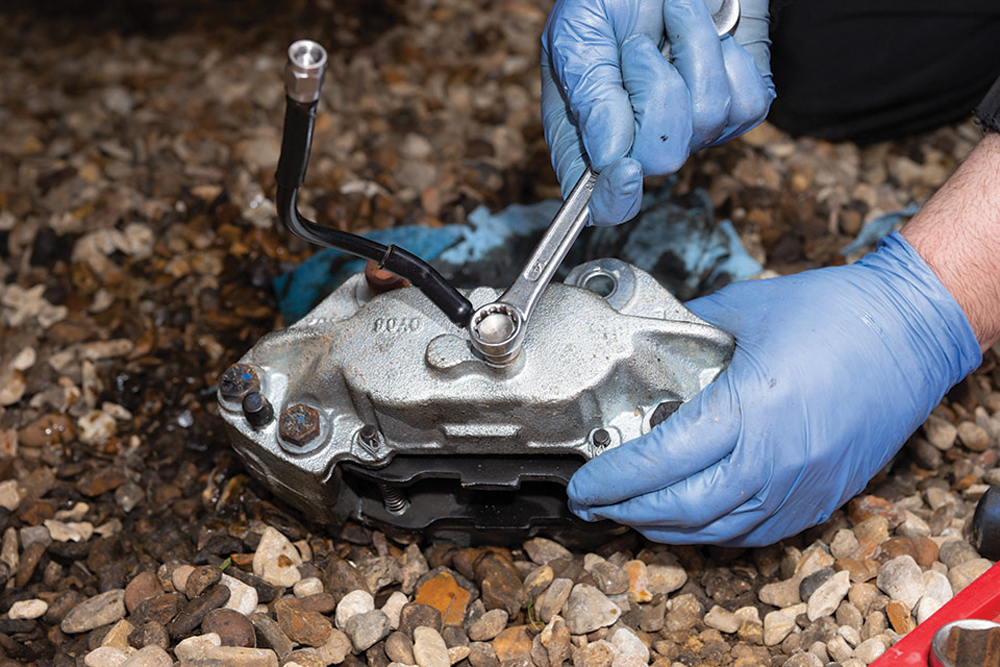
Assemble the caliper: Take the special brake pads that come in the Design Development Engineering kit, and fit them the correct way around into the new caliper with the pins, springs and split pins. Take the banjo bolt and sealing washers from the hose kit, and attach the hose to the caliper.
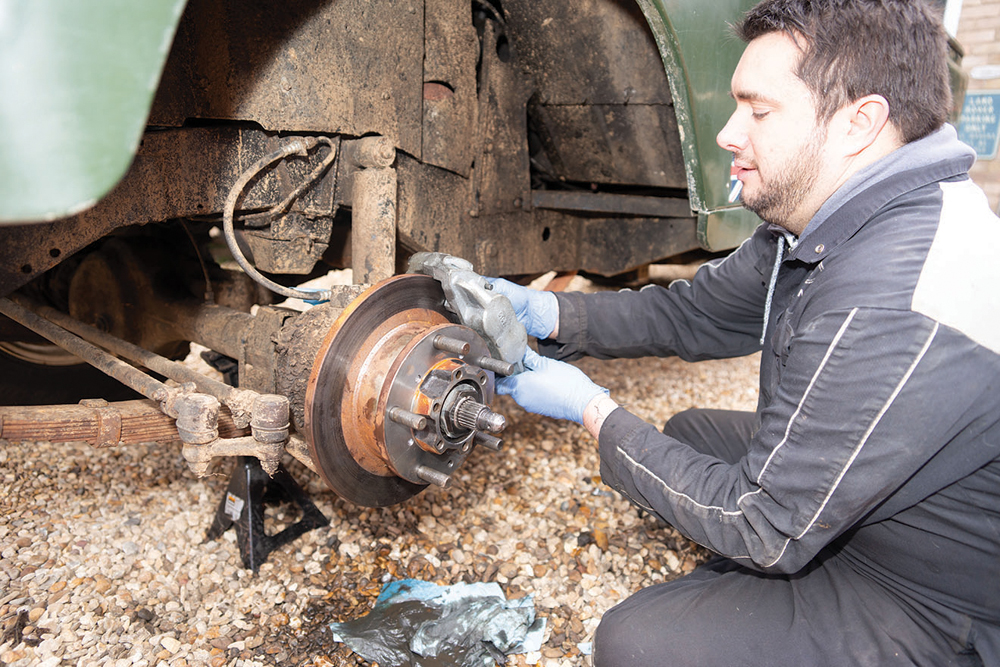
Offer it up: If your calipers are new, the pistons should be fully retracted making fitment over the disc easy. If not, push them back. The holes in the caliper body should line up with those in the DDE bracket. Make sure the pads sit flush with the edges of the brake disc.
Fiddly bolts: Take the cap-head bolts from the DDE kit, and fit them with a spring washer each. Slide the bolts through the caliper and start them both by hand in the threads of the caliper bracket. Access is limited, so use a 10mm Allen bit on an extension or an Allen key, and be patient.
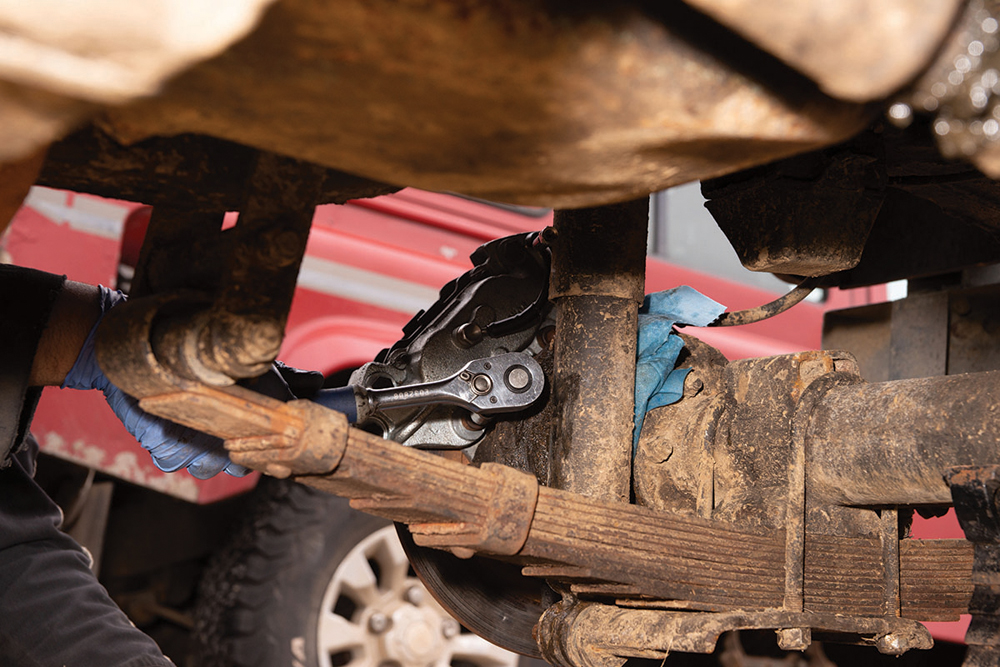
Tighten them up: Keep on winding those cap-head bolts in until the spring washers have compressed, then give them one final tighten. Take care not to damage the heads, as it’s tricky to get a ratchet in behind fully; turning the steering can help by opening up the space behind.
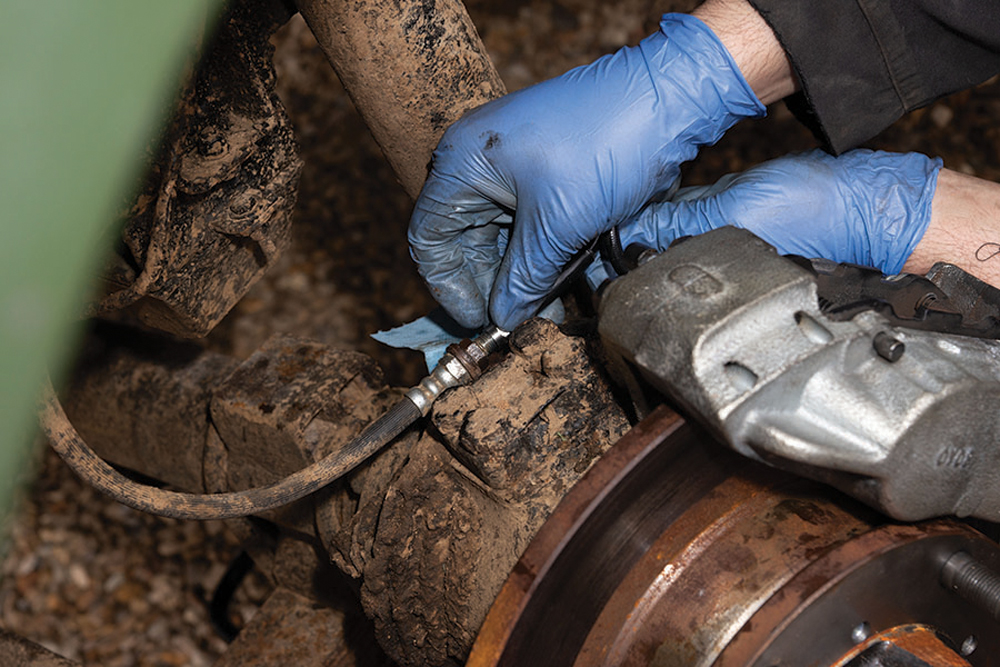
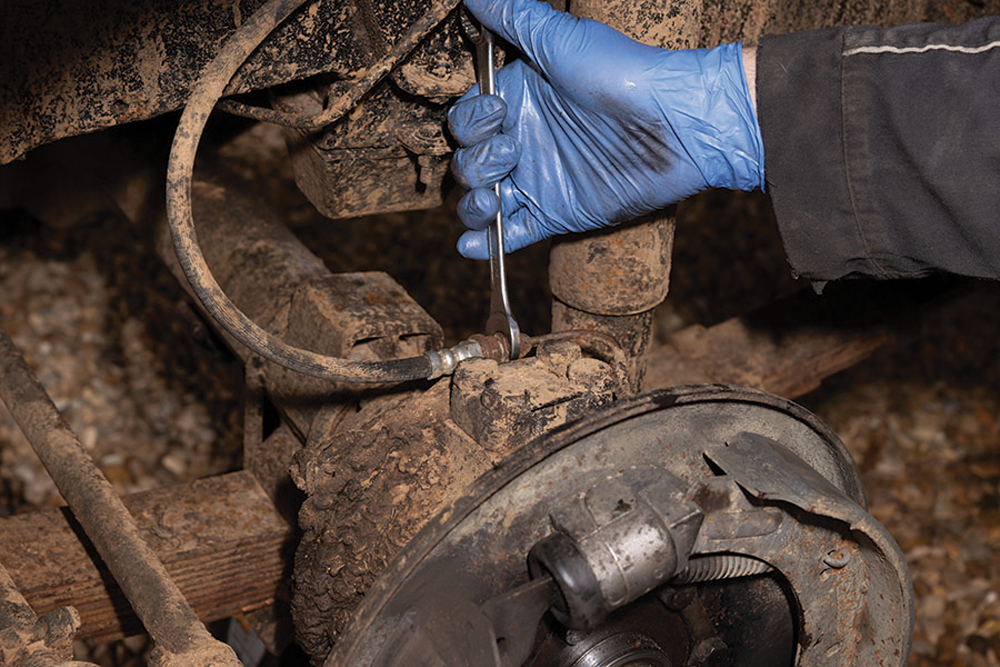
Plumb the pipe: Take the female end of the new braided flexible brake line, and offer it up to the male end of the original flexi that runs from the chassis to the axle. Start the fitting by hand, taking care not to cross-thread the unions. Don’t fully tighten them up yet.
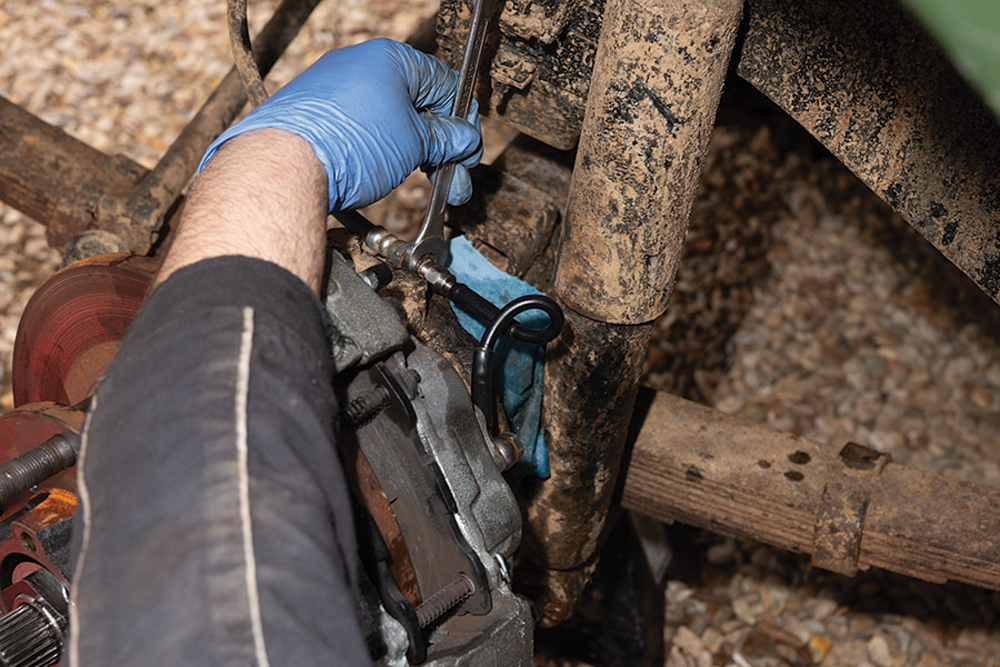
A proper pigtail: The new braided line needs to maintain a pigtail shape, so that it clears the damper when the steering is turned lock to lock. Hold it in place as shown, then tighten the banjo bolt onto the caliper and the female fitting where it meets the original flexi; check clearance.
Refit drive member: With the new brake disc and caliper in place and plumbed, and the wheel bearings adjusted, the drive member or freewheeling hub can now be refitted. Don’t forget to use a new gasket; refit the washer behind the nut, tighten the nut and fit the split pin and cap.
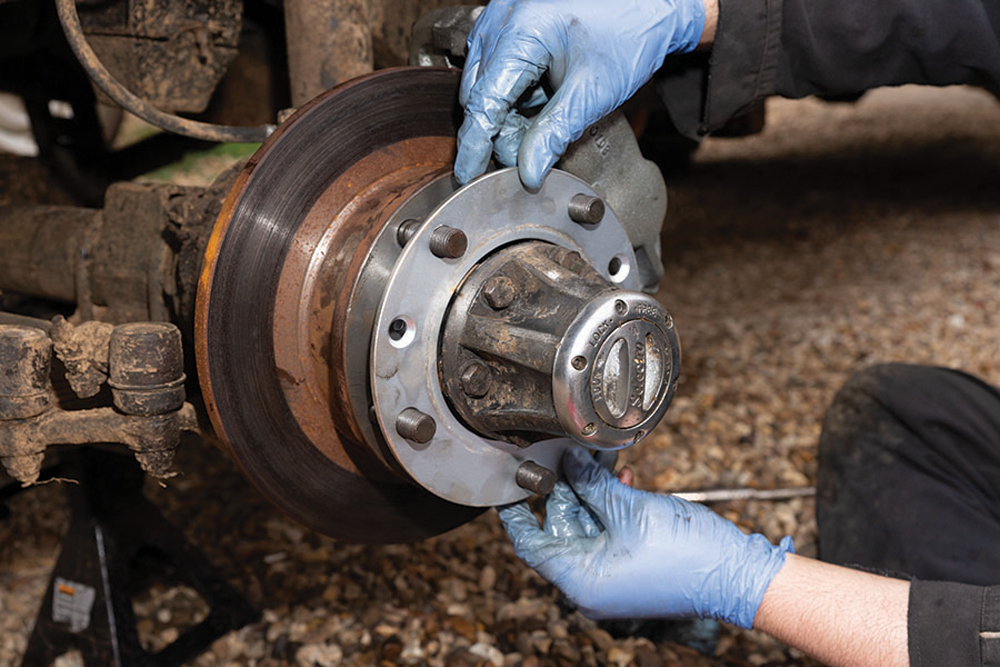
Fit spacer plate: Slide the supplied spacer over the wheel studs, and secure with the countersunk screws. They restore the original track width, by mimicking the thickness of the brake drum that is no longer fitted. Don’t forget, you will still need Discovery 1, Wolf or wider offset wheels.
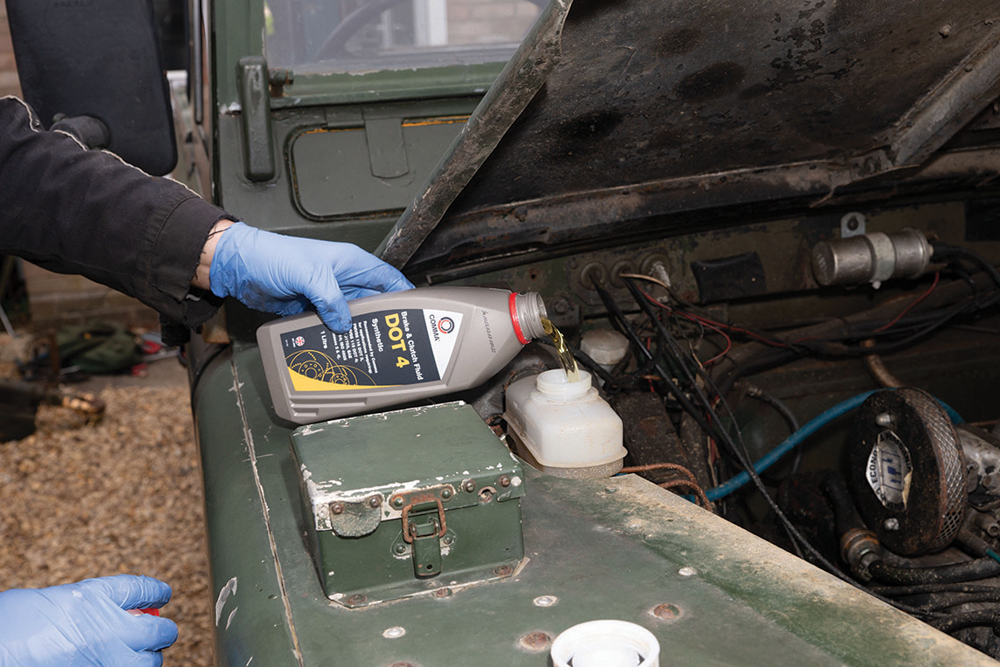
Fill with fluid: Once you have completed the disc conversion on both sides of the Land Rover, remove the cap on the brake master cylinder. Refill the reservoir with fresh DOT 4 brake fluid, right up to the top. The brake fluid level will be adjusted after bleeding the brakes.
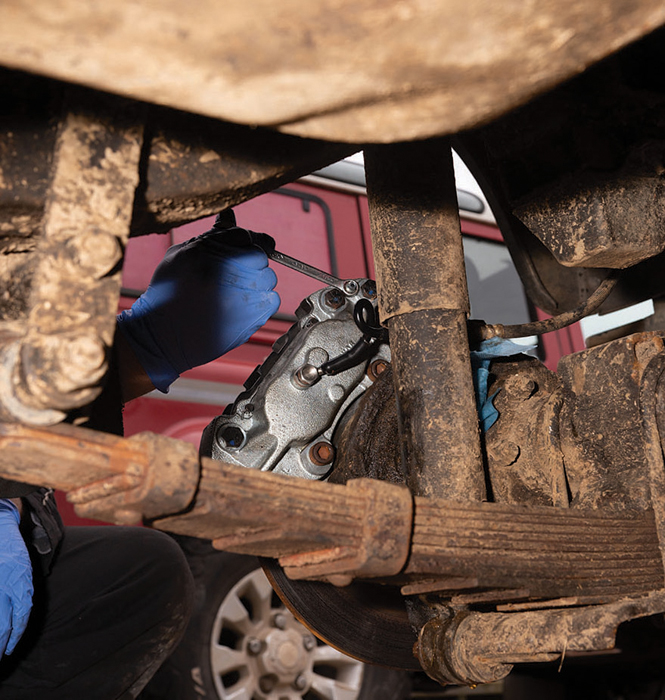
Bleed the system: Attach a piece of clear pipe to the bleed nipple on the caliper furthest from the master cylinder, and open the nipple. Have an assistant pump the pedal until no air bubbles remain, then lock the nipple and do the other side. Refit the wheels and torque the nuts to spec. All done – go for a test drive!
Like to have your own Land Rover library?
Try our Budget Digital Subscription. You'll get access to over 7 years of Land Rover Monthly – that’s more than 100 issues plus the latest digital issue. All issues are fully searchable so you can easily find what you are looking for and what’s more it’s less than 10p a day to subscribe. Click here to find out more details and start enjoying all the benefits now.