


01 February 2018
|
 : credit: © Trevor Cuthbert
Trevor Cuthbert explains the methods and equipment that can make brake and clutch bleeding an easy one-person task
Models: Series, Defender, Discovery 1 & 2, Range Rover Classic
Time: 1 Hour
Cost: £112.50
Difficulty: 2/5 stars
Tools needed: Pressure brake bleeding tool, vacuum brake bleeding tool, brake bleeding bottle, compressed air line, 10 mm and 11 mm spanners
Parts: Pressure brake bleeding tool: £48 (Sealey Tools Ltd)
• Vacuum brake bleeding tool: £35 (Sealey Tools Ltd)
• Brake bleeding bottle: £24 (Sealey Tools Ltd)
• Brake fluid: £5.50
Work safely: • Wear protective gloves or barrier cream to protect the skin from brake fluid.
• Ensure the chassis and components are stable and secured before working underneath the vehicle.
• Consider wearing a bump cap when working under a vehicle.
• Beware of inhaling brake dust and use brake cleaner spray solution
• Wear eye protection when opening bleed nipples.
• After working on the braking system, check the brake operation immediately and drive with caution.
• If in any doubt about the condition of the brakes or pedal firmness, ask a garage to check the vehicle.
When the hydraulic system is opened during maintenance or repair, air becomes introduced. This air must be expelled and replaced with brake fluid by bleeding the system. Examples of repairs that will introduce air include, renewing rusty or fractured brake pipes, replacing flexible brake hoses, replacing brake calipers (or wheel cylinders in drum brakes), replacing a master cylinder or slave cylinder, and replacing all of the fluid with new as part of a service schedule.
Conventional brake and clutch bleeding
Bleeding the brakes or clutch by the traditional method, requires two people. One to press the brake or clutch pedal at the appropriate time, while the other person is at the caliper, wheel cylinder or clutch slave cylinder with a jar, a length of clear tube and an 11 mm spanner.
Before bleeding, the fluid reservoir must be filled, and kept topped up throughout the process – otherwise air will be reintroduced. The pedal is pressed to the floor and held there. At this point the other person uses the spanner to open the bleed nipple, so that air and fluid are expelled through the tube and into the jar (the clear tube passes below the level of fluid in the jar to prevent air getting in at the end). The bleed nipple is closed again, before the pedal is released. This process is repeated until only clear brake fluid is expelled through the tube, which indicates all the air has been pumped out and replaced with fluid.
This traditional method is very effective and has been used since the dawn of hydraulic brakes and clutches – and some would argue that it is the best method. However, it requires two people to operate, and can be time-consuming.
ABS brakes
The traditional brake bleeding method is not suitable for ABS braking systems. These systems are much more complicated and are usually bled by a ‘power bleeding’ method using software built into the vehicle ECU via a diagnostic unit. This allows for one-person bleeding. Alternatively, ABS braking systems in Defender and Discovery 2 can be bled by the two methods described here, if a diagnostic unit is not available.
Pressure bleeding the clutch and brakes
The pressure brake and clutch bleeding system is a simple but effective tool. It allows one-person operation and requires no external power or air supply. The bleeder holds 2.5 litres of brake fluid, which is more than enough for a complete braking system flush without the risk of running the brake fluid reservoir dry.
The basic kit is supplied with a special 42 mm adapter cap that fits many modern brake and clutch fluid reservoirs.
The adapter cap is securely fitted to the reservoir in place of the original cap, and the hose attached via a quick-release mechanism. The bleeder is filled with brake fluid and pumped – it’s as simple as that.
The braking system on a Land Rover uses a master cylinder operated by the brake pedal to force fluid through the brake pipes to the brake callipers (on disc brakes) or the brake cylinders (on drum brakes). The hydraulic action and force exerted by the brake fluid on the pistons in the calliper squeezes the brake pads on either side of the brake disc to operate the brakes at each of the wheels. Likewise, with drum brakes, the fluid hydraulically acts on the brake cylinder, which pushes the brake shoes outwards against the brake drum. Drum brakes are found at the front and rear of Series Land Rovers, while later coil-sprung Land Rovers have disc brakes at the front and can have disc or drum brakes at the rear, depending on age and model.
The clutch operates by a similar hydraulic system, where a pedal-operated master cylinder pushes clutch fluid through to the slave cylinder, to ultimately push the clutch release lever against the pressure plate to engage or release the clutch.
The braking and clutch systems use the same type of hydraulic fluid – DOT 4 brake fluid – and rely on only fluid being in the system. If there is any air in the system, it will not operate correctly because when the pedal is pressed, the air in the system will compress before the fluid does, resulting in a spongy brake pedal – this is almost always due to the presence of some air in the hydraulic system.
Clutch

Step 1: This clutch master cylinder reservoir is empty because the fluid was all drained off prior to changing the old clutch slave cylinder for a new one.

Step 2: As the slave cylinder is tricky to reach, a little funnel helps get the clutch fluid filled without causing spillage and mess around the bulkhead.

Step 3: The brake master cylinder is empty because the fluid had been drained in order to fit new brake pipes and flexi hoses, as well as brake calipers.

Step 4: The brake and clutch fluid reservoirs must be filled with fluid, before any of the bleeding methods are used – pressure, vacuum or traditional.

Step 5: Pressure brake bleeding tool has replacement reservoir cap and fits modern brake and clutch fluid reservoirs, with quick-release hose attachment.

Step 6: The reservoir adapter cap is fitted in place of the original cap and tightened so that a good seal is created to ensure fluid will not leak.
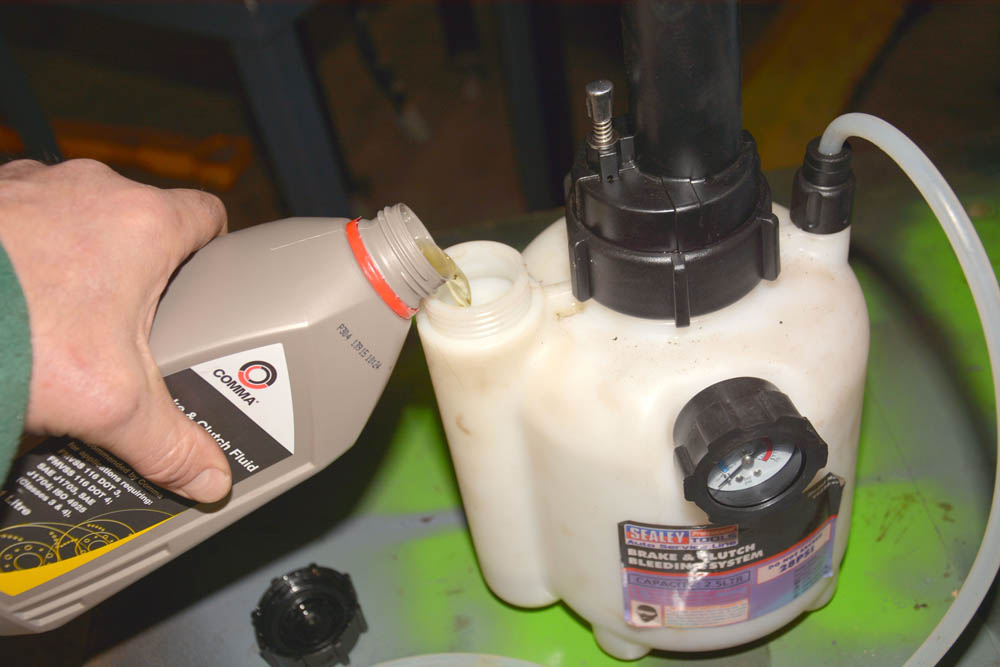
Step 7: The pressure brake bleeding tool is filled with sufficient fresh brake fluid to complete the job. It can hold up to 2.5 litres of fluid.

Step 8: The feed hose from the brake bleeding tool has a quick release connector which attaches to the reservoir adapter cap, allowing the fresh fluid to flow.

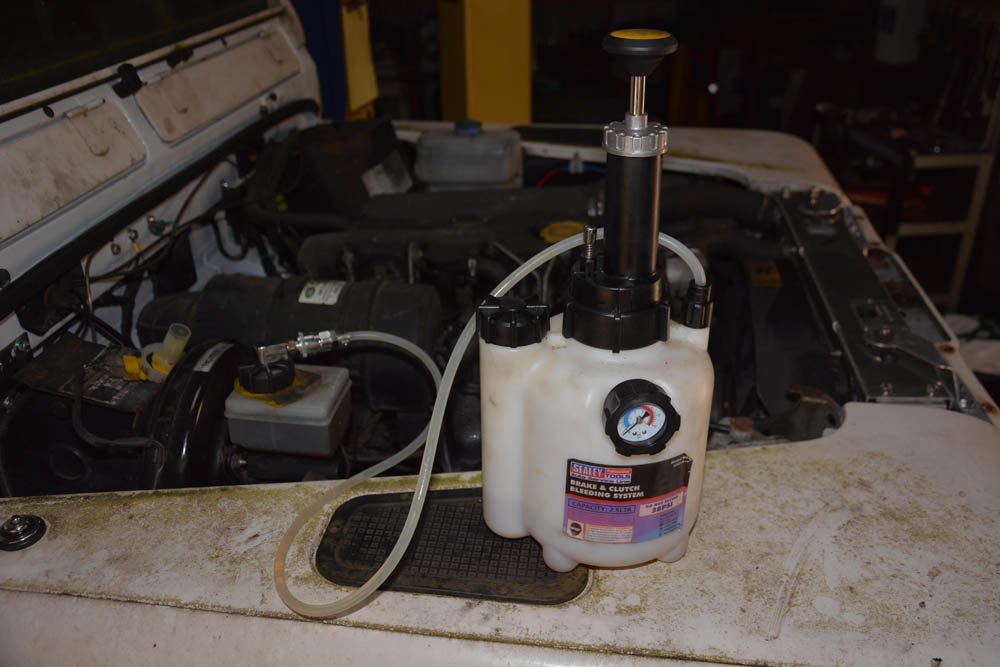
Step 9: The brake bleeding tool incorporates a hand pump, which is operated to pressurise the system – fluid will then flow when a bleed nipple is loosened.

Step 10: For a conventional clutch system, as found in most Defenders, a low pressure of around 12 psi is sufficient to bleed the system.

Step 11: Clutch slave cylinders are usually placed in a restricted location and most are best accessed from below the vehicle, particularly in Defenders.

Step 12: A tube is placed over the bleed nipple to direct emerging fluid into a brake bleeding bottle with non-return valve, as the air is expelled from the lines.
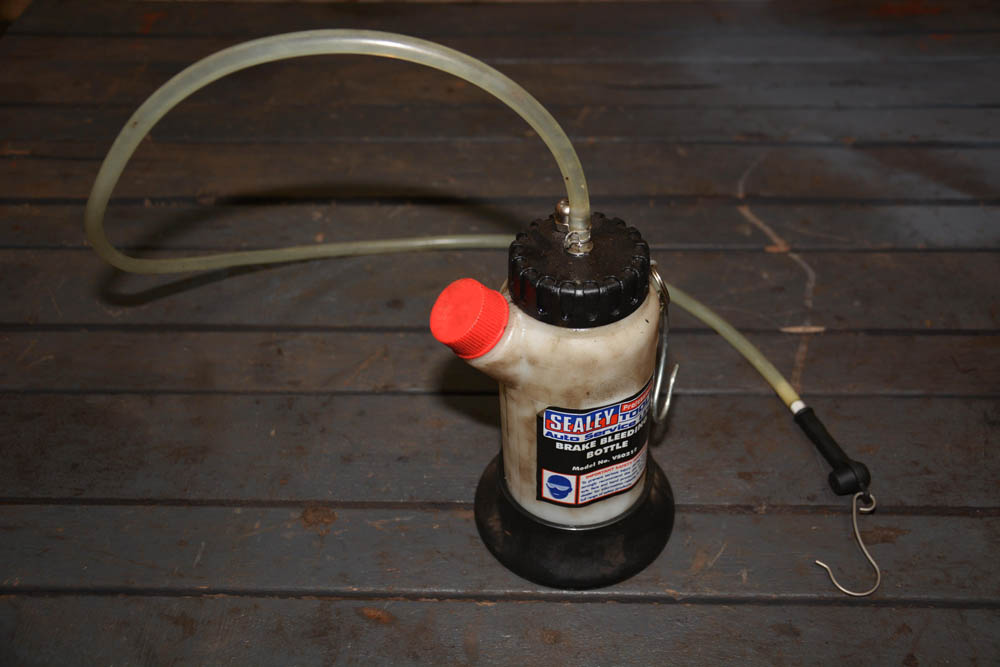
Step 13: The brake bleeding bottle costs around £25 and is quick and clean in operation. The clear tube allows for easy observation of air bubbles and fluid.

Step 14: This non-return valve in the brake bleeding bottle is particularly useful when conventional two-person brake or clutch bleeding is being carried out.
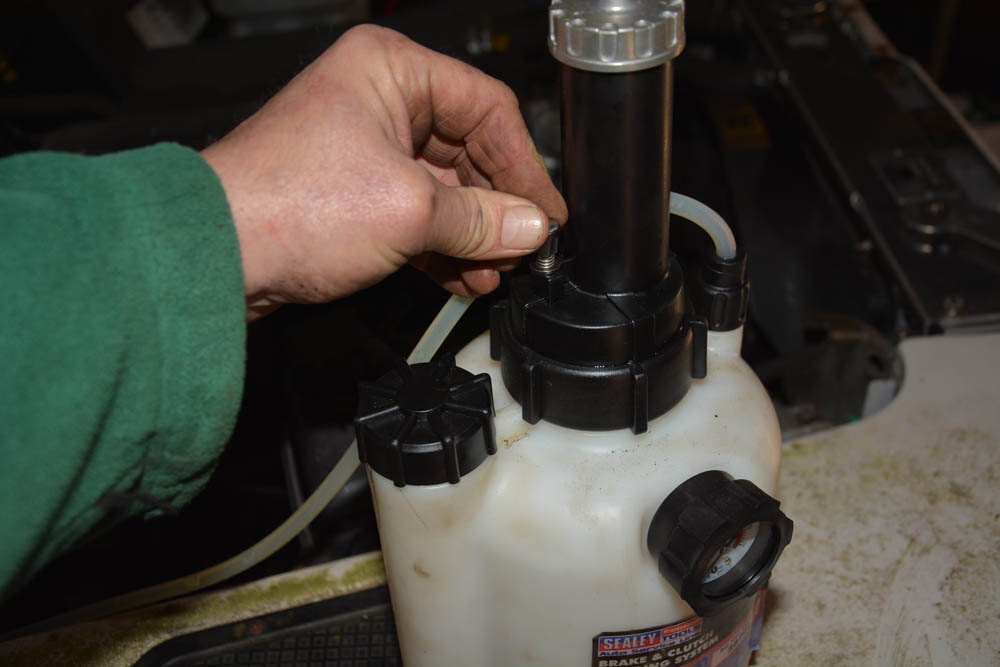
Step 15: As soon as all of the air is expelled and the system is filled with brake fluid, the pressure is released from the tool by pressing this valve.
Brakes

Step 1: The same adapter cap fits the brake fluid reservoir on a Defender, and the quick-release hose is attached just as it was with the clutch reservoir.
Step 2: The brake bleeding tool is again pressurised to 12 psi, though it’s capable of bleeding ABS systems where a higher pressure of around 20 psi is used.

Step 3: As with conventional brake bleeding, the pressure brake bleeder is used on the hub furthest from the master cylinder first, and finishing with the nearest.

Step 4: The bleed nipple is opened with an 11 mm spanner (or 10 mm in some cases) until all the air bubbles are expelled and clear fluid is observed in the tube.
Discovery 2 special adapter
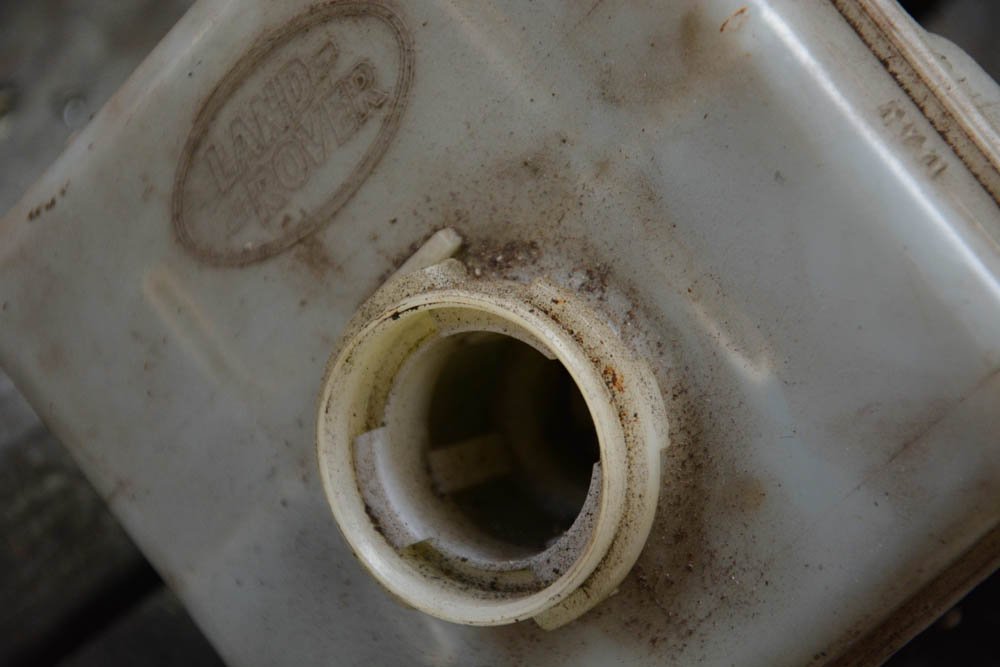
Step 1: The brake and clutch fluid reservoir fitted to Discovery 2 is different to Defender and cannot use the adapter cap supplied with the pressure bleeding tool.

Step 2: This universal adapter from the manufacturer has the J clamps too close for a Discovery 2 brake reservoir, so I have modified it with a steel plate.

Step 3: The 8 mm plate was cut to size and drilled to hold the J-clamps slightly further apart to clear the reservoir. The plate is cable-tied onto the adapter.
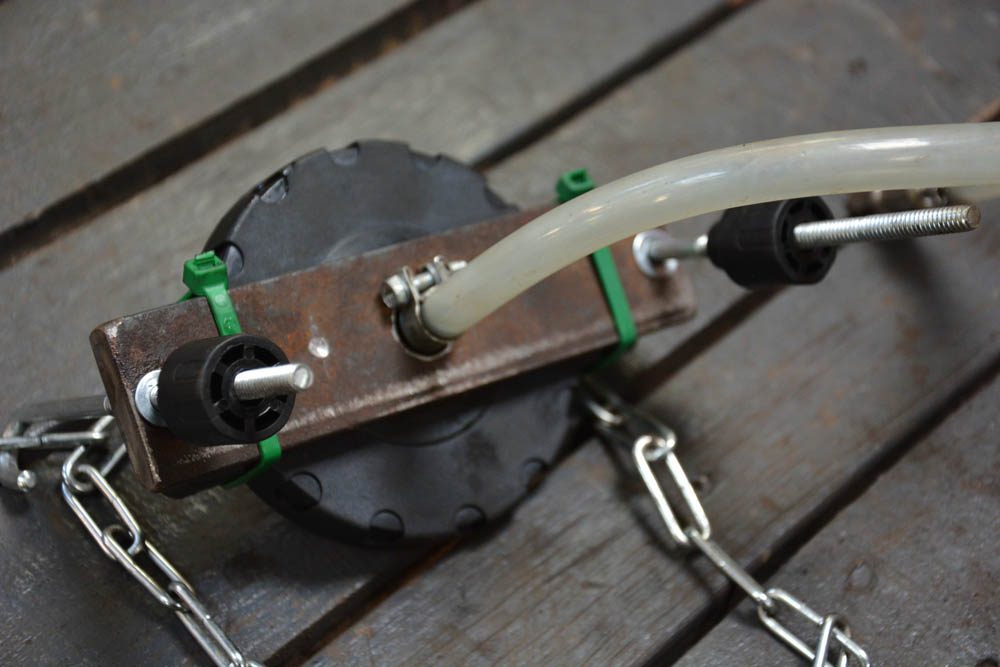
Step 4: Looking at the top of the adapter, you can see the steel plate has also been drilled in the centre to allow the plastic pipe connection to pass through.
Step 5: On this spare combined brake/clutch fluid reservoir from a Discovery 2, it can be seen how the addition of the steel plate allows the universal adapter to work.

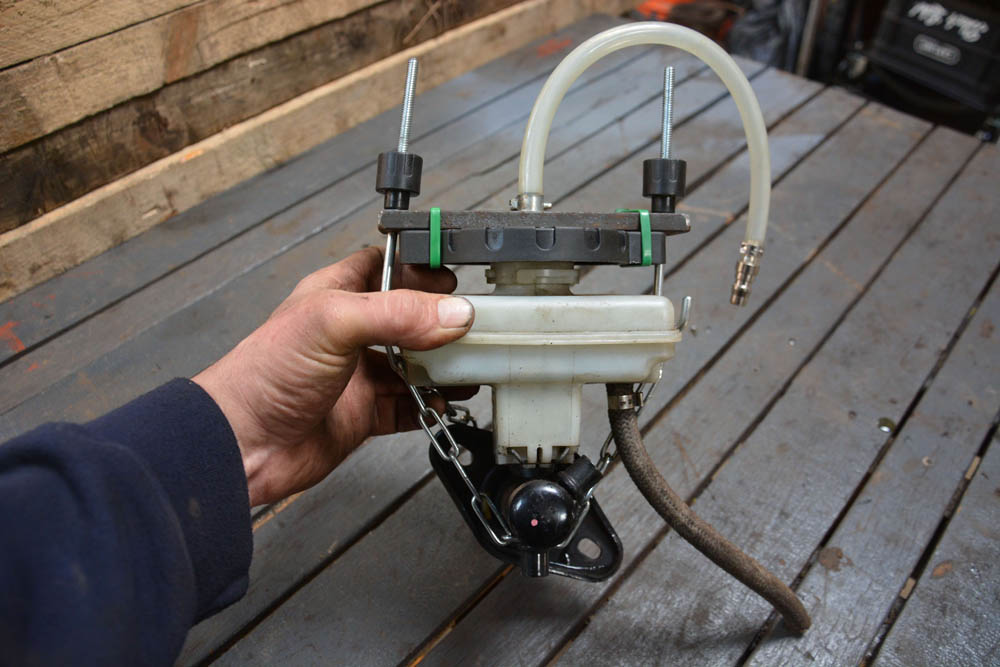
Step 6: Fitted to the reservoir of a Discovery 2, the universal adapter is ready to connect to the pressure brake bleeder, to service the brake and clutch systems.

Step 7: The pressure brake bleeder has a habit of leaving the reservoir over-filled with fluid. This syringe is used to take off some of the excess fluid.
Vacuum bleeding the Clutch and Brakes
This system requires a compressed air supply of around 90 to 120 psi for operation. The fluid reservoir is filled and kept topped up throughout the bleeding process. The air line is attached to the unit and operation of the trigger creates suction at the bleed nipple to draw fluid through the brake or clutch lines from
the reservoir.
The bleeder is clean and effective, and allows for one person operation, but it is not as fast as the pressure bleeding method. Both systems can also be used for complete fluid replacement.
One slight downside of the vacuum bleeder is its tendency to draw a little air at the nipple if the cover is not making a good connection.
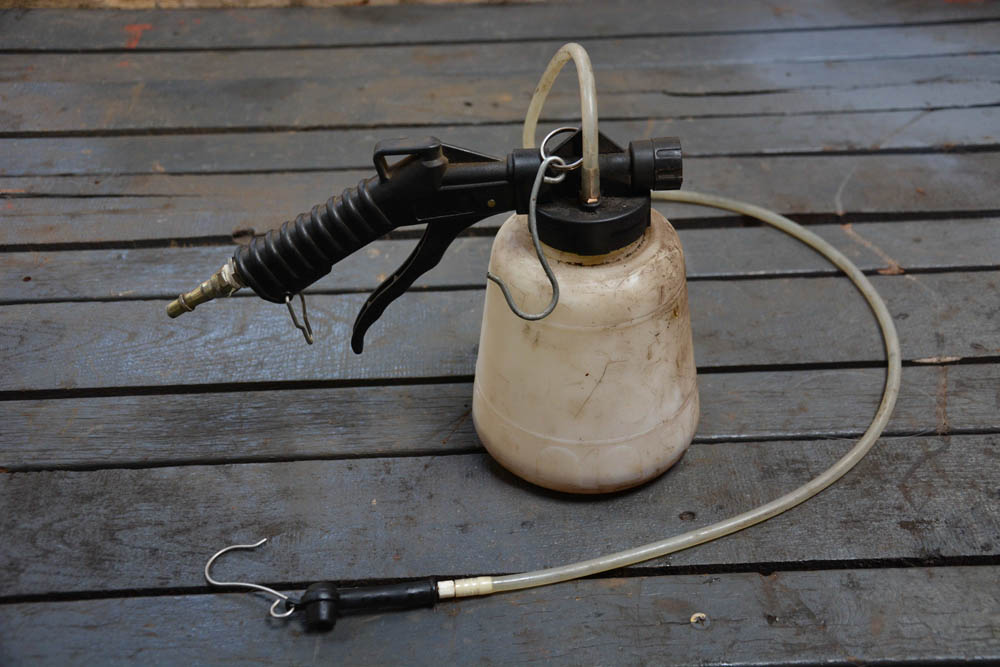
The vacuum bleeding tool needs to be connected to the workshop air line via a quick-release connector. Note that no reservoir adaptor cap is required.

The hose from the vacuum brake bleeder is attached to the bleed nipple. With the nipple opened, the trigger is pulled to suck air and fluid through.
Comparing the options
Back in my early days of tinkering with my first car and my old camper van I progressed from the traditional method of brake bleeding to an early pressure bleeding system: the Gunson’s Eazi-Bleed. This used air pressure from the spare tyre to force fluid through the brake system. In my hands, it was almost a one-shot system. After a couple of uses, I could never really get it to seal properly again, with a resulting mess of brake fluid spillage. At today’s prices this kit is still only around £15 and remains a workable solution.
As my work with Land Rovers ramped up, I discovered the vacuum bleeding system and was extremely happy with it for quite a few years. It happily dealt with braking systems and hydraulic clutches in many Defenders and Series Land Rovers – and successfully bled the ABS brakes and the clutch in my Discovery 2 projects.
In recent years, I have used a professional pressure brake bleeding system and consider it to be the best of all. It pushes the fluid through the braking system quickly and positively, and also inspires confidence that all air is out of the system first time, every time.
Starting at the furthest wheel from the master cylinder, and bleeding each in turn, down to the closest, I can achieve excellent brake pedal pressure at first attempt. I always repeat the bleeding process as a check, and rarely find any further air to expel.
Did you know that you can now get access to the entire archive of Land Rover magazine content with our brand new digital archive? You can enjoy all the issues since the launch of the magazine – use the search bar below to find features, reviews and other great content: