


01 December 2018
|
 : credit: © Ed Evans
Ed Evans finds his Range Rover Sport on the verge of major coolant loss, and explains a simple check and fix to avoid disaster
Models: Discovery 3 and Range Rover Sport 1 with 2.7 TDV6 diesel
Time: 2.5 hours
Cost: Length of hose and clips
Difficulty: 3/5 stars
Tools needed: Usual workshop tools, power hacksaw, coolant pressure tester.
Work safely: Never work on, or open, a cooling system until the engine has fully cooled and the system is fully depressurised. The bleed process requires the coolant cap to be slowly released a quarter turn when hot – take recommended safety precautions before doing this; When running the engine to bleed the cooling system, ensure exhaust gas is directed safely outside of the workshop; Wear thick gloves when using a power saw.
Sudden loss of coolant from deep in the engine bay of a Discovery 3 or Range Rover Sport 2.7-litre V6 diesel could lead to a serious roadside breakdown at best, or a seized engine at worst. And we’ve found exactly the place inside the packed engine bay where this might happen. It’s worth checking this, or asking your garage to check at the next service. If all is well, you’ll have peace of mind. If not, a timely repair could save your engine.
This job cropped up when we were replacing the air conditioning condenser with Steve Grant in Britpart’s workshop, shown in the November issue of LRM. It was only by removing a few parts that we were able see this normally hidden part of the cooling system, and it was only the movement of components while working in the engine bay that luckily disturbed the impending coolant leak, turning it into a waterfall that we couldn’t help but notice. I was lucky to have travelled the 160 miles motorway journey to Bripart with this leak about to happen.
For sure, if it had failed on the road, I’d have been stranded with no chance of a roadside repair.
The problem was a steel coolant pipe that runs from the left side (viewed from the driver’s seat) of the engine, turns in front of the engine, then points downward where it’s connected by a hose to the engine thermostat down below the radiator. In this case, the steel pipe had rusted through from the outside, and only a thick rust scab was holding the coolant in. The steel pipe points vertically down where the hose is attached, so we assume that any salt-laden winter road spray passing through the front grille can settle in the neck of the hose, against the steel pipe, corroding it from the outside.
We could see the steel pipe was a risky replacement job to attempt, given the short time frame we had. Access for replacement is not good, and the pipe is only available as part of a larger assembly, which could have been a lengthy job to fit.
But a bit of initiative cured the problem for negligible cost. Here’s what we found – and how we fixed it.
Accessing the problem area
We showed how to reach the area concerned last month when changing the vehicle’s air conditioning condenser. Gaining access to the coolant pipe is a similar job, except the radiator and headlamps don’t need to be disturbed this time. We’ll run through the access work briefly here.
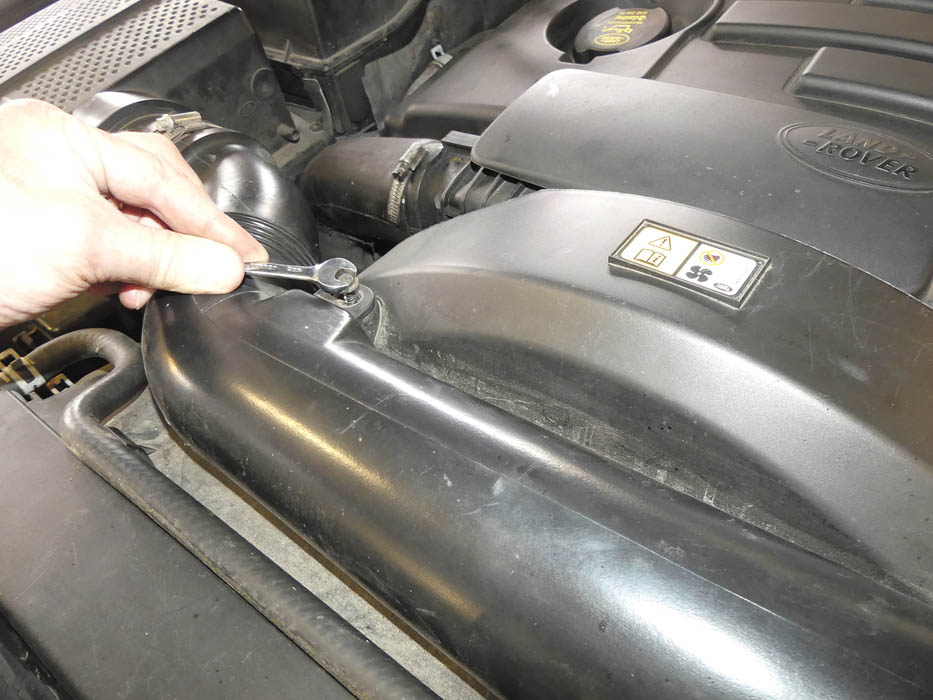
The air inlet duct is detached from the air filter box and the fan cowl, then pulled out vertically, followed by the upper fan cowl.
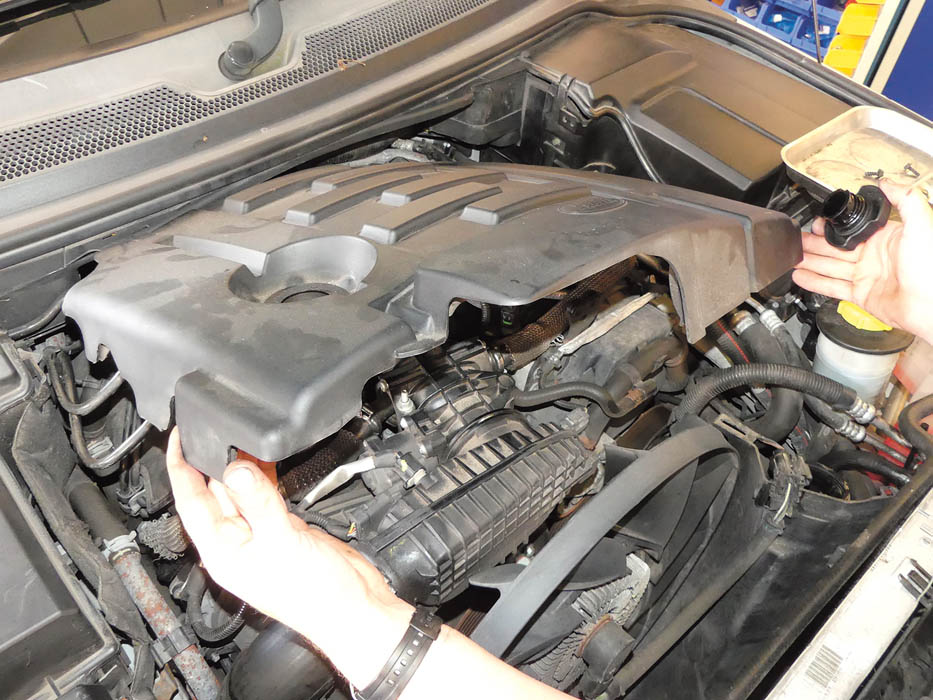
We’ve now exposed the cooling fan but, to remove it, we first lift off the engine cover and disconnect the fan’s multiplug from the harness.

Remembering the fan stud has a left-hand thread, the fan assembly is unscrewed from its hub and withdrawn, but the lower fan cowl still restricts our view.

We need to drop the underpanel in order to unclip hoses from the underside of the fan’s lower cowl – they’re just snap clips that need a gentle pull.
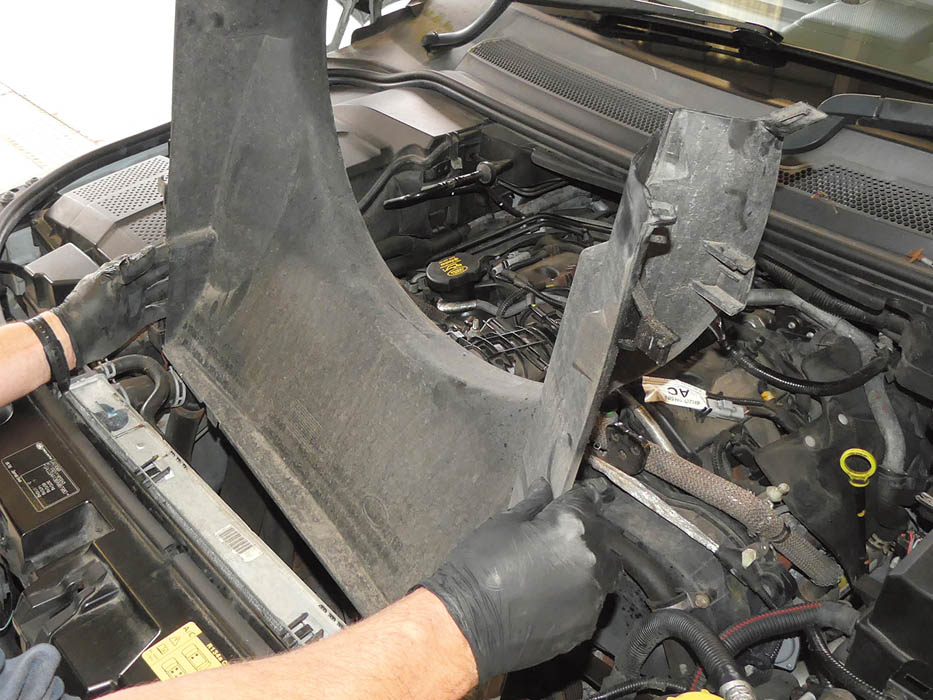
Screws and clips holding the fan’s upper cowl are removed, and the cowl can be lifted up and out, giving good access to the problem area.

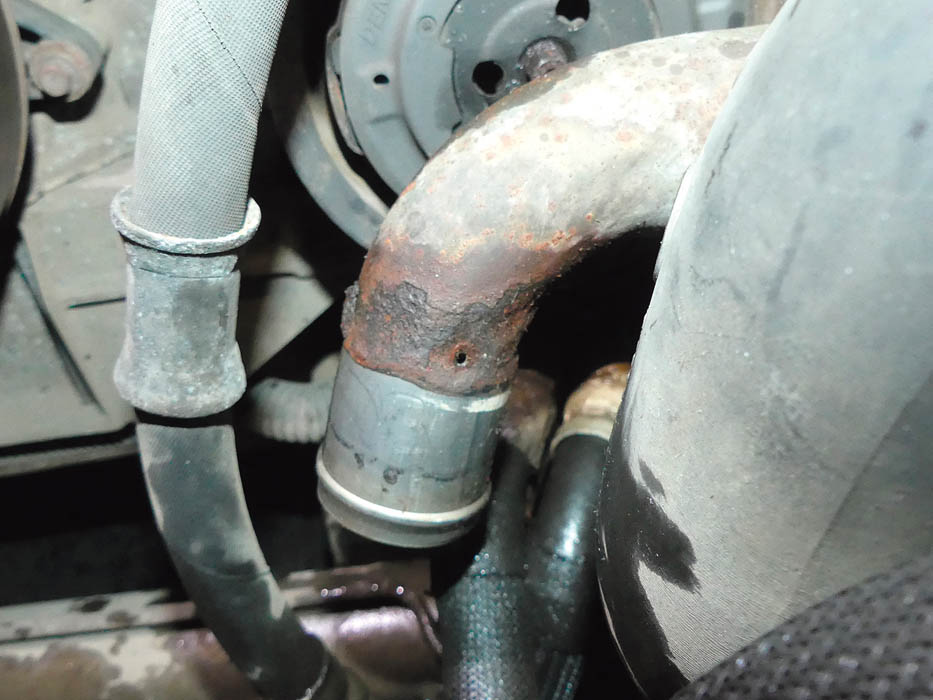
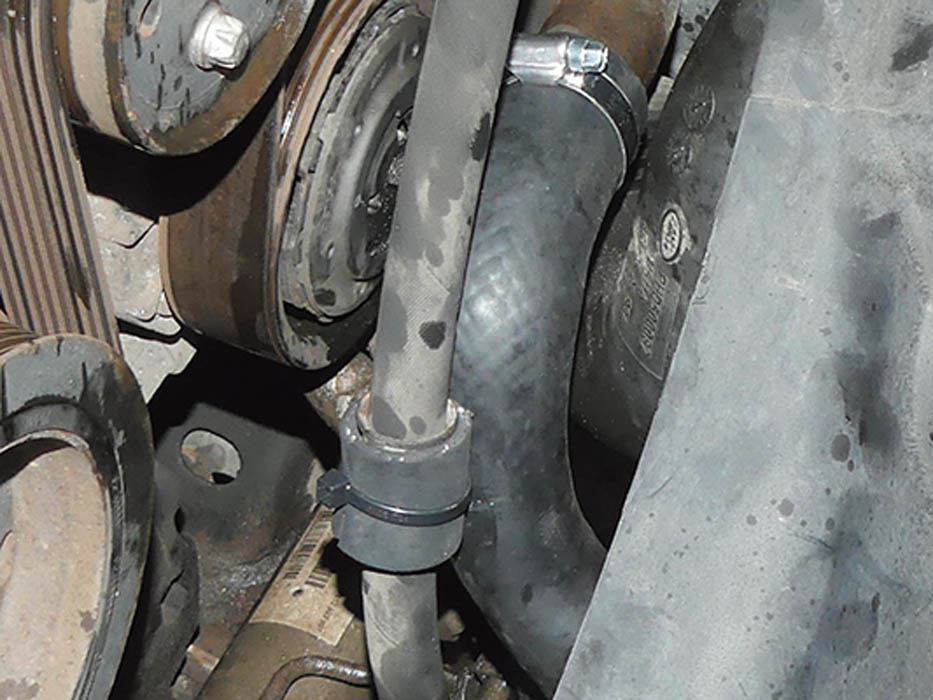
The problematic steel coolant pipe is arrowed (pictured left). The connected hose runs from the left, down from the steel pipe to the thermostat.
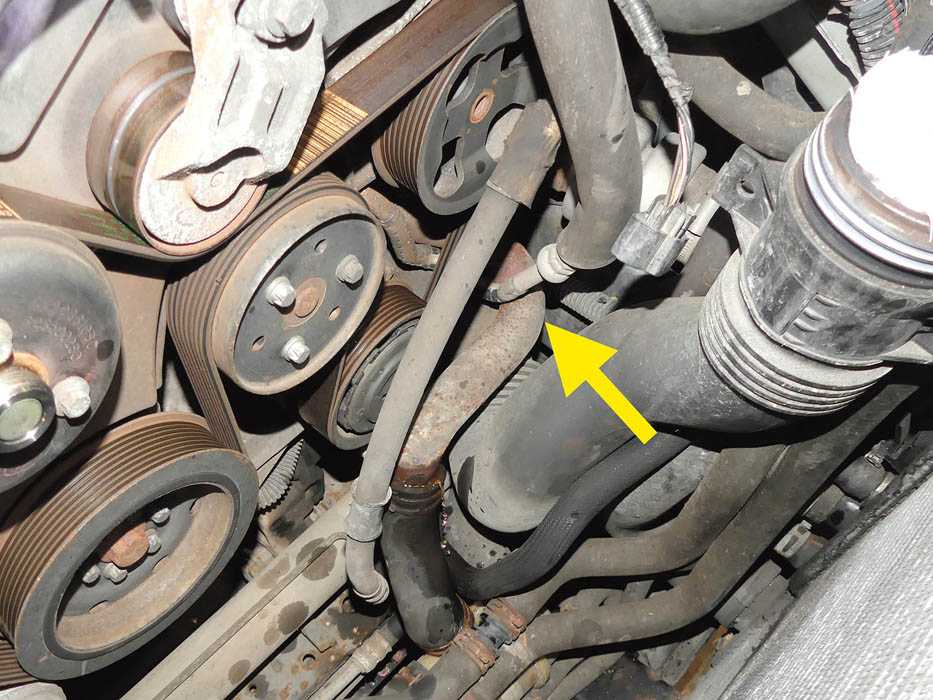
Here’s a close-up. The far end (pictured below, arrowed) of the steel pipe curves back along the side of the engine. The thermostat is under those hoses at the bottom.

The coolant is drained by releasing the smallest (left side) hose from the thermostat housing stub, as the coolant flows out into a tub.
Back in the engine bay, we remove the hose (which is in good order) from between the steel coolant pipe and the orange thermostat housing.
Repair technique
At first glance the obvious solution is to replace the corroded steel pipe. At second glance we quickly realise the pipe is running along the left side of the engine, out of sight. This is a congested area with poor access, and there’s concern over what else we might disturb if we tried to remove the steel pipe. And I need to be heading back home up the M6 in a couple of hours. To put the hat on it all, we find the replacement steel pipe is only available as part number LR 020009 (hose assembly and thermostat), which is the thermostat plus all connected pipes and hoses costing between £200 and £300, depending where you shop. Add on a garage labour cost to replace this complex coolant route and we have a very expensive small hole to fix. Regardless of cost, we had no time to go down this route, but nevertheless effected a good permanent fix for minimal cost.
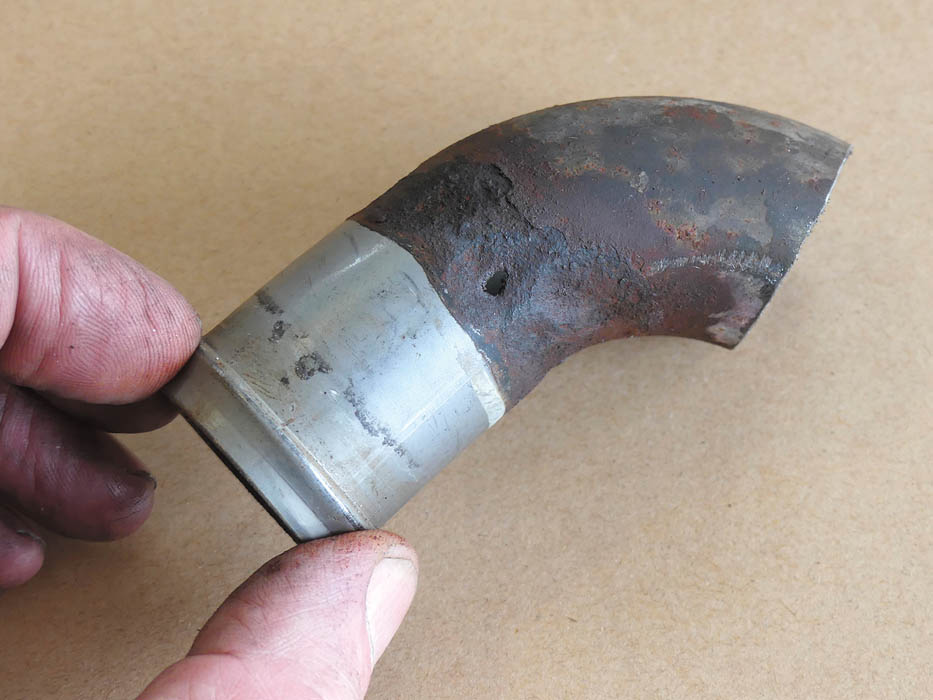
Here’s the cut pipe end, even the good part was measured at just 1 mm thick. That leaves the horizontal section of the pipe in place to connect to.
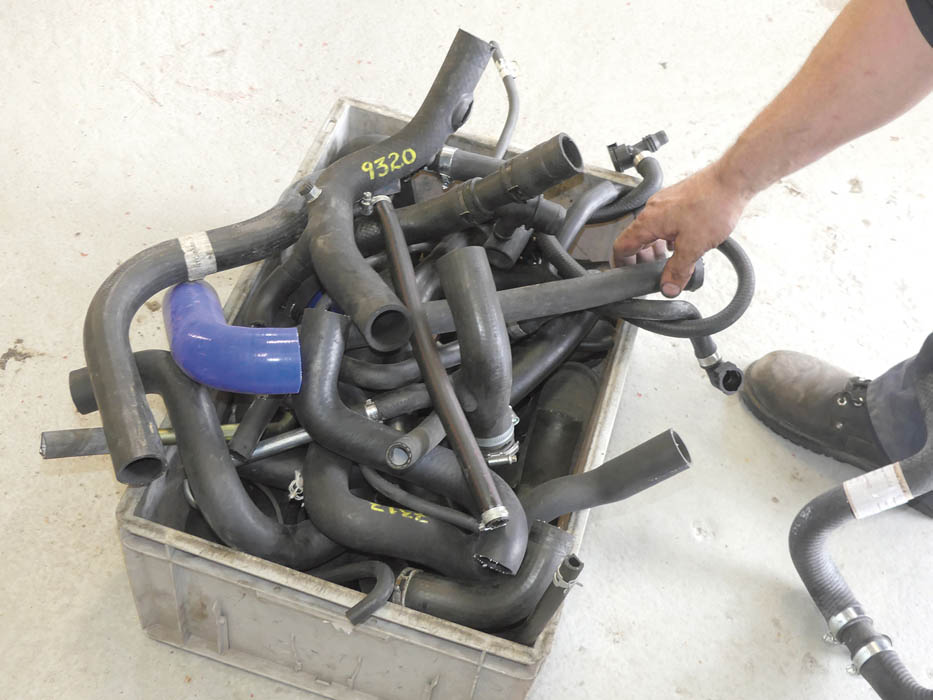
We need a one-off hose to fill the gap. So we raid Britpart’s test lab for assorted hoses that have passed pressure test and cut the best to suit.
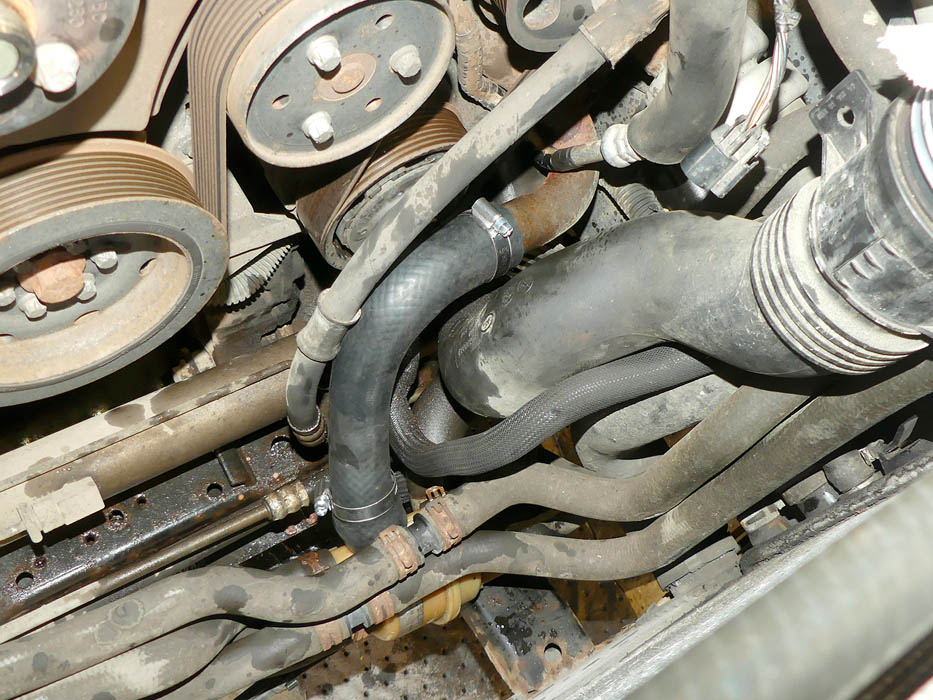
The repair hose looks as correct as any standard part would. Importantly, the shape has worked without inducing any flow-restricting kinks.
Finally, we zip-tie a piece of protective rubber around the adjacent PAS fluid pipe in case it decided to vibrate against our new hose.

Before filling the coolant system, the coolant cap is removed and the vent/bleed screw opened on the top of the coolant expansion tank.

An additional bleed screw is opened on the end of this small hose on the top front of the engine. This bleeds air from the cylinder heads.
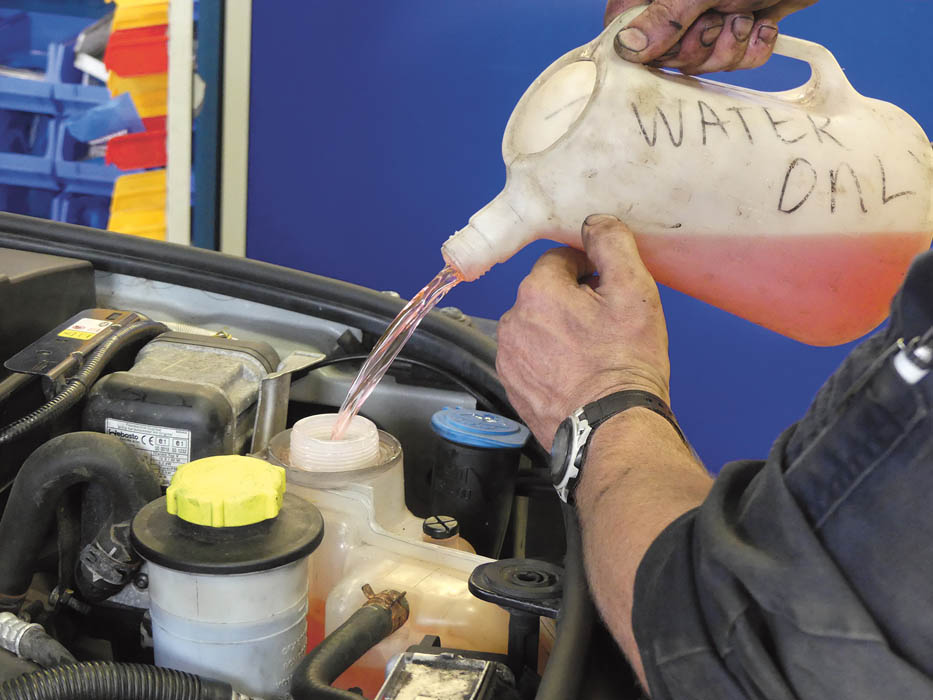
The system is filled with antifreeze until if flows from the bleed screws. The screws are then closed, the cap replaced, and cabin heat set to max.

Before completing the bleed and rebuilding the engine bay, we checked our new hose by applying a pressure test. All good to go.
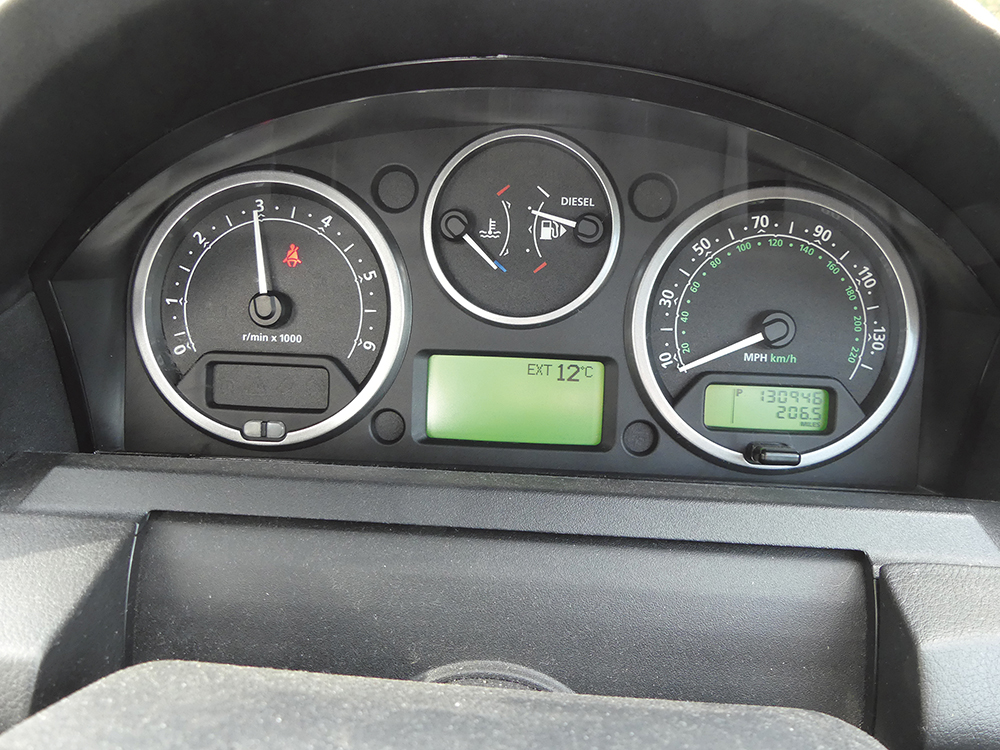
The engine is now run at 3000 rpm for one min, idle for five mins, another min at 3000, then run until the thermostat opens, before switching off.

Air collecting in the expansion tank is released by cautiously opening the bleed screw, doing this helps depressurise the system for the next stage.

The filler cap is now covered with a thick cloth and, wearing thick gloves, carefully opened a quarter turn to release the pressure.
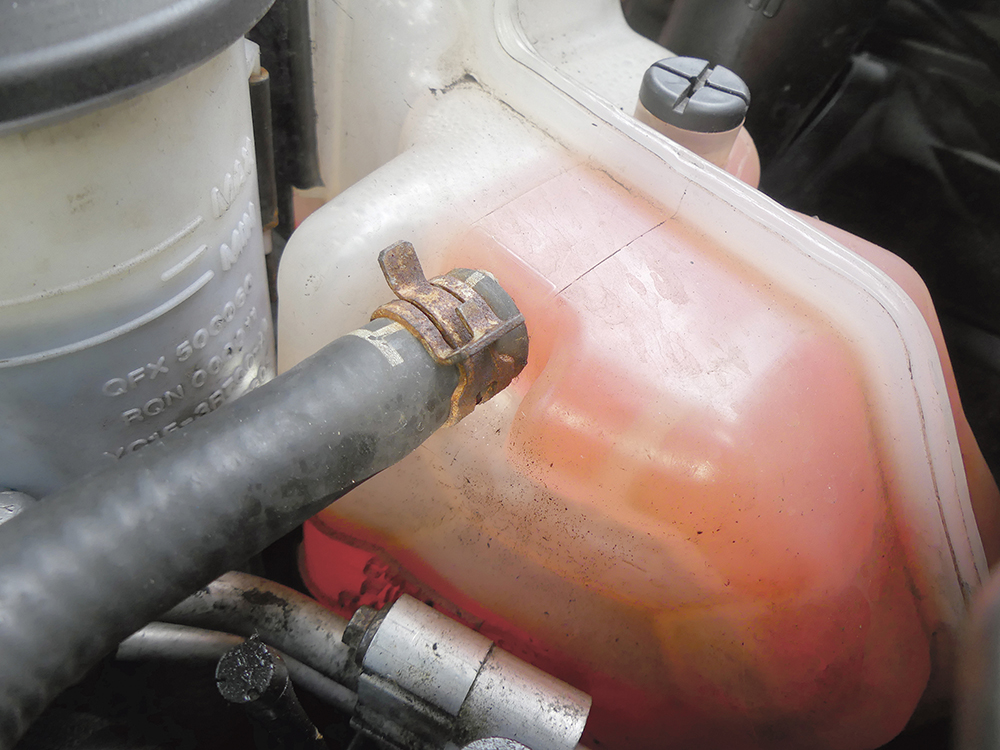
The coolant is now topped up to 3 cm above the higher of the two level marks. This will settle as the engine cools, when more coolant may be needed.
De-briefing

This is the basic coolant pipes and hoses layout (the Land Rover replacement part LR 020009 has many more pipes than shown here).
After WE refitted the fan, cowl and other access parts (which were all explained in last month’s air conditioning feature) I set off on the 160-miles journey home with a diligent eye on the engine temperature gauge. I stopped at the M56 services to check the coolant level and it had moved to the lower mark. An hour later on the M6 it was a tad lower, but I was confident that was due to normal settlement. Next day, when the engine was cold, I topped the coolant up to the top mark, and I also fitted a second compression hose clip alongside the upper clip, with their screw fasteners positioned diametrically opposite to each other. I recommend this additional clip only because the cut end of the steel pipe is no longer swaged. It’s probably not necessary, but I was about to drive to France with no time to have the official complete pipe, hoses and thermostat assembly replaced, so it was a case of belt and braces. The car has since covered 2000 relatively high-speed miles, mostly loaded with four people and luggage. The temperature gauge has been spot on, and the coolant level in the tank hasn’t moved.
Had the pipe failed on the road, and the car been recovered to a garage, the complete pipe, hoses and thermostat system would have been replaced as a single item, and there is an obvious advantage in replacing a complete system. Unless you are in a breakdown situation as I was, complete system replacement is the best course to take.
We were convinced this corrosion problem was due to salty road spray coming through the front grille and settling in the gap between the top of the hose and the steel pipe. You’d expect the heat to evaporate it away, but the salt would stay there, and so any moisture condensing on the pipe while the car is parked would become corrosive and fester away. We wouldn’t expect similar problems with the other end of the steel pipe (to the engine water inlet connector) because the hose end there is pointing down so would not collect water, and it’s well away from road spray.
I was lucky to find this while at the Britpart workshop. Otherwise it would almost certainly have burst during the motorway run and have discharged enough coolant to quickly damage the engine – temperature gauges don’t always tell you in good time.
Did you know that you can now get access to the entire archive of Land Rover magazine content with our brand new digital archive? You can enjoy all the issues since the launch of the magazine – use the search bar below to find features, reviews and other great content: