


08 October 2021
|
 Smooth the weld for a factory look
: credit: © Alisdair Cusick
Smooth the weld for a factory look
: credit: © Alisdair Cusick
Raised weld profiles can spoil the authentic appearance of a repaired panel or chassis. Alisdair Cusick explains how to achieve a factory appearance while retaining weld integrity
Time: 2 hours
Difficulty: 5 out of 5 stars
Models: All Land Rovers, but particularly restorations.
Tools needed: Metal finishing tools, welder method of choice (MIG shown).
Thanks to: James Holmes for his help and expertise in demonstrating this process.
Work safely:
• Wear hand and eye protection when cutting and handling metal.
• Always have a fire blanket to hand when welding.
• Always support a vehicle on stands, never a jack.
• Wear correct eye protection and gloves when welding and grinding.
It doesn’t matter what Land Rover you own, at some point in the vehicle’s life it will likely need a weld repair. Welding is the process of using heat to join two materials together, using a filler material to create a joint. In all the welding processes used, be it gas, arc, tungsten – and even with plastic welding – the filler material ultimately stands proud on the joint. Some people are happy with that visual appearance and accept it, but there are areas on a vehicle where obvious joints are cosmetically unacceptable, like bodywork, or on restorations, where a flawless or original appearance is a primary focus.
We’ve demonstrated the discreet weld technique here on a chassis, partly because, if you want to strive for an invisible finish, the thicker material can be an aid. Body panels, like inner wings on Range Rovers or Discoverys (commonly 1.2 mm steel) need a little more care as they are more easy to blow into holes when welding, and to distort through the heat built up. Invisible joints on bodywork are not impossible by any means, but do need a little more care and experience. Whilst the principal concern of any welded joint has to be its integral strength, it isn’t that hard to make a strong weld joint invisible with a little practice. You just need the right process, done correctly – and plenty of patience.
I’ve rated this job as a five for difficulty, partly because it leans towards someone who not just knows how to weld, but has enough experience to consistently get a good joint. Equally, although you may not have a desire to weld yourself, we can hopefully show you enough to appreciate a quality repair you’ve had on your vehicle – or, heaven forbid, spot workmanship of poor quality. Here, James Holmes shows us how to produce a strong weld repair that won’t be visible, or will appear original, when the work is completed.

Horror show: Typical repair by an untrained welder: a thick, wandering line of filler material surrounding the repair section. Weld dots sit on the repair joint, not fusing into it.
SIMPLE INSERT REPAIR

Start right: Here’s a typical repair area on the side of a chassis rail where an outrigger has been cut off. Chassis is usefully thicker than body, but same principles apply.
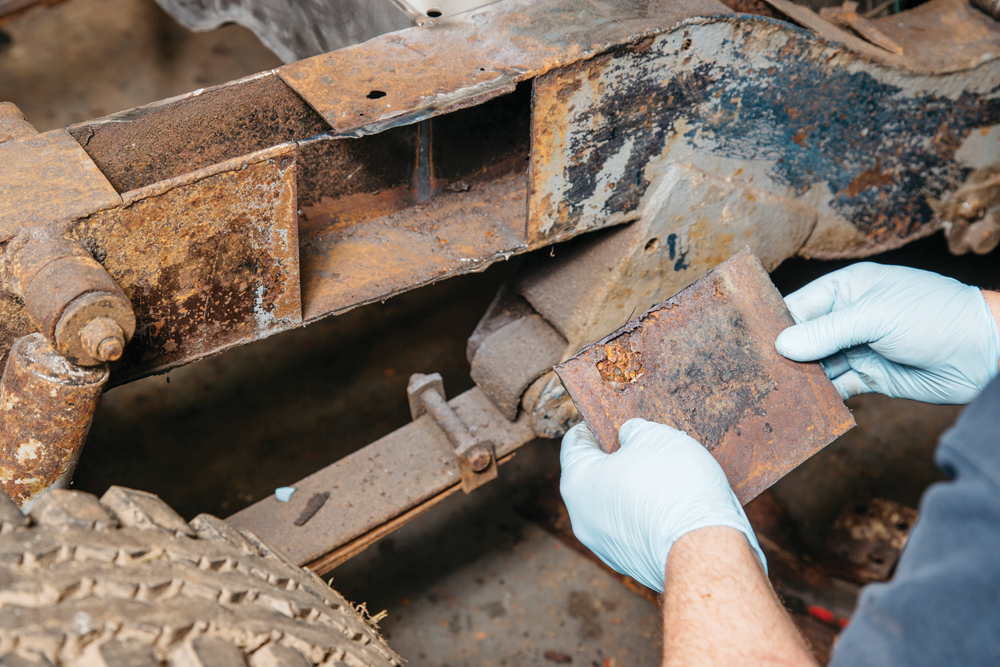
Cut it out: Cut out the localised corrosion. You want to get back to clean, solid steel again, utilising straight edges. Straight edges mean simpler repair panels and simpler welds.

Make it tight: Make a repair section, and here’s the first secret: make it as tight fitting as possible. Chamfering edges 45 degrees helps tuck it in and improves weld penetration.

Fit it right: James uses the dotting technique with a MIG welder to fix the repair panel in place. The tight fitting helps aid good fusion between weld joints and panels.

Watch it disappear: Getting each element right means no weld gaps. James now dresses the weld: removing the raised cap of the weld. Watch the weld become invisible, and the repair, too.
Why it matters: Invisible welds aren’t just for cosmetic perfection. Our smoothed repair section now makes fitting the outrigger easy. Once fitted, the whole area should look untouched.
MORE COMPLEX REPAIR

Often the case: The repair area often increases as you chase back to solid metal. James trims this panel for the top of the chassis in the same manner as before.

Back-up needed: This top section repair has plenty of side rail material to work with, but achieving a strong weld at the butt joint (arrowed) with no blow-out, needs more work.
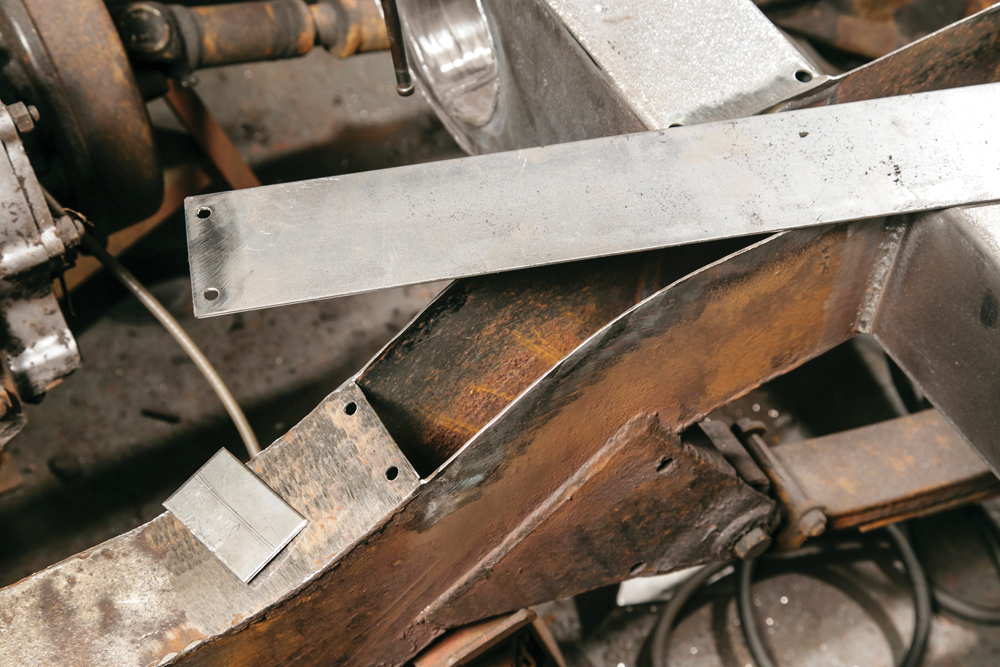
Extra tab: A small tab, equal in width to the inside of the chassis, is made. Two holes are drilled each side of the joint on the chassis and repair panel.

Tab first: The tab is held in position (half width) with a clamp. Notice the tab is visible through the two holes drilled in the chassis near the joint edge.
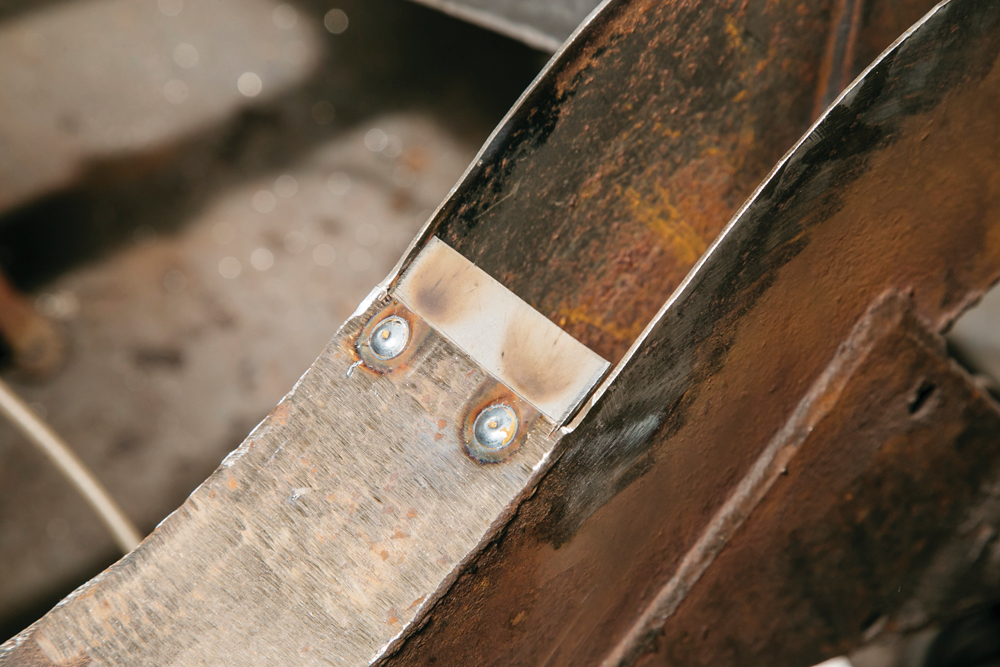
Fill it: The drilled holes are now filled with a puddle weld, fixing the tab to the chassis. This tab gives extra meat for the repair panel to be welded to.
Panel goes on: The repair panel goes on. Here, the first hole is puddle welded and there’s one spot weld on the joint. The butt weld along here will also penetrate the tab.

Mix and match: The repair panel top is clamped, then tack welded. Now, inspect the existing surrounding welds which dictate how your finished welds will need to look to blend in.

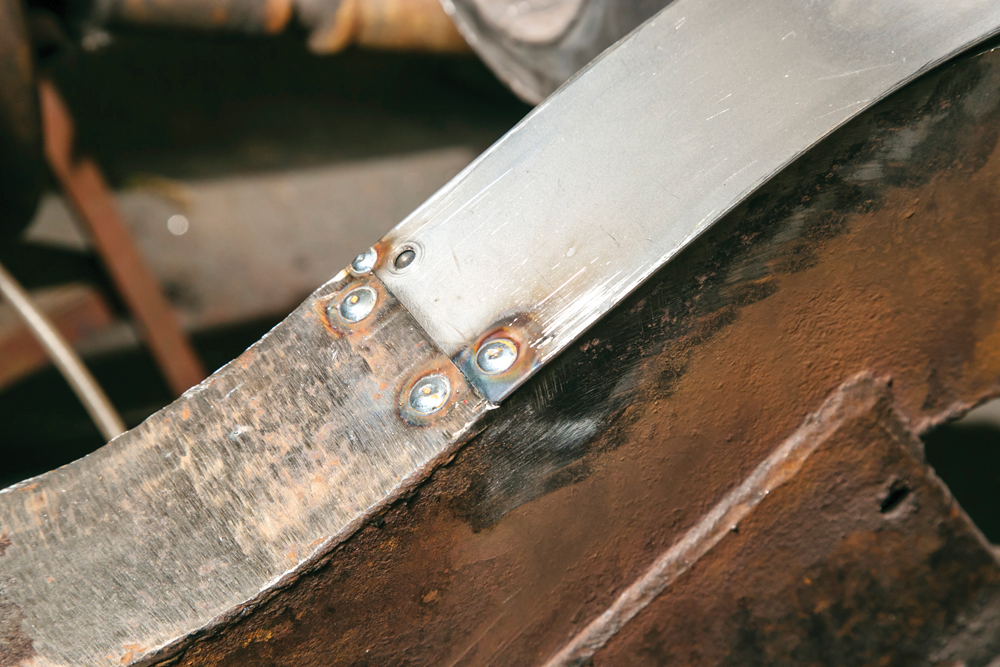
Get the right profile: The original factory welds are proud on the corners, not dressed back. James expertly produces matching welds on the repair. Note the butt joint is also fully welded.

Voila! The right visual weld profile means that dressing the corners to match the adjacent factory finish is easy. The butt weld with backing plate has been dressed flush.

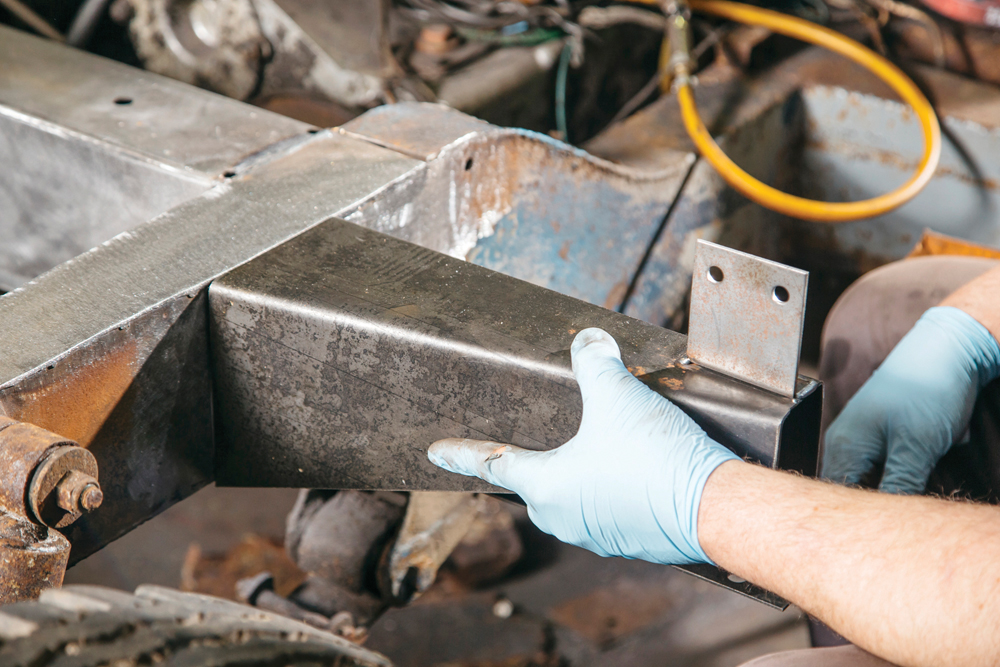
Scale it up: For larger repairs, the same idea scales up. Here, two right-angled tabs are used to join a chassis rail. Tabs are perfect for strong box section repairs.
Strength before appearance
The trick for making cosmetically discreet, yet suitably strong, weld repairs is as much about getting each element right along the way as it is about learning a special process. The weld only dresses back invisibly when it sits right. The way it sits depends on correct penetration and joint alignment which, in turn, has a relationship to material thickness and to the ultimate strength of the joint.
Correct penetration means strength is achieved through the full thickness of the joint so that the weld cap can be gently dressed back without adversely affecting the integrity of the joint. In turn, that joint not only looks right, but is as strong as possible. Technique plays a large part, but that comes with time invested in practice. Develop an appreciation for the details in each step and, in addition to making a discreet weld repair, you’ll be a better welder producing strong joints.
So this isn’t about simply grinding back a weld joint to pretend it’s not there. Instead, we’re showing how perfecting each step adds up to the end result being cosmetically much better as well as being a competent repair.
When Aristotle said ‘‘excellence is not an act, but a habit’’, he may have been welding his Land Rover. Because with welding, if you try to hide poor workmanship, you’ll make it look even worse. To get your welds to disappear, focus on getting everything ‘right’ along the way. Part of the reason welds disappear after dressing is because the welds have been correctly achieved, on a correctly fitting repair panel. It is as simple as that.
Achieving perfect body welding
LRM Technical Editor Ed Evans reckons that when metalwork needs to be replaced on a top-end Land Rover, it’s a job for the professionals
As Alisdair has pointed out here, blended weld repairs are an option on chassis welding, having greatest importance when restoring a vehicle to look just as it did when originally built by Land Rover. But when it comes to body repairs, hidden welds are essential if the finished panel and paintwork are to look anything like acceptable. And with the thinner material of body panels, skill and ingenuity are again the order of the day.
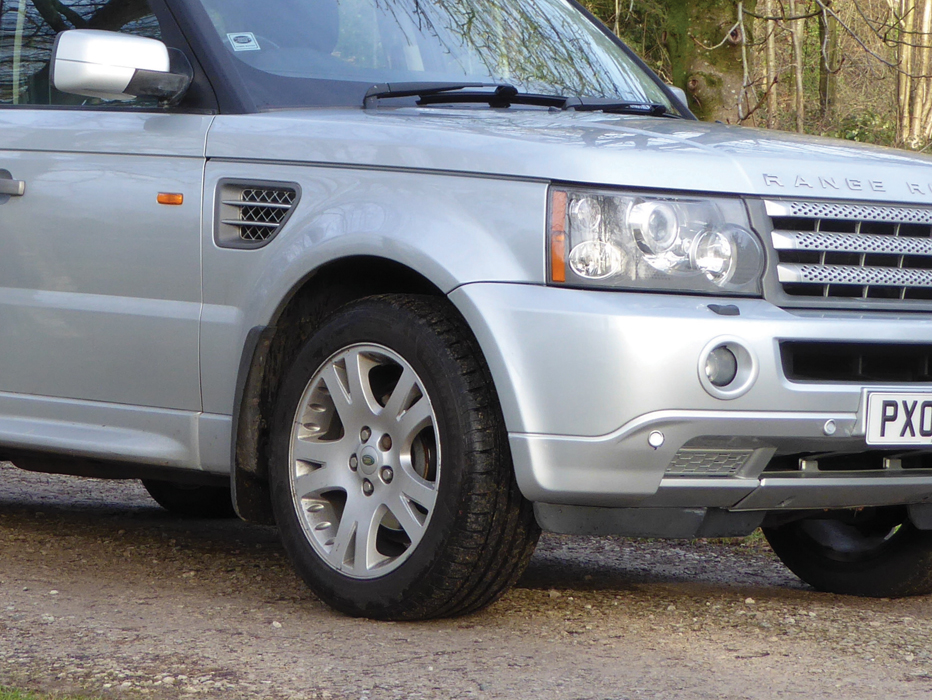
A few months ago I made a minor rust repair on the rear wheel arch of my Range Rover Sport using a dab of filler, rather than welding. I was delighted with the final paint finish, achieved with good quality aerosols by Jayco. The paint match was perfect and the surface texture just right, but the job was let down a few weeks later by shrinkage of the Isopon P38 filler under the paint. Maybe I’d mixed it incorrectly or the conditions weren’t ideal, but the depression it created looked like a botched repair. By this time, I’d spotted rust coming through on the remaining three wheel arches, so I handed the car to my local bodyshop for a long lasting professional job. And that’s given the chance to supplement Alisdair’s feature by showing some lovely hidden body welding.

Worse than it looks: The rust on this right-hand front wheel arch looks no more than a cluster of pinpricks, but the corrosion is right through and needs cutting out.

Deep cut: After removing the mudflap for further inspection and cutting out the rust, the surrounding area of the panel was found to be good and solid.

Class welding: A steel insert is attached with a continuous MIG weld with zero panel distortion and full weld penetration. Straight edge will be trimmed to the curve.
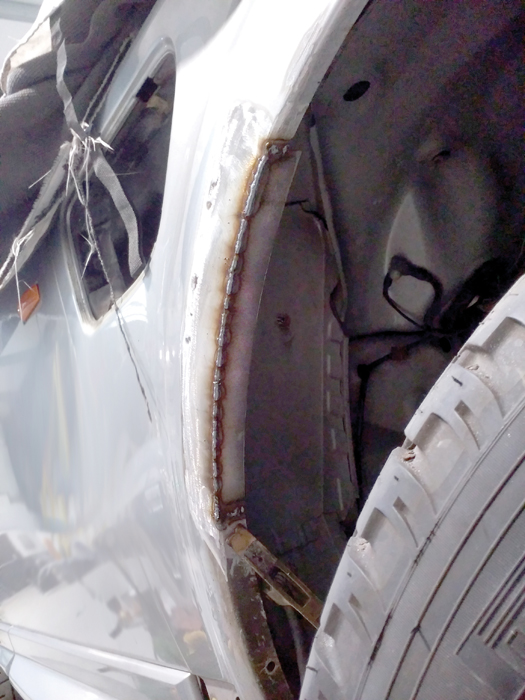
Lip service: A trimmed and shaped strip of steel is welded in place to form the inner flange lip. This is typical classic car restoration work.

Smoothie: Weld penetration and strength allows the steel to be buffed back to remove any signs of the weld profile. The repair is strong, and that curve is perfect.

Discreetly welded: Given an expert paint job and body parts refitted, you’d never know anyone had been there. I’m hoping this 2006 body will be good for another 15 years.
As with the Alisdair's discreet chassis welding, fusing steel in this way takes a lot of skill and practice to even approach professional standards. But it is the way to go for detailed restorations or to maintain a Land Rover’s body in ‘as new’ condition.
Ed used Evans Autobody accident repair specialists in Cumbria to have his repairs made.
Budget Digital Subscription
Get access to over 7 years of Land Rover Monthly – that’s almost 100 issues plus the latest digital issue. The issues are fully searchable so you can easily find what you are looking for and what’s more it’s less than 10p a day to subscribe. Click here and start enjoying all the benefits now