


09 April 2024
|
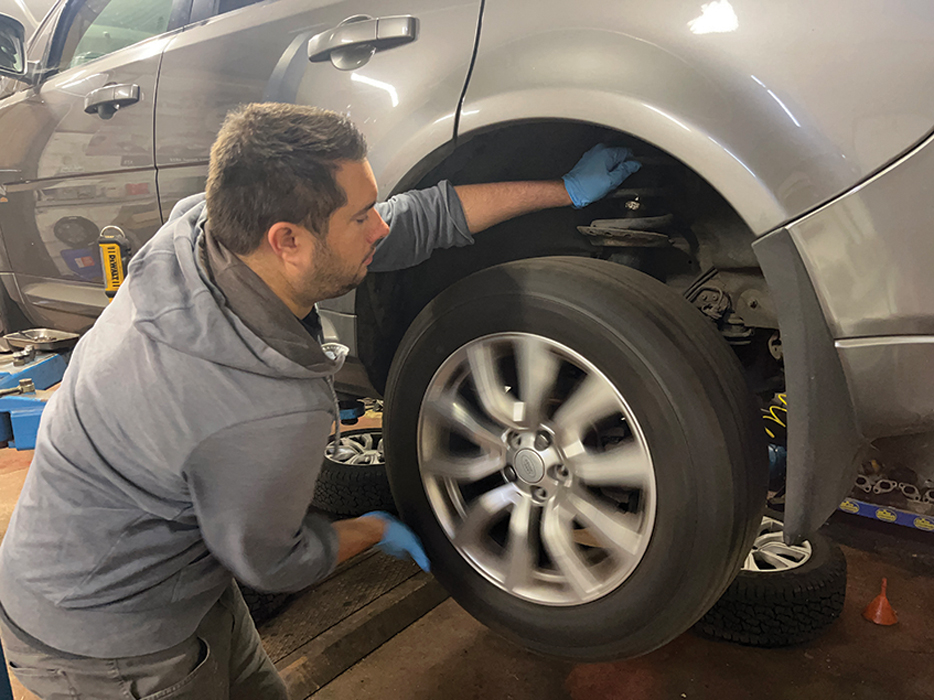
 Martin gets to grips with his Freelander 2's rear hub
: credit: © Martin Domoney
Martin gets to grips with his Freelander 2's rear hub
: credit: © Martin Domoney
Freelander 2 rear hub bearings can make a real racket – Martin explains how to change one with minimal strip-down
Need to know
Time: Three hours per side.
Cost: £19.94 to £104.64
Difficulty: 3 out of 5
Model: Freelander 2.
Tools needed: Socket and spanner sets, breaker bar, wire brush, hammer, torque wrench, T50 Torx bit, puller, pry bar, penetrating oil, trolley or pillar jacks, axle stands, Gen 2 bearing tool.
Parts and costs: Freelander 2 rear hub bearing (Genuine) LR041425 £104.64, lrdirect.com.
Work safely: Raise and support the vehicle securely on rated equipment. Wear the correct PPE at all times. As with all safety-critical component, if you aren’t confident in your abilities, leave the job to the professionals.
Freelander 2s are one of Land Rover’s more reliable offerings in recent years thanks to their relative lightness and simplicity, but they still suffer from wear and tear on the moving parts, in common with any other vehicle.
If you get a rumble or whirr from the back of your F2 while driving, it’s normally one of three things. If the wheel alignment is out, the tyres can wear unevenly, causing a hum that gets louder at speed and can change over different surfaces; the rear differential’s pinion bearing can fail, which is a whirr most evident under hard acceleration and deceleration and, finally, the hub bearings can get worn or pitted, which manifests as a whine or rumble which generally changes volume or pitch as the vehicle’s weight shifts from side to side when cornering. It’s important to diagnose the problem first, to avoid barking up the wrong tree and changing parts unecessarily.
Hub bearings are one of those jobs that you won’t want to do twice, so it’s worth investing in the best replacement bearings you can afford. They start at around £20 for the cheapest pattern parts, and expect to pay around £100 each for Genuine. When you consider the mileage that Genuine ones tend to cover without issue and the money you can save by doing the job yourself, it’s generally better to spend a bit more and fit at least OEM ones.
We’re using a Gen 2 bearing tool here, to suit the 82mm bearings that the Freelander uses. They’re not the cheapest tool to buy, but you’ll only have to buy it once, and it saves time and hassle over removing the whole hub from the car. If you have a friendly local garage or tool supplier, they may even rent you one for a weekend if you ask nicely.
Find the noise: A worn hub bearing will typically get louder or change pitch when cornering, as the weight of the vehicle transfers, but may not exhibit play when the vehicle is jacked up. Grab the coil spring, and spin the wheel – a faulty hub bearing will rumble through the spring.

Caliper and carrier: Raise and support the vehicle, then remove the road wheel. I’m changing the brake pads at the same time, so have removed the caliper separately. Unbolt the carrier from the hub, and hang it so the flexi isn’t stressed. Use service mode if you have an electronic park brake.
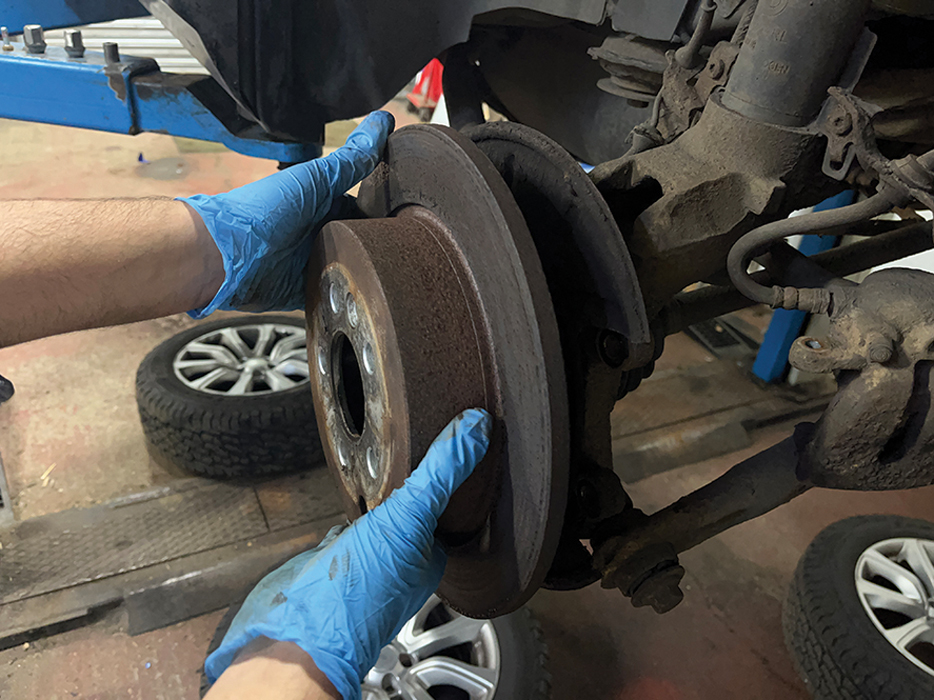
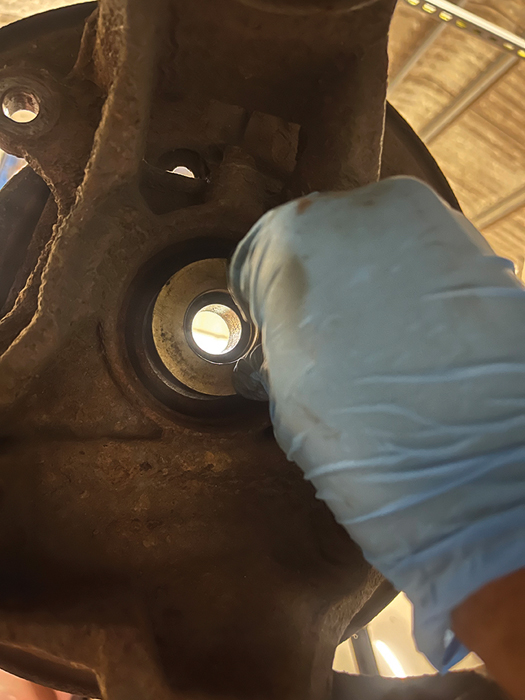
Remove the disc: For a manual handbrake, look through the access hole and slacken the adjuster off with a flat-blade screwdriver. Undo the single T50 Torx screw, then slide the brake disc off the wheel studs, clean any brake dust out with brake cleaner and set it aside.
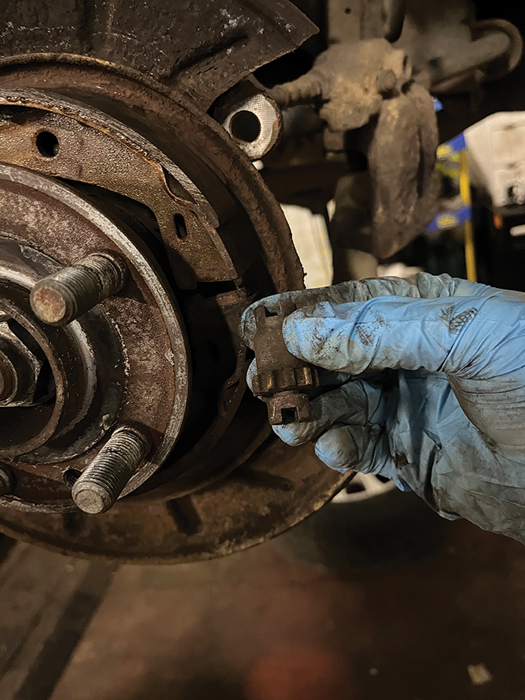
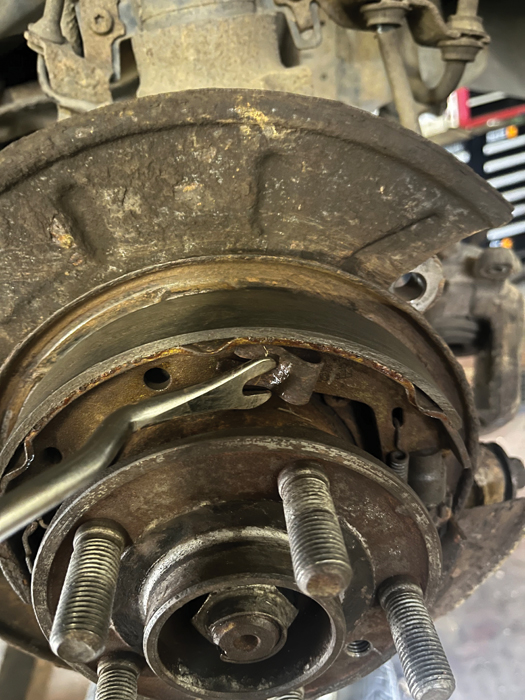
Adjuster out first: Lever the brake shoes apart slightly to release the spring tension, then withdraw the knurled adjuster from the back plate. This is a good opportunity to take it apart, clean up the threads and the surfaces, and lubricate it with a light smear of anti-seize grease.
Take your shoes off: Next, the brake shoes must be removed. It’s easiest to keep them as complete as possible, so use a screwdriver to release the two spring clips (one top, one bottom) then manoeuvre the pair of shoes off the back plate and over the hub. Lay them out as removed, for later.
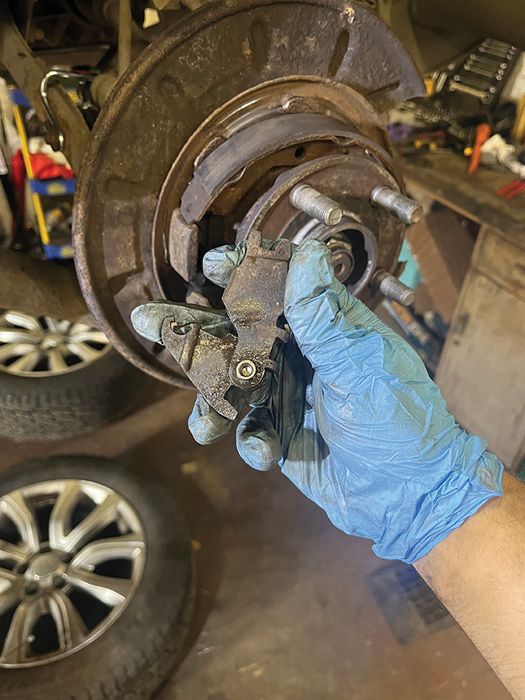
Inspect the pivot: This piece is what actuates the brake shoes, pushing them outwards and onto the surface of the drum. It’s commonly seized up, especially on automatics, so unhook it from the handbrake cable and wire brush it. Lubricate and work it so to ensure that it operates smoothly.
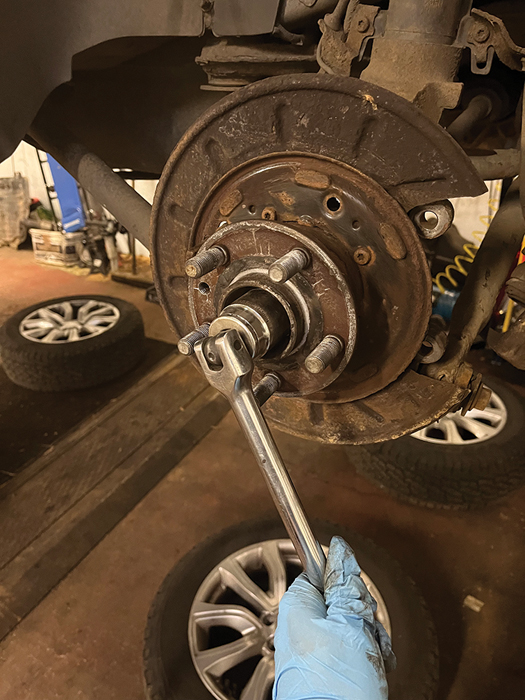
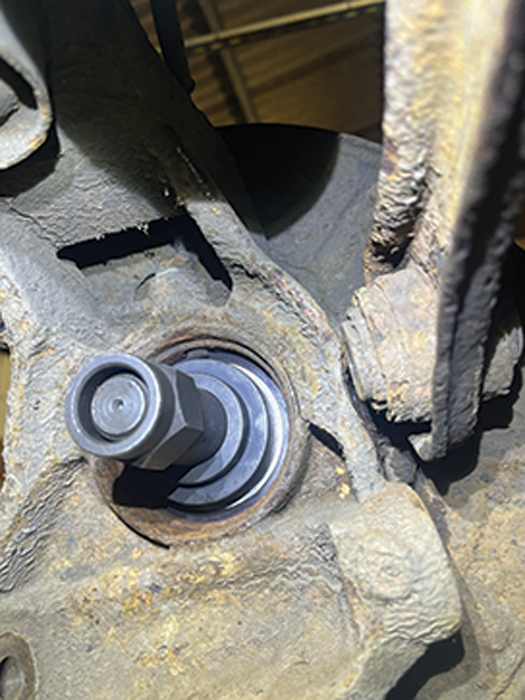
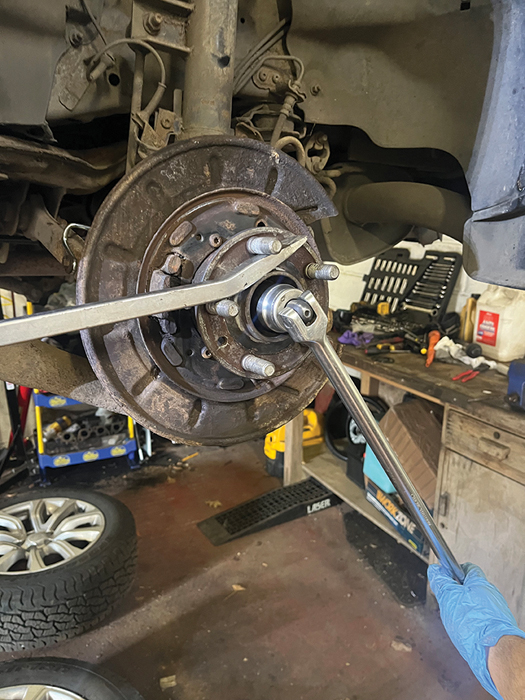
Undo driveshaft nut: Use a 32mm socket on a breaker bar or impact wrench to undo the nut holding the driveshaft into the hub. This nut is also responsible for sandwiching the bearing together, so expect it to be tight! Stop the hub from turning with a long pry bar as you break it free.
Release lower arms: In order to give sufficient room for the driveshaft to come free of the hub, the lower suspension arms must be unbolted. Clean up the threads with a wire brush and apply penetrating oil to ease them, then undo the two nuts and bolts and wind them out.
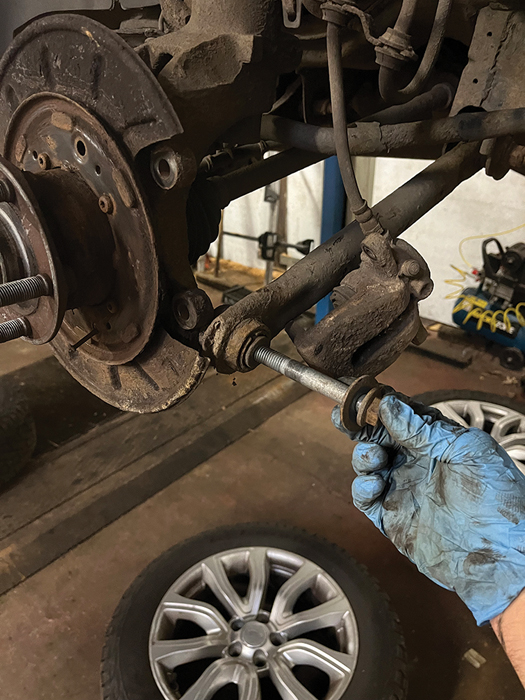
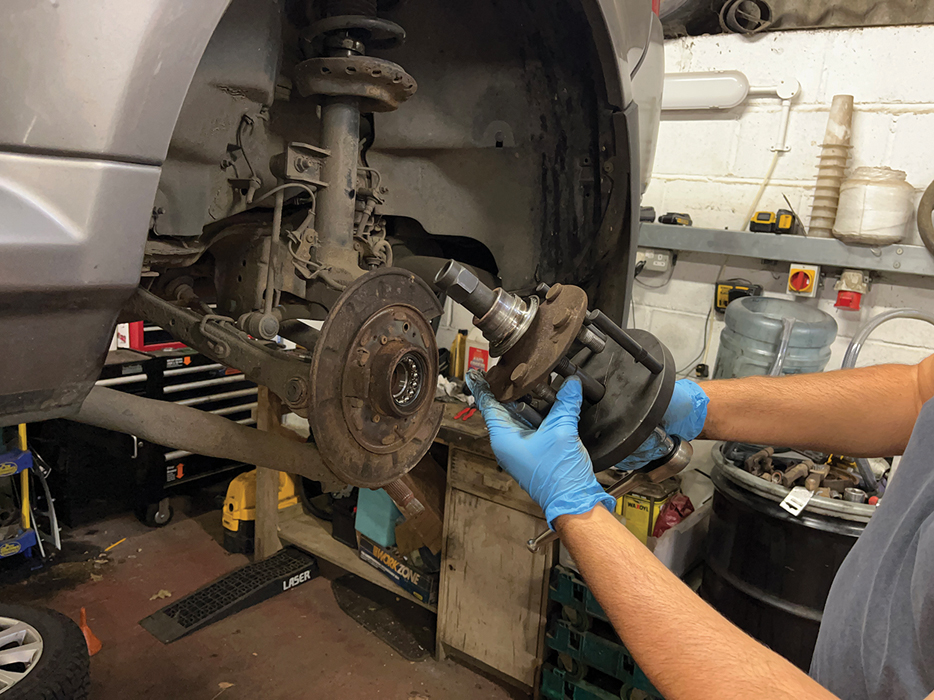
Separate splines: Use a soft drift to knock the driveshaft back through the hub – don’t be tempted to use steel or hammer it directly, or the threads could be damaged. Once free, pull the bottom of the knuckle outwards and release the driveshaft. Wire brush and lubricate the splines.

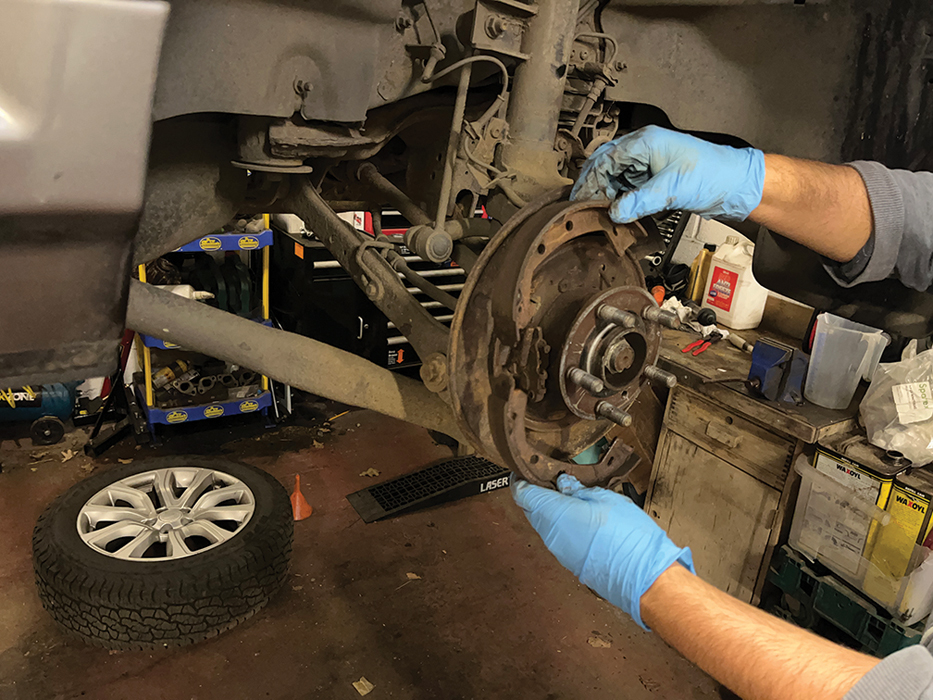
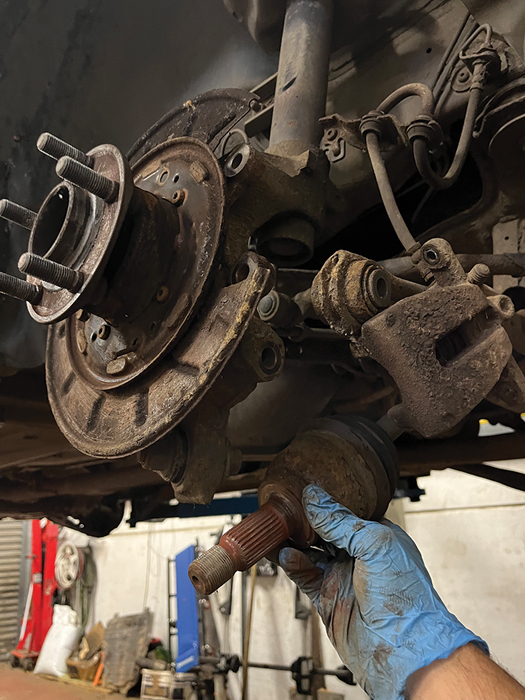
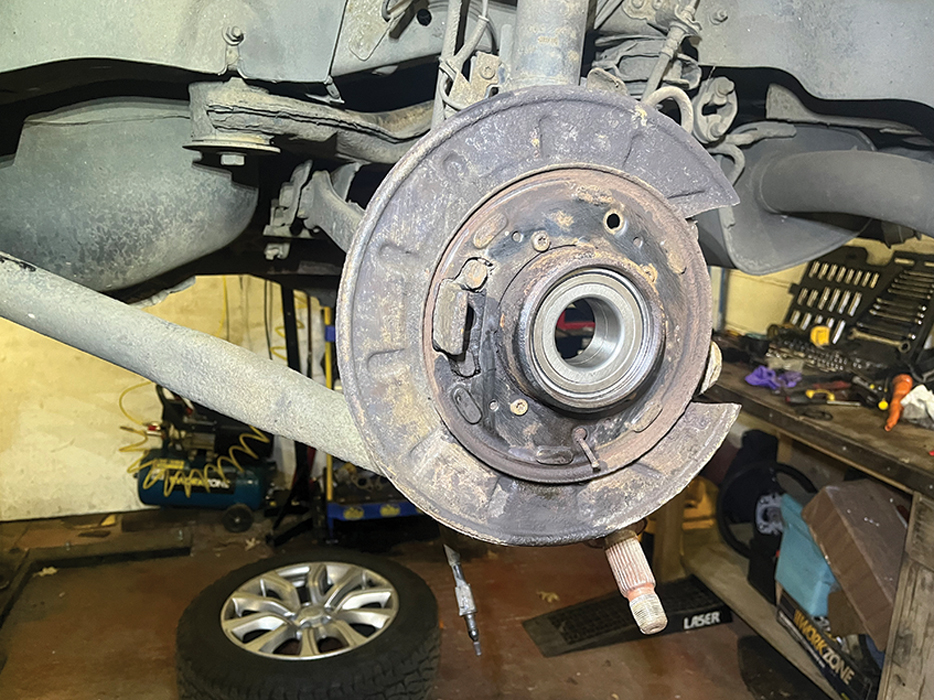
Take a look: With the driveshaft out of the way, you can get a better view of the back of the hub bearing and the surface we’ll be using to push it out later on. Note the ABS sensor at the top – take extra care not to damage it. Remove, if possible, but most are seized solid (like this one).
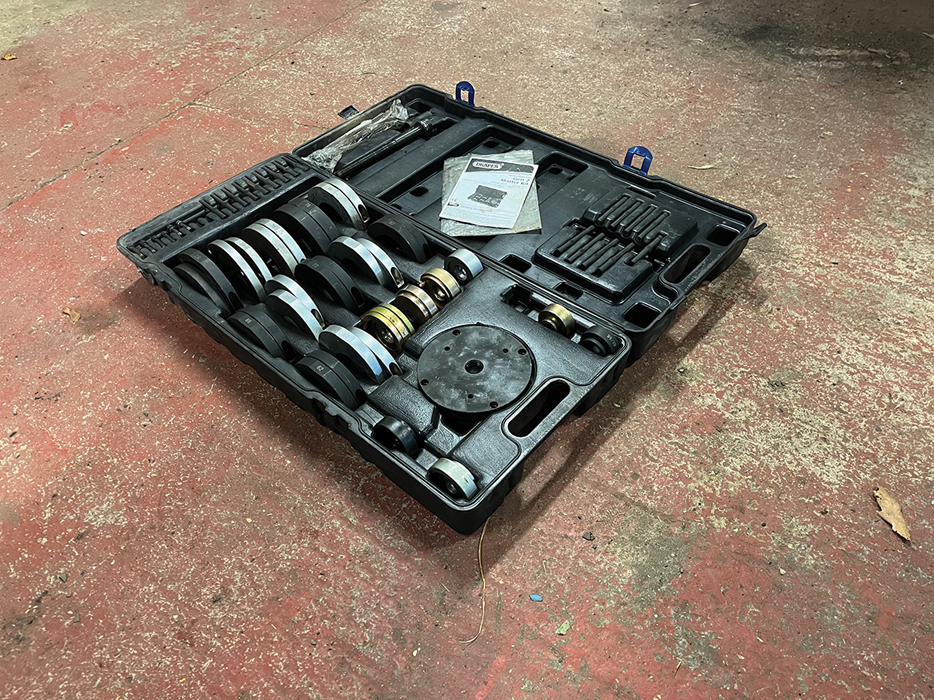
The special tool: This is the Gen 2 Bearing tool kit that makes the bearing replacement possible with the knuckle still in place. This particular kit is from Draper, but the correct one for this job is also available from Britpart retailers under DA6135. Avoid cheap, nasty kits; they don’t last.
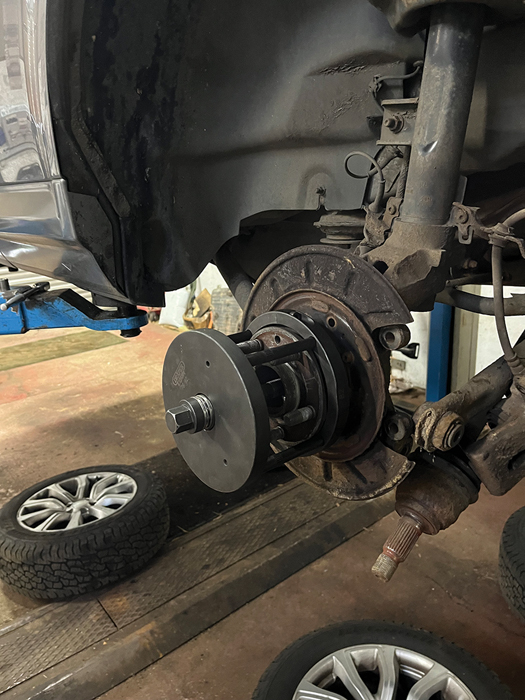
Operation 1: Set the bearing tool up so that it supports itself on the front of the bearing socket, behind the hub flange, and acts upon the back of the hub where the driveshaft slides in. Use a combination of the drivers, plates, spacers and threaded bar to achieve this.
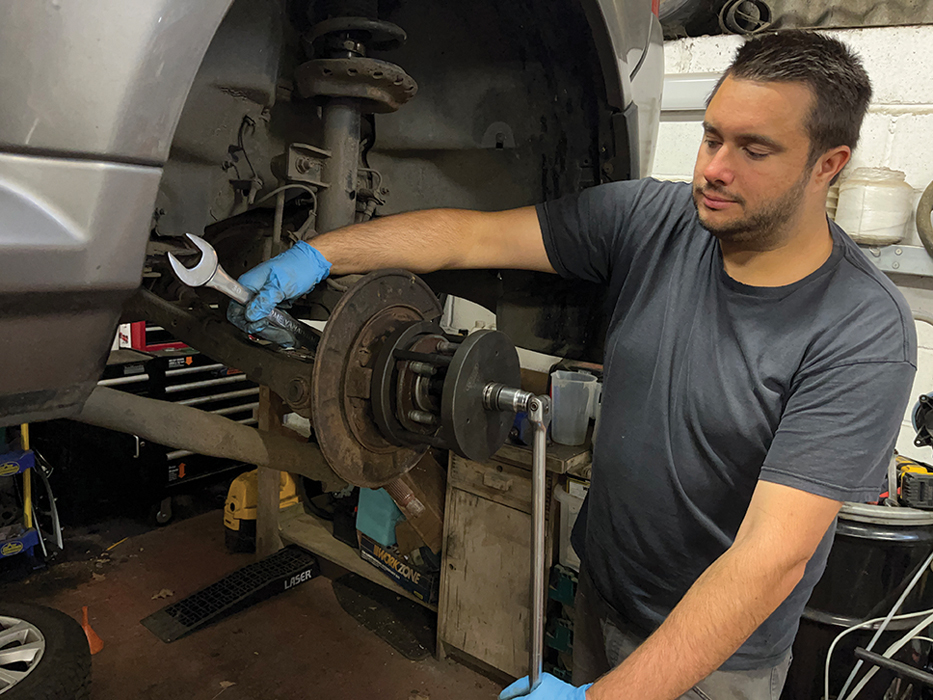
Apply pressure: Hold the nut at the back of the hub with a spanner, then tighten the bolt from the front with a long bar. Gradually apply pressure, checking the tool as you go, until the hub flange is driven out of the bearing. It didn’t take much grunt to get this one moving.
Lift hub away: Just before the hub comes away completely, support the tool to prevent it falling on the ground. Here you can see where the slim nut has pushed the hub through the centre of the bearing, while the posts have braced the tool against the knuckle, just like using a press.

Prise circlip out: In order for the bulk of the hub bearing to be removed (the inner race came away stuck on the hub, this is normal) the retaining circlip needs to be prised out – wear eye protection. Clean away any rust scale, then use a pick or screwdriver to ease the clip up and out of its groove.
Reset the tool: Use the same bearing tool set-up for removing the hub bearing as before removing the hub. This time, increase the size of the driver on the back side to push against the inner bearing race, but keep it compact enough that it does not contact the protruding ABS sensor.
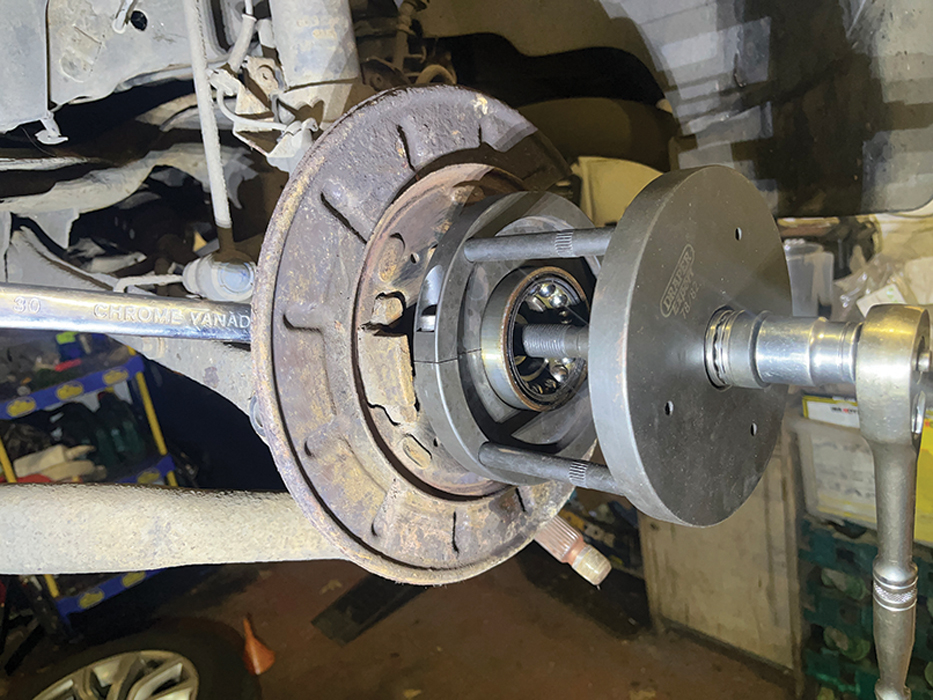
Pull bearing out: With the hub removed, here’s a better view of the two half-moon plates that support the tool on the front face of the knuckle. They slot around the edge and are clamped together with two cap-head bolts. Wind the driver in to pull the old bearing out.
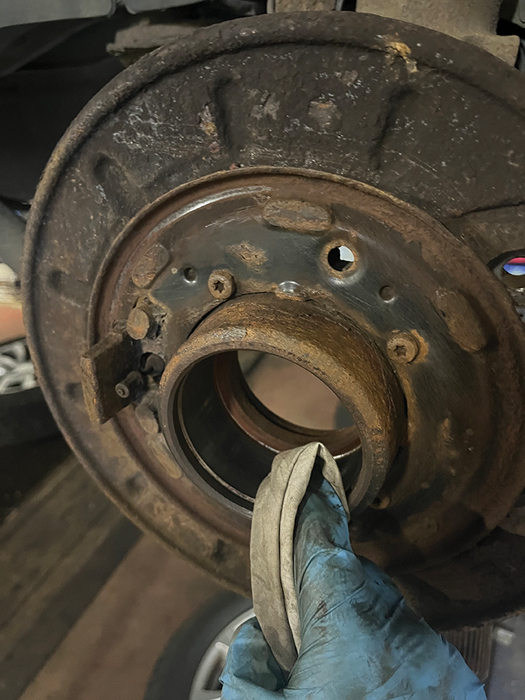
Clean the area: Once the old bearing is out, spend a few minutes cleaning the socket that the bearing sits in, and use a pick or screwdriver to clear any rust out of the circlip’s groove. It’s important that the socket is as clean as possible, or the new bearing may not slide in or seat properly.
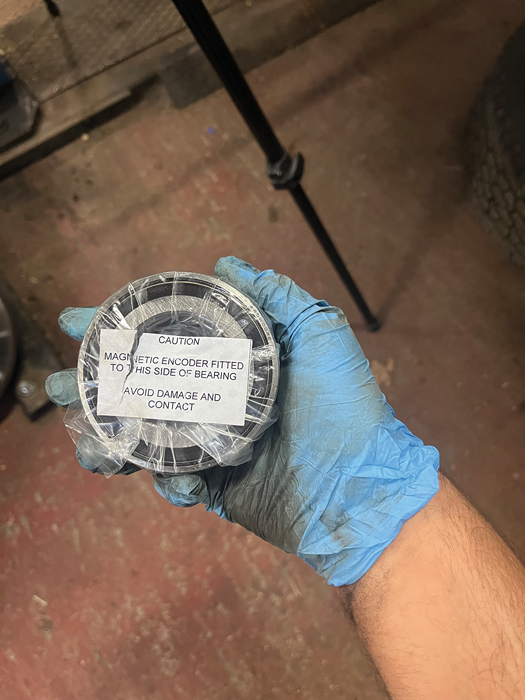
Take note: The bearing incorporates a pick-up ring that the ABS sensor takes a reading from, so it’s vital that the bearing is fitted with the magnetic pick-up facing towards the sensor. The ring can be identified easily as it’s a dark grey colour – the other side of the bearing is all silver.
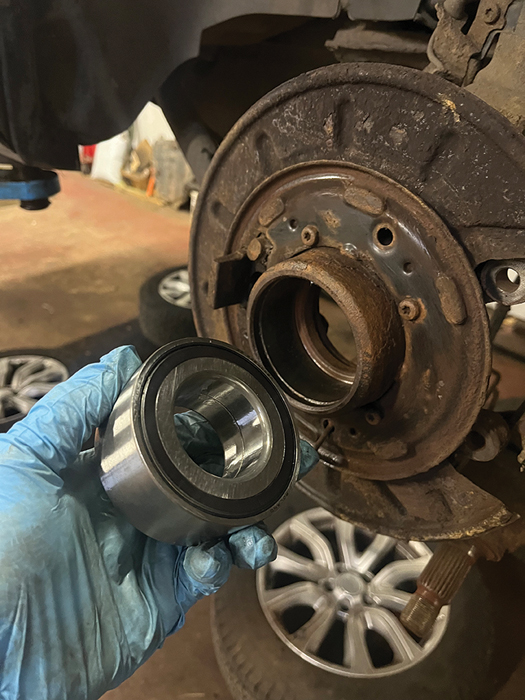
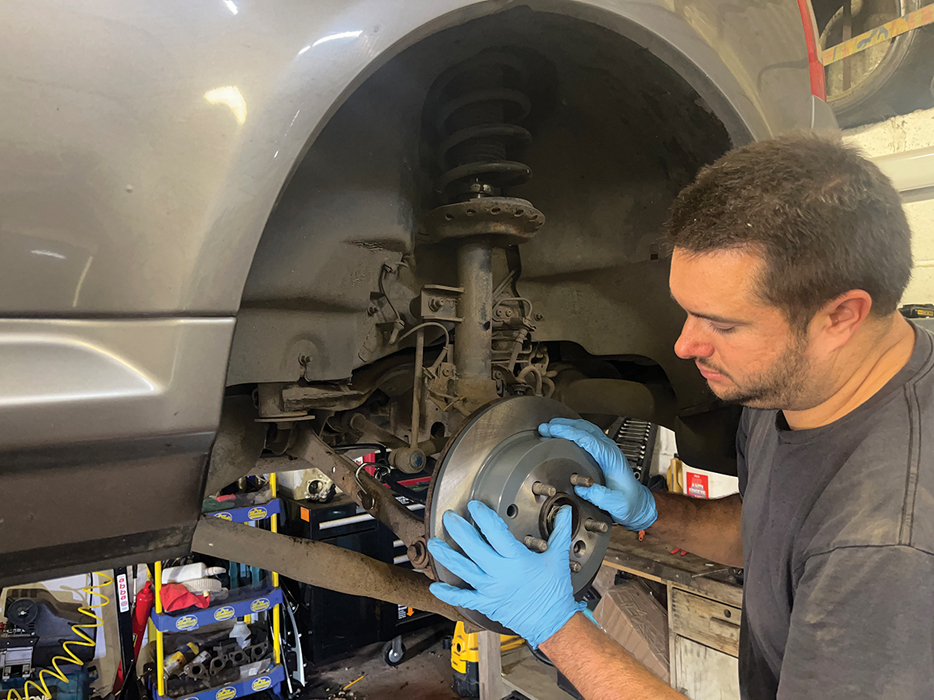
Offer it up: Remove the new hub bearing from its packaging and inspect it for any damage – you don’t want to fit a bearing that’s been dropped. Offer it up to the knuckle, with the dark grey magnetic side inboard, so that it will sit up beside the ABS sensor once it’s pressed home.

Draw it home: Set the tool up so it’s supported by the back face of the knuckle, then slide the threaded rod through and select a driver that acts on the inner bearing race, but doesn’t contact the muck shield. Ensure the bearing is square, then wind it fully home with the tool.
Refit the circlip: Use new circlip if supplied with bearing. Wearing eye protection, compress the clip and push it into its groove, making sure it’s seated correctly all the way around. The bearing is held in tight thanks to the interference fit, but you don’t want the clip coming out.
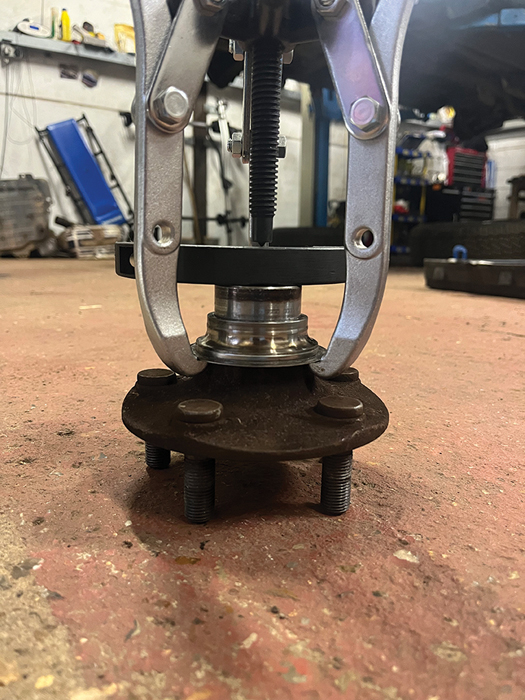
On the pull: One of the old bearing’s inner races is still stuck on the drive hub, and needs to be removed before the hub can be refitted. Use a three-legged puller to draw it off the hub – if you don’t have a puller, it can be carefully cut through most of the way and split with a sharp chisel.
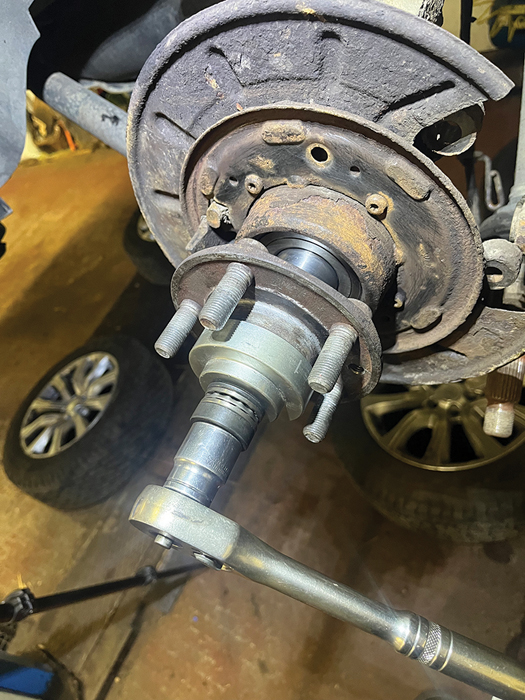
Install hub flange: Set up the Gen 2 tool for the final time, now supported by the inner race of the new hub bearing on the inside of the knuckle, and acting on the front of the drive hub. Wind the tool in to push the drive hub the entire way through the centre of the bearing until it stops.
Refit the driveshaft: Pull the bottom of the knuckle out, then slide the driveshaft through the hub splines. Fit a new hub nut and tighten it to 330Nm, then a further 30 degrees and stake over. Refit the lower suspension arms, and torque the nuts and bolts to 175Nm at ride height.
Brake shoes back: Hook the brake shoe actuator back onto the handbrake cable, then lift the brake shoes back onto the back plate, ensuring they locate properly and neither of the springs drop out. Secure them with the spring clips on the pins, and slide the knurled adjuster back in.
Finish the job: Lift the brake disc on, and secure with the T50 Torx screw. Set the handbrake adjustment with the knurled adjuster and a screwdriver, then refit the caliper and carrier, torquing the bolts to 110Nm. Refit and torque the wheel, and enjoy a peaceful, rumble-free drive once more.
Like to have your own Land Rover library?
Try our All-Access Digital Subscription. You'll get access to over 7 years of Land Rover Monthly – that’s more than 100 issues plus the latest digital issue. All issues are fully searchable so you can easily find what you are looking for and what’s more it’s less than 10p a day to subscribe. Click the link above to find out more details and start enjoying all the benefits now.