


07 June 2024
|
 Bring some modern Tech to your Defender Dash
: credit: © Alisdair Cusick
Bring some modern Tech to your Defender Dash
: credit: © Alisdair Cusick
Bring your Defender’s car audio into the modern age with a double DIN head unit. Alisdair Cusick details what’s involved
Need to know
Time: 10 hours
Cost: £650
Difficulty: 3 out of 5
Models: Defender 2006-2016.
Tools needed: Soldering iron, screwdrivers, loom tape, trim tools, wire strippers, drill and step drill, marker pen, ruler, reciprocating saw, de-burring tool, torch, heat shrink, heat gun.
Parts and costs:
integrated316.com:
• Britpart double DIN conversion £240
• IRB panel £140
caraudiodriect.co.uk:
• Alpine iLX-W690D £399
• JCV KV-CM30 reversing camera £59.99
mobilecentre.co.uk:
• Hazard switch extension loom, 11DAFUXL01, £36.00
• Switch extension loom, 11DBA307L3, £24.00 (pack of three, for five-way switches with either white, black or blue connectors)
4x4overlander.com:
• Nakatanenga Defender DAB aerial, £82
Work safely:
• Always disconnect the battery before electrical work.
• Always confirm wiring.
• If in doubt, hire a professional to undertake the job.
Thanks to: Ian Baughan at IRB Developments and Tim Consolante at Mobilecentre. irbdevelopments.com, integrated316.com, mobilecentre.co.uk
In-car technology has moved on from medium and long wave radios, tapes and CDs, to now incorporate sat nav, hands-free calls, music streaming and more. We’ve all got used to instant connectivity in modern cars, but is there a way to get that into a Defender?
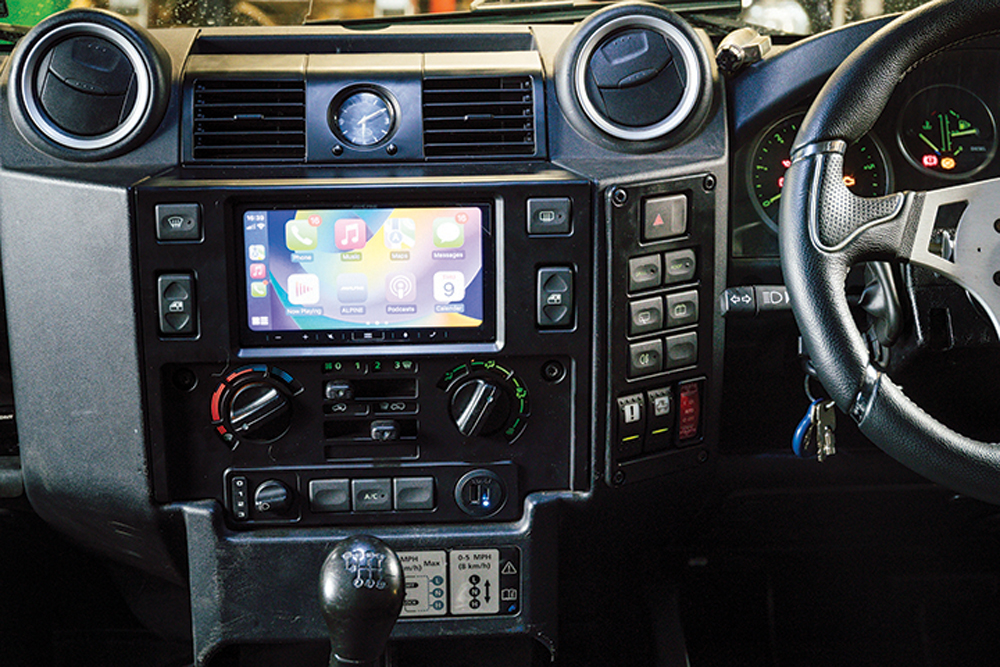
Thankfully, there are several ways to solve the problem, but one of the most effective comes in the form of a double DIN head unit. The DIN refers to the standard radio/CD size and double means literally that; it is twice as tall, which permits a larger screen to be used. So, gone are the minute buttons and garish flashing lights of cheap aftermarket radios. With a larger dash footprint, a touchscreen permits a smartphone system to be employed. This permits full connectivity with a smartphone, allowing music streaming, sat nav, phone calls and much more. All easily accessible in the centre of the car’s dash.
Because the radio aperture increases, some factory switches have to be relocated from their original locations to make room. The Britpart double DIN kit comes with an auxiliary panel to accommodate these switches in a new location, but in our case the customer replaced this with one of IRB’s modular switch panels, which is fully customisable to match the switches should you wish. Relocating switches typically involves extending the loom of some, like the hazard warning lights. Fortunately, wiring expert Mobilecentre offers ready-to-go loom extension kits exactly for this purpose, which we have used here to save time as well as neaten the job. So, let’s follow Ian Baughan, of IRB Developments, as he fits a system to Chris McCormack’s 110, who also lent a hand.
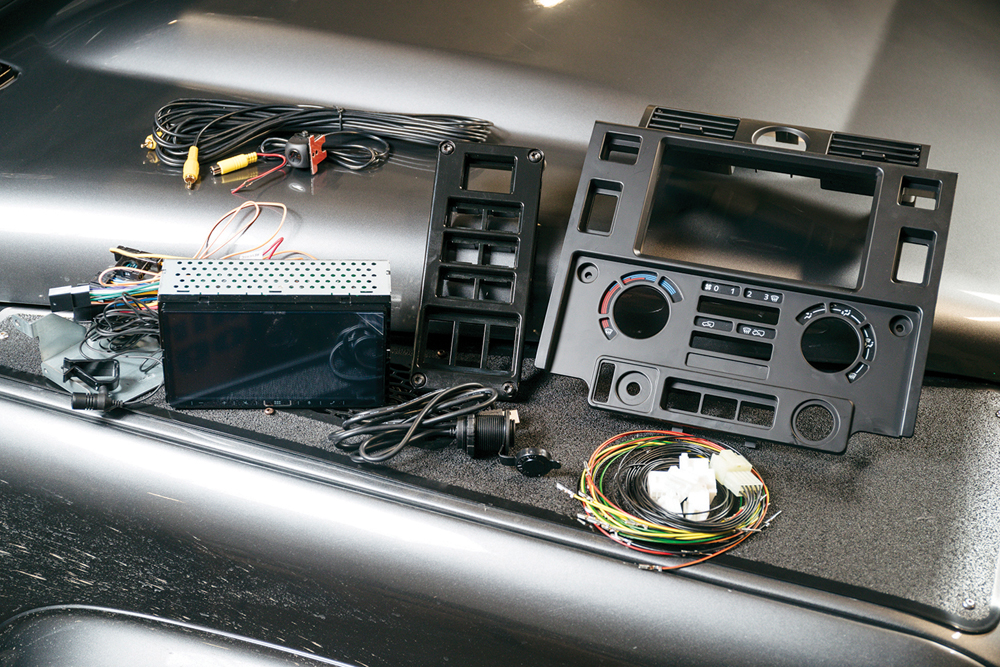
The parts: This is what we’ll be fitting. Left to right: reversing camera, double DIN head unit, auxiliary switch panel, USB socket, new radio housing and switch extension looms.

Old out: Chris McCormack removes the existing radio. Two Torx screws, then the fascia can be prised carefully out with trim tools. Don’t let it fall as it might damage the wiring.

Disconnect: To remove it fully, each of the various switch connector blocks are released. We won’t need the radio or the fascia, but we’ll be reusing the factory switches.
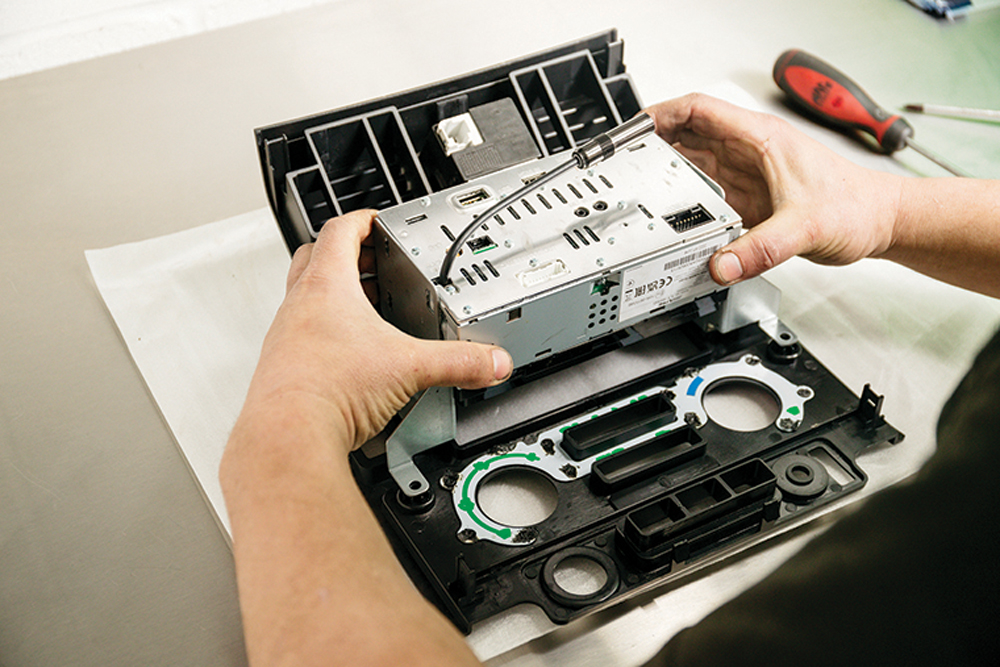
Radio in: The radio adaptor plates screw on and the head unit fits from the rear. The factory clock is removed from the old fascia, and transferred to the new.
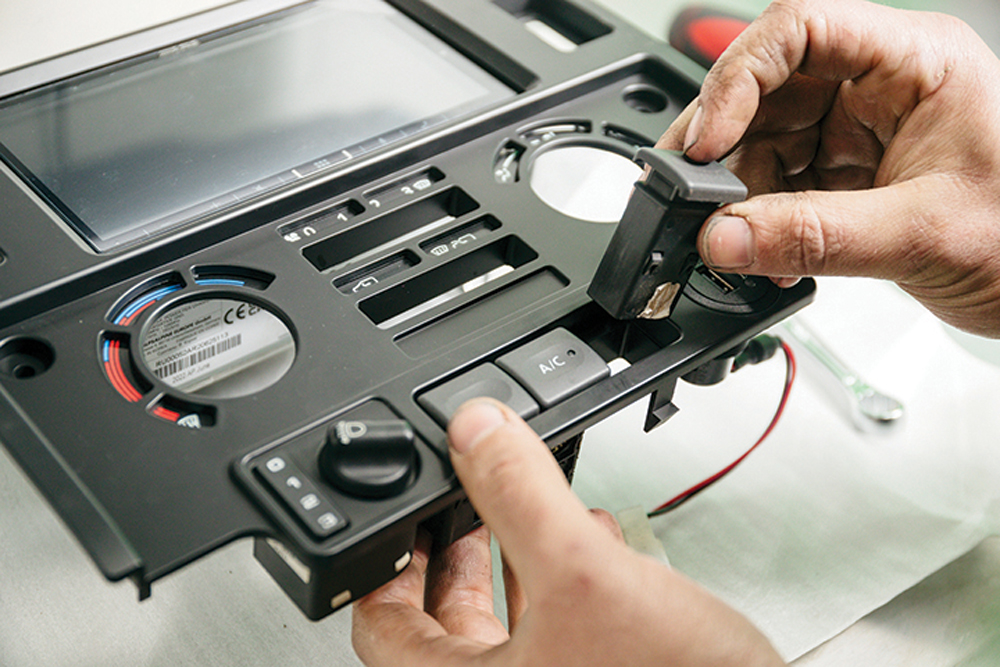
Switches: The existing window and ancillary switches (or blanking plates), headlight levelling dial and power socket (USB, in this case) all swap over to the new panel.
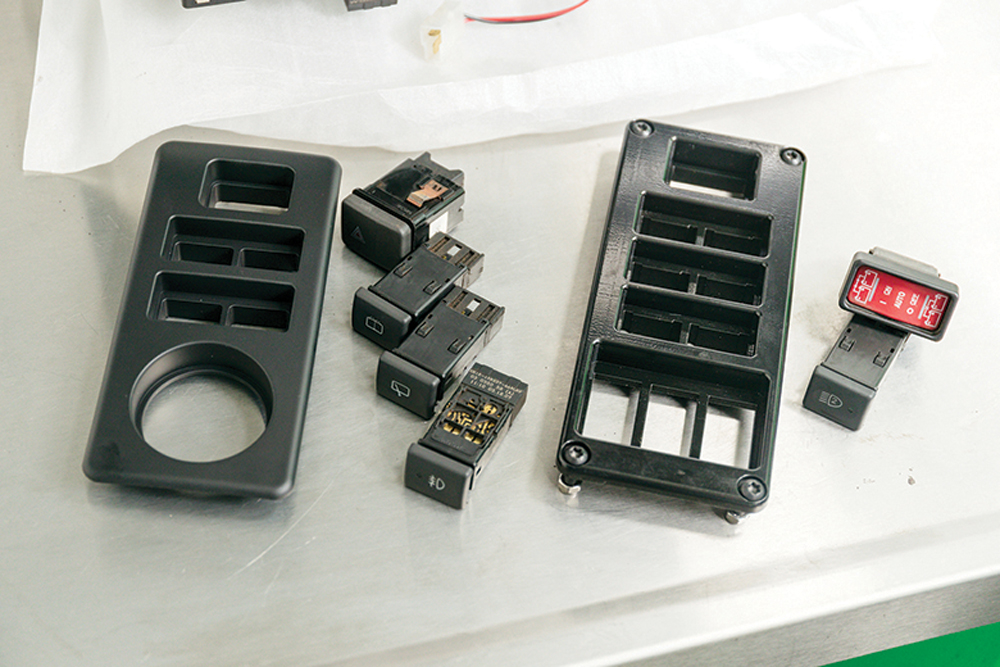
Customisation: The standard auxiliary panel in the kit (left) is preconfigured for common switches. IRB offers a customisable alternative (right), for those wanting an exact match for their switches.

Fit it: Either panel fits the same way, by being cut into the dash between the head unit and the instrument binnacle. Ian removes the existing accessory switch on our sample car.

Mark. Check. Check again: He marks around the switch panel, then joins the lines, ready to cut. But not before checking multiple times on accurate placement on the angled mounting surface.
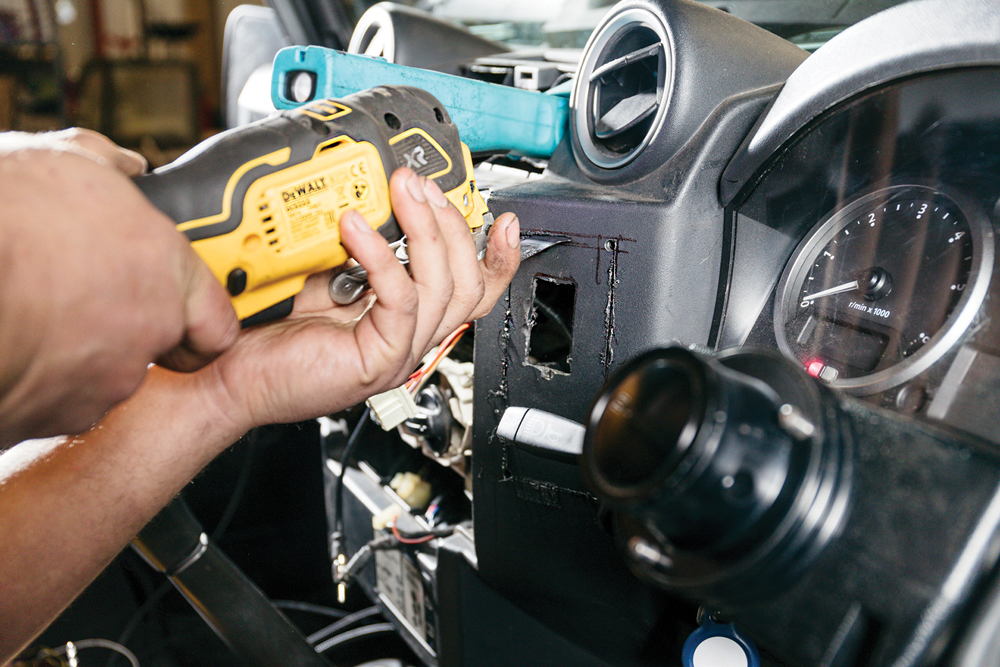
Cut it out: Working inboard of the mark line, Ian cuts the aperture using an oscillating blade tool. There are strengthening ribs on the interior, which need deeper cuts to penetrate.

Tidy job: Ian trims the edge until the panel fits perfectly, then trims the rough edge with a de-burring tool, but sandpaper would do too. Neat work is good work.

Fix: The panel fixes on with Torx screws, then the switches can go in and be connected – except the hazard warning lights, because the loom won’t reach.

Extension loom: For that task Ian uses the Mobilecentre loom extension, which plugs between loom and switch, extending the wiring to the new location on the dash. Made for the job.

Power to the passenger: The head unit comes with a USB socket, so Ian drills a mounting hole in front of the passenger, then fits the socket. Out of sight, but to hand.

Wiring access: For the reversing camera wiring this speaker trim is removed, along with the trim above the rear door. Keep the trim tool clean when working near the headlining.

Camera loom: The camera wiring feeds up the rear corner, along the roof/body joint horizontally above the rear door, then forwards on the driver’s side to the A-pillar.

Camera mount: This Defender already had an aftermarket number plate light plinth. Ian drills then mounts the reversing camera to this, then drills access holes for the wiring to feed through.

Cables: The factory number plate light connector and camera cable feed through the factory body hole. A second hole is made for the smaller camera wiring, including a protective grommet.
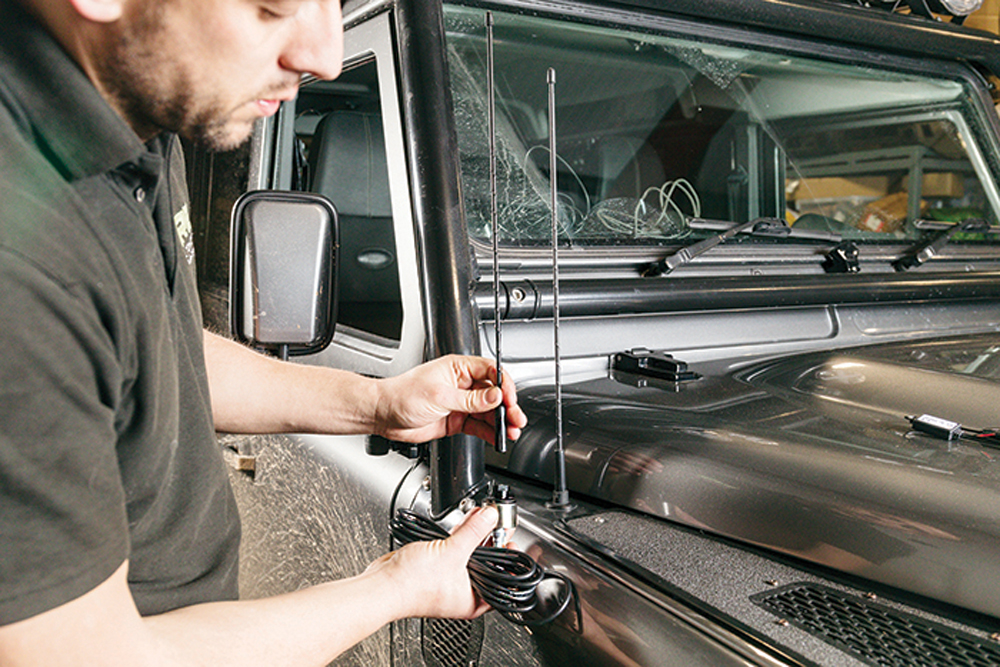
Improved signal: Our head unit needs a DAB aerial, which Chris’ 110 already has. If not, it mounts to the wing, then wiring simply feeds to the dash through the bulkhead.

Extended wiring: The rear heated screen wiring needs extending, so take a reference photo of the factory connector block. This will be duplicated using Mobilecentre’s extension.

Undo the old: Using a small screwdriver, Ian opens the anti-back-out clip, then depresses each connector pin so he can withdraw each pin from the block in turn.

Fit the new: First populate the new genderless connector duplicating the factory wiring, then repeat this task at the other end, re-using the blue connector block.

From here to there: In place in the dash, this loom now bridges the old and new positions of the rear heated screen switch, moving from top left to top right.

Binnacle out: The head unit needs to be told when the car is in reverse. Ian favours the reverse feed behind the binnacle. So, out it comes and its connector unplugs.

Get the right wire: On the connector block, Ian removes the connector housing, then identifies PIN 26, the reversing light feed. This is the wire he prefers to take a feed from.

Mid-point solder: Perform a mid-point splice; pull back the factory wire insulation, wrap the feed wire around the exposed core, then solder a joint. Don’t forget the heat shrink.

DAB loom: The DAB aerial earth and ignition live feeds pick up from the head unit wiring with more mid-point solder joints. Ian does this task on the bench.
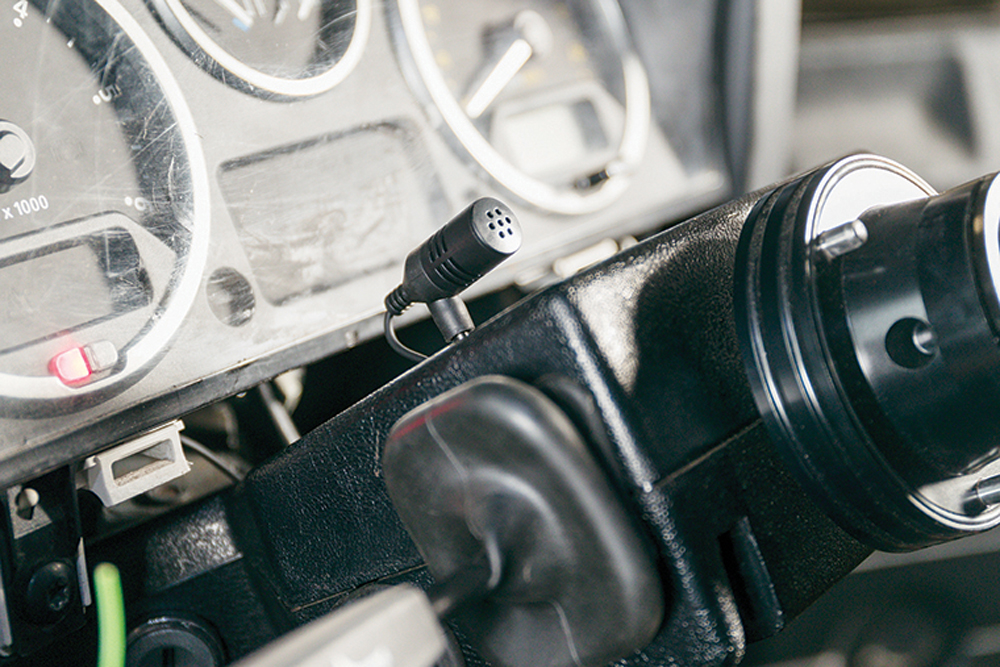
Microphone mount: The microphone for the head unit is fitted to the steering column upper shroud, which simply unscrews for access. Feed the cable through the dash to the centre.

Head unit wiring: Ian connects up the head unit. Plug in the connectors for reversing camera, microphone and aerial. The head unit’s reverse feed wire is soldered to the binnacle feed.

Console fit: With head unit wired and centre console switches in place and connected, Ian eases the console into the dashboard. They can be finicky, so take care.

Camera feed: At the rear, Ian solders the reversing camera earth and live feeds into the reversing light, then connects the co-ax connector. The trim can now be refitted.
Big switch on: The Defender can have its earth lead reconnected. All functions are tested individually and together: radio, reversing camera and hands-free microphone.

Switches, too: The same for the switches, seen here in the IRB modular panel. Generally, if they illuminate, they should be wired correctly, but Ian still tests all for function.
Like to have your own Land Rover library?
Try our All-Access Digital Subscription. You'll get access to over 7 years of Land Rover Monthly – that’s more than 100 issues plus the latest digital issue. All issues are fully searchable so you can easily find what you are looking for and what’s more it’s less than 10p a day to subscribe. Click the link above to find out more details and start enjoying all the benefits now.