


17 February 2024
|
Banish frosted and misted windscreens by fitting a heated screen. It’s simple and cheaper than you’d think, as Alisdair Cusick explains
Need to know
Time taken: 3 hours.
Tools needed: Trestle table, hand sprayer, plastic trim tool, suction cups, non-stretch cord, screwdriver, Torx drives, soldering iron, wire strippers, drill, spanners.
Difficulty: 4 out of 5
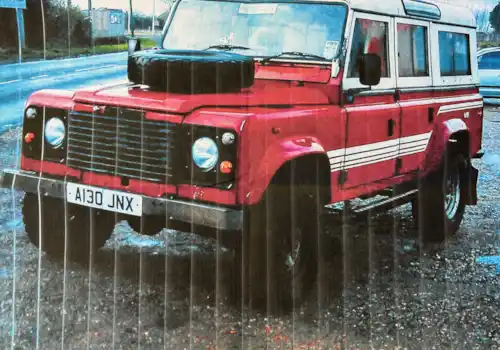
Models: Defender 2002-2016 (similar process on 1983-2002).
Parts used: Heated screen, integrated 316 two-tab heated windscreen, Defender 1983-2016, £135; Mobilecentre heated screen wiring kit with OEM switch (2002-2016) 11DHFS2YUG, £216.
Work Safely
• Use the right tool, for the right job.
• Always disconnect the battery before starting electrical work.
• Never handle glass without wearing suitable gloves.
• Always confirm wiring circuits, routes and integrity.
• If in doubt, hire a professional to do the job for you.
Thanks to: Ian Baughan at IRB Developments, irbdevelopments.com; Paul Gibbons at PG Windscreen Solutions, 07931 297599; [email protected], and Tim Consolante at Mobile Centre, mobilecentre.co.uk, for their help with this feature.
We’ve all jumped in a Defender in winter and sat there, frustrated while the windscreen demists using the blowers, too slowly for comfort. Ice may be not just outside, but inside too, and we can’t drive the car to warm the coolant for heat as we can’t see through the windscreen. So, we sit there as the fan impotently blows cold air on full chat.
But that needn’t be the case. Retrofitting a heated windscreen is a relatively simple task, and well worth considering. At the flick of a switch, the screen clears quickly, meaning you can get moving rather than sit waiting.
The windscreen installation itself is tricky, but not impossible to fit at home, but the wiring is definitely straightforward. To get a handle on what’s involved, we visited IRB Developments which was fitting a heated screen to a 2012 TDCi Defender. Ian Baughan of IRB prefers to get a glass expert in to deal with the glass work, so we watched windscreen pro, Paul Gibbons, of PG Windscreens, handle that part of the task, incorporating some key pieces of advice. Primarily, that is to use a Genuine Parts windscreen seal because, Paul tells me, they’re simply a better material and they fit without issue.
The second part of the installation is the wiring, and for that Ian uses heated windscreen wiring kits from Mobile Centre. With a choice of switch for the heated windscreen (standard factory switch or Carling Contura switch) their loom is purpose-designed for Defenders, and can even incorporate a voltage sensing relay which is supplied with the kit. If fitted, this detects the voltage rise from the alternator when the engine is running, and activates two relays to give live outputs. It’s useful for ensuring current is provided to start the car first, then activating current-drawing items like heated screens or heated seats once the engine is running. We left this off this installation, as Ian prefers to take a feed from the cigar socket ignition live.
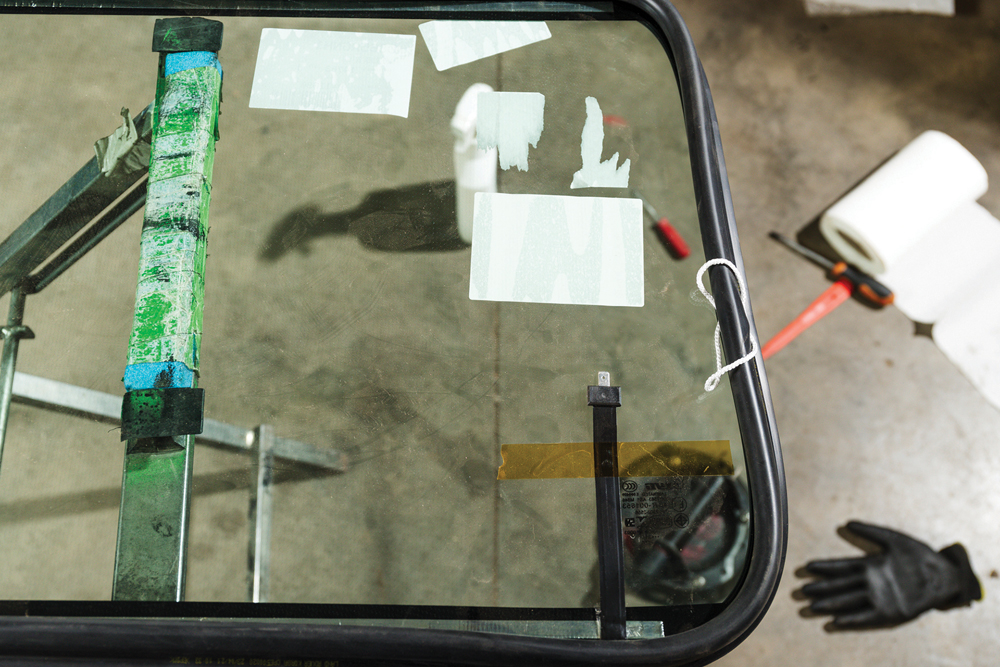
Removing the old screen
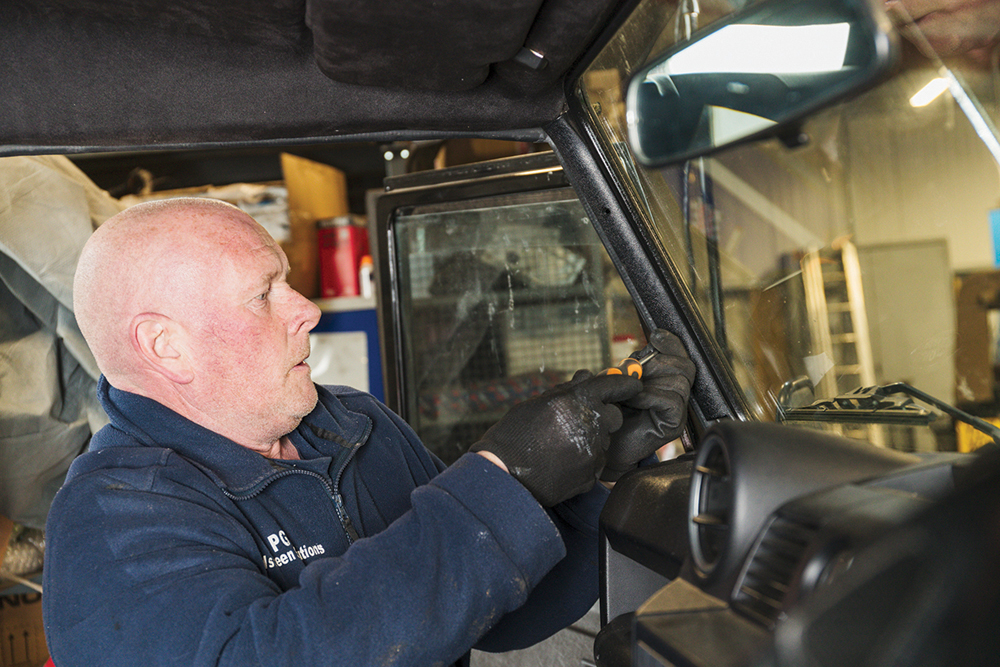
Trim off: Paul starts inside the car by removing the trims each side of the screen. Two fixings and they’re off, but not before he’s already employed one trade trick.
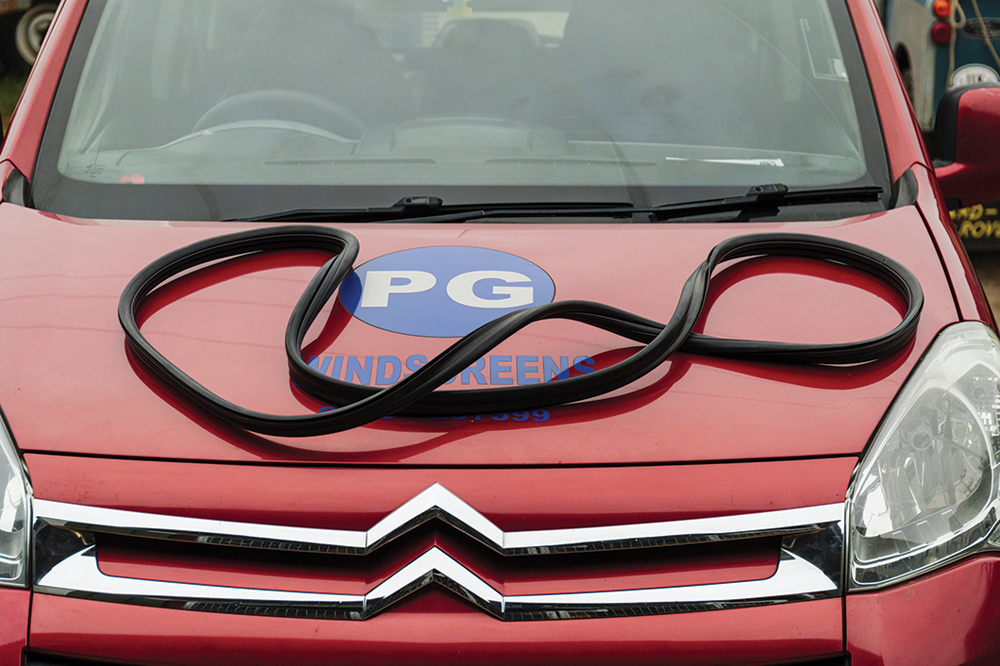
Work smart: Before starting, to help make the new seal more supple he’s rested it on the warm bonnet of his van. Engine heat slowly warms and softens the rubber.
Old out: Outside the car, he uses a long-handled blade to cut the outer lip from the existing seal. Blade flat on the glass, he slices around the seal.
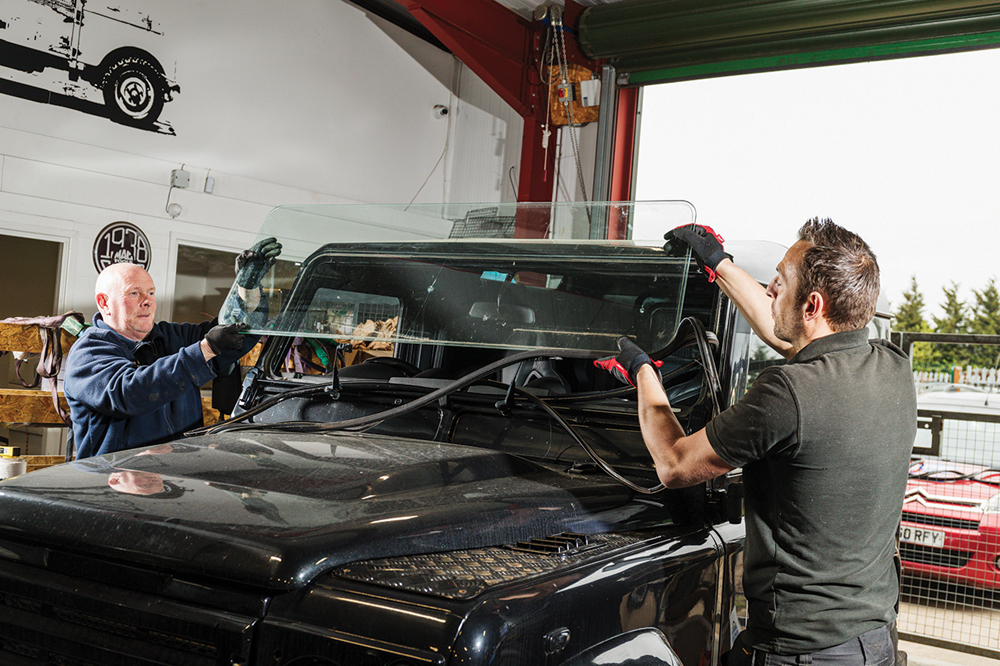
That was quick: The old glass is then easily lifted out. Rather than cut the seal, some people push the glass out from inside, with their feet. Our way is safer.
Installing the new heated screen

Preparations: Laid on a trestle, the new screen’s packaging comes off, but the cables are left taped up. It’s inspected for flaws, which may cause it to crack while fitting.
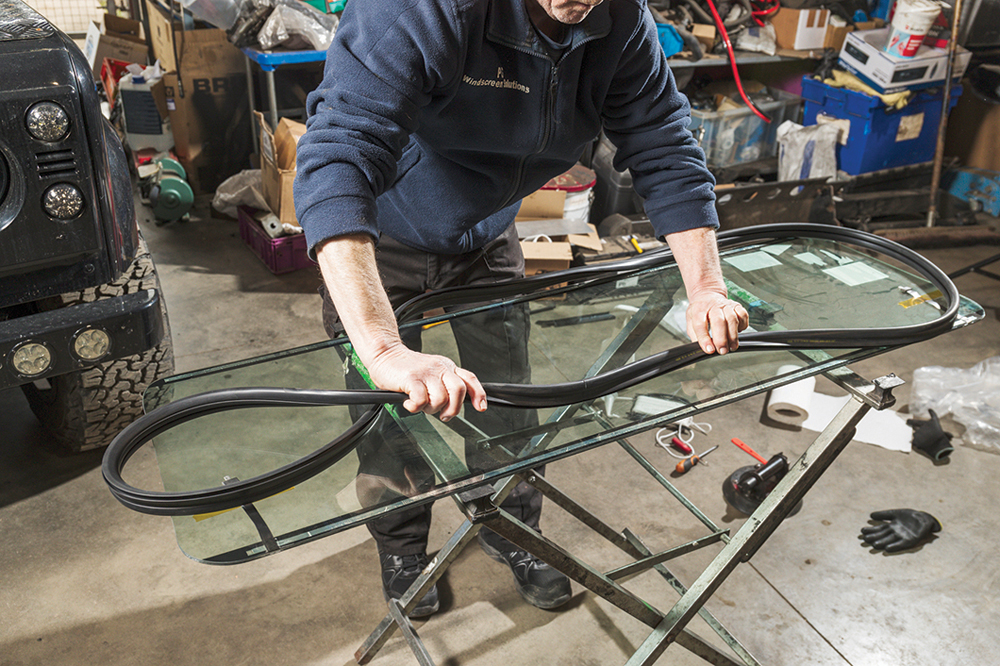
Centre it, fit it: Paul centres the join of the rubber seal in the middle of the bottom of the screen, then begins steadily fitting the seal all around the screen edge.
Excess material? If there is any excess seal material, he loses this on all the corners, by compressing the material there, so it remains tight on the straight screen sections.

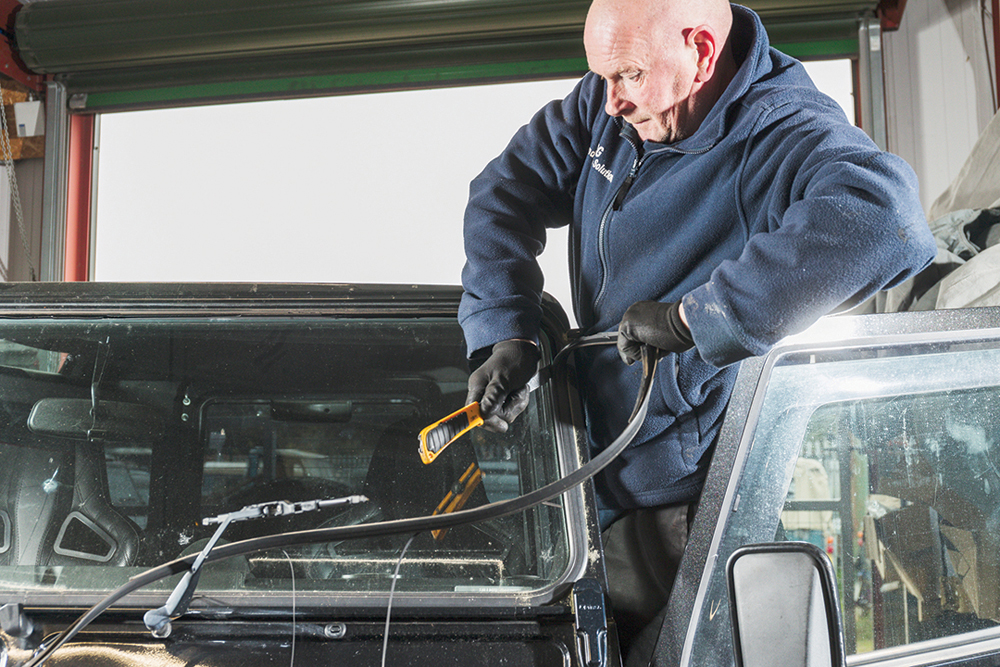
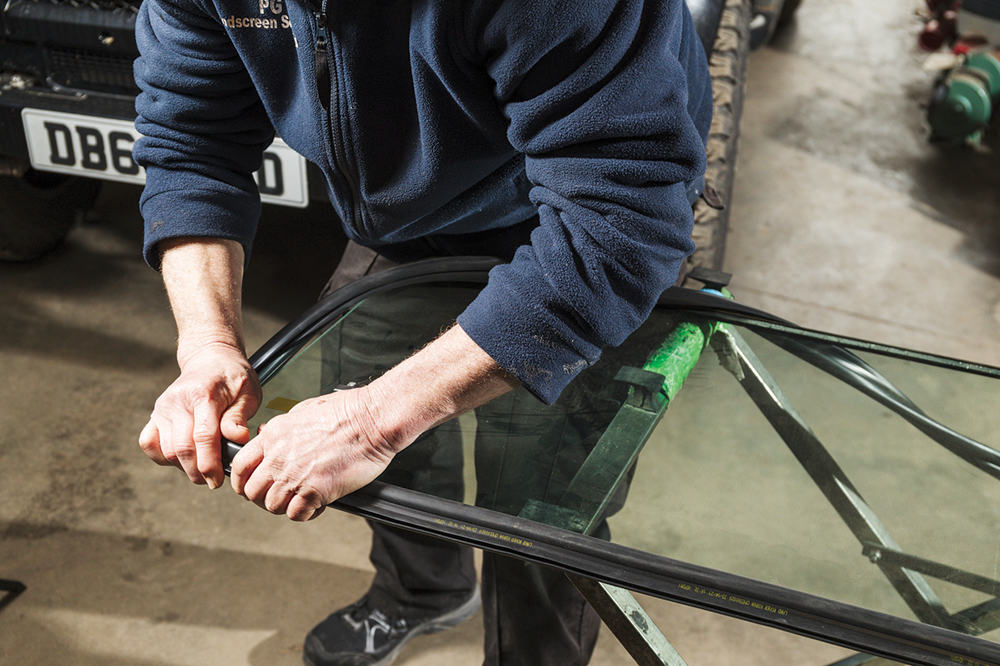
Strung up: Paul strings up the seal, first tucking cord into the inside edge of the screen, then around the inner seal lip, and begins threading around the whole screen.
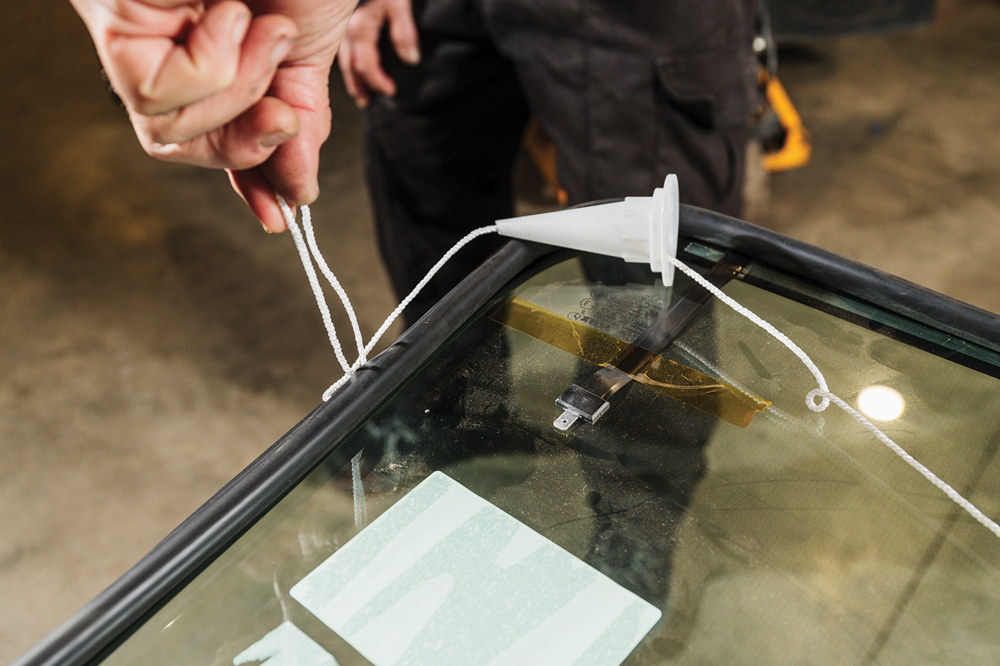
Trade trick: When he gets to the opposite side, he comes inside, makes a loop, then threads back outside, continuing around. The loop becomes a handle, helping manipulate the glass.
Ready to fit: He continues threading the cord to where he started off, makes another loop and cuts the cord. He now has two handle loops: left and right on the screen.
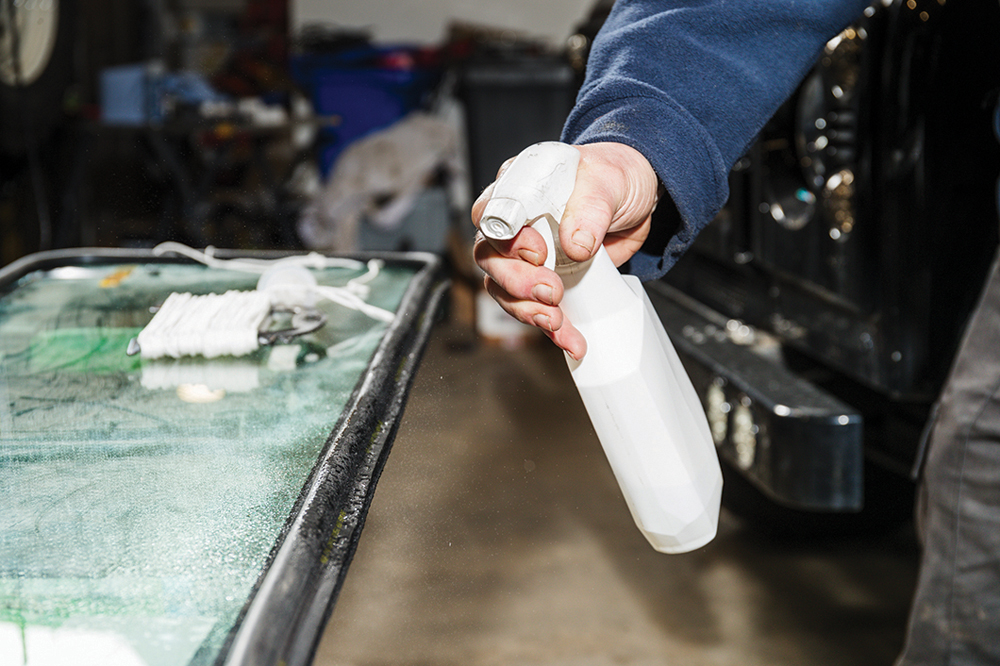
Lubrication: To help the seal slide, not tear, he lubricates the outer edge with glass cleaner. The car body aperture is similarly sprayed, to also help the seal move.

First fit: Using a large suction cup, Paul eases the screen onto the car. From inside, in the nearside corner, he begins to encourage the inner seal lip to locate.
Pull the cord: By pulling the cord, he encourages the seal’s inner lip to fold over the body aperture. As the cord pulls out, more of the seal’s lip then locates.
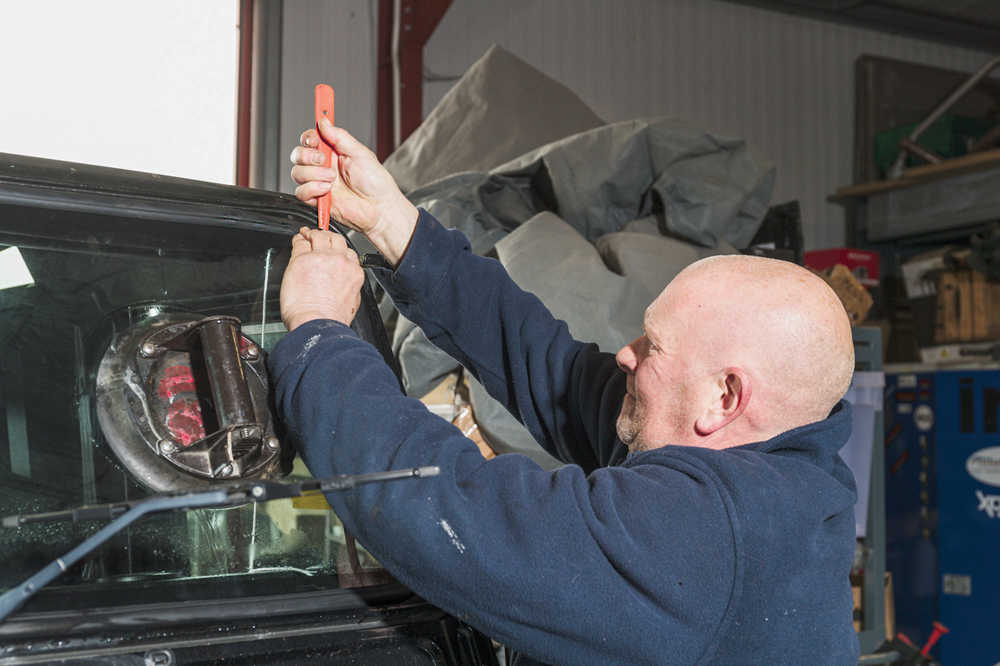
Encouragement: Outside, the outer lip is then encouraged to locate correctly. It may need a push with a plastic tool to fully locate, but sometimes the screen must move.
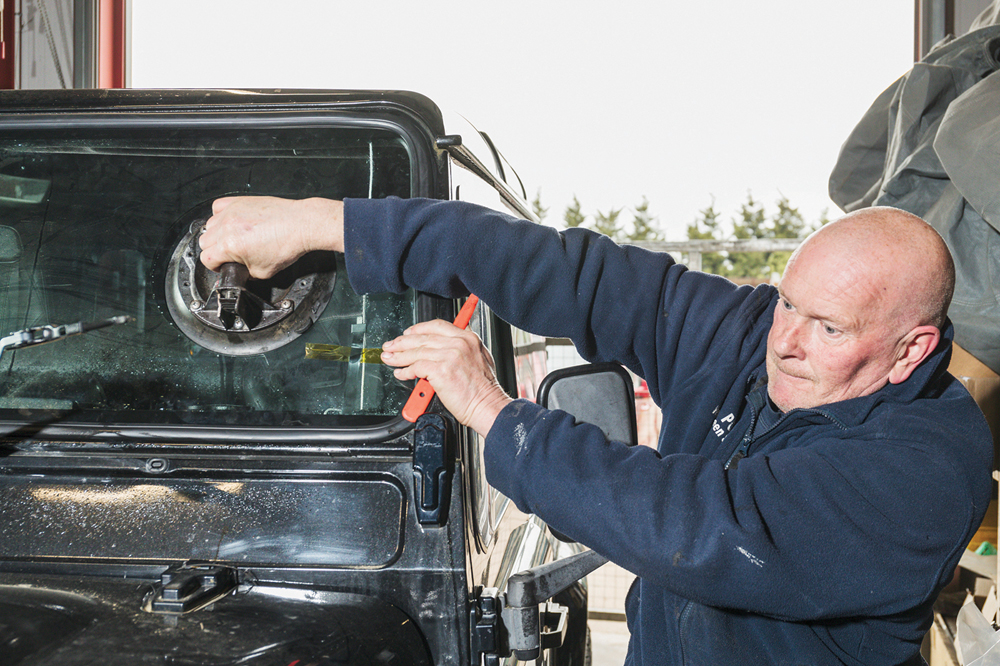
Heavy pull: Paul gives a hefty sideways tug on the suction grip to pull the screen right against the A-plillar. The seal then locates correctly inside and out on that side.

Repeat to the end: He pulls the cord, folding the seal all the way around the inside. Again, the screen may need a pull here and there to make sure it locates properly.
Windscreen fitting tips
Paul Gibbons of PG Windscreen Solutions offers useful tips:
• Use a genuine seal.
• If it won’t go in at first, don’t panic. If in doubt, remove the screen, relubricate, then try again.
• Use the double loop string method, which means you can shuffle the screen left and right a little, if needed.
• Don’t thump the screen, which risks damaging the glass or the seal. Finger pressure should be all you need.
• If you aren’t confident with the glass, then hire a professional to do that for you. They’ll do it faster, know all the tips and tricks, and how to get the best result.
• Check if your car has tinted glass or plain, and make sure you order the correct screen for your vehicle, which matches the existing glass.
Wiring up
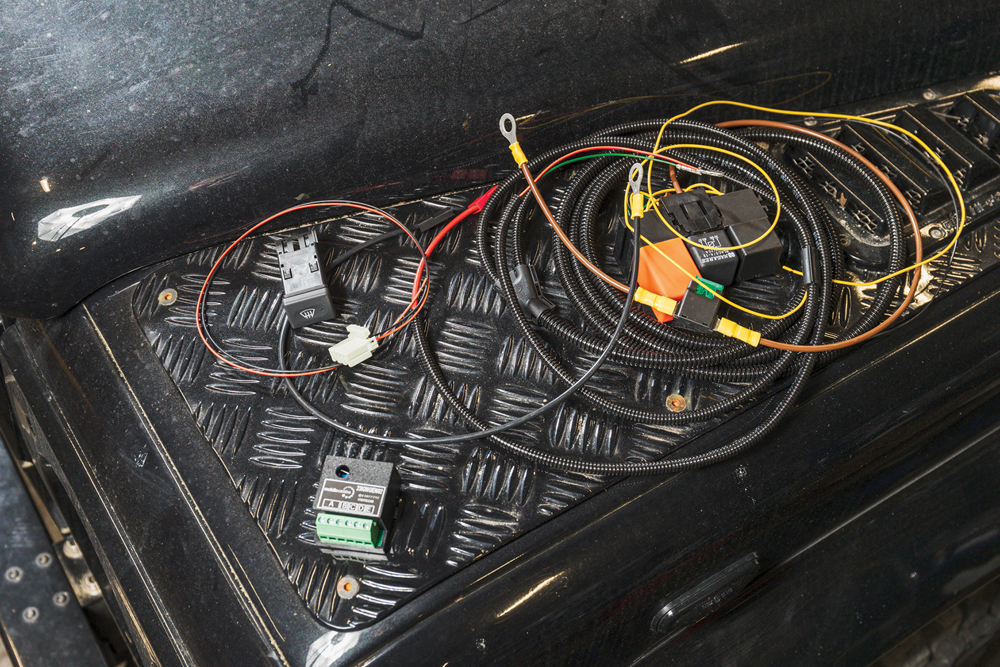
Next job: Screen fitted, we’re on to the wiring. This is the loom, using a factory heated screen switch. The optional voltage-sensing relay (bottom of pic), won’t be used today.
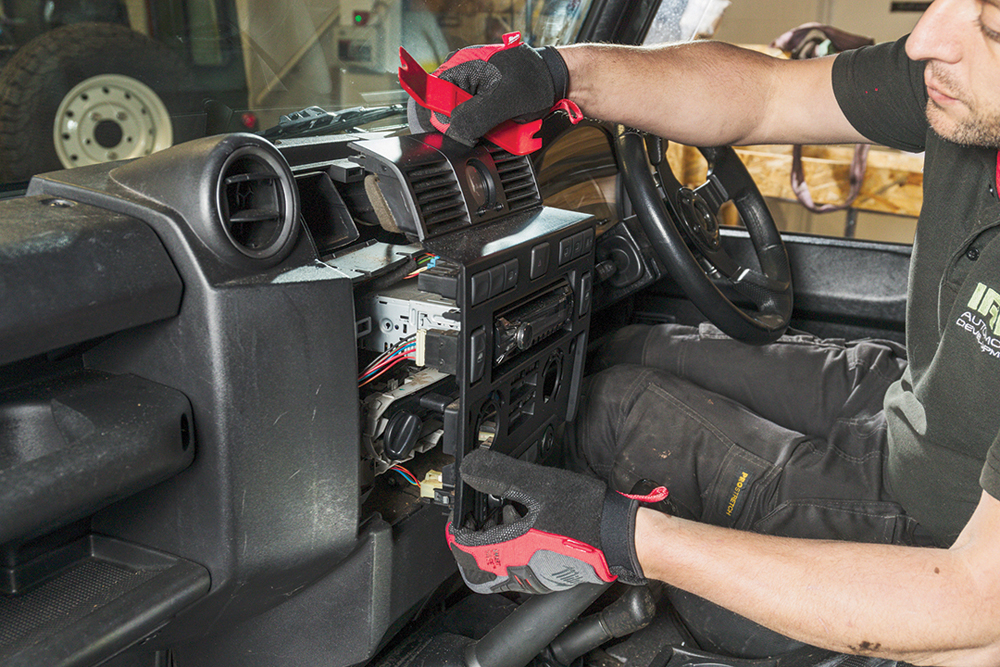
Dash out: Disconnect the battery. Out comes the centre console, then the various radio and switch wiring can be disconnected and the console fully removed.
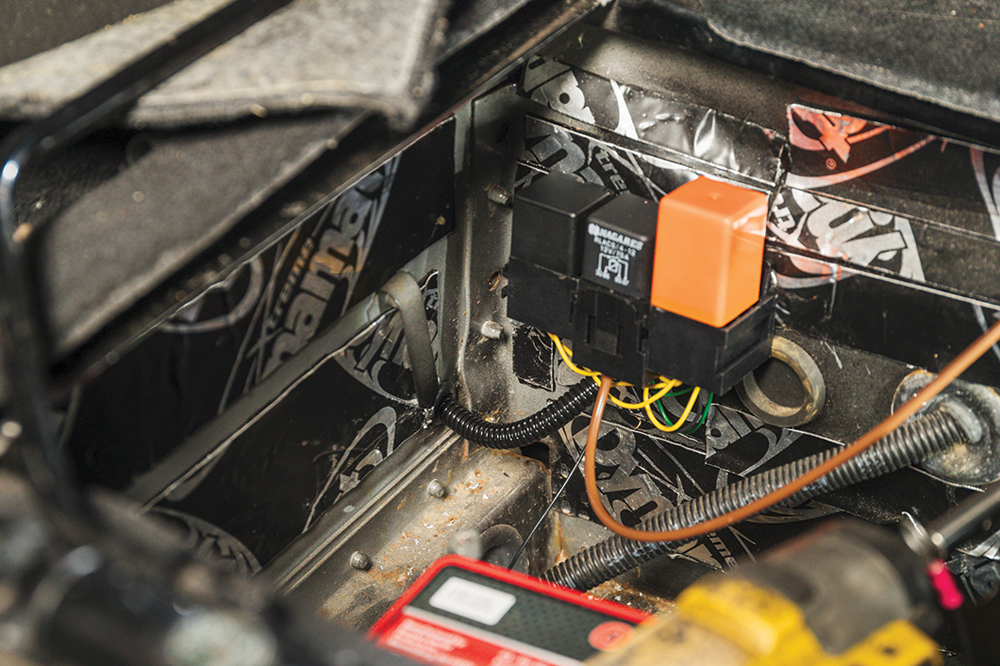
Seat off: Passenger seat and battery box cover removed, we can decide where to mount the heated screen relays. Our battery box is fairly empty, thankfully.
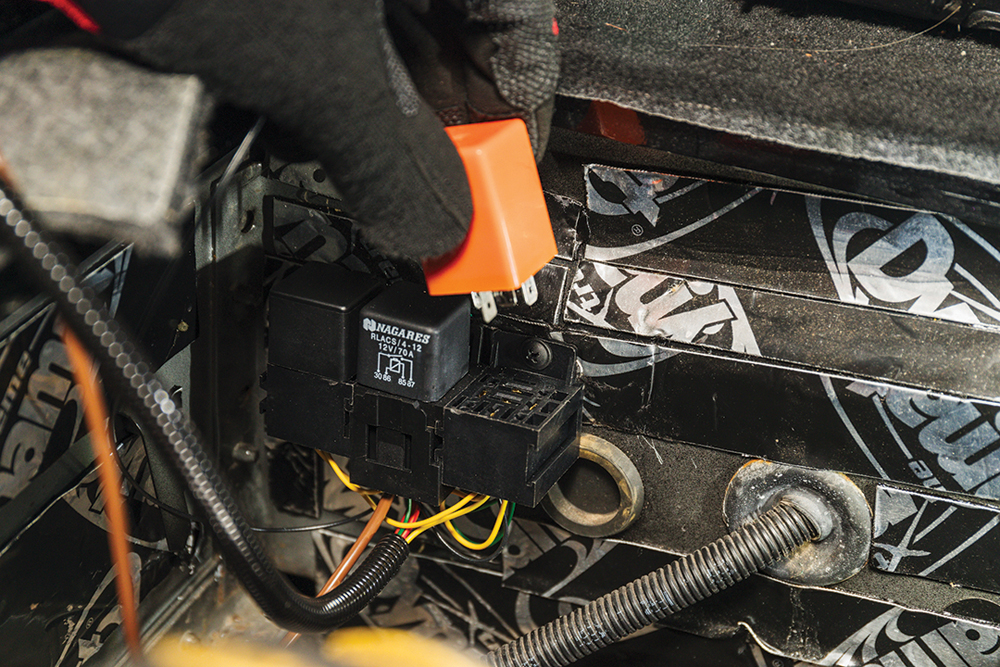
Mark, drill: Ian marks the body, then drills two holes for the relay fixings. The relay mount is screwed on to the seat box and the relays can go in.

Vital grommet: The loom will thread through the seat box front. So the seat box is drilled to accept a grommet which is fitted to the loom after opening this connector.
Proper job: The grommet then seals the new seat box hole and locates the loom in place. The wiring can head towards the dash area, and up to the windscreen.
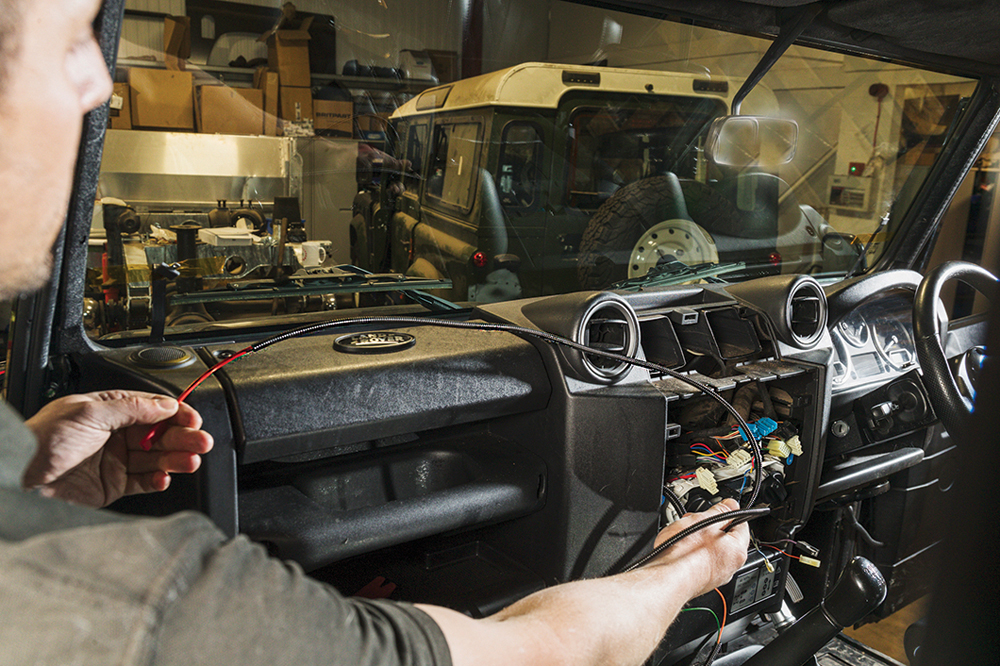
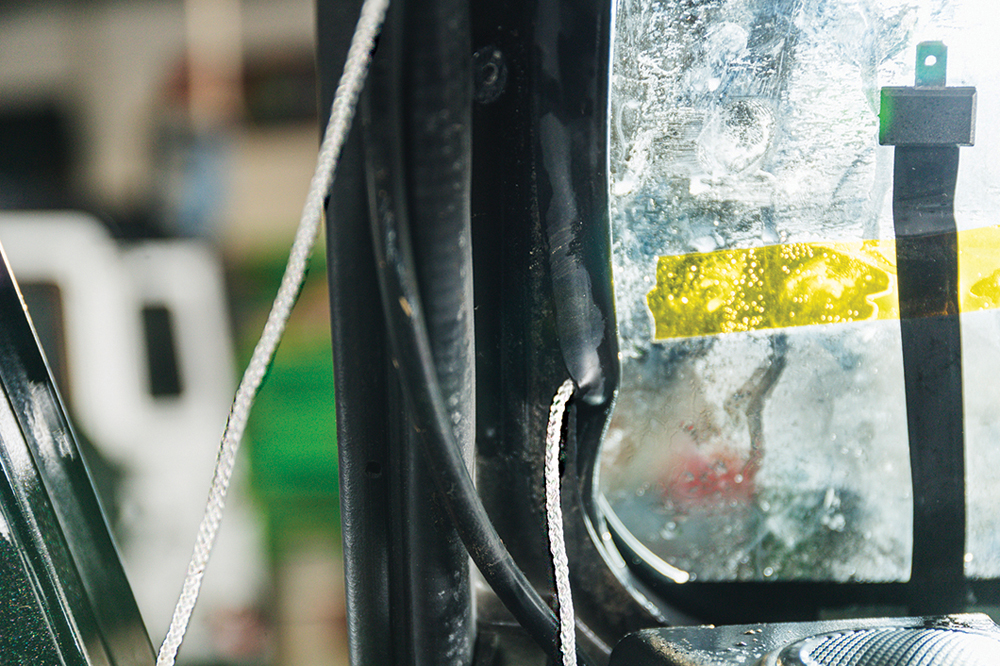
Route: The screen loom threads forwards, along the transmission tunnel, up the dash and then left, like this, to the windscreen element connector. Last bit is the trickiest.

Elementary: The feed to the screen elements is threaded behind the dash, and the red spade terminal is connected to the windscreen element. Nothing should be tight.

Element earth: The element earth connects, then threads down the offside A-post. It can be connected to these bolts, but Ian prefers to use a fixing behind the nearby speaker.

Behind the speaker: Seen here, this bolt has sufficient unused thread for a second nut to be fitted to clamp the earth feed. Using this means no new wiring is visible.
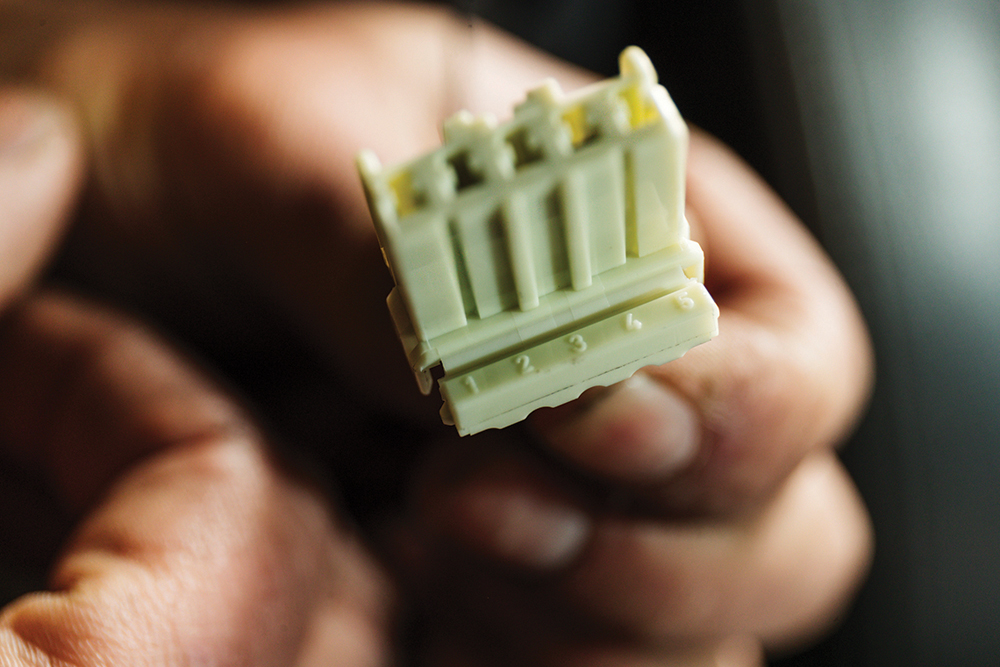
Populate the connector: Ian populates the switch connector block with the wiring from the relays to Mobile Centre’s instructions. The various feeds then just need connecting.

Illumination: red/orange. First is the illumination, which Ian piggybacks from the adjacent heated rear window switch wiring, using a mid-point splice solder joint to the orange wire.
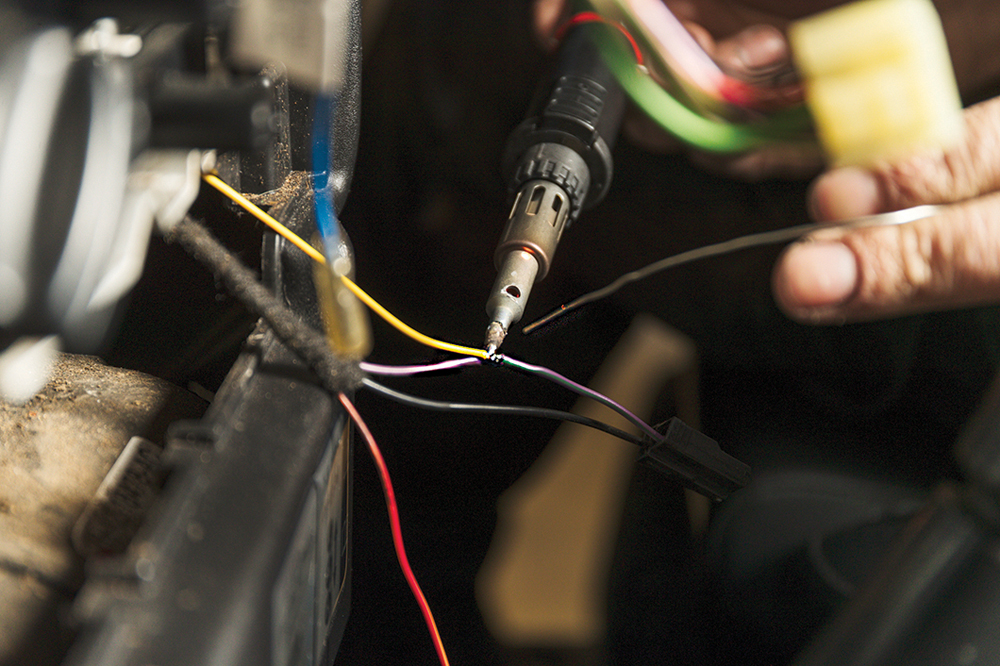
Ignition live: yellow. He does the same with the cigar lighter, jointing the purple/green wire to the factory cigar lighter live feed. Confirm your wire colours if in doubt.

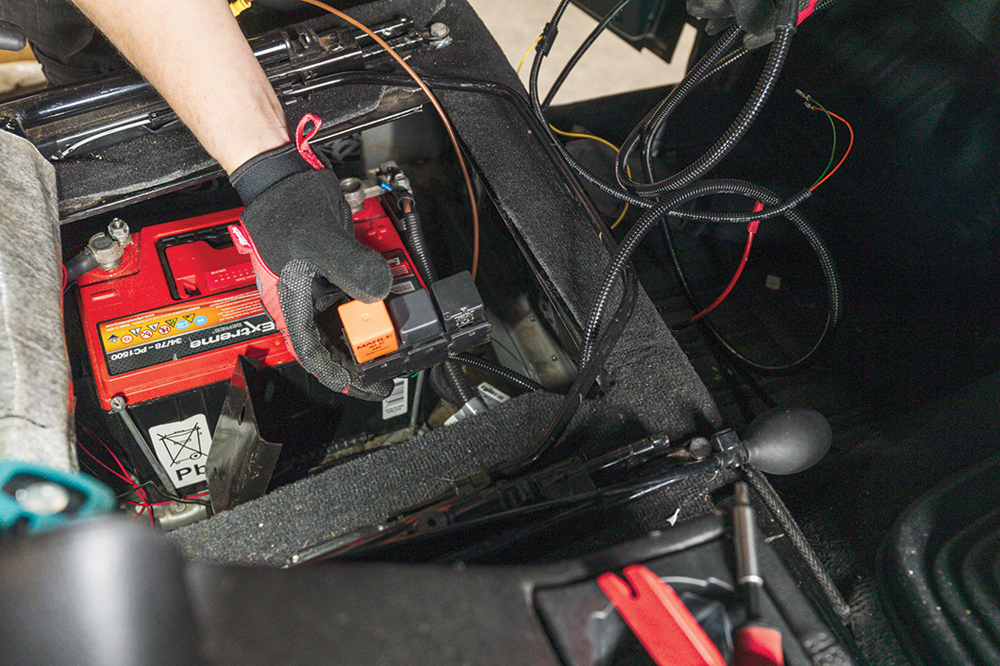
Earth to chassis: Ian prefers to connect the earth to the factory earth point, through this grommet to the chassis. Note the battery post isn’t to be used for an earth.
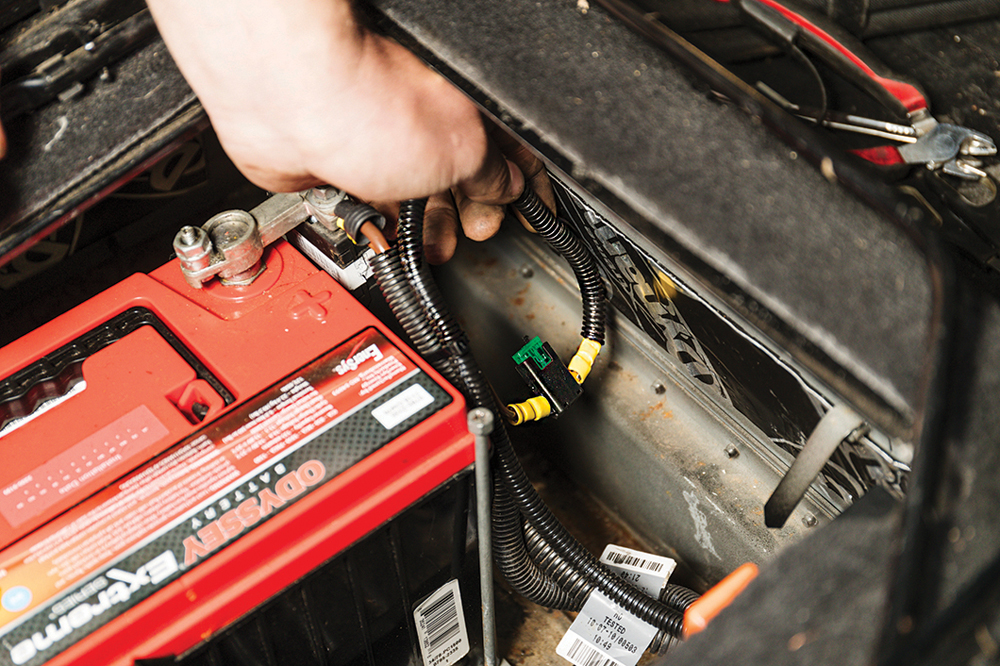
Battery positive: The relay positive feed then connects directly to the battery. This post does permit feeds to be attached, but they should be fused. The battery is then reconnected.
Wiring tips
• Work neatly with wiring.
• Don’t use quick connectors, or uninsulated joints.
• Take time to practice and execute neat solder joints. Mid-point solder joints are the mainstay of auxiliary wiring, so the ability to perform them, then insulate them neatly, is a very useful skill.
• Use cloth loom tape to hold wiring together. This helps prevent abrasion, reduces potential noise and is flexible.
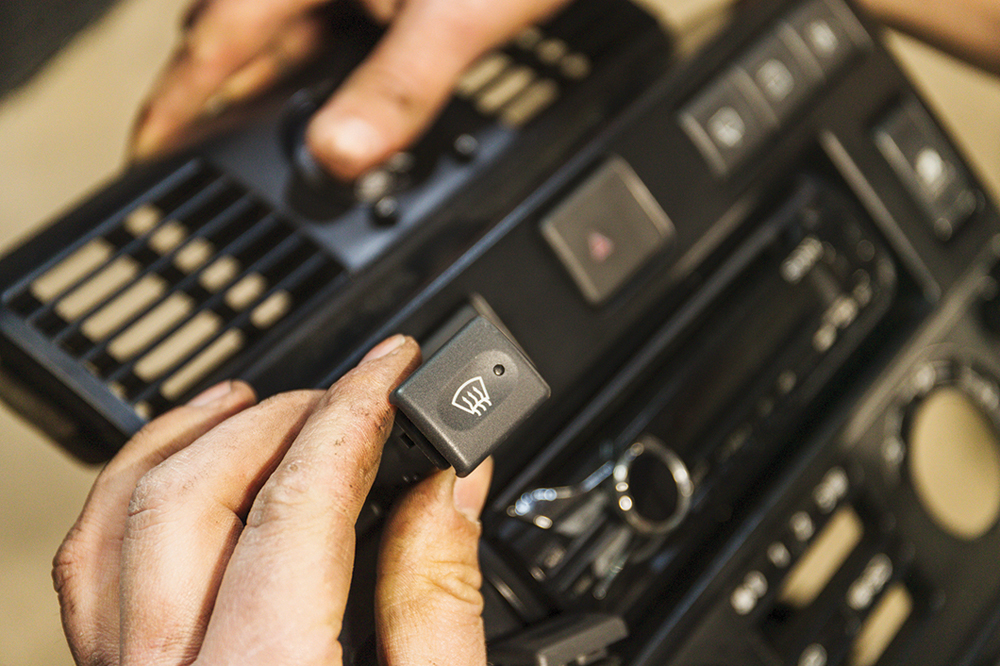
New switch: The factory switch is fitted to the centre console next to the heated rear screen switch. The wiring is reconnected, then the console and fixings are refitted.
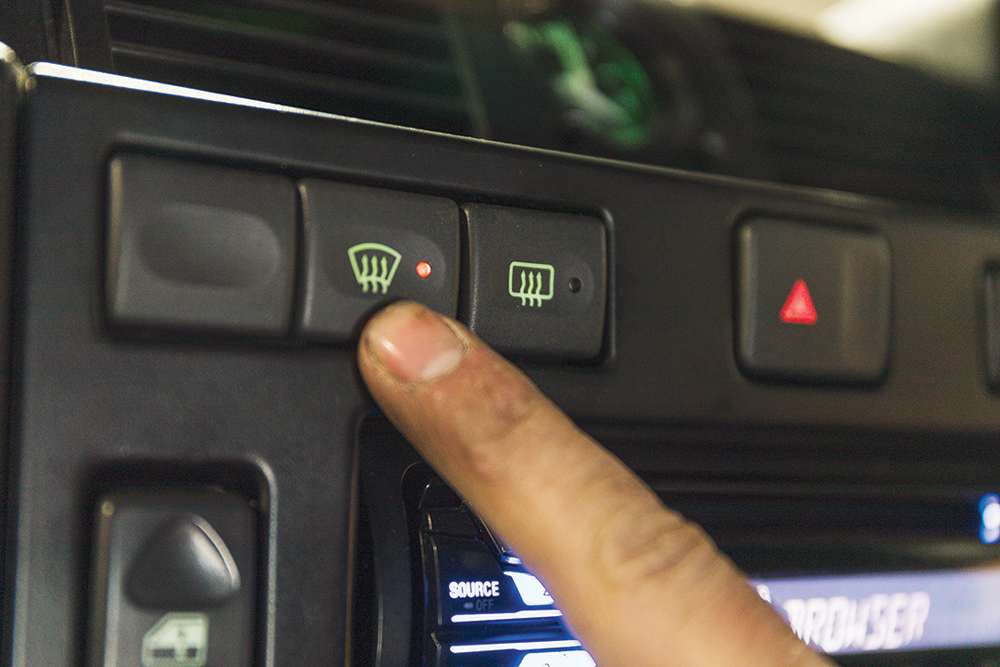
Test: The switch is tried. It should illuminate the telltale when activated, but also backlight when the lights are turned on. If it does all that, that’s the job done.
Check that the wiring kit suits the screen
Tim Consolante of Mobile Centre explains the wiring side of the job, and some points to look out for: When Land Rover first fitted a heated windscreen to a Defender for the military, it had a single type of screen manufactured and the OEM wiring was designed to suit only that screen. Later, for the Td5 model, Land Rover introduced a heated screen option for non-miltary buyers. Fast forward to today, and we have many aftermarket manufacturers producing many types of screens with different specifications, some needing much more power to work than others. Aftermarket wiring looms also vary in design and specification.
Originally, it was not possible to retrofit a Defender with a heated front screen, so when Mobile Centre developed the first wiring kit to allow this as an aftermarket upgrade, we carefully chose proven components. Our timer relay, for example, is identical to that used by Peugeot from the 205 model onwards.
Some cheaper wiring kits use the timer relay to switch the power directly to the screen, which is where problems arise. The Mahle-branded timer we use is rated at 20 amps, but you will find some kits using unbranded timers which are only 12A. For this reason, it is common for the timer relay to fail on the cheaper kits because it is overloaded, in some cases failing instantly.
In factory production heated front screens, Land Rover used a relay to switch the power from the timer to the screen. We do the same and our kits are easy to identify because of this extra relay. The relay we use is rated at 70A, making it 3.5 times more powerful than just using the timer relay on its own. A big relay also needs big cable to allow the power through, which is why we use 4.5mm² cable. Again, this is three times the size of some cheaper kits.
This larger relay and larger cable works with any windscreen on the market, with spare capacity for both a safety margin and the ability to add extras, such as heated mirrors, without having to upgrade anything.
Separately, it is important to understand that aftermarket screens can range in specification from 15A to 30, with some being specifically marketed as ‘high output’ screens. Because of this, you can appreciate why many cheaper wiring kits fail because of overload.
In addition, the OEM factory-fitted Land Rover screen has connection spades in each corner, as we see in the this feature, which we call a ‘two tab’ screen. However, some aftermarket screens come with three or even four tabs for the power, so again you need to check the kit has the necessary wiring.
The takeaway from this, is to make sure your heated screen wiring kit has the capacity to match the power needs of your screen, including an additional safety margin to prevent overload and premature failure.
Like to have your own Land Rover library?
Try our Budget Digital Subscription. You'll get access to over 7 years of Land Rover Monthly – that’s more than 100 issues plus the latest digital issue. All issues are fully searchable so you can easily find what you are looking for and what’s more it’s less than 10p a day to subscribe. Click the link above to find out more details and start enjoying all the benefits now.