


03 February 2024
|
 Juddering under hard braking became apparent at 58k
: credit: © Dave Barker
Juddering under hard braking became apparent at 58k
: credit: © Dave Barker
When Discovery 3 & 4, and Range Rover Sport 1 suspension bushes or ball joints fail, replacement of the complete suspension arm can be the cheaper and easier option
Need to know
Time: Around 2 hours (with experience).
Difficulty: 3 out of 5
Tools: General workshop tools including 10, 15, 20, 21, 22, 24, 32mm spanners, track rod end ball joint splitter, jack and axle stands or vehicle lift.
Model: Discovery 4 (shown here), similar job on Discovery 3 and Range Rover Sport 1.
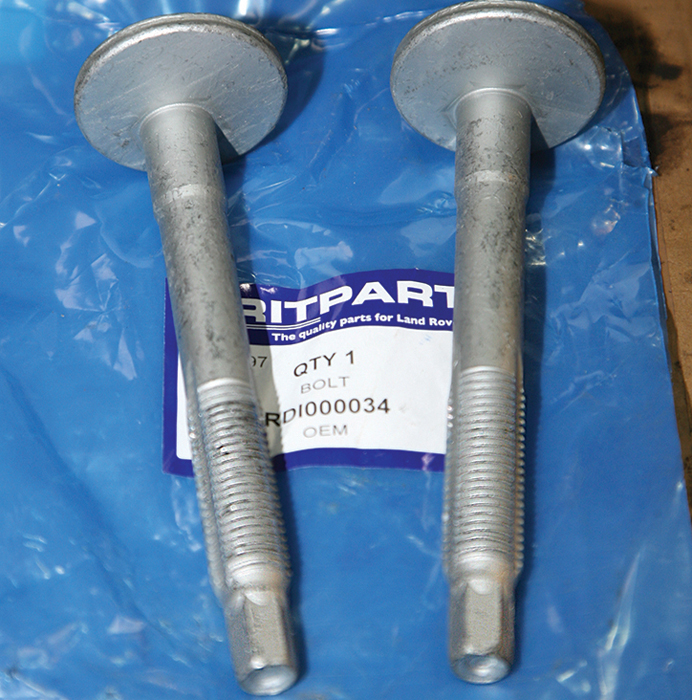
Parts and costs: Lower front suspension control arm RH, part number LR073367; lower front suspension control arm LH, part number LR073369, prices from £91 to £274 (genuine). Bolts for lower control arm bush (four required), part number RDI000034, £7 to £10 each.
Work safely:
• Before raising the vehicle, first ensure that the stands or lift are correctly rated for the weight of the vehicle, and are in serviceable condition.
• Ensure the vehicle is securely supported on the stands or lift, especially if it’s a wheels-free post lift, before starting work.
• Wear protective gloves or barrier cream to protect the hands and skin from fluids, oils and sharp edges of components.
• Wear appropriate masks and eye protection when clearing dirt and dust.
• When using an angle grinder/cutter, wear thick gloves and face protection and be aware of the torque-twist tendency of the machine, and also the risk of kick back.
• Check correct torque settings for individual vehicle types.
Thanks To: Maddison 4x4, Water House Farm, Station Road, Topcliffe near Thirsk, YO7 3SG. Tel: 01845 587407, maddison4x4.com
This 2010 model year Discovery 4 TDV6 had done 58,000 miles and was still on the original factory-fitted suspension control arms, both top and bottom, front and rear. However, the owner had noticed a juddering under heavy braking and also vibration on rough ground, especially when crossing cattle grids.
All the suspension arms were checked and play was found in both of the lower front suspension control arms, though not sufficient to fail an MoT test at this stage. As the vehicle was due a service, the opportunity was taken to change both front lower suspension arms at the same time, rather than wait for its annual MoT in five months when the wear would be much more noticeable.
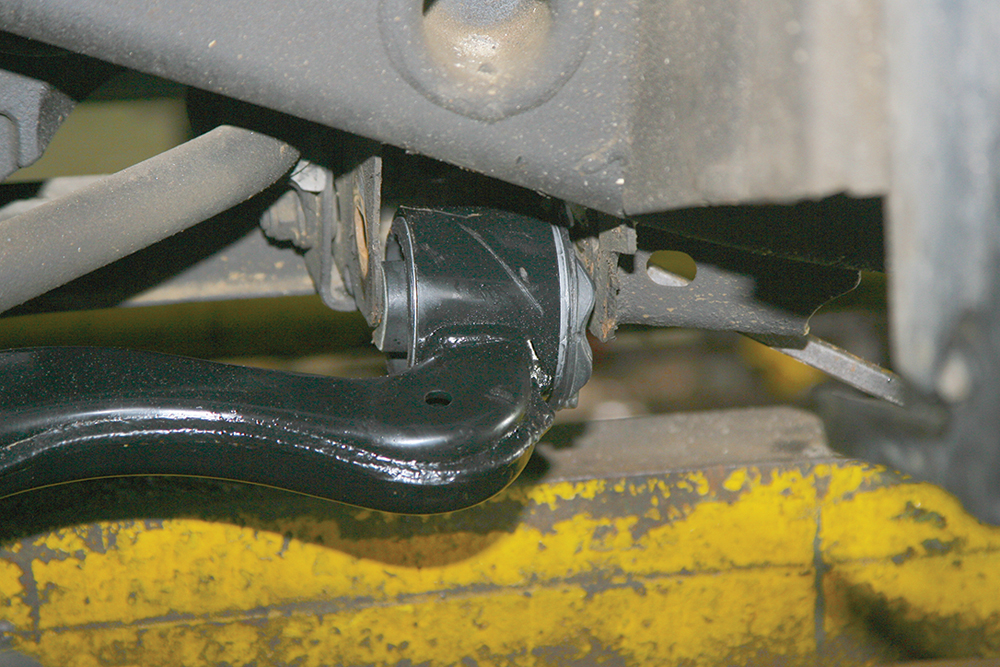
The Disco 4’s independent front suspension comprises upper and lower control arms which secure the steering knuckle, with the lower arms also connecting with the air spring/damper unit. Wear in the bushes of the control arms affects the suspension geometry and will cause the steering to become a little vague and give a juddering effect under heavy braking. It’s a common concern on Discovery 4, with some vehicles wearing the bushes much quicker than others.
Normally, when a suspension bush needs to be replaced, the suspension arm is removed from the vehicle and the old bush pressed out and a new bush pressed in. On the Discovery 4 it’s normally the bushes in the front lower arms that need to be replaced – bushes in the upper arms do not wear as quickly.
Replacing the bushes is difficult, requiring a substantial hydraulic press, and can work out more costly than replacing the complete arms in both parts and labour time, especially using Genuine Land Rover replacement bushes costing around £70 each. Aftermarket bushes (including polyurethane types) are much cheaper. However, in most cases the suspension arm still needs to be removed from the vehicle and, usually, one or both of the securing bolts through the bushes will have become seized inside the bush, meaning either the bolt, the bush or even the arm itself, will need to be cut. So it’s normal practice to replace the complete lower suspension arms, which come with new bushes and a new lower ball joint all pre-fitted.
When the arms are replaced, it’s advised to also replace the securing bolts. These are special eccentric bolts which are set into position with cam washers. These need to be refitted in exactly the same orientation as the originals to ensure the suspension is restored to its previous alignment setting (assuming it was correct). After fitting new arms, the suspension arm bush bolts should only be tightened fully when the vehicle is sat with its wheels on firm ground. It’s also advisable, after replacing the suspension arms, to have the steering and suspension alignment checked with four-wheel alignment equipment to ensure accurate handling and steering, and normal tyre wear.
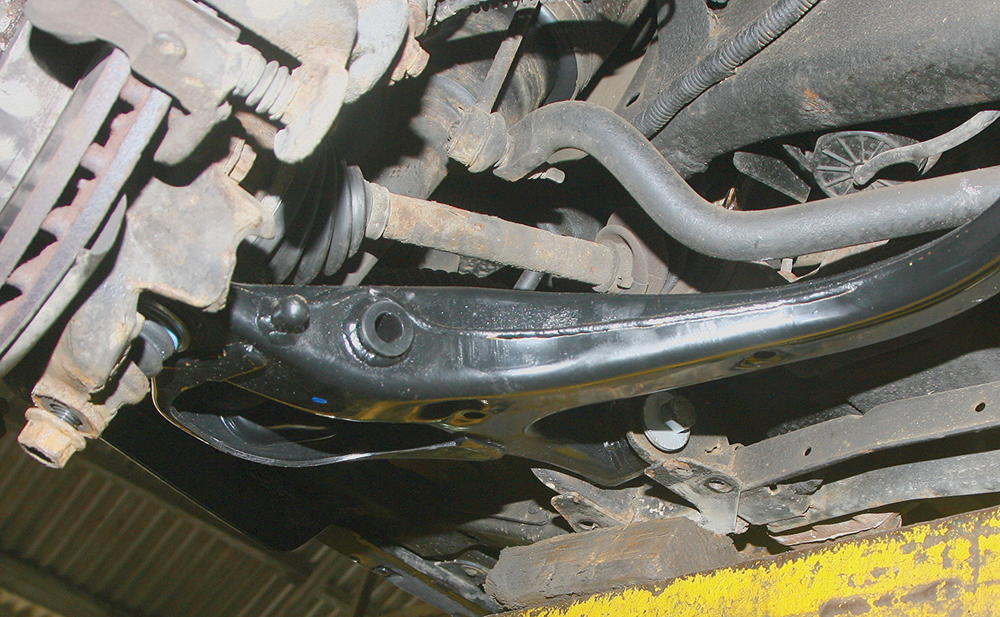
In this feature we show the right-hand side lower arm being replaced (right-hand as viewed from driver’s seat).
Removing the suspension lower arms
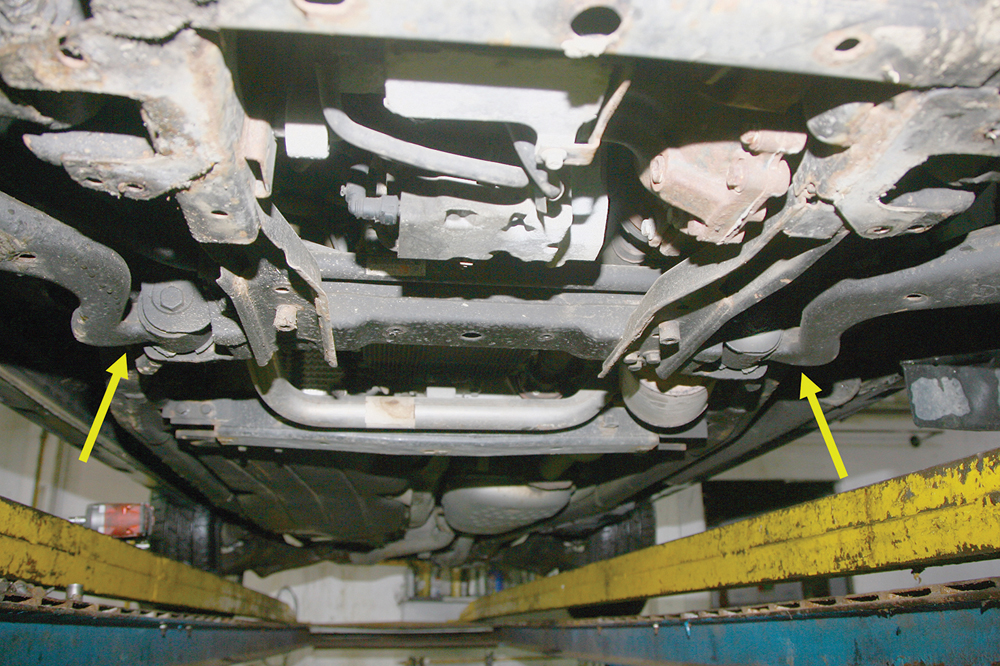
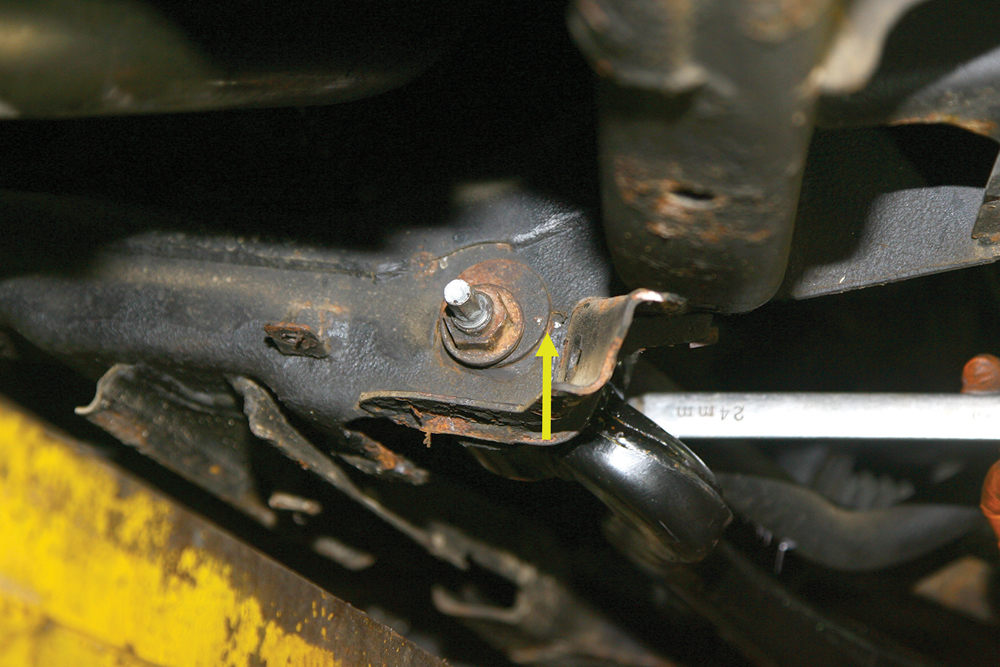
Starting the work: With the Discovery safely supported, the engine undertray is removed to access the lower suspension arms and the two securing bolts (arrowed) on each side.

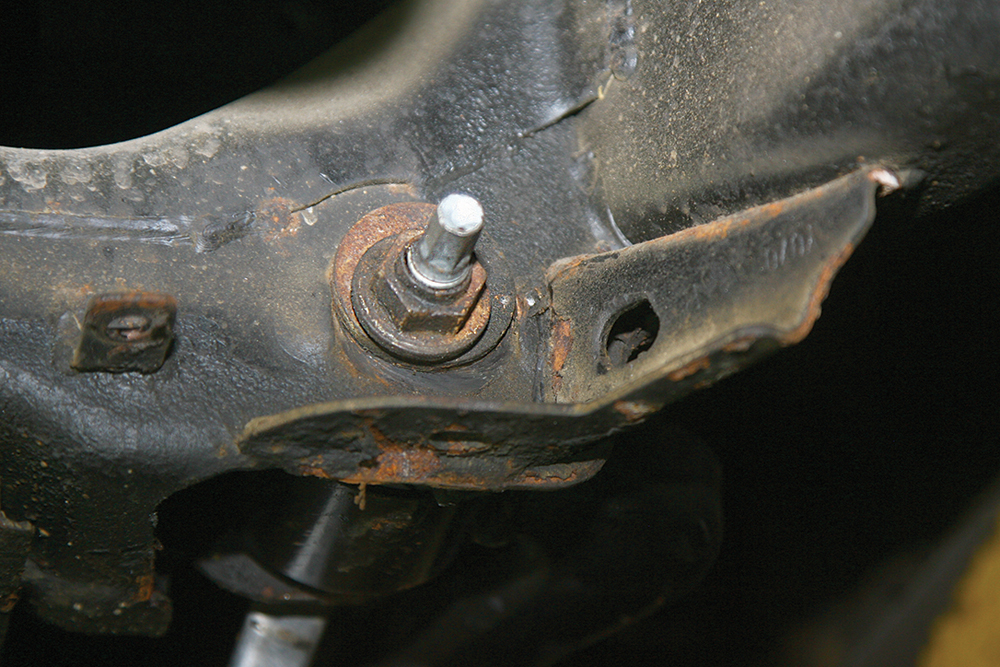
Use a punch: The position of the lower arm bush bolt cam washers are clearly marked to the chassis using a punch, to ensure alignment is correct when rebuilt.

Loosen the bolts: Once the alignment of all the bolts’ lock cam washers have been clearly and carefully marked onto the chassis, the securing nuts are then loosened.

Check order for refit: With the nut undone, a note is made of the correct sequence of fittings for reassembly later: nut, plain washer, then the off-set eccentric cam washer seen here.

Pry loose if needed: The eccentric cam washers are often seized onto the bolt and need to be pried loose, always noting which washer goes with which mounting bracket.

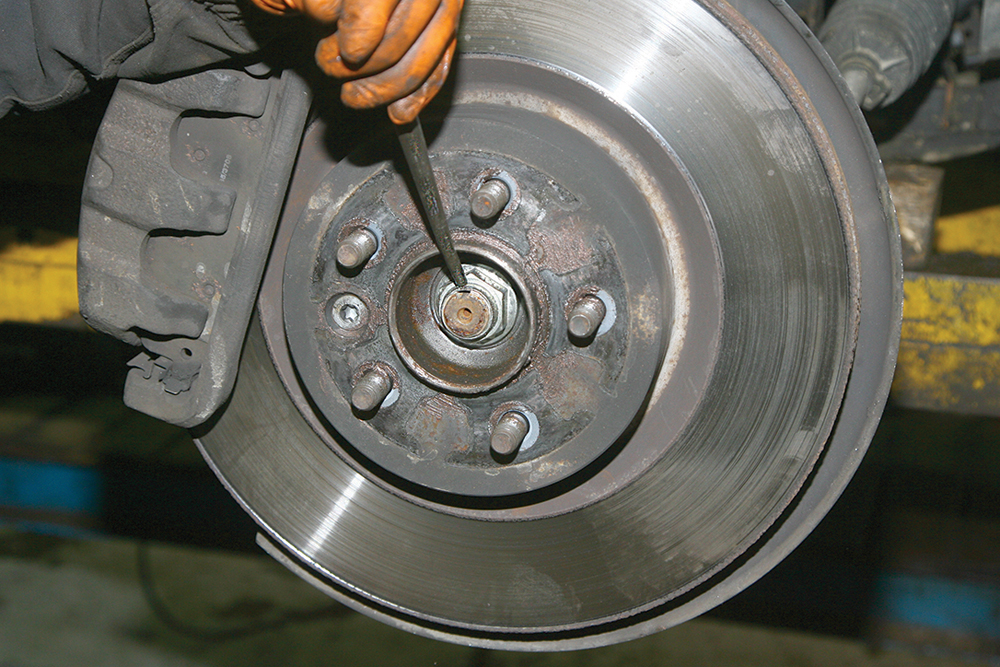
Driveshaft: The front driveshaft hub retaining nut is removed and discarded, as a new nut should be fitted when rebuilding. We’ll later separate the driveshaft from the hub.

Free the splines: With the nut removed, the driveshaft is carefully knocked back through the hub assembly using a soft punch, thus freeing it from the hub splines.

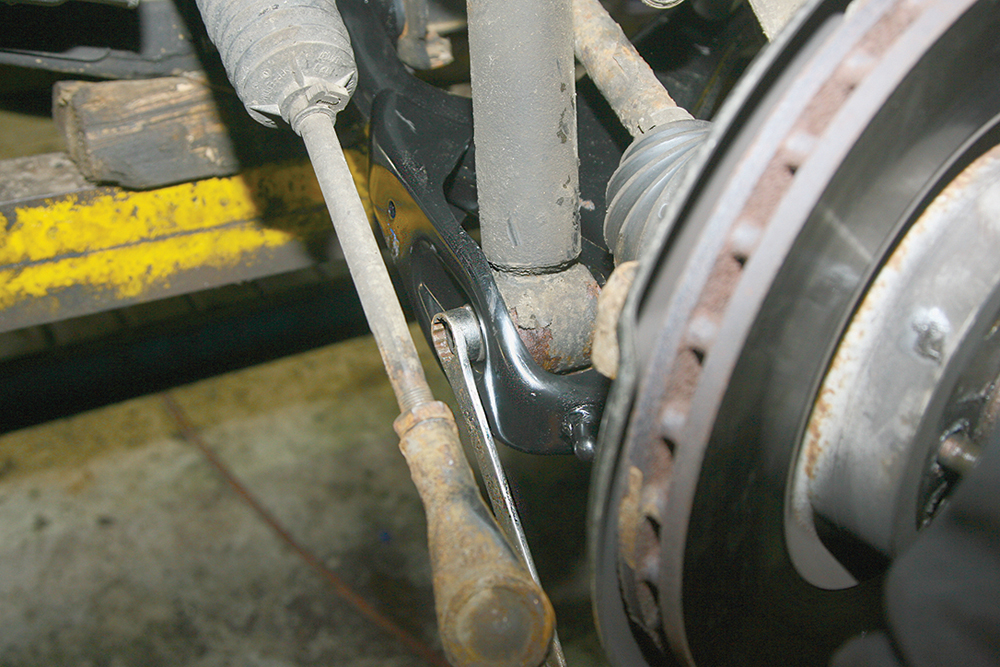
Loosen the rod: The steering control arm to track rod end locknut is loosened; this allows a little extra movement to assist when the track rod is split from the steering knuckle.

Undo and remove: The securing nut holding the steering lower control arm track rod end (TRE) to the wheel steering knuckle is now undone and removed from the TRE.
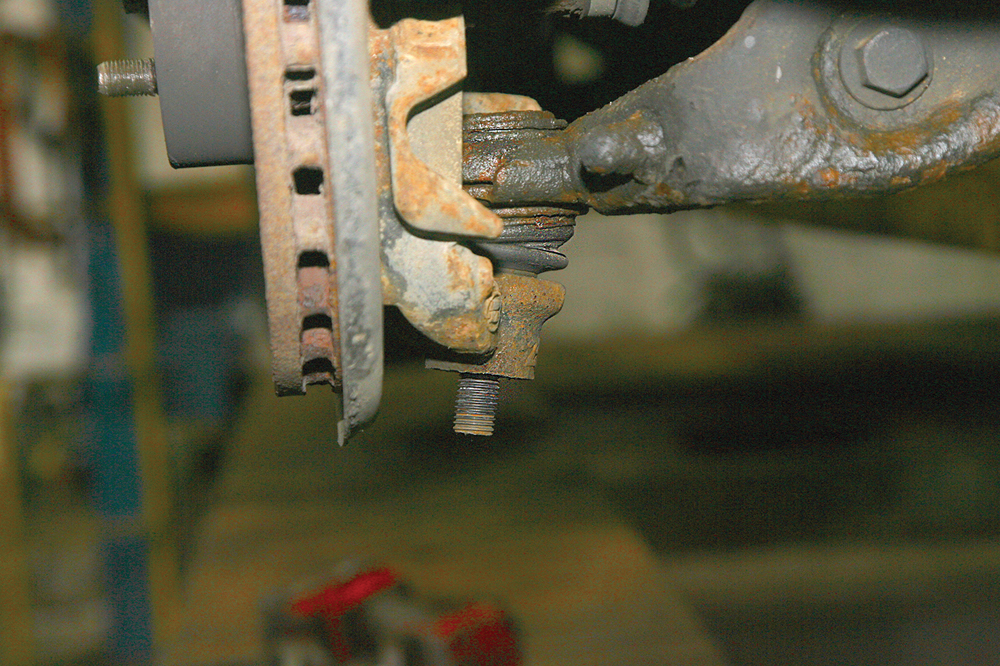
Suspension arm ball joint: The 24mm securing nut holding the suspension lower control arm ball joint in position in the wheel steering knuckle is undone and then removed.

Splitting the joints: This hydraulic ball joint separator splits the TRE and the ball joint from the steering knuckle. Any suitable ball joint separator tool can be used.

Damper bolt: The long bolt holding the air spring/damper to the lower control arm is undone and then knocked out, releasing the lower arm from the bottom of the damper.

Knock through: With the wheel steering knuckle released from the lower control arm, the front driveshaft can now be knocked out of the wheel hub assembly.

Try to remove the bolts: With all fittings freed, we try to pry or knock out the long mounting bolts running through the bushes that locate the lower control arms to the chassis.
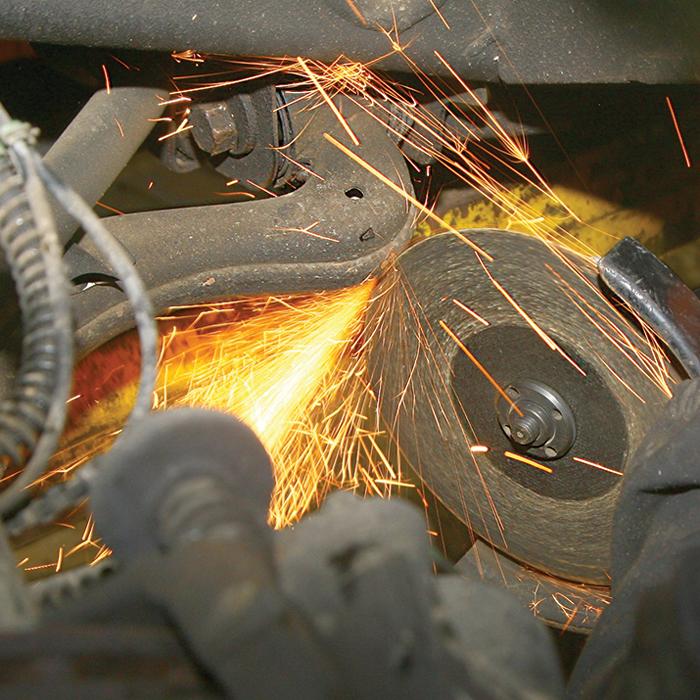
Cut to remove: Normally, as in this case, all four bolts are seized into the bushes and will not knock out. One option is to first cut through the lower control arm at both ends.

Remove the cut arm: With both inner ends of the lower arm now cut through, the complete lower arm assembly can be manoeuvred clear and removed from the Discovery.
Cut the bolts: Using a thin cutting disc on the grinder, the bolts running through the bushes are carefully cut through between the chassis flange and the remains of the arm.

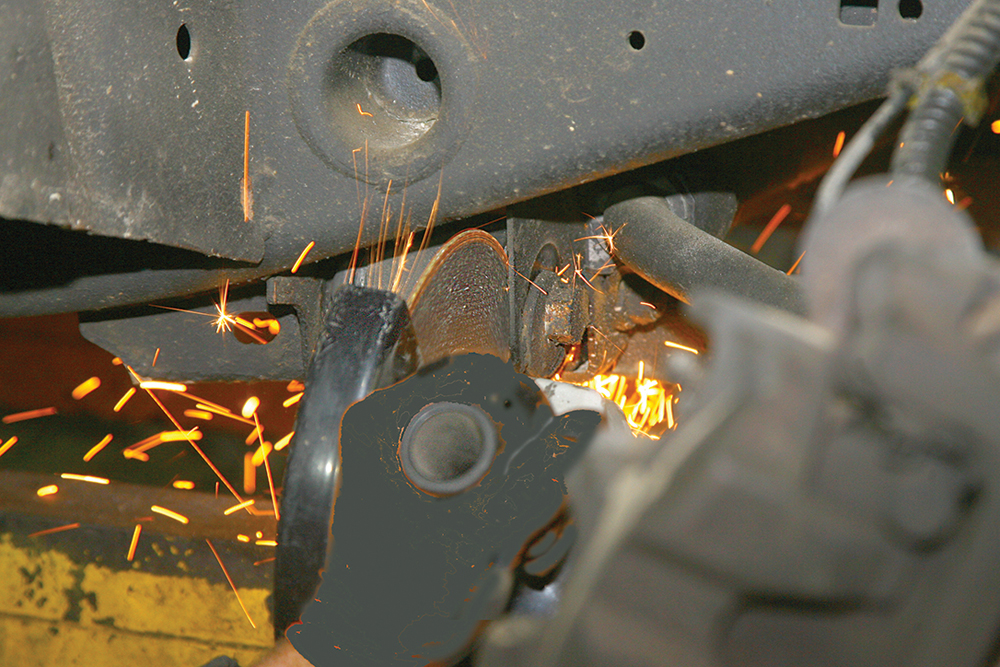
Pry out the bush: Once the bolts have been cut through, the old worn bushes can be pried out from the lower control arm mounting brackets on the chassis.
Installing the new arms
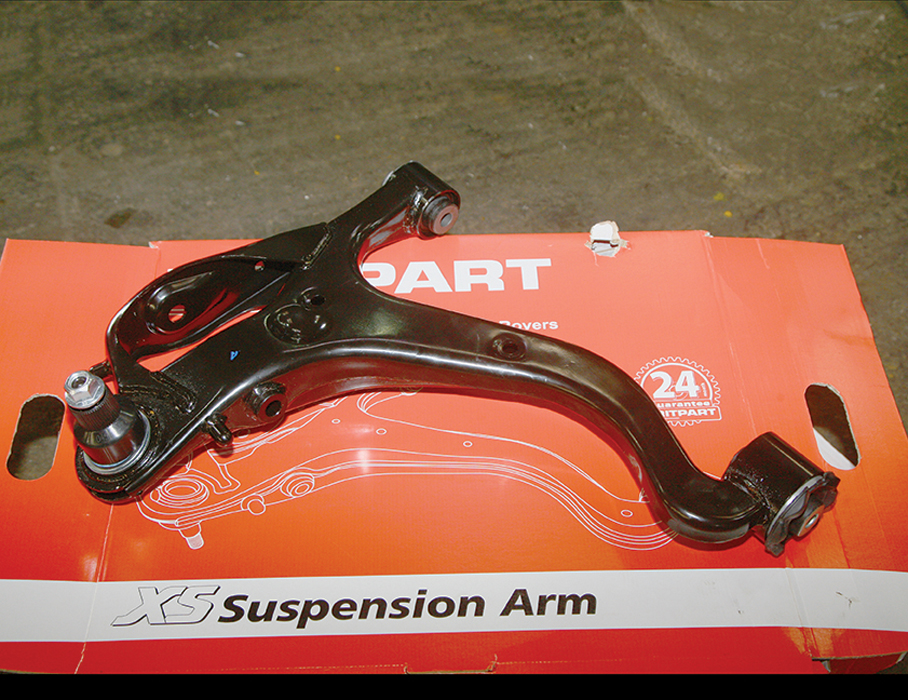
New lower arm: This aftermarket suspension lower arm is supplied with a new wheel knuckle ball joint (left) and the two chassis location bushes (top and right) all pre-fitted.
Cam bolts: These new cam bolts can be rotated using the hexagon end to set the road wheel geometry by moving the lower arm in relation to the chassis.

Fit new arm: The new lower control arm is now lifted into position, first engaging the ball joint into the steering knuckle, fitting the nut and torquing to spec (115Nm)..
Align the bushes: With ball joint secured in place, the new lower arm assembly is swung up to the chassis position so the bushes are aligned in their mounting brackets.

Grease up: Before the control arms’ new eccentric bolts are fitted through the bushes and brackets, anti-seize grease is applied to the shank to aid removal for future repair.

Bolting up: The new bolts are fitted through the brackets and arm bushes, then the eccentric washers, plain washers and the nuts are fitted, with the nuts just nipped up.
Fitted correctly? At this stage, the bolts and the off-set cam washers are checked to ensure the punch marks correctly align to the punch marks on the chassis mountings.
Refit driveshaft: The driveshaft is manoeuvred back through the hub, carefully aligning the splines with the wheel knuckle, and fully seated through the assembly.
Damper and TRE: The air spring/damper is bolted back into the new suspension arm and the TRE refitted to the steering knuckle and both fixings tightened to 300Nm.
New stake nut: With the driveshaft already in the wheel hub, a new stake nut is fitted and tightened to 275Nm then, the nut is staked to prevent loosening.

Tightened and checked: The Discovery is lowered onto its wheels and the arm-to-chassis bolts tightened to 275Nm, ensuring the alignment punch marks on the cam washers to the chassis remain correct.

Laser tracked: As the steering control arm TRE had been loosened earlier, the steering is adjusted and realigned using laser tracking equipment, and the steering rod lock nut re-tightened.
Double-check: Finally, with installation of the new lower arms complete, all the fixings are re-checked for tightness and the alignment of the cam bolt washers to the chassis reconfirmed.
Like to have your own Land Rover library?
Try our All-Access Digital Subscription. You'll get access to over 7 years of Land Rover Monthly – that’s more than 100 issues plus the latest digital issue. All issues are fully searchable so you can easily find what you are looking for and what’s more it’s less than 10p a day to subscribe. Click the link above to find out more details and start enjoying all the benefits now.