


01 May 2024
|
 Installing a fresh spring and damper will improve the ride
: credit: © Martin Domoney
Installing a fresh spring and damper will improve the ride
: credit: © Martin Domoney
Replacing tired springs and dampers will restore ride height and handling, as Martin explains
Need to know
Time: One day
Cost: £466.70-571.84
Difficulty: 2 out of 5
Models: All Defender models, Discovery 1 and classic Range Rover.
Tools needed: Socket and spanner sets, screwdriver, torque wrench, pry bar, wire brush, emery cloth, anti-seize compound, trolley jack, minimum 3-tonne axle stands.
Parts and costs:
• Terrafirma Defender 90 standard height spring and monotube damper kit (part no. TF185), £466.70.
• YRM galvanised turrets (part no. 324), £33.60 each.
• YRM stainless steel turret rings (part no. 210), £37.94 pair. Brookwell.co.uk, Yrmit.co.uk.
Work safely: Raise and support the vehicle securely on rated equipment. Wear the correct PPE at all times. Only work on safety-critical systems, like suspension, if you are confident in your abilities. If you’re not, leave it to the professionals.
One of the best things about Land Rovers is how easy it is to adapt them for what we love doing most, whether that’s camping, overlanding, greenlaning, off-roading… The list goes on.
Fitting accessories and upgrades inevitably means adding some weight to the vehicle. A bit is okay and won’t make a noticeable difference to the Land Rover’s stance or handling, but bulky items like a winch or roof tent can have a big impact on how the vehicle drives and even looks when it’s parked. Couple any extra mass with already-worn OE suspension, and you could have a wobbly, lopsided Land Rover on your hands that you won’t want to look at, let alone drive. In fact, even without extra weight, sagging springs and leaky, worn-out dampers will have a dramatic negative effect on the way the vehicle behaves on the road.
Thankfully there are tons of options on the market to bring the balance and handling back into check after bolting on as few or as many accessories as might tickle your fancy. In this case, LRM Associate Publisher Steve Miller’s 90 carries around a Frontrunner roof rack and tent, and has the loadspace decked out with sound deadening material and extra trim, so there’s a bit more weight over the back axle than normal.
After speaking to Eddie Priscott at Terrafirma, we decided the firm’s new standard height coil springs coupled with monotube gas dampers would be just the job. Anticipating battling some rust along the way, we also grabbed some stainless steel turret rings and galvanised turrets from YRM Metal Solutions to help things progress smoothly.

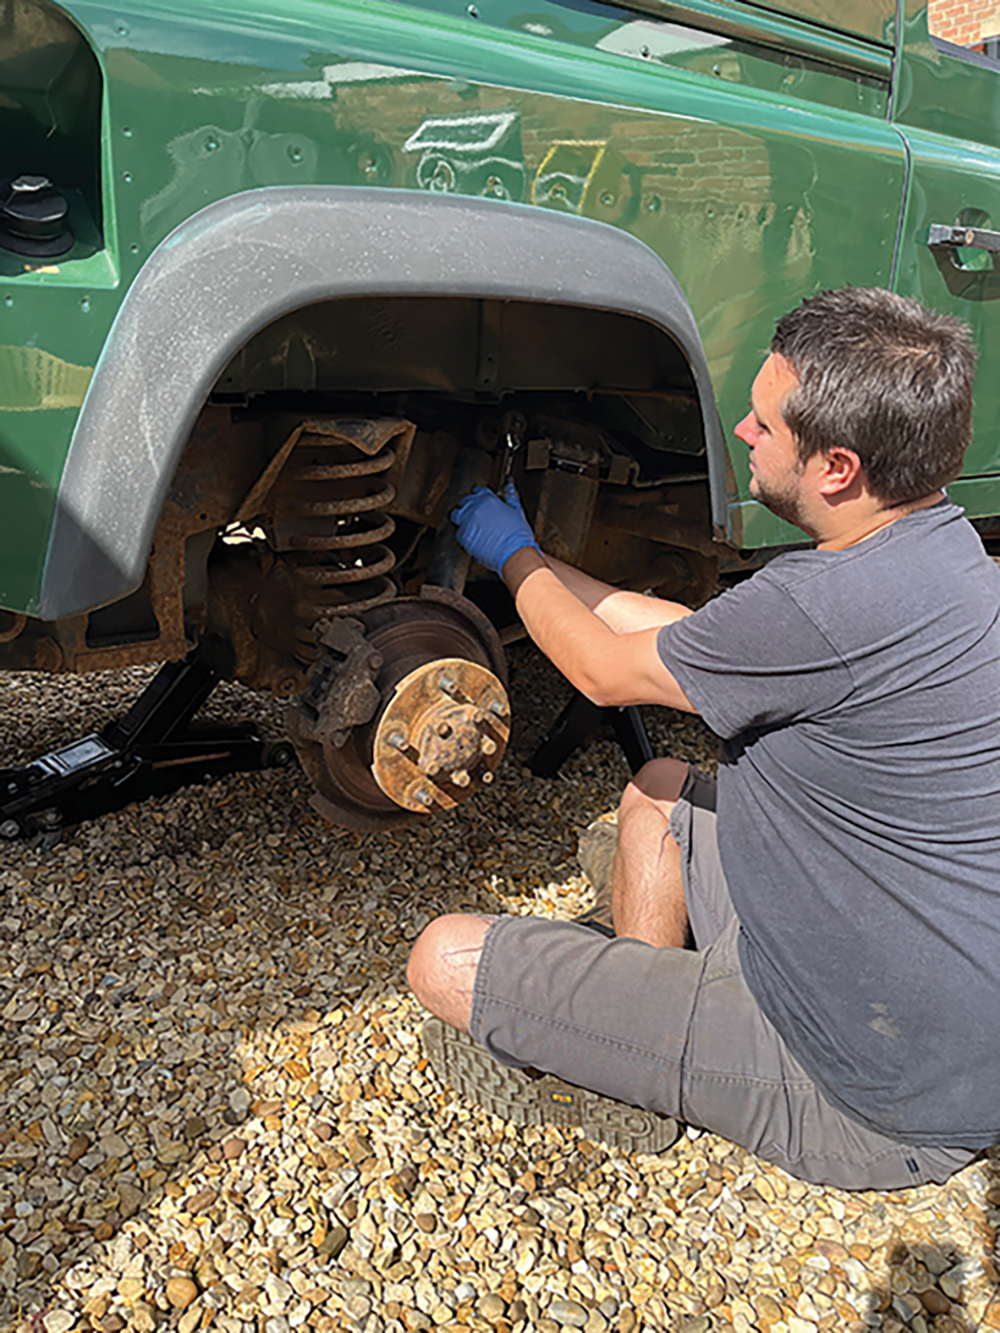
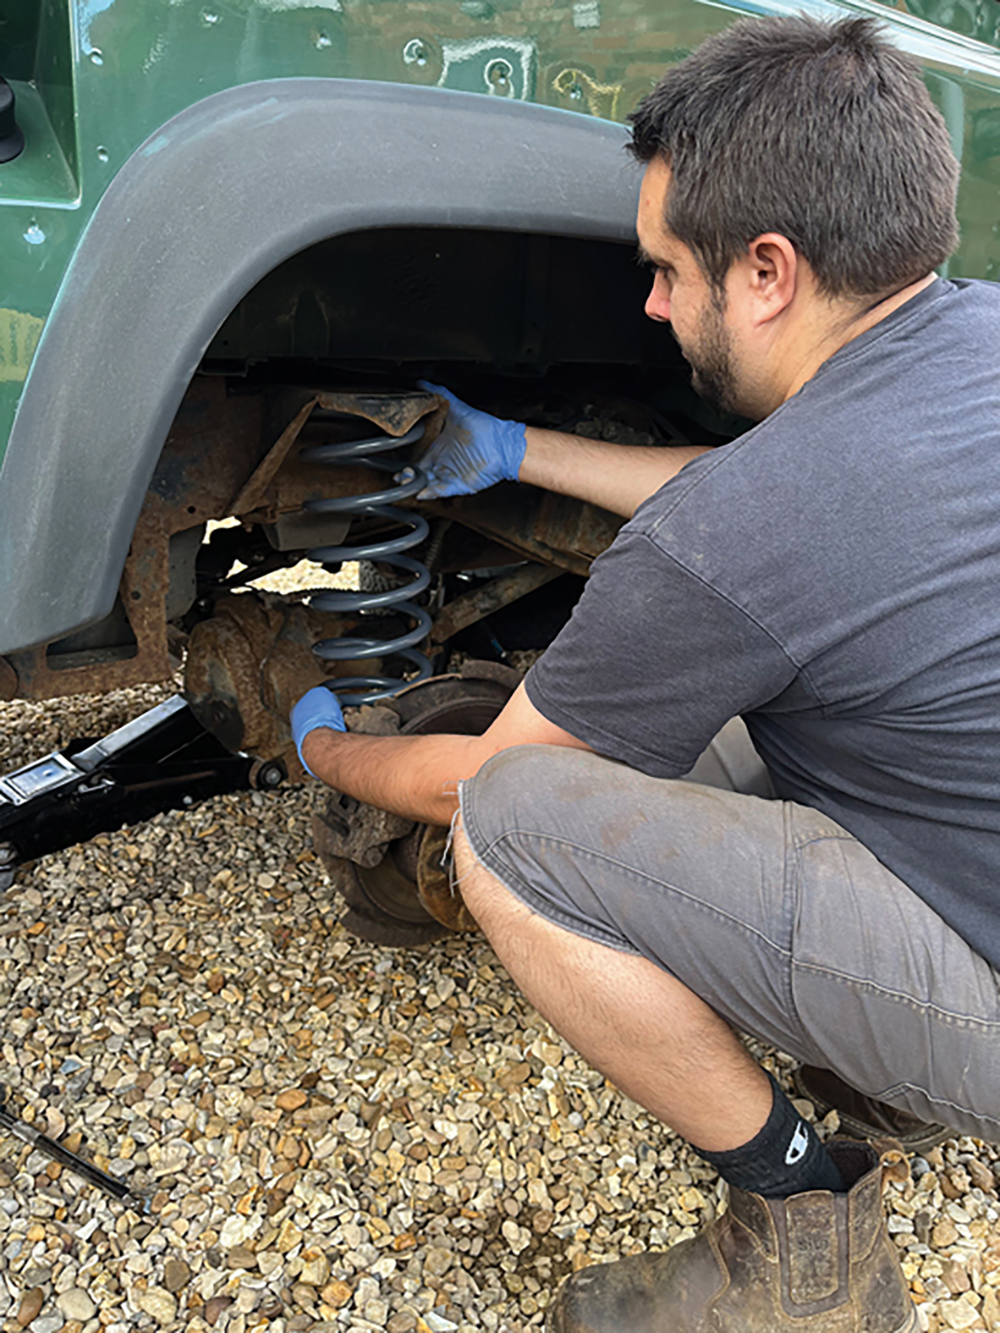
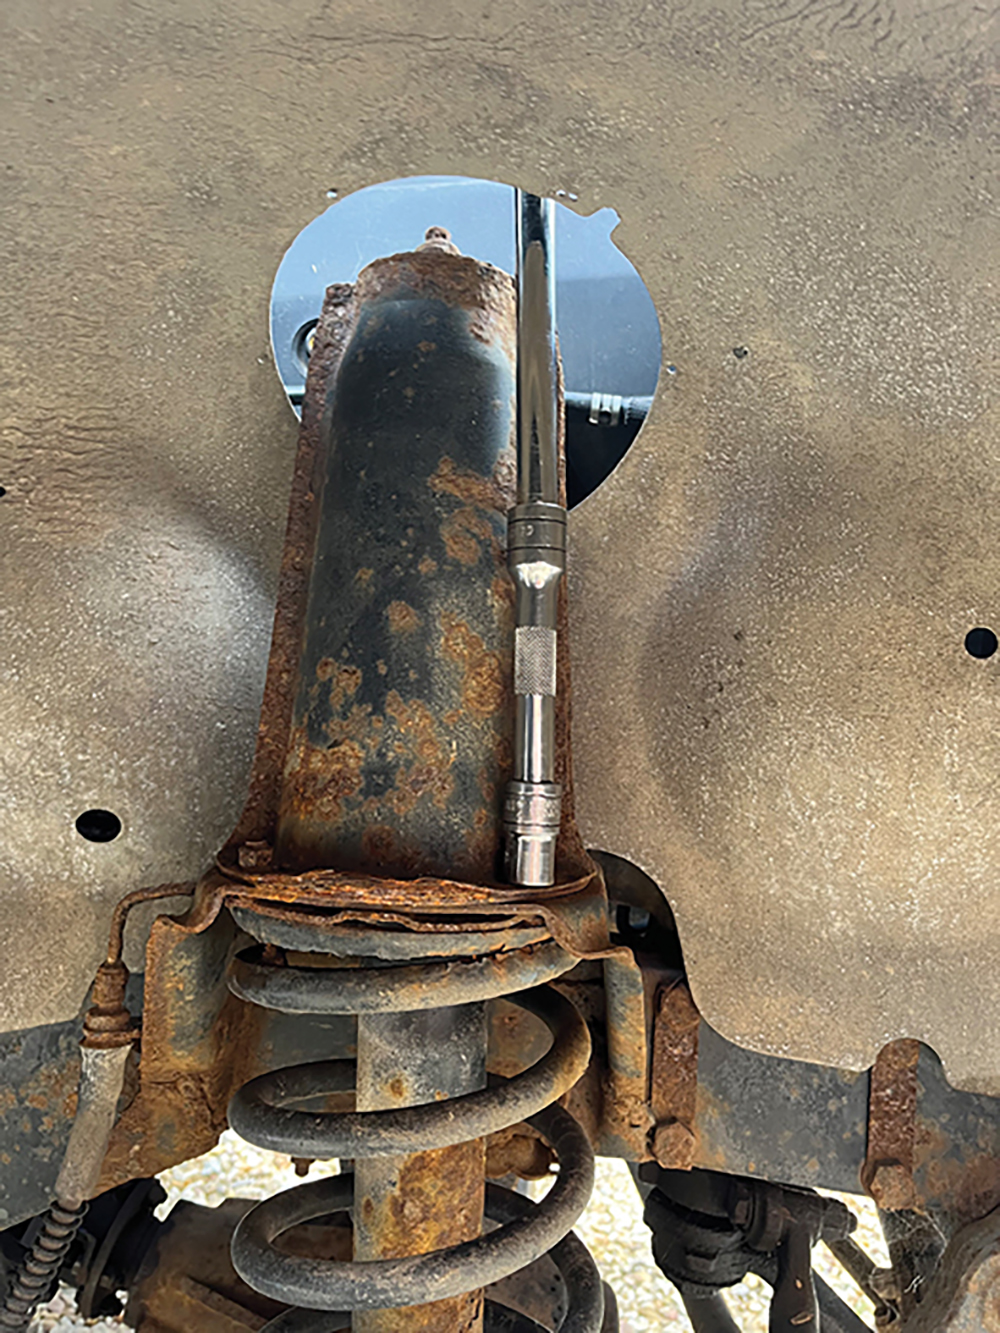
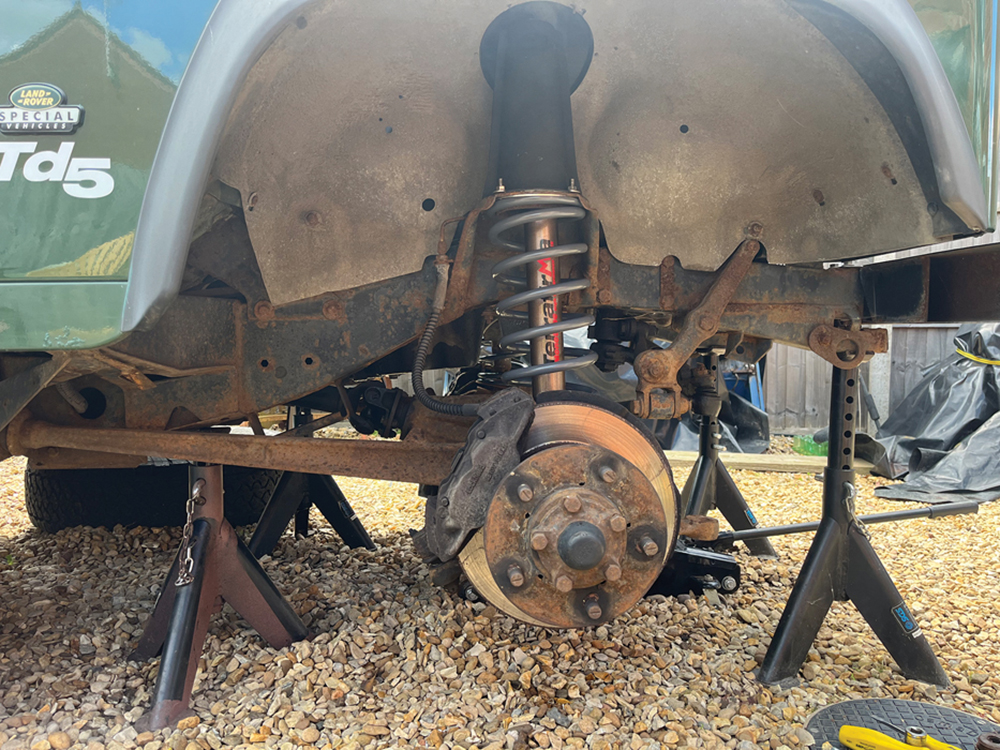
Sturdy stands: For the springs to extend far enough to come out from between the axle and the chassis, we’ll be relying on the axle hanging down. Jack the Land Rover up evenly under the axle, and support it securely under the chassis on rated axle stands. Leave the jack in place.

Rear end first: We’ll start at the back; loosen and remove the wheel nuts both sides, and remove the road wheels. Now’s a good time to inspect the tyres and brakes if you haven’t had the wheels off for a while. Slide them underneath the chassis as an extra fail-safe.
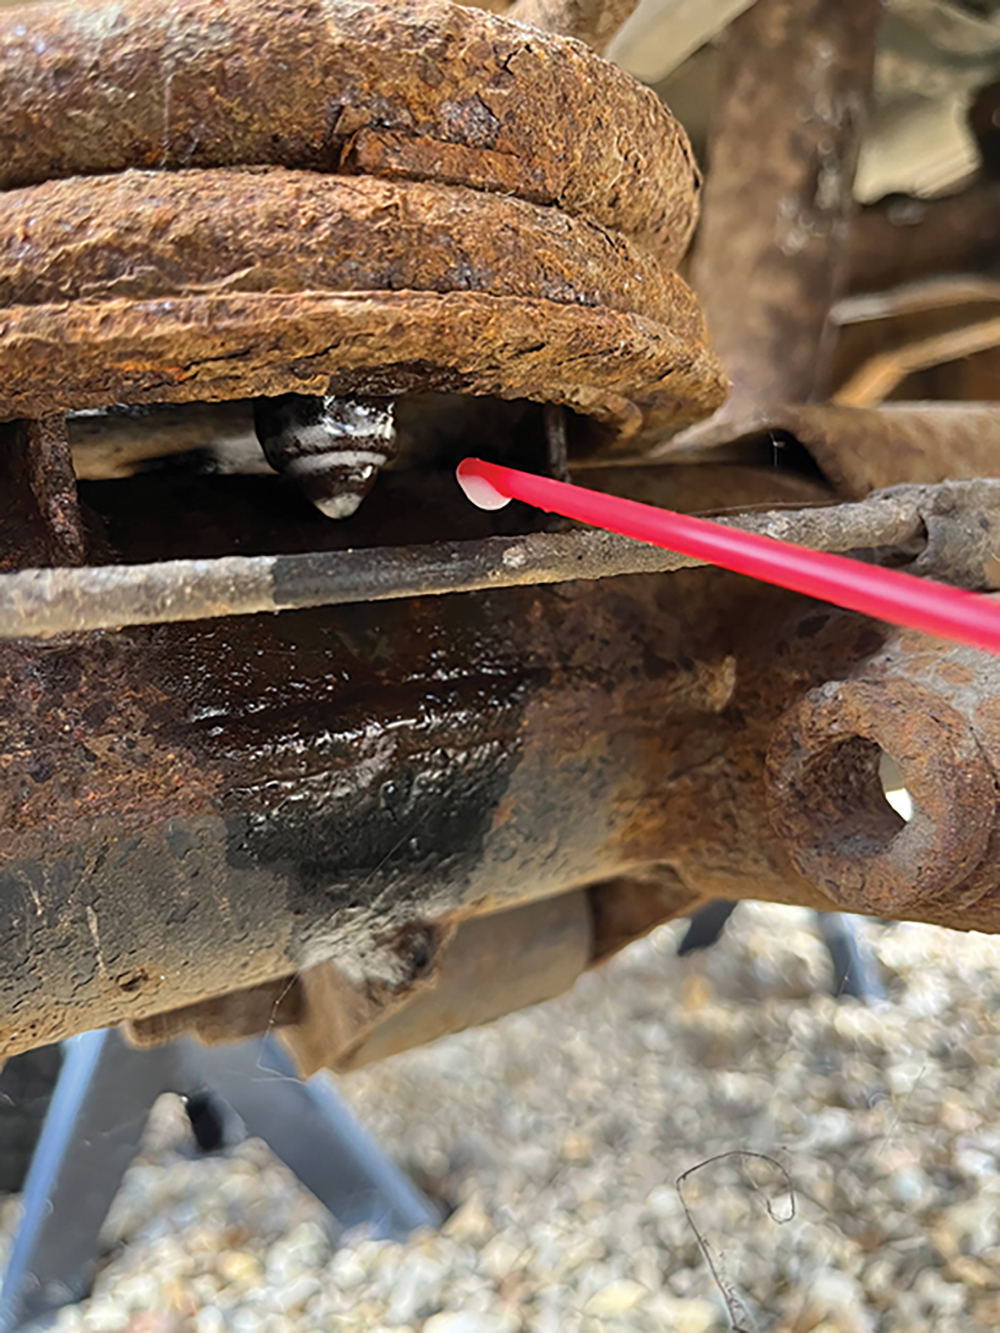
Treat the fixings: To make life as easy as possible and reduce the risk of bolts snapping or rounding off, spend a few minutes with a wire brush cleaning up the spring clamp bolts heads and exposed threads, and give everything a liberal coating in penetrating oil to break down rust.
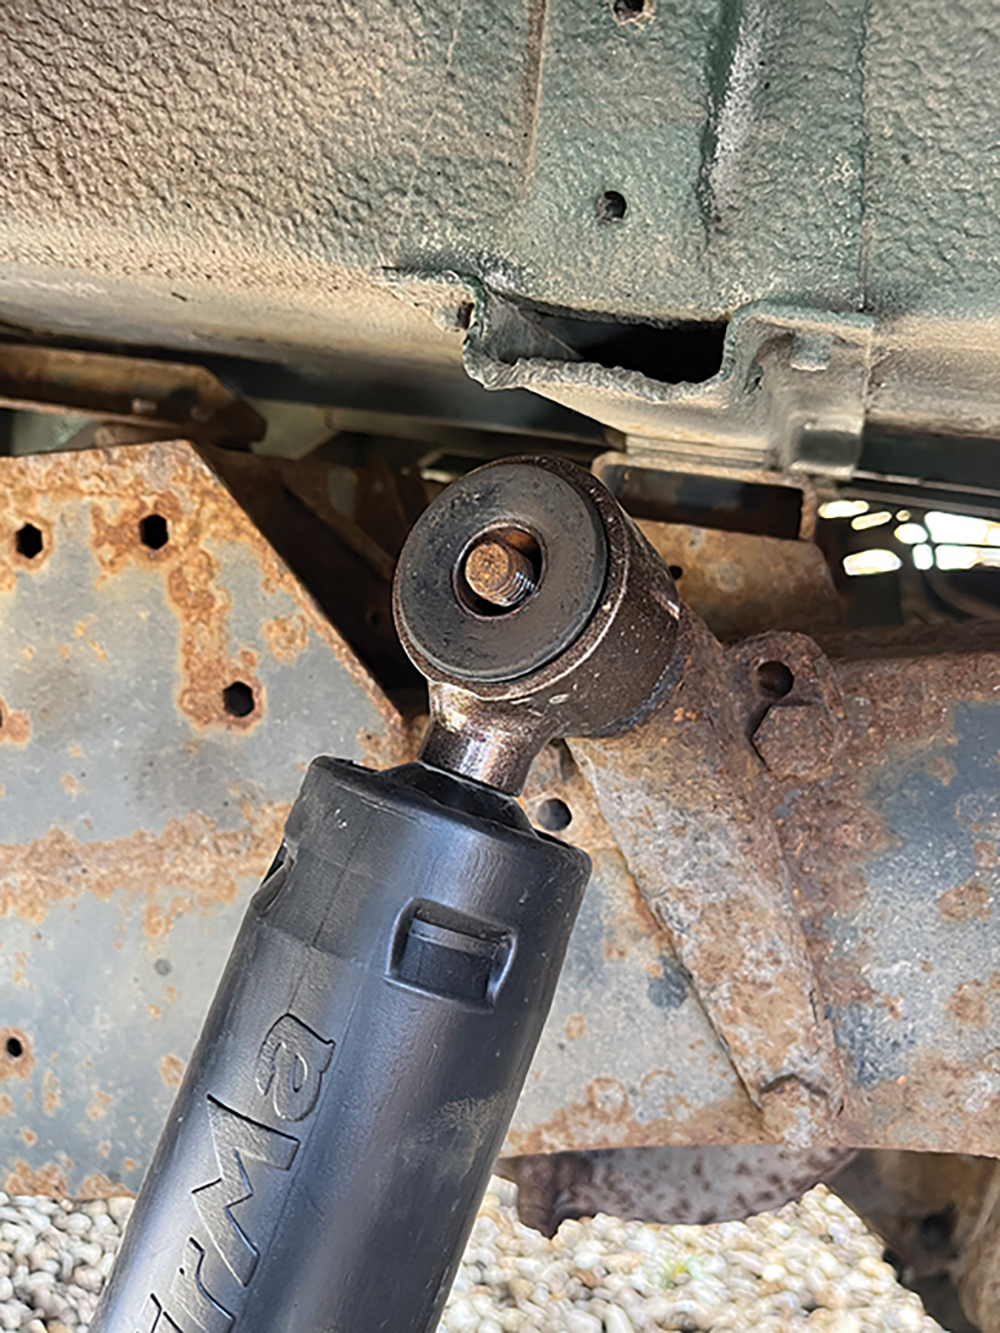
Unbolt the damper: Jack the axle up so that the damper isn’t under tension at full extension, then undo the single nut securing it to the bracket on the chassis. Hold the damper body with a pair of grips or an oil filter strap, and undo the nut that sandwiches it to the axle, then lift it off.
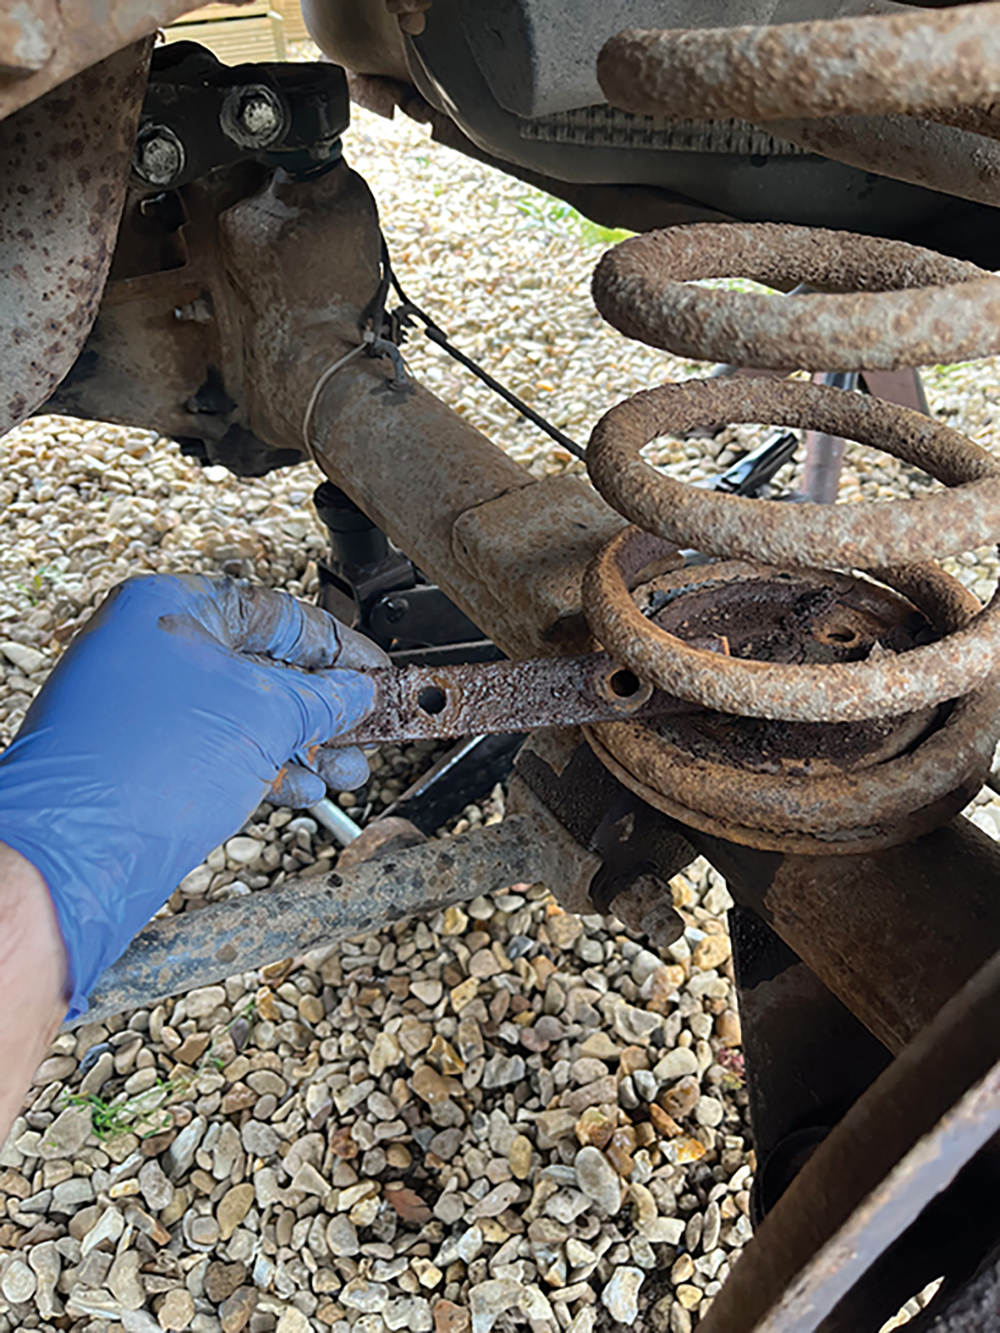
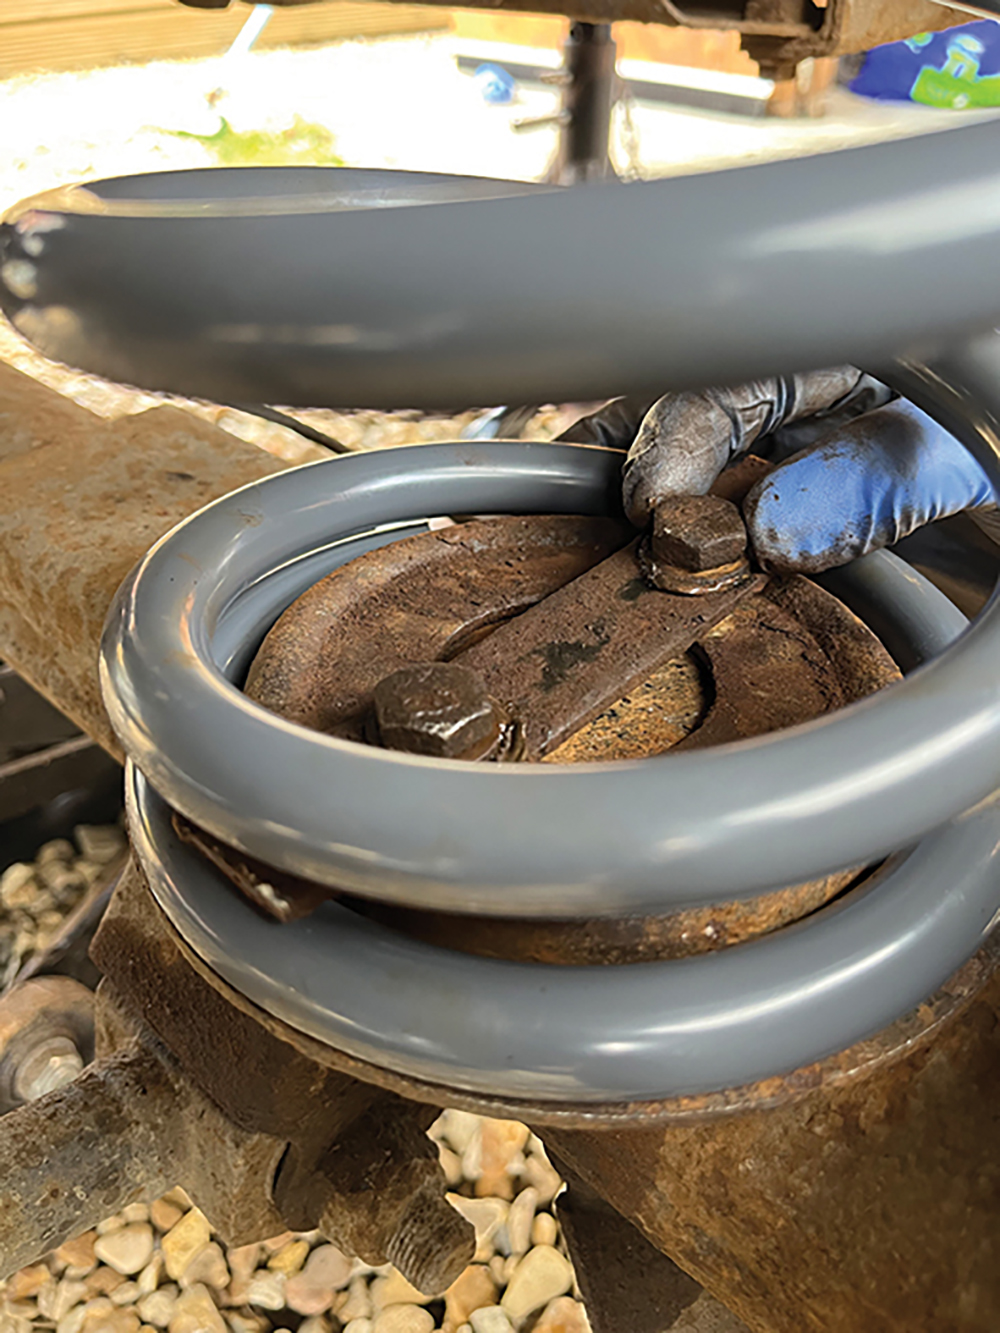
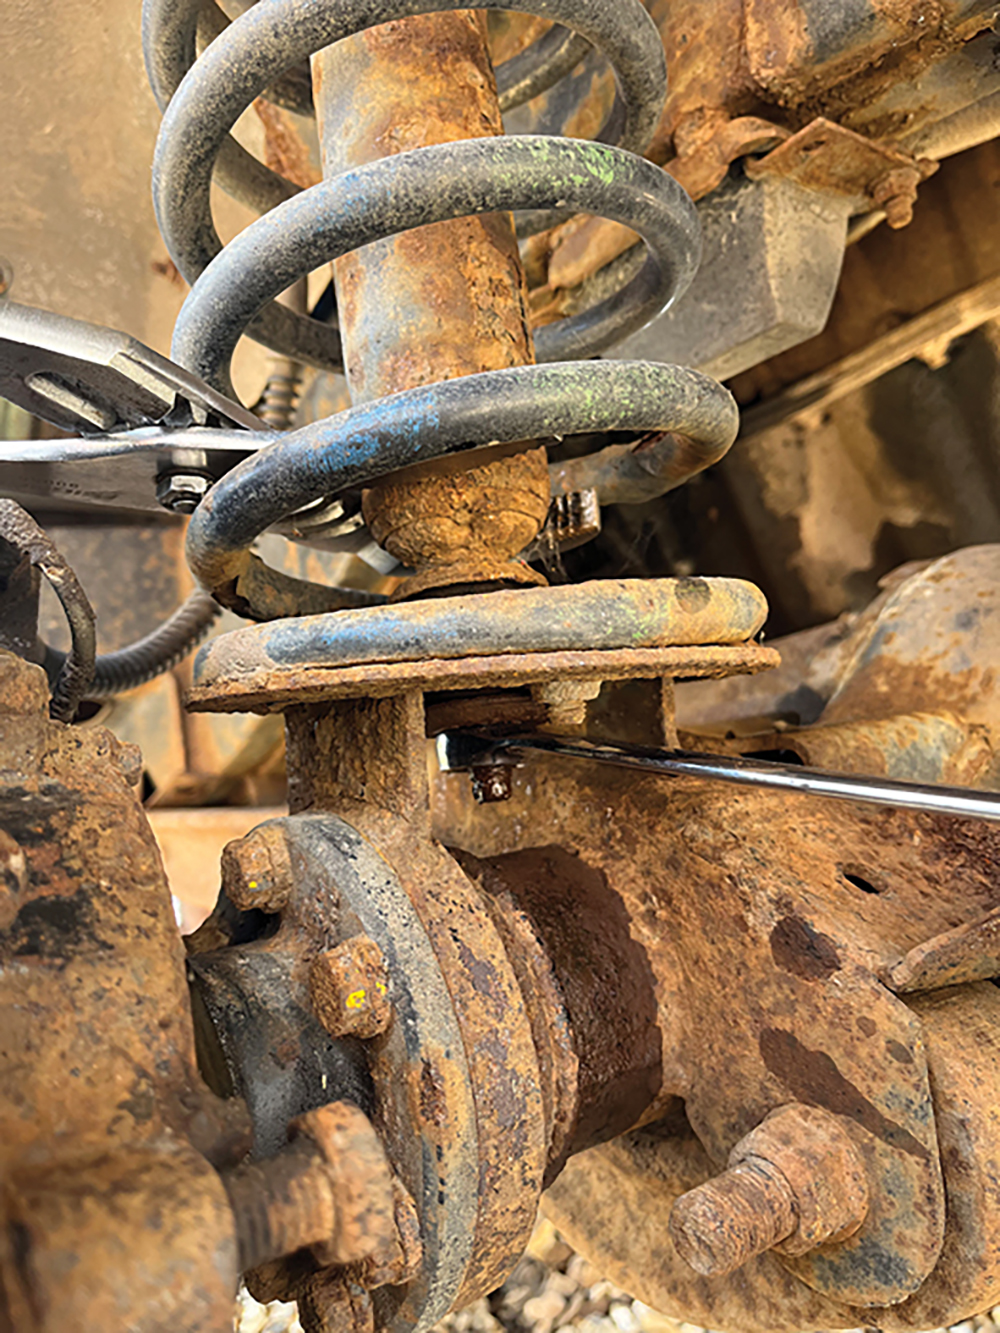
Spring clamps off: Using a combination of 17mm spanners or a ratchet and socket slotted between the gaps in the coil spring, loosen and undo the two nuts and bolts that secure the spring retaining plate to the axle. Retrieve the fixings and washers, then lift the retainer away.

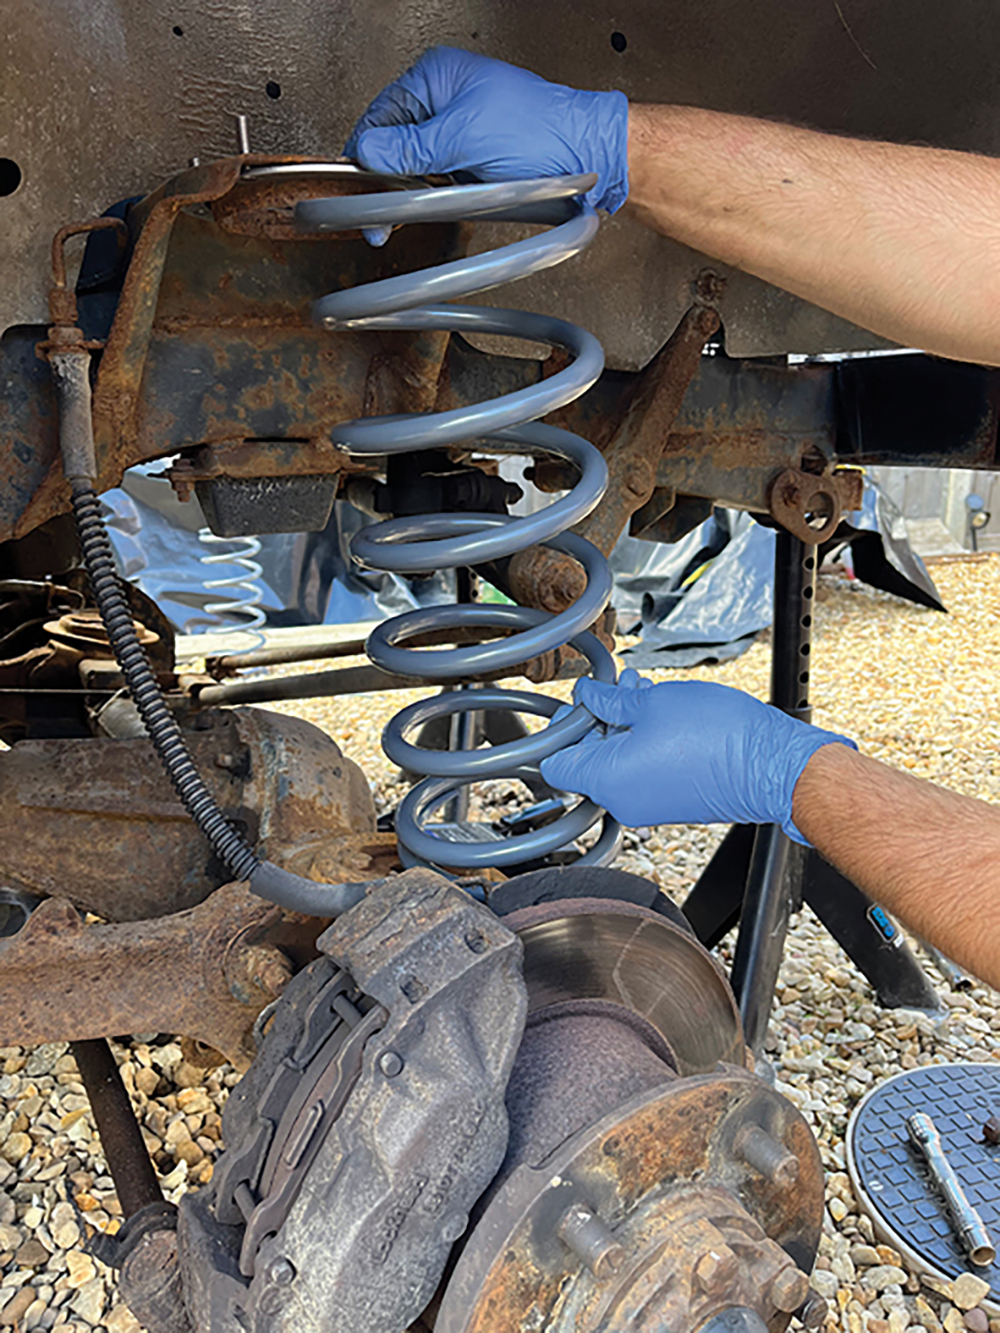
Spring time: If your Land Rover has an anti-roll bar, undo the bolts that attach it to the chassis to allow the axle to move freely. Carefully lower the axle down on the jack until the spring is loose between the axle and chassis, then push downwards on the hub and pull it free.

Have a clean-up: As the new parts will be shiny, it’s worth tidying up the spring seats and retaining plates. Secure each in a vice and use a manual or drill-driven wire brush to dislodge loose rust and paint. Repaint black. Wear eye protection and breathing filter mask.
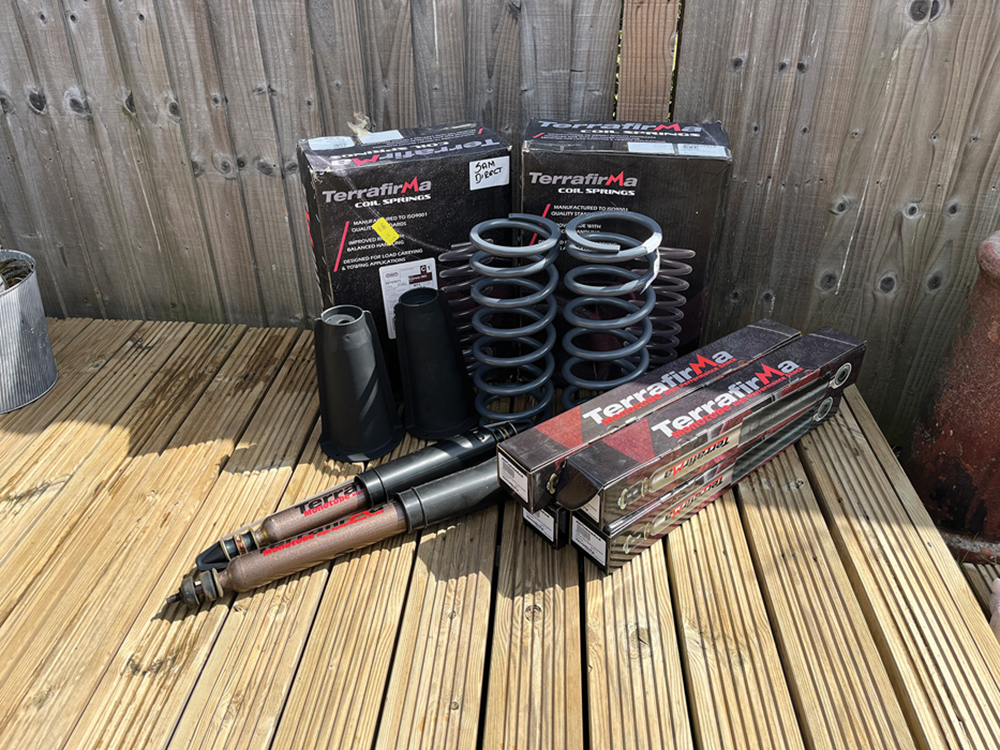
Check it out! This is the new kit we’re fitting to the Defender – the Terrafirma standard height coil springs and monotube dampers sold as a complete vehicle set under part number TF185. Also shown are the galvanised YRM turrets, which have been given a coat of black chassis paint.
Standard or lifted?
We’re fitting slightly uprated but standard-length springs to this Defender, to keep the original look and just improve its handling and ride with a roof tent and camping gear on board. Because we’re keeping it at its original ride height, we don’t have to make any further modifications aside from matching the springs with appropriate dampers, which are also included in the Terrafirma kit in this case.
Things can get more complicated if you choose to fit longer springs to lift the Land Rover. Most off-the-shelf kits can raise the height by up to 40mm, which can be helpful to fit slightly oversize tyres for off-roading, but the suspension geometry will still be altered which will affect the handling, and the centre of gravity will be raised. Any higher than 40mm and the propshaft angles will be approaching their working limits, which can manifest in vibration while driving, and the brake hoses may also need to be extended if longer dampers are also fitted to increase suspension travel. It’s all fixable stuff with castor-correction radius arms or bushes, wide-angle or double-cardon propshafts and extended brake hoses, but it adds cost. And don’t forget, bigger tyres will increase gearing, making acceleration more sluggish.
In short, think carefully about lifting your Land Rover before you take the plunge, as there are knock-on effects which can make the drive less civilised on the road. This may sound dissuading – and it’s not meant to be – but consider if you really need those extra couple of inches, and be sure to declare all modifications to your insurance company.

Taking sides: The springs come boxed as front and rear pairs, and are also labelled to show which side of the Land Rover they should be fitted; D/S for driver’s side, P/S for passenger’s side. It’s vital that they are fitted in the correct position or the Land Rover will lean and handle badly.
Fit the new spring: Using a similar method to removing the old coil spring, push downwards on the hub and lift the new spring (and cleaned-up spring seat) into place between the chassis and axle. It can be a bit of a handful to do by yourself, so ask for some assistance if needed.
Retain it: Wiggle and twist the spring and retaining plate until the holes in the plate line up with the ones in the axle bracket, then slip the retainer through the coils and push the two bolts down through the three layers. Fit the nuts and washers, then tighten the bolts.
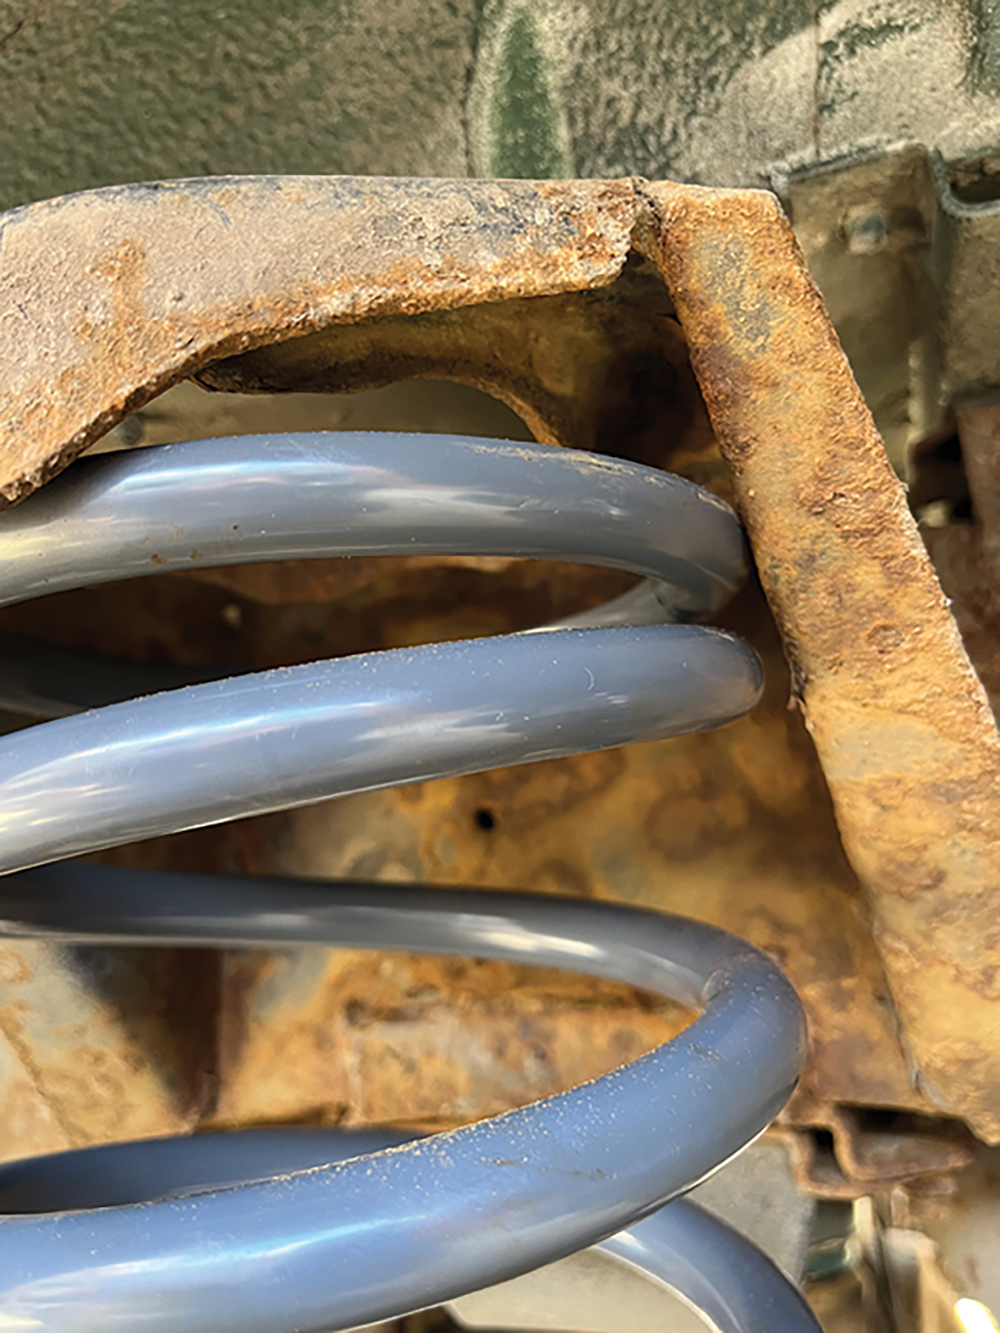
Check location: Once both springs are in, carefully jack the axle back up, checking that they both locate properly into the rings at the top of the chassis brackets. You may need to manipulate them into place with a pry bar while an assistant raises the axle. Reconnect anti-roll bar if fitted.
Shocking scenes: Clean any rust off the upper damper mounts with a wire brush, then lightly grease. These dampers came with new bushes installed; if required, push the bushes and metal tube home. Offer up the new damper and fit the washer and nut, but don’t tighten yet.
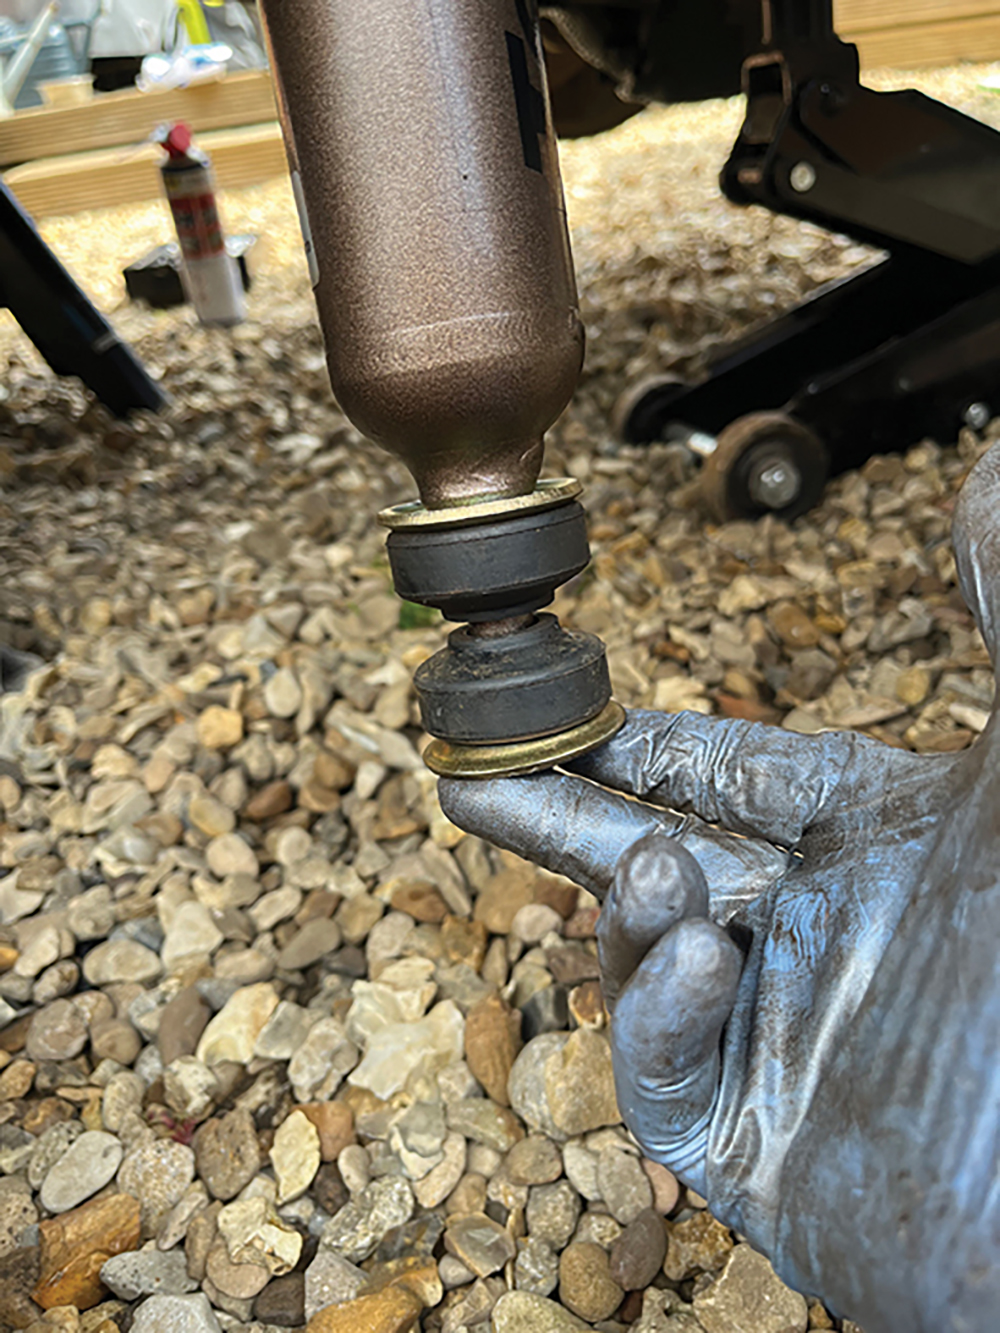
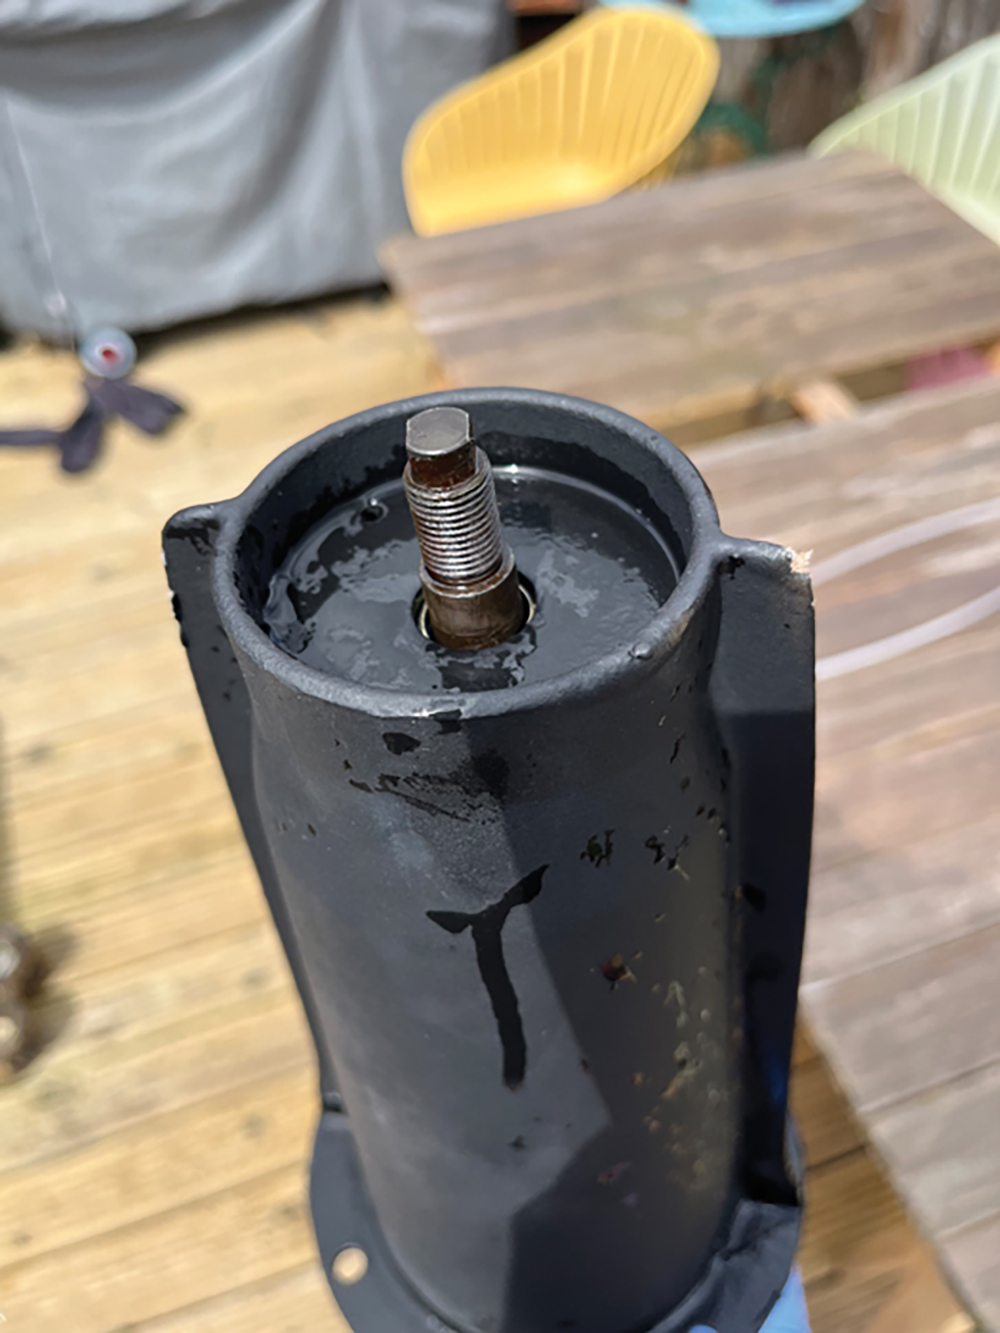
Lower bushes next: Before locating the damper’s lower pin into the socket on the axle, make sure that the bushes and metal cups are assembled in the correct orientation as shown; failure to do so can damage the pin. Assemble, locate and nip the nut just enough to start to compress the bushes.
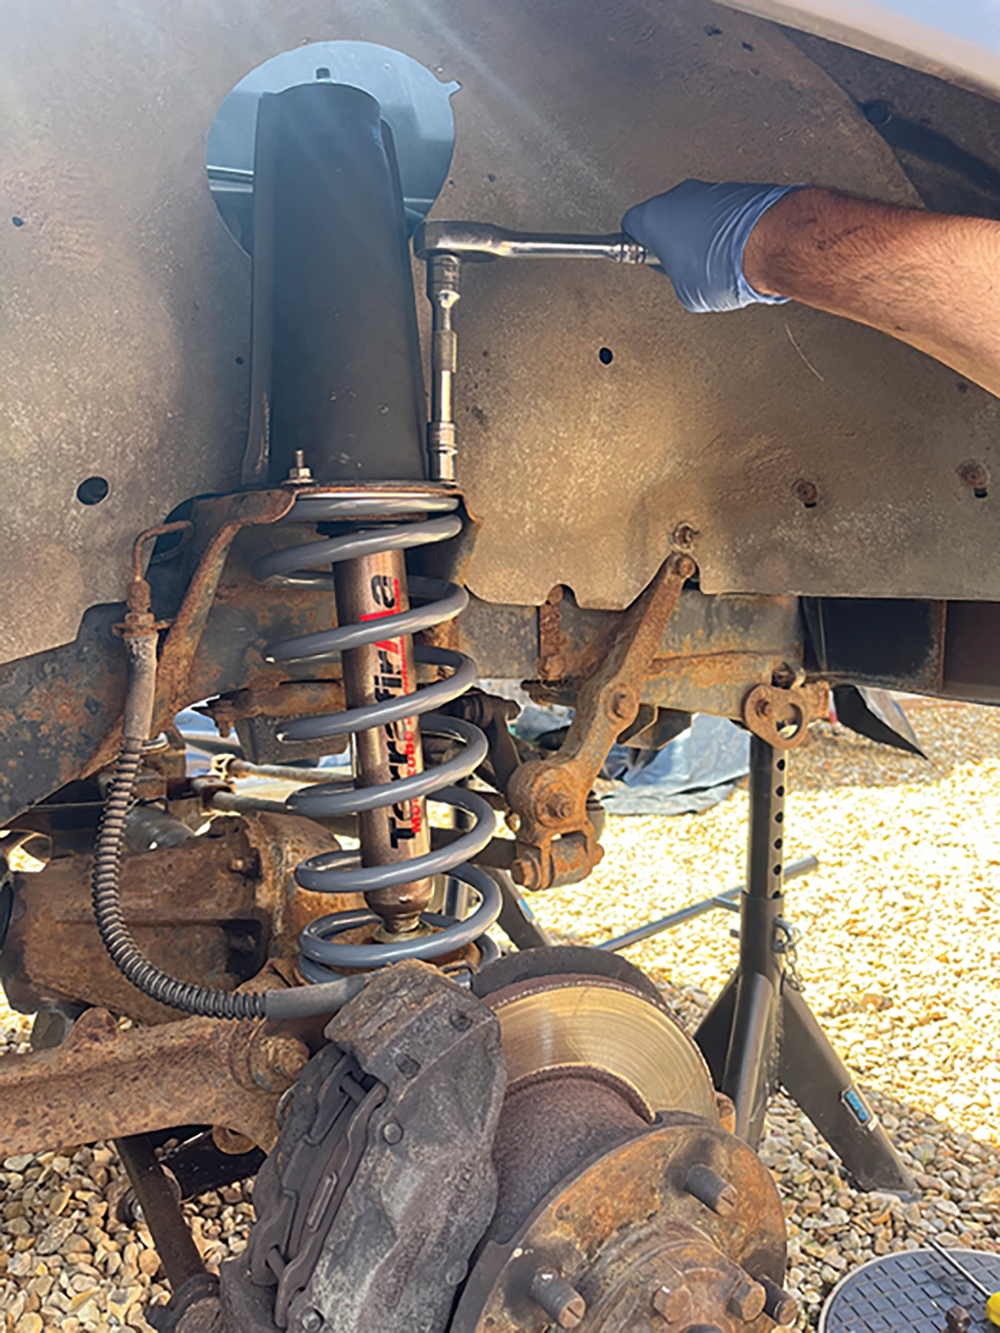
Tighten top mount: With both springs in place and the dampers attached to the axle, tighten the upper mount nut enough to compress the damper bush. Refit the wheels, and torque the wheel nuts to spec, then lower the Land Rover off the stands and raise and support the front end.

Now the front end: Open the bonnet and locate the two round plastic caps on the inner wings – these will come off to allow the damper and turret to be removed. Start by removing anything that’s blocking access – on this Td5, that means the airbox intake pipe and turbo hose.

Remove the caps: Undo the six screws holding each cap in place with a Phillips screwdriver, taking care not to drop any of the short screws into the abyss below, then lift the plastic caps off and place aside. Don’t forget to plug the open ends of any open pipes, if you had to remove them.

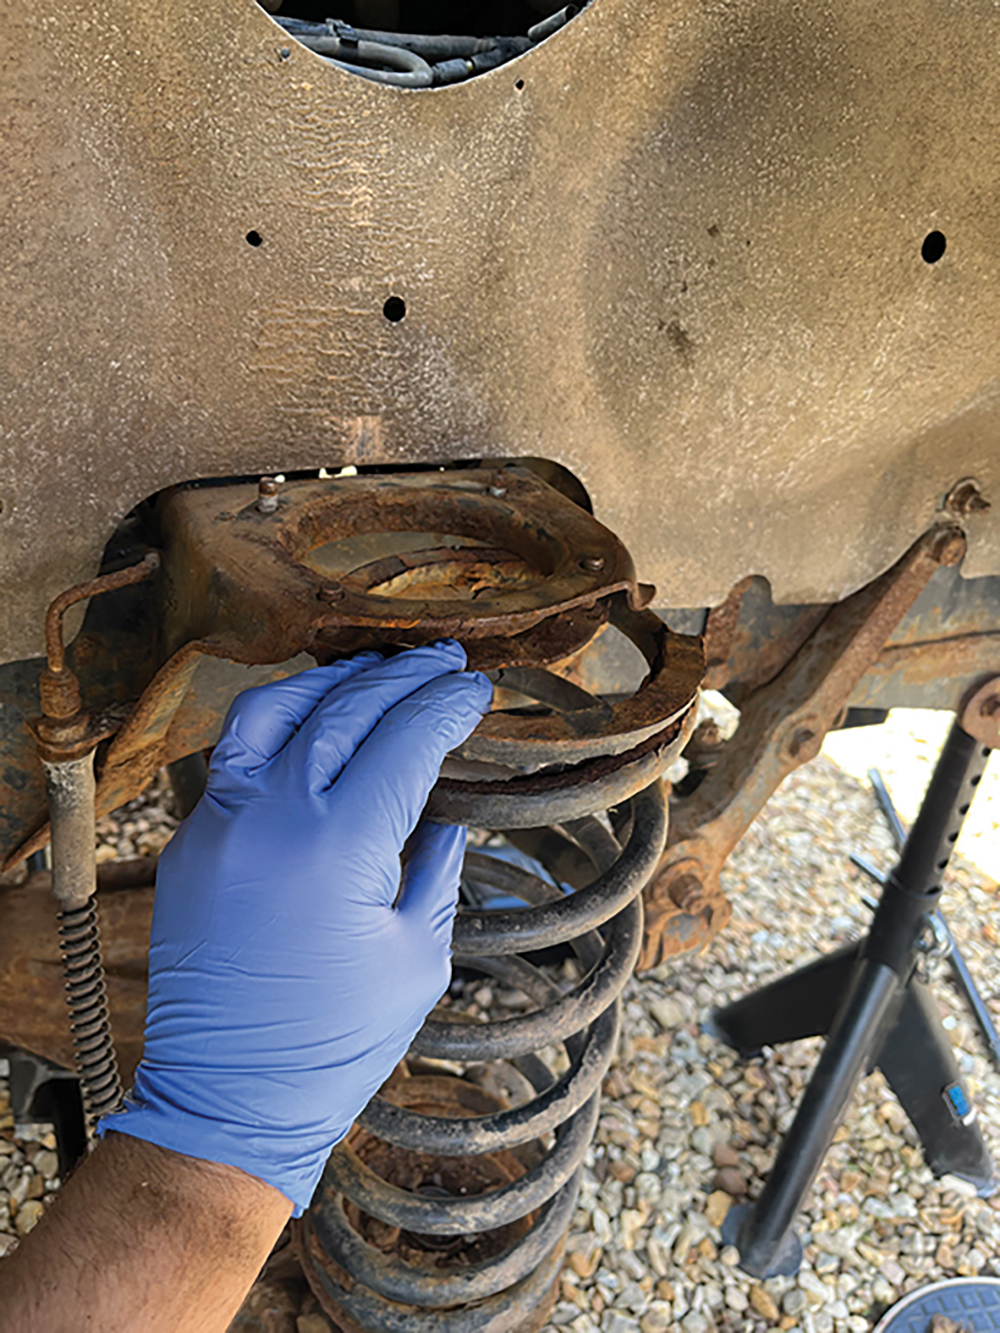
Crusty turrets: Not the name of an up-and-coming Indie band, but what was lurking underneath those plastic covers. This is typical of Land Rovers that don’t get washed off in winter as often as they should – inspect yours ahead of time and order some replacements if needed.
Prepare for snappage: No matter how far in advance you spray the turret ring studs with penetrating oil or how hard you scrub them with a wire brush, there’s always a chance they’ll snap, so get new turret rings as well. Use a 13mm socket on a long extension to reach the inboard ones.
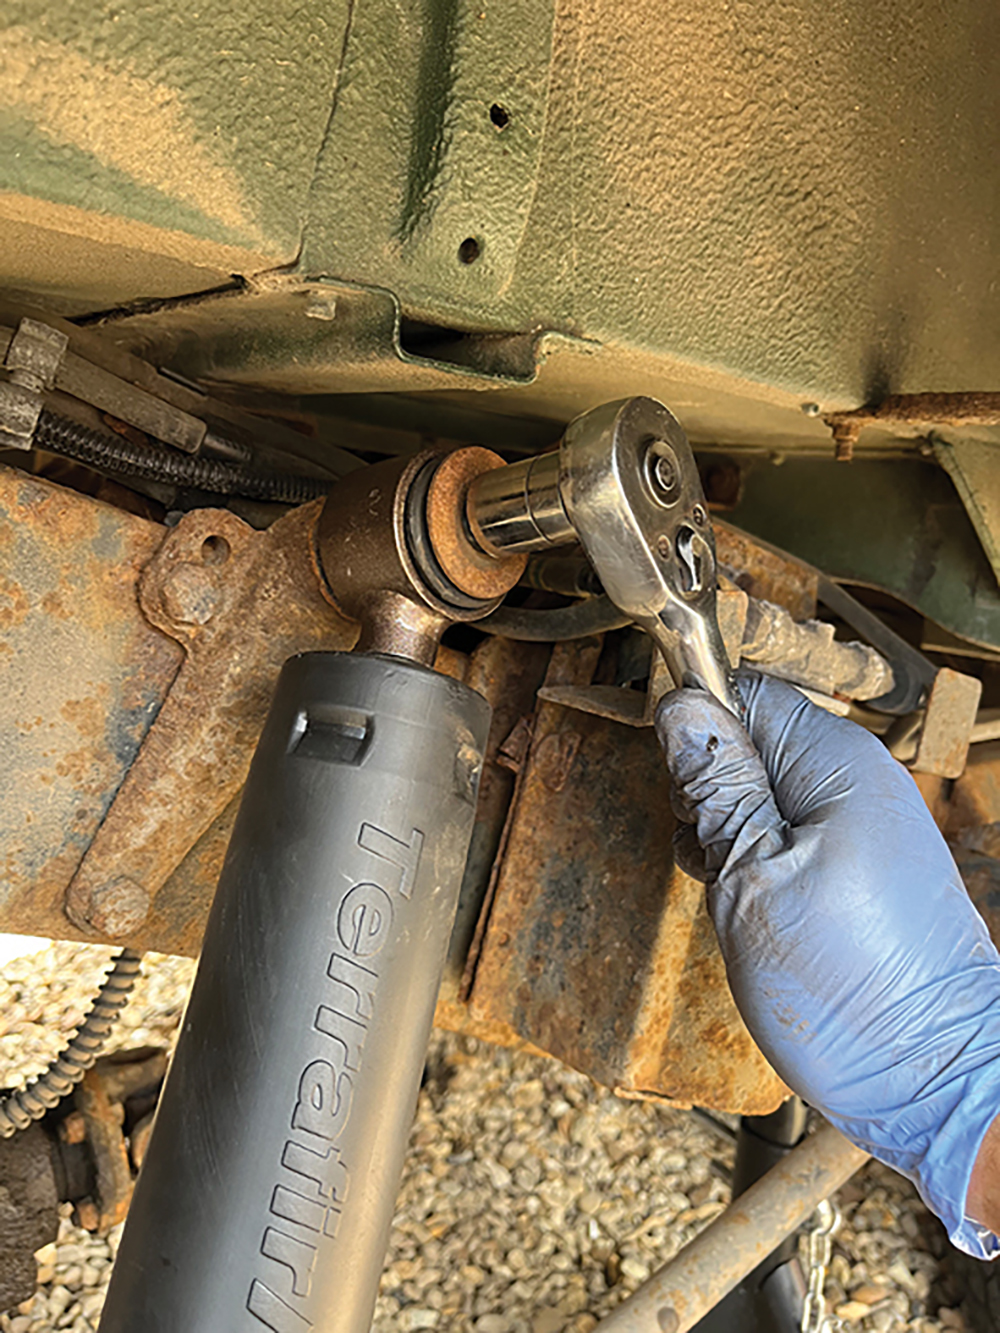
Undo damper nut: Clean as much rust off the exposed threads as you can, then use a pair of grips to hold the body of the old damper and undo the nut at the bottom. Sometimes it’s easier to let the spanner hold itself in place and use the extra leverage of the grips to turn the damper.
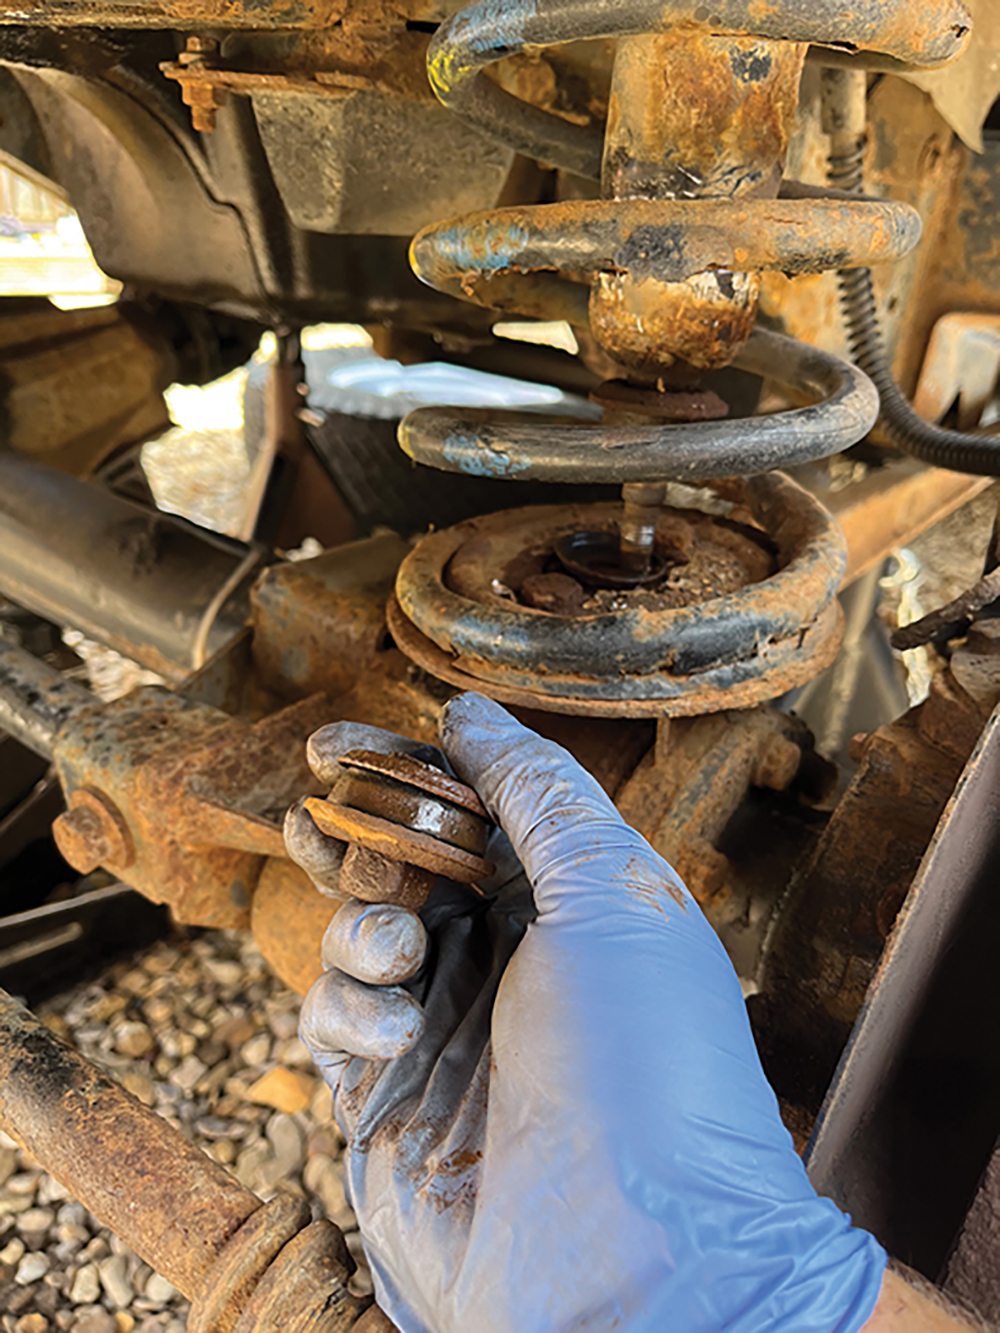
Collect the bushings: The new front dampers come with new rubber bushings and washers just like the rear ones, so retrieve all the old parts that have dropped off the old damper as it was unbolted. The bushes are most likely past their best, but the washers are worth keeping hold of.
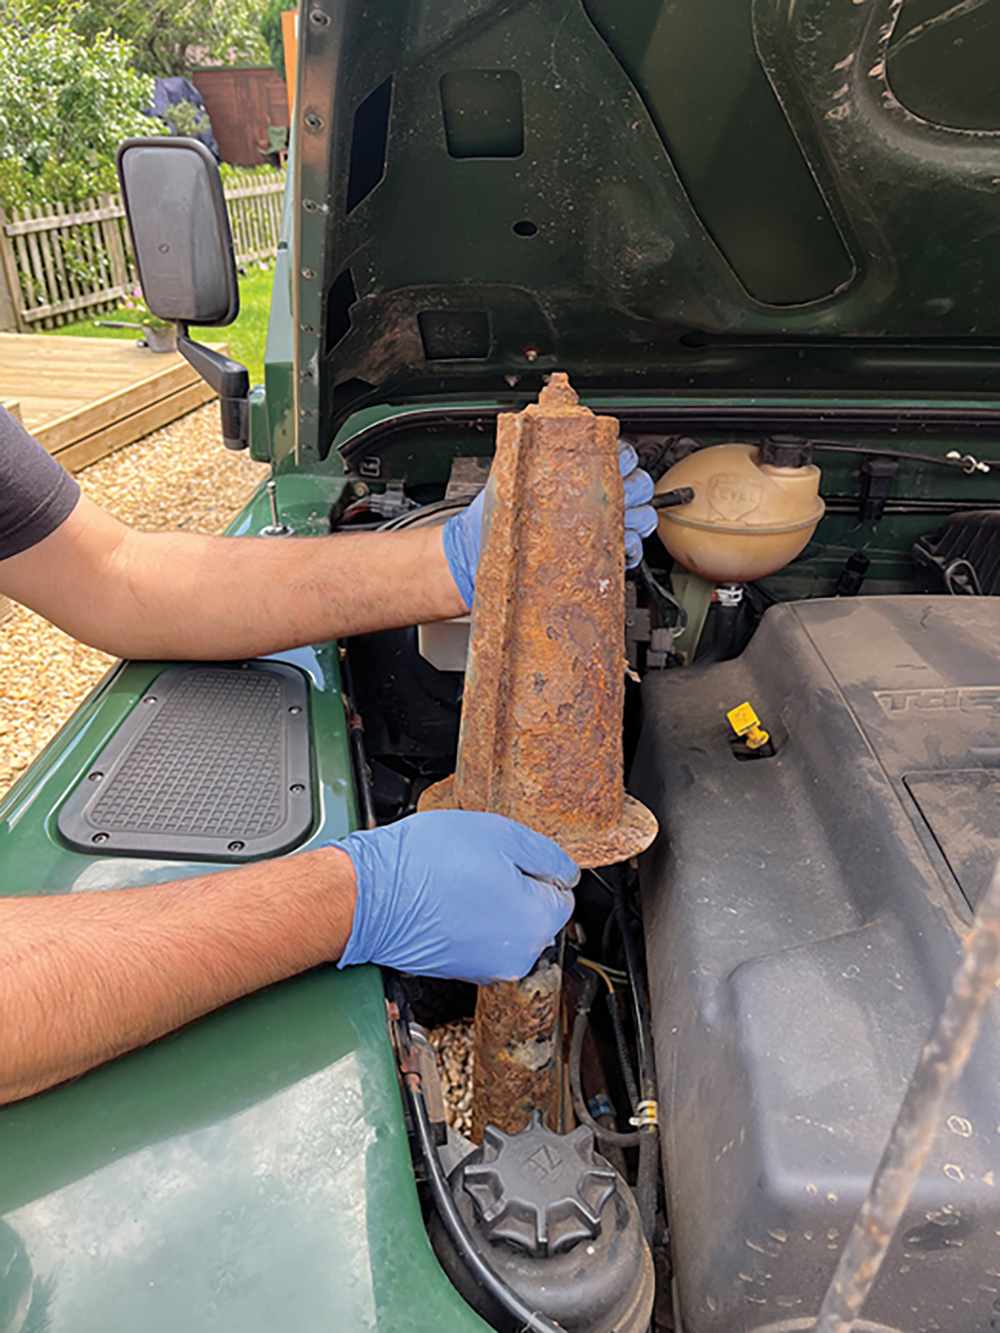
Old damper out: With the turret ring and lower nuts off, the old damper and turret can be manoeuvred out of the engine bay. You may need to ease the inner wheelarch over slightly to let it past, as it overlaps the edge of the turret. Once out, release the damper from the turret, if re-using it.
Old spring off: Either lower the jack and push down on the front hub, or lever the top of the coil downwards and out of its perch to release the spring, then lift it away. Unlike the rears, standard front springs aren’t retained at the base, so the spring plate stays on the axle.
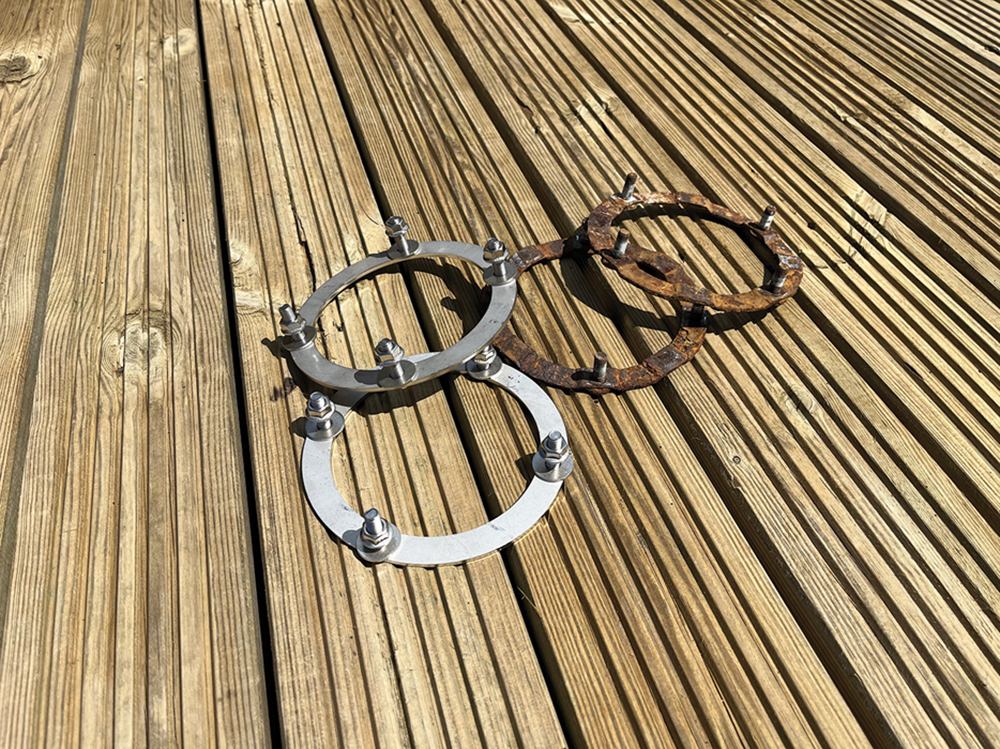
Ring ring: Here’s a better look at the old turret rings, and the higher-quality stainless steel ones we’ll be fitting in their place. The reason the old ones corrode so readily is that muck, mud and salt gets flicked up and trapped on top of the turrets, which eats away at the mild steel.
New spring in: Fit the new turret ring and hold it in place with a couple of nuts. Locate the base of the new spring on the seat, then lower the axle and slide the top into the chassis bracket. Take care not to overstretch the brake hoses; once in, raise the axle enough to capture the spring.
Spring rates explained
Coil springs, and the specification to which they are made, are absolutely vital to the way the vehicle they are fitted to drives, rides and handles weight, whether unladen or loaded.
The rate, or ‘stiffness’ of a spring is determined by its steel quality, number of coils, and diameter of the metal that makes it up.
You’ll notice that when new, OE Defender springs have coloured marks on them to identify their rate. They’ll be different on the front and rear, and often side-to-side, to make sure that the vehicle sits level and drives as well as possible.
Many aftermarket springs are described as ‘heavy-duty’, which generally means the standard poundage has been increased by a set amount over OE springs, allowing the Land Rover to be laden with more heavy gear before the ride height is compromised – for instance fitting a winch and bumper, or a roof rack and tent.
Fitting uprated springs to a Land Rover that rarely carries extra weight can mean a small increase in ride height, and the unladen ride on the road will be much firmer than standard. It’s always worth speaking to a specialist to see which springs they recommend for your needs.
Fit new dampers: Assemble the bushes and washers onto the turret; the thick washer first, then the bush, then the thinner centring washer. Sandwich the turret between the bushes, then spin the nut on and tighten it until the bushes start to squash down. Fit the lower bushes, too.
It’s coming together: Lower the turret and damper assembly through the hole in the inner wing, and drop the damper pin into place in the spring seat. Apply downward pressure on the turret so that the holes slide down over the studs, and tighten the four nuts – it’s easier with assistance.
The final nuts: Wire brush any paint off the damper pin threads, then fit the lower bushes and washers to the pin and spin the nut on. Tighten the nut to compress the bushes – don’t use a ratchet spanner for this job, as it can become trapped as the pin comes down though the nut.
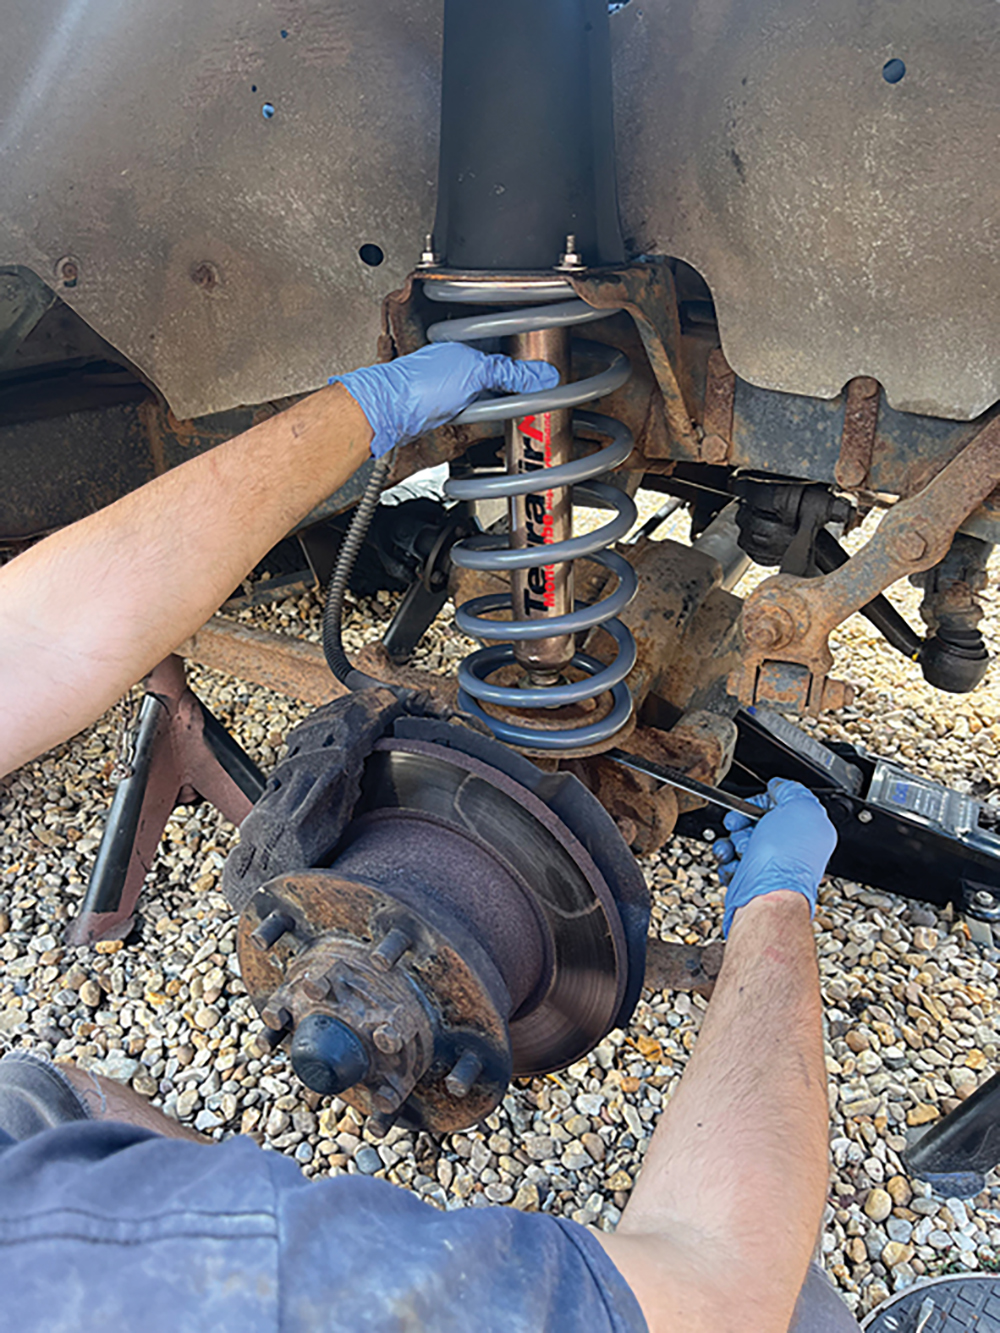
Looking good: While the rest of the 90’s underside could do with a good clean and underseal, the Terrafirma suspension looks fantastic in place. The Defender’s correct ride height will be restored and it will handle loads better, aided by those uprated monotube dampers.
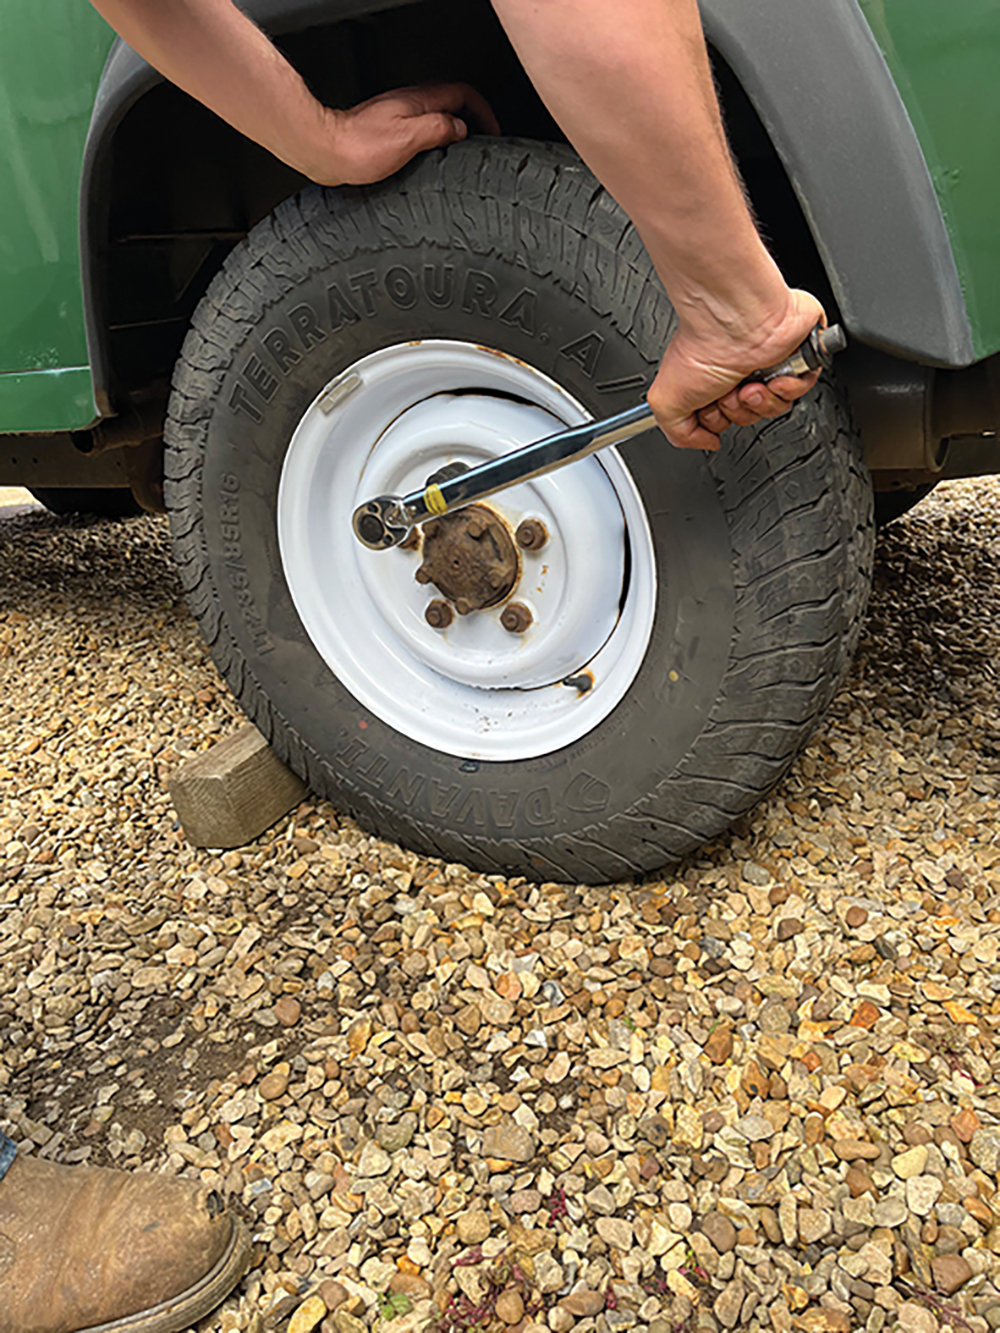
Refit and road test: With all four corners refreshed with new coil springs and shock absorbers, the wheels can go back on and the nuts torqued to spec, and the Land Rover can be lowered off the stands. Finally, go for a drive and enjoy the improved ride quality and control, on and off-road.
Like to have your own Land Rover library?
Try our All-Access Digital Subscription. You'll get access to over 7 years of Land Rover Monthly – that’s more than 100 issues plus the latest digital issue. All issues are fully searchable so you can easily find what you are looking for and what’s more it’s less than 10p a day to subscribe. Click the link above to find out more details and start enjoying all the benefits now.